Category: Resources

How-to-type articles, technique videos and more
  • I’m Losing My Edge – The Plight of the Aging Athlete

    I’m Losing My Edge – The Plight of the Aging Athlete

    This article was made possible through the generous support of our voluntary subscribers.  If you would like to see more collegiate coverage like this, please support FasterSkier with a voluntary subscription.  
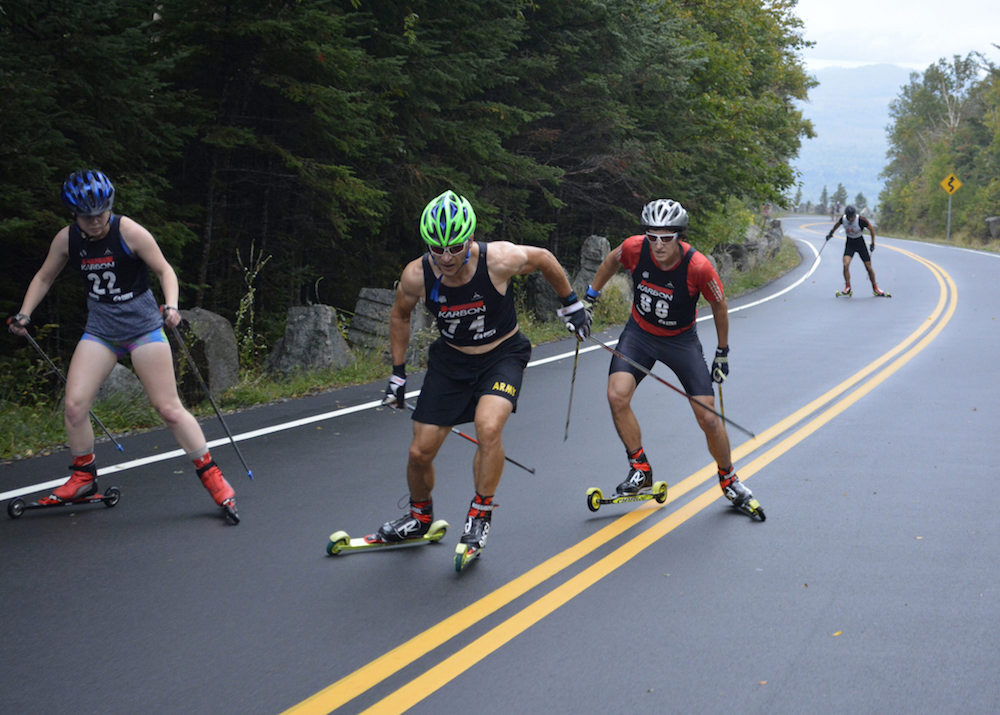
    Seasoned veteran Duncan Douglas (74) leads biathletes Russell Currier (in red) and Paul Schommer (back right) in the 2016 Climb to the Castle roller-ski race up Whiteface Mountain, while Clarkson’s Jenevieve Broadwell (22) looks on. Douglas held off Currier by eight seconds for his third victory in four times racing the Climb and Schommer finished third. (Photo: NYSEF/Flickr)

    I’m losing my edge

    The kids are coming up from behind

    I’m losing my edge

    LCD Soundsystem


    I knew it was coming. I have the conversation all the time with patients in the physical therapy clinic: “The older we get, the less our bodies care about fitness—the priority is to simply survive another day, never mind getting faster or even maintaining muscle mass.” I knew it was coming and I tried to fight it. I made my training more structured. I became more consistent with weight training. I tried to get more sleep. I tried to drink less wine. But I couldn’t control the reality that I turned 50 this year and every hard trail run I did was slower.

    Andy Munter (Ketchum, ID) racing the 2023 Boulder Mountain Tour at the age of 69. (Photo: BMT)

    I’m sure there are plenty of readers in their 60s and 70s who are currently shaking their heads and thinking, “You think you’re slowing down now, just wait until you’re my age.” But it’s still challenging to accept. When I transitioned from bike racing to running in my early 40s, Strava was full of praise and PRs. Now, Strava just laughs at me, “Kudos, you just set another Slowest Time Ever!”

    I found cross country skiing later in life. It’s been a blessing both in the tremendous joy I get from the self-propelled glide on snow and from the rewards of learning a new skill. I came to Nordic skiing with a good engine, and plenty of experience Alpine skiing, but I had zero technique. Initially, I didn’t much care because I only saw skiing as a way to stay fit for cycling season. But as I came to enjoy the skiing more and more, I started to focus on gaining better technique, which thankfully brought increased speed. Now, I think the gains in technique are about equal to the losses in fitness. Treading water, but at least not drowning. 

    I’ve read sciencey articles like this and this. And books, which I really would recommend, like The Midlife Cyclist and Fast After 50 (not trying to push Amazon; please get them from the bookseller of your choice). But they did little to console me and only reinforced the obvious. In search of some tips on reconciling my condition (and hopefully easing my depression), I got in touch with a couple of heavily decorated masters athletes, who are both older and faster than my whiny ass, to ask a few questions about their experiences with aging and training.

    My former PT colleague Lo Knapp is 70 years young and still swimming at the highest level (for her age). She just set two more age group world records, adding to her already impressive collection. Barry Makarewicz, at 63, is a local legend on the triathlon, bike racing, and skiing scenes. He’s won a half dozen races at World Masters and took the overall at the Yellowstone Rendezvous 50k at age 47.

    Katherine Ann, Barry Makarewicz and Rob Bradlee hiking up Grandeur Mountain above Salt Lake City, Utah in 2017. (Photo: Rob Bradlee)

    When did you start slowing down or notice age related changes in performance?

    Lo: I pretty much held my speed until age 60. My 200 yard breaststroke time at age 38 was ~2:42. At age 44 it was down to 2:39 (pretty much my lifetime best but also affected by some rule changes). Age 60 was 2:44 (national record in yards)–not much slower than age 38. Then, at age 62: 2:47. I was wondering what is wrong with me? After covid and polymyalgia rheumatica, age 67 was 3:02. Crazy slow. Anyway, in a 50m pool, between age 60 and 65 I slowed down 10 seconds in a 200m breaststroke. And another 11 seconds between 65 and 70. And this is after not slowing down much 38-60. That just seems like significant slowing.  

    Barry: In my early 40’s I think I noticed that I was not at the physical level of the younger athletes in terms of physical capacity, but in skiing I was able to sort of hold my performance steady due to improving technique. I actually feel like I held my skiing performance kind of steady from my mid 40’s until later 50’s (57-58).  Then I noticed a significant decline in power, strength and top end mojo.


    How have you changed your training, or approach to training, in hopes of minimizing these age related changes?

    Lo: We know older folks need more rest/recovery time, but I am not sure what that means. I still work hard, just nap more afterwards (or maybe because I’m not working and I am able to nap!). I think weight lifting is key, especially for women. We lose so much strength as we age—hormone drops? I do a TRX class 1x/wk and another session of kettlebell or a core strength session 1x/wk. When I rest for a meet, I REALLY rest more than I used to. I decrease my yardage much more. But I still push hard on the bike and in the pool. It’s a slippery slope that you have to fight against.  “No, we’re not doing that interval. We can do faster than that!”  

    Barry: The common complaint of needing several days to recover after a hard workout or race did not really hit me until 60ish. Now it’s a real thing to need more easy days of active rest to feel recovered.  

    I have always felt that general strength training is very important for performance, overall health, and injury prevention and made weight training part of my year round routine. Now, as an older person, I am even more dedicated to consistent general strength training year round with more ski focused strengthening work in late summer and fall. I am absolutely convinced that focused and consistent strengthening exercise is essential for any middle to older aged person for good quality of life and longevity. This is where the best gains are made and kept.

    Becoming a student of skiing technique has helped me stay competitive, and it has been fun to focus on body position and execution, especially in classic technique. We are very lucky to have so many opportunities to watch elite skiers on video and in person. There are always technique tips to observe and try to copy. 

    In summary my method for adjusting my approach to training to minimize the inevitable age related changes are:

    1. Consistent and vigorous strength training. Both general year round and ski specific seasonal work.
    2. Consistent interval or other high end workouts. Use it or lose it.
    3. Always focus on improving ski technique.
    Salt Lake City, Utah’s Lo Knapp having fun where she is happiest in 2014. (Photo: Courtesy Photo)

    I’m sure it wasn’t easy to see yourself getting slower. How did you come to terms with this mentally and emotionally?

    Lo: Since I had a close friend, age 58, die of cancer this year, my motto at Nationals was, “I’m just happy to be here!” I am happy to be alive, healthy and able to work out and challenge myself. I do get discouraged when I see how slow I am going in practice. Is this the best I can do because I’m old? Or can I do better? Then I compete and I am with my peeps and I win events and I realize we are all getting old and slow. So it tells me that I’m still right in there, even though I’ve slowed down. It gives me a boost for another year. If I didn’t compete, I would be really discouraged.  

    Barry: I am trying to accept the inevitable decline with some grace and not fret too much about tumbling down the results list. At this point there is nowhere to go but down so try to enjoy the notion that I’m still doing it and having fun with what I have always loved to do.


    Responses were mildly edited for clarity. Huge thanks to Lo and Barry for sharing.


    Here are my primary takeaways: 

    • The older you are the slower you’ll be, but at least you’re still out there–and being out there is the whole point to begin with. 
    • With age comes wisdom, so train smarter because you can’t handle harder, at least not without a lot more recovery. Make your “easy” days legitimately easy so your “hard” days can be truly hard (and absorbed by the body).
    • Strength training is key. Your body doesn’t care about building muscle anymore so you’ve got to pick up heavy things, at least twice a week, to remind it that being strong is still a good idea. 
    • Sleep is the best recovery aid on the market, and your body needs all the recovery it can get. Seven hours minimum. 
    • Your metabolism might be slowing down, but you still need gas in the tank so don’t skimp just because your six pack feels more like a keg.
    • Technique is the great equalizer, especially in skiing, and there’s always room for improvement. Age related losses in aerobic capacity and strength can be countered, at least to some extent, with increases in efficiency. 

    I’m trying to stay optimistic and apply the words of wisdom from my elders. I’m very grateful that I can lace up my running shoes and knock out an easy hour without taking ibuprofen. Maybe I don’t feel fast on trails anymore, but I’m still amazed that my eyes and feet can talk to each other seemingly without any delay from my brain. I know this agility will help when I’m statistically at risk for falling while going out to the mailbox. Now that winter has arrived and I’m happily on snow, I’m spending even more time focusing on technique, finding tremendous joy from nailing the kick or being lock-in stable on the glide ski. I’m getting slower and the kids are getting faster, but we’re all having the same amount of fun.


  • Prioritizing Eye Health on the Trail: What to Look for in Cross-Country Skiing Sunglasses

    Prioritizing Eye Health on the Trail: What to Look for in Cross-Country Skiing Sunglasses

    Emma  Ribom (SWE) and Jasmi  Joensuu (FIN), (l-r) rocking their shades during the World Cup mixed relay in Engadin (SUI). (Photo: Nordic Focus)

    Cross-country skiing is becoming more popular. The latest numbers from Statista show that 5.32 million Americans went cross-country skiing in 2023. That’s a significant increase from 4.85 million in 2022! It’s no surprise more people are discovering and loving the sport. It’s not just fun—it also offers a wealth of health benefits.

    Cross-country skiing is a low-impact, accessible form of cardio that can improve your balance and even enhance bodily and situational awareness. But did you know that it can benefit your eyesight, too?

    The more trails you ski, the better your vision will be when navigating bright, snowy environments. Researchers even find that cross-country skiing can prevent or slow the progression of common ocular diseases like age-related macular degeneration (AMD), cataracts, diabetic retinopathy, dry eye, glaucoma, and even myopia (nearsightedness).

    Edvin  Anger (SWE) and Remi  Lindholm (FIN) (l-r) during the mixed relay in Engadin (SUI).  Racers almost always wear sunglasses not just because of the sun coming from above but also the bright reflection bouncing off the snow – plus the protection from the sharp pole tips flying close to your face from your competitor’s poles. (Photo: Nordic Focus)

    That said, skiing is still a vision-intensive activity in uncontrolled open terrain—meaning it poses some eye dangers, too. Overexposure to the sun’s UV rays alone can gradually damage them, leading to AMD and cataracts. The dry winter air can dehydrate them. More importantly, sunlight bouncing off the snow can overwhelm your eyes with glare—causing temporary vision loss from snow blindness or photokeratitis. Any impacts on your eyesight these factors cause can significantly increase your risk of running into an accident.

    That said, you’ll want to wear a good pair of sunglasses on the trail. Look for these key features to ensure you can prioritize eye health as you ski:


    High-tech filters

    The best sunglasses for cross-country skiing should both protect and enhance your vision on the trail. For a good laundry list of what to look for, it’s worth considering the technologies offered by Bliz. This is the dedicated skiing sunglasses brand imported by EnjoyWinter, which is owned by former Factory Team runner Andy Gerlach, for good reason. Of course, all Bliz sunglasses offer 100% UVA and UVB protection as standard—but they go even further by leveraging other high-tech lens filters you’ll want to take advantage of. Notably, BLIZ HYDRO and BLIZ FUSION add polarized filters that block the sun’s glare to adequately protect you from snow blindness. When paired with NORDIC LIGHT, Bliz sunglasses will also enhance color and contrast so you can better see the trail you’re on. Many Bliz frames also come with interchangeable lens systems, so you can use the best lenses possible for different light conditions. You’ll even get shatter-proof, anti-scratch, and anti-fog properties to ensure you can reap all those benefits for the entirety of each route you try.


    Vision-correcting lenses

    Sure, cross-country skiing can gradually improve you see the details of snowy environments so you can avoid mishaps, especially if you get sunglasses with vision-enhancing filters. However, all those perks will get canceled out if refractive errors like nearsightedness blur your vision. It’s easy to think that contact lenses are a good alternative to specs on the trail, but the cold air can dry your eyes out to further blur your vision—and, in colder temperatures, can cause contacts to harden or even freeze.

    That said, you’re better off getting prescription sunglasses if you need vision correction while cross-country skiing. LensCrafters offers a particularly good selection that includes pairs from popular sportswear brand Oakley. That includes models like the RSLV, Latch™ Panel, Kato, and Radar® EV Path®. Each set of frames can accommodate even higher prescriptions on their lenses—and their oversized, wraparound designs mean you can benefit from clear vision from all angles, so you can view the trail and its hazards with ease. That’s on top of the lens filters they use, including polarized filters and PRIZM technology, which similarly provide glare-blocking and vision-enhancing benefits.


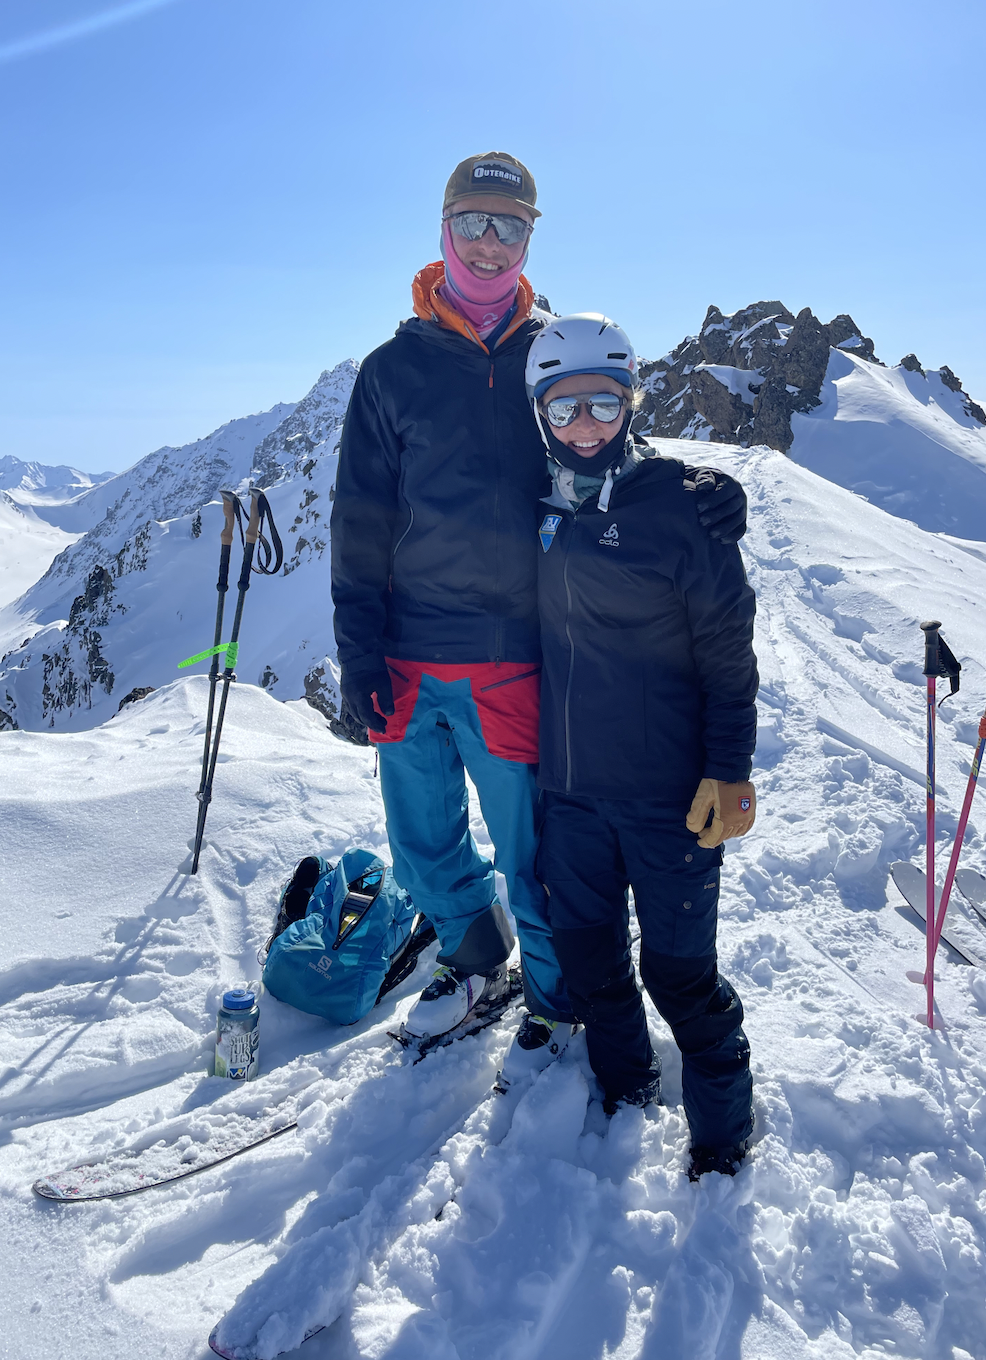
    Hannah Halvorsen and her brother Bjorn enjoy the Alaska backcountry after finishing the 2022 race season. (Courtesy photo)

    Helmet-ready frames

    Cross-country skiers need sunglasses frames that are more than just comfortable to wear and durable enough to withstand impact and extremely cold temperatures. For ease of use, they should ideally be helmet-compatible, too. After all, you don’t want them to slip off! Wondering what that looks like? Consider the latest sunglasses-and-helmet set from Smith Optics. The Pursuit sunglasses are made from bio-based injected polymer to create durable, lightweight, and razor-thin frames that don’t block your peripheral vision. These boast additional features perfect for cross-country skiing, such as vents that provide additional airflow to prevent lens fogging. More importantly, these frames are magnetic—meaning they snap right onto the brand’s Summit helmet and won’t come off. This pairing ensures you can protect both your head and eyes without having to worry about your sunglasses dropping somewhere along the trail, or being so tight that they squeeze your temples and cause headaches. This study even confirms that the design of this set has been found to help recreational-level Alpine skiers more quickly react to hazards in their peripheral vision, meaning they’ll be doubly beneficial for you as a cross-country skier.

  • A Skiing Mom’s Gear Guide: Kikkan Randall’s Essentials for Skiing with a Baby

    A Skiing Mom’s Gear Guide: Kikkan Randall’s Essentials for Skiing with a Baby

    Skiing with kids can feel like, well, a daunting junk show. The gear explosion, the logistics puzzle, and the constant battle to keep everyone warm and happy can make you wonder if it’s worth stepping foot out of the door. As a mom of two, I live this reality, staring down the barrel of a long winter filled with wrestling squirmy little bodies into layers upon layers of wool, fleece, and down. Can kid-pulling ever be more than just a logistics hassle and a sufferfest?

    When I reached out to five-time Olympian and gold medalist Kikkan Randall for advice, she told me to hold on a few days. “I have a new device. I want to trail test it before we talk,” she said. Ok, ok. Interest piqued. A few days later, she got back to me. Here is someone who has not only figured it out but turned skiing with kids into something enjoyable—maybe even relaxing? I took close, personal notes, and her strategies are a guidebook and practical packing list for any parent dreaming of making ski outings more than a chore.

    The Setup: Packing for the Trail

    “It’s all about having a system,” Kikkan explains. “I start by loading the Kid Runner, which has been a game-changer for skiing with a baby. I pack the main carriage, attach the telescoping poles to the waist harness, and add my skis and poles. Then, of course, there’s the diaper bag.”

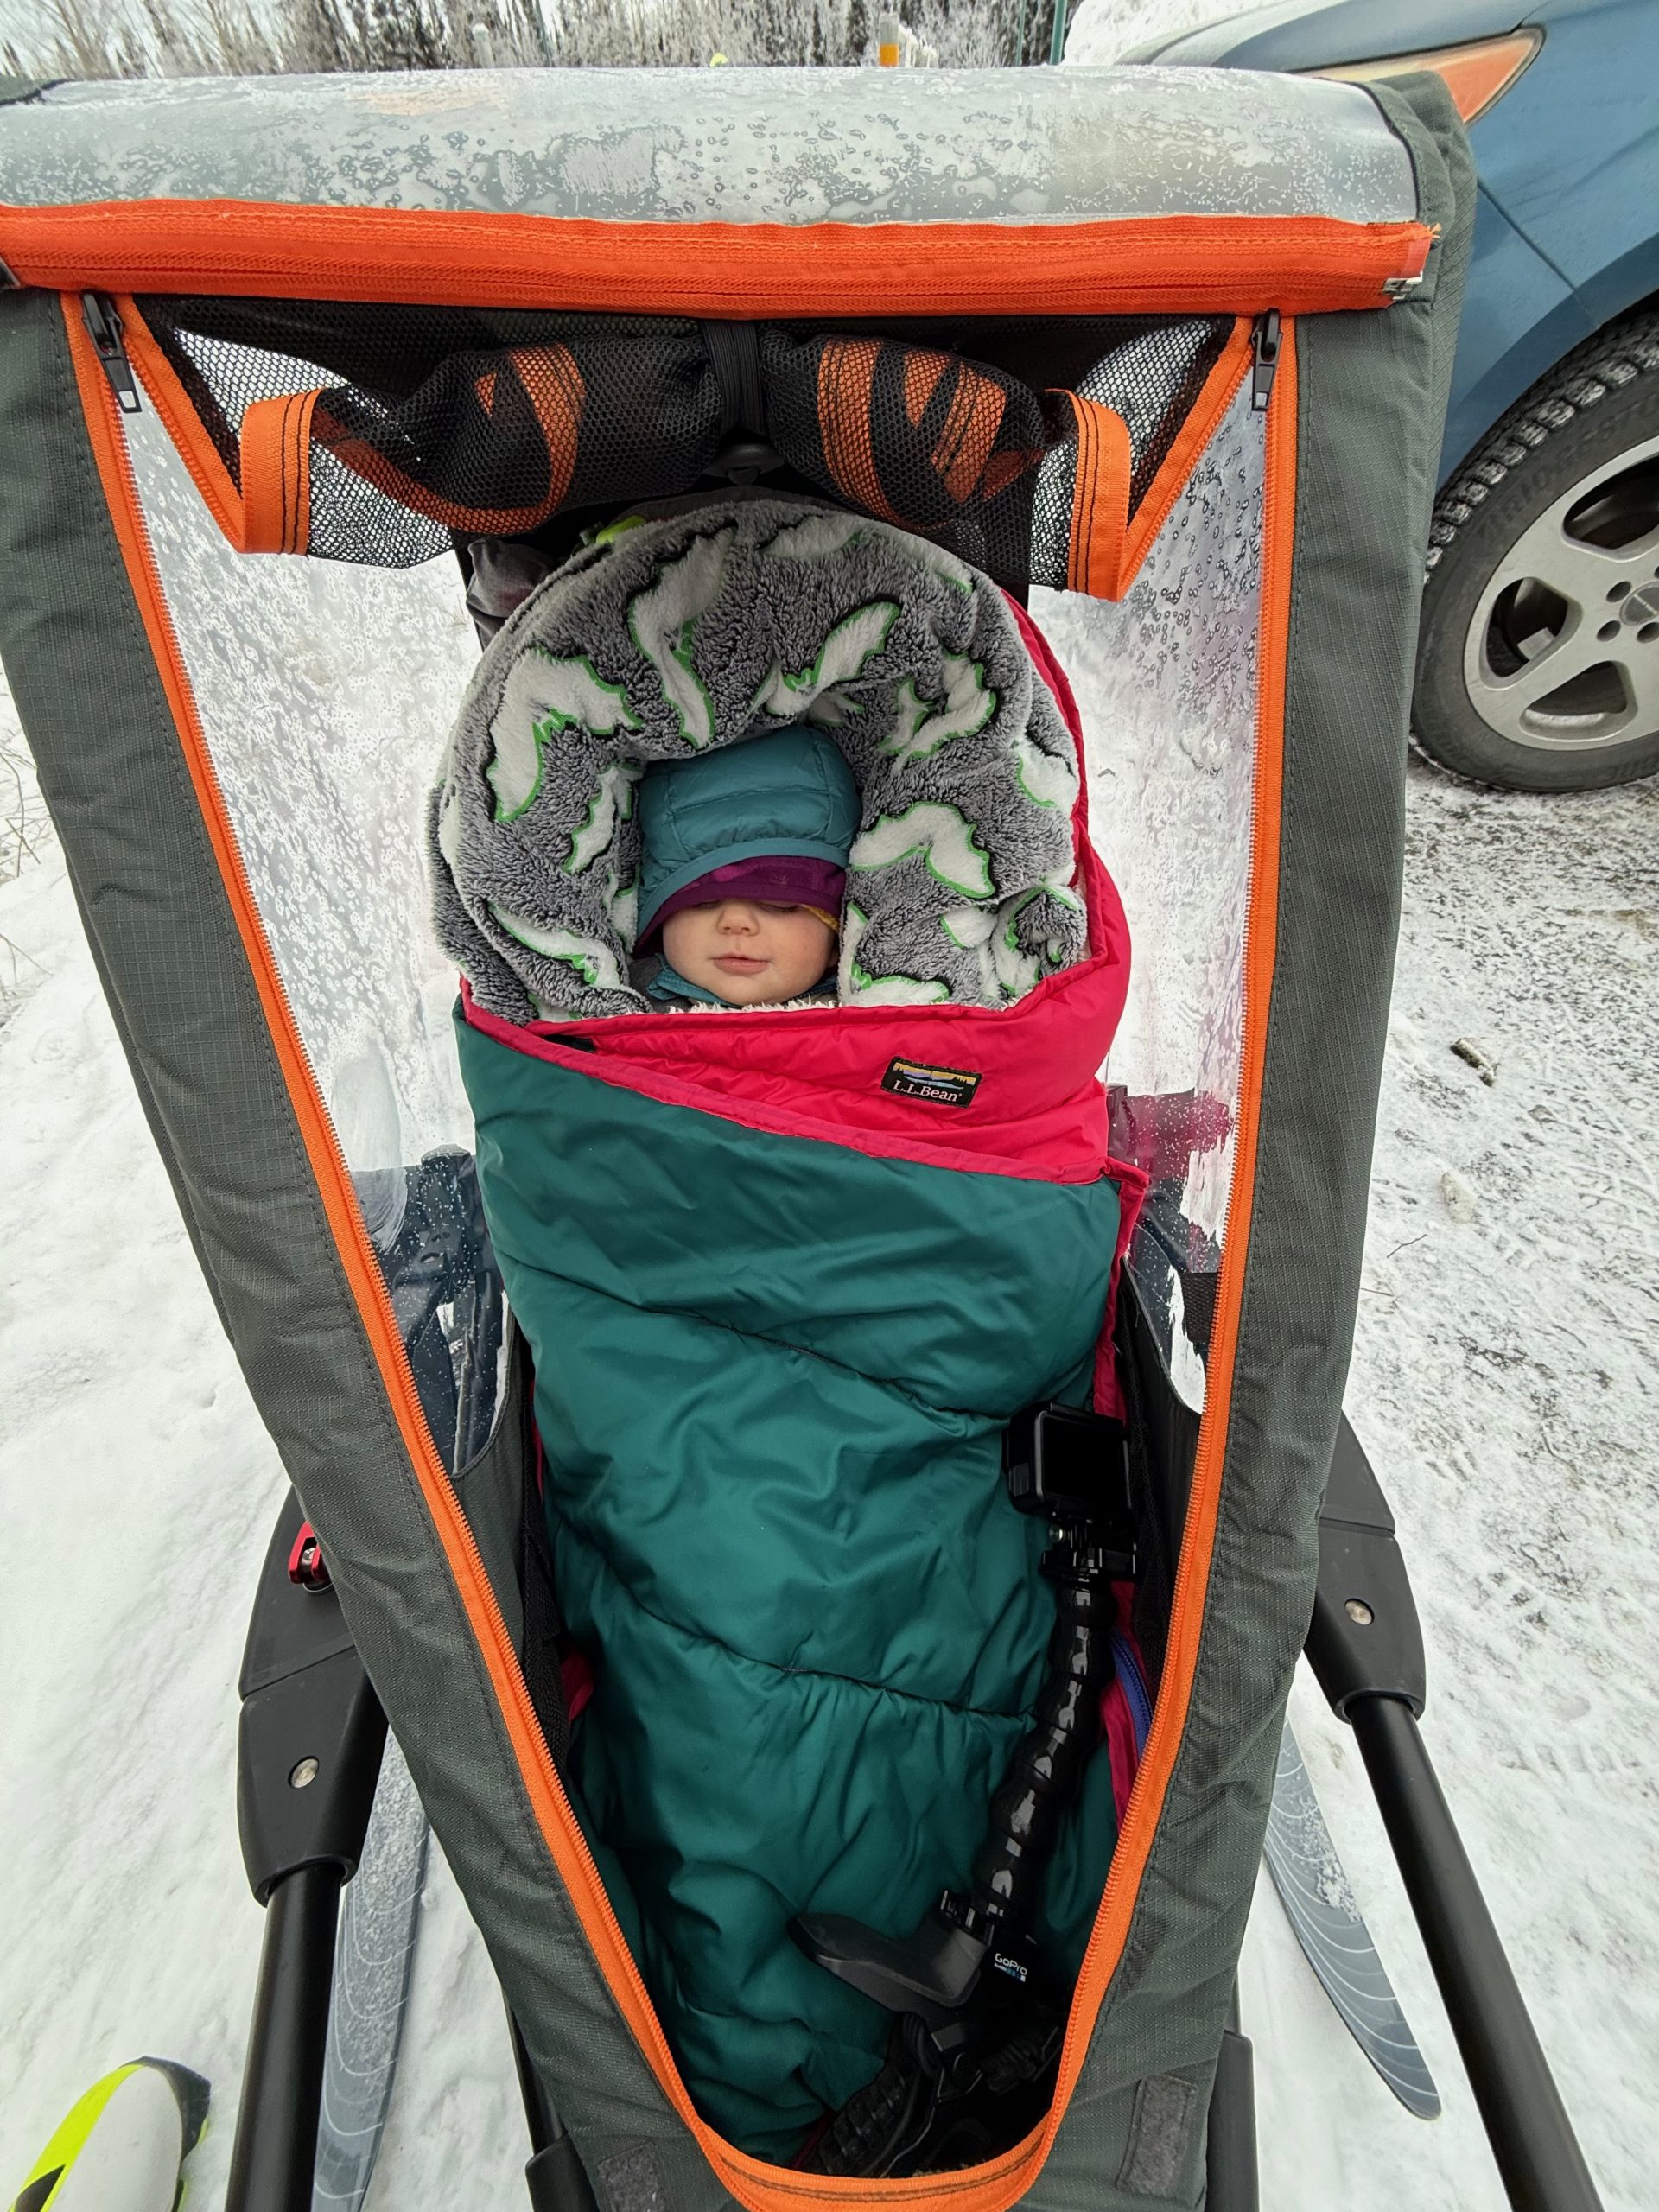
    Inside the Kid Runner, Kikkan uses a down puffer suit and a fleece bunting to keep her baby snug. “It’s furry on the inside and adds a cozy layer of insulation,” she says. She also employs a clever hack she learned from fellow skiers Brian and Caitlin Gregg – using half of a pool noodle wrapped in a fuzzy blanket to stabilize her baby’s head. This trick prevents any bobble-heading on uneven terrain, keeping her little one’s head steady and secure. Even though her baby has pretty good head control for five months, it helps keep her extra supported. Plus, she always falls asleep in the Kid Runner, so this setup makes it quite comfortable for her.

    Kikkan also tucks a bottle between her baby’s legs, inside the bunting. “It stays warm there and is ready when she needs it,” she says. It’s a simple trick that keeps everything streamlined and ensures her baby stays content mid-ski.

    Baby Aspen rides in cozy style, snugly layered against the winter chill with her bottle close at hand—ready for every mile of the adventure. Photo: Kikkan Randall
    On the Move: Transforming the Experience

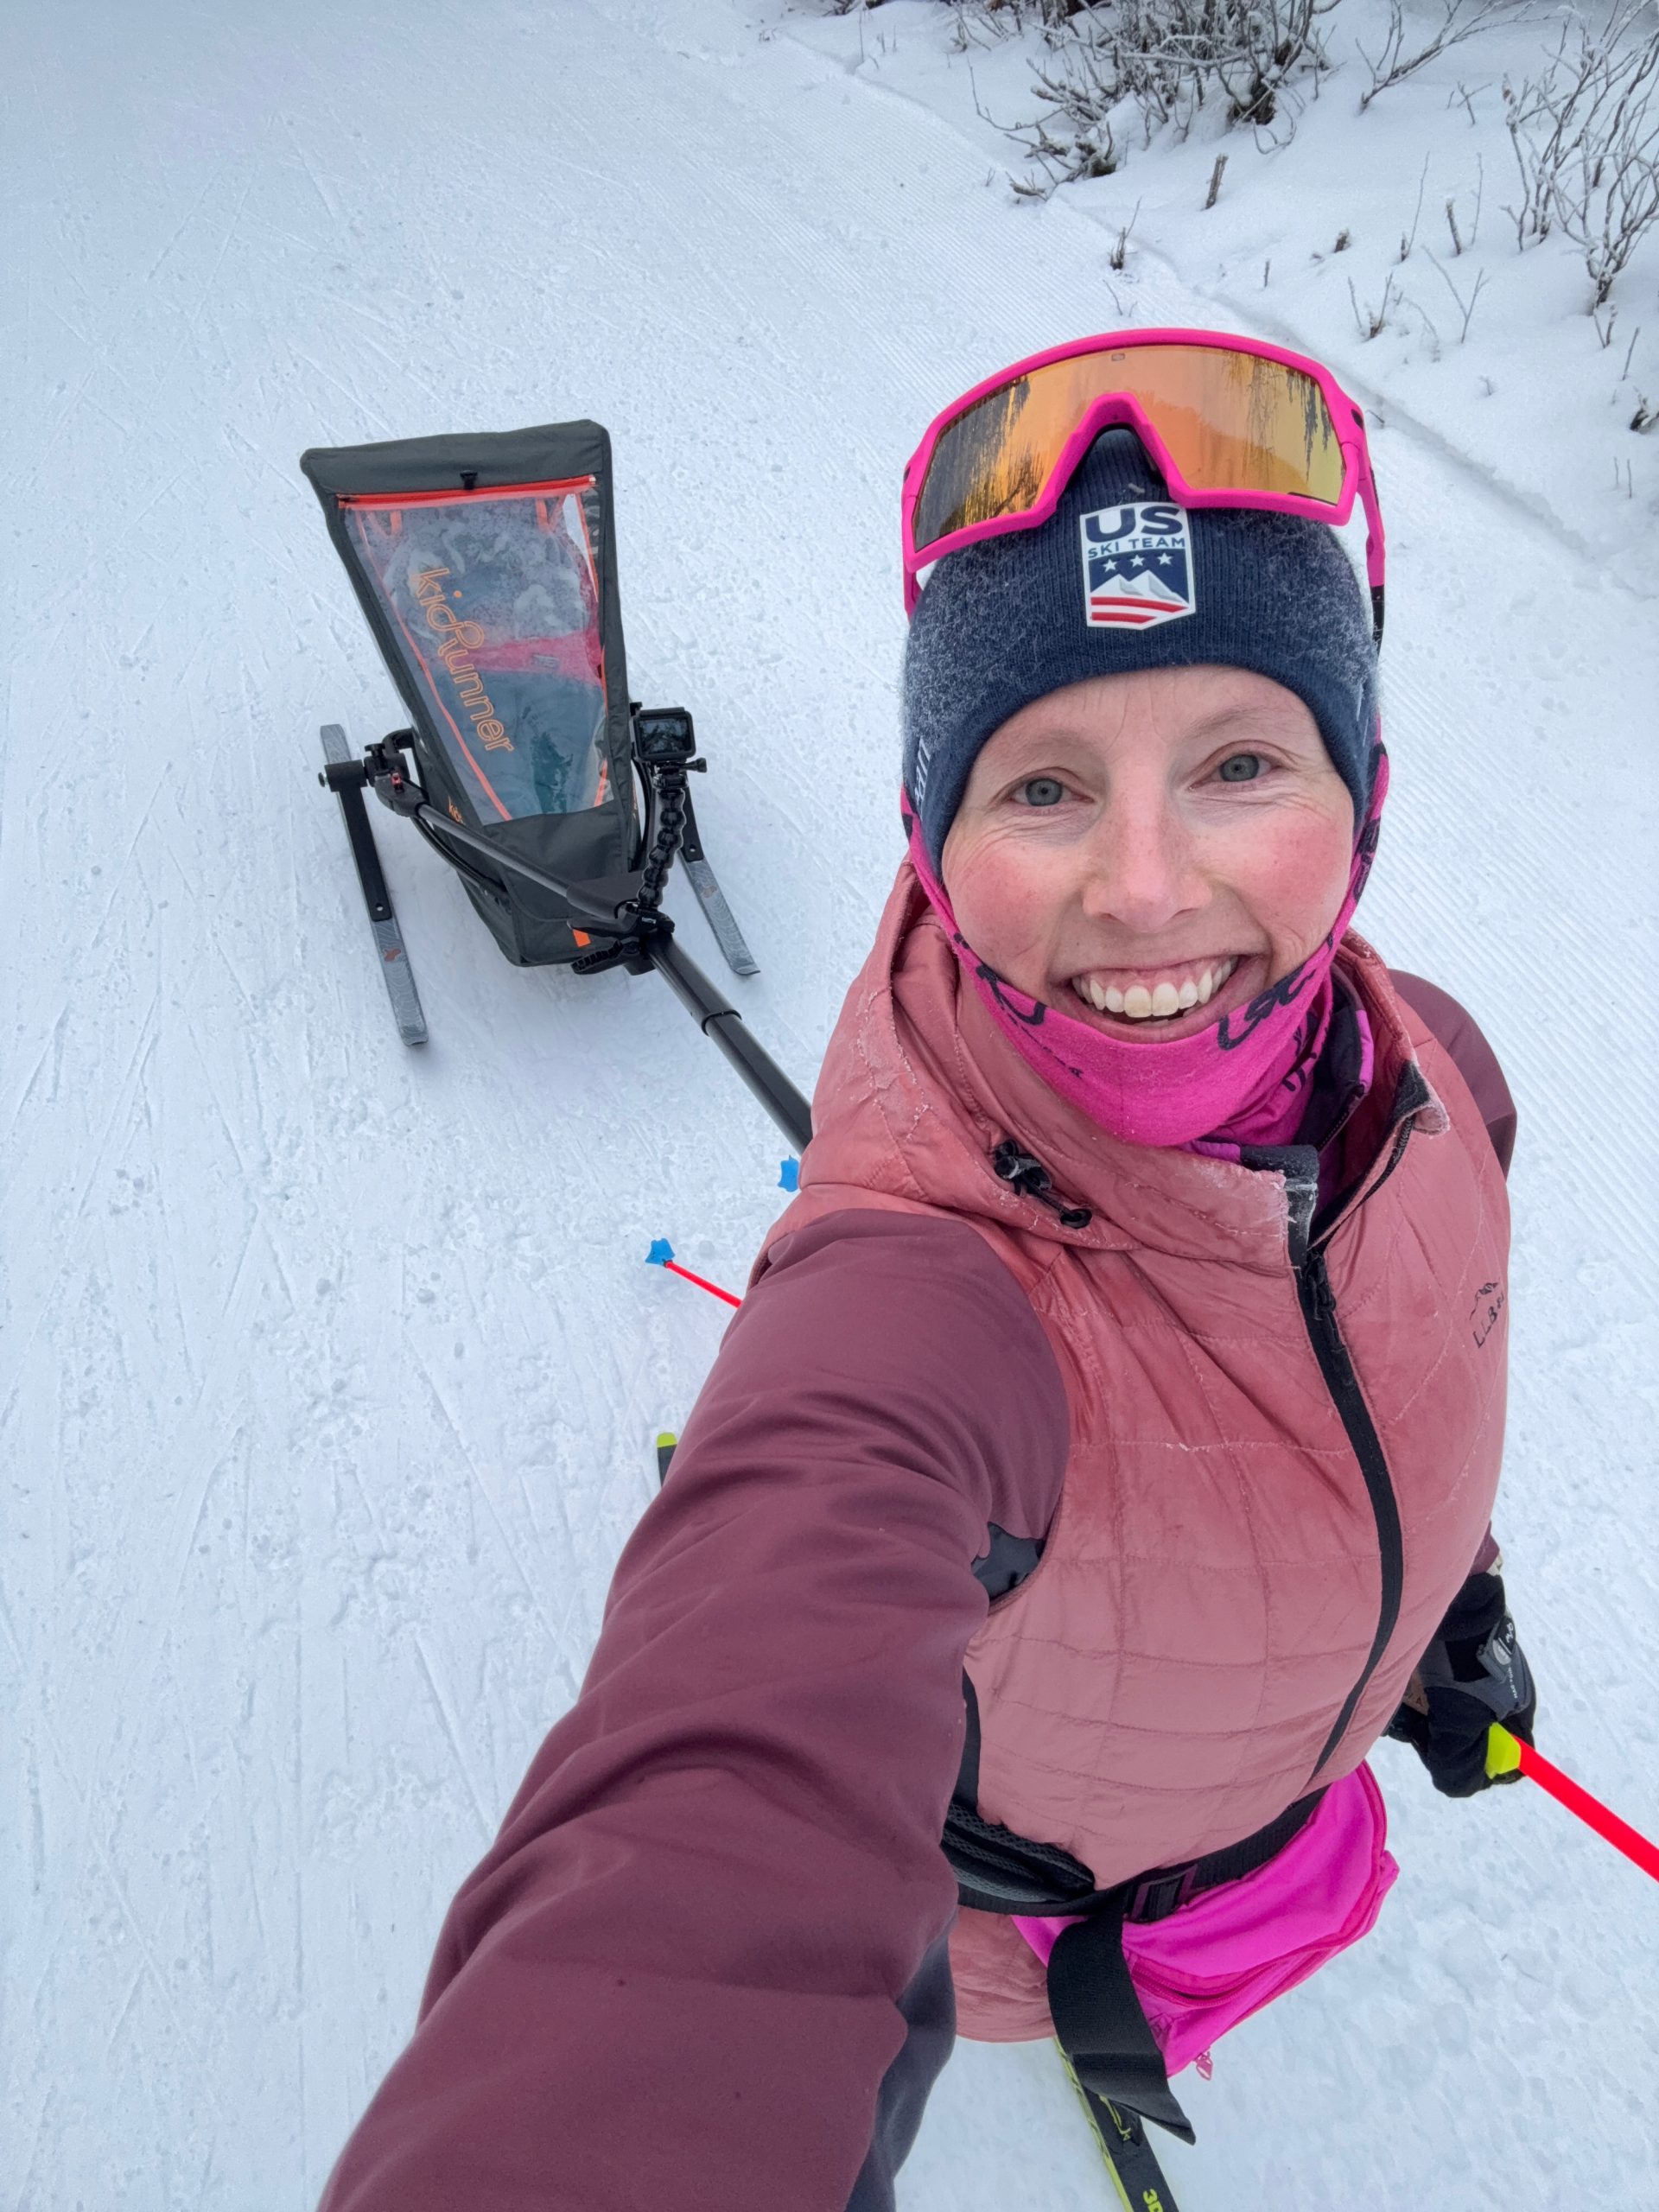
    At first glance, the Kid Runner looks like any other kid-pulling contraption, but Kikkan highlights several details that make it particularly well suited to Nordic skiing. “The single-point harness is a big deal,” she explains. “With other systems, like the double-point harness I used with my older son, you’re constantly fighting against the weight pulling you back. It makes it harder to stay in your natural ski stride and can really wear on your lower back after a while.”

    Kikkan Randall makes Nordic skiing with a little one look seamless using the innovative KidRunner ski trailer. Photo: Kikkan Randall

    The single connection point pivots with your movement. “That pivot point is what allows you to ski dynamically,” Kikkan says. “You’re not locked into a rigid position, so you can lean forward, flex your ankles, and really feel like you’re skiing—not just towing.”

    Stability is another key feature. “It tracks so well, even on downhills,” Kikkan adds. “I was worried about it tipping or dragging on uneven snow, but it’s been super predictable.”

    Kikkan said she has been out for several genuinely good skis towing her baby.

    The Gear List: Kikkan’s Must-Haves

    Here’s a breakdown of Kikkan’s go-to gear for skiing with her baby:

    1. The Trailer: The Kid Runner is an innovative ski trailer designed to let you ski naturally while towing your little one. Its single-point harness and pivoting connection allow natural movement, preventing the strain and discomfort common with traditional setups. Lightweight, adjustable, and smooth-tracking, the Kid Runner is a game-changer for skiing parents.
    2. Baby Layers
      • LL Bean Ultralight 650 Down Bunting: Perfect for keeping the baby cozy in the Kid Runner.
      • Fleece hat with chin strap: Keeps the hat in place, which is so helpful.
      • Mittens and booties: These are tucked under the puffer suit to ensure they stay securely in place, keeping your baby’s hands and feet warm throughout the adventure
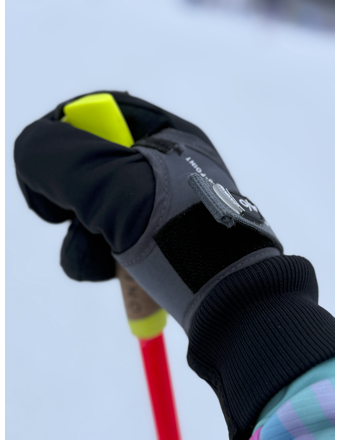
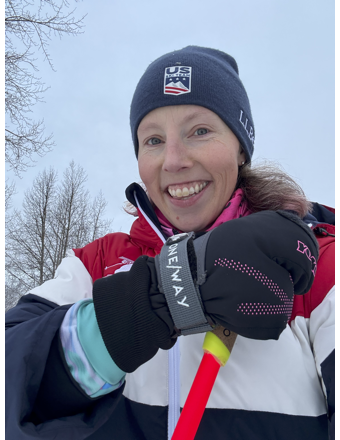
    3. Quick In and Out Poles: Kikkan uses One Way Storm GTX Poles with magnetic click-in straps. These poles make it easy to stop and check on your baby without fussing with complicated gear. “When your baby fusses or you just want to peek back and make sure everything is good, you don’t want to be fumbling with straps. These poles let you stop, unclip, check in, and get back to skiing without missing a beat,” she says.
    Grip, snap, go. Magnetic pole grips are a game-changer for Nordic skiers on the move. Photo: Kikkan Randall
    Quick in, quick out—Kikkan shows off her One Way Storm GTX poles with magnetic click-in grips, making it easy to stop, check in, and get back to skiing without missing a beat.

    4. Drink Belt
    Great for carrying water and a phone. Worn above the trailer belt for easy access.

    5. Ski Boot Covers
    These make walking to the trail much easier and safer while preventing snow and ice from getting packed into your boots during multiple trips back and forth from the parking lot.

    Finding Your Groove: Advice for New Parents

    For parents who feel overwhelmed at the thought of skiing with a baby, Kikkan’s advice is simple: start small and be patient. “The first couple of times might feel like a circus, but once you find your rhythm, it’s so worth it. The fresh air, the movement—it’s good for both of you. The Kid Runner has roll bars and a five-point harness, so I feel confident my baby is secure.”

    She emphasizes the importance of taking your time to get dialed in. Each outing, she learns something new—whether it’s how to load the car more efficiently or a small adjustment to make her baby more comfortable.

    Whether you’re a competitive athlete like Kikkan or just looking for a way to get outside with your little one, her gear recommendations and tips offer a practical, approachable guide. “It’s not just about getting out for family time,” she says. “With the right setup, you can actually enjoy a great ski experience, too.”

  • Unlocking Peak Performance: The Guide to ARC Ski Brushes

    Unlocking Peak Performance: The Guide to ARC Ski Brushes

    FasterSkier readers can receive 25% off ARC brushes for the next week by shopping at EnjoyWinter.com and using FasterSkierARC as your promo code. No stacking of discounts allowed.

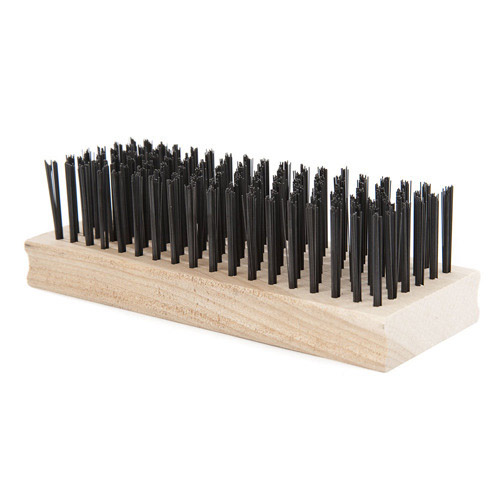
    As we’re getting ready for winter, I want you to go out to your garage, basement, or wherever you keep your ski tools and take an honest look at your ski brushes. How are they doing? Are they clean and the bristles standing straight up? Or do they look like an old toothbrush, with the bristles matted down from usage over time?

    Skiing well takes a lot of work. From the many hours of training to your equipment management and travel logistics, cross-country skiing is a sport that rewards those who are skilled and thoughtful in their preparation. In the process of preparing for a race, any number of factors could be off, resulting in a subpar performance despite many other things going well.

    Why are we talking about brushes? With the banning of fluorinated waxes and the introduction of new fluor-free waxes, the meta of ski tuning has changed. A good application of fluorinated waxes could make anything faster, smoothing over suboptimal camber, grind, and structure, resulting in competitive skis. Many athletes I’ve talked to have found that certain skis in their fleet are no longer viable now that fluorinated waxes are not an option. With the introduction of fluor-free racing waxes, greater attention must be placed on the camber, grind, and structure of the skis. Further, one of the strengths of fluorinated waxes was their ability to repel, among many things, dirt. The newer fluor-free waxes have yet to demonstrate the same capacity for keeping skis running clean, and therefore in our ski preparation, we must be mindful of any dirt or pollution we are introducing to the skis.

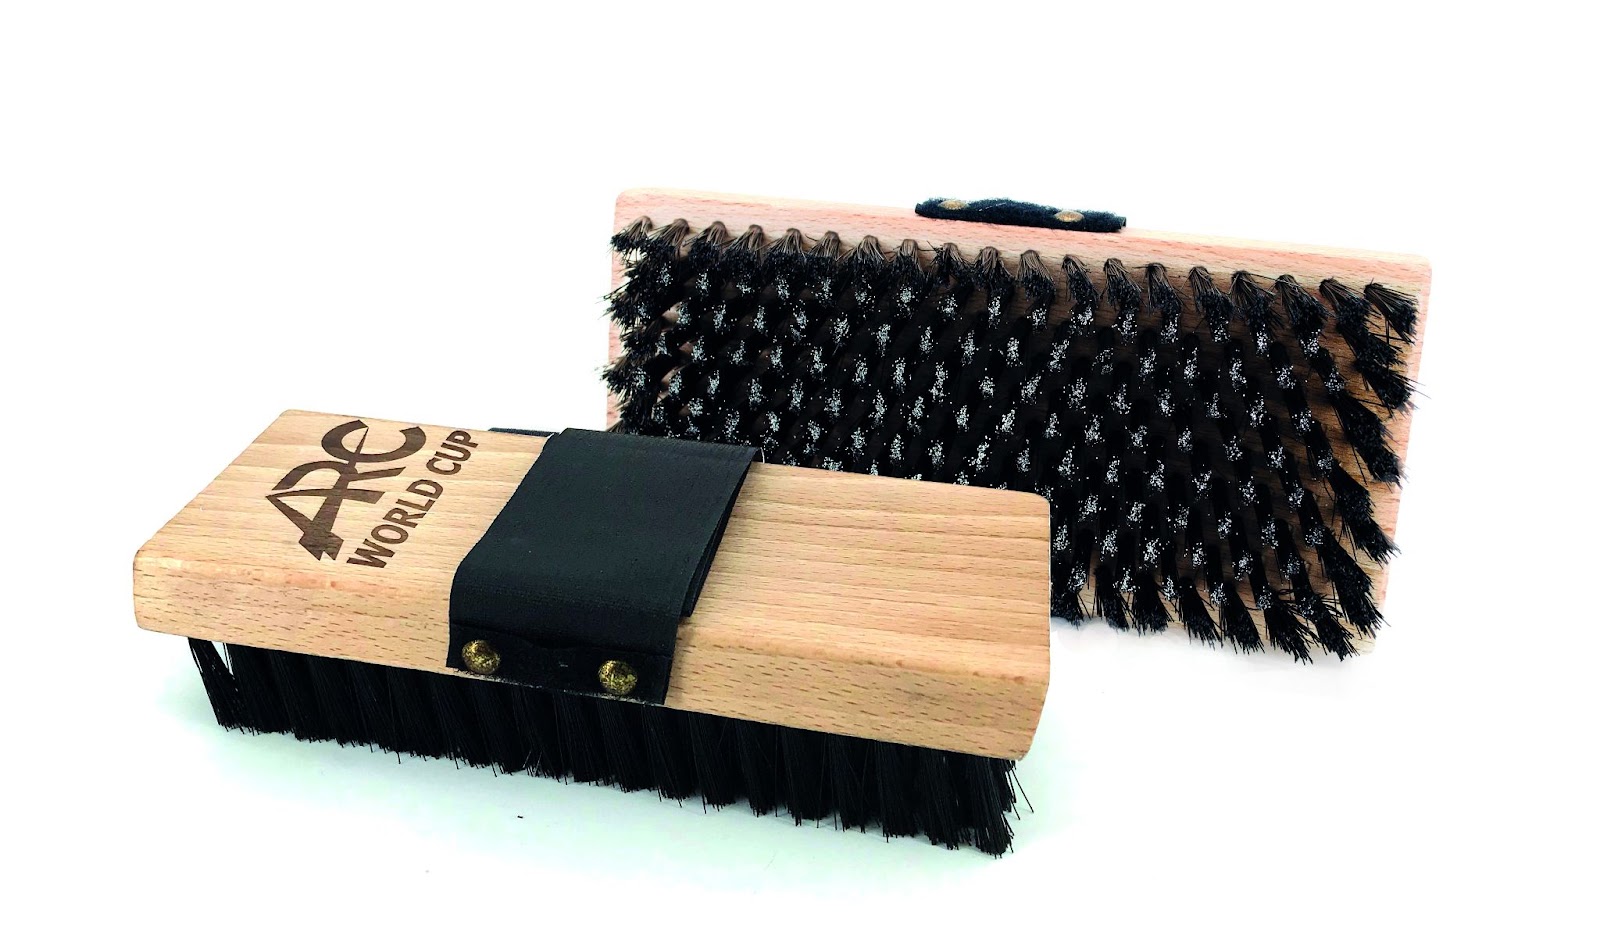
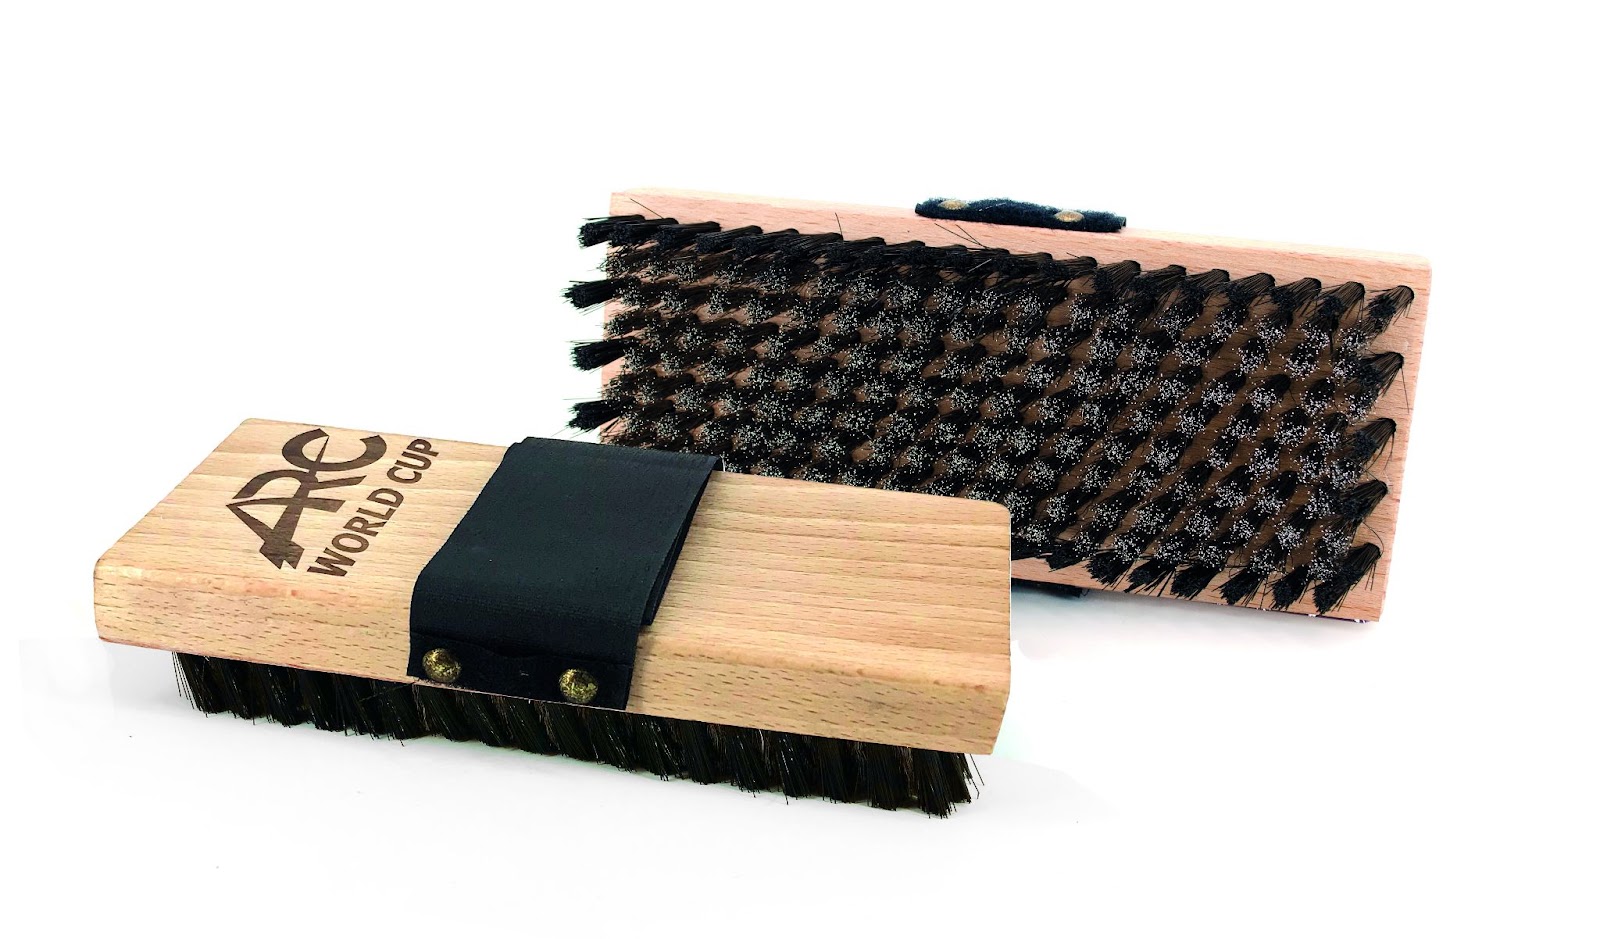
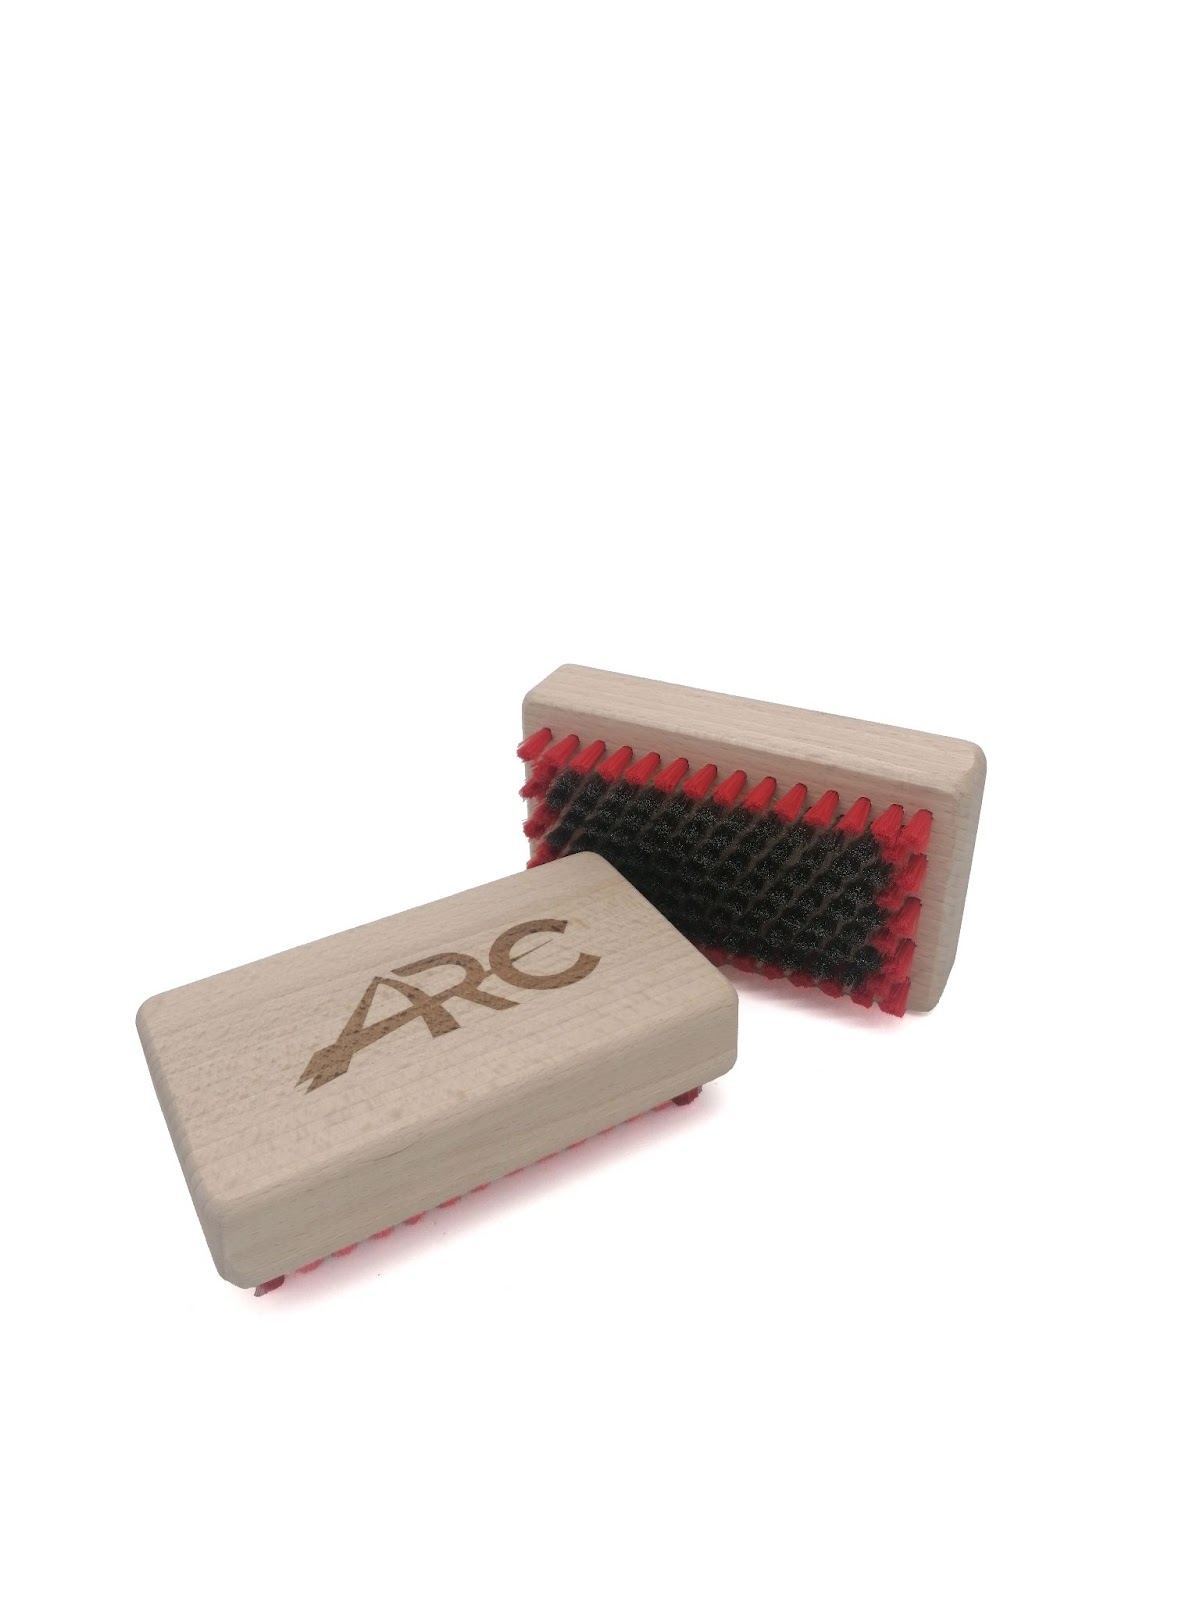
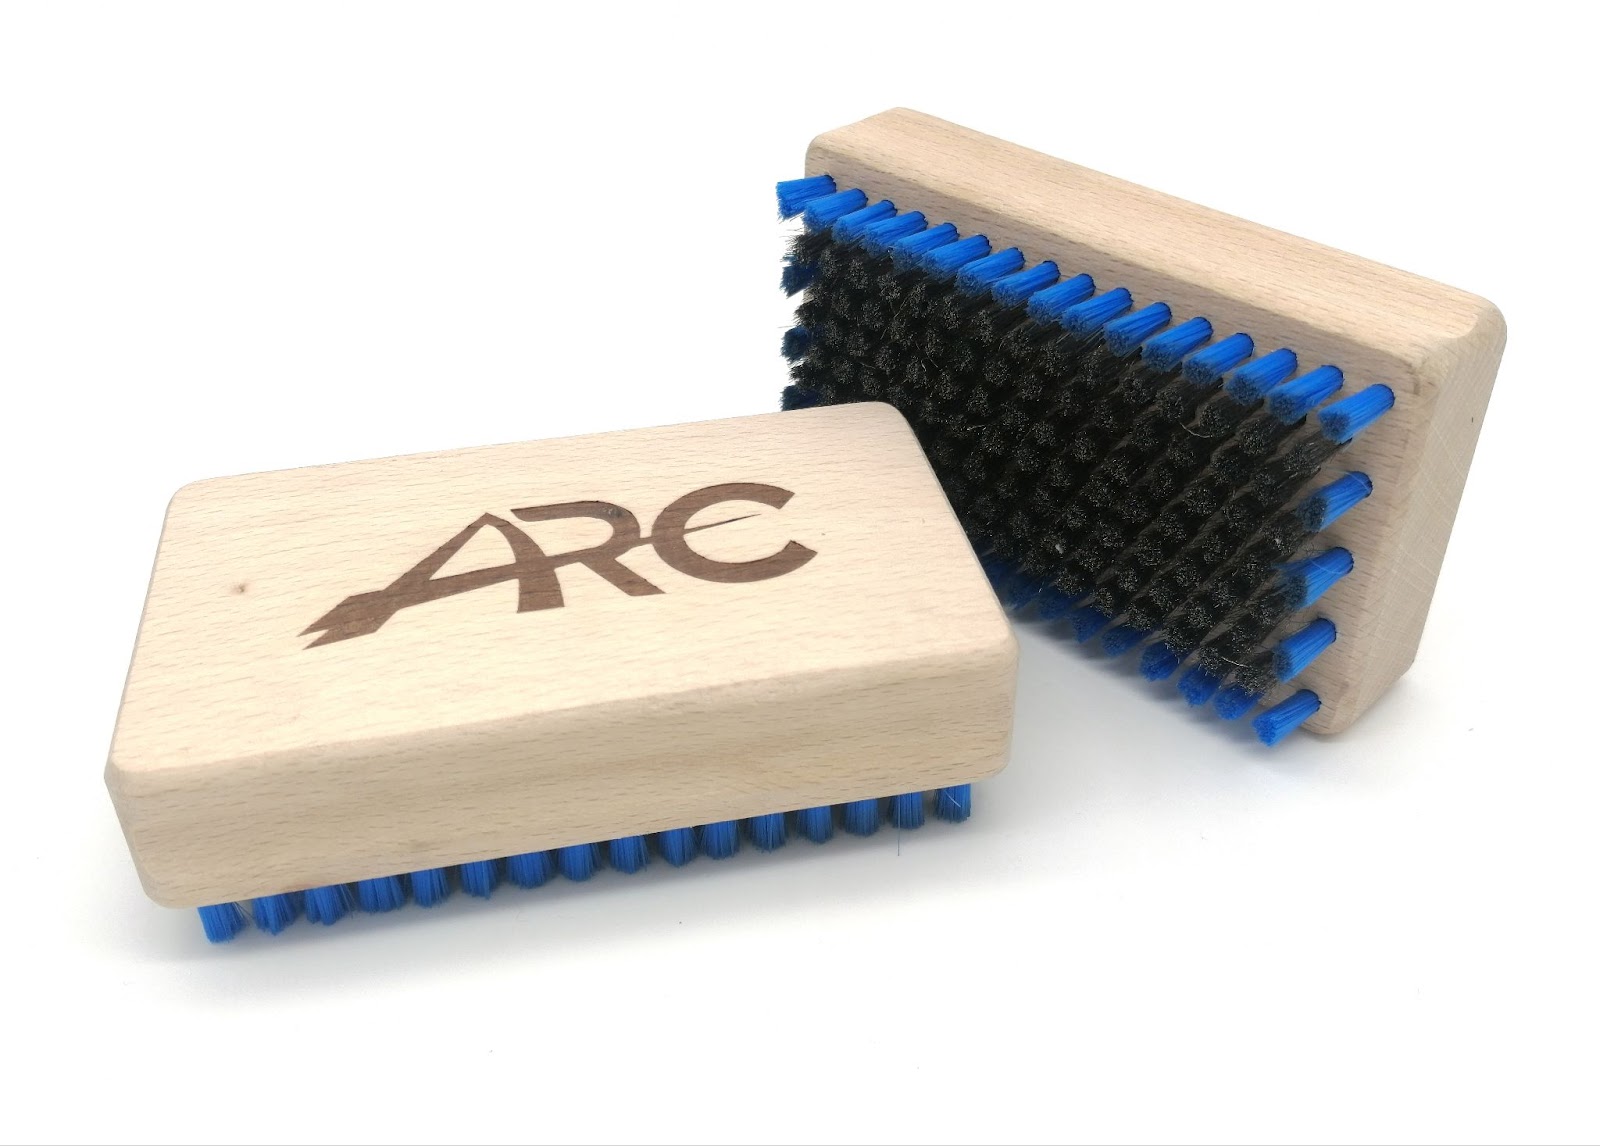
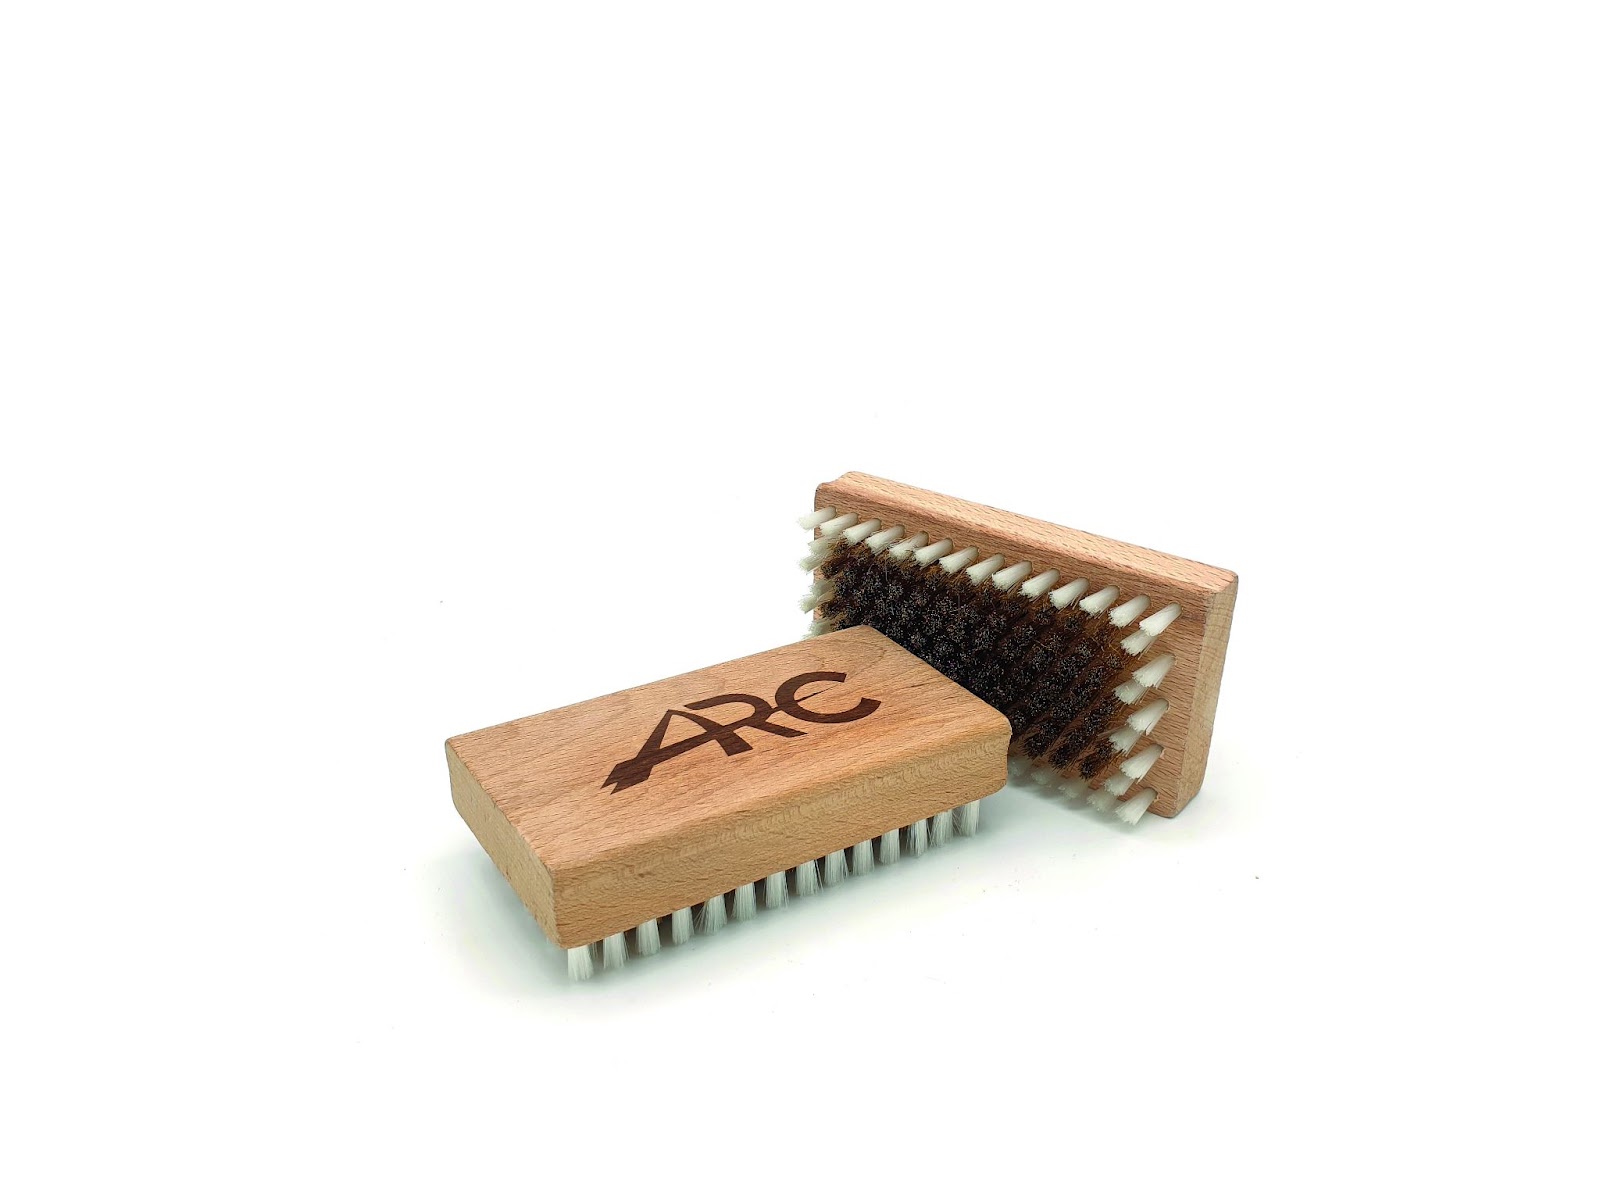
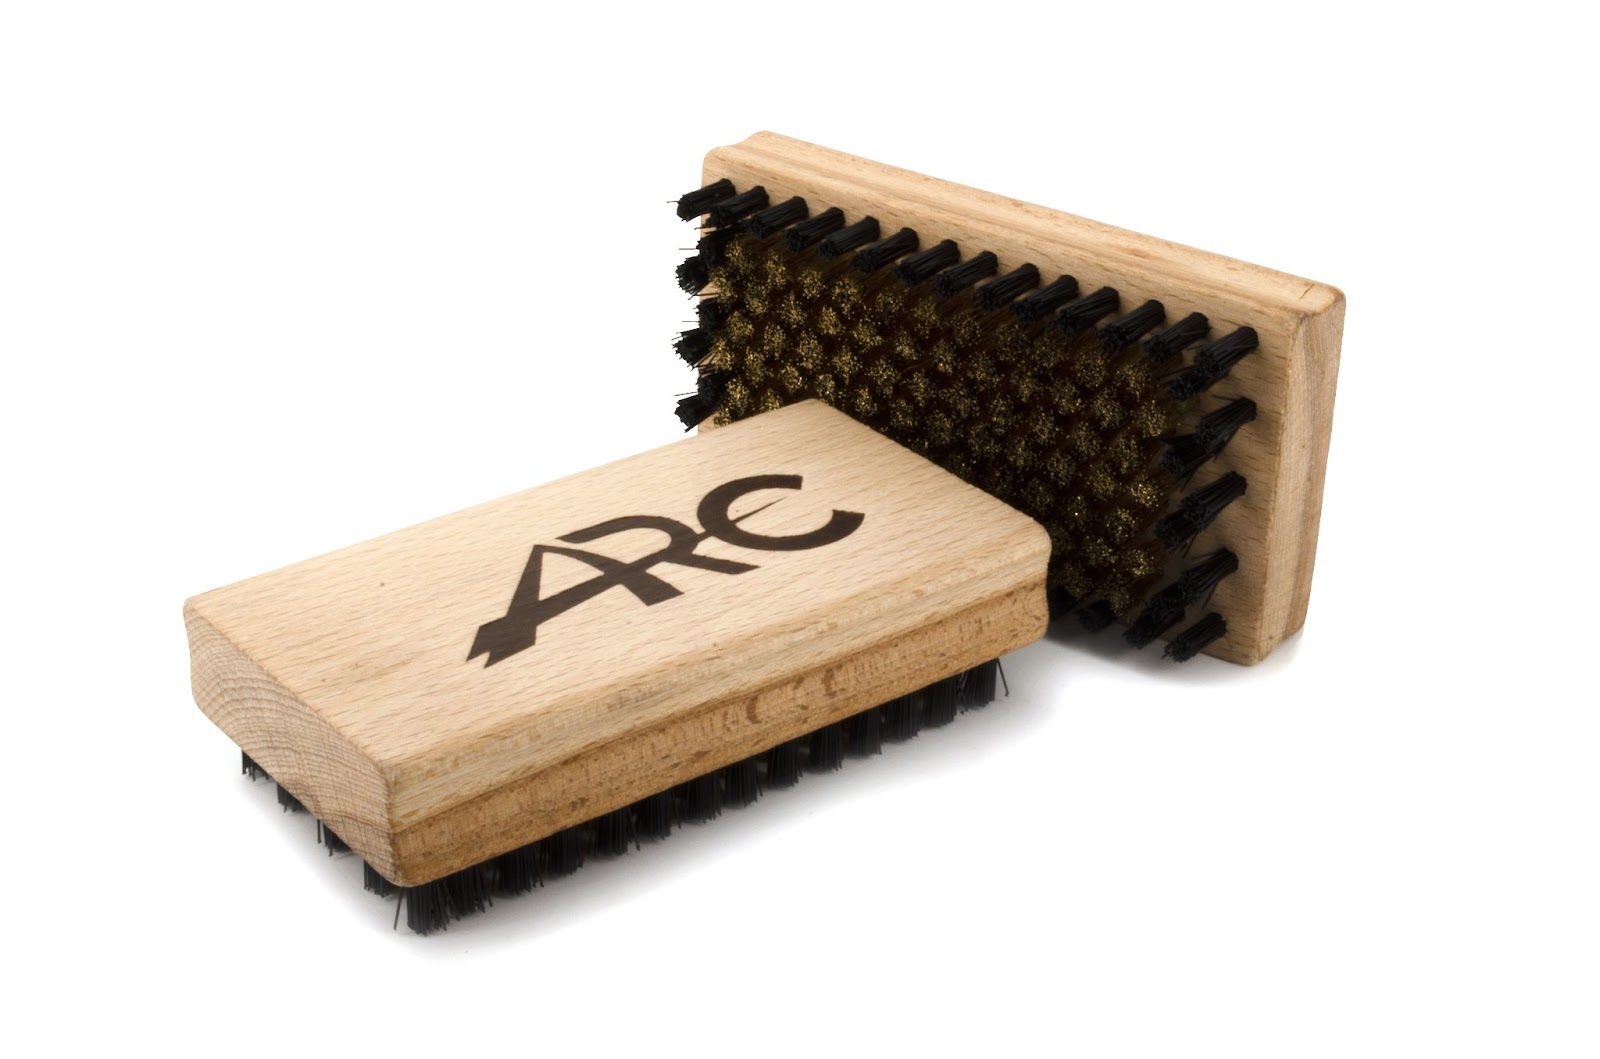
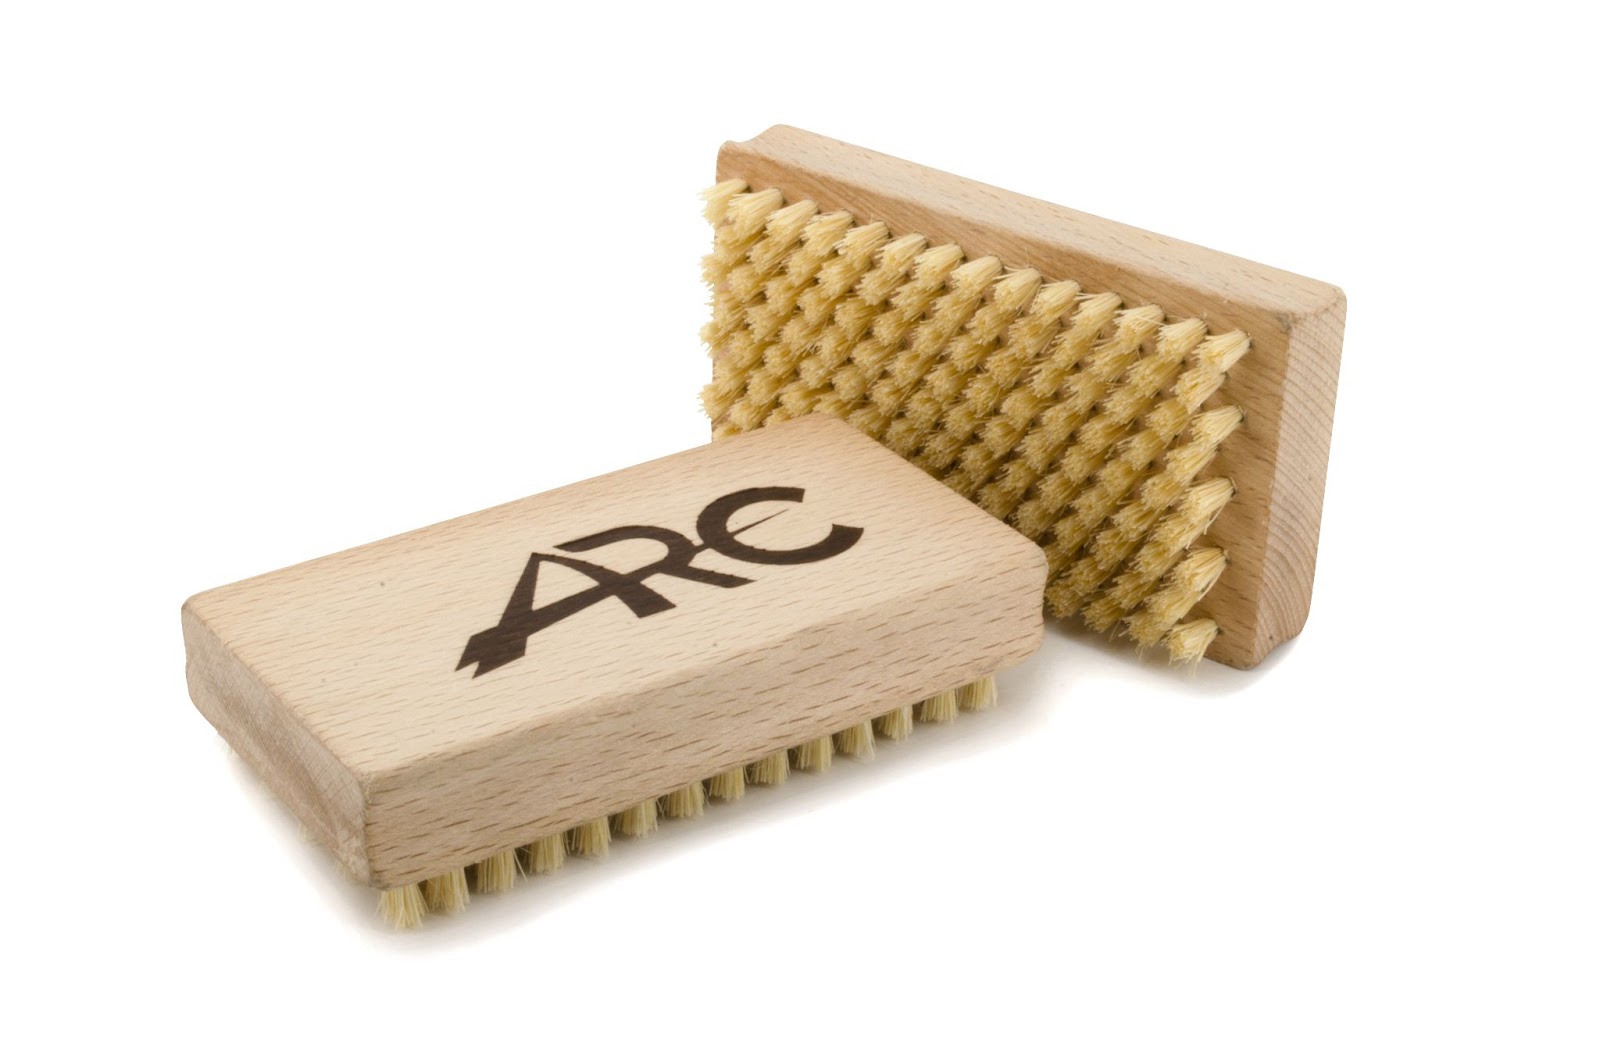
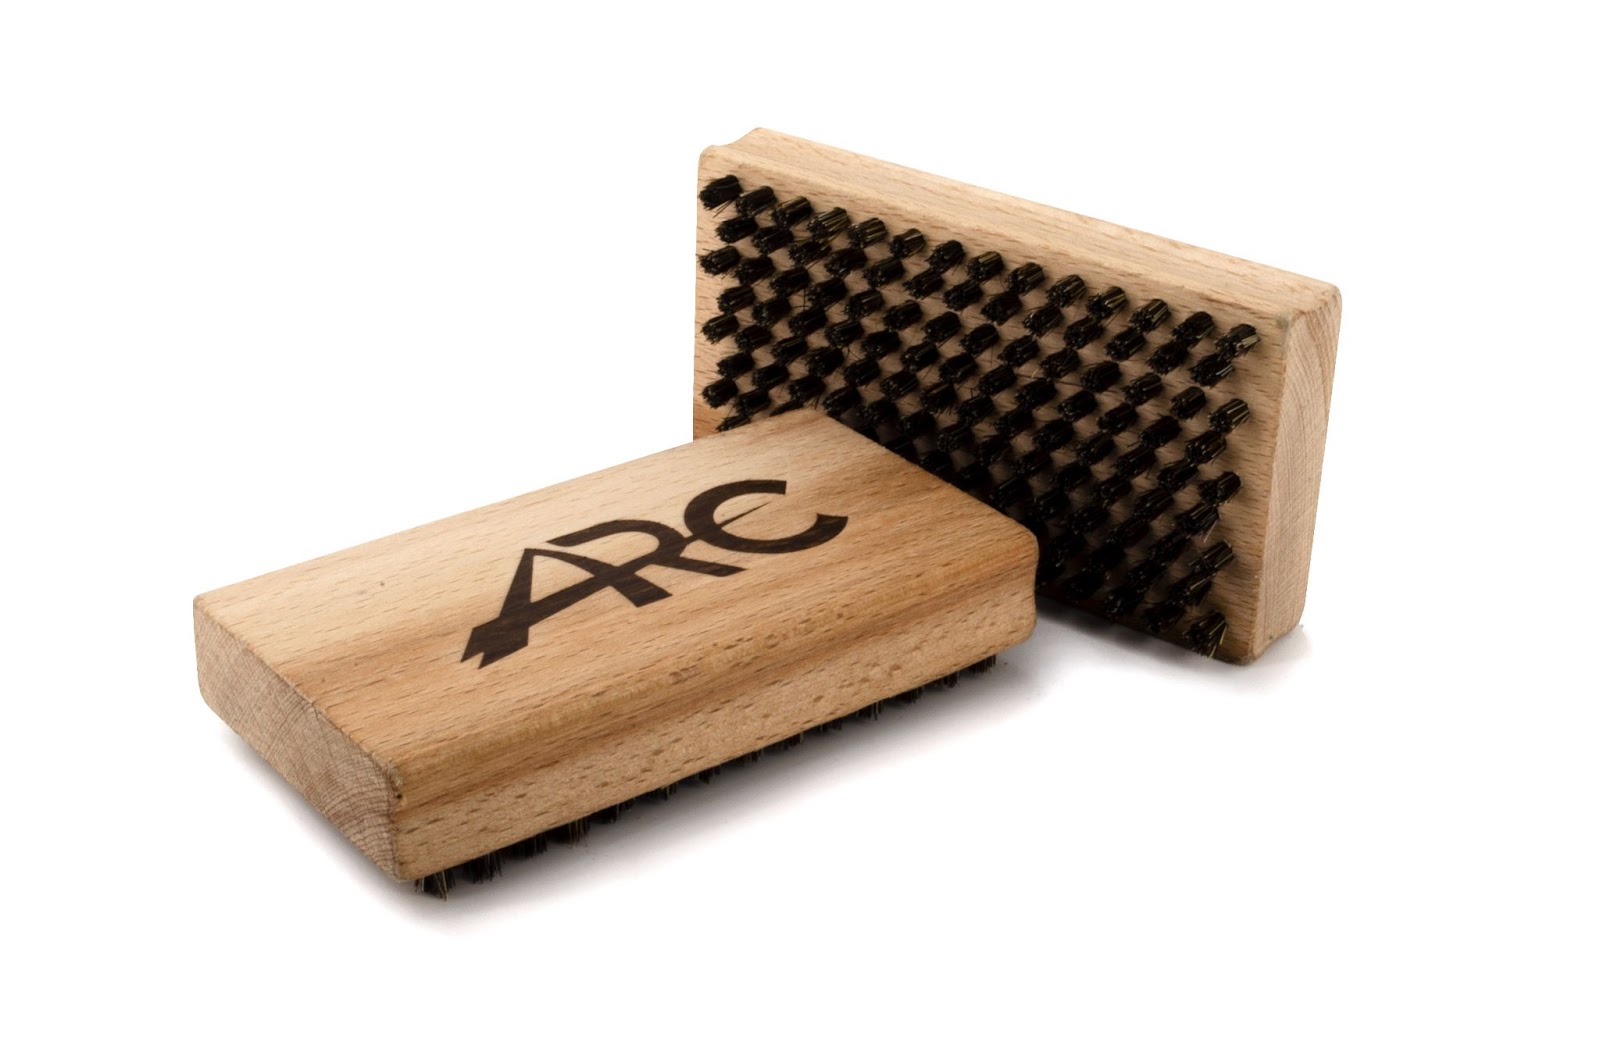
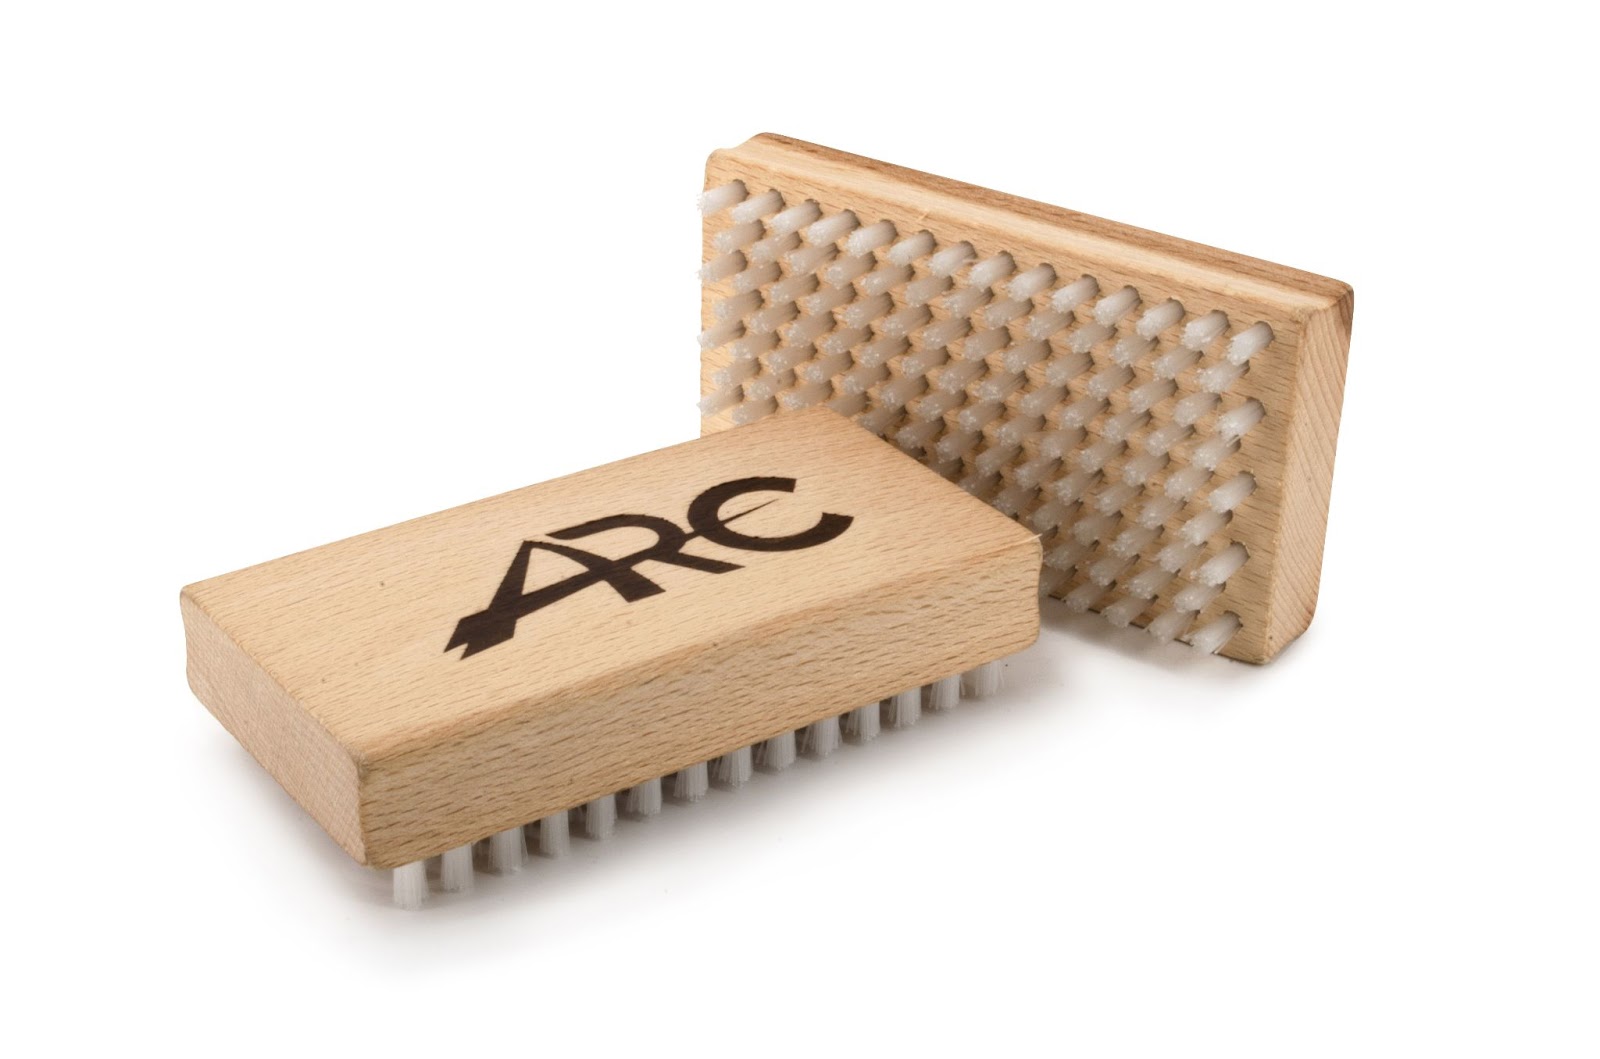
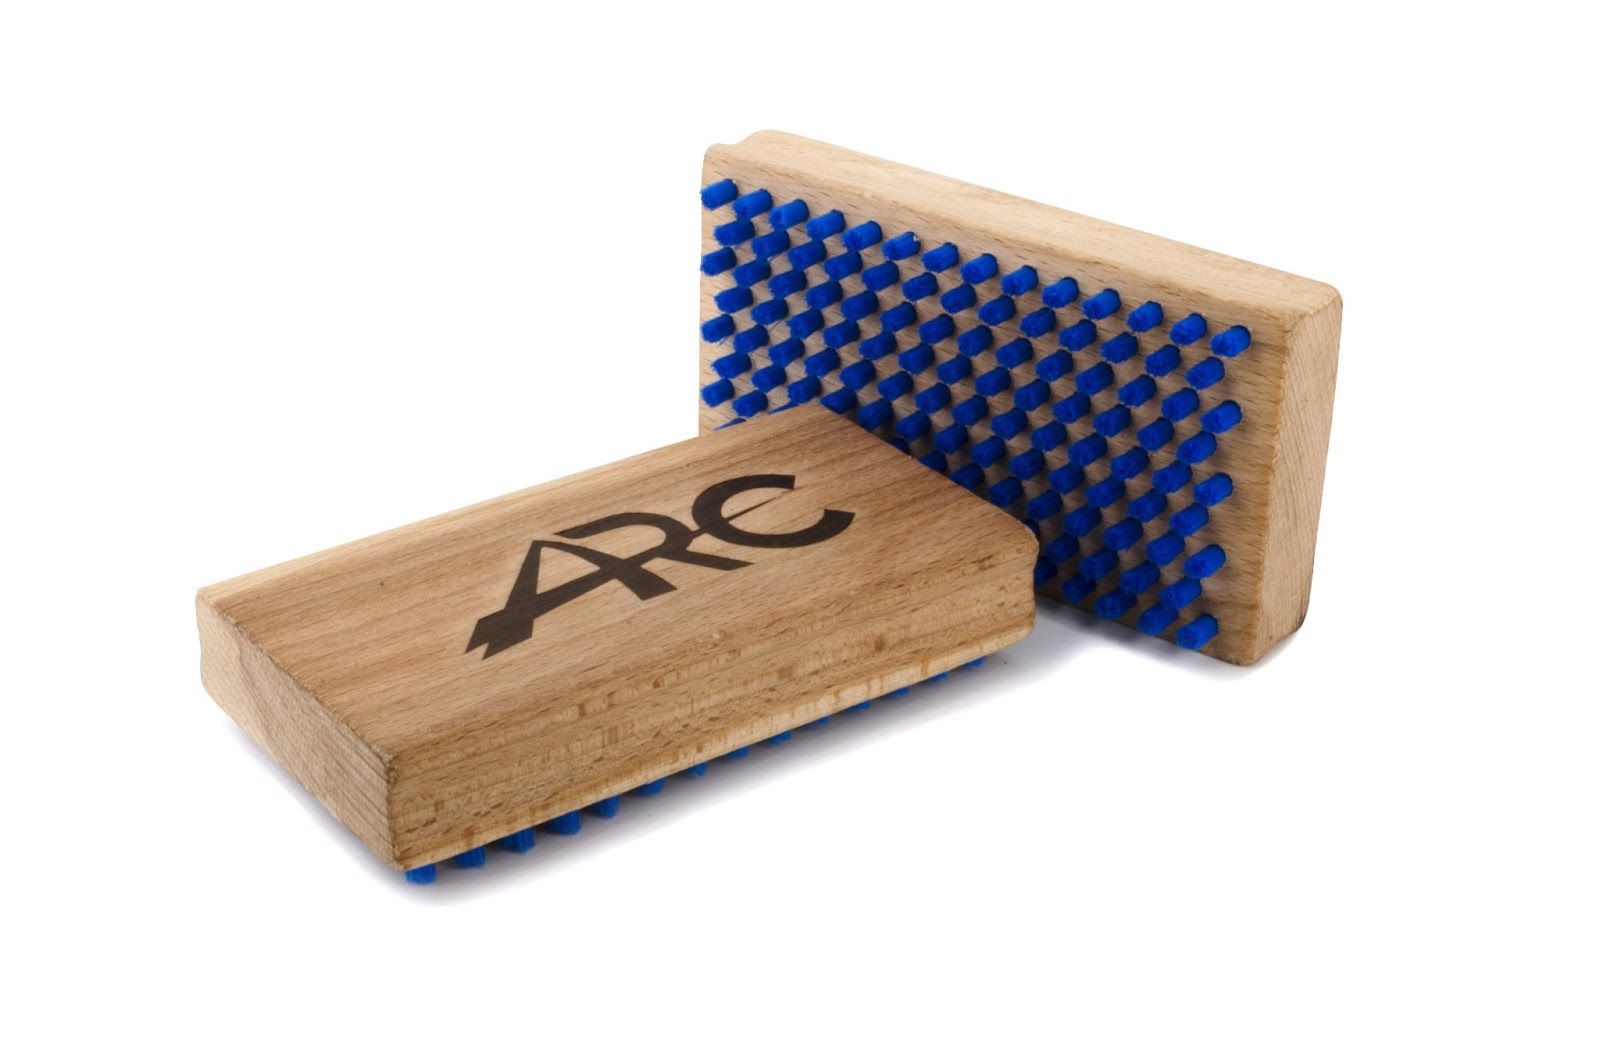
    Why ARC? Like many of the brands from EnjoyWinter, ARC is an OEM manufacturer of brushes. They make their own stuff, whereas other companies go to companies such as ARC to make their brushes for them. This means that ARC is at the forefront of development because they are making the brushes for other industry leaders.

    ARC also has strong ties to SVECOM stone grinders, an industry leader in stone grinders for cross-country skis. SVECOM grinders are used by World Cup teams and factory race rooms, including the Salomon factory. This connection is necessary to understanding the benefit of using ARC brushes, as they are backed with industry-leading knowledge on ski texturing.

    On ski texture (simplified): When gliding on snow, we’re gliding on a thin layer of water from melting the snow. When tuning our skis, every step is changing the relationship between creating a thin film of water and repelling that thin film. Too little water, and it’s like skiing on sandpaper; too much, and the skis will suction cup themselves to the snow.

    When we brush our skis, we’re applying texture to the ski. Certain brushes apply more texture to the ski, like our metal brushes. Some brushes apply hardly any structure, like our nylon brushes. Knowing this, you can begin to make decisions about how you’re going to brush your skis based on the conditions you’re going to be skiing in.

    On brush application and order: two schools of thought:When brushing your skis, you are removing paraffin from the surface, structure, and then polishing the ski base. There are many ways to go about doing this. Here are two examples of brushing orders that you can do for different conditions.

    Examples:

    Cold, microcrystalline paraffin:Speedtex superfine before applying wax, Soft Brass, hard horsehair, soft nylon.

    Warmer, waxier paraffin:Speedtex superfine before applying wax, 0.7 Stainless steel, tampico, soft nylon.

    These are just two recommendations; however, I recommend you test and figure out what works best with your skis and the snow that you are skiing on.

    Note: Most Nordic brushes from ARC are available in standard size, large World Cup size, and available as a roto tool.

    World Cup Steel Brushes for downhill pursuits:

    • 3.0 Tempered Steel: Engineered for World Cup level speed skiing, this brush excels in high-speed skiing disciplines. Its precisely engineered steel wires create micro-scratches on the ski base, maximizing water flow and enhancing glide. This brush can also clean your barbecue—this is not a brush for Nordic skiing.

    • 2.5 Tempered Steel Angled Wires: Designed for optimal paraffin absorption and adhesion, this brush features angled wires for smoother application and efficient removal of excess wax. Use it as a foundational brush for all racing paraffin types, creating a consistent, scratch-free base. Again, don’t use this on your Nordic skis.

    • 2.0 Hard Stainless Steel: Your essential all-purpose brush, this model tackles both racing paraffin and general waxing needs, removing excess paraffin and preparing the base for enhanced glide. I wouldn’t recommend this brush for your Nordic skis.

    Stainless Steel Brushes for Precision and Versatility:

    • 1.0 Fine Stainless Steel: I recommend this brush as your ski cleaning brush or as a good standard steel brush. This can be used to open up the structure on the base of your ski before applying colder paraffins.

    • 0.7 Extra Fine Stainless Steel: My favorite brush, this brush effectively clears colder, microcrystalline paraffins. This is a must-have, either used first or second in the brushing process as it both clears the structure and removes surface paraffin.

    Brass Brushes for budget performance:

    • Hard Brass: A less expensive alternative to the 1.0 steel. I use this brush for cleaning skis when paired with a glide cleaning solvent.

    • Soft Brass: This is comparable to the soft steel but will remove colder paraffins without excessively scratching the ski base. Use this brush when you want to minimize the amount of structure being applied to the ski on a really cold day.

    Natural Brushes:

    • Tampico: A natural fiber obtained from the agave plant, this brush is gentle on the base while removing excess wax. Apply after an initial metal brushing. Best suited for waxes with medium-to-low melting points.

    • Hard Horsehair: This can be used for scrubbing away hard surface paraffin when you want to minimize the impact on the structure of the ski while removing wax.

    • Soft Horsehair: A natural fiber alternative to the soft nylon.

    Finishing Brushes:

    • Hard Nylon: This is a good workhorse polishing brush that will work quickly and last a long time as long as you keep it clean!

    • Soft Nylon: This is going to be your finishing brush most of the time for liquids and other finishing waxes. I like this combination of soft and short bristles for working on skis as they’re able to do work on the running surface without flopping around.

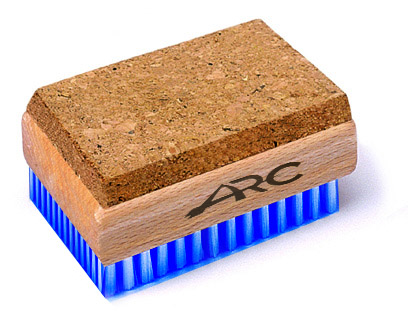
    • Cork Nylon Combi Brush. This brush is a killer deal for liquid applications. Cork on the back, soft nylon on the other side at a competitive price. Ideal for all liquid wax applications for all levels of skier.

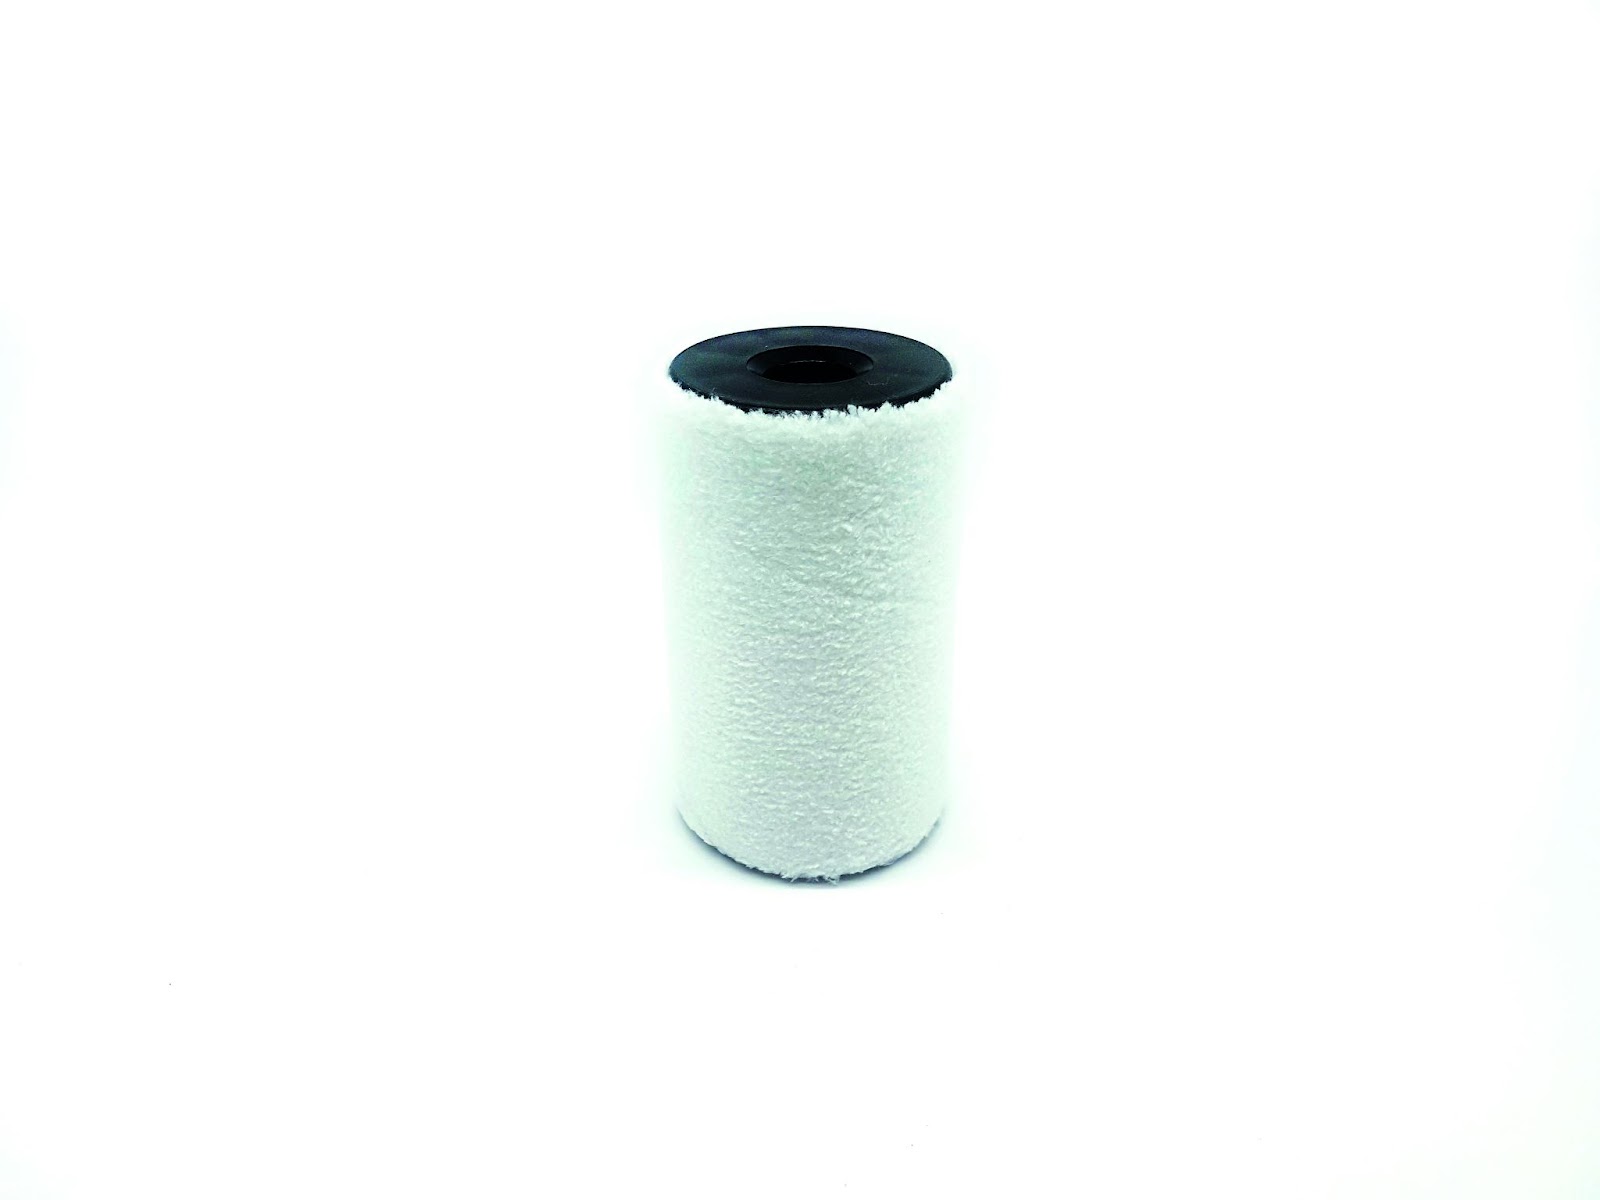
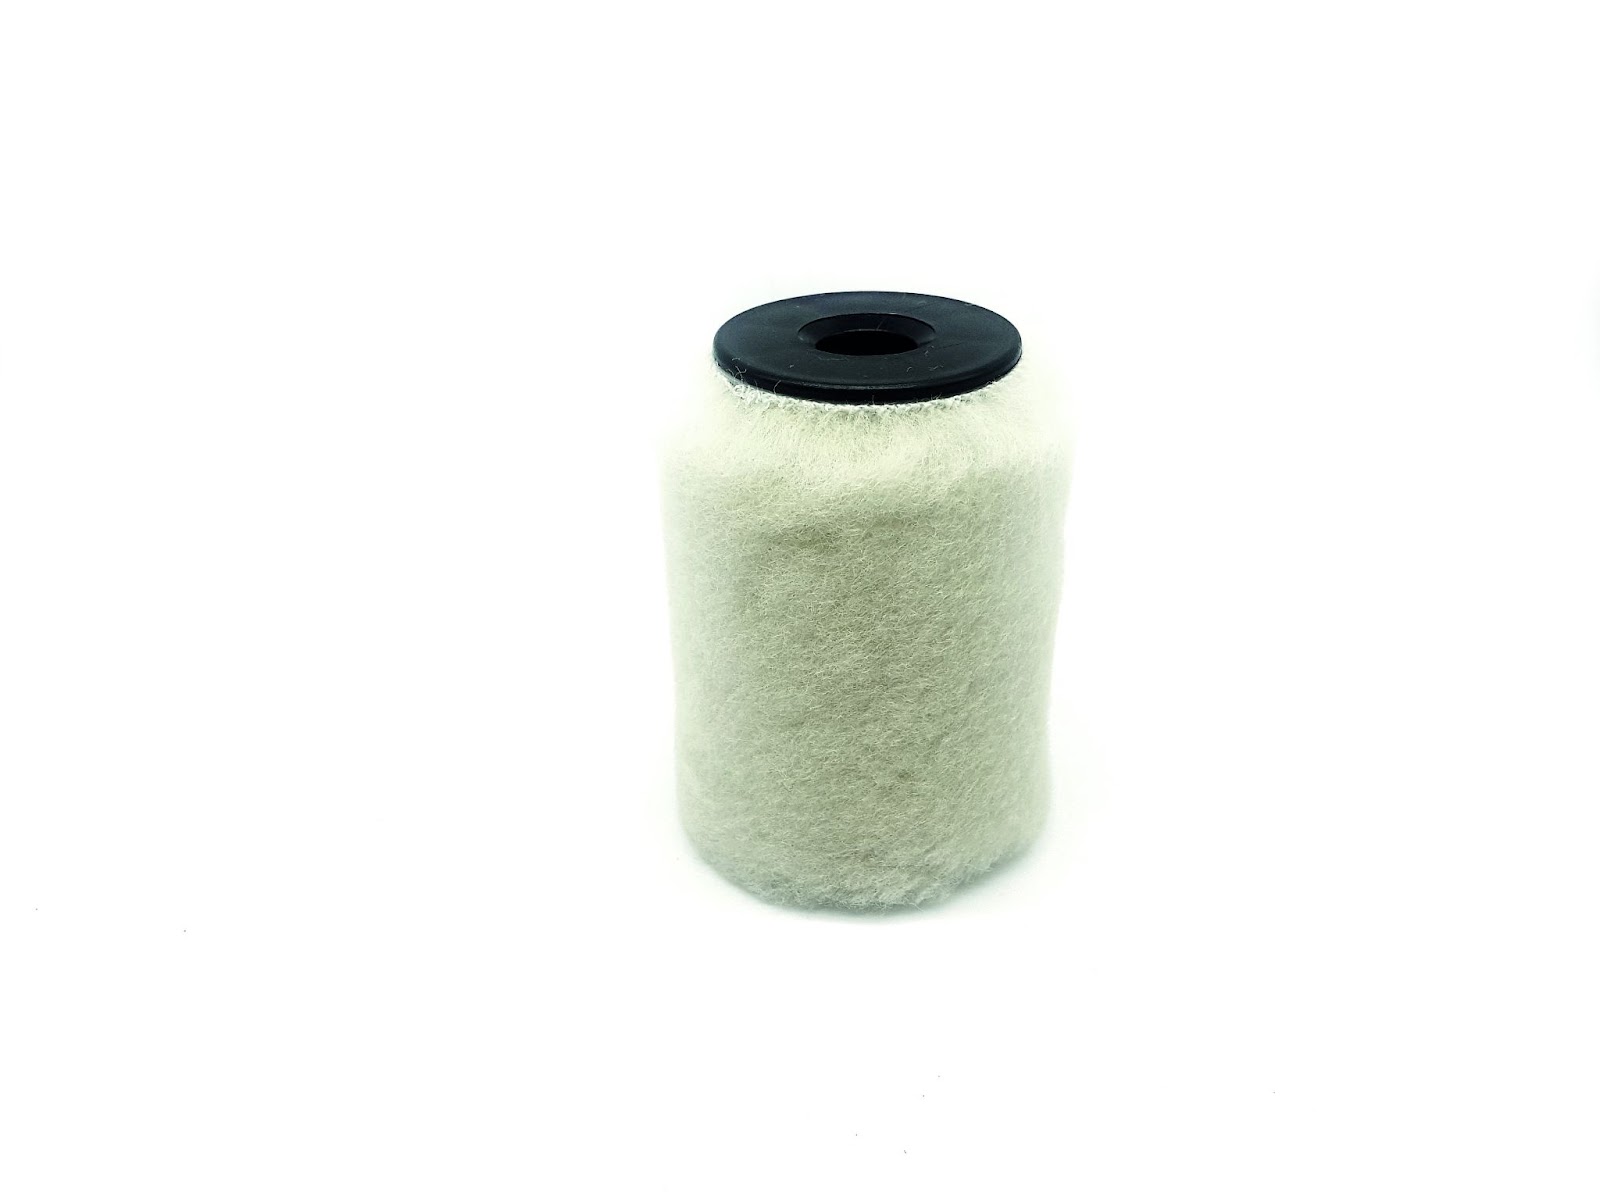
    Enhanced Application with ARC Rollers, available in 10cm, 14cm, and 20cm:

    • Polyester Roller: An industry standard, capable of applying waxes hot or cold consistently.

    • Merino Wool Roller: Ultra-fine merino wool for the application of thin film waxes, including solids or liquids.

    • Speedtex Fine Roller: Designed to deeply clean and polish ski bases before waxing. It can also do a great job removing gunk from your waxing iron (we also sell sheets of this). This will gently abrade the surface of the ski upon application.

    • Speedtex Super-Fine Roller: Designed to deeply clean and polish the ski before wax application. The difference with this roller is that it will not apply micro abrasions to the ski base.

    Take a critical look at your ski brushes. Are they worn out, dirty, contaminated with fluorinated wax? With the shift away from fluorinated waxes, it is necessary to make sure our ski selection and preparation is dialed even more than before. With the expert knowledge behind ARC, you can trust that you are getting the most out of this step in the process.

    See you on the trail (or wax cabin) – Jacob

    FasterSkier readers can receive 25% off ARC brushes for the next week by shopping at EnjoyWinter.com and using FasterSkierARC as your promo code. No stacking of discounts allowed.

  • Smooth Transitions: Moving Wisely From Pavement To Snow

    Smooth Transitions: Moving Wisely From Pavement To Snow

    Our bodies are very good at adapting to change, as long as it comes slowly enough. That first frosty day in autumn always feels brutally cold. Take the same temperature in March and we’re in shorts and short sleeves. Our response to exercise load is no different. Taken as a slow and progressive build up, our bodies will respond with increased strength and capacity to stay on the right side of the load vs tolerance equation. But when it comes on too quickly–too much too soon–our bodies tend to complain.

    Jessie Diggins (USST) stay familiar with snow feels while training at the Snow Farm in New Zealand in 2018. (Photo: ColinWitherill/Warren Miller Entertainment)

    The first day on snow is a highlight of every season. Long hours of sweat in the summer sun finally bear fruit with that ephemeral glide of skis on snow. We’ve finally escaped the harsh pounding of running, the clack of rollerski poles on pavement, the constant threat of distracted drivers in 4000 pound death machines hunting you on the road bike (apologies for the drama). It’s definitely easy to get carried away. Before we know it those first giddy strides have turned into a three hour ski when you only packed food and water for any hour. Best case scenario, you’re a bit sore for a couple of days. Worst case, you’ve irritated or injured something that could derail your whole ski season.

    The obvious solution is to progress slowly. For those fortunate enough to have easy access to ski tracks, this takes some self control but is very doable. For those who are not able to get on snow frequently enough to have a progressive build, it’s going to take more prep work to ensure that your body is ready for you to go full gas as soon as the skis hit the snow. 

    If you’ve been rollerskiing, you definitely have a head start. But rollerskiing is not snow skiing. Snow will present different challenges, and therefore different loads on the body. Classic striding is more nuanced and often requires more work to set the kick than simply relying on ratcheted wheels. Pole plants, while nice and quiet, lack the snappy feedback as the snow compresses under the basket (and maybe let you get away with low hands on initiation without the tell tale skid of pole tips on pavement). Balance on the glide ski is now subject to variations in terrain, snow characteristics, and especially grooming quality. 

    November conditions in Lefthand Canyon (Photo: Sophie Spalding).

    If you haven’t been rollerskiing (I don’t blame you), it’s likely that your arms haven’t seen much load over the summer. Your legs have probably been the focus with running, cycling, and hiking. But these are very straight line motions—fine for classic skiing but not the best prep for the lateral demands of skating.

    Ideally you’ve been doing strength training, ski specific drills, and stability work all summer. If not, this article is your friendly reminder that it’s not too late to get yourself ready. If you are a Faster Skier regular (thank you!), then you’ve likely come across some of my previous articles and hopefully you’ve incorporated the associated exercises into your regular “pay to play” maintenance workouts. Here are some highlights which are particularly appropriate to this conversation: 

    Single leg stability and balance: In Good Standing – Fundamental Elements of Ski Stance 

    Lateral hip strength: Go Sideways for Strong Skating Hips

    Reinforcing the big toe: An Ode to the Big Toe 

    Shoulder health: Building a Better Skier Part 4: The Shoulder

    Higher level dynamic exercises: Adding Power to the Push Off: Understanding the Rate of Force Development 

    So what does a “slow progression” on snow look like? A good example is what the Sifel US Cross Country Ski Team calls The Pace Project. As a tool for race prep, the goal is to ski repeats on a (typically) 5k loop with subtle changes in effort, subtechnique/gearing, nutrition, etc in order to learn the best recipe for repeatedly clocking your fastest times. As an early season, toe in the water vs head-first dive kind of progression, the goal would be to ski the loop (or whatever strip of snow you may have) at a pace where your time, perceived effort, and heart rate stay fairly consistent lap after lap. If your heart rate, perceived effort, and time are all going up, you’re overcooking it and not sticking to the plan. If effort and heart rate are consistent but you’re getting slower, it’s unlikely that you’re burning all of your matches, but your technique is starting to suffer. This might be a good time to take a step back and re-focus on technique. The idea is to ski in control–not necessarily easy, but under a sustainable effort for the duration. If you’re counting laps, look to add a lap every few sessions on snow. The general guidance is frequency before duration before intensity. If increasing frequency isn’t an option, then definitely build up duration prior to adding high intensity.

    Zak Ketterson capitalizing on some early snow time at Frozen Thunder back in 2021. (Photo: Team Birkie)

    When dryland prep and on-snow progression have been combined, the body should be able to stay ahead of the load and tolerate the transition smoothly. Glitches definitely happen and shouldn’t be ignored. However, a niggle or small amount of pain that subsides within a few hours is unlikely to represent a concerning injury. If the pain keeps occurring, if it becomes moderate or severe, or if that mild pain is lasting into the next day, it’s a good idea to take some relative rest and seek the help of a physical therapist (ideally one who knows the specific demands of Nordic skiing). 

    Now go do some balance exercises, a snow dance or two (afterall, dancing has been shown to decrease back pain with skiing), and don’t forget to scrape the storage wax off your skis!


  • Four of My Favorite Quick and Nutritious Meals 

    Four of My Favorite Quick and Nutritious Meals 


    Grain bowl

    Green Curry

    Flatbread with chickpea tomato pistachio – NYT 

    Stir fry 


    Food can be fun, tasty, nutritious and easy to make! I love to cook elaborate meals when I have time, but often the simple and quick recipes end up being my favorite. Whether it is a recovery day or a 5 hour training day, eating a well-balanced meal is important for staying strong, healthy, and happy! When I can, I try to cook foods that are grown locally and in season, because I know where they come from and are rich with fresh nutrients. Foods in season also taste much better too! Here have been my summer go-to meals that are quick, easy, and always a crowd-pleaser.


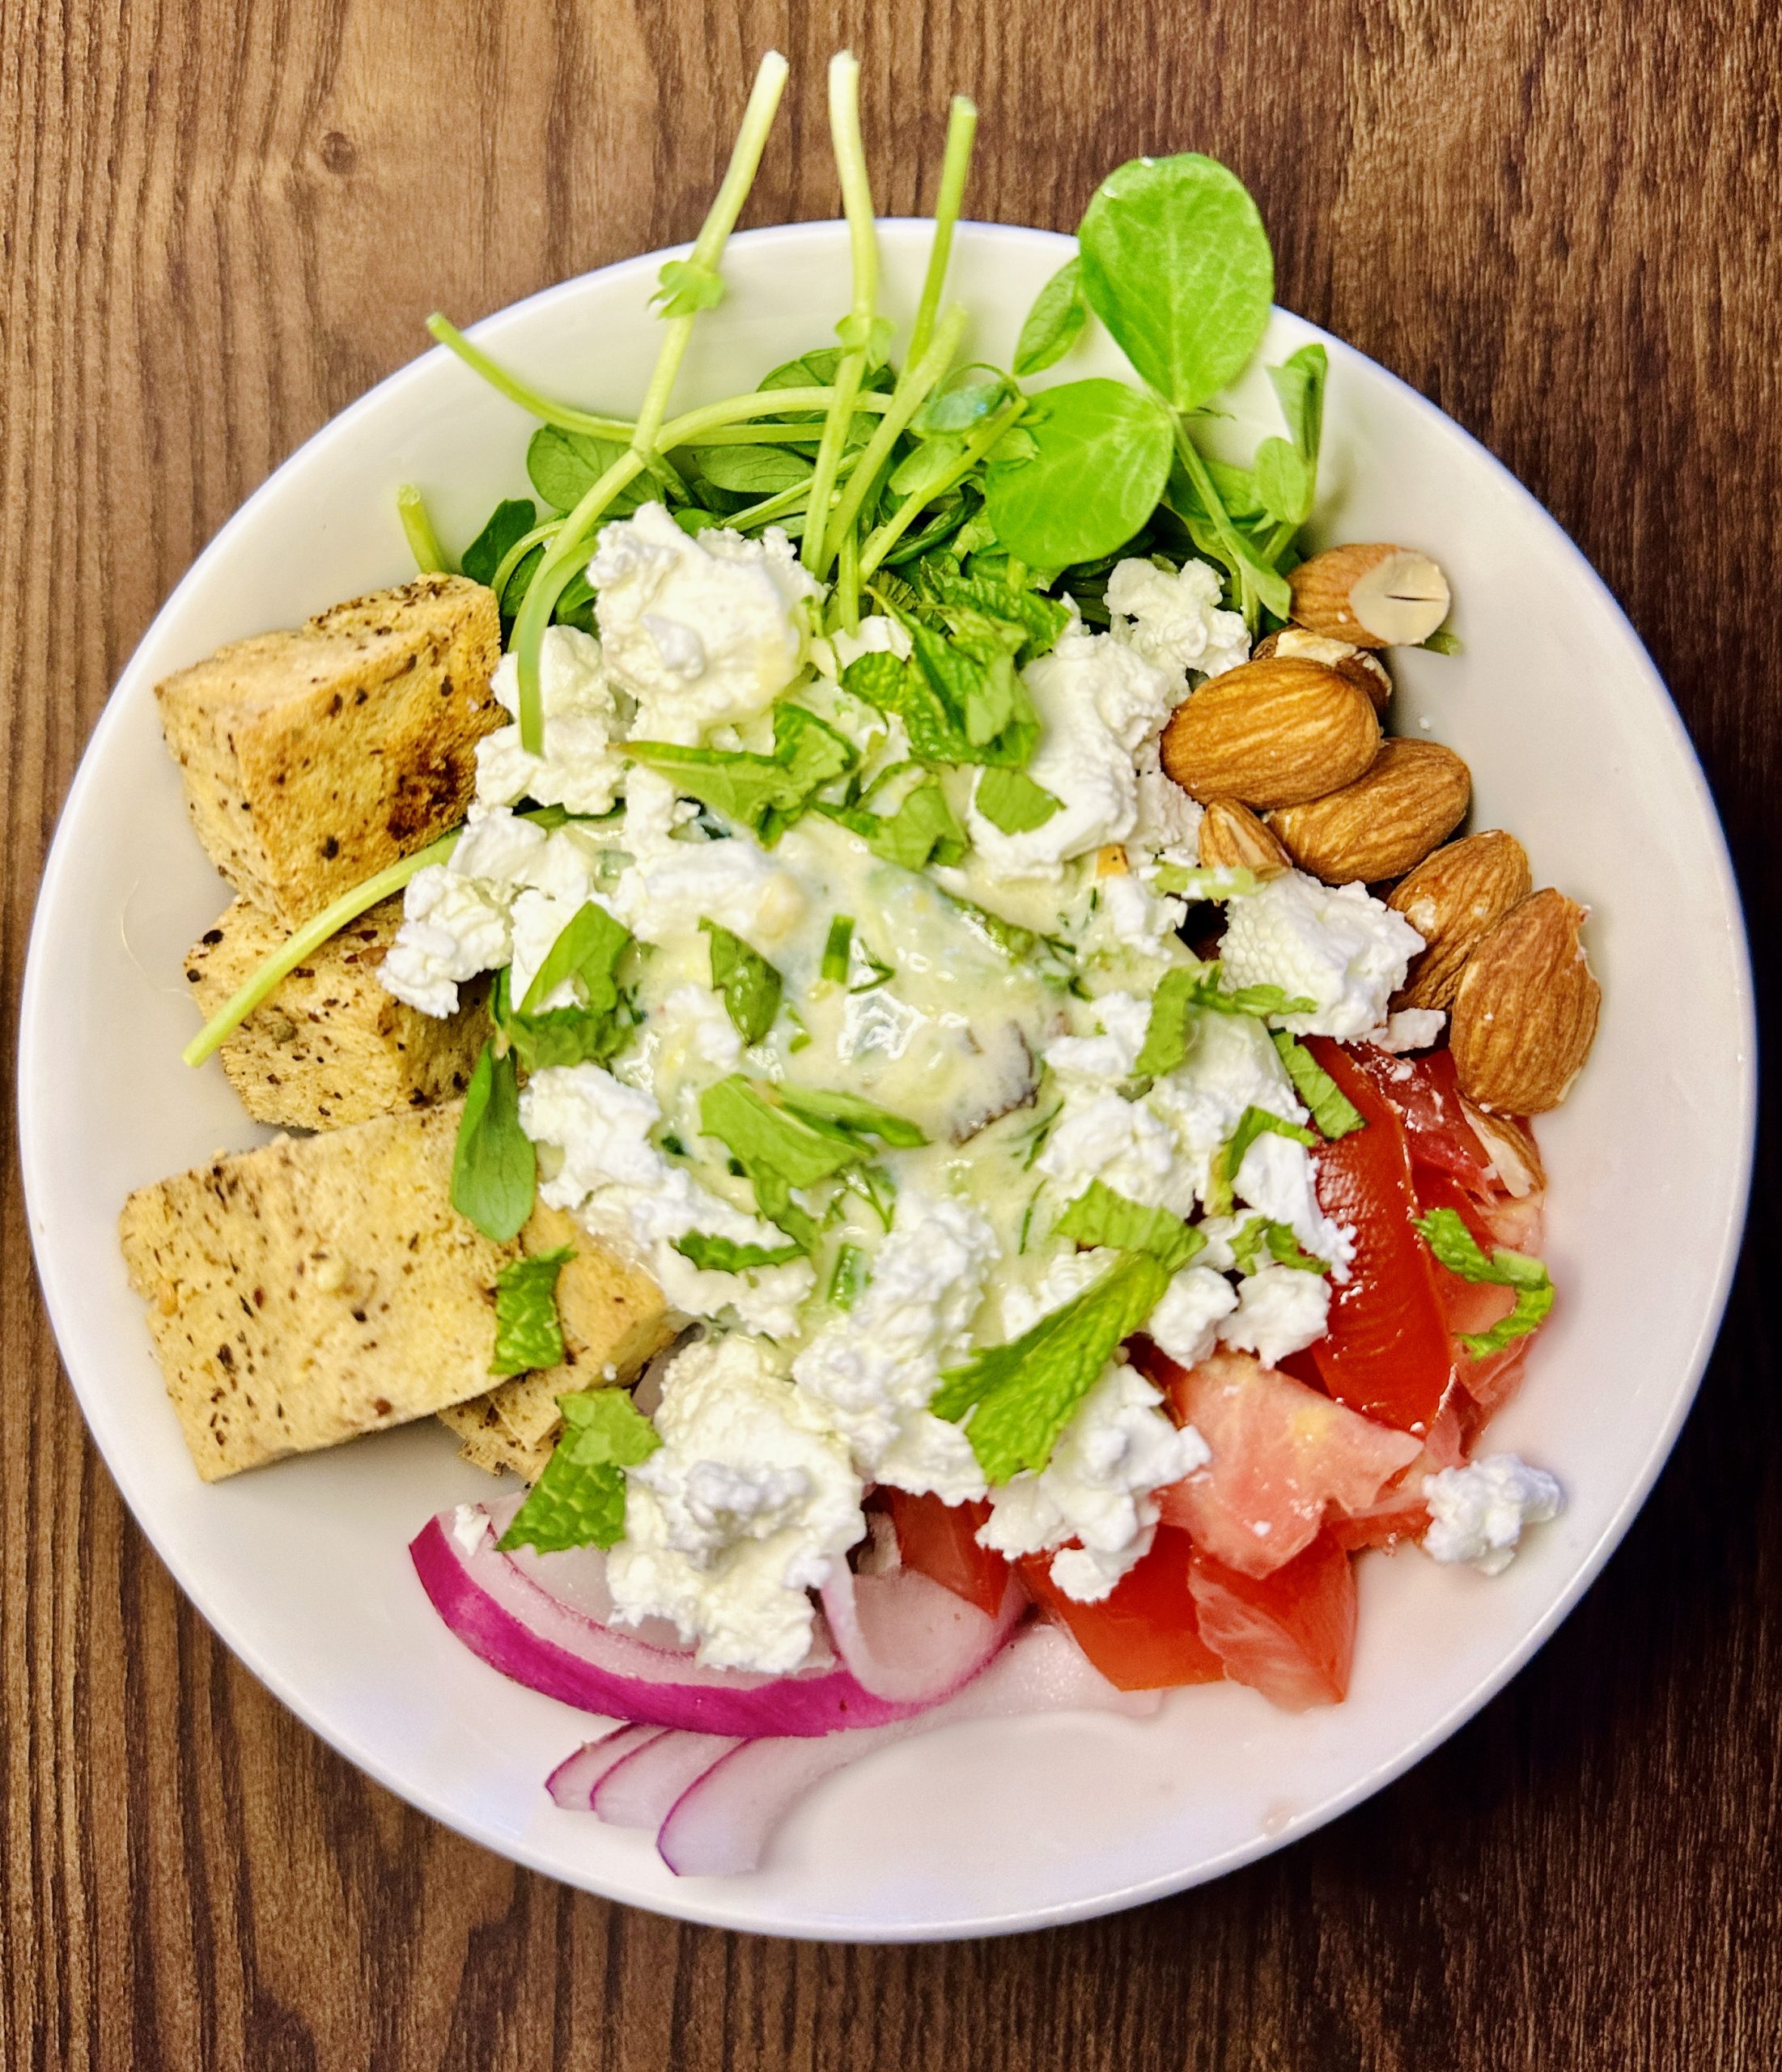
    Grain bowl – ie. choose your own adventure 


    What I love about a grain bowl is that you can really substitute any part of it with what you have in your fridge and pantry. There are 4 parts to the bowl: grain, protein, veggie, sauce (+ cheese and herbs as toppings)! Technically, this isn’t a set recipe, but this is my most frequent go-to dinner.  Here are a few of my favorite combinations. 

    Combo 1: 

    Grain: Brown rice

    Protein: Tofu, almonds

    Veggies: Leafy greens, tomatoes,  

    Sauce: Lemon tahini dressing

    Toppings: Feta, mint

    Grain bowl. (Photo: Julia Kern)


    Combo 2: 

    Grain: White rice

    Protein: Ground chicken, peanuts 

    Veggies: Broccoli, arugula, bell peppers

    Sauce: Thai chili sauce 

    Toppings: Pineapple, cilantro

    Grain bowl. (Photo: Julia Kern)


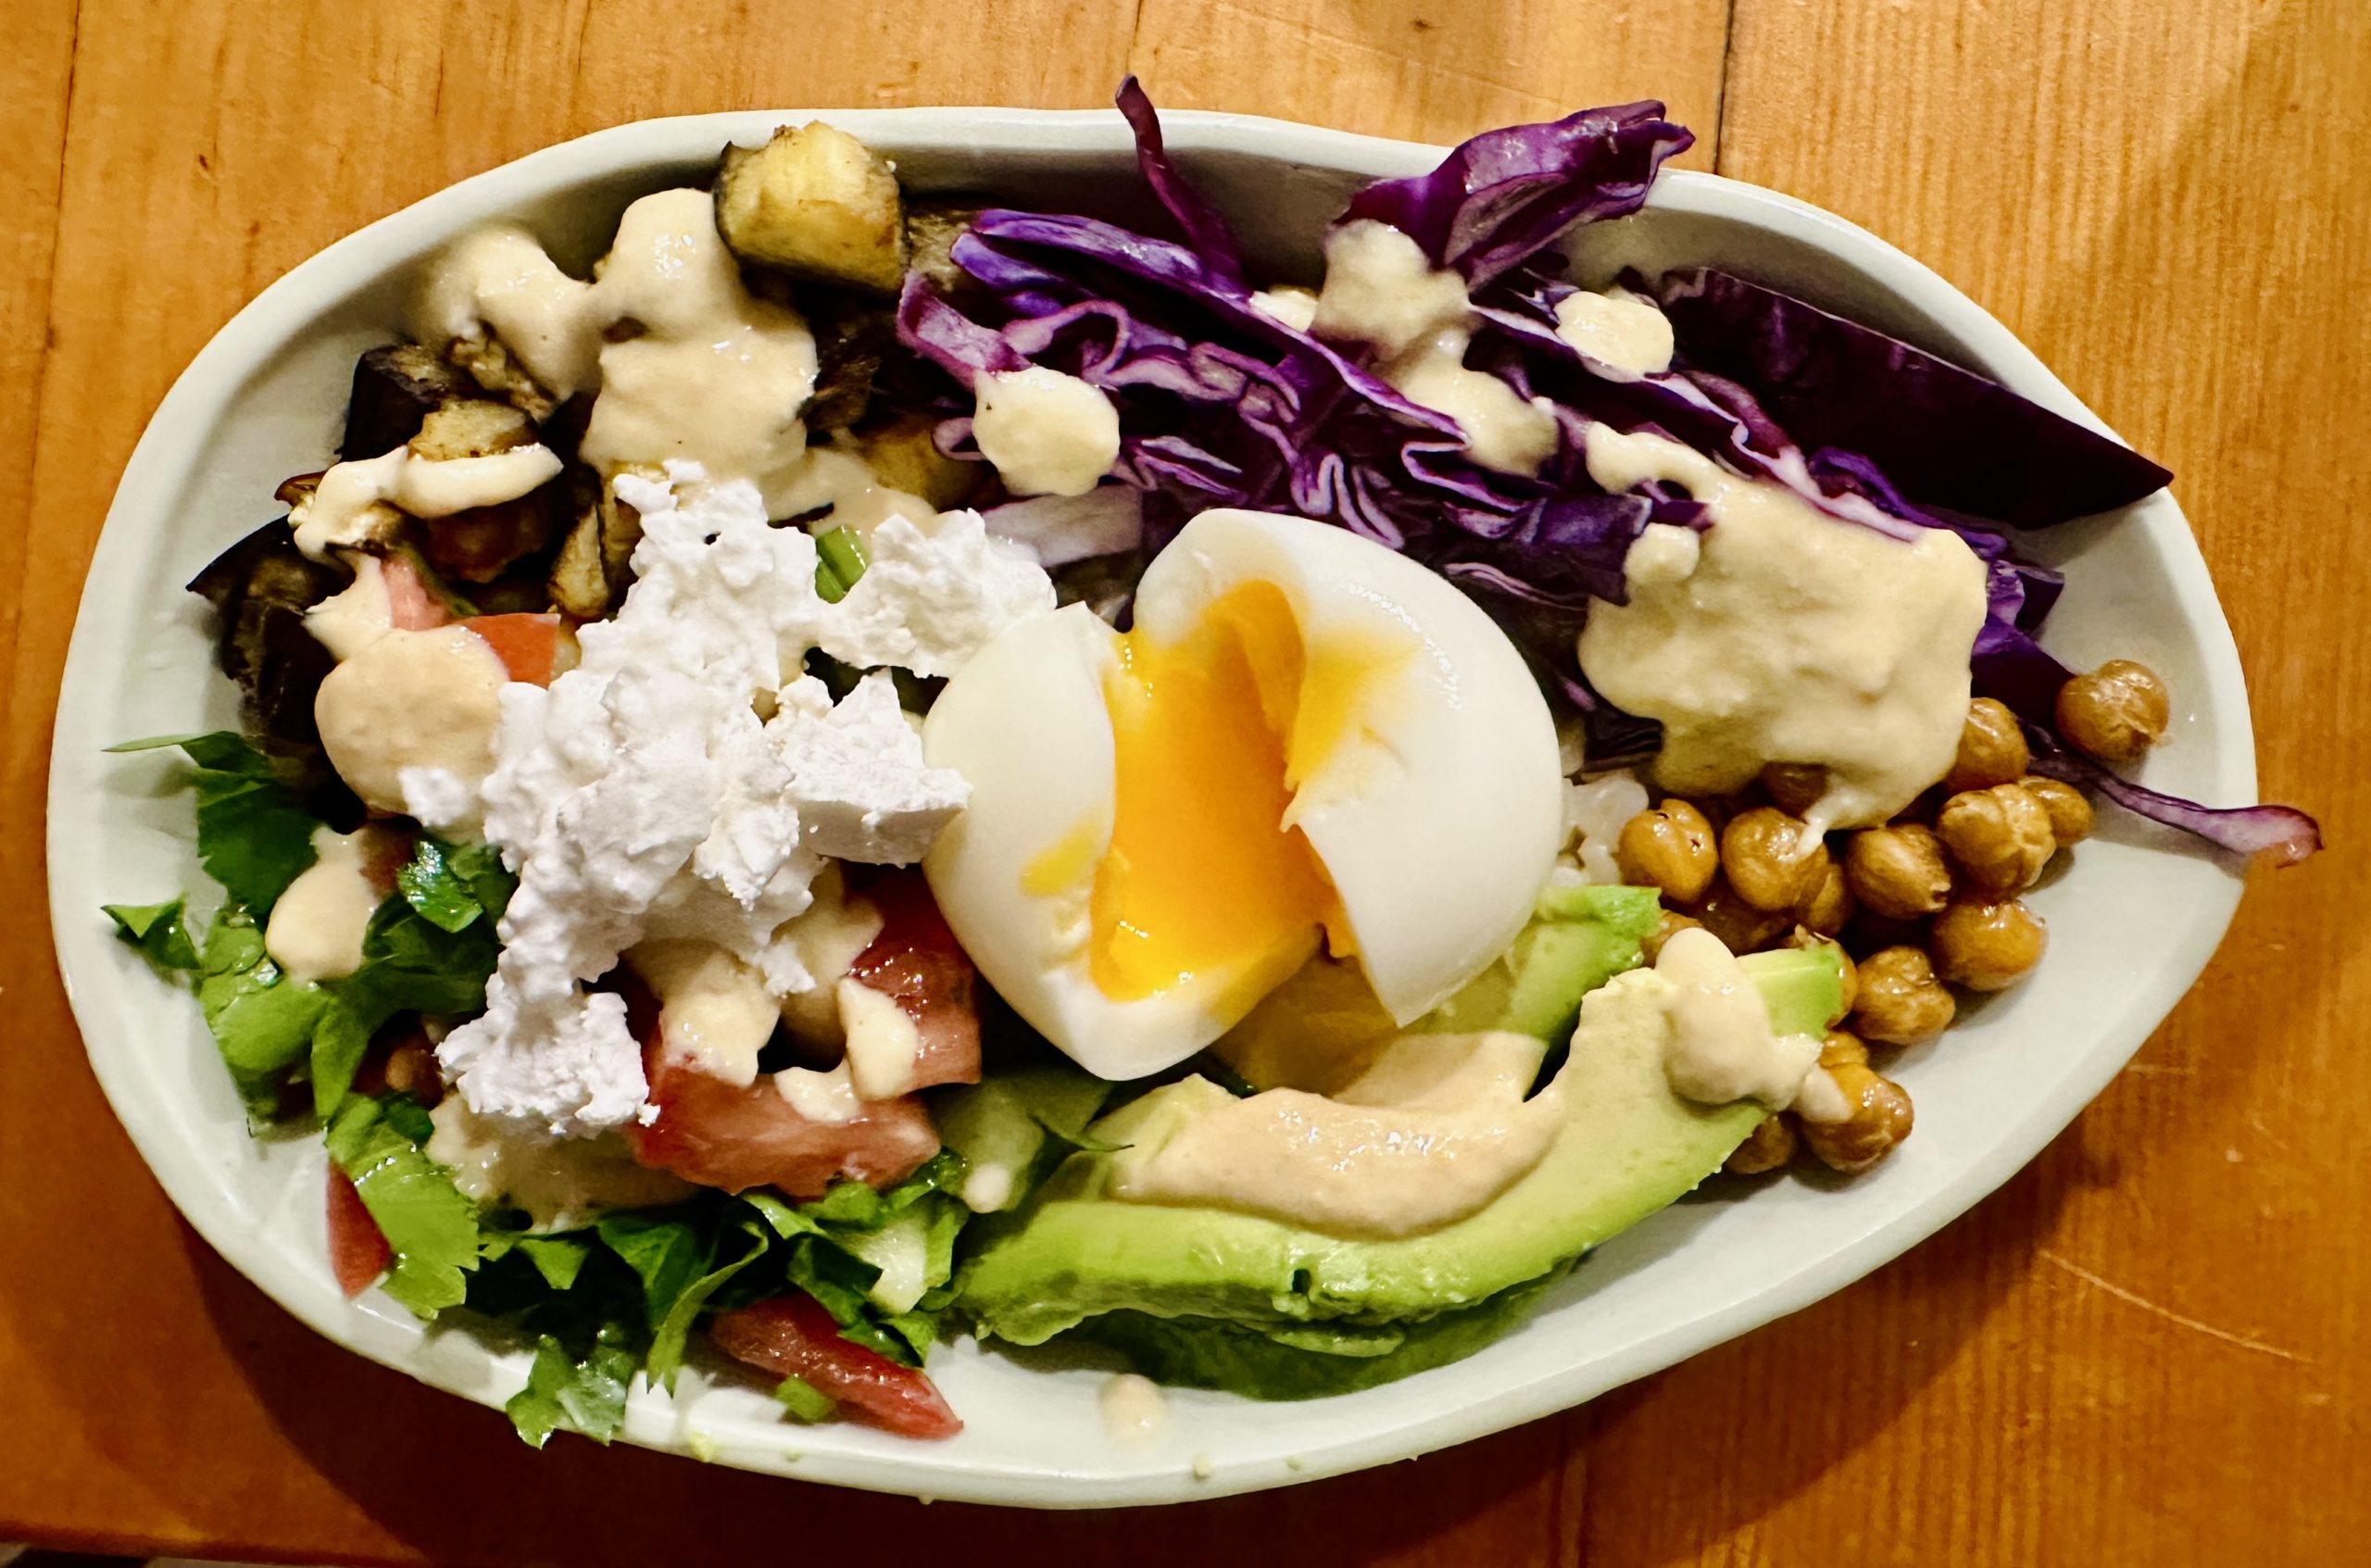
    Combo 3:

    Grain: Farro

    Protein: Egg, chickpeas 

    Veggies: Cucumber, tomatoes, shredded cabbage, eggplant 

    Sauce: Lemon tahini dressing 

    Toppings: Feta, parsley 

    * Lemon tahini sauce 

    Blend ⅓ cup tahini, ⅓ olive oil, ⅓ cup water, 3 tbs lemon juice, garlic, 1 tsp soy sauce 

    *Thai chili sauce

    ¼ cup Thai chili sauce, ⅓ cup soy sauce, 2 tbsp lime juice, garlic, ginger

    Grain bowl. (Photo: Julia Kern)


    Green curry 

    On those colder or rainy days, it is nice to have a warm meal. I like curry because you can always substitute veggies for what you have in the fridge and it is full of flavor. 

    What you need:

    • Rice (or other grain)
    • Tofu or chicken
    • 2 cups of veggies
    • 1 can of coconut milk
    • Thai green curry paste 
    • 1 lime


    Cook a pot of rice or other grain of your choice while you make the curry sauce. 


    While the rice is cooking, mix 1 can of coconut milk with 4 tbs of Thai green curry paste in a medium-sized bowl. In a large, well-seasoned pan (I like to use coconut oil for this recipe), place either your tofu or chicken in the pan and pour 3 tbs of the curry mixture over and cook your protein until it is fully cooked. If there is not enough oil, add coconut oil to the pan as the protein cooks. Once your protein is cooked, set it aside in a bowl while you cook the vegetables. 

    Green curry prep. (Photo: Julia Kern)

    Add 2 cups of vegetables of your choice into the pan. I used kale and snap peas in this iteration, sticking with the green theme! Cook the veggies for about 4 minutes before pouring in the rest of the curry mixture. Let this mixture cook, stirring occasionally until the sauce starts to thicken and the veggies are cooked. 

    When it is done, top the curry with lime juice, add the tofu back in, and season to taste. Assemble the curry in a bowl with rice, topping with some fresh herbs like basil and cilantro, and cashews. 


    Flatbread Dipped in Cucumber Yogurt


    I loved this recipe for hot days this summer because it had a refreshing cool zingy taste to it, and required little oven and frying heat. I also really like this recipe because you can make it ahead of time and it is ready to go when you come home.  


    What you need:

    • Flatbread (or other dipping bread) 
    • 1-2 cups Greek yogurt
    • 1 big cucumber or 3 mini ones
    • 1 cup cherry tomatoes
    • 1 can chickpeas 
    • 1 clove garlic 
    • 1 lemon 
    • 1 ½ teaspoons curry powder
    • ⅓ cup herbs (I like basil and/or mint)
    • ¼ cup nuts for toppings (pistachios) 


    To make the yogurt dip, mix together the yogurt, cucumbers, hebs, zest of a half of lemon, salt, and pepper in a medium-sized bowl and then keep it in the fridge until you are ready to eat. Save the remaining half a lemon as wedges to serve on the side. 

    In a pan, heat oil on medium and add in the tomatoes, cooking them for 5 minutes. Once they start to burst, add in the chickpeas, curry powder, salt, and pepper. Simmer this for about 4 minutes and then let it cool in a bowl until you are ready to serve. I usually make these 2 steps ahead of time and keep both bowls in the fridge until I come home and I am ready to eat. 

    Flatbread dipped in cucumber yogurt. (Photo: Julia Kern)

    When I am ready to assemble the dish, I spread the yogurt mixture in a deep bowl or wide platter. I top it with the tomato chickpea mixture and sprinkle the herbs and nuts on top. You can either squeeze the lemon wedges over the mixture or serve them on the side as additional fresh citrus as topping. Using whatever flatbread you have (whether homemade or store-bought), I try to warm them up briefly in the microwave and then enjoy the dish by dipping into the mixture with the flatbread! 

    Stir Fry 


    Who doesn’t love a good stir fry? At the end of the week, I often have leftover veggies in the fridge, and it is the perfect way to use them up in a quick and delicious way! This recipe below is a twist to the classic rice, soy sauce stir fry so I hope it adds a different variation to the classic stir recipe. 

    What you need: 

    • Soba noodles (or other noodles or rice)
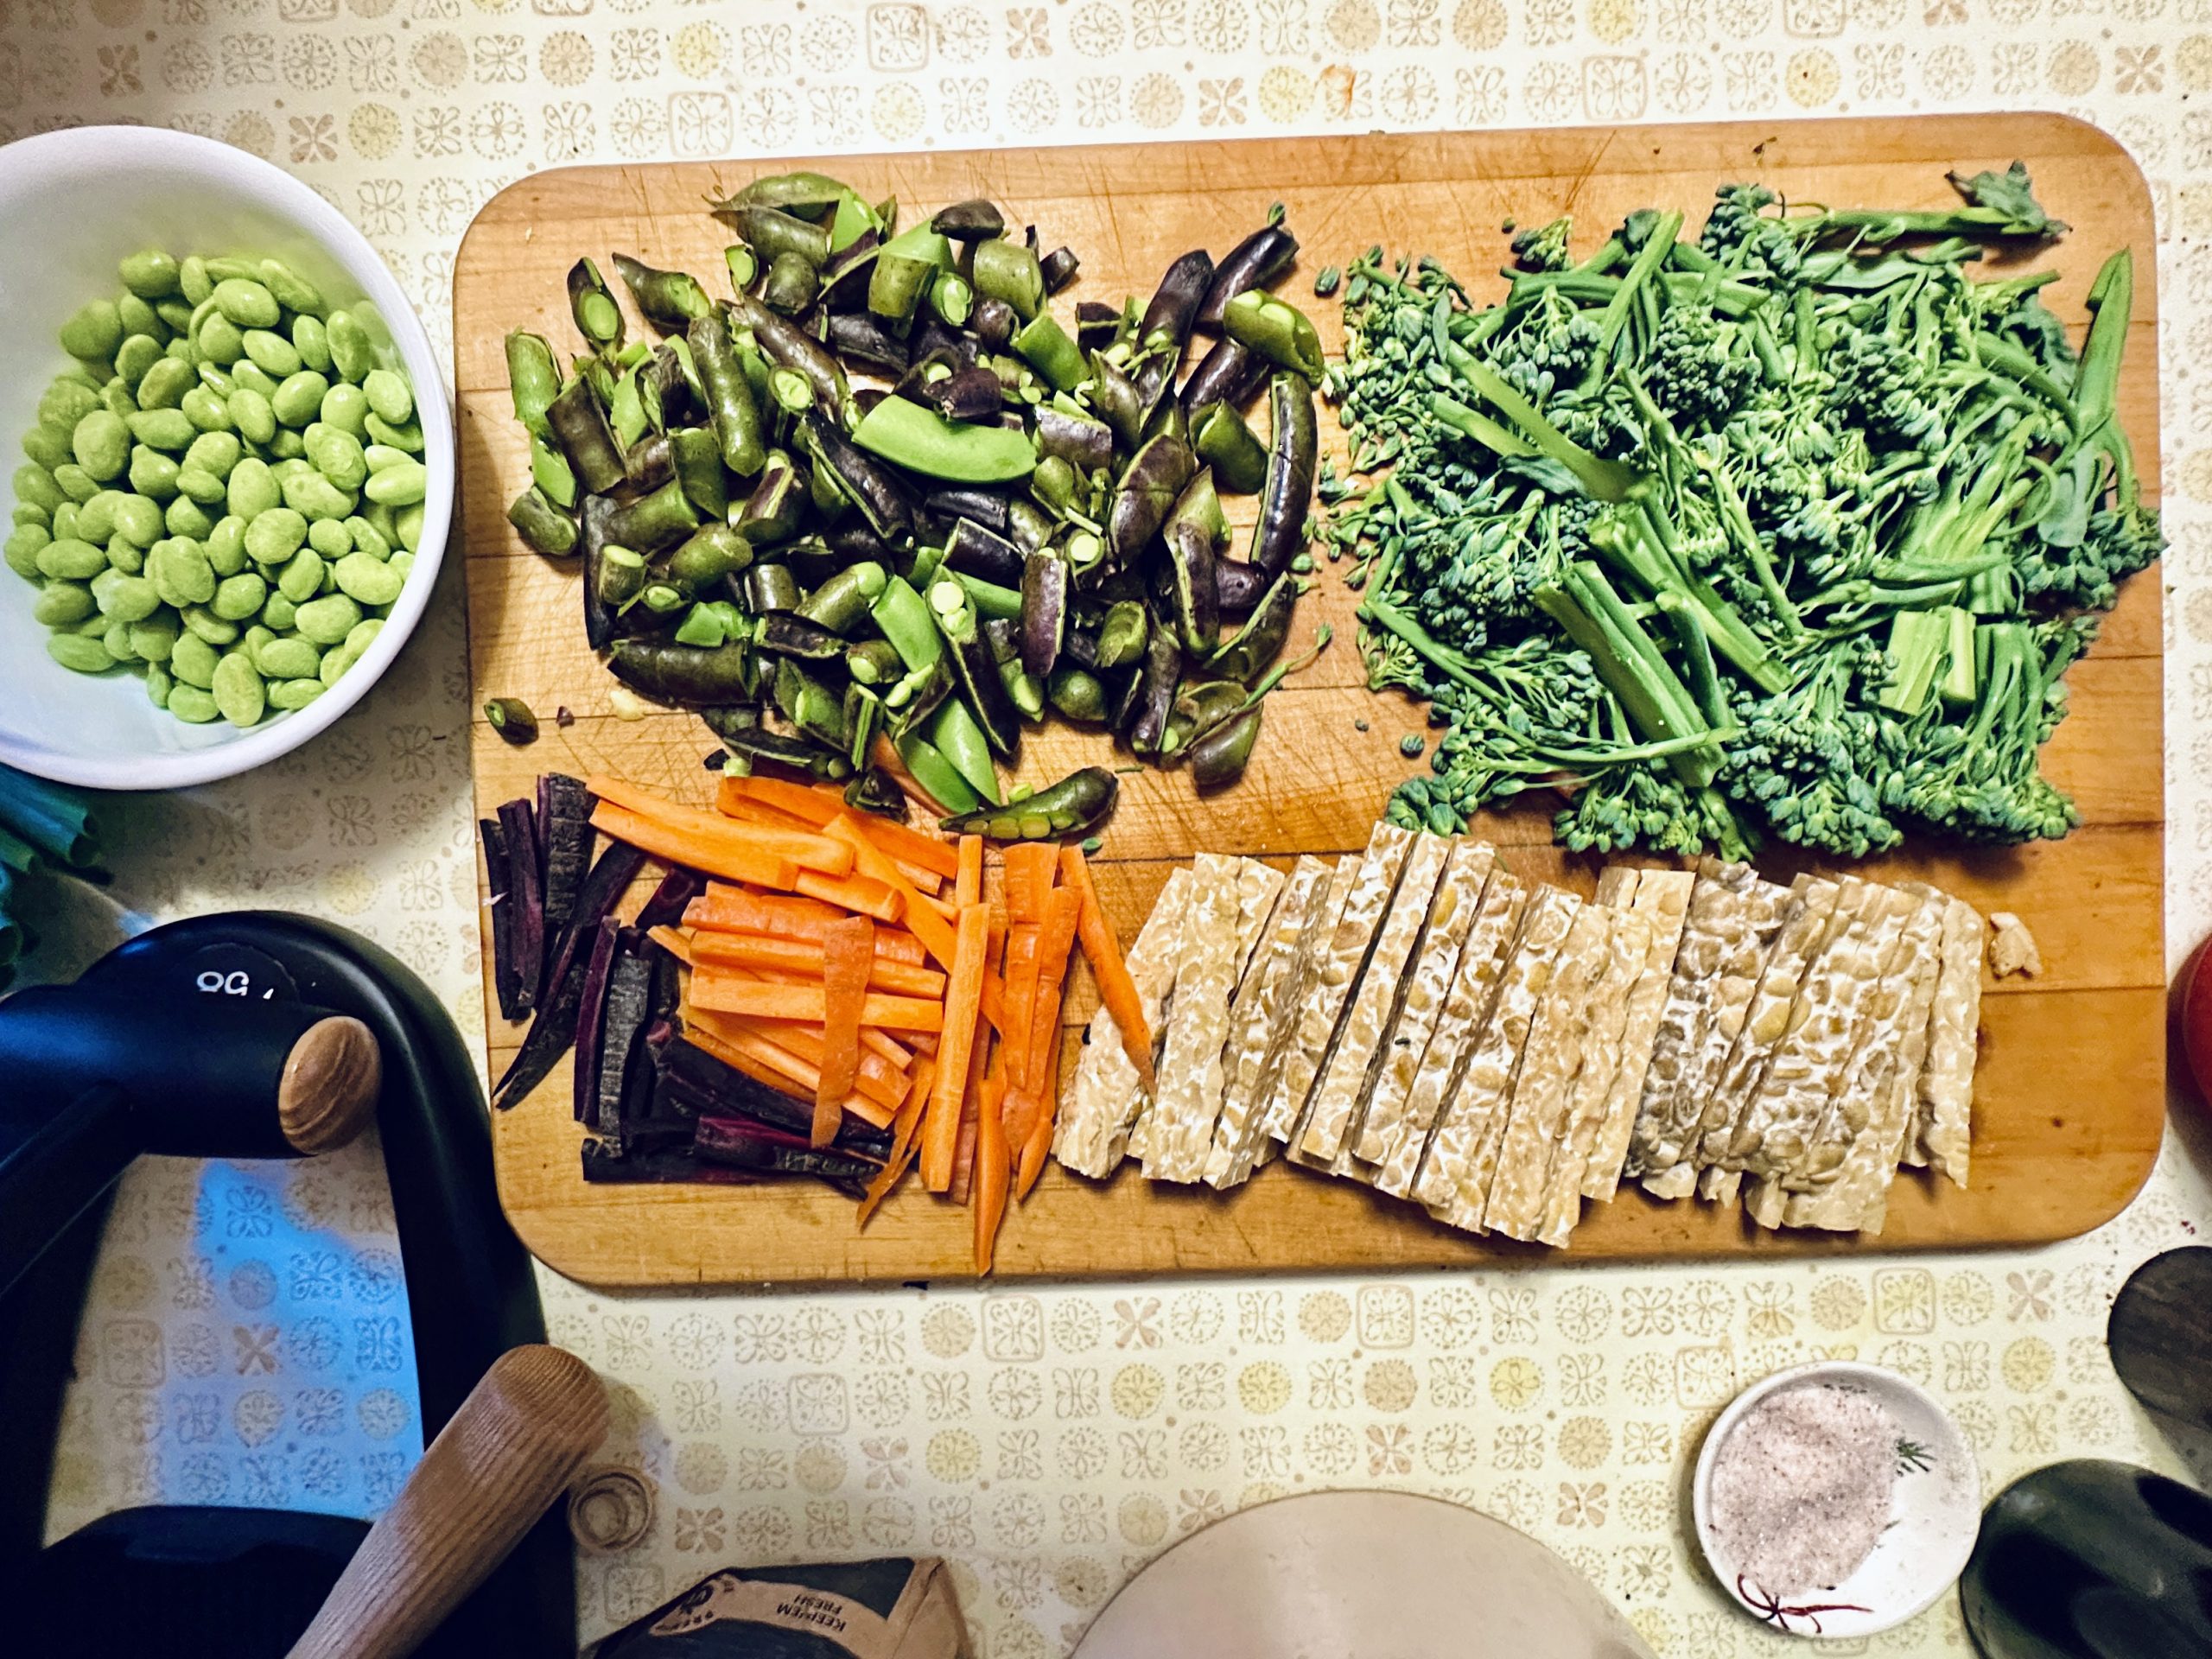
    • 2-3 cups veggies (broccolini, snap peas, edamame, carrots) 
    • Tempeh (or other protein) 
    • ⅓ cup herbs (cilantro or basil)
    • ¼ cup tamari or soy sauce 
    • 2 tbsp Olive oil
    • 1 tbsp Sesame oil
    • 1 tbsp honey or maple syrup
    • 2 tsp ginger 
    • Chili sauce or other hot sauce 


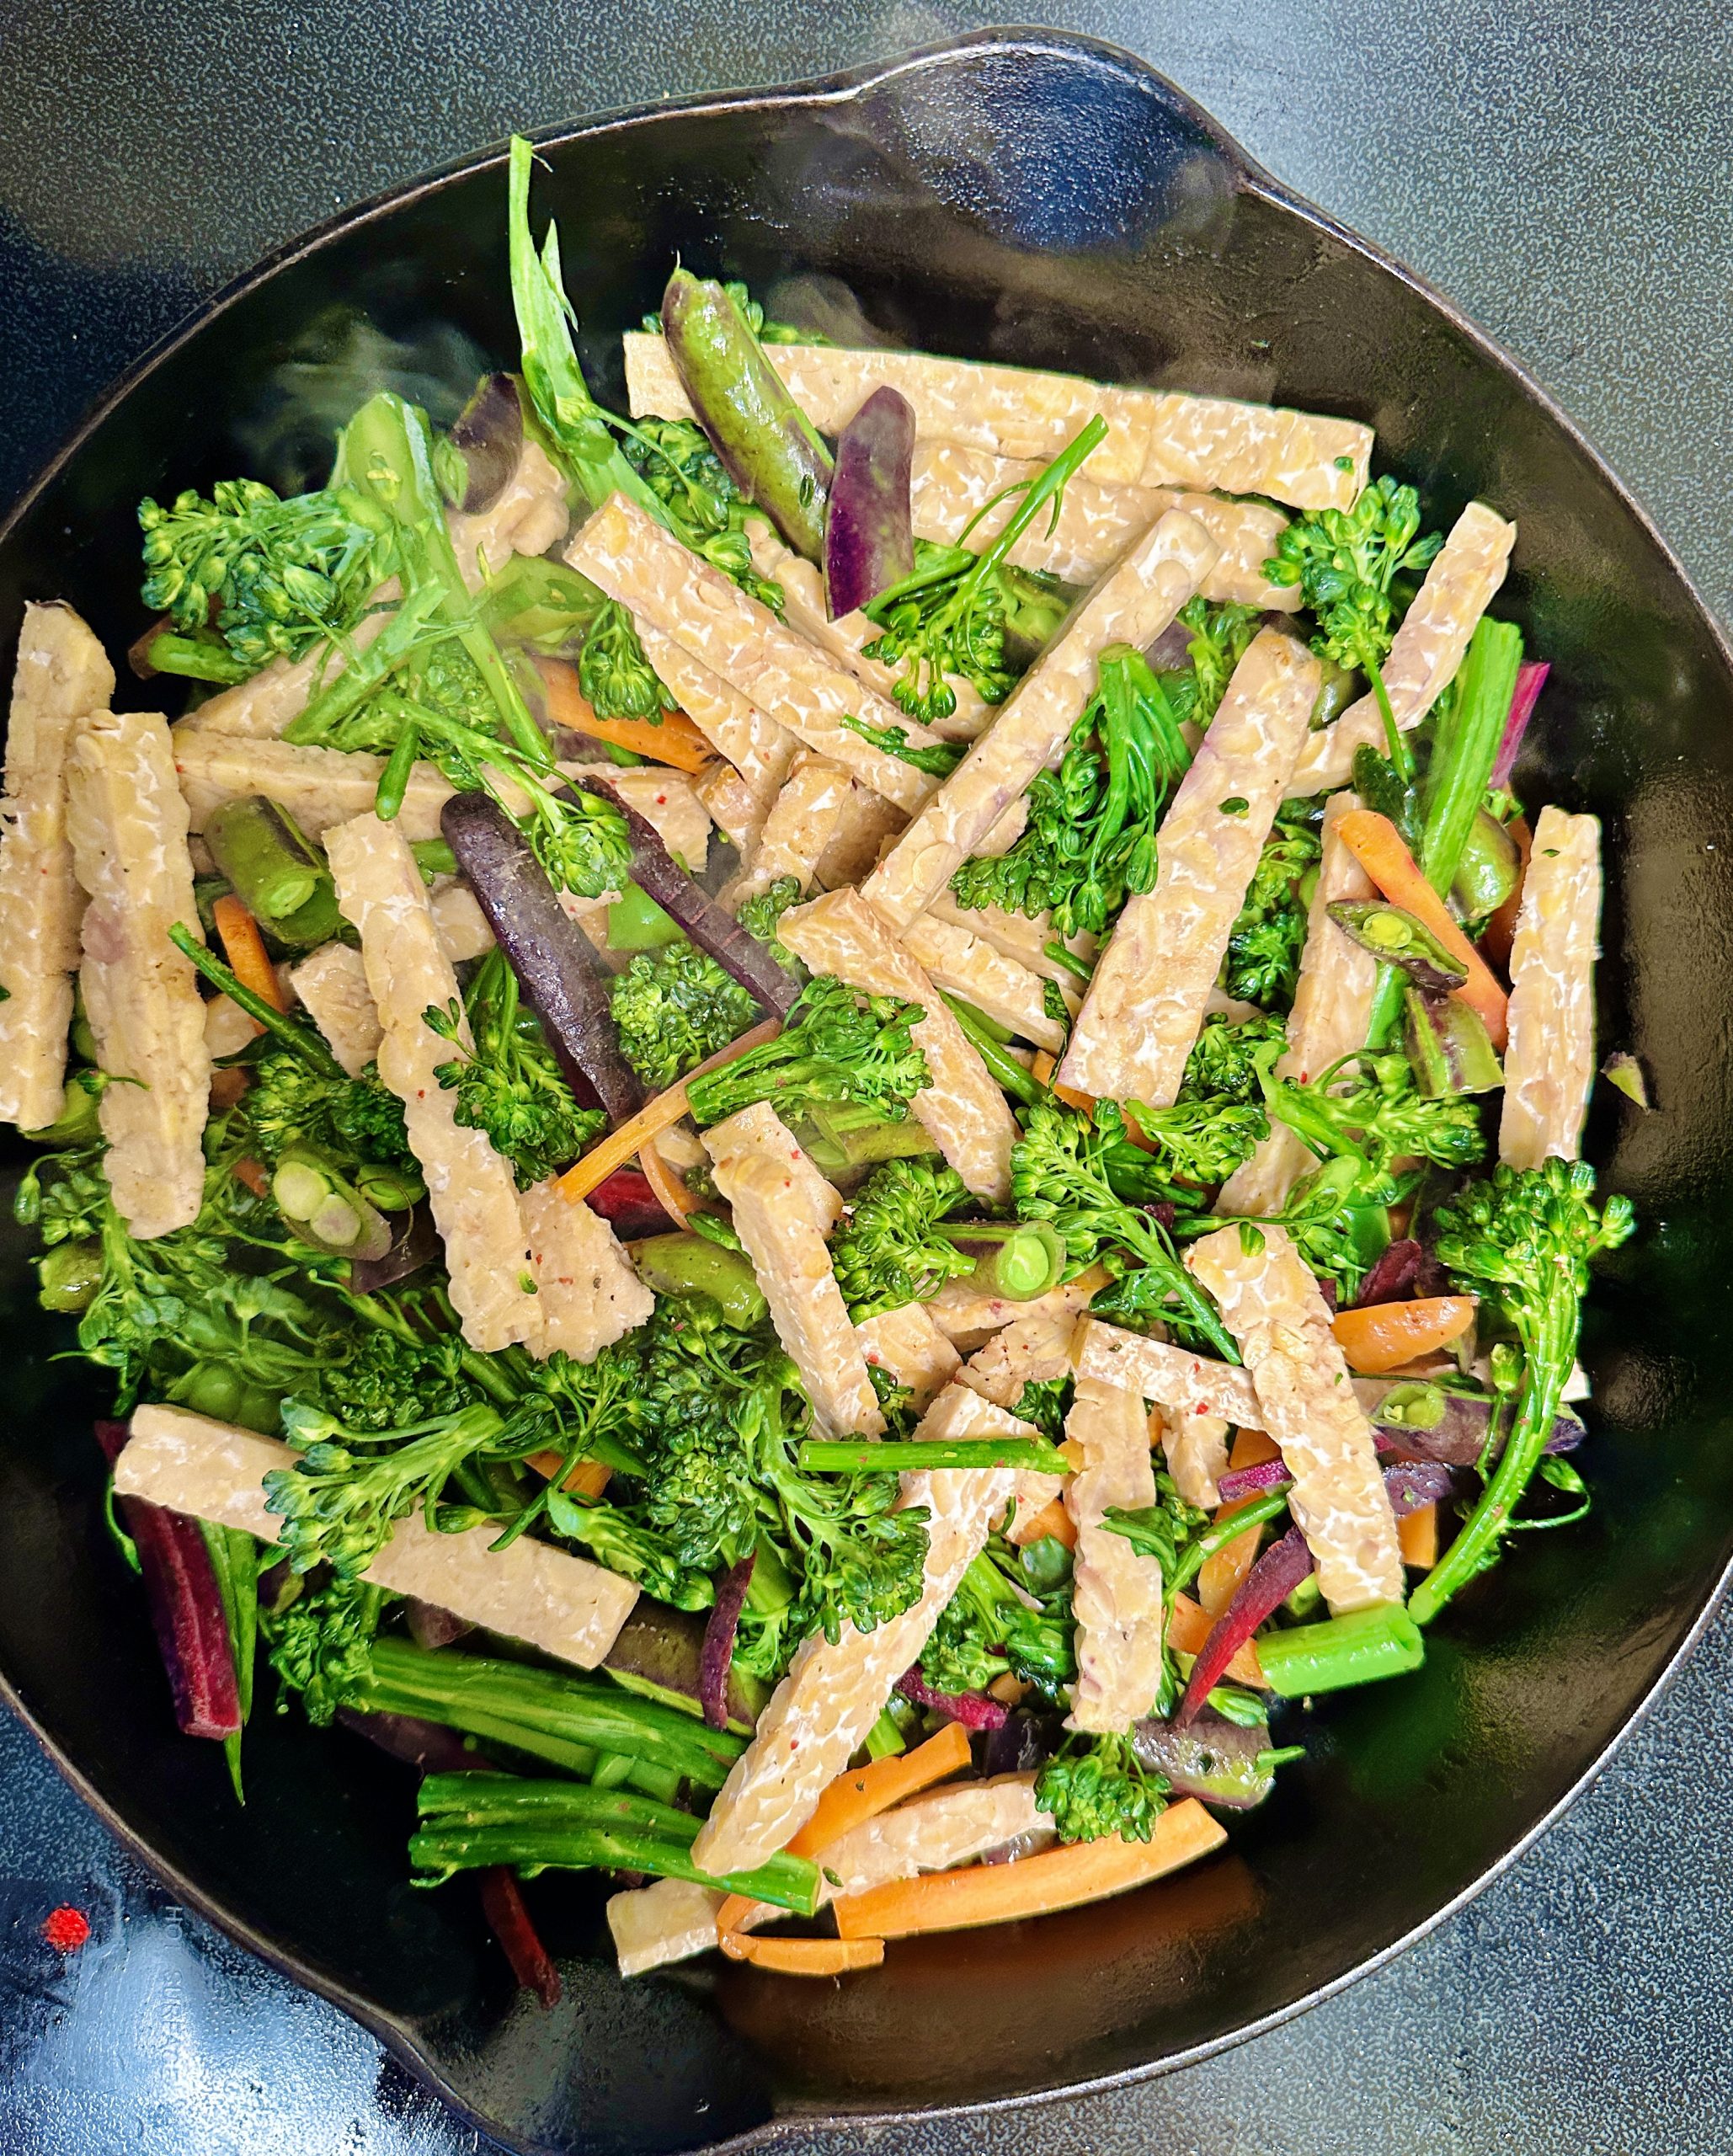
    Chop all of the veggies into you preferred shape (I like to make thin strips). Heat a skillet with olive oil and sautee the veggies and ginger for 5-7 minutes until they start to soften up and slightly golden. Add the tempeh in after a few minutes. 

    Stir fry. (Photo: Julia Kern)

    In the mean time, heat 2 pots of water. In one pot of water, add the frozen edamame and cook them for about 5 minutes until they are warm all the way through. In the other pot, cook the noodles to your desired to you liking. 

    Stir fry. (Photo: Julia Kern)

    In a bowl, mix together the tamari, seame oil, honey, and hot sauce. Toss all of the noodles and the edamame into the veggie skillet and add the sauce. Let it summer for 2 minutes and then serve hot. Top with herbs and nuts if you like! 

    Stir fry. (Photo: Julia Kern)
  • 5 Activation Exercises To Get You Ready for Any Workout 

    5 Activation Exercises To Get You Ready for Any Workout 


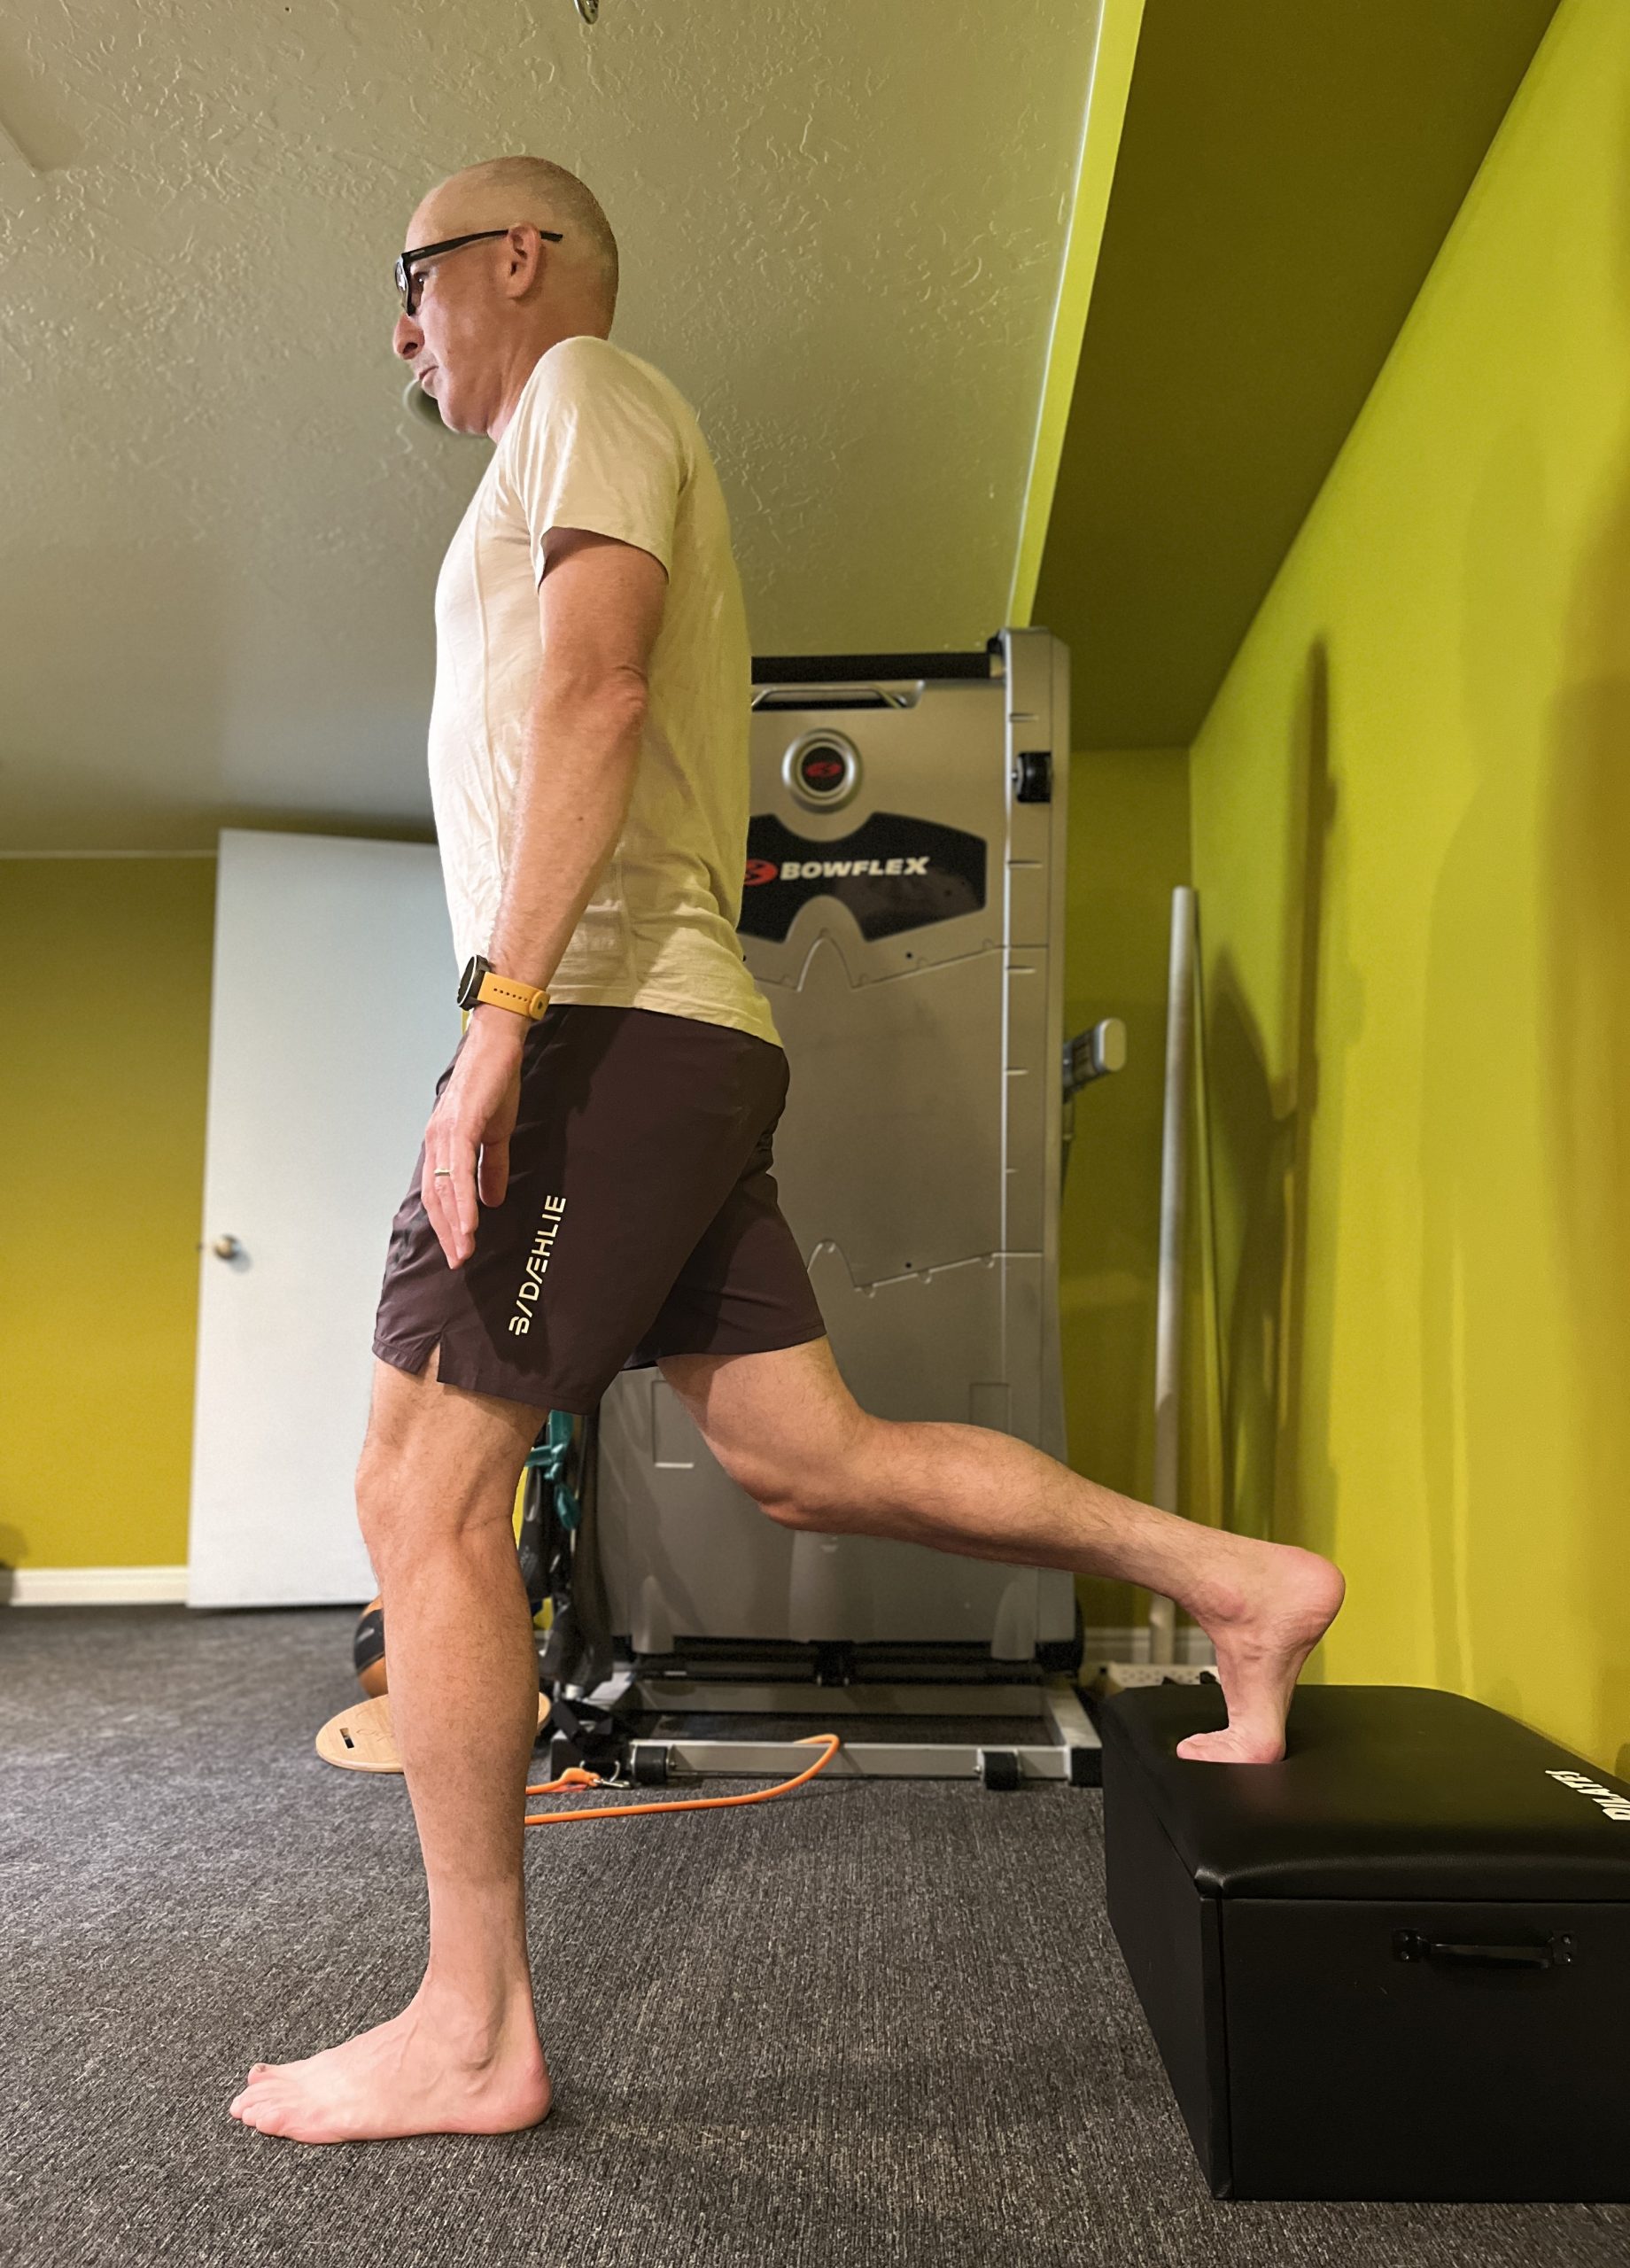
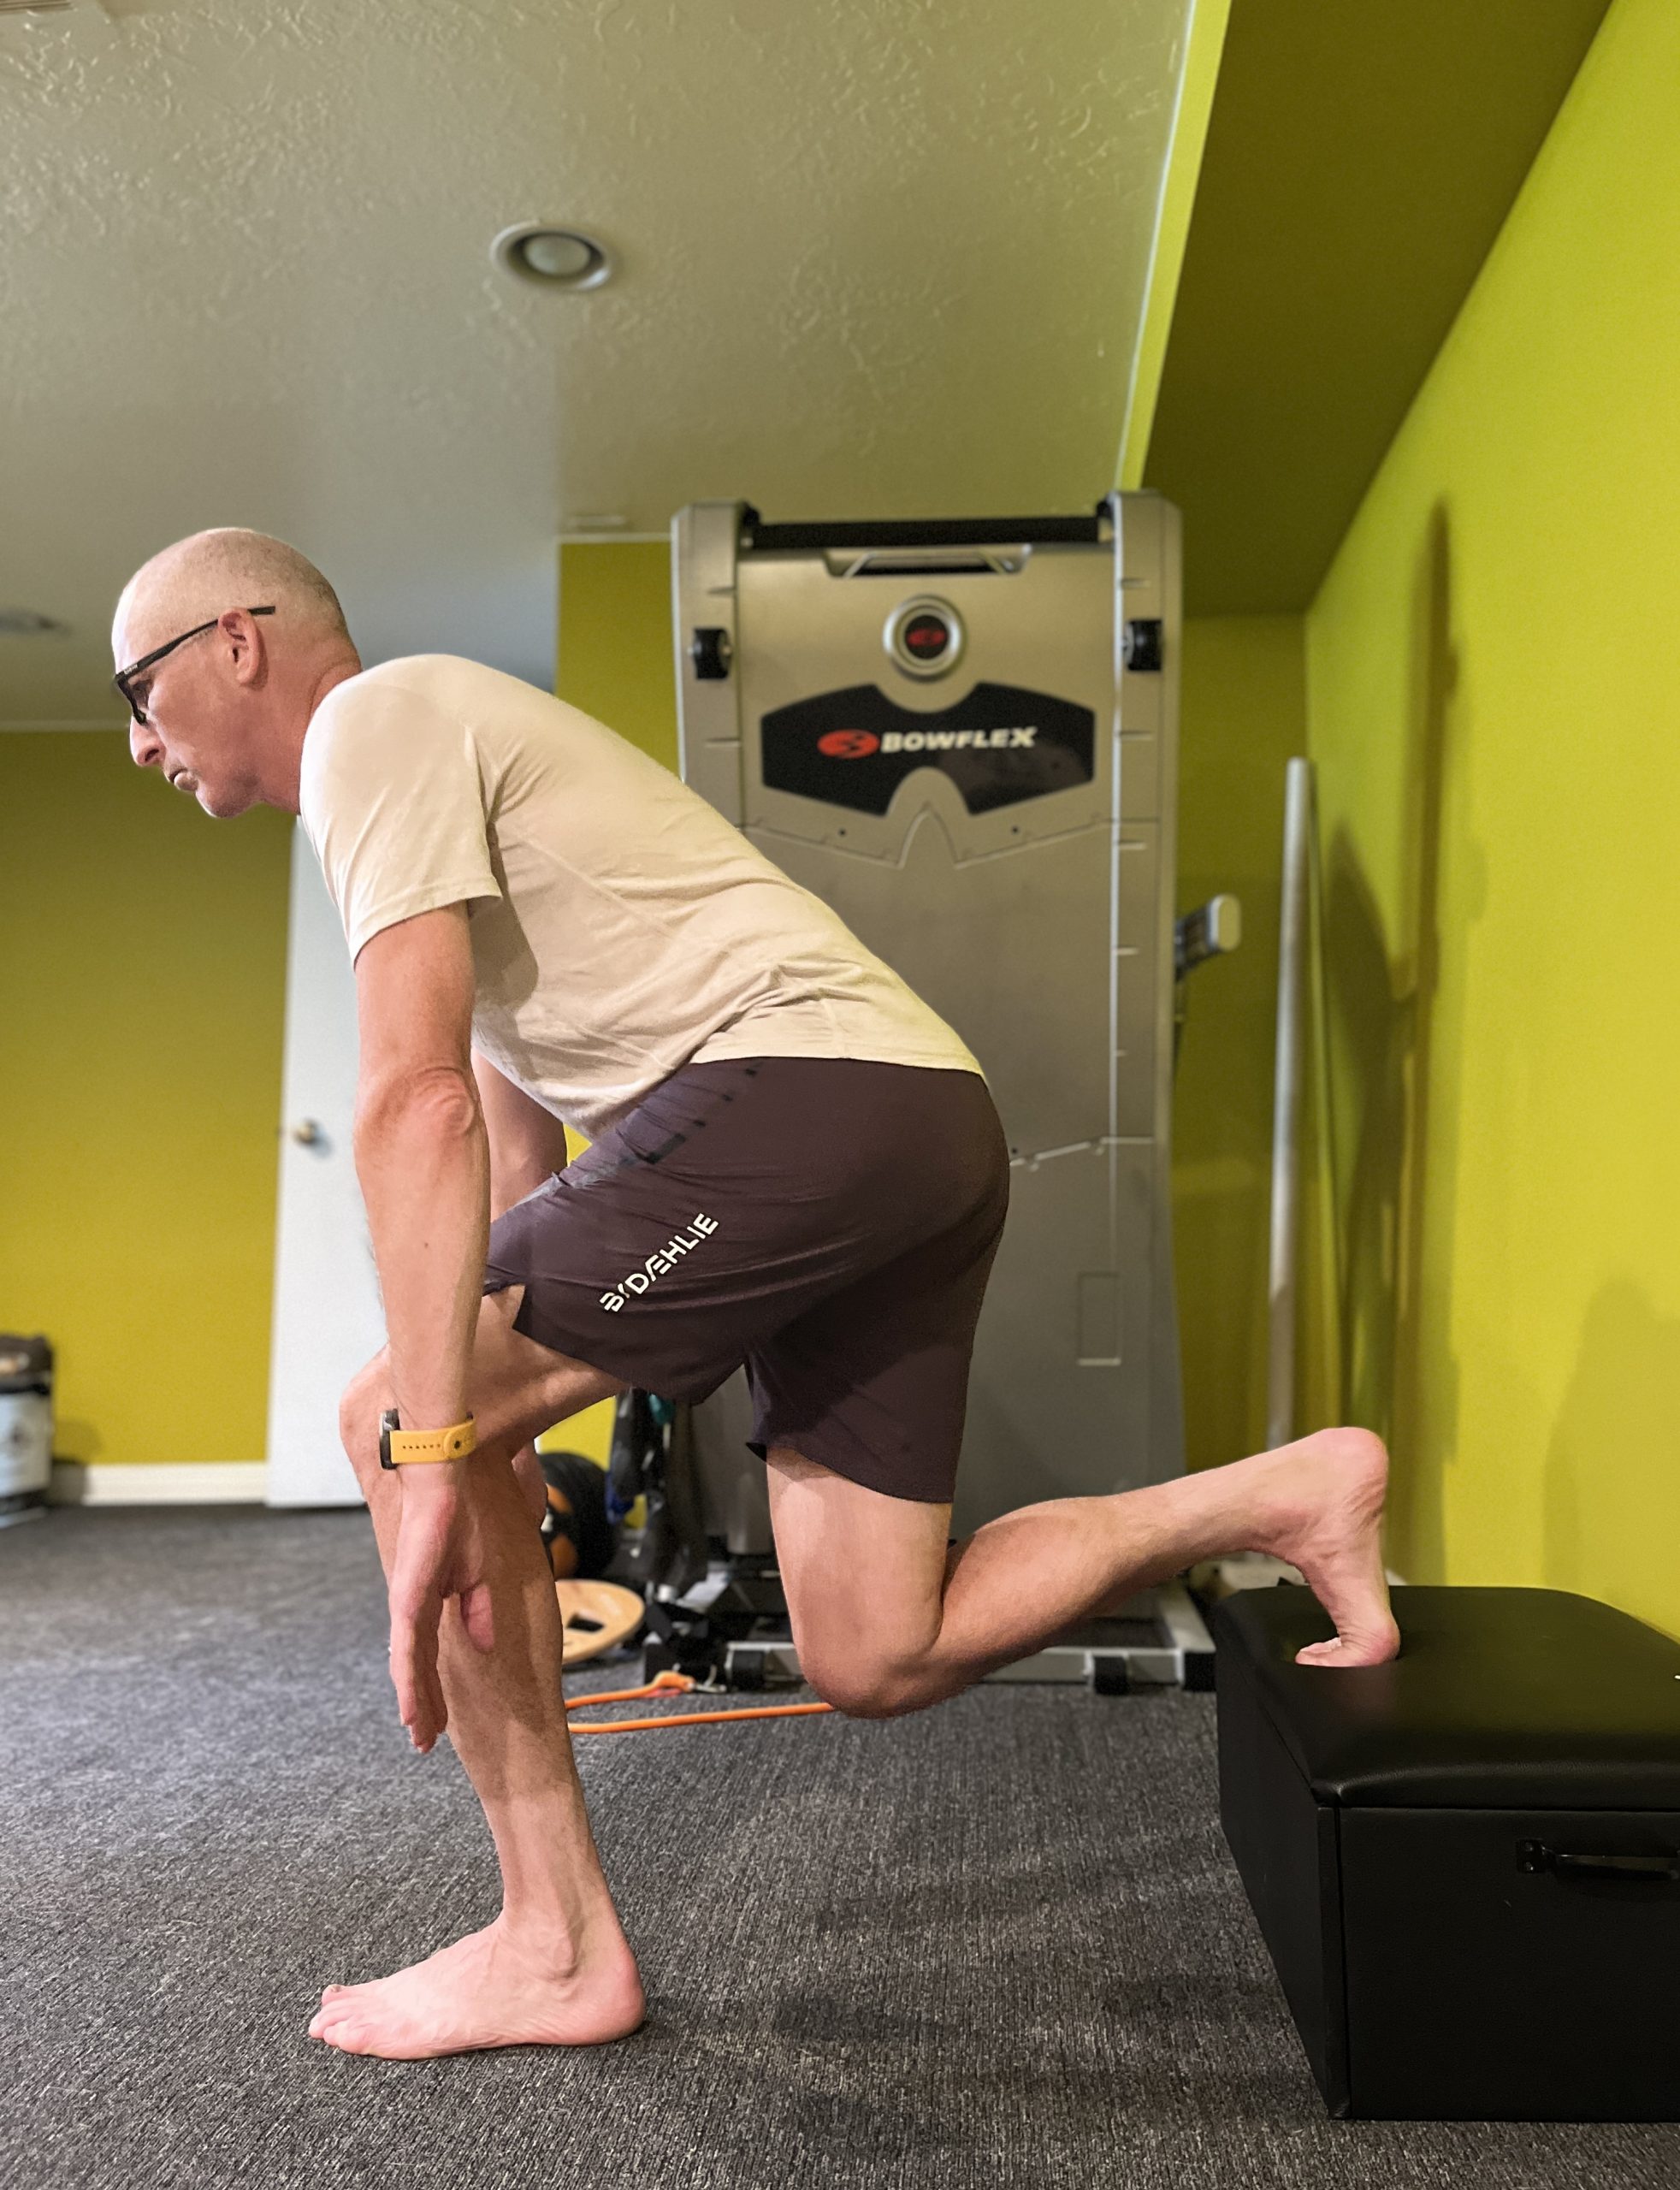
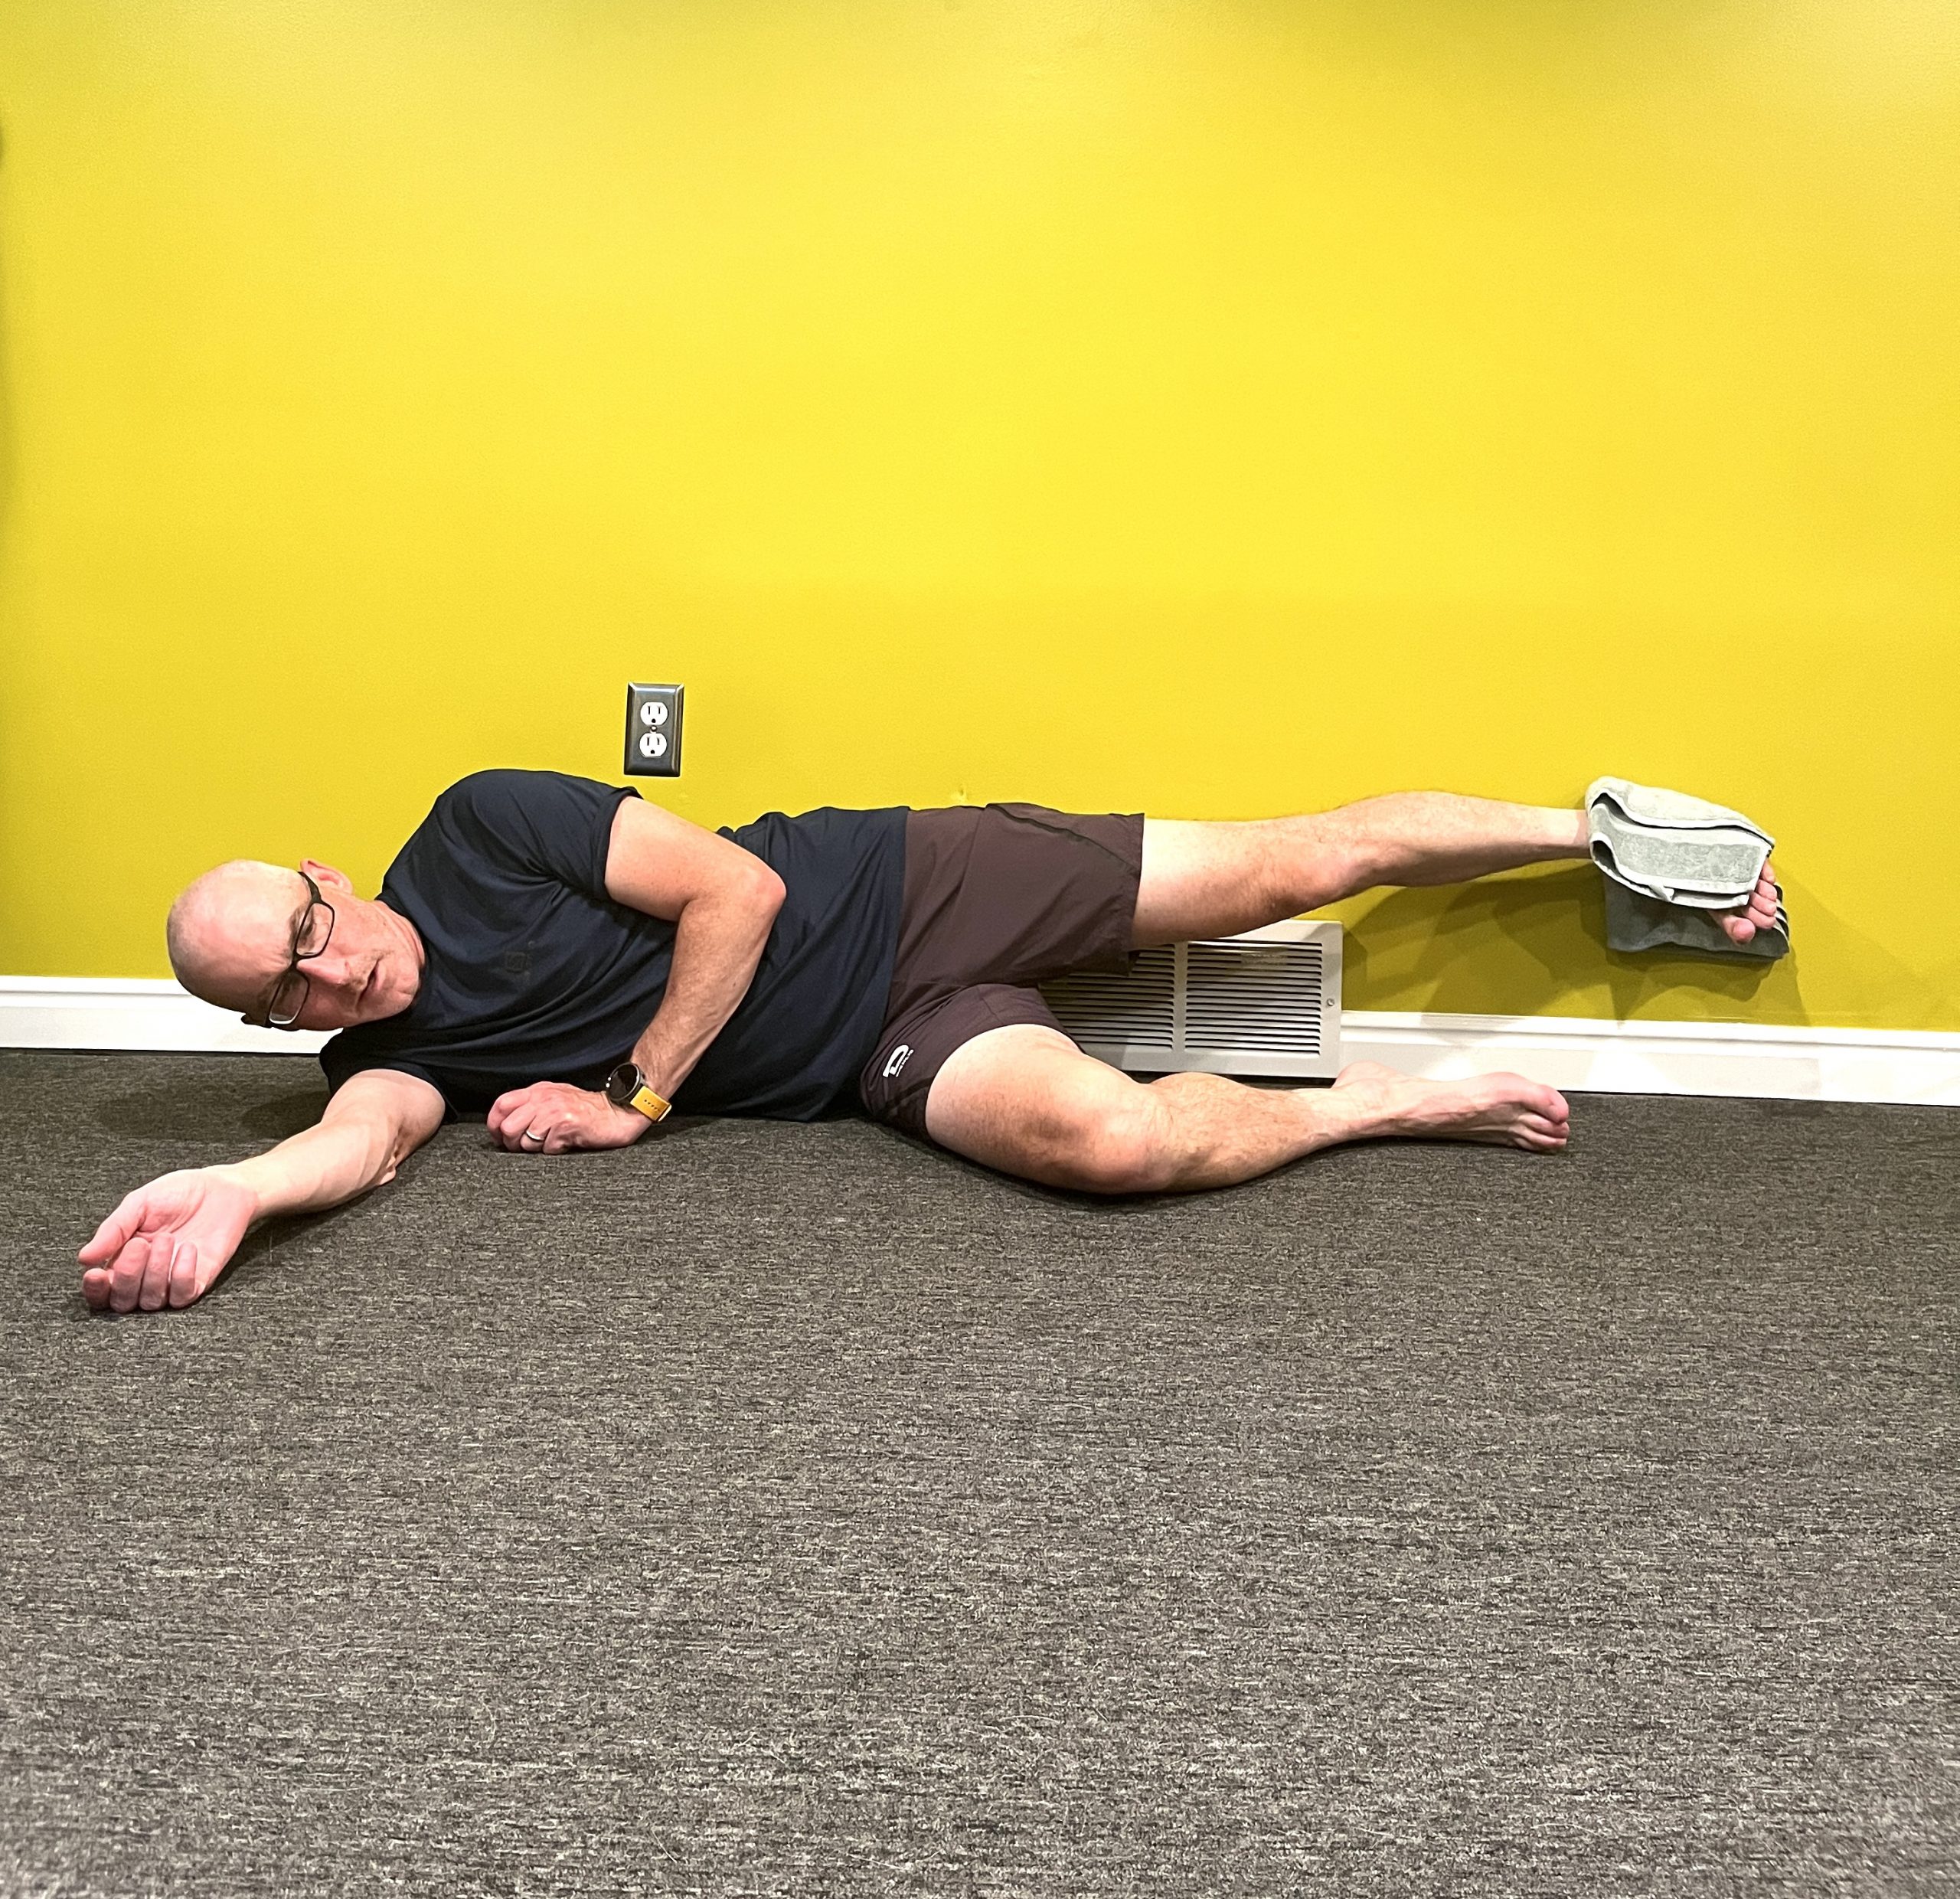
    From a young age, my track coach insisted that we did a thorough dynamic warm-up before starting any training session to activate the right muscles and avoid injury. I have my track coach to thank for teaching me this at a young age. Especially as I get older, my daily activation exercises are crucial in keeping injuries at bay and getting my body warmed up before the “warm up”. For me, the challenge is activating and using the right muscles when I am training, especially when I am tired. I have found that incorporating 5 activation exercises daily is a way to activate those muscles and sneak in my PT exercises so that my body is ready to go when I start training.

    When I first started incorporating activation/PT exercises, I had a hard time doing them at the trailhead or parking lot because laying on the ground was difficult and I didn’t want to carry a lot of equipment with me. These 5 exercises are designed so that you can do them anywhere, anytime, with just one piece of equipment, an ankle band, and only take a few minutes! Give them a try and note how your body feels, especially during your warm-up and throughout your workout. 

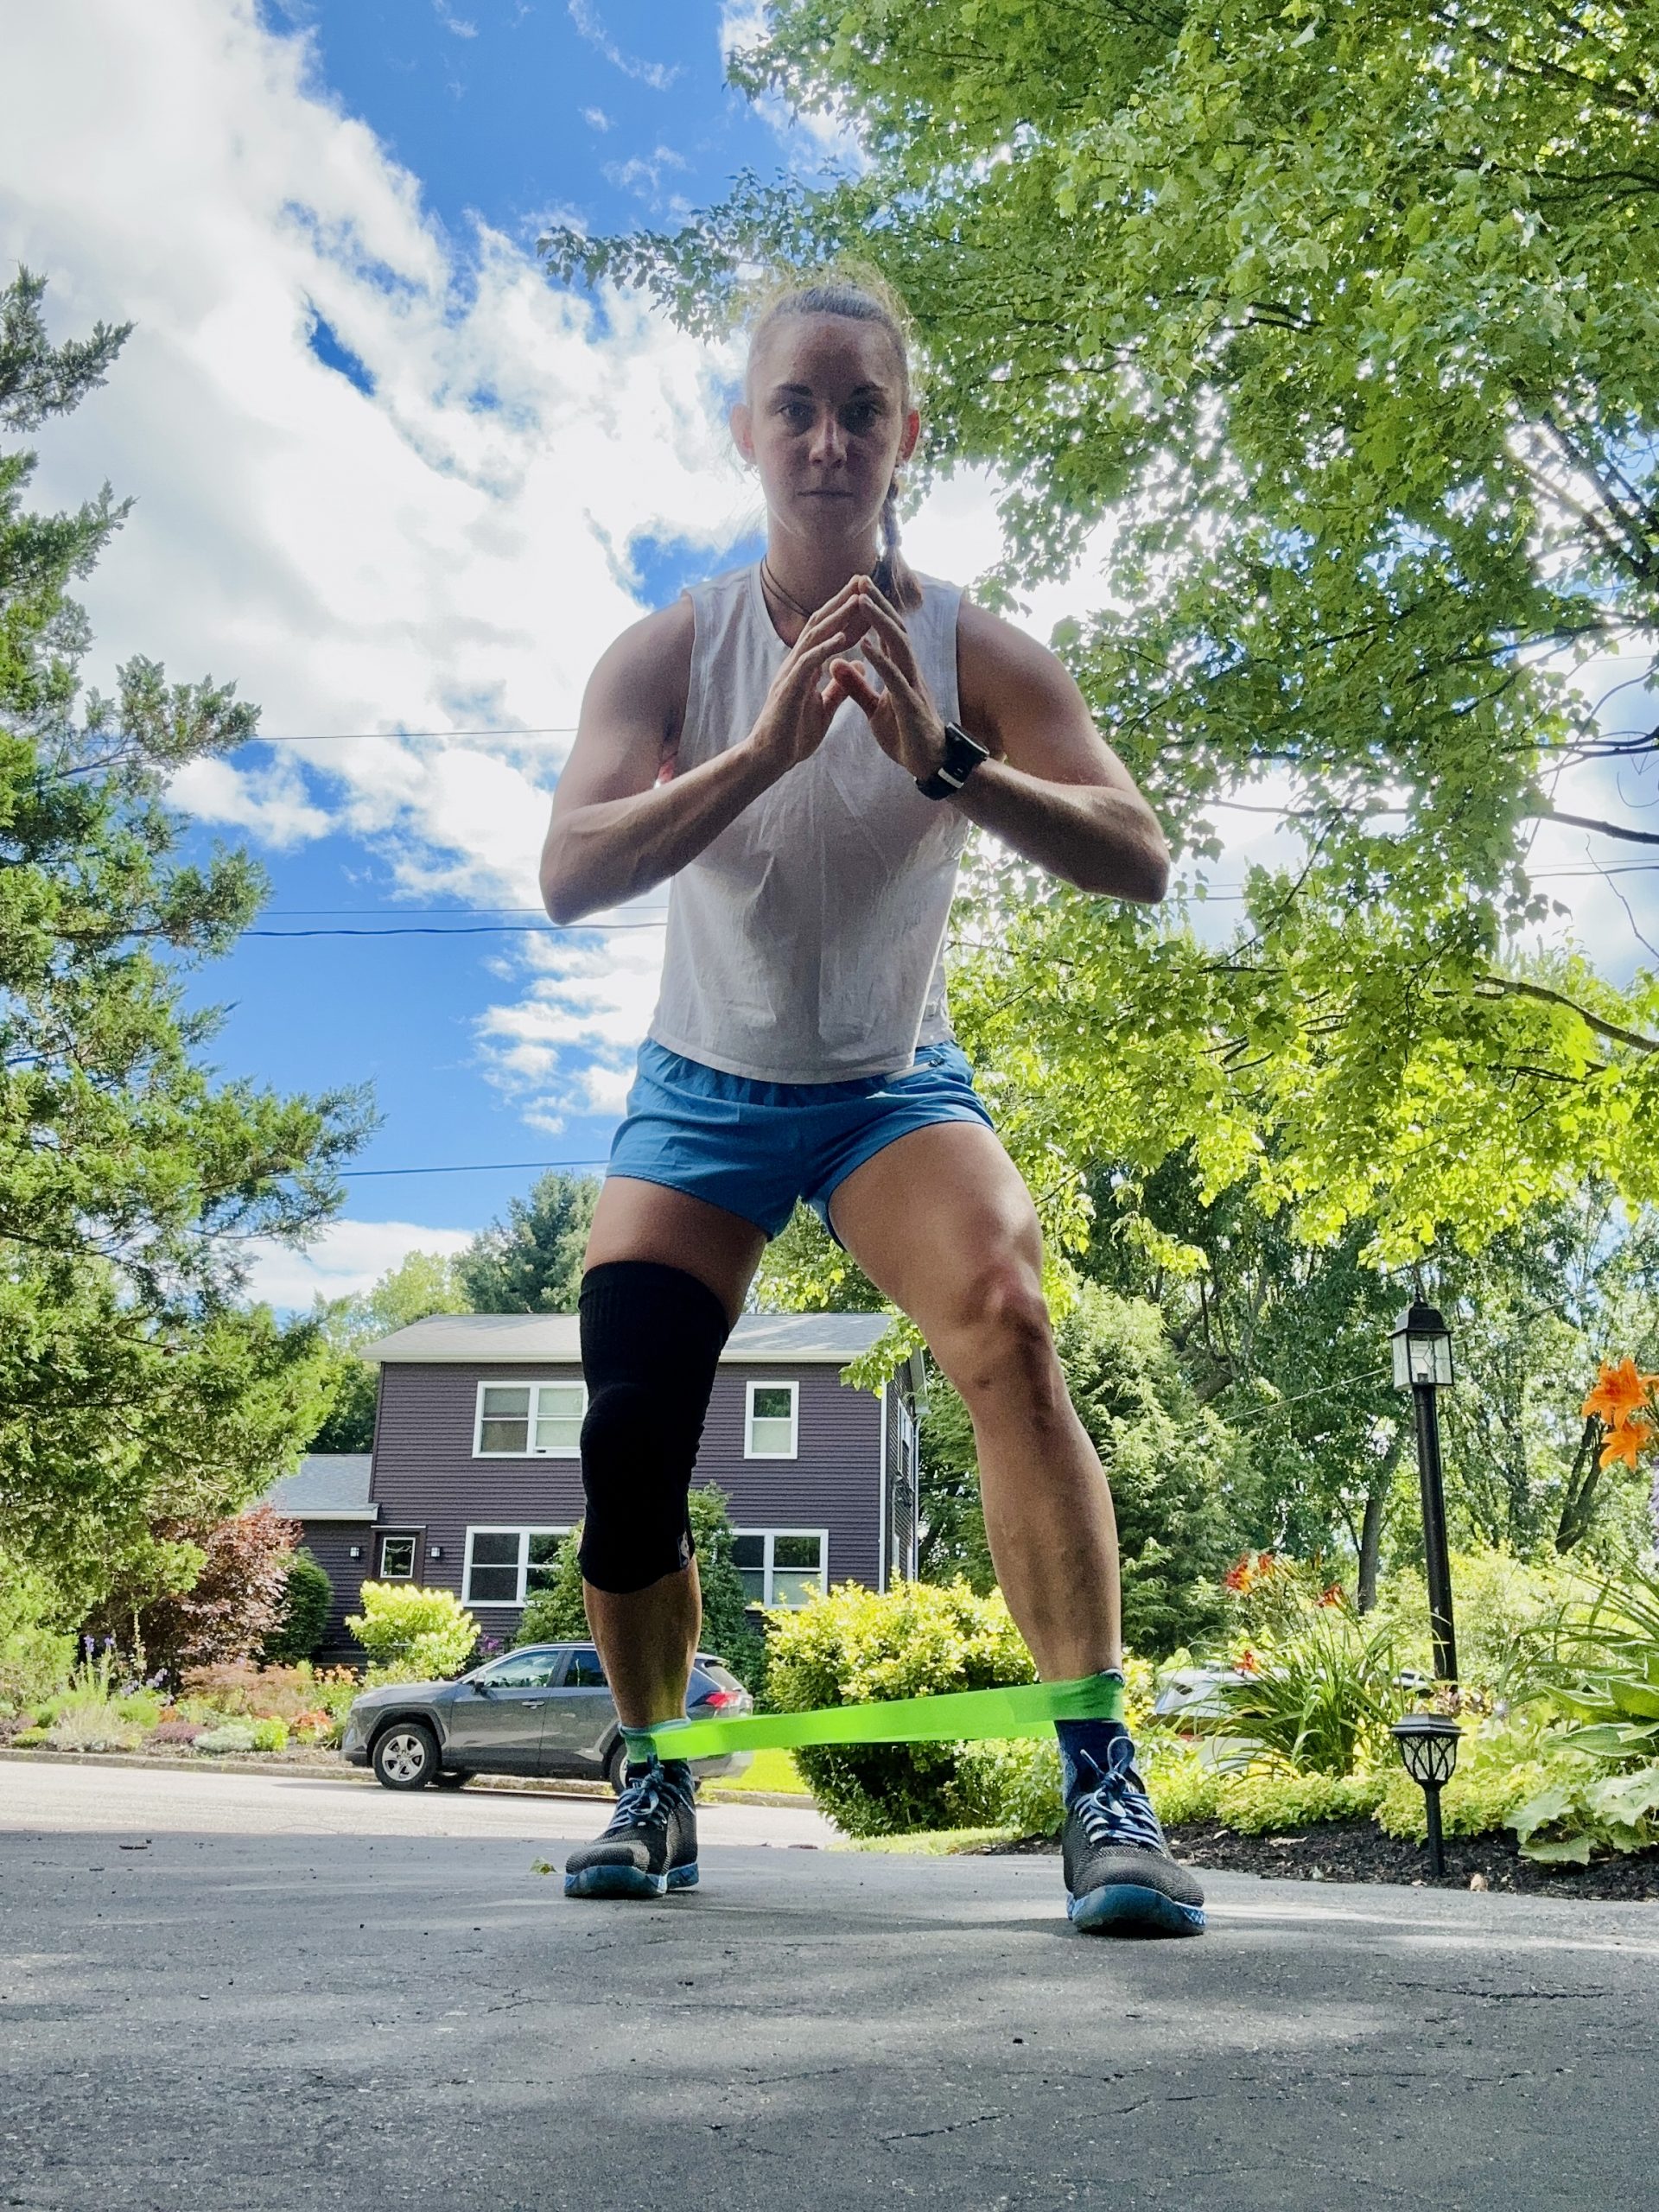
    What you need: 1 ankle band, that’s it! I always keep a green one in my bag. 

    Where to do it: Anywhere! At home before you go exercise, or in the parking lot/trailhead. 

    Banded Skate Walks

    Activating: glutes, core, balance

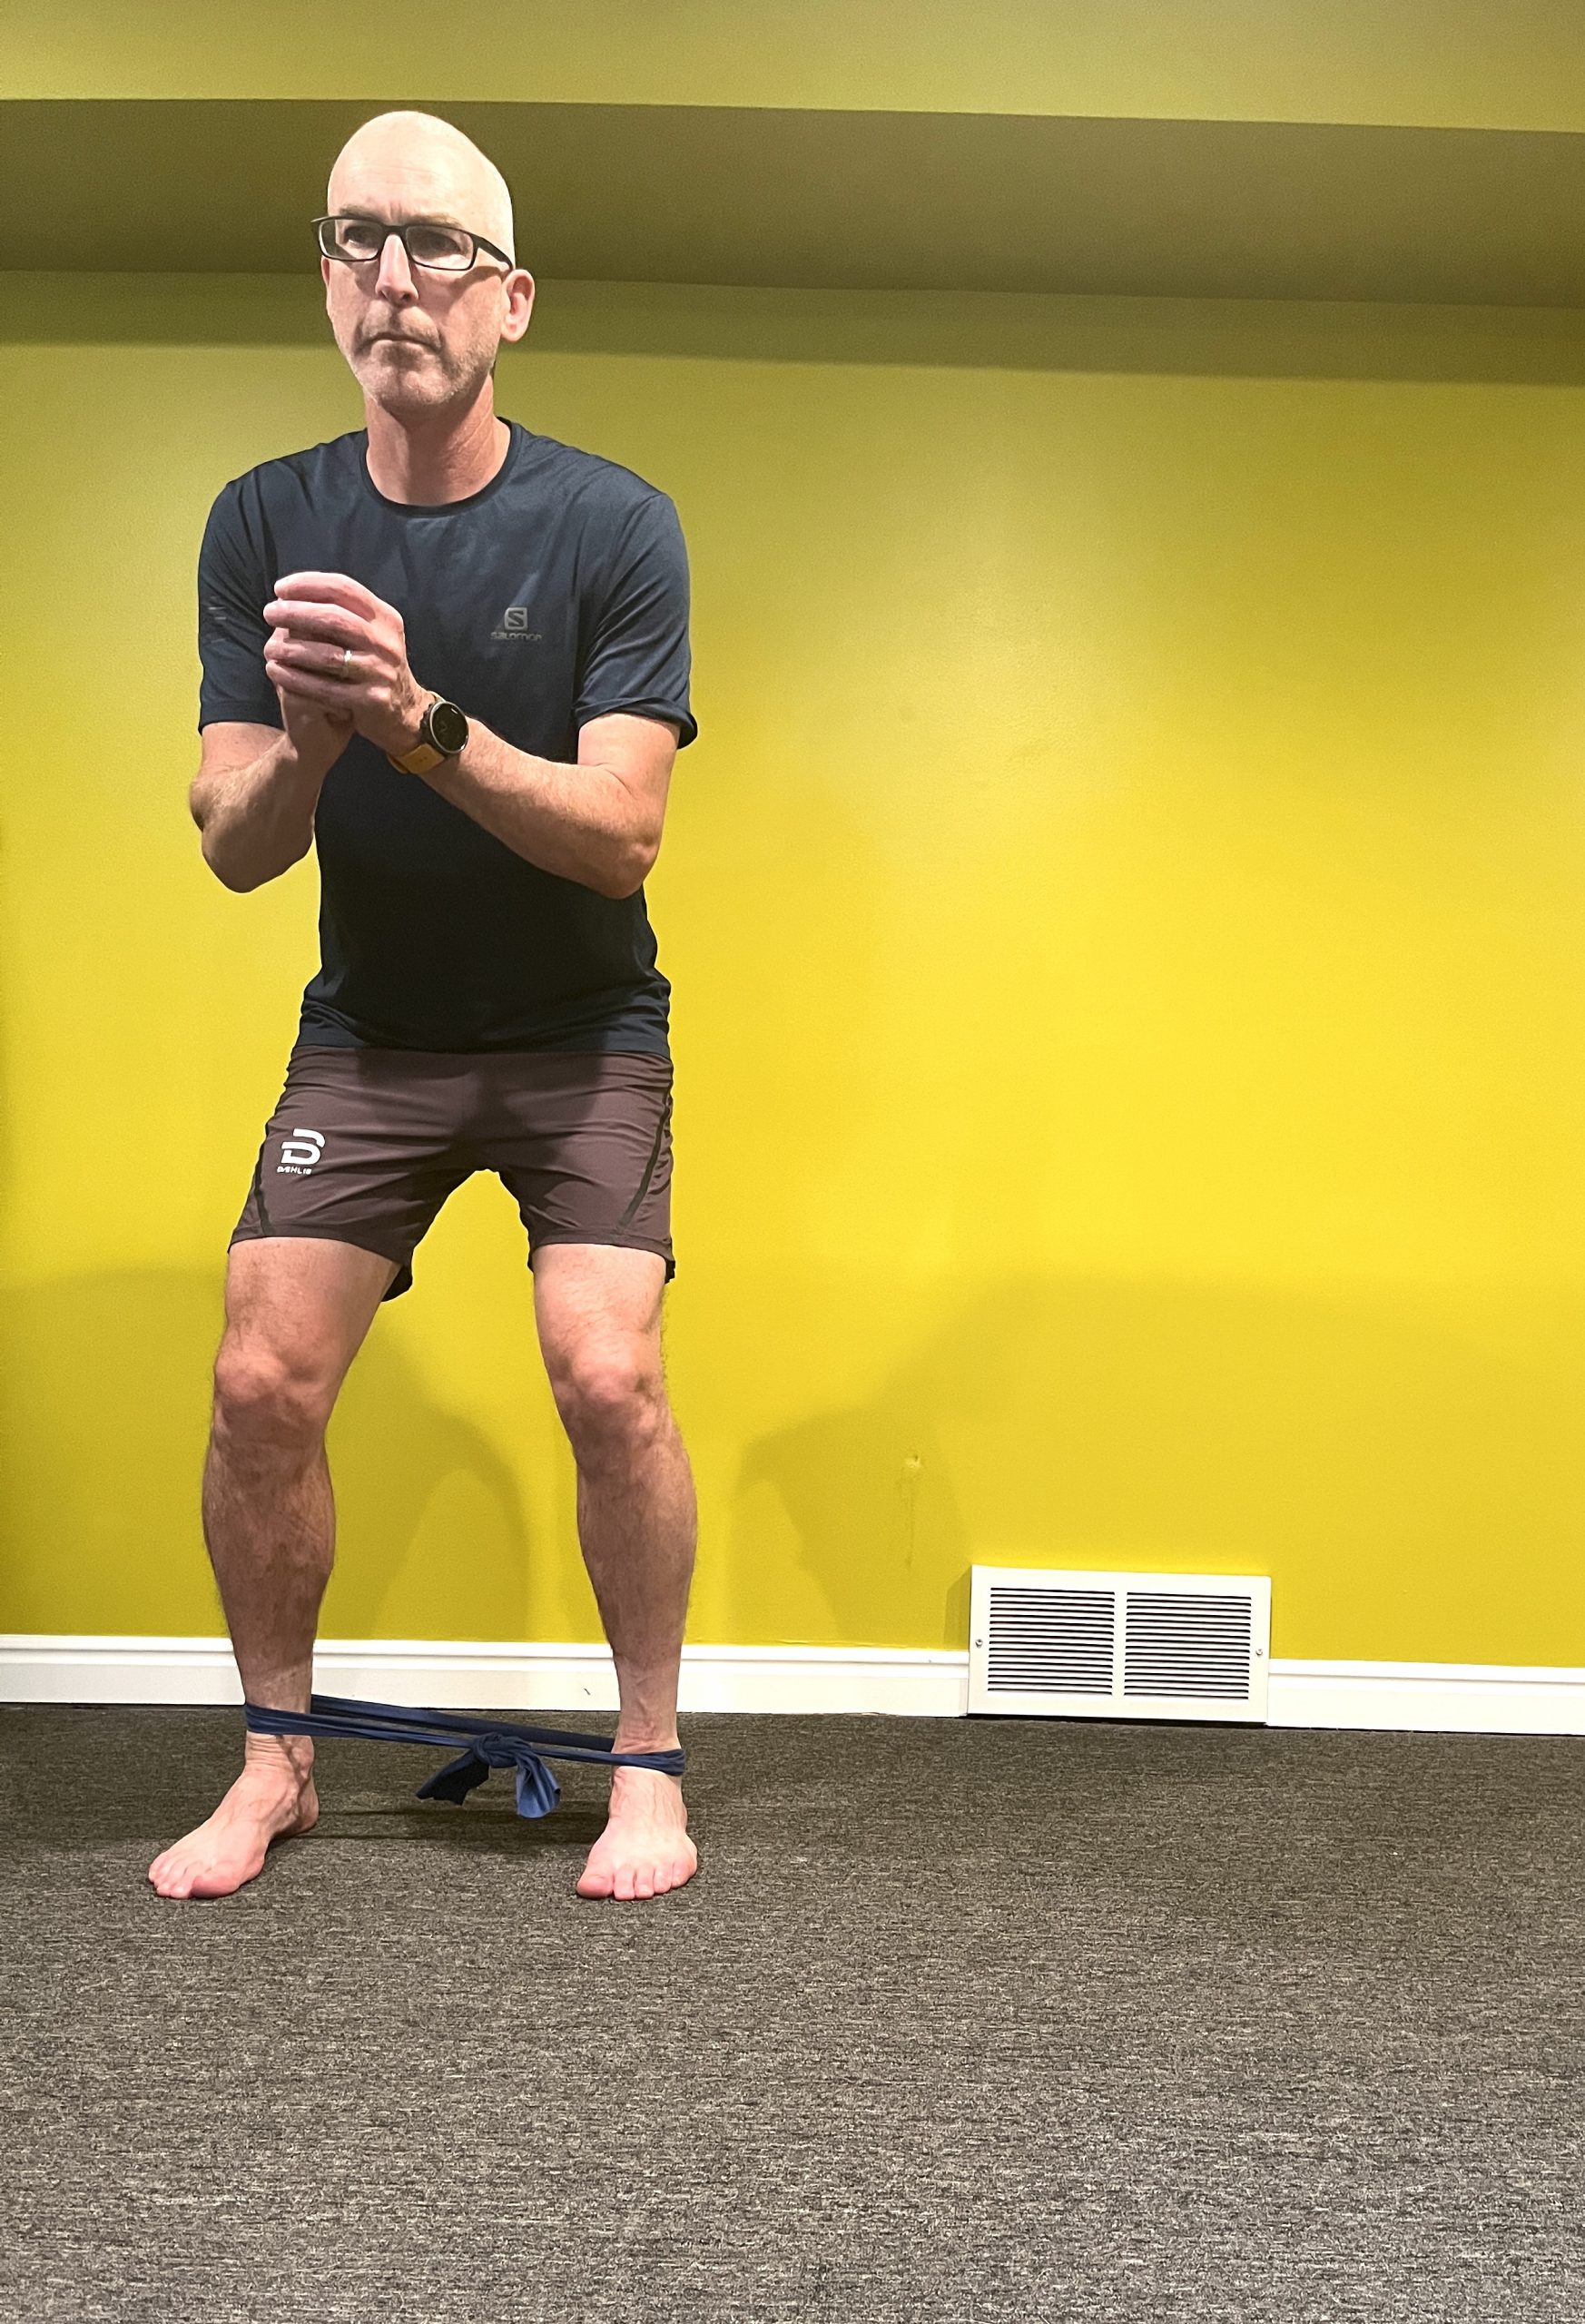
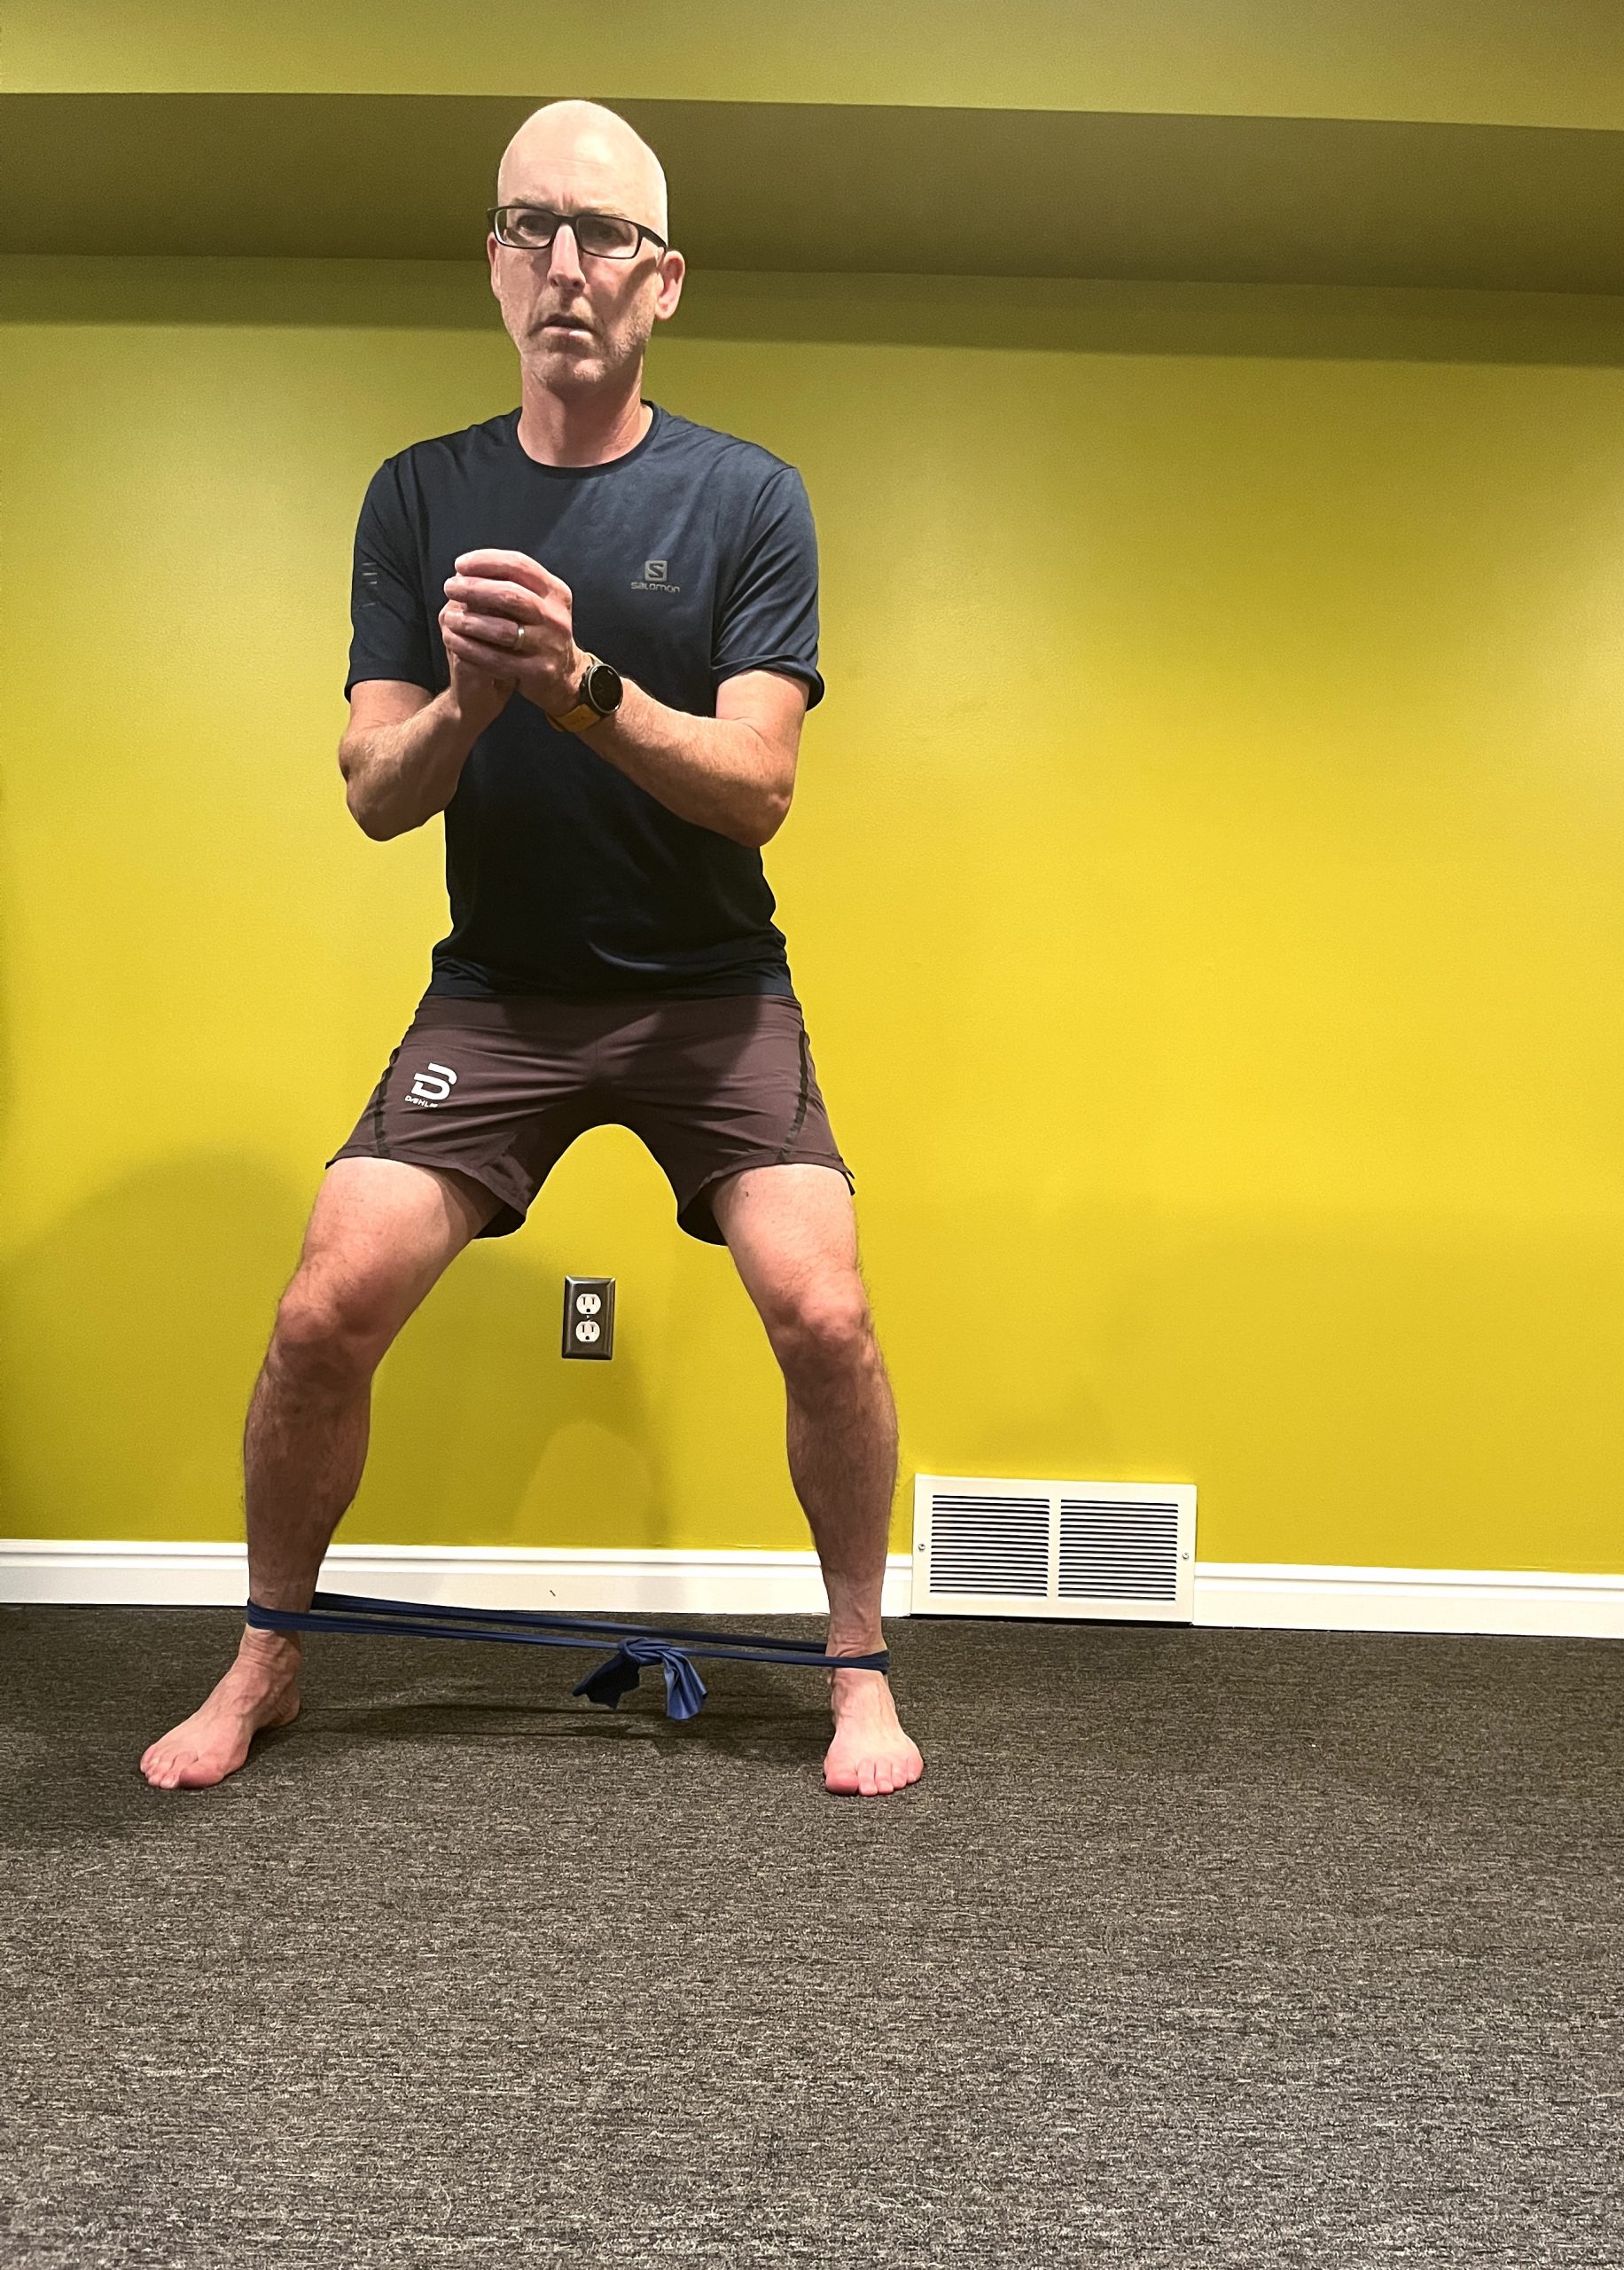
    Place a band around your ankles. Slightly round your back and engage your core. Slowly skatewalk backwards, placing your right leg back. Bring your left foot in without placing it on the ground, and transfer your weight entirely onto your back right leg like you are about to do a single-leg squat. Engage your right glute and slowly skate the inside left leg back and out. Repeat for 6 steps back, and 6 steps forward. 


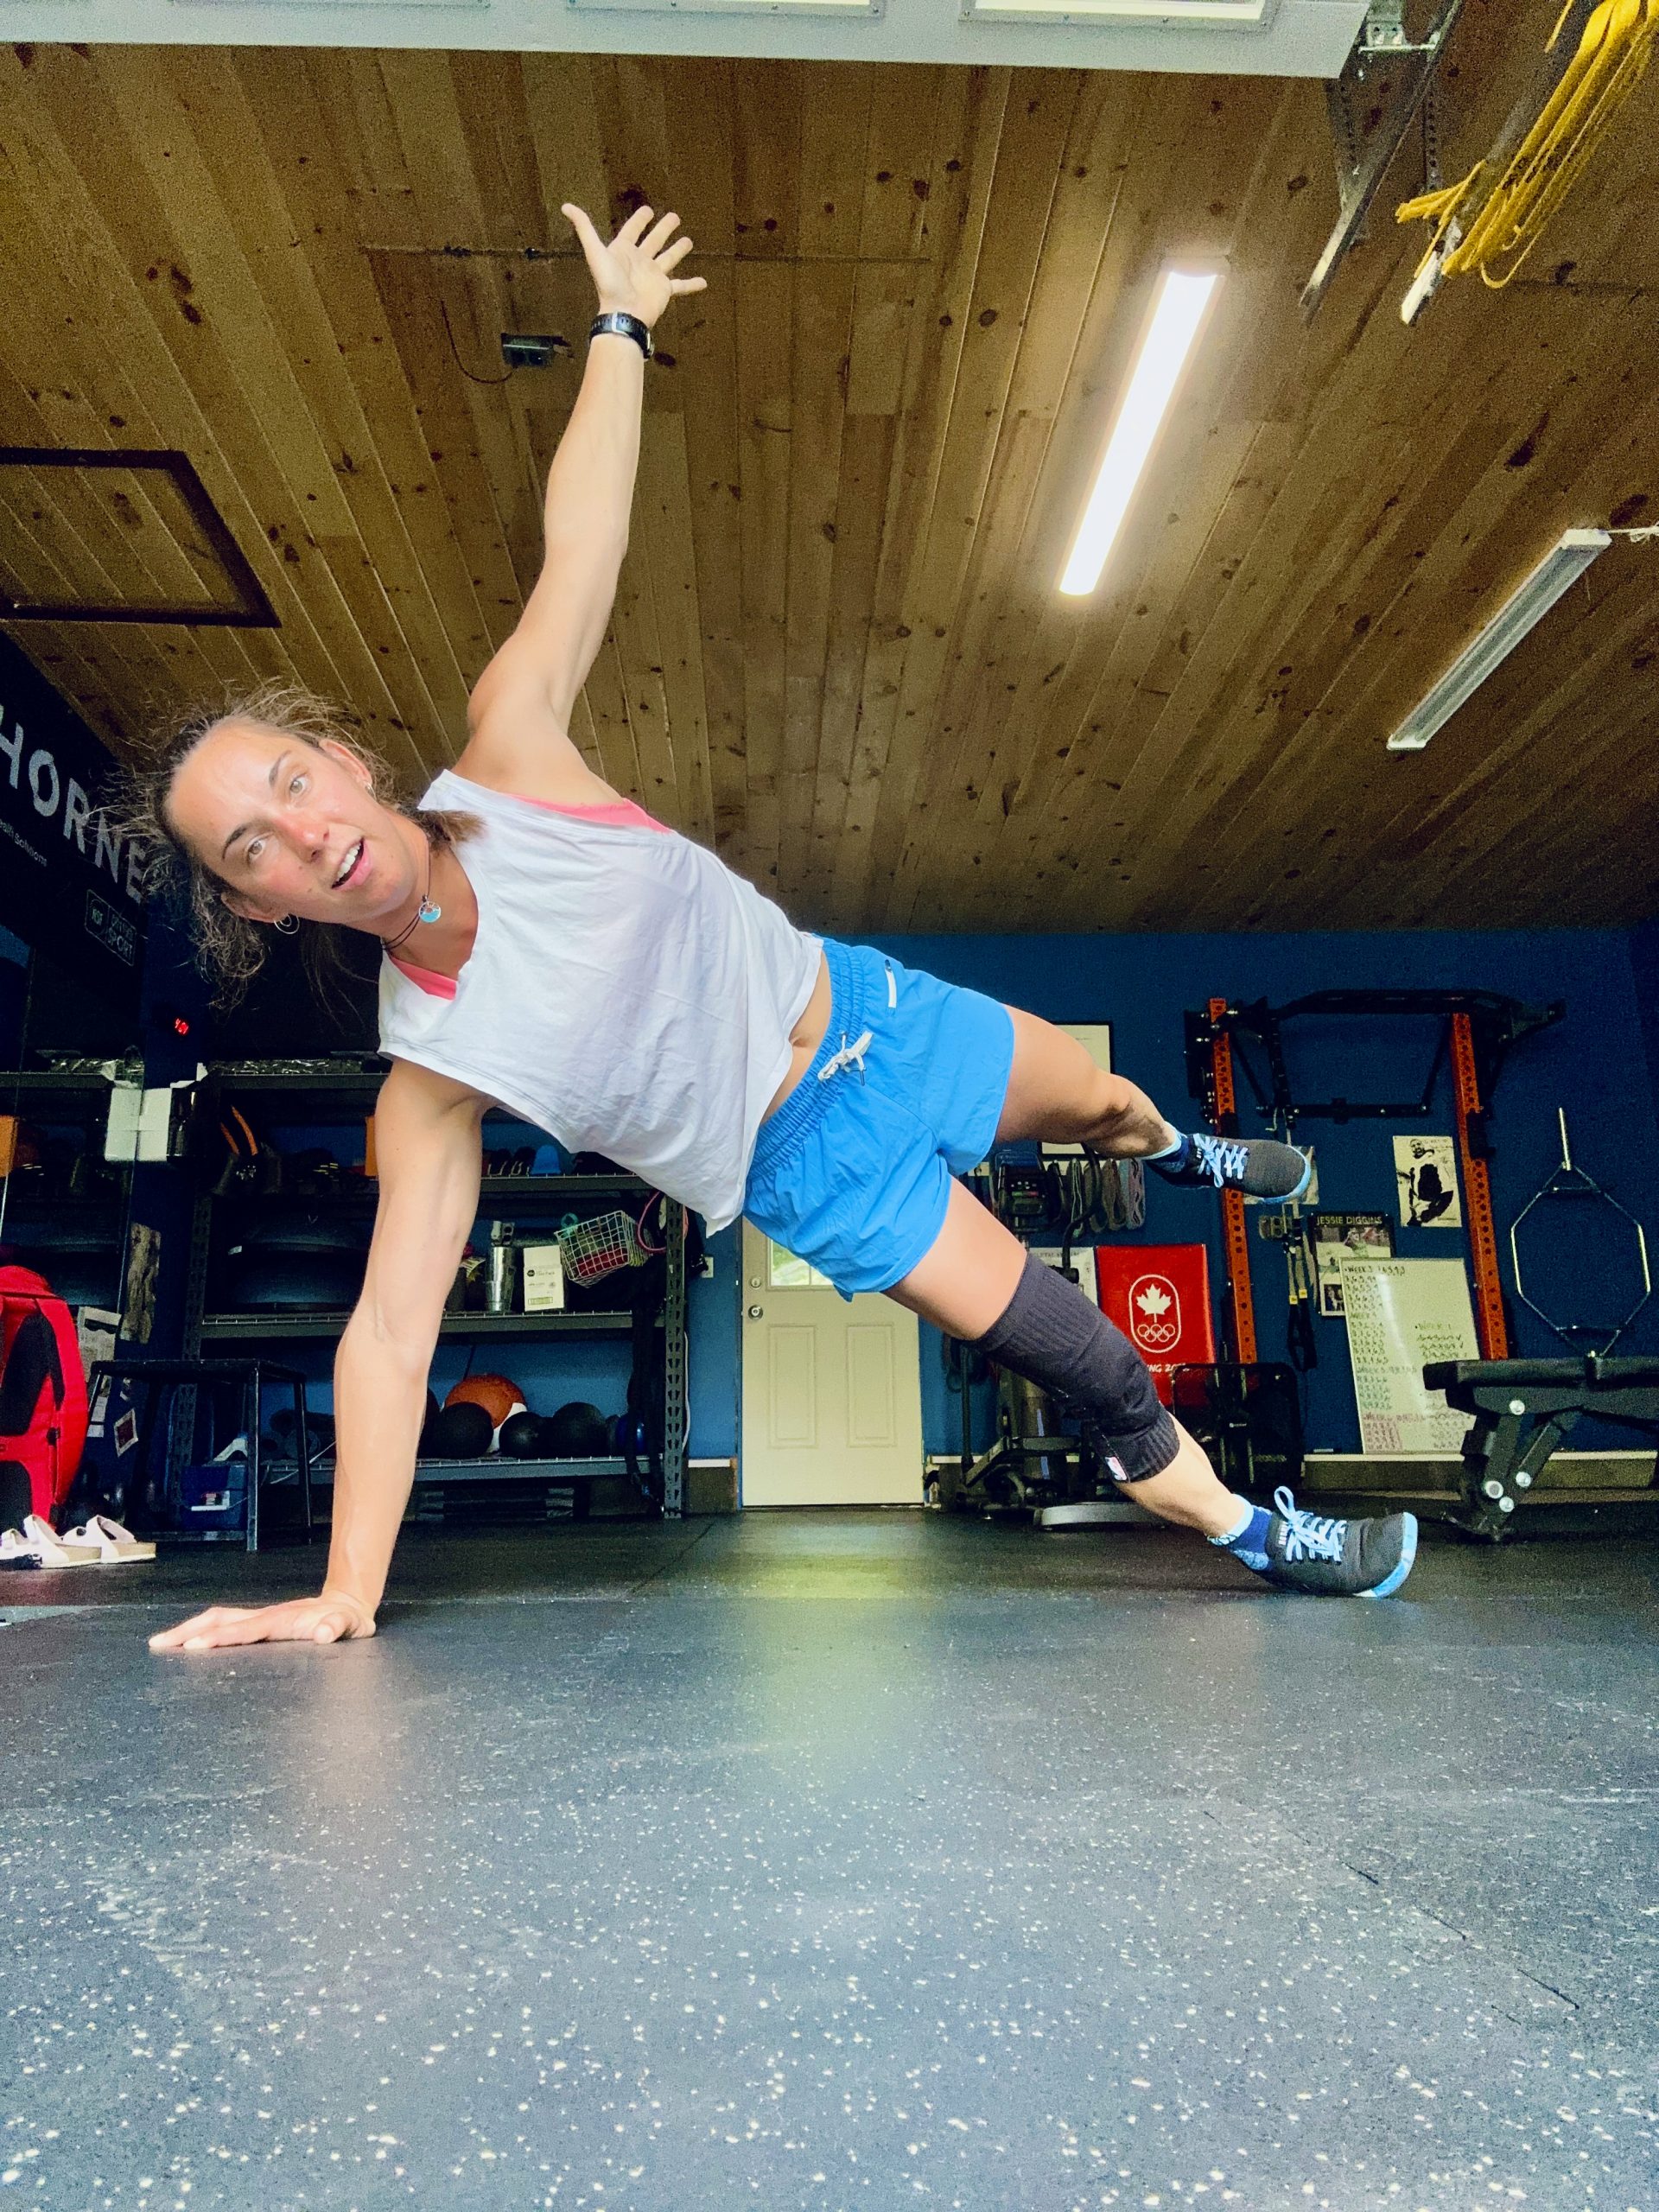
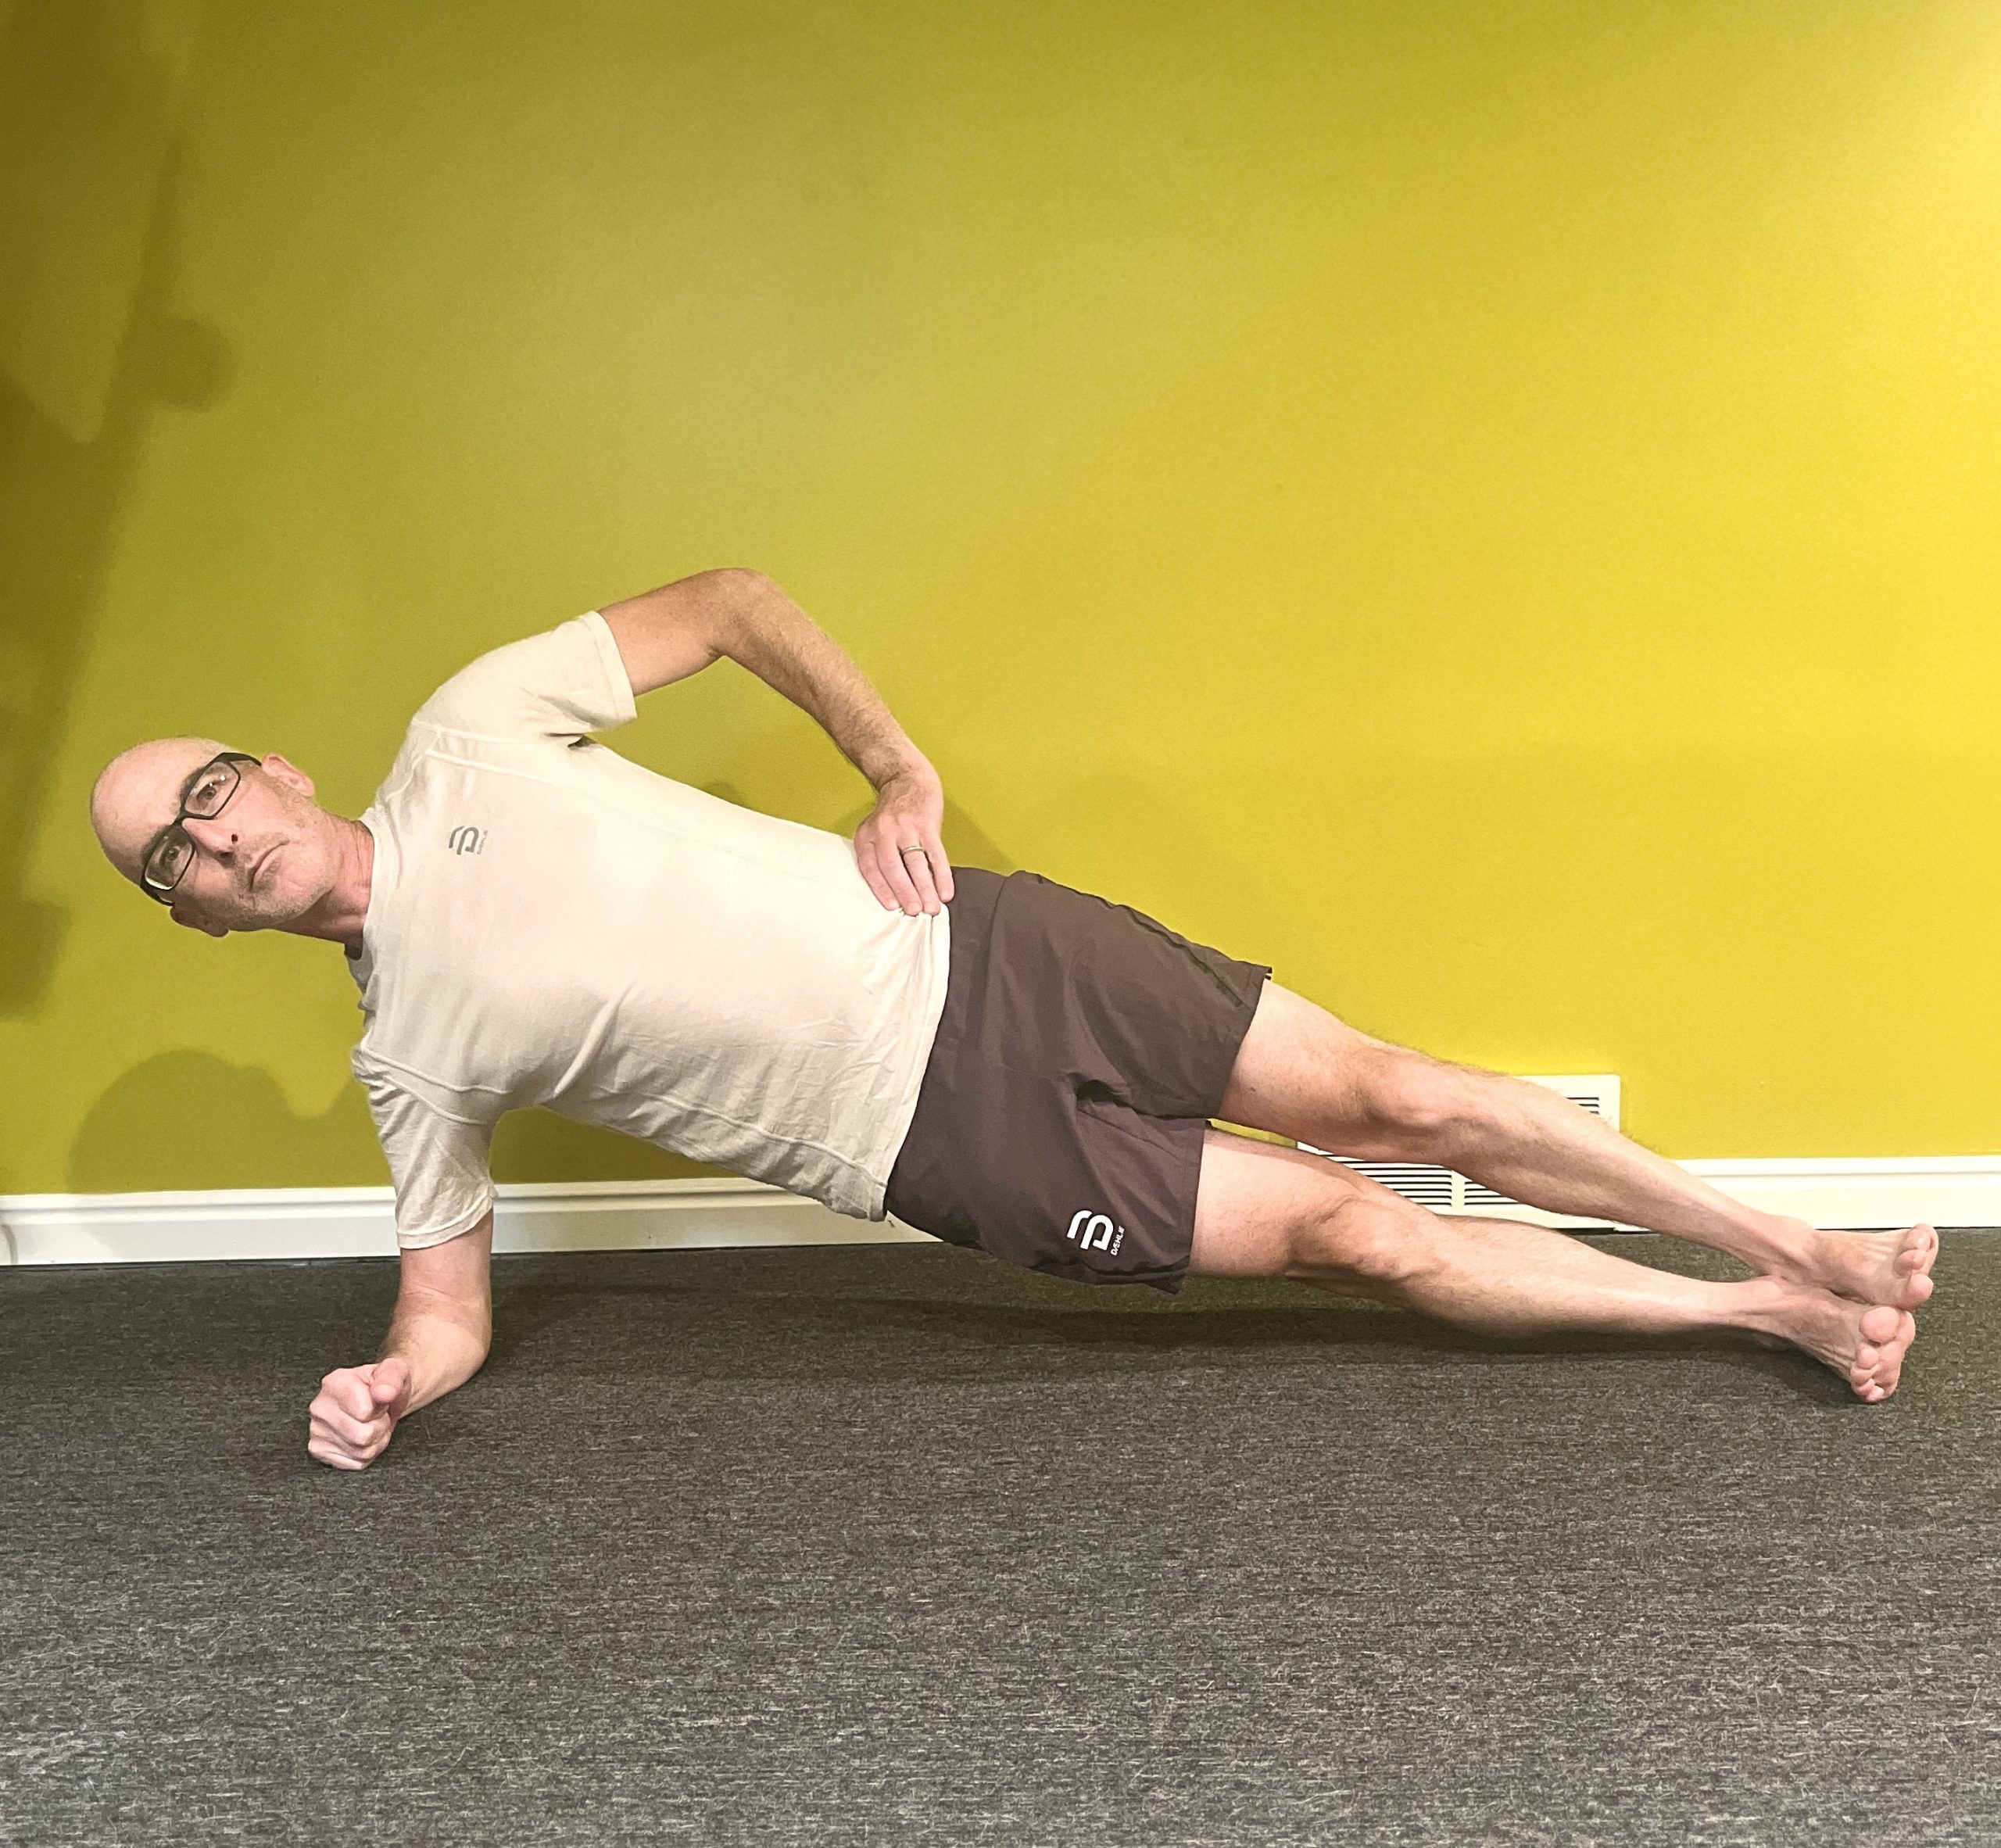
    Side plank star 

    Activating: core, glutes, obliques, shoulders 

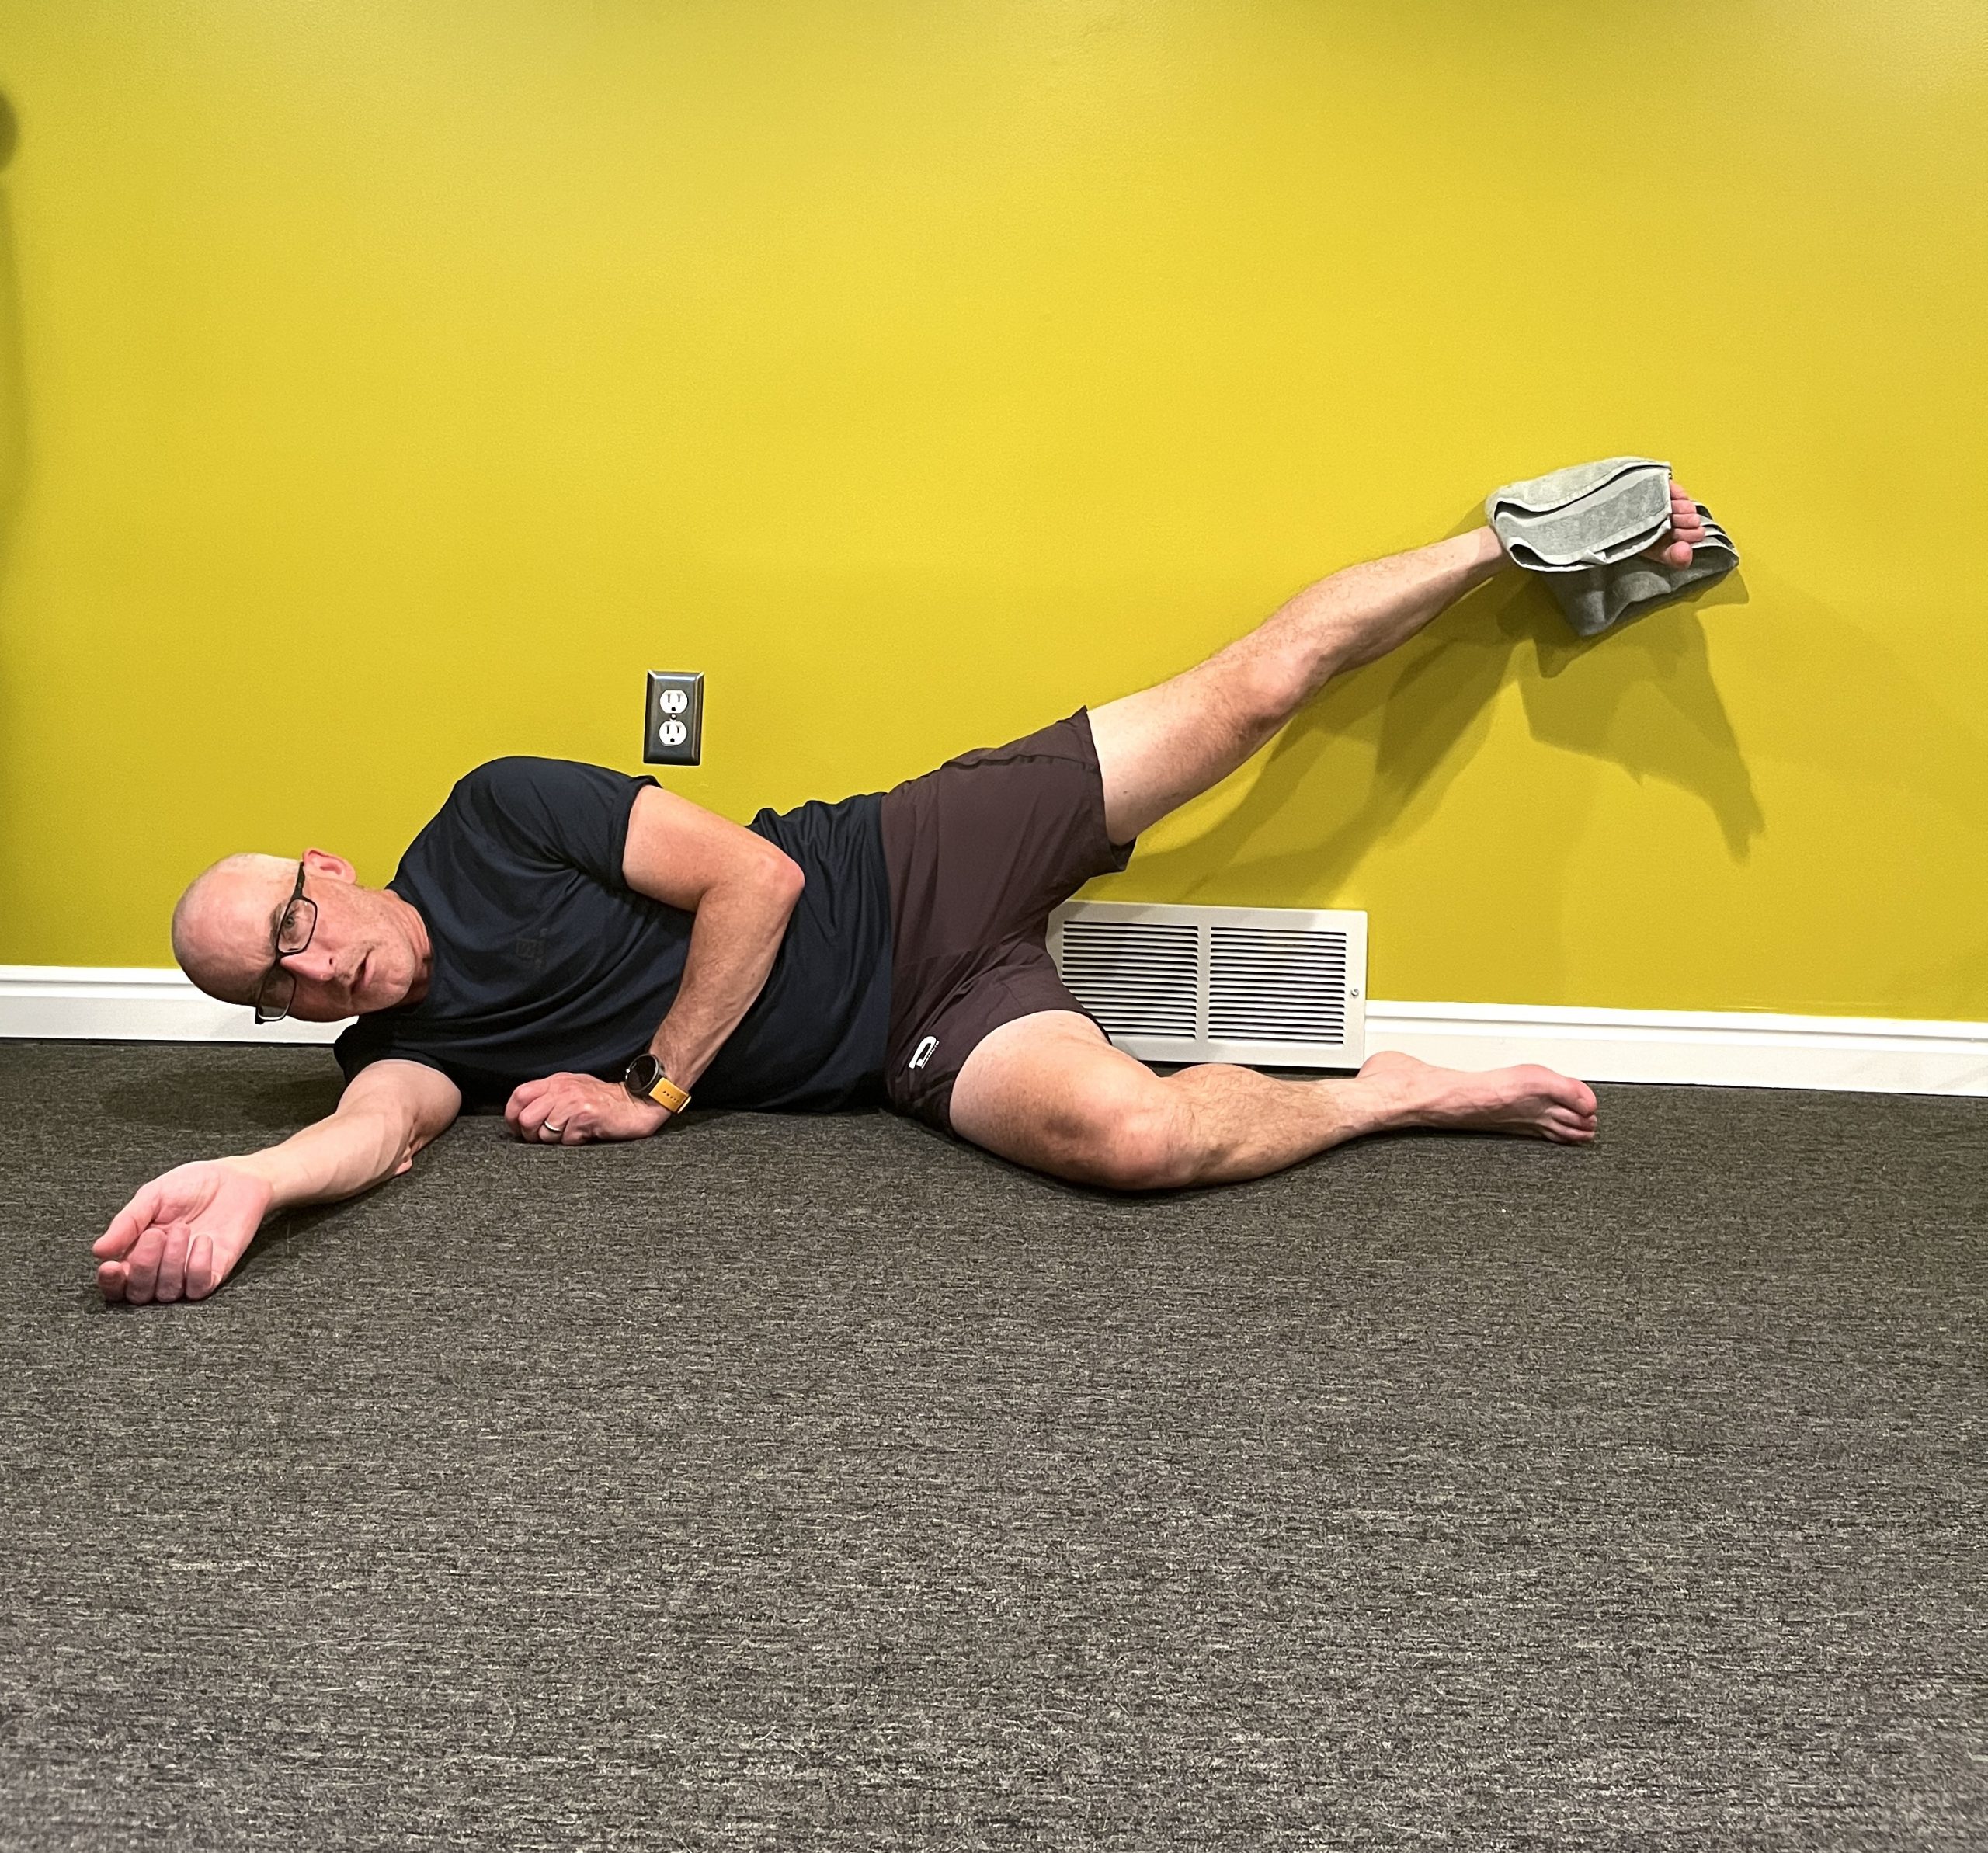
    Place your right hand (or elbow on the ground if it is soft) and right foot on the ground and come into a side plank. Make sure your body is in a straight line and your back is slightly rounded, with your core engaged to start. Lift your left arm and leg up straight into the air, and bring your left leg slightly back, activating the left glute. Raise and lower your left leg 10x before switching sides. Remember to maintain a straight line with your upper body.


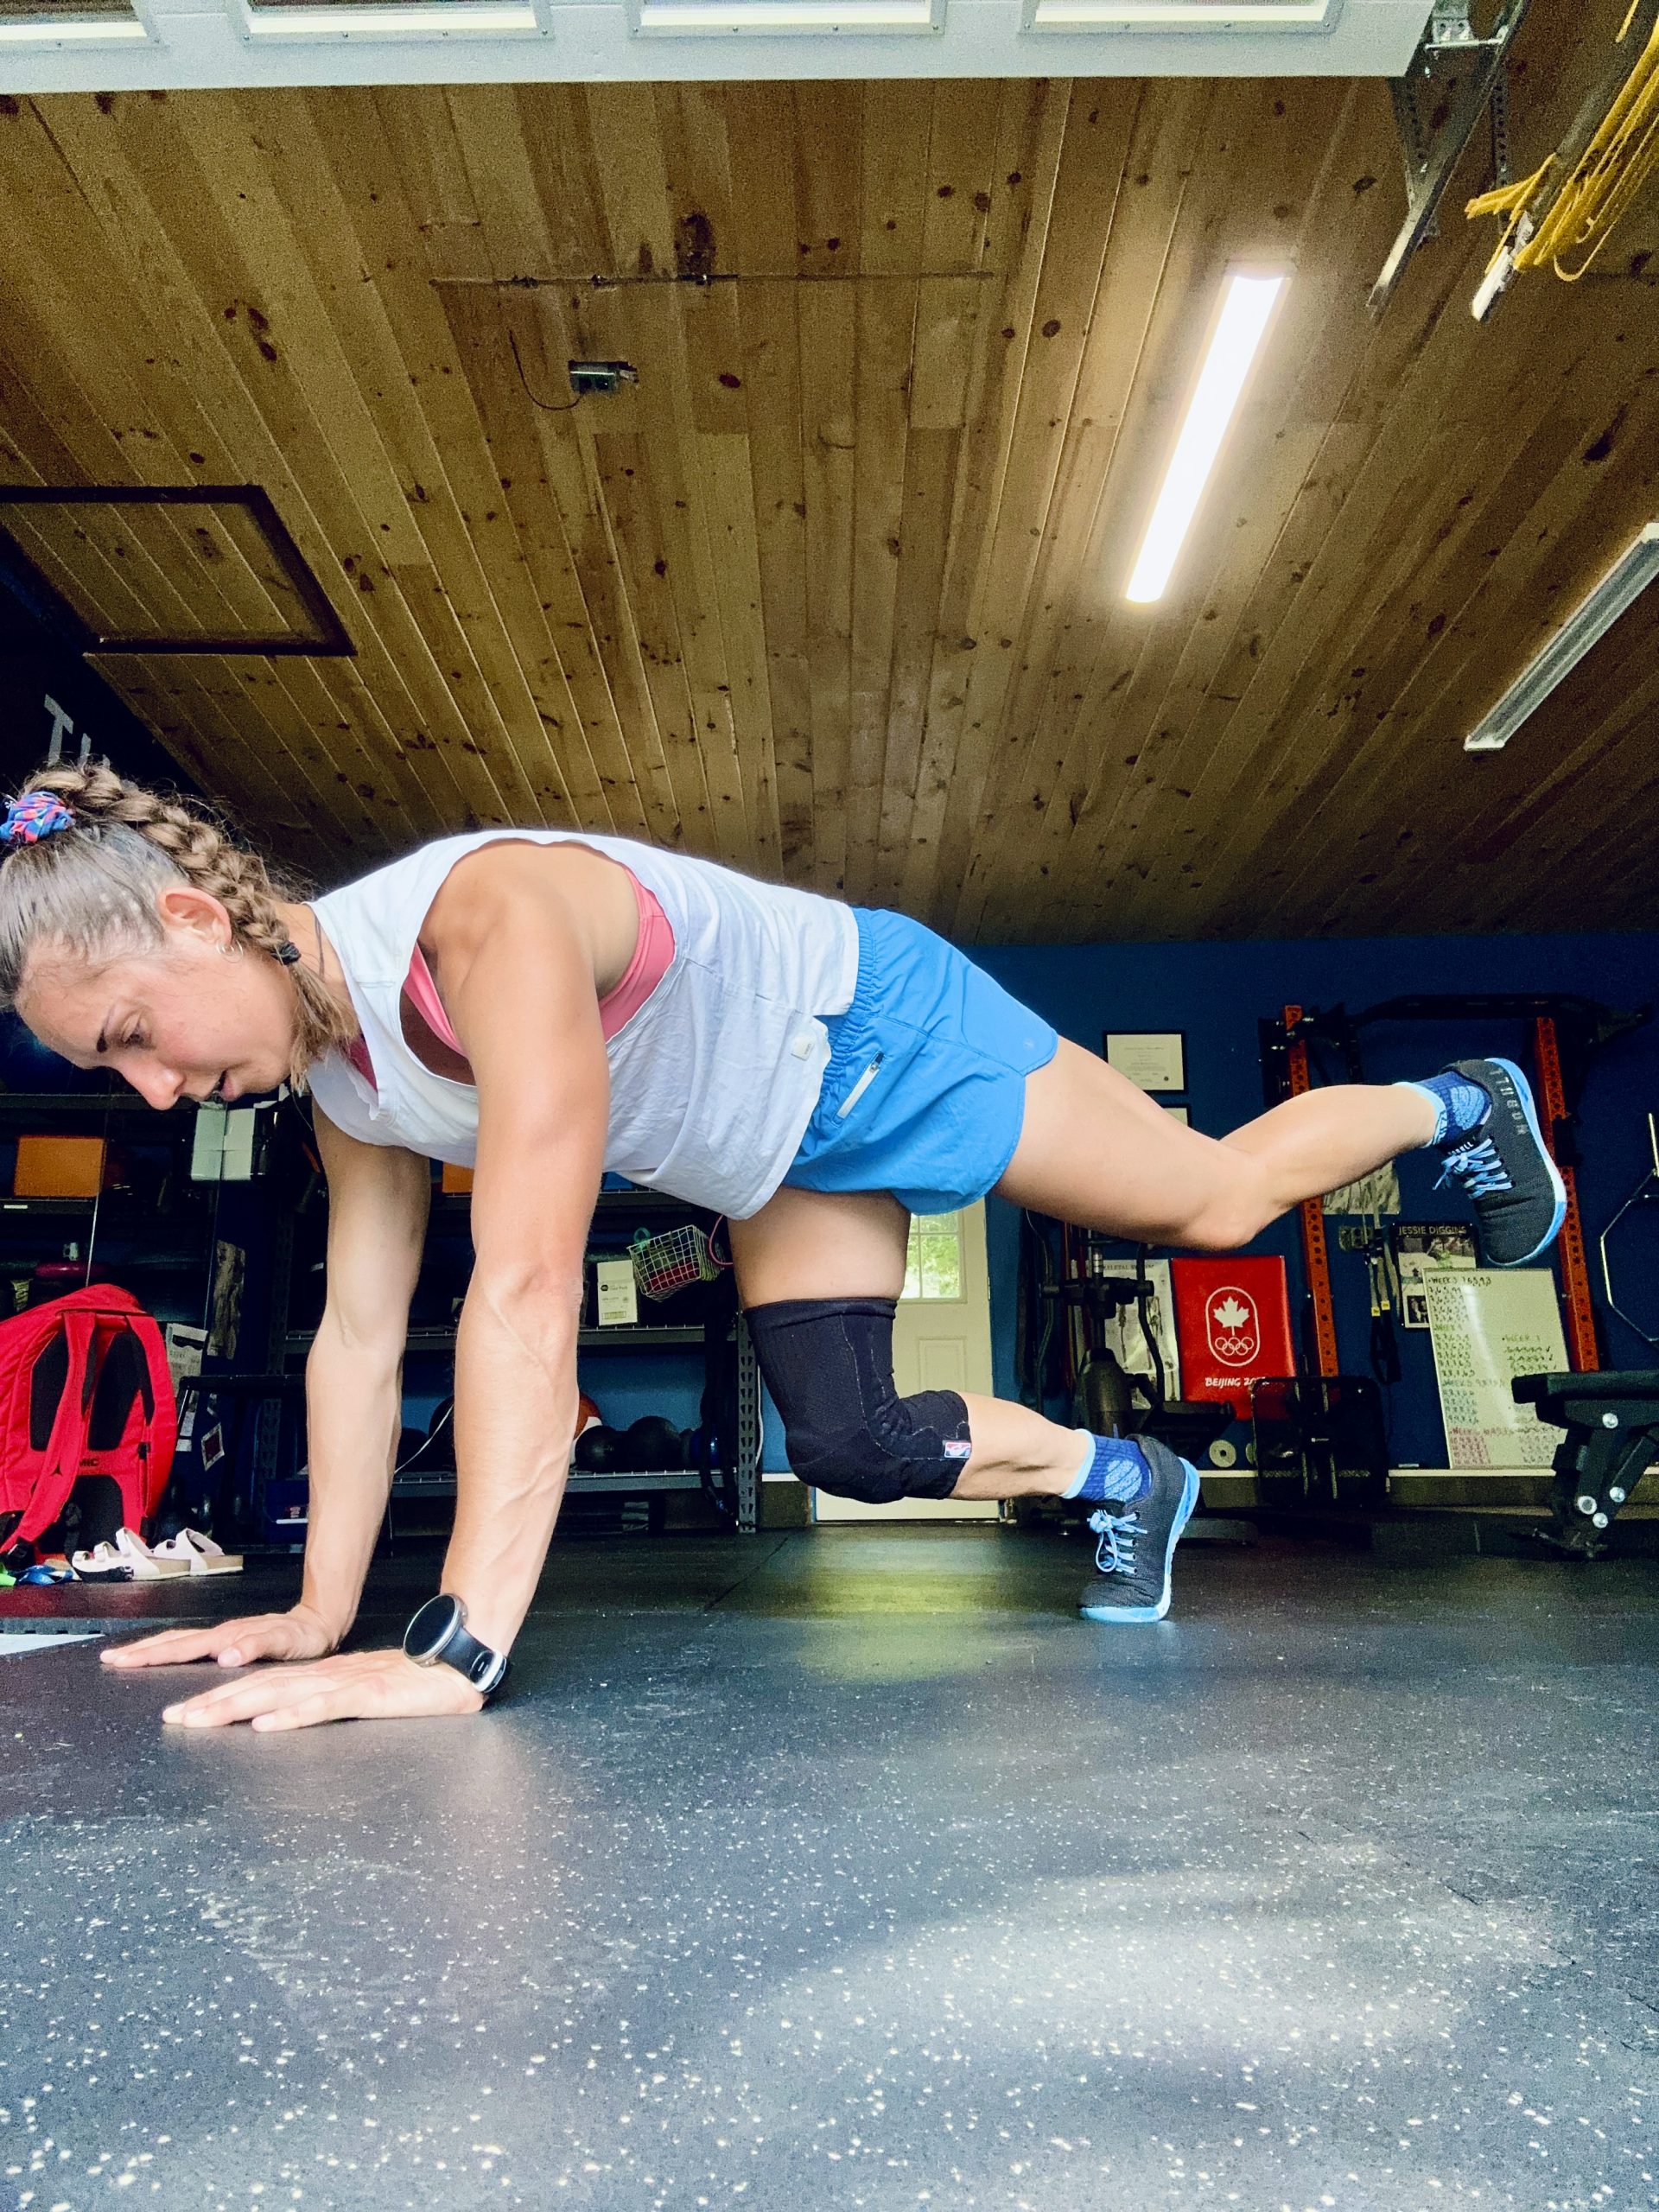
    Bird Dogs 

    Activating: hamstring, glutes, core, obliques, back, lats

    Place your hands and knees on the ground in a tabletop position. Slightly round your spine and engage your core. Lift yourself a few inches off the ground, maintaining the position. Start by kicking one leg back and bringing it back in, maintaining the stable and flat starting position. Kick out the other leg and return it. If you want to add an extra layer of difficulty, reach out one arm and then the other. Repeat this 5x, extending one limb at a time. Focus on pulling your arms and legs closer to one another to get your core firing.  


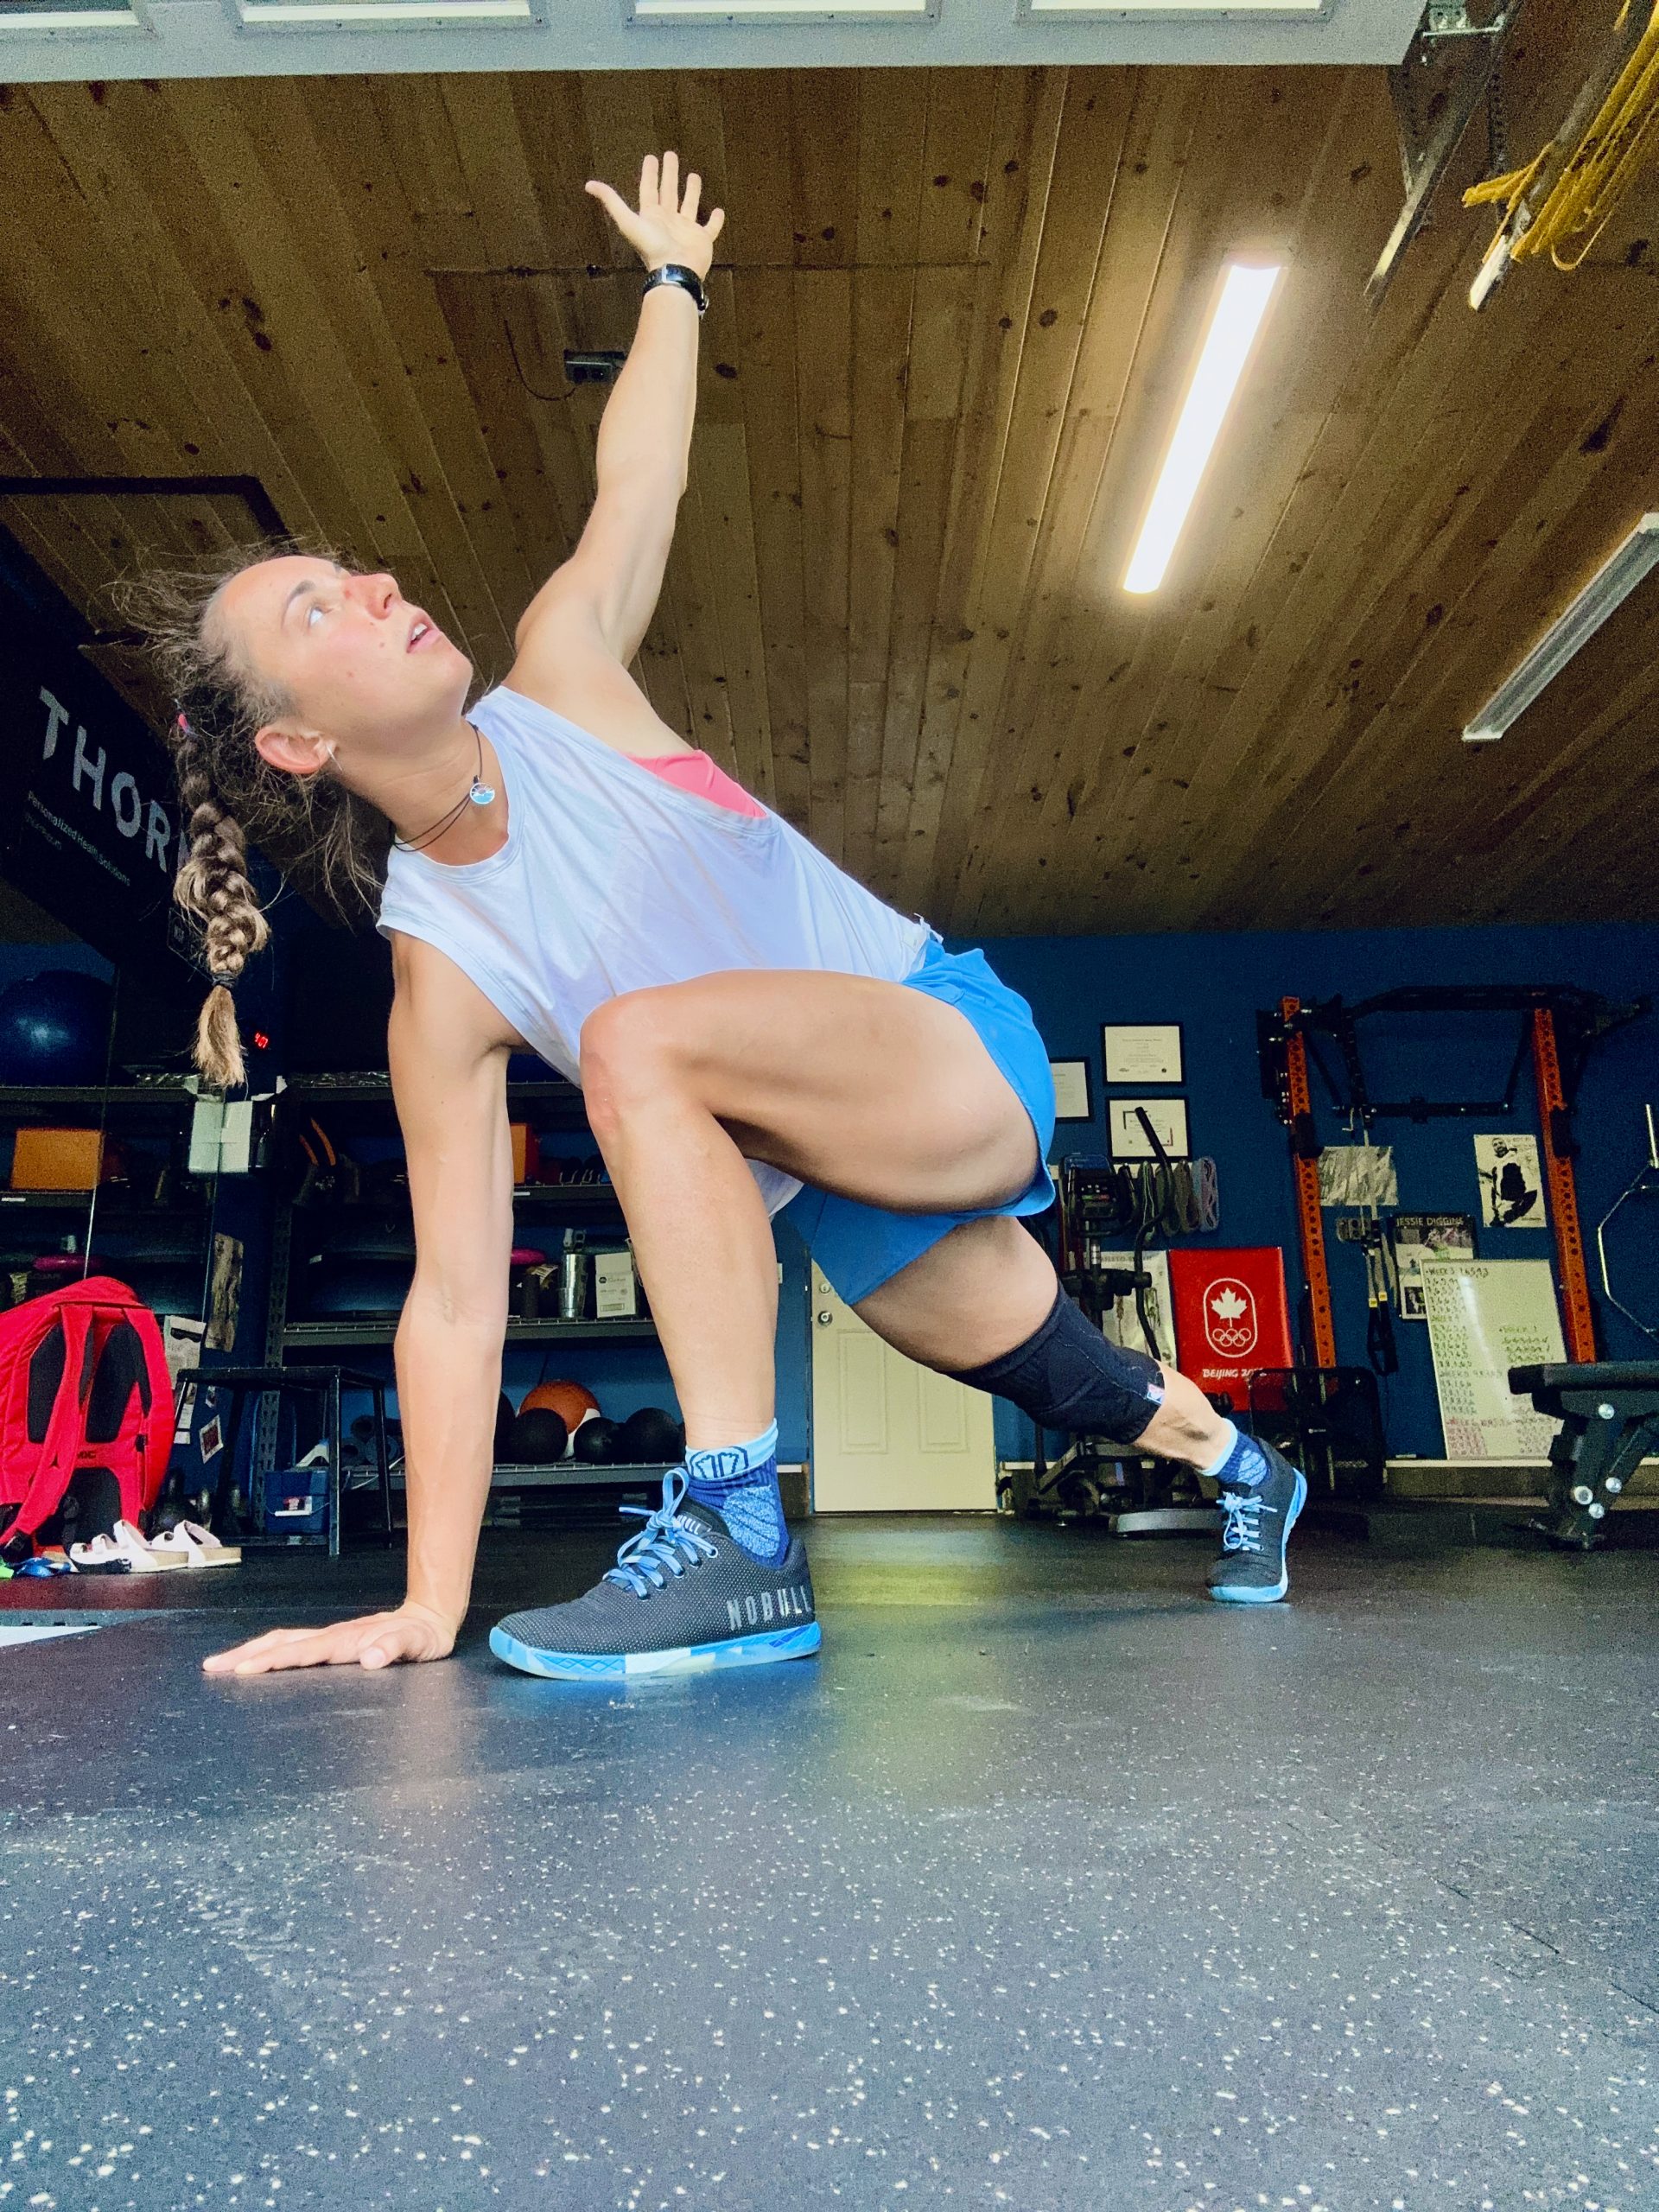
    Front Lunge and Twist 

    Activating: quads, hamstrings, glutes, core 

    Engage your core and then lunge forward with your left leg. Place your hands on the ground on either side of your left leg. Keep your chest tall. Keeping your left arm on the ground, reach your right hand up towards the sky, twisting your upper body. Place your right hand back down, and reaching your left hand to the sky. Return your left hand to the ground and press through your right leg to return from your lunge to the standing position. Repeat on the other side. Do a total of 4x per leg.


    Plank Shoulder Tap + Kickbacks

    Activating: everything 🙂 

    Start on the ground in a straight-armed plank position with a band around your ankles.  Make sure you are in a straight position, engaging your core before you start the movements. Lift your right hand to tap your left shoulder and return it to the ground without twisting or rotating your back, keeping it steady. Now bring left hand to your right shoulder and return it to the ground. Kick your right leg up to the sky, keeping it straight and activating your posterior chain. Return the right leg back to the ground and do the same with the left. Alternating left and right arms and legs for 4 cycles.


  • Is it Time to Throw Away Your Waxing Iron?

    Is it Time to Throw Away Your Waxing Iron?

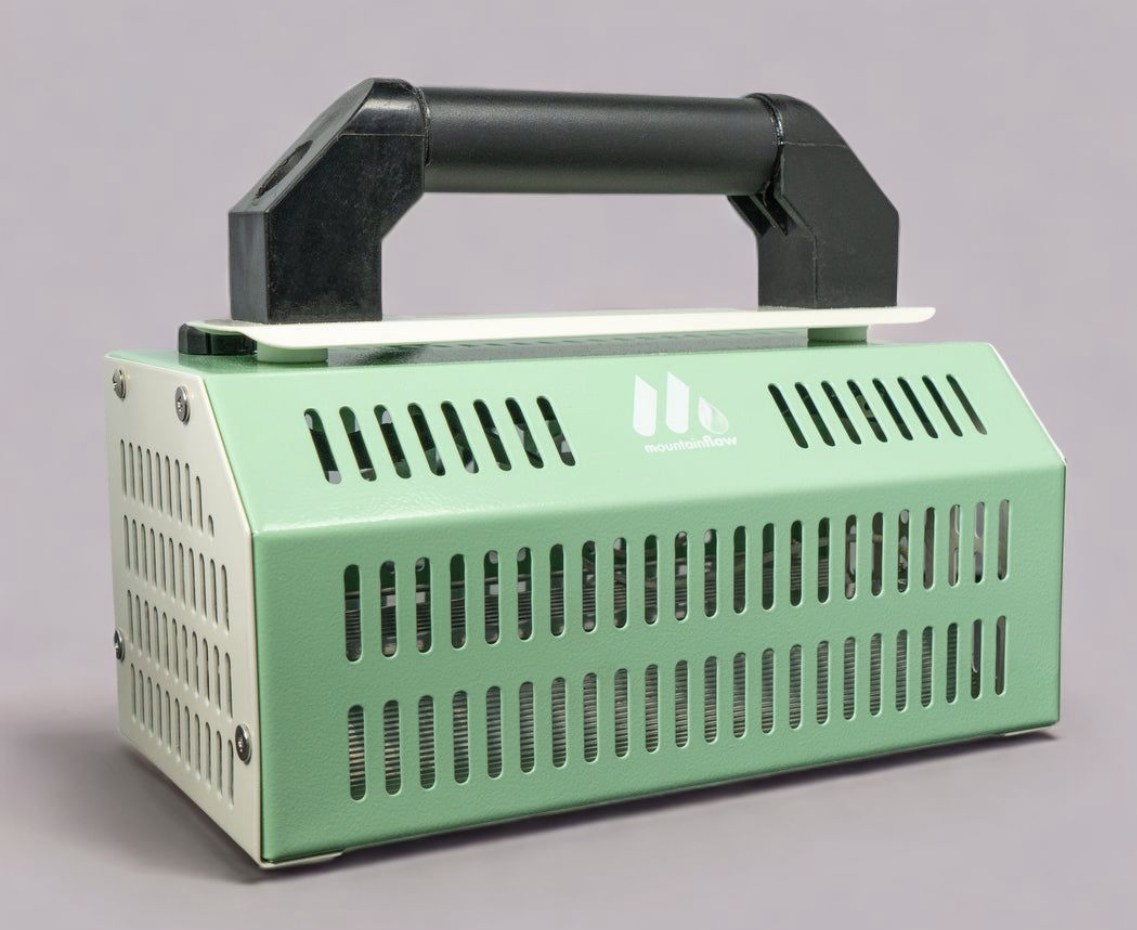
    The Mountain Flow infrared waxer. (Photo: Mountain Flow)

    The last several years have seen tumultuous changes in the ski waxing world. After the fluoro ban went into effect, manufacturers have been scrambling to bridge the performance gap between now prohibited fluorinated wax and non-fluoros. But it’s not just wax manufacturers who have been busy trying to figure out how to build a better mousetrap now that the most powerful weapon ever developed in the waxing arsenal has been sidelined.

    Wax technicians have also been experimenting with every application method under the sun to try and gain an advantage. They have been assessing innumerable variants such as—roto fleecing liquids, roto corking, slurry applications, and deep base penetration through infrared heat. Wait a minute; what was that last one? Applying wax using infrared heat? Yes, that’s the newest hot trend (a little pun intended) in wax application.

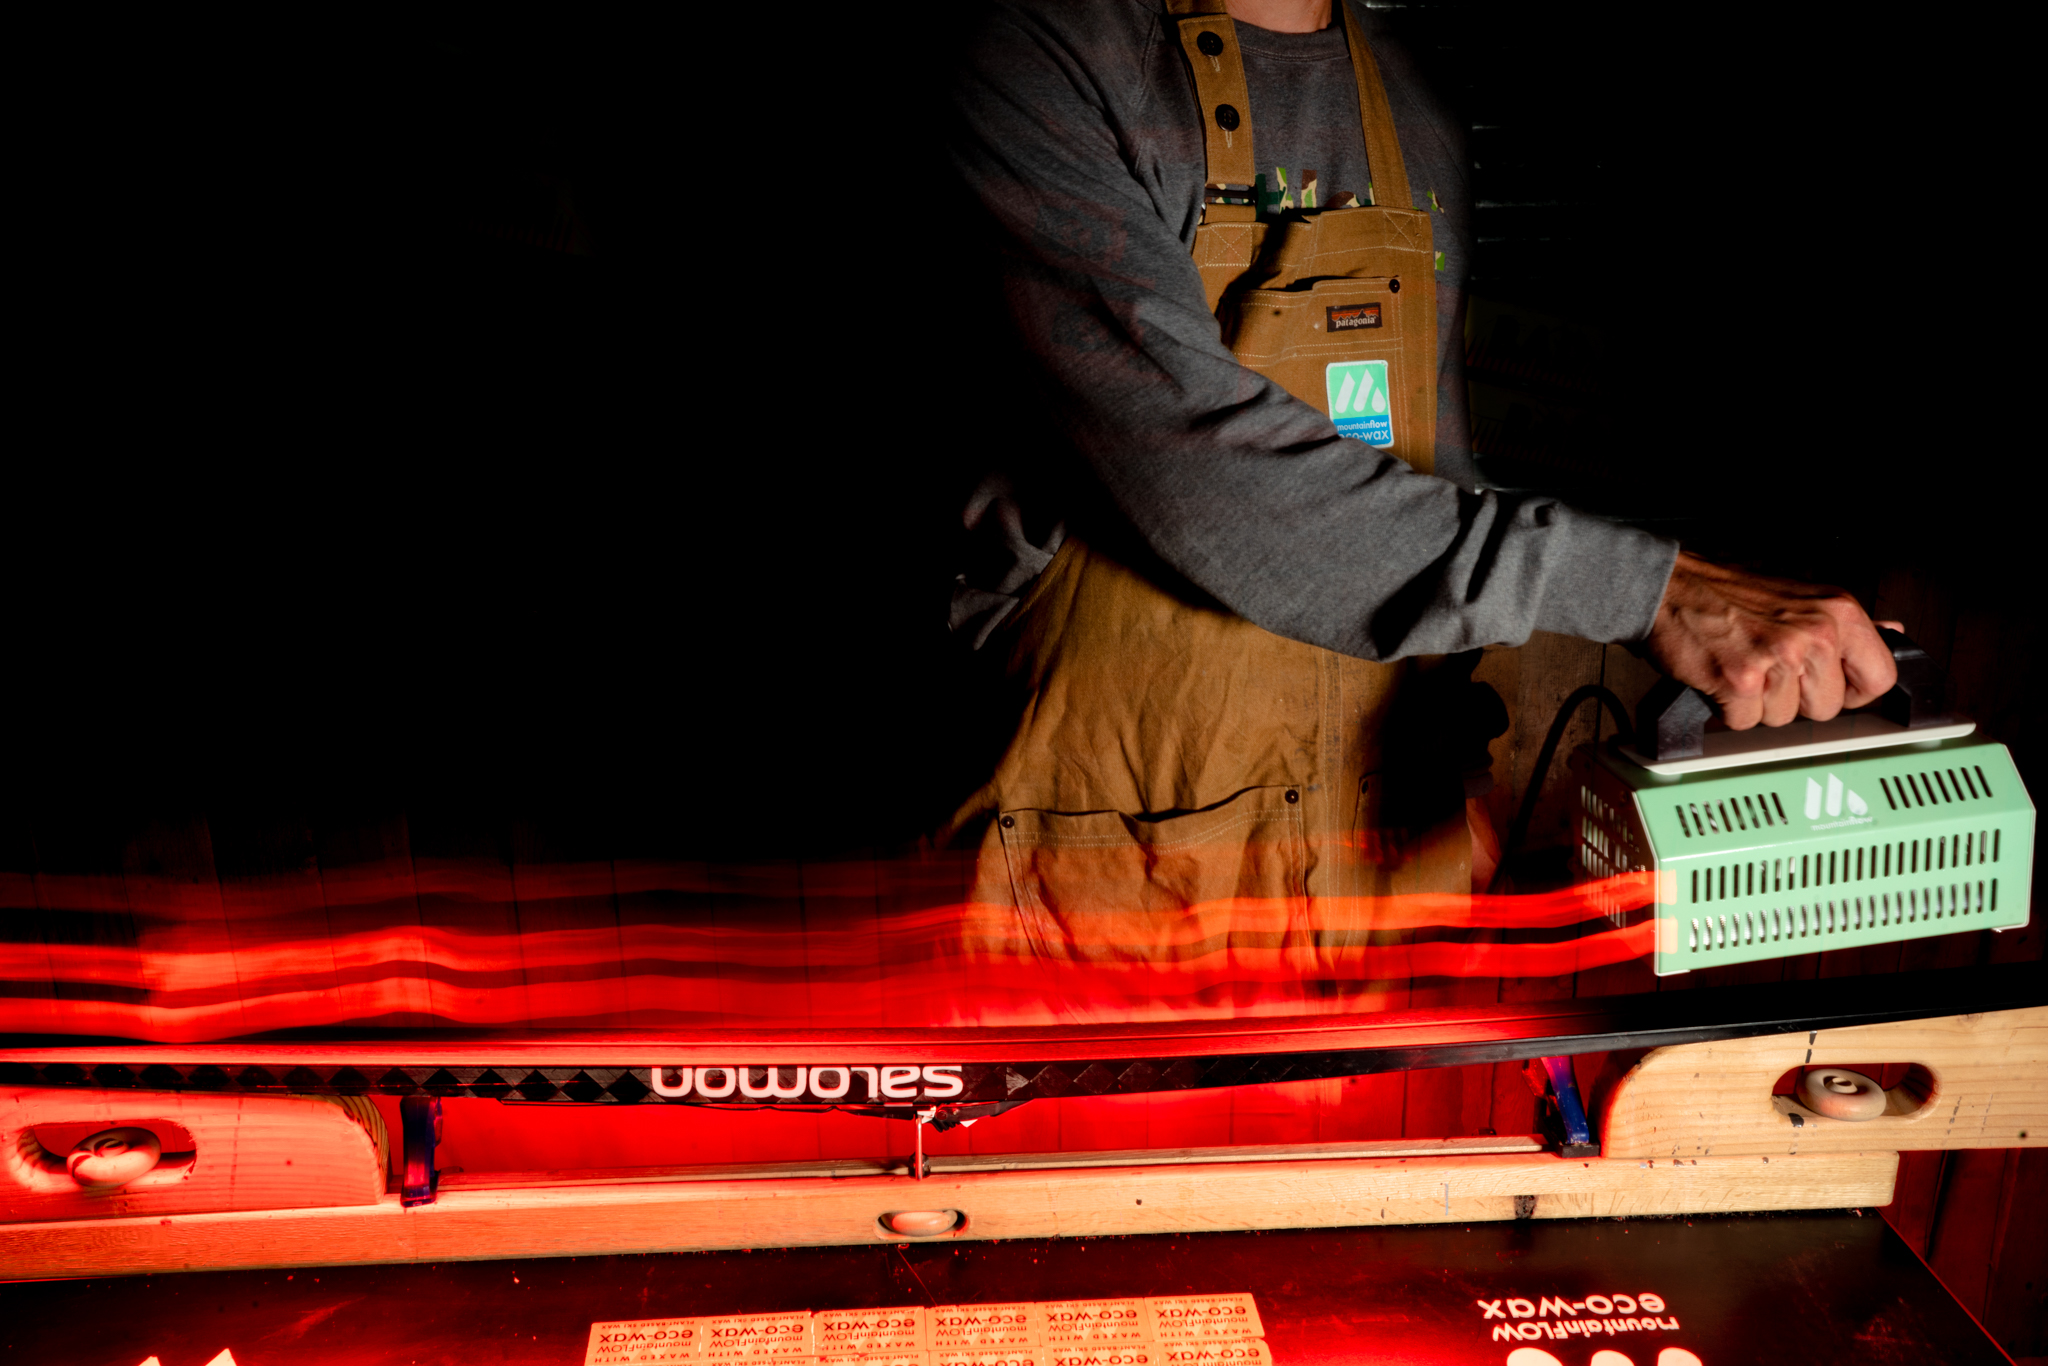
    Time lapse of infra red waxing at work. (Photo: Mountain Flow)

    Everyone is familiar with infrared heating on some level. If you have ever stood outside an airport terminal or bus stop in the winter and felt the warmth from red heat lamps aimed at you, keeping you warm, or gobbled down some fast food that’s been sitting under a glowing red light, then you’ve experienced infrared heating. So, it’s not much of a stretch to ask, “would infrared heat melt ski wax?” We’re also in a time when infrared technology is having a bit of a star moment being touted as providing recovery benefits when exposed to human bodies, and infrared saunas are claiming benefits over traditional heating methods.

    A company in Carbondale, Colorado now wants you to go infrared when waxing, and is selling a direct to consumer infrared waxer (you can’t accurately call it an iron) to replace your venerable waxing partner, the old iron. Mountain Flow is the company, and its founder and CEO,  Peter Arlien wants to change the way you wax your skis, in every possible way. Not only is Mountain Flow selling an infrared waxer, but they also have a complete line of plant based glide waxes which do not contain petrochemicals.

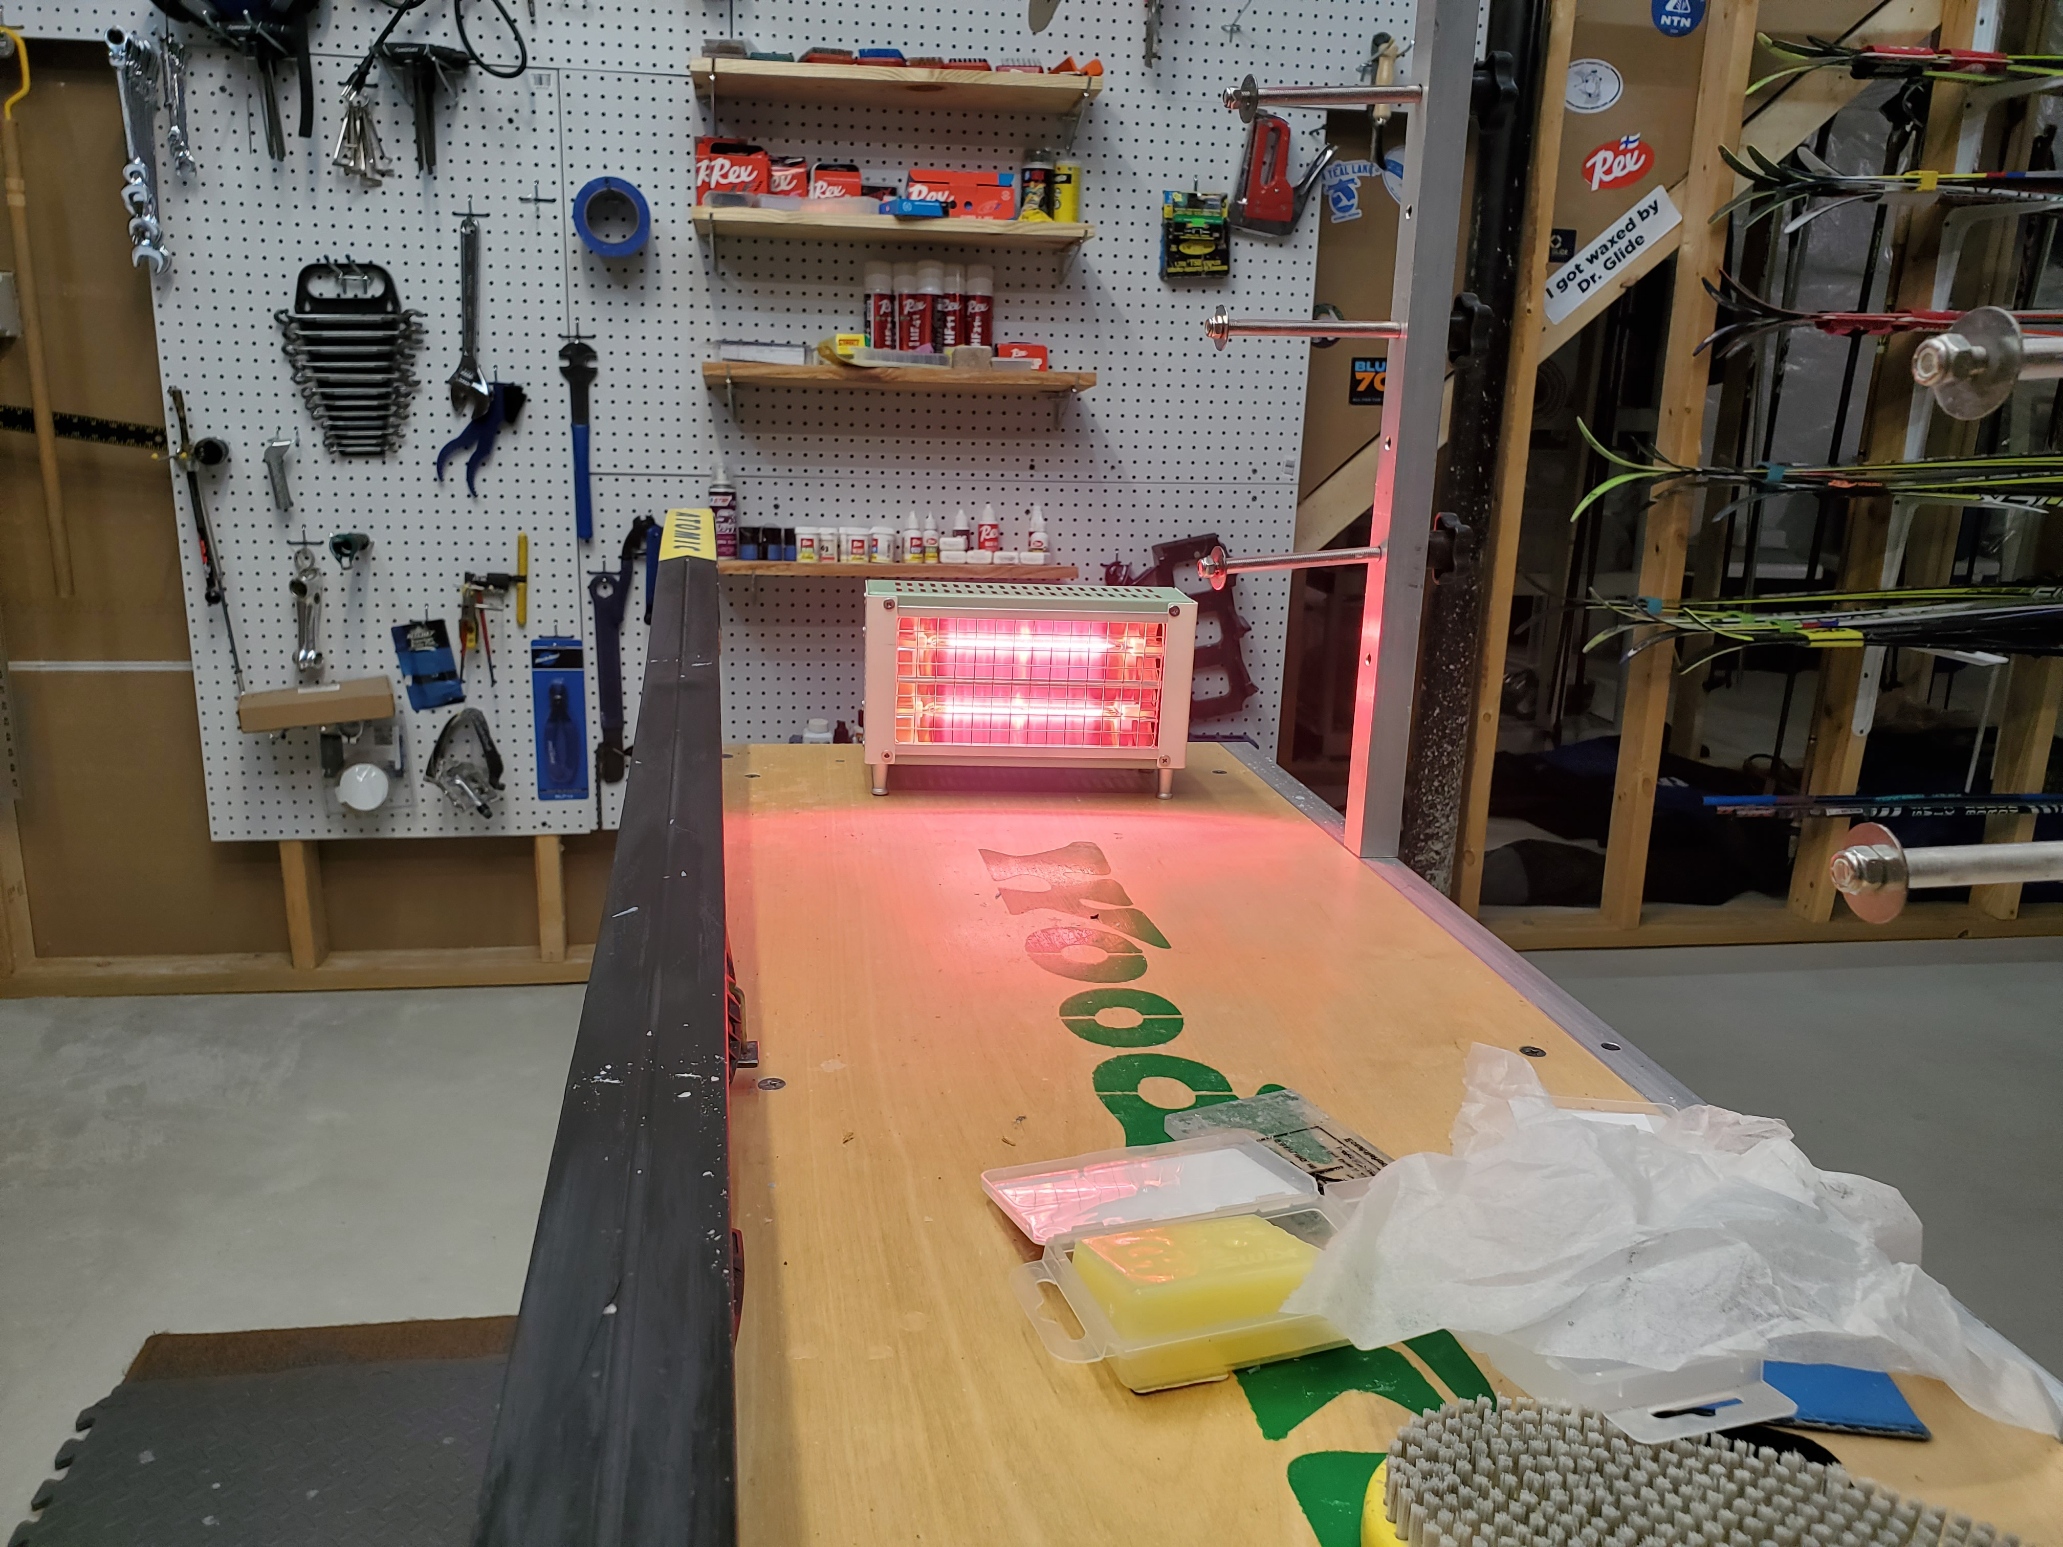
    Mountain Flow’s infra red waxer getting a tryout. (Photo: FasterSkier)

    Infrared wax application isn’t new, it has been around in Alpine ski shops for some time. Many Alpine shops have high tech commercially scaled infrared waxers which automatically travel the length of the ski on a moving arm and apply a deep coat of wax to your boards. The claims around infrared are intriguing and as it becomes more common place could it spell the end of the faithful and sometimes beloved waxing iron? For his part, Arlien isn’t seeking to destroy your friendly wax iron, but he does want everyone to be able to wax skis more; in a sustainable, efficient, and environmentally friendly method.

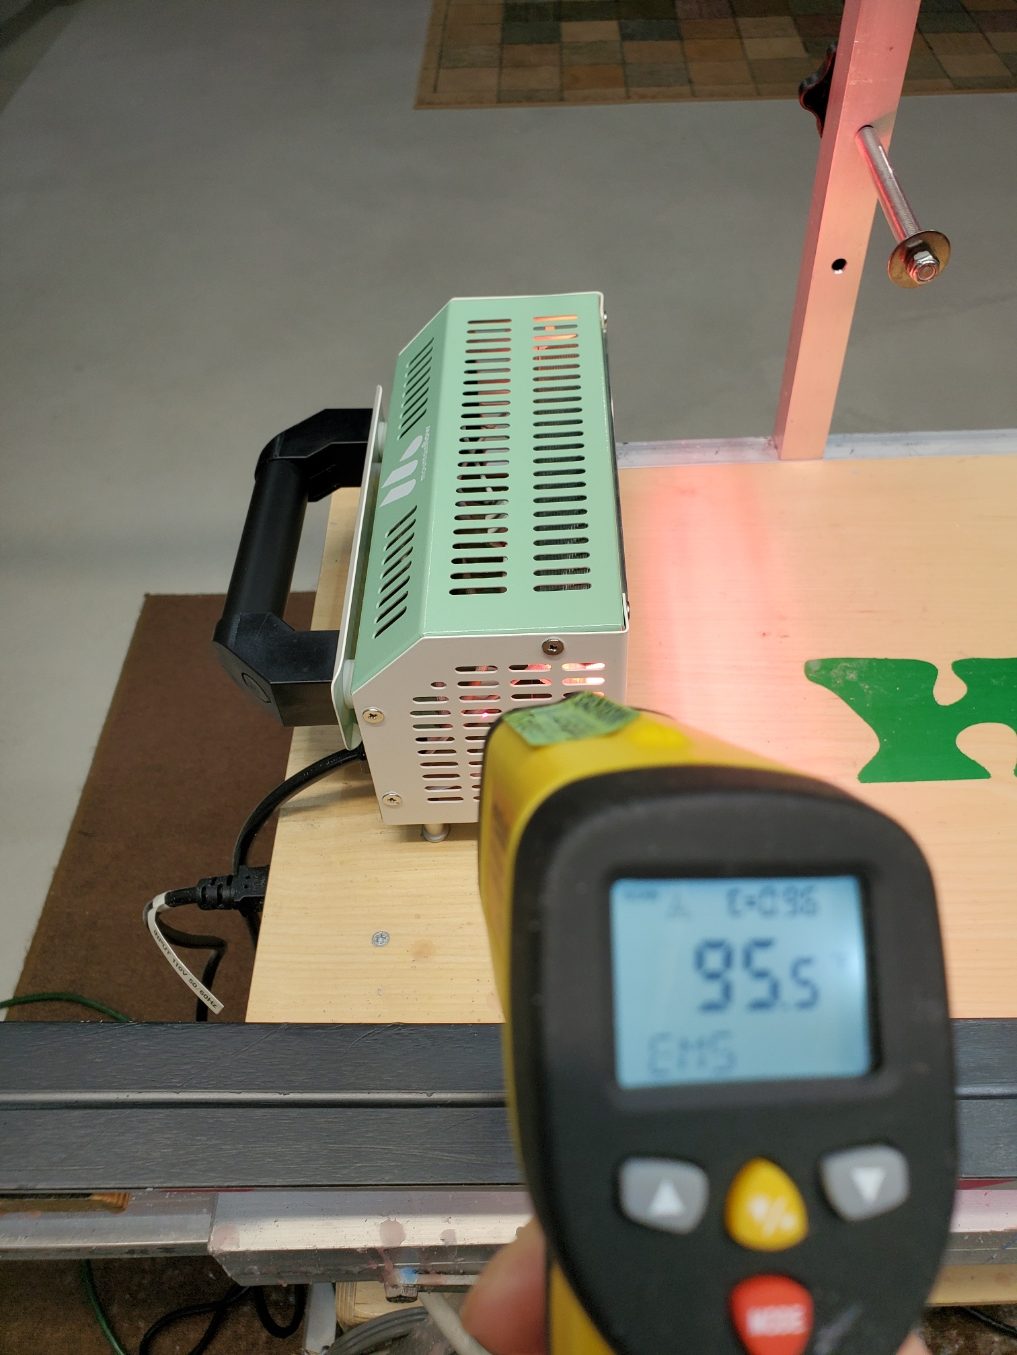
    The waxer gets a little warm if you leave it pointing at things, so it’s best to turn it off when not in use. Since it comes up to operating temperature as soon as you turn it on, that’s not a problem. (Photo: FasterSkier)

    Originally from upstate New York, Arlien moved to Carbondale to have better skiing access. He doesn’t have an engineering or chemistry background to help with product development, but does have degrees in Neuroscience from Colby College and an MBA in Business Intelligence and Data Analytics from the University of Alaska. “I was and am a skier,” said Arlien. “That’s what got me interested, I did have a science background, but the wax was formulated from a skier’s perspective. I worked as a ski technician for years and waxed thousand of skis.” Arlien’s first saw infrared waxers in Alpine shops. Those are large expensive wall mounted units. “More and more shops are going in that direction because of the benefits of infrared; great base penetration, you use way less wax, and there’s no scraping or mess.”

    Mountain Flow’s origin story includes an appearance by Arlien on the television show Shark Tank. In the show Arlien did strike a deal with the sharks, but at the end of the day, after the lawyers had finished, the deal didn’t go through.

    Developing the infrared red waxer wasn’t hampered by Arlien’s lack of an engineering background. “Infrared technology isn’t new. We didn’t have to invent that. Basically, we just looked at what we wanted that wasn’t out there.” Arlien worked with infrared equipment manufacturers to develop prototypes of an infrared waxing device, which could often be a trying experience. Early on in the process Mountain Flow identified the number one manufacturer in the world in infrared technology and tasked them with meeting  the company’s specifications. “They send you a sample and maybe it turns on, and that’s about it. But there’s about a million other things wrong with it. Then they send another one. It took us about two years to get a product we were happy with.”

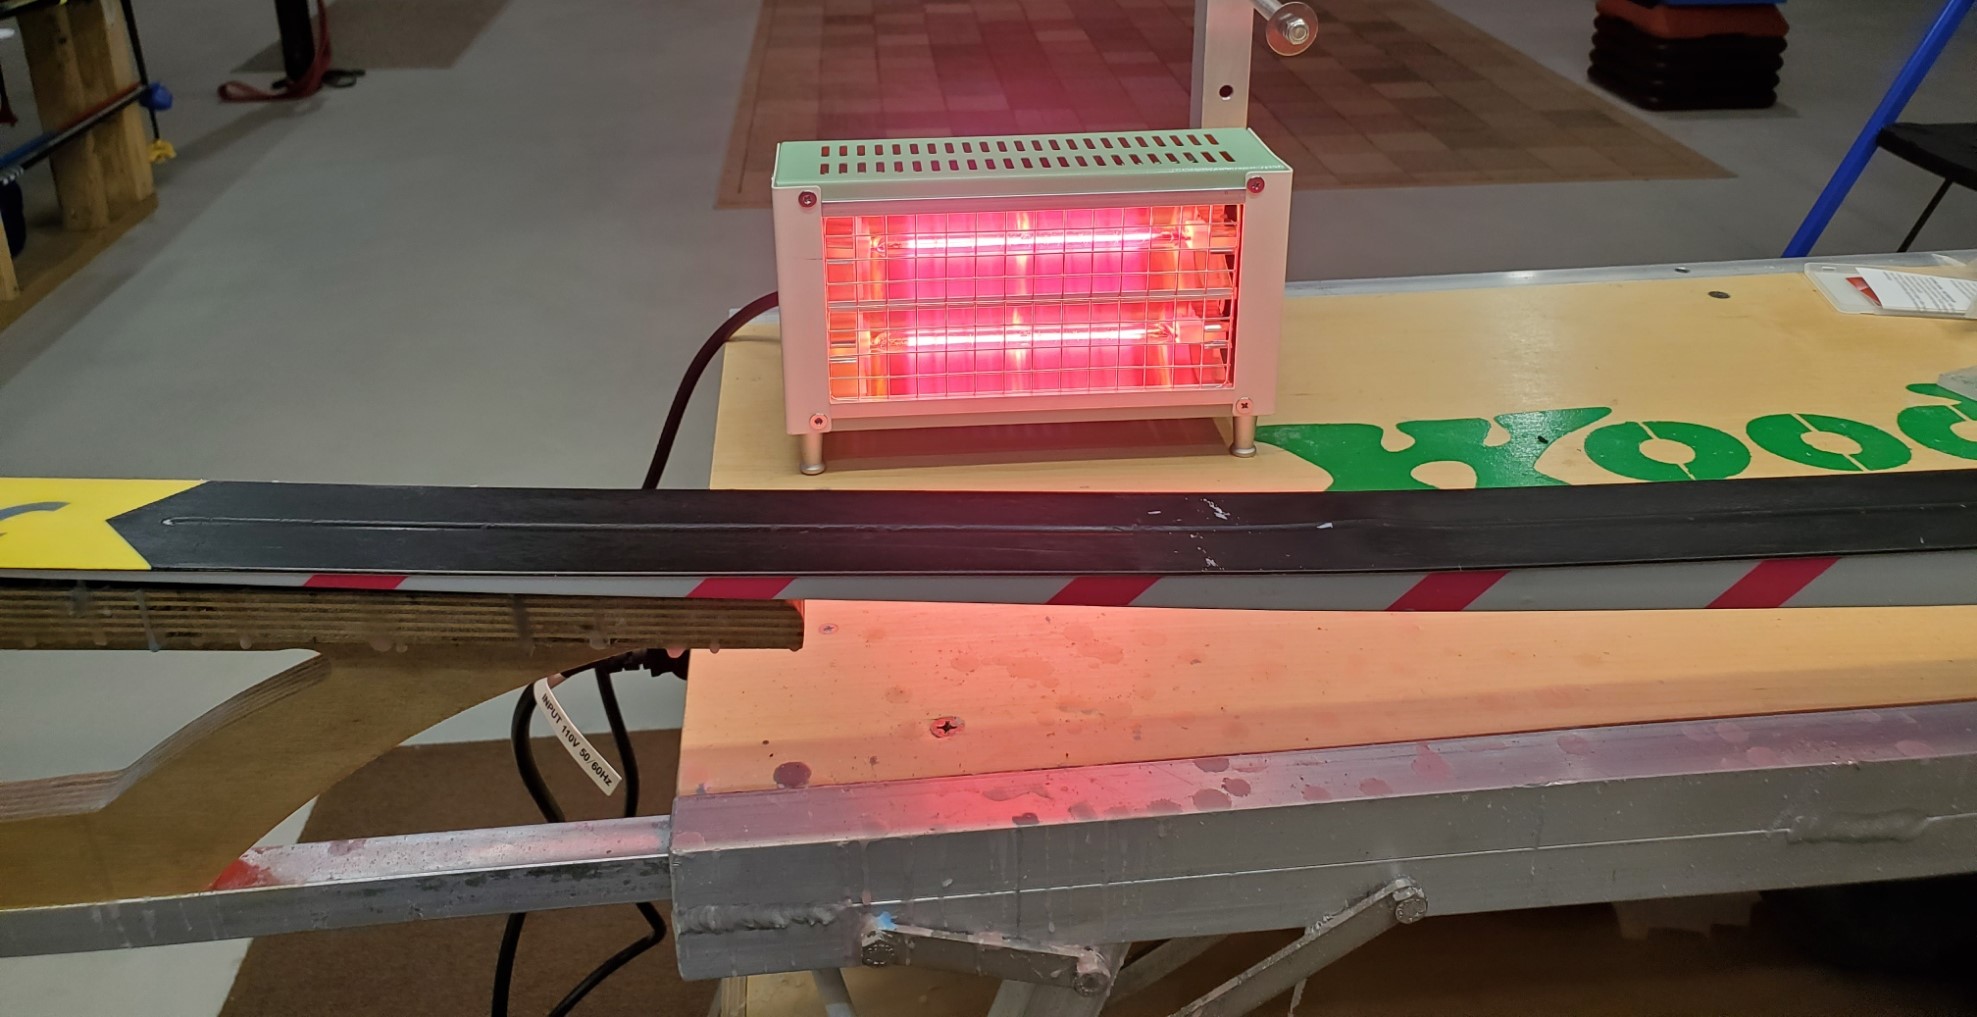
    The outside of the waxer gets warm, but it’s not so hot that it’s difficult to manage. (Photo: FasterSkier)

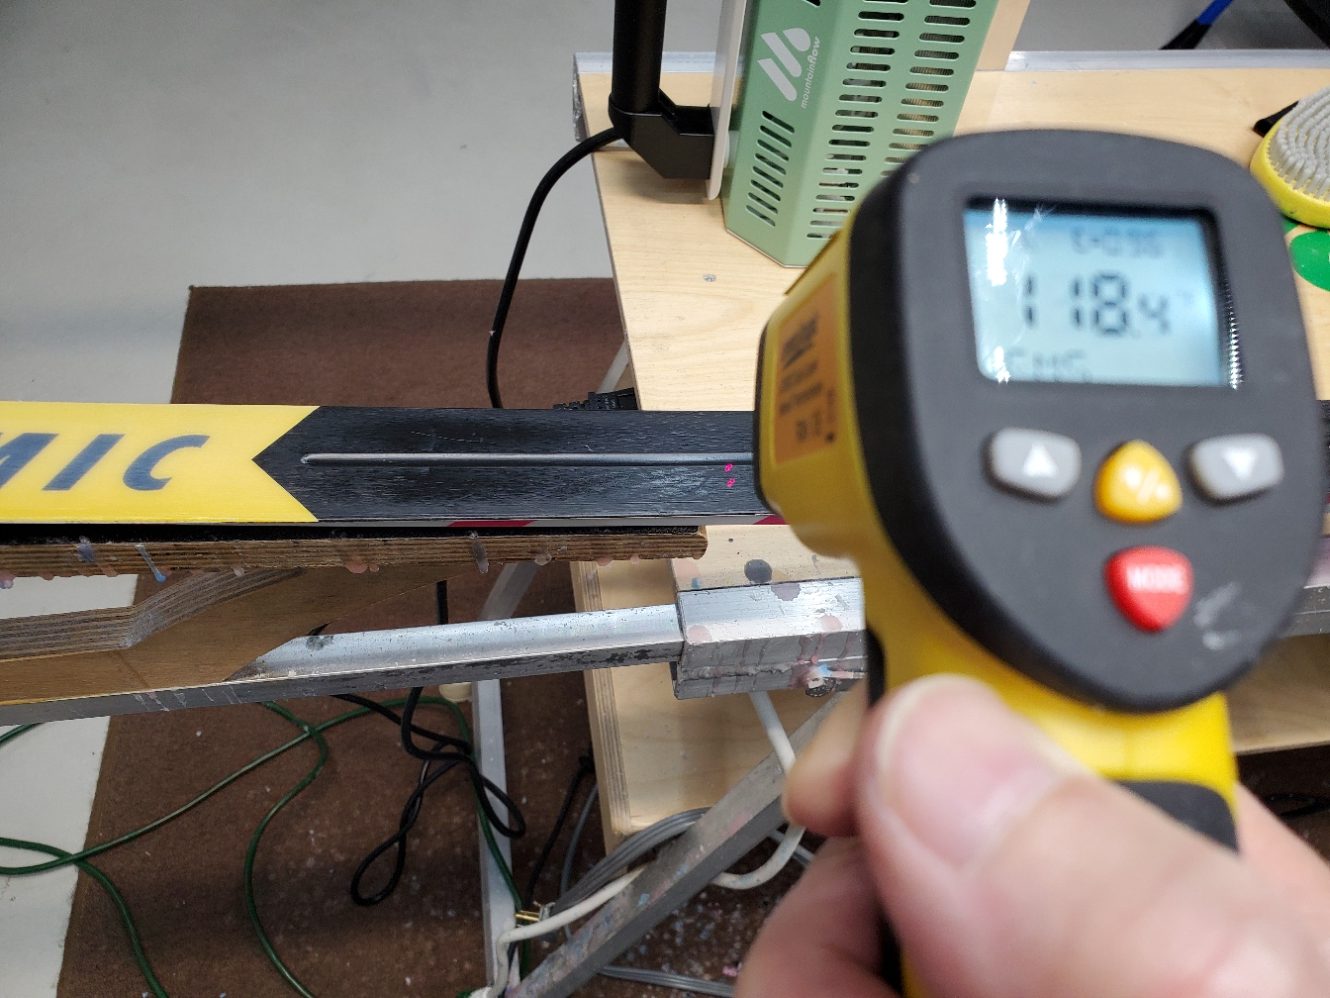
    Arlien’s product kind of looks like a hollowed out iron with bulbs where the base would be. To use it, you hold the device a couple of inches above the ski and move it up and down the ski length just like an iron. But you never touch the ski base. When the waxer is turned on it comes up to temperature instantly, so there’s no waiting for it to warm up and there’s no variation in temperature as the waxer moves along the ski. You control the temperature by how close you hold the device to the ski base.

    Arlien says infrared isn’t just for high volume waxers. “I think there’s huge opportunities in high performance waxing. You can do things you couldn’t do with a traditional wax iron. You can use it to speed up the application process, and I think you get better base penetration. Also, with the infrared waxer you can heat up the base with a liquid wax without damaging the ski.” To wax a ski when using conventional block wax, you crayon on a thin layer and then melt it in with the infrared waxer. Arlien says that the layer is so thin that it usually won’t require scraping, you can just brush it off. That’s touted as one of the big advantages. There are others. Everyone’s had the experience of working with super hard waxes like Start Green. When you scrape it after ironing— if you let it come to room temperature— the wax fractures and shatters, flying off the ski like a light bulb just exploding. This doesn’t happen with the infrared waxer. The residual wax layer is so thin that you can just brush out the ski and avoid the wax crackling or do some minimal scraping.

    Ski base temperature is controlled by how close you hold the iron to the base instead of setting a temperature. (Photo: FasterSkier)

    Then there’s the kick wax advantage. Klister and binder waxes can be heated in without touching the ski. When using a conventional iron with klister and other kick zone waxes, there’s always the problem of cleaning the iron after applying the kick zone wax to avoid getting contaminated kick wax into the glide zone. You either have to very thoroughly clean the iron to avoid later contamination, or the more obsessive-compulsive among us will use a dedicated kick wax iron. But it’s a completely different process with the infrared waxer. Since the waxer never touches the ski, there’s no mess to have to deal with.

    Arlien also sees applications for recreational skiers who are just interested in having a more enjoyable skiing experience. “You can hot wax the fish scales of a Nordic ski. This would be instead of using anti-icing treatments. You’re enhancing glide and getting anti-icing from the wax, but you’re putting on such a thin layer that you’re not clogging the structure of the fish scales. It’s such a thin layer you don’t loose kick. I then do a reverse brush, going tail to tip, to remove the residue.”

    Business for the infrared waxers has been brisk. “So far in September, we’ve almost outsold our entire winter last year. People love the concept and how easy it is to use. Typically, with ski wax when you make the process easier, there’s a tradeoff. With the infrared, it’s quick and easy, and you’re actually getting more performance out of the wax.”

    There’s no need to worry about the device’s longevity. “The bulbs are gold halogen and are supposed to last for 10,000 hours, but they can be replaced if needed. The waxer comes with a two year warranty.”

    There are a couple of basic safety precautions to employ when using the infrared waxer. Since it projects heat, don’t leave it on pointed at anything combustible, and don’t point it at wax sitting on your bench, since it could melt it. The device might help keep your work area a little warmer, or even potentially heat up a cup of coffee, but as Arlien points out, you don’t have to worry about it giving you a sunburn. “Infrared is on the opposite end of the light spectrum from ultraviolet, and it’s ultraviolet which gives you a tan.” But you still shouldn’t point it at skin since it could make it hot. This is all easy to deal with since the instructions state to turn the waxer off when you set it down. Since there’s no warmup time when you turn it on, there’s no reason not to turn it off.

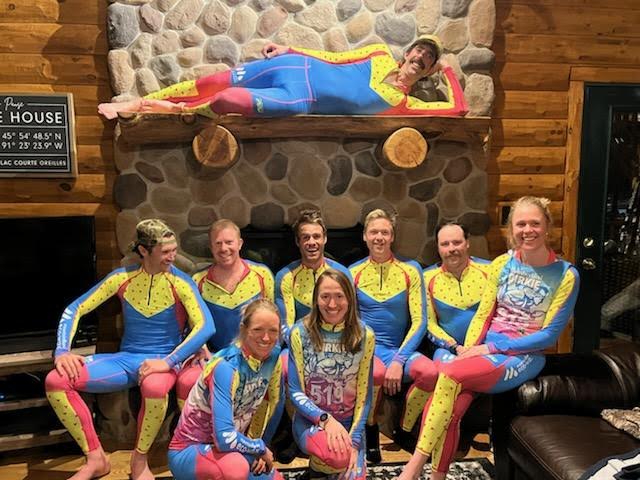
    Mountain Flow had success with its plant based wax at the Birkie. Arlien is the skier laying on the mantel. (Photo: Mountain Flow)

    Arlien doesn’t just want to change the way you wax; he also wants to change what you wax with. After spending years working in a ski shop, he was tired of working with wax derived from petrochemicals. His solution was to invent a plant based wax. “Wax is petroleum, and whatever you put on your skis goes into the environment, directly into the snowpack, and into our watershed. That didn’t feel great. I was convinced there were other solutions. So, I dug into tribology (the science and technology of interacting surfaces in relative motion) articles to see what plant based substances would work. I just kept iterating … ski all day, go home and kept iterating and getting better and better results.” The process took about two years. The wax contains no petrochemicals. Arlien has tested his product against other non-fluoro waxes and claims it compares favorably, and that the durability is as good or better. “The first year we went to the Birkie we brought a team of seven skiers, and we had four top 15 finishes, and people were saying they were coming across the lake (towards the end of the race) and the wax was flying.” Most of the waxes contain products which are already used on the market for natural beauty products and that’s the source for most of the raw materials.

    Arlien says that the easiest way to purchase the infrared waxer is through him directly at Mountain Flow.  The infrared waxer sells for $249.95 and comes with an elegant carrying case.

    FasterSkier appreciates the support of our new partner MountainFLOW this season.  As a celebration of this new relationship MountainFLOW is offering the FasterSkier community a complementary bottle of whiskey from the Steamboat, CO based Mythology Distillery* with the purchase of an Infrared Waxer and a 10% discount on all additional MountainFLOW purchases — to take advantage of this opportunity use promo code fasterskier at checkout.


    *Purchaser must be 21-years-old and live in a state Mythology Distillery can ship too.


  • The Old Man and the Lake: A Skier Swims Across the Mackinac Straits. Part II

    The Old Man and the Lake: A Skier Swims Across the Mackinac Straits. Part II

    In Part one of The Old Man and the Lake, our reporter shared his story about dealing with the sudden onset of chronic illness; how time, persistence, and swimming helped him regain his athletic life, and the odyssey of swimming across the Mackinac Straits. In part two, the story continues with his ongoing swimming saga post bridge swim, and the lessons learned about goal setting and the reality of dealing with disappointing outcomes.

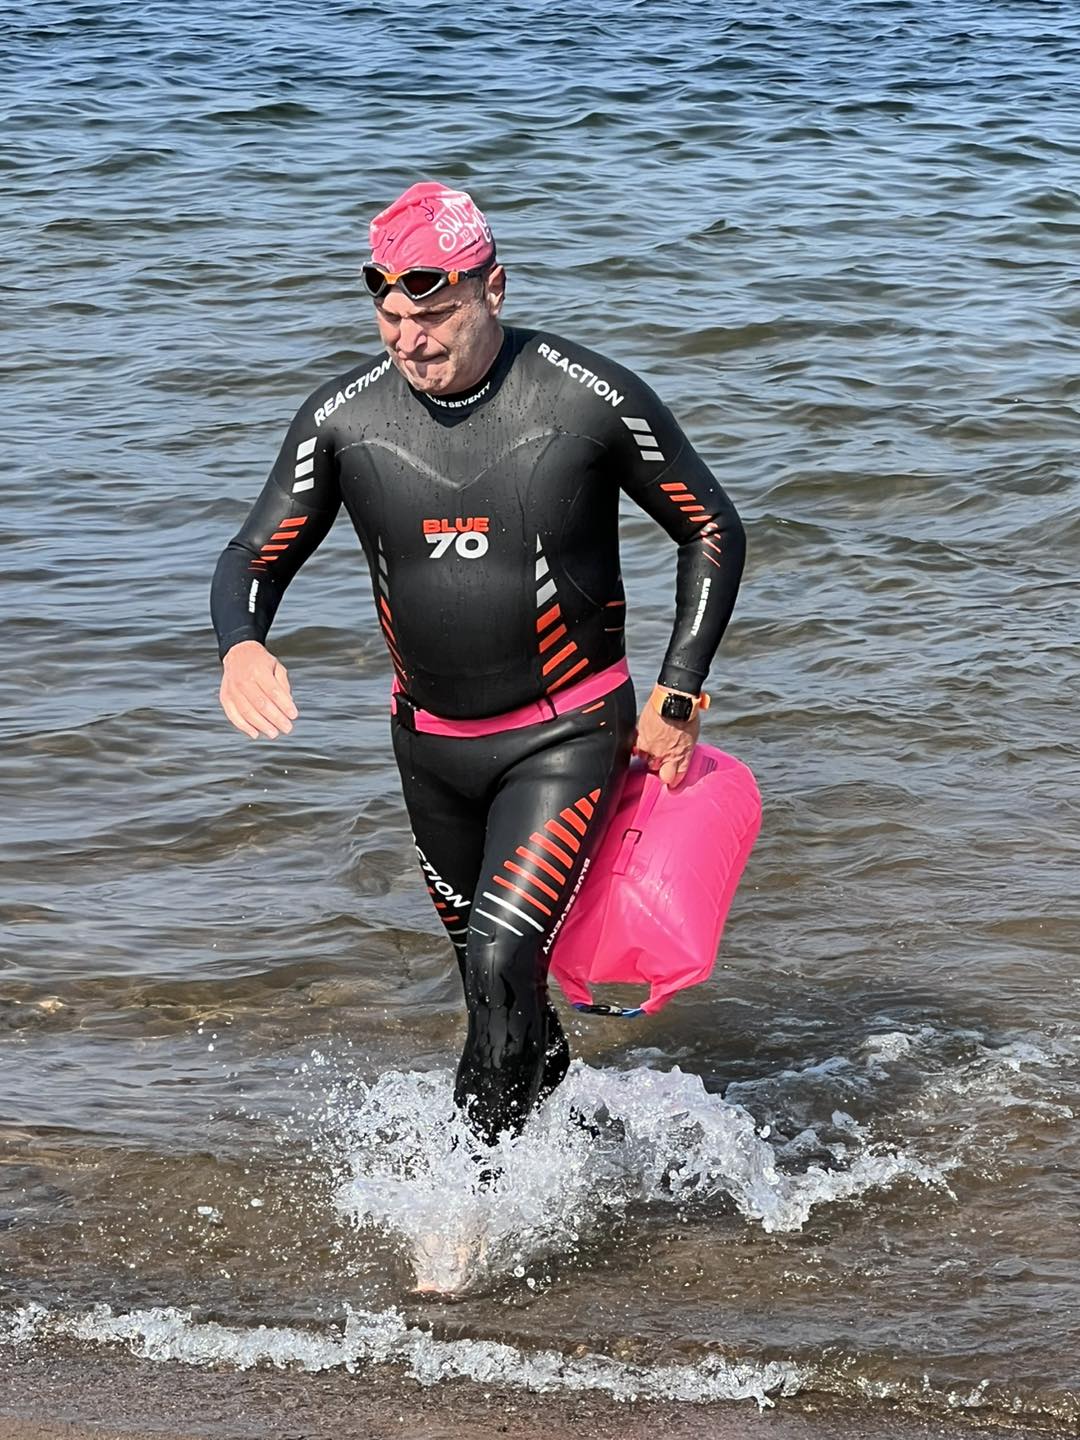
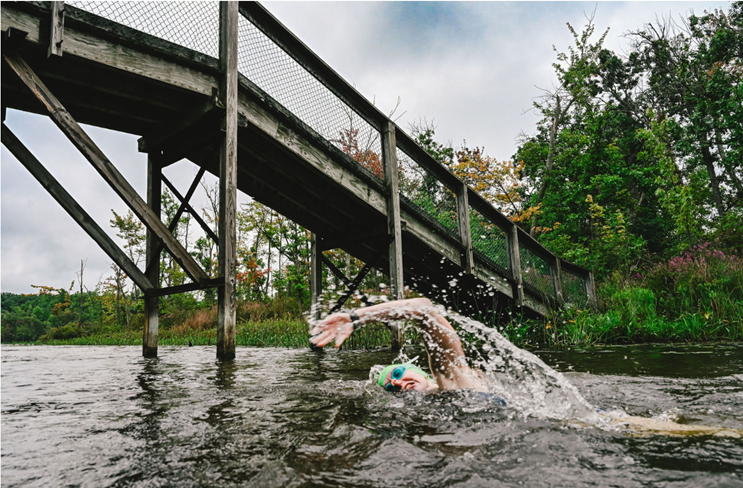
    A grimace shows the author’s hard final push out of Teal Lake, or was it just pain from stepping on stones? (Photo: Courtesy Swim Teal Lake)

    Next up on the race calendar the weekend following the Mackinac Bridge Swim was an event called Swim Teal Lake. This is a 2.25 mile point to point swim the length of beautiful Teal Lake in Negaunee, Michigan. Teal lake is a gorgeous inland lake with clean clear water and no motorized craft allowed in it. It’s therefore just about a perfect venue for swimming. A low key fun event with under 70 participants, the race has the decided feel of a local neighborhood happening, which it is.

    Everything came together for me at Teal Lake in an unusual confluence of good outcomes. I paced myself perfectly, swam in a straight line, and ended with just a little bit left in the tank. This —and the small field—put me in the unusual position of winning my age group. This was something I had never previously come close to doing. I recognized it was a bit of a unicorn, but nonetheless, I savored the moment and enjoyed the success.

    After the washing machine like experience of the Bridge Swim, Teal Lake felt like an easy jog in the park. At the finish, I had to remind myself that it was only a few years ago that a 2.25 mile swim would have been physically impossible for me, and remind myself to enjoy the moment.

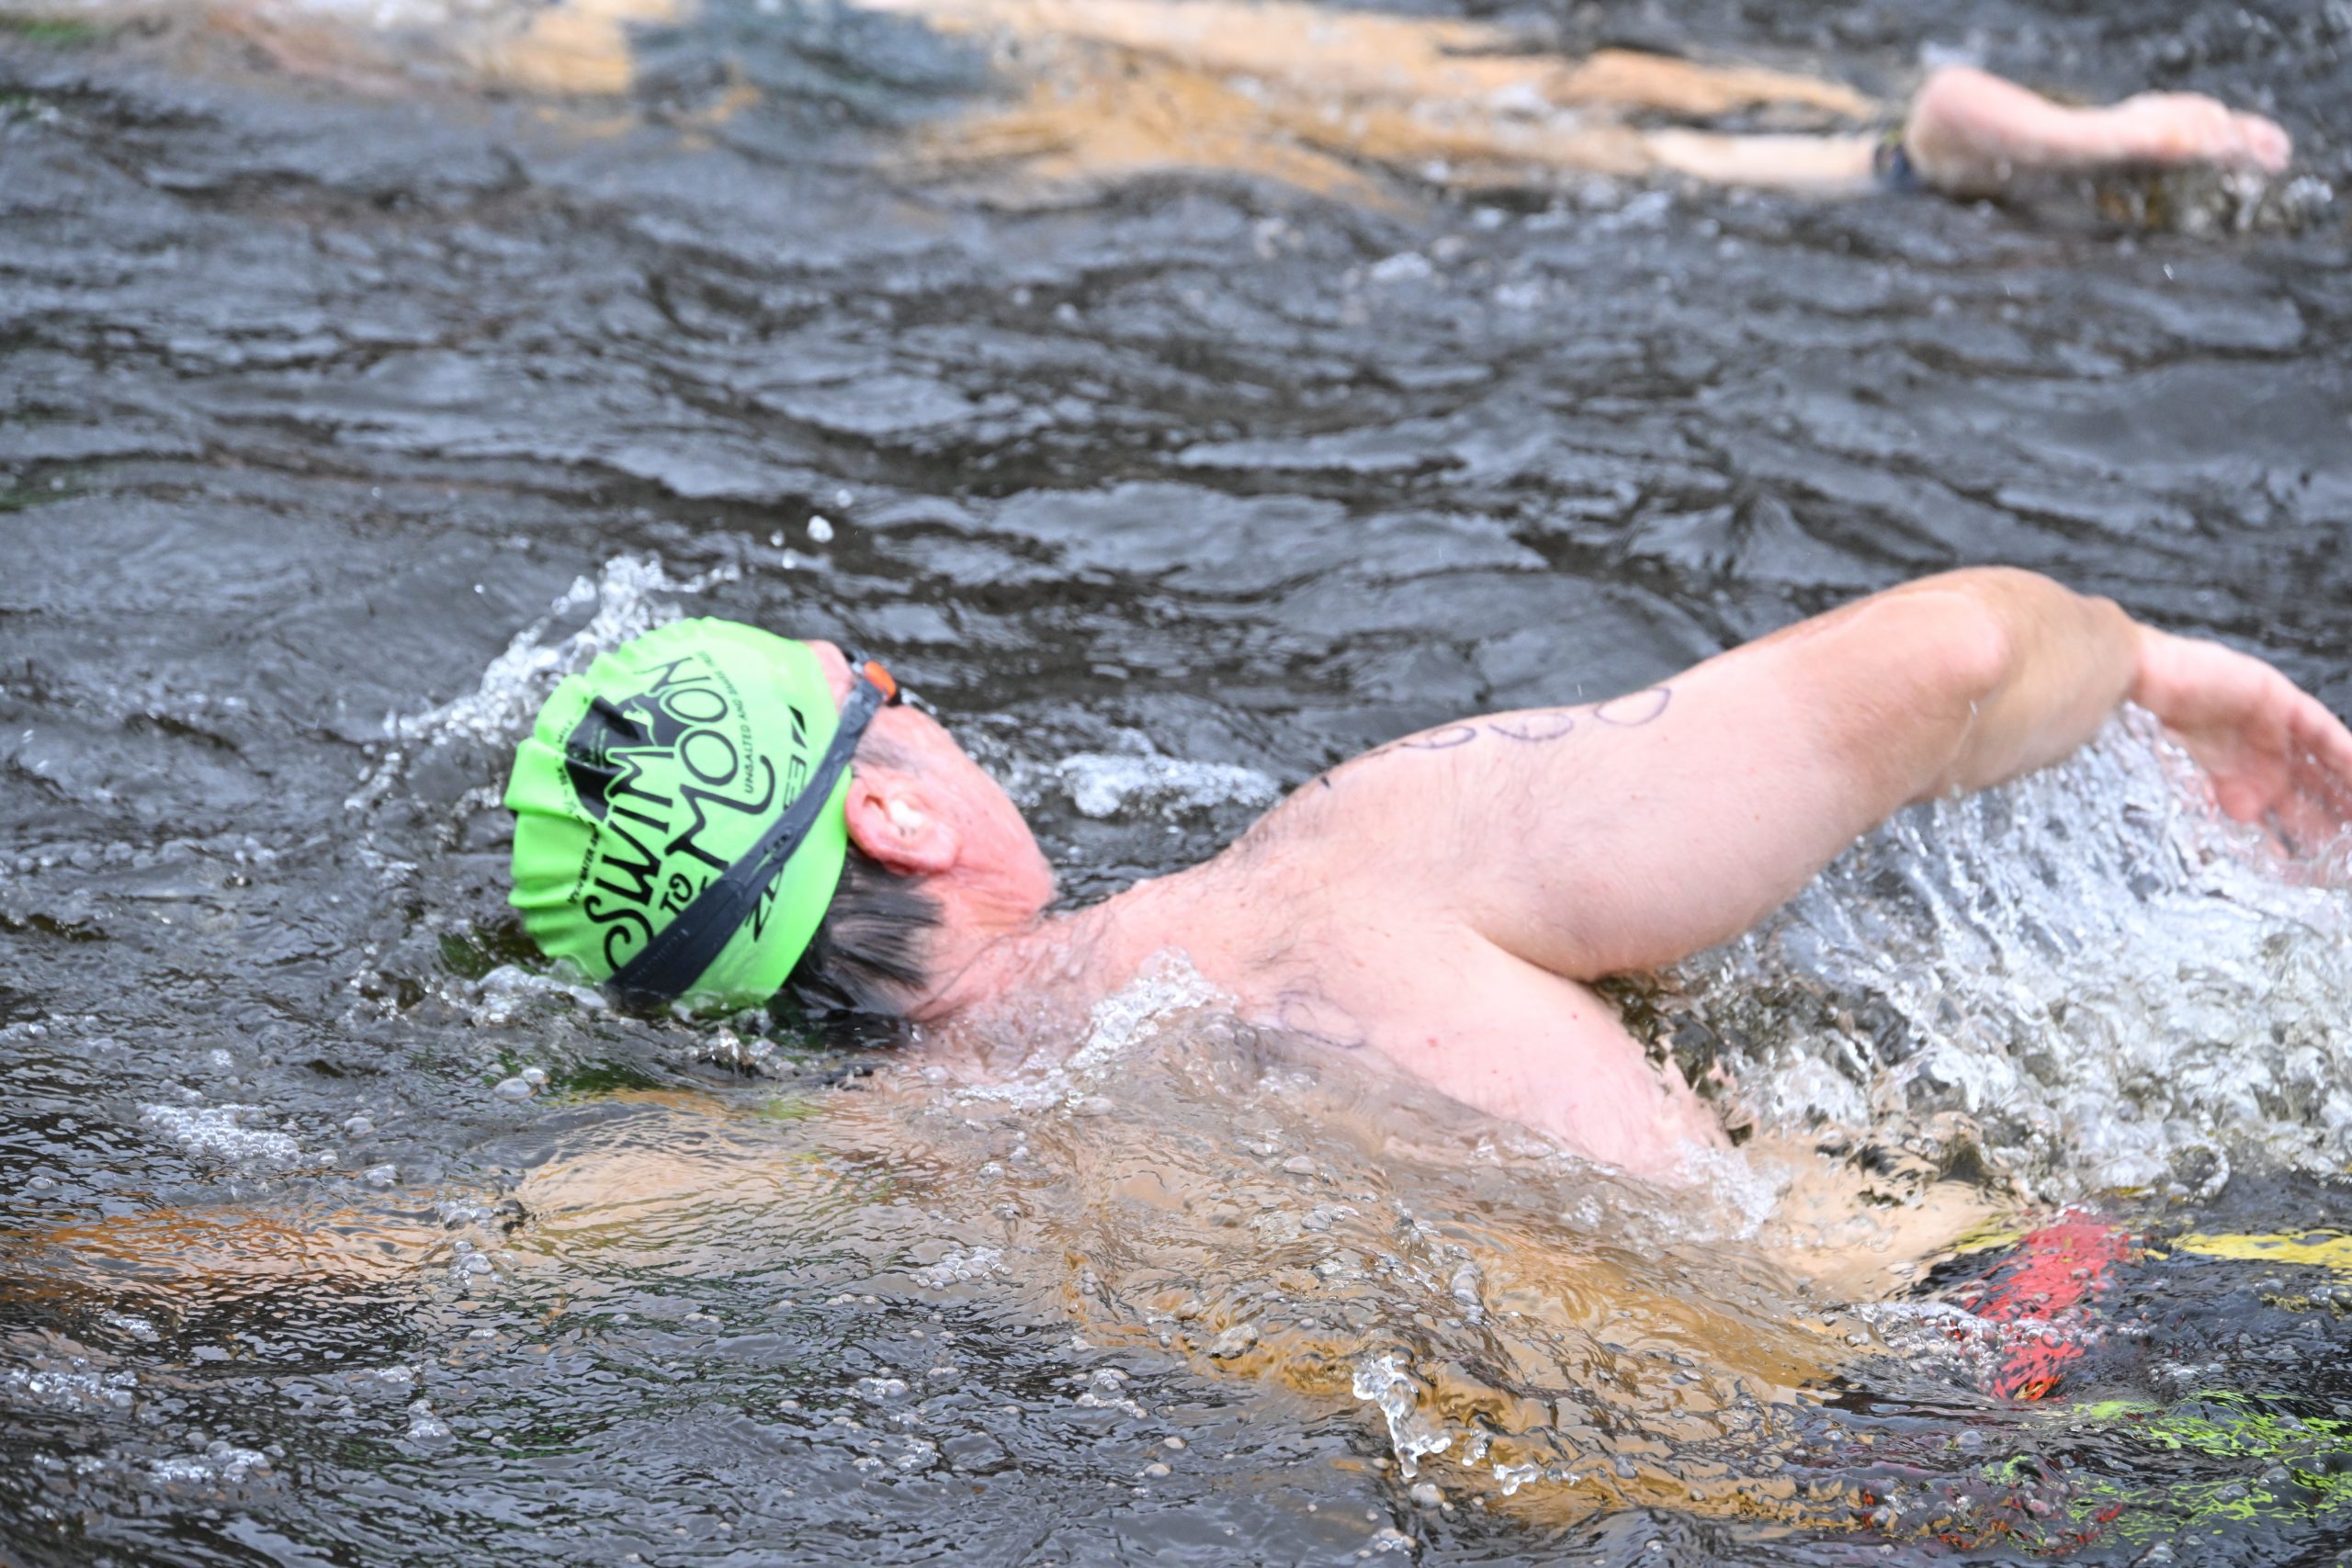
    The author in Half Moon Lake swimming to the moon. (Photo: Courtesy Greg Sadler Photography and Epic Races)

    There wasn’t a lot of time to savor the victory since I still had the Swim to the Moon 5-k race ahead of me which was only three weeks away. Swim to the Moon has enjoyed phenomenal growth as long distance open water swimming generally has been enjoying a surge in popularity. The event is now held over two days. It includes a 15-k swim—a staggering 9.3 miles, which is somewhat incomprehensible to me—and over the weekend there are almost 1,000 participants in all of the different events.

    Swim to the Moon is held just outside of Hell, Michigan. Here, the author is literally on the road to Hell. (Photo: Amy Kostrzewa)

    For Swim to the Moon, I had a very specific performance goal in mind. My finish times had been hovering just above two hours for the last two years and I was determined to punch through the 120 minute barrier. In search of this goal, and in preparation for the Bridge Swim, I spent a lot of time working with a swim coach to refine my technique and make myself more efficient. My old technique dated back to the mid-80s, and things have changed quite a bit in technique philosophy in the ensuing decades. So, I broke down my technique and basically had to relearn how to swim. By the time late summer rolled around I was swimming completely differently and felt like I was primed to break the two hour barrier. It felt like going from using mostly V-1 to being able to go mostly V-2.

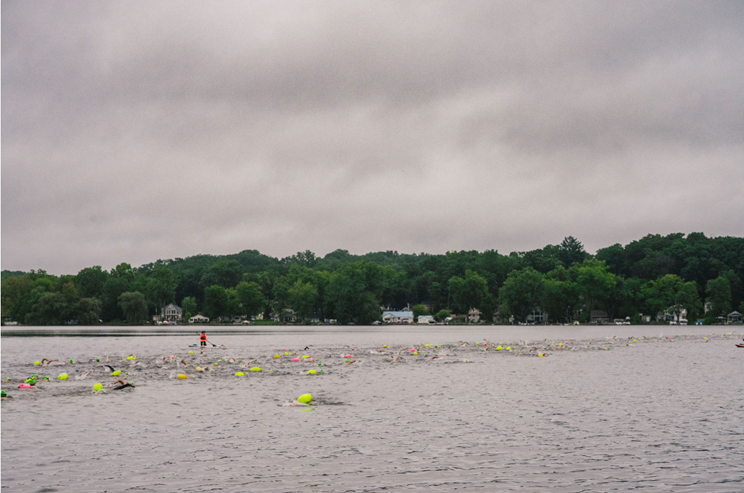
    Swimmers as far as the eye can see at Swim to the Moon. (Photo: by Aaron Palaian Photography/aaronpal.com)

    My strategy had been to settle in at the fastest pace I could sustain and try to hold it. I stuck to this strategy and only looked once at my watch the entire swim. But herein lies the problem with focusing on outcome goals instead of process goals. In Swim to the Moon, I swam hard, felt like I was swimming in a straight line, and fought through multiple major leg cramps throughout the swim. The entire race I felt like I had the two hour mark in the bag.

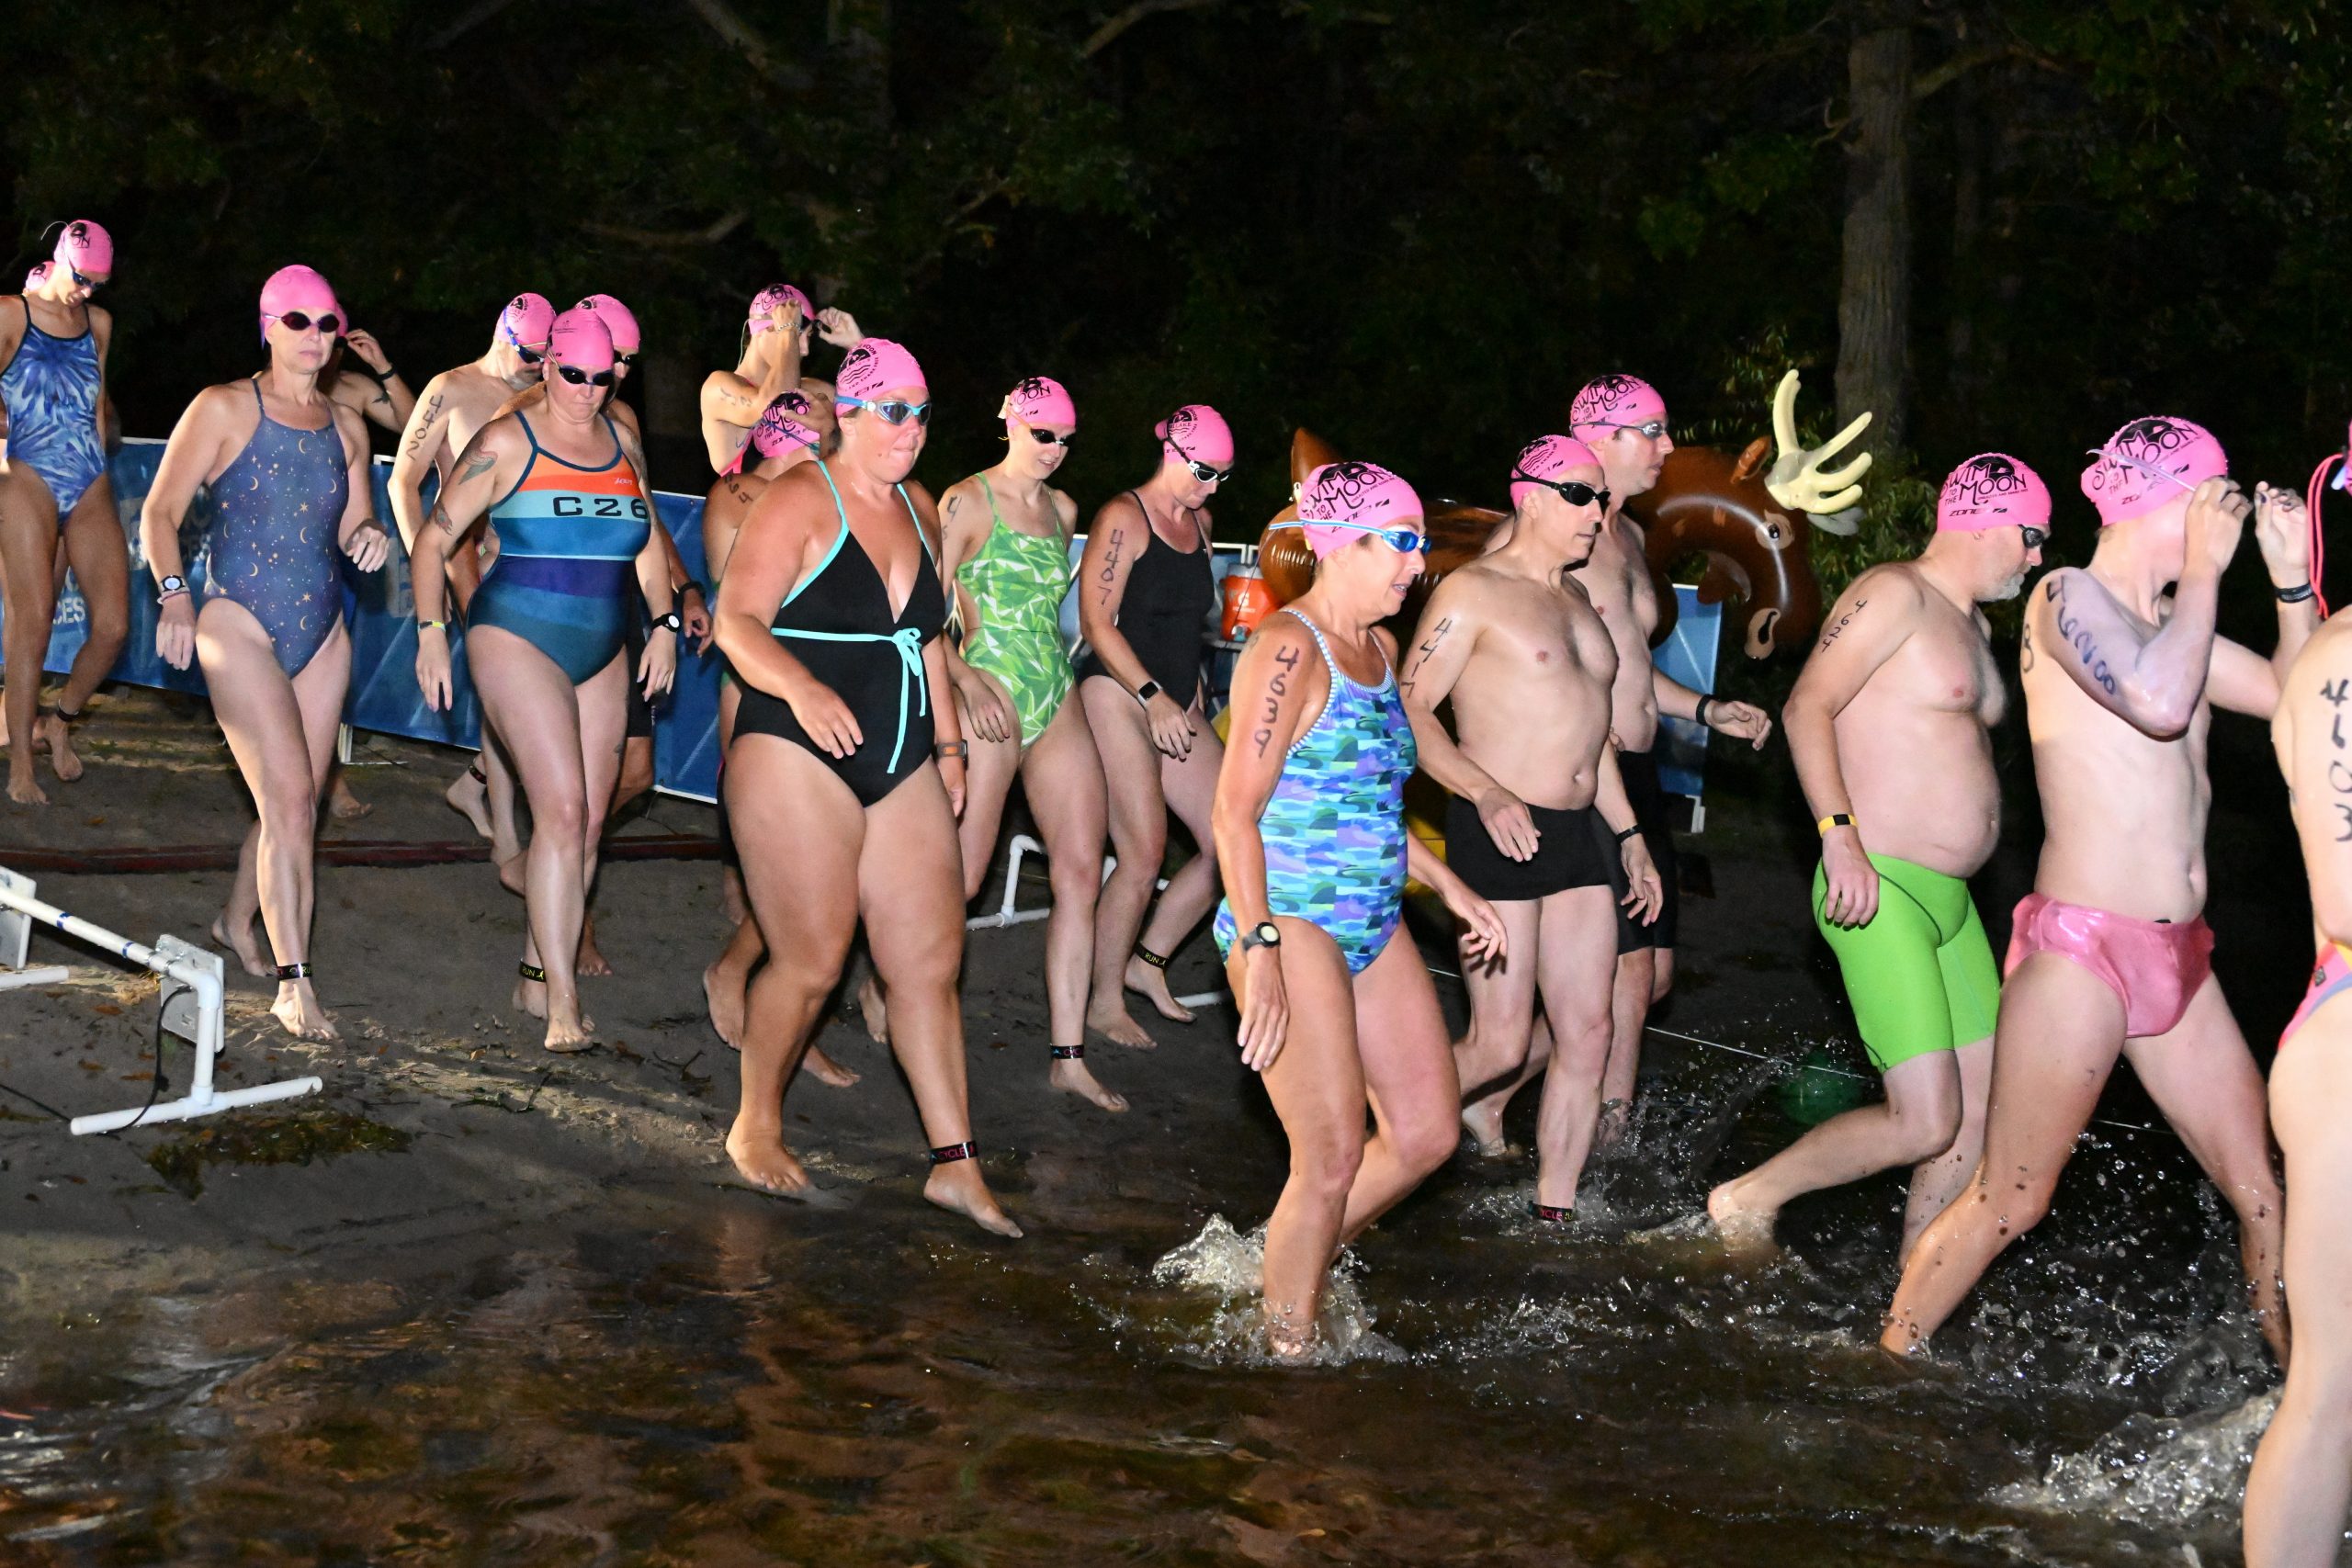
    Due to the length of time it takes to swim 15-k, that race starts in the dark before sunrise. (Photo: Courtesy Greg Sadler Photography/Swim to the Moon)

    As I approached the finish line, I was confident I had achieved my goal, but was then quickly crushed when upon exiting the water I looked down at my watch and saw 2:07 staring me in the face. Not the outcome I had wanted—not even very close. Instead of being proud and happy upon exiting the water, I was upset and confused. How could I feel like I was swimming so well, with my rebuilt stroke, and be five minutes slower than the previous year?

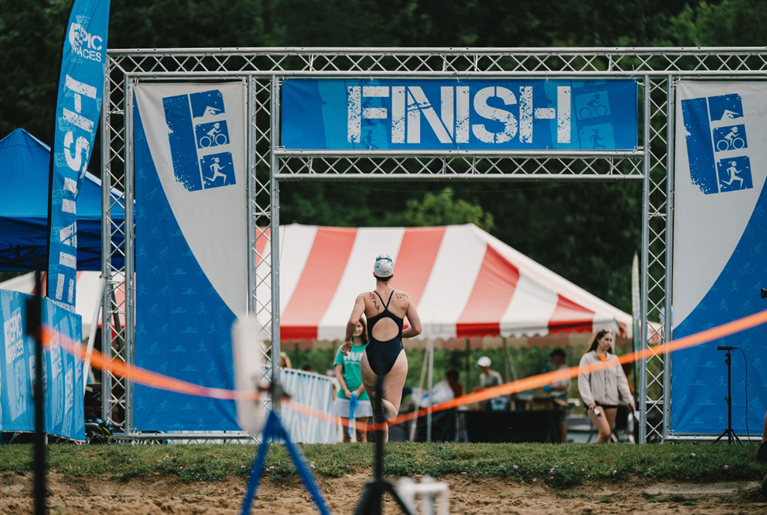
    By focusing on the results, I denied myself the joy of completing the journey. (Photo: Photos by Aaron Palaian Photography/ aaronpal.com)

    Unwittingly, I was enabling the arch enemy of happiness—comparison. Comparing yourself to others and to your former self is unproductive and I should know better, but nonetheless I went down that road.

    It took my wife’s positive mindset to urge me to remember the road I had journeyed the past eight years and to think back to how much it took to get from the couch to the pool, to marathon swimming. We also looked up the winner’s results and saw that all of the top swimmers were a couple of minutes slower than the prior year. The fact that everyone was a little slower was some consolation.

    But this is the trap in focusing on performance goals. There are just too many things out of your control for it to be a good metric. The wind might be from a bad direction, the course might be set up slightly differently, you might encounter traffic which negatively affects you—similar to ski racing. Or, you just might not have a great day. All of these things, and others, were possible factors affecting my time. I’ve really tried to learn the lesson to focus on process and not outcome, but focusing on outcomes is a difficult mindset to walk away from.

    A swimmer passes under a bridge on the way to swimming to the moon. (Photo: Photos by Aaron Palaian Photography/aaronpal.com)

    I’m proud of my efforts to reclaim part of my life. I’m proud of the discipline and persistence it took to get from the couch to completing long swims, but part of me still felt empty, dissatisfied, and lacking. It’s one thing to say, “focus on process goals,” it’s another thing to reach deep into your psyche and override deep personality traits and learned behaviors to actually make that shift happen.

    If I contrast how I felt after Swim to the Moon compared to the Mackinac Bridge Swim, the difference is stark. After the Bridge Swim, once I had recovered, I felt a great sense of accomplishment, pride, and satisfaction. After my 5-k swim, I didn’t feel any of that initially. It took a great deal of reflection to bring the positive emotions to the top. I think one big difference was that the Bridge swim wasn’t a race; it was an event to test your individual ability to make it to the other side of the lake. Since there wasn’t any timing involved, there wasn’t any of the baggage which goes with that. There wasn’t any comparison to others, and the only metric which mattered was crossing the finish line. Free from the built in outcome goals of racing, mentally I found myself in a way better place after the Bridge swim. Does this argue for giving up racing, or not wearing a watch? I’m not sure, but there is a case to be made for it. Should I force myself after a race to walk away without looking at the results and promise never to check them online? That seems contrived and completely artificial. If I’ve really reached the point where process matters more than outcome, then I should be able to find myself at the bottom of the results sheet and not really care. You can’t fake satisfaction.

    If I am being completely honest with myself I just haven’t reached the point where I can truthfully say that process goals mean more to me than outcome goals. I still look at race results and think about what it would take to trim 10 percent from my times. I still commit the cardinal sin of comparing myself to others on the results list. Maybe I don’t trust the process enough, or maybe the idea of results are just too hard wired into my psychological makeup to change? After all, most of the arc of my life—and probably the same for most people reading this— has been charted along outcome goals since being a teenager. Are the test scores good enough, is the GPA high enough, is the bar result passing, are the jury verdicts positive, are the annual revenues high enough, are the election returns the right ones? All of these outcomes from different parts of careers in different parts of my life mattered deeply and guided my efforts for decades. And here is where there is a larger societal disconnect. In most of life, process isn’t rewarded; outcomes are. The outcome based view of success applies to almost every walk of life. Have a leaky faucet that the plumber didn’t repair properly, or a lawsuit that didn’t go well? No one really cares about the process in these circumstances, just the results. The list is almost endless of areas of life where only the outcome matters. It’s mainly in athletics that process goals are focused on; so it’s a bit of an outlier.

    To turn everything in one’s head around and say, “I’m not going to worry about the result, and just think about the process along the way,” may at the end of the day be a more positive and productive mindset, but converting my outlook to truly accepting the process as being more important than the outcome may be a more daunting task than dragging myself out of the hole I was put into by chronic illness, or dragging myself across the Mackinac Straits.

    Repeating the Mackinac Bridge Swim is still up for discussion. (Photo: Courtesy Mackinac Bridge Swim)

    So, now that I’ve fought my way back to being able to compete, I might have one more challenge to overcome; starting to focus on enjoying the journey, appreciating the process, and worrying less about the results. I don’t know if that’s an achievable goal, but it might be just as important as getting myself back into the game in the first place, and like the man said in part one of this article, “I didn’t say it would be easy, I said it would be worth it.”

  • Lessons in Process Goals

    Lessons in Process Goals

    I think Jessie Diggins has taught the world many things. Maybe it’s how to find your grit and accept the pain while you push your body to new limits. Maybe it’s a better understanding of eating disorders, where to find help, and knowing you’re not alone. Or maybe it’s the art of applying face glitter on race day. I’ve learned a bit about all of those things (when Jessie says you’re getting glittered, you’re getting glittered), but mostly I’ve learned how to be a better physical therapist.

    As most cross country ski fans know, the 50km race in Holmenkollen, Norway is the Super Bowl of the sport with tens of thousands of fans lining the race course. Until the 2023 edition, women were only permitted to race 30km because no one, or at least the old men in charge, thought they could handle the longer distance without irreparable harm. After years of pushing, the women were finally going to race the golden distance equal to the men. This meant a lot to Jessie and she was one of the favorites to win.

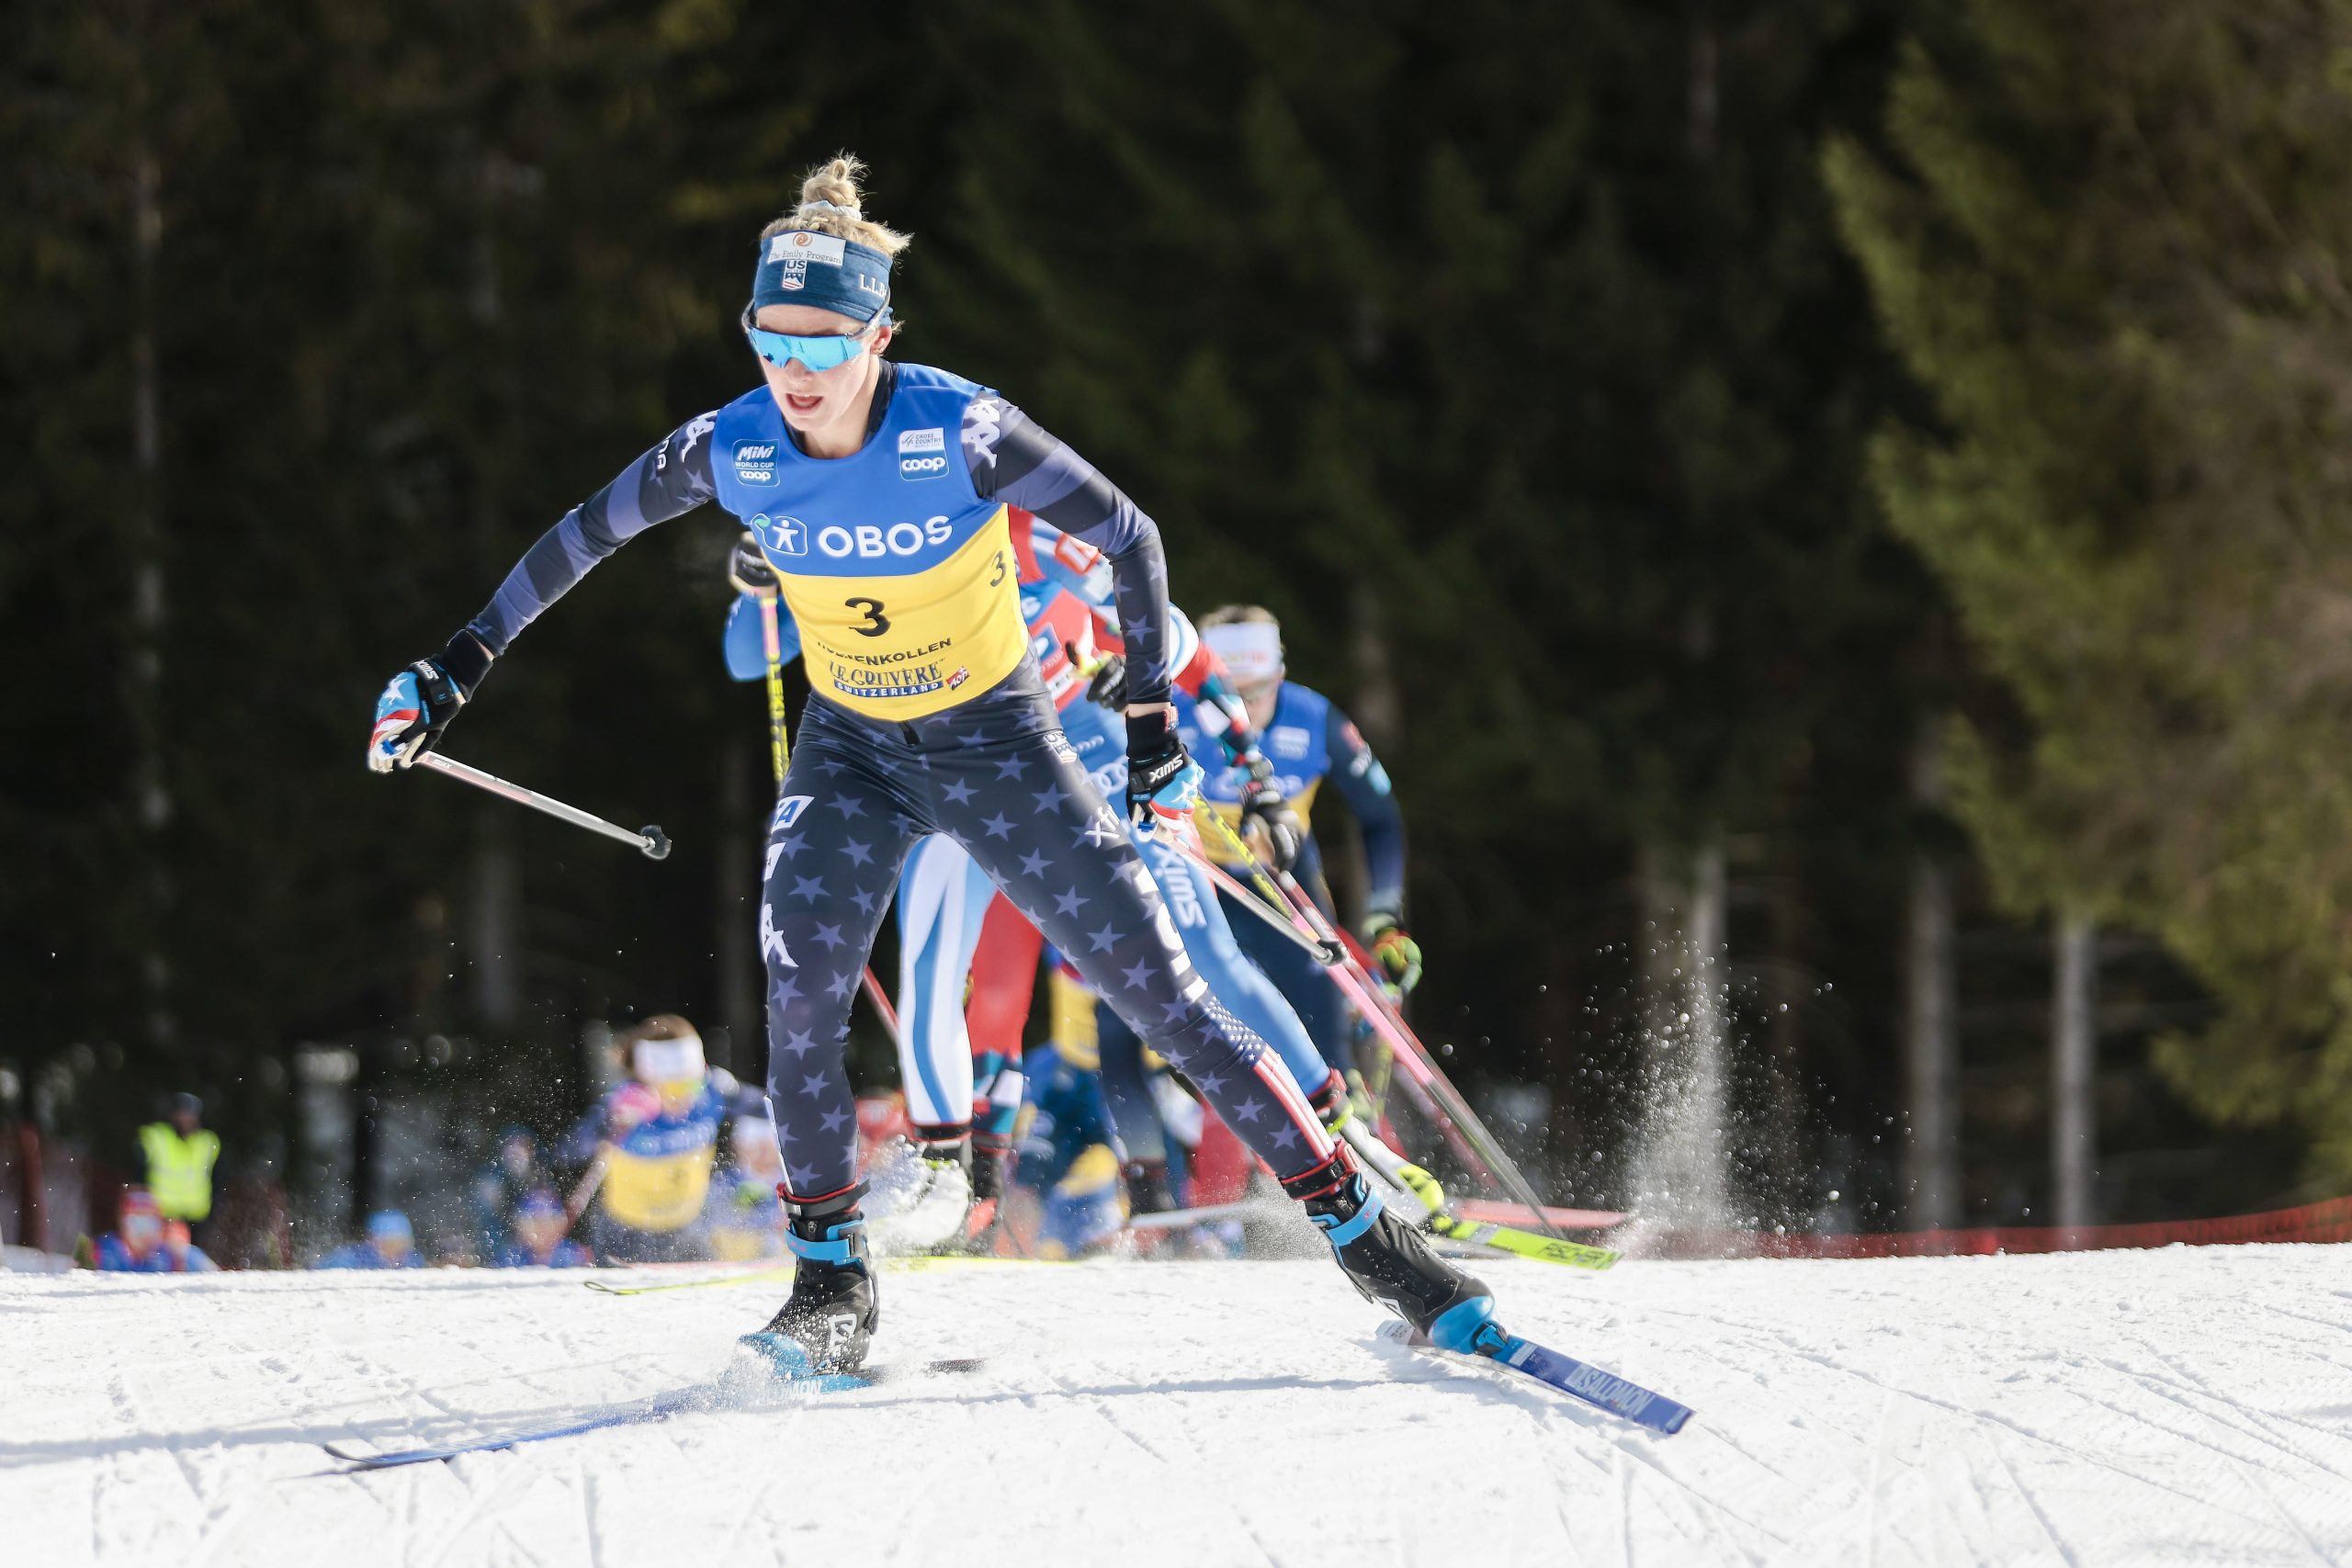
    Jessie Diggins (USA) on her way to a podium finish during the first 50k version of the famed Holmenkollen in Oslo (NOR). (Photo: NordicFocus)

    On the eve of that race, I was on physio duty with the US Ski Team and Jessie was on my treatment table for me to work out some kinks and help prep her body for the race. Small talk can help the time pass and maybe take the sting out of my thumbs digging into tired muscles. At some point during that treatment session I asked what her goals were for the big race. I expected her to say a win, or more humbly a podium place, or maybe even talk about sprinting for bonus points at the top of the hill. But her goals had nothing to do with the results of the race and everything to do with how she was planning to execute her day. She described her breakfast plan, her warm up plan, and her race plan which was all about staying relaxed, not stressing if she was out of position, getting her drink feeds, and enjoying the fact that she, a woman, was finally getting to race 50km at Holmenkollen. Yes, she admitted that a win would be really, freaking cool, but she was focusing her energy on the things that she could control. She knew that another skier being better on the day was out of her control. She knew that a miscalculation in ski prep, leaving her with slower-than-the-pack skis, was out of her control. Instead, she chose to focus her energy and set goals based on what she could control, not based on her place at the finish line. She was focusing on how to do what she does.

    Psychologists call these process goals vs outcomes goals. Think of process goals as characteristics of how you do what you do, not whether you hit objective markers. For Jessie, these were her strategies for how she was going to approach and execute her race day, not what the results sheet said afterwards. If you’re doing an interval session, the outcomes goals are the time splits, heart rate, lactate, etc that you’re targeting while the process goals are the characteristics or nuances of the workout: technique, form, pacing, breathing, posture. Again, these process goals are not the what but more the how. The same distinction could apply to school work where the test score is the outcome goal and the attention in class, quality note taking, focused studying, and a good night’s sleep are the process goals.

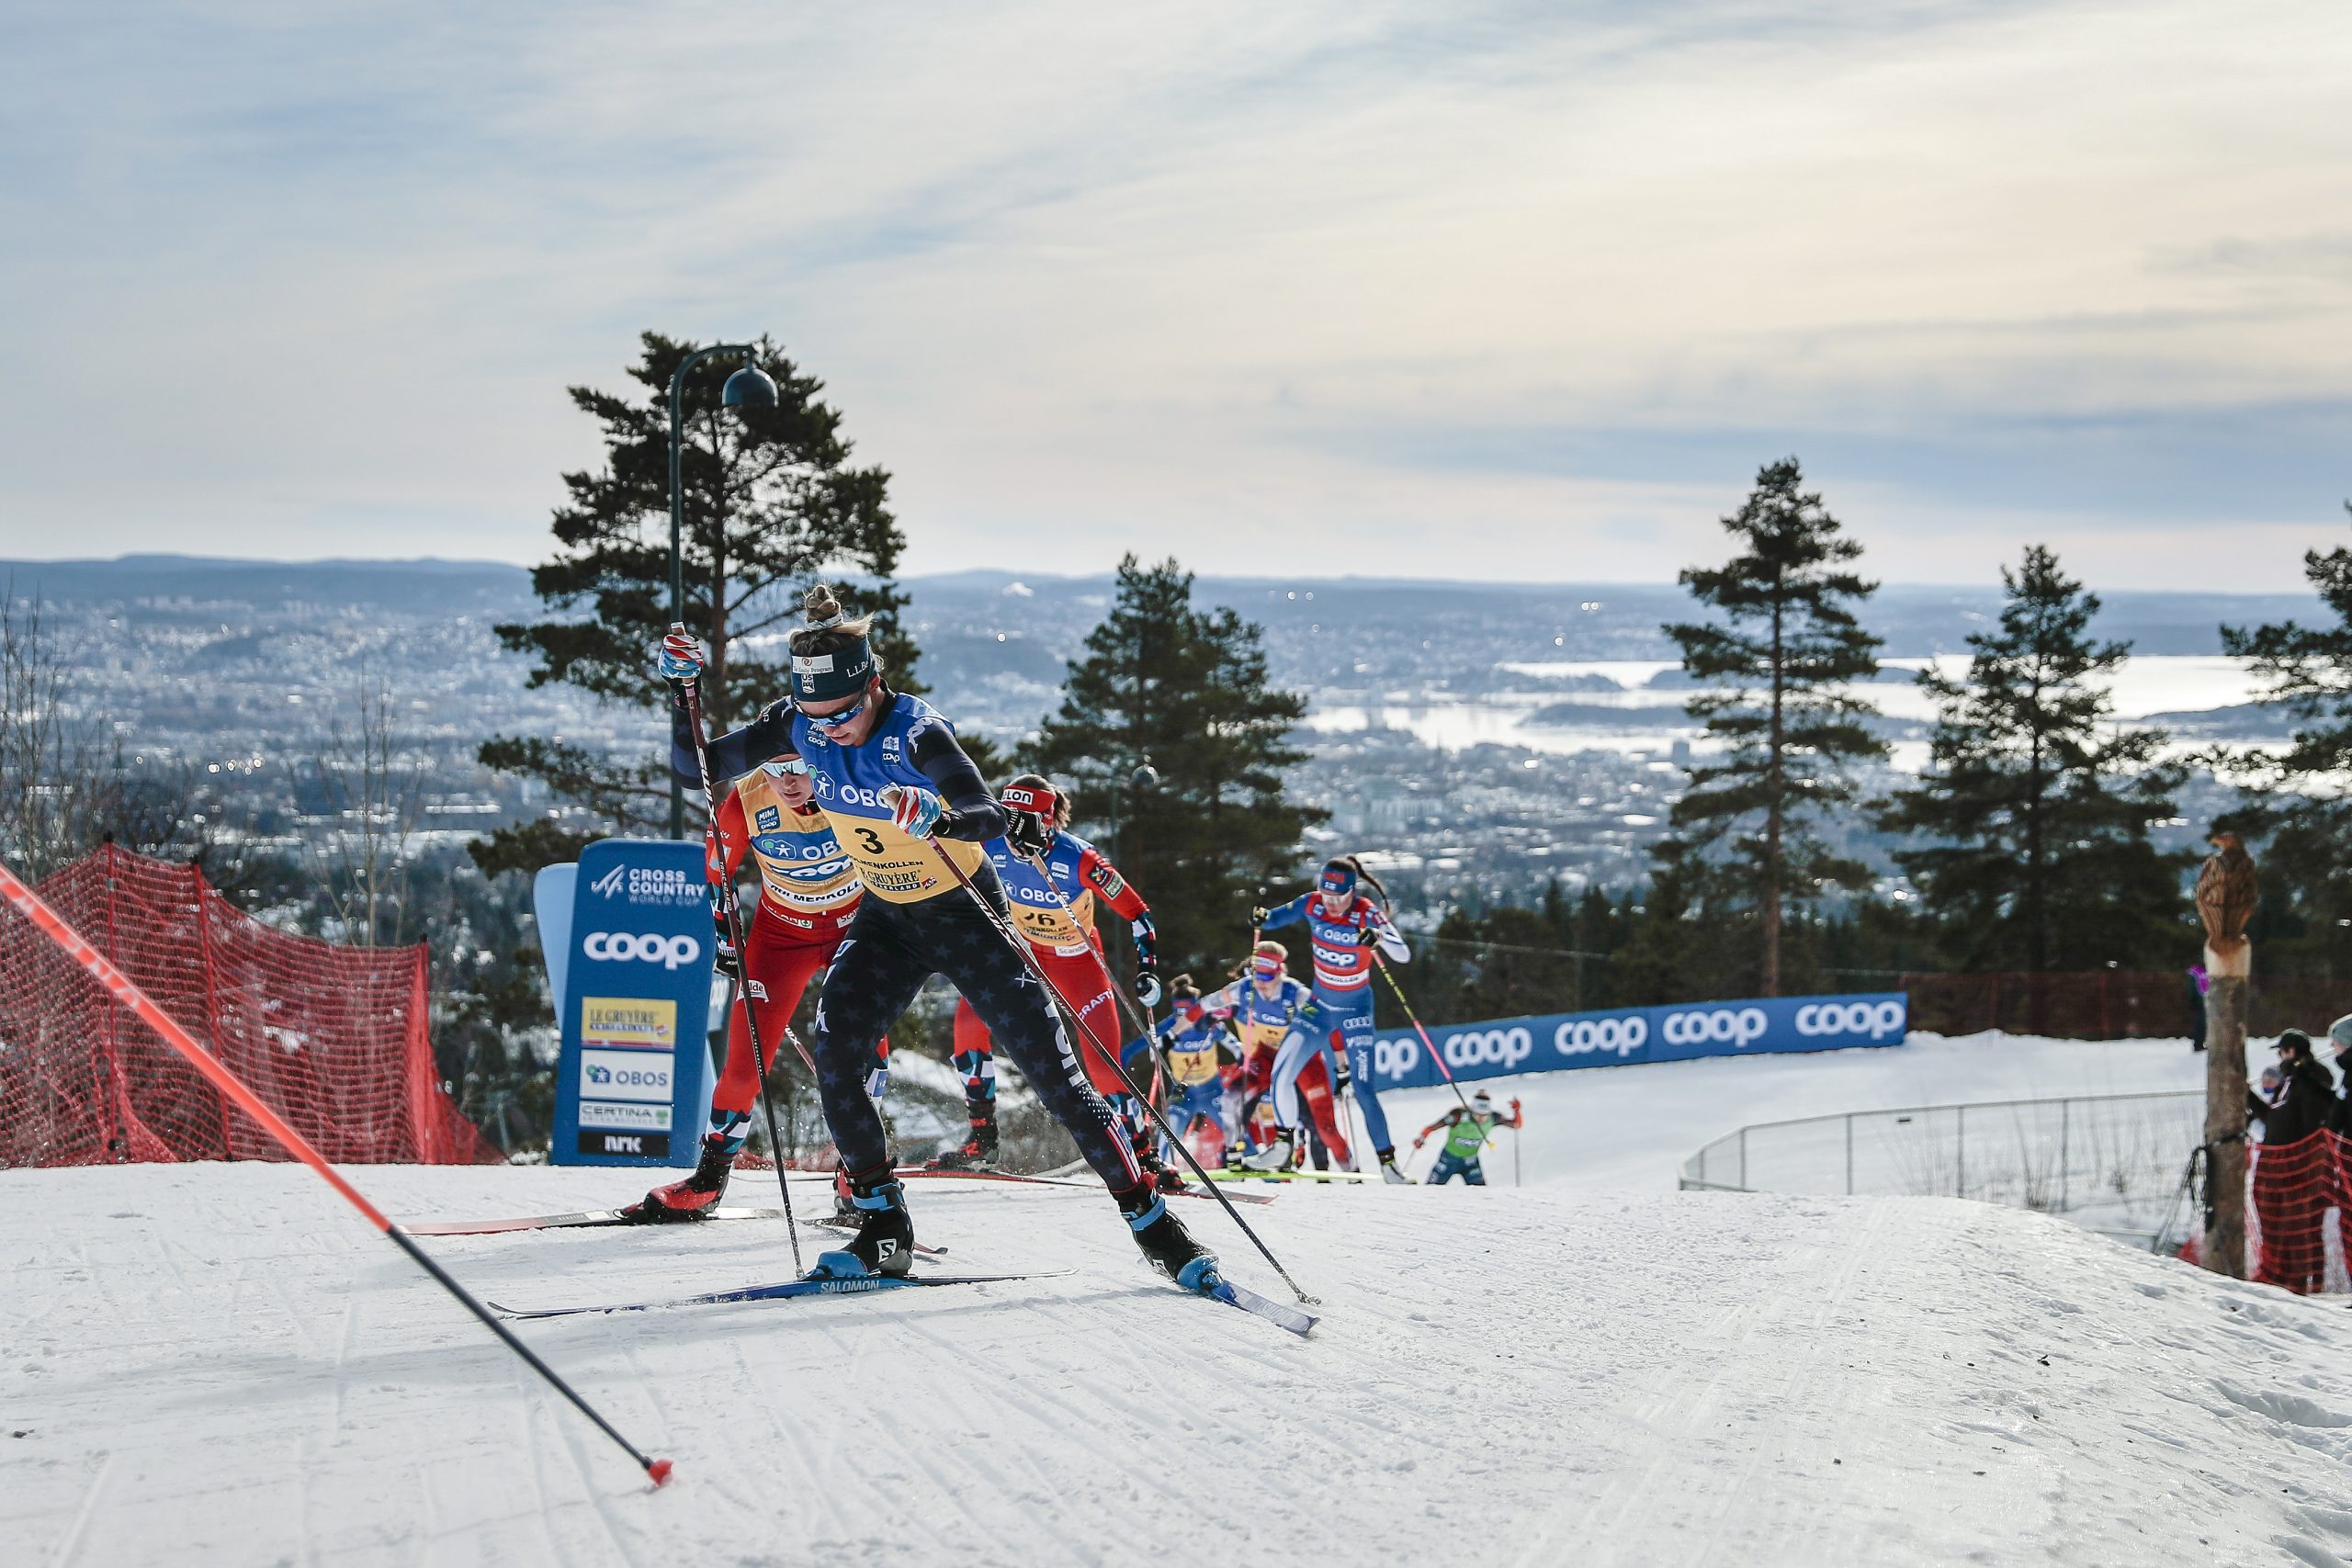
    Diggins climbs away from the stadium on one of the early iconic climbs on the Holmenkollen course with Oslo (NOR) in the background.
    (Photo: NordicFocus)

    Applied to sport settings, this meta-analysis makes a very strong case for setting process vs outcomes goals. As the authors note in the article, “process goals were more beneficial for increasing performance and self-efficacy than other goal types, [which] is a noteworthy finding, given self-efficacy has been shown to enhance decision-making, increase motivational intentions, and is positively correlated with sport performance.” And there’s no reason to think that the same couldn’t be said about the application of process goals outside of sport.

    I have been a physical therapist for nearly 20 years. For the vast majority of that time, my self-efficacy was tied to the outcomes of my patients. My mood at the end of the day was very dependent on their progress. The first thing we PTs ask when you come into the clinic is, “How are you doing? How’s your pain?” If the answer is “better” then I’m calm, relaxed, and clear to think of how else I can help this patient. If the answer is “the same” or “worse” then my heart rate and stress go up and my clouded mind has a harder time focusing on the decisions required to recalibrate my treatment plan. One or two of these patients a day and I can weather the storm. If that’s most of my day, I’m going to leave the clinic in a self deprecating funk as the worst PT on the planet.

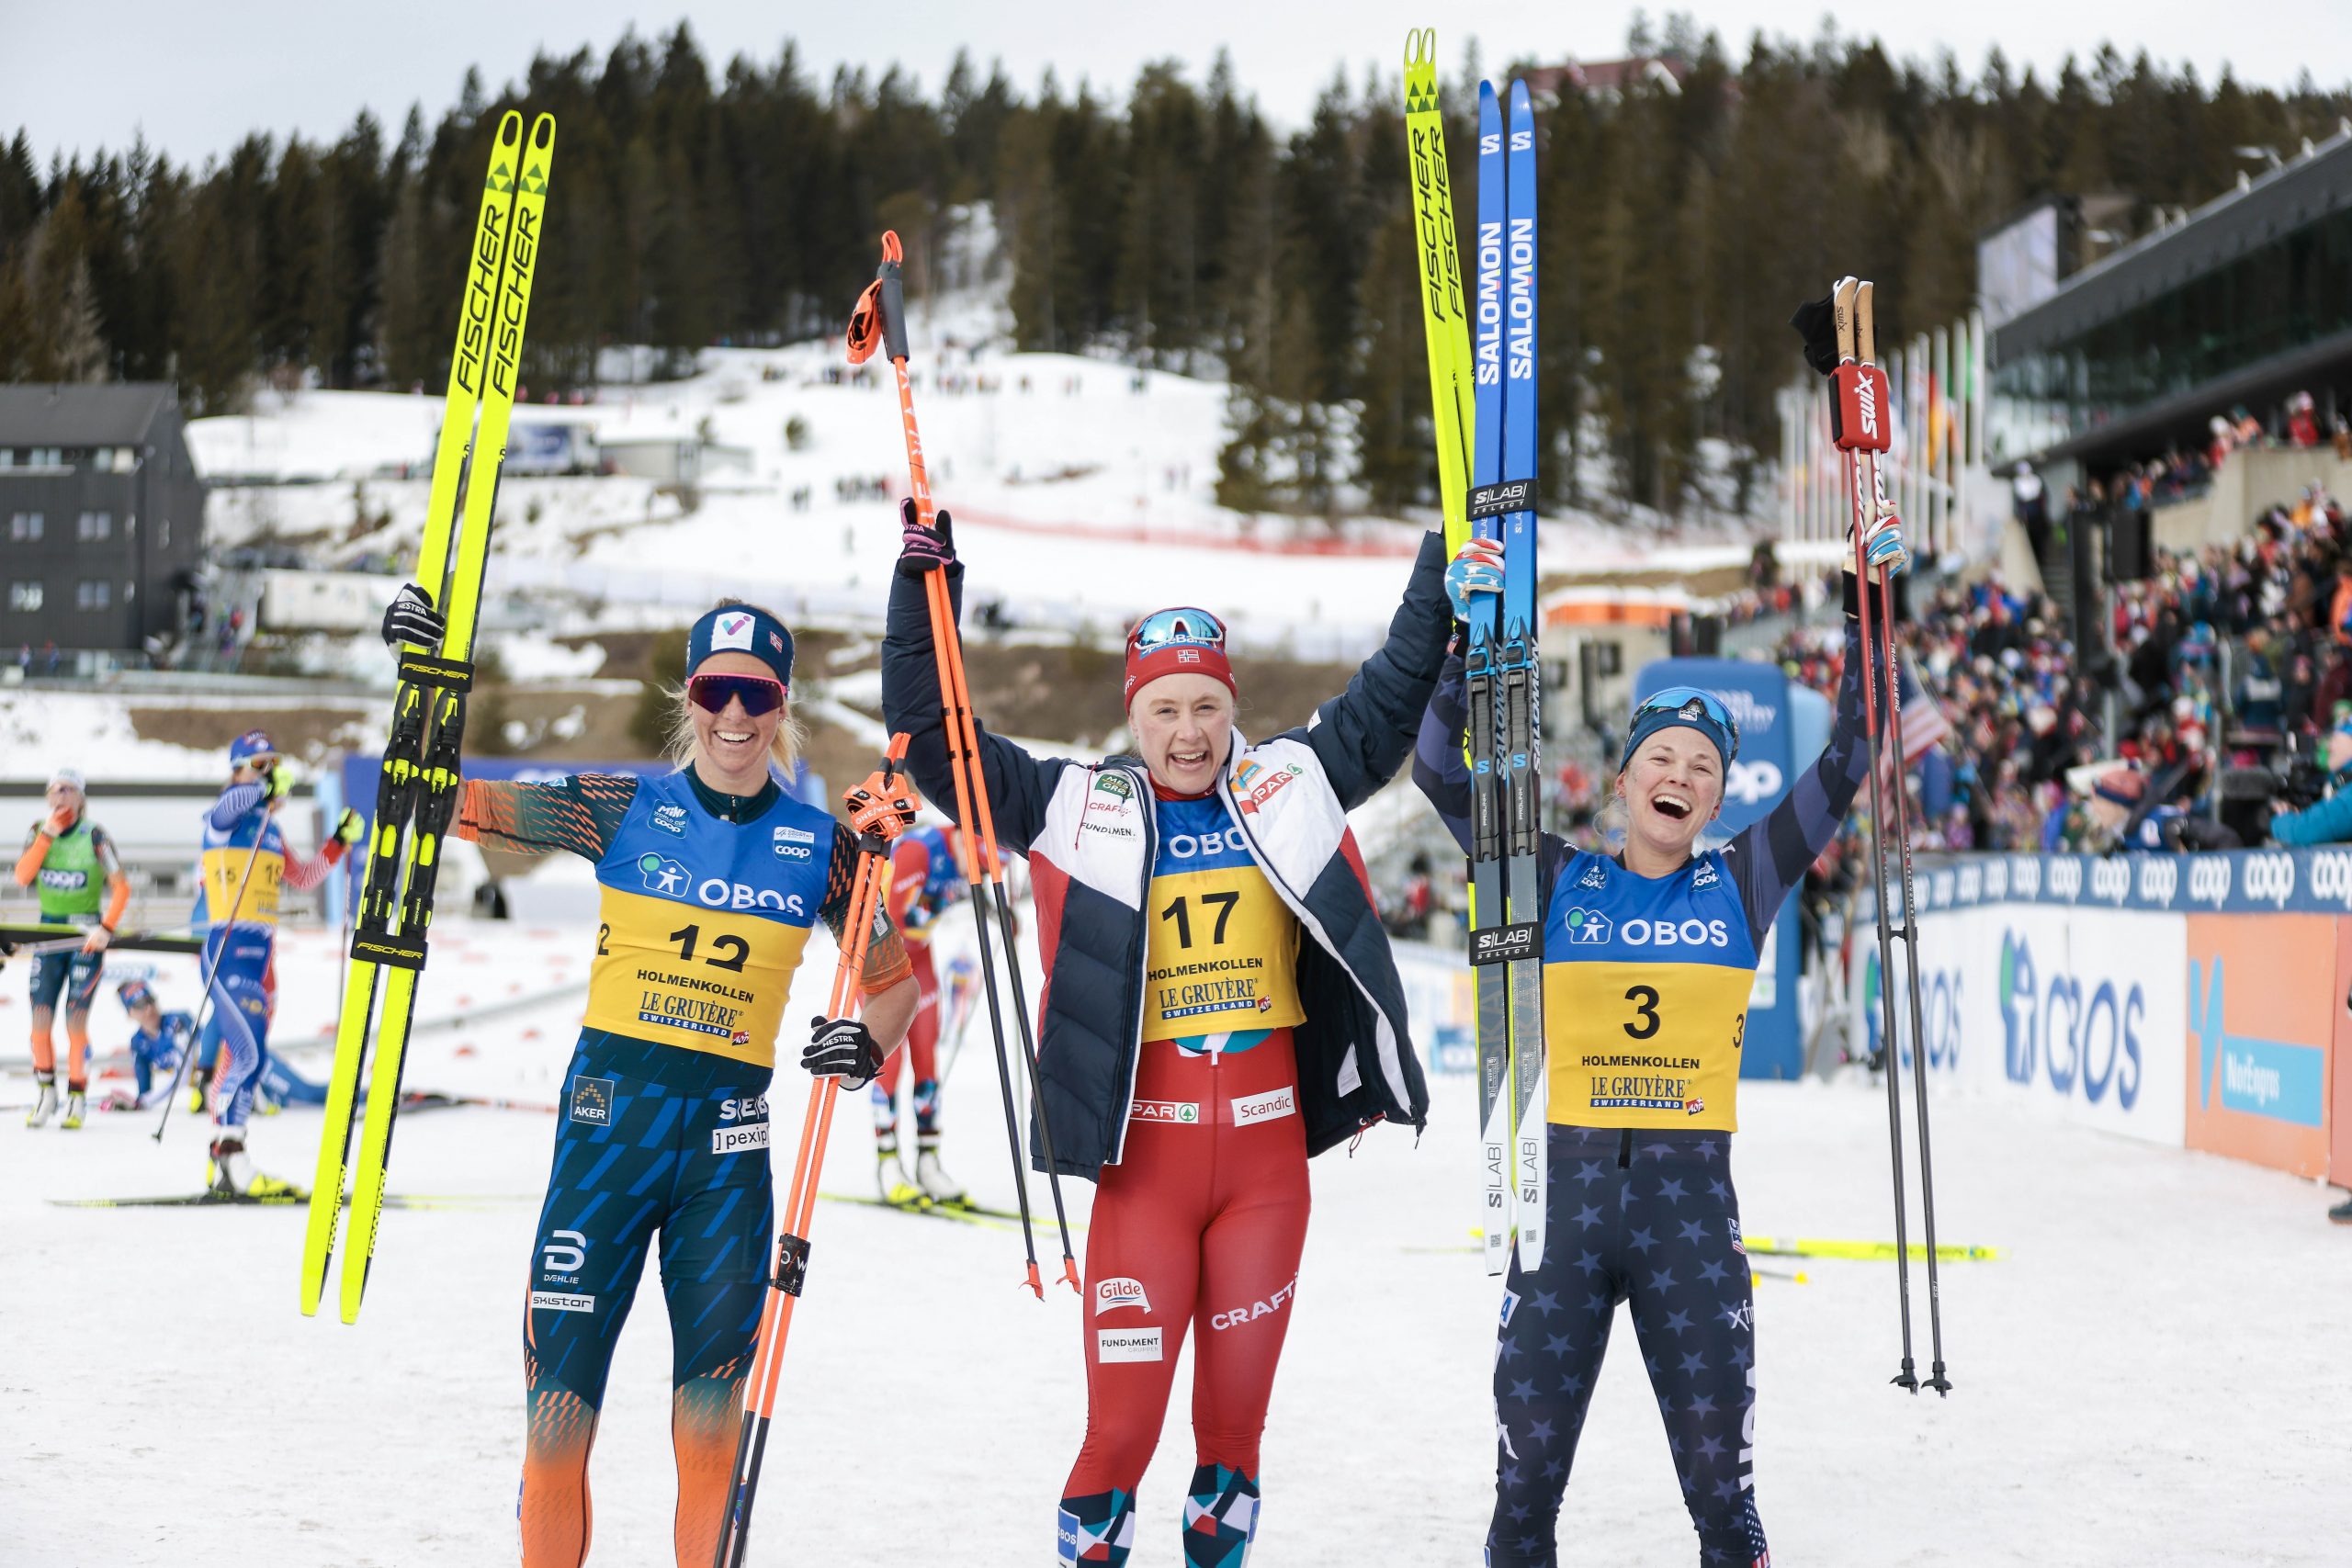
    Jessie Diggins finished in third place in the historic
    Holmenkollen behind Astrid Oeyre Slind (2nd place – NOR) and Ragnhild Gloeersen Haga (1st place – NOR). (Photo: NordicFocus)

    My patients’ outcomes–their pain, strength, mobility, function, quality of life–are exactly that. They are outcomes goals. And they are very important. But that pre-race conversation with Jessie made me realize that they’re not always within my control. Once the patient leaves the clinic, I have no control over whether they do their home exercises, whether they’re cutting back on training as we discussed, or whether their life stressors are a significant contributor to their symptoms. I can only control how I do what I do. But if I know that I’ve checked my boxes—listening to the patient, gathering and analyzing information, creating a reasoned treatment plan, and implementing that plan—then I’ve done the best that I can do regardless of the outcome.

    This shift in focus from patients’ outcomes to my processes has not diminished my empathy, compassion, or desire to help patients achieve their goals; however, it has enabled me to leave the clinic on a high note far more often than not. I went from being another burn-out statistic (studies like this one place blame on a lack of “basic psychological needs of autonomy, competence, and relatedness”–not dissimilar from what are considered the attributes of process goals) to enjoying my time in the clinic. My work is still very cognitively and emotionally challenging, but I find that my cup is full more often than it is empty. And placing more focus on how I do what I do has improved my performance with patients, ultimately making me a more effective PT.

  • Running From Injury

    Running From Injury

    For better or worse the old cliche, ski racers are made in the summer still applies. Cross country runners are made in the summer too. Conveniently, running is excellent training for skiers and obviously runners. Inconveniently, there tend to be a lot of injuries associated with running. And even more inconveniently, we don’t have a ton of research to tell us why or what to do about it. 

    The clearest correlation to running related injury appears to be training error, which is estimated to account for 60-70% of injuries. But less clear, as this paper digs into, is which variable is most at play: volume, duration, frequency, or intensity? In an attempt to quantify “training error” and provide some guidelines, we have what’s come to be known as the 10% rule. The basic premise here is that you shouldn’t increase your weekly running volume by more than 10% over the previous week. But the 1st rule about rules is that there are no rules. So, this is more guidance than gospel. 

    In addition to being a standout skier and soccer player Sammy Smith ran cross-country. (courtesy photo)

    What might be closer to a rule is that injuries happen when the load that’s placed on the body exceeds the body’s ability to tolerate that load. In this equation, we can modify load via training parameters like the variables that the article above attempted to dissect: weekly volume, duration of runs, frequency of runs, and intensity (speed and/or elevation gain and loss). We might further modify running load via surface (pavement vs dirt), footwear quality, and running form (more on that in a minute). On the other side of the equation, we can modify the body’s ability to tolerate load via exercise and preparation for the demands of running (much more on that in a few minutes).

    Just like there is no perfect skiing technique, there is no perfect running form. However, in both sports we do have an optimal range, and when movement patterns fall outside of that range they become inefficient. Decreased efficiency equals both decreased performance and increased load, neither of which are desirable. Inconveniently (again), it’s very hard to define what proper running form looks like. It’s maybe easier to define what it doesn’t or shouldn’t look like. Even then, there are only a handful of moderate correlations between aberrant running form and injury. 

    At the top of the list is overstriding, aka landing with your foot well out in front of your body’s center of mass. (This is not to be confused with heel striking—landing with initial foot contact through your heel as opposed to mid foot or forefoot. Heel striking isn’t necessarily overstriding though most overstriding does tend to be characterized by heel striking.) The primary issues with overstriding are an increase in peak/impact forces and a decrease in control of the knee, both of which are going to increase load on the body. Without diving too deep into the rabbit hole, the best way to correct an overstride is to increase the cadence or steps per minute—more steps at the same speed equals a shorter stride length. To train this, you need to be on a treadmill at a fixed speed (if you try to increase your cadence outside, you’ll likely just run faster) with your steps timed to the rhythm of a metronome. The target is to increase your steps per minute by 10%, which has been shown to effectively decrease loading rates.

    Jessica Yeaton enjoys training in the terrain near Albuquerque, NM. (Courtesy photo)

    Next up is a lack of pelvic control or what’s often called hip drop or femoral adduction. This occurs when the muscles of the stance leg are overwhelmed and unable to control the hip, and therefore the pelvis. As a result the pelvis drops on the opposite side, altering knee kinematics in the process, and frequently causing knee pain. We look to correct this through exercises targeting hip strength, coordination, and control as well and balance and stability in single leg stance. Conveniently (finally), this would be all of our ski-specific dryland exercises and drills. If you are a FasterSkier regular, then you’ve already seen numerous exercise suggestions here, here, here, here, and here, all of which are quite appropriate for running injury prevention.

    That’s a great segue into the other side of the equation: the body’s ability to tolerate load. To paraphrase Geoff Burns, PhD from a recent Science of Sport podcast on running biomechanics, It’s not any one component—joint or muscle—that correlates with injury or performance, but how the system behaves as a whole. We must behave like pogo sticks. More force in equals more force out. But the body must be able to withstand these forces and be able to direct them appropriately. 

    Novie McCabe and Sophia Laukli on a training run in Alaska. (Photo: Novie McCabe)

    Essentially, Dr Burns is saying that running is an inherently high load activity and the body must be adequately prepared (strength, stability, mobility, etc) to handle these loads. Despite Instagram posts proclaiming Five Exercises Every Runner MUST Do! there is no magic exercise. I literally asked three different colleagues, all running injury specialists, What are your top three exercises for preventing running injuries? Inconveniently (here we go again), I got three different answers. 

    Not to use that as a cop out, or get away without including pictures of my bald head and yellow-walled basement, here are MY top three exercises for runners (and skiers). These, plus all of your other strength training and pay-to-play maintenance exercises, should be in the mix two or three times a week. As with any exercise, the goal is to challenge or nudge the body in order to get the desired adaptations. This, as with all training, is a bit of a Goldilocks thing: too hot and the body is unhappy and let’s you know about it; too cold and nothing happens. Please be aware that these exercises (and the ones in my previous articles linked above) may not be your Goldilocks. If you are currently dealing with a running related injury (or any musculoskeletal pain), please visit your friendly, neighborhood physical therapist instead of searching for an internet cure.


    Triple Extension

    This is a classic running form drill to promote pushing through the hip, knee, and ankle. The shape–the ability to fully extend the hip and knee while going high on your toes–is arguably more applicable to sprinters than distance runners; however, it makes my list due to the work done by the calf muscles which are major players in running.

    Triple Extension Start (Photo: Ned Dowling)
    • Stand on one foot about 3 feet away from a wall. Hands are on the wall at about shoulder height. Imagine the wall is falling on you and you need to push it back upright. At the foot, your weight is biased toward the front of the foot so the heel is just high enough off the ground that you could slide a credit card under it.
    • Still holding up the wall, drop down into a low squat with your opposite leg trailing behind. 
    • With a quick push, stand as tall as you can. You should have equal weight from the inside to outside of the foot, and the knee and hip should be straight, but thinking about getting tall often accomplishes the task.
    • If doing this exercise on one leg is too challenging, you can do it both legs together.
    • Aim for 2-3 sets of 10x on each side. This is also a good running warm up.
    Triple Extension Finish (Photo: Ned Dowling)

    Bulgarian Split Squats aka Trail Leg Lunges

    These work the glutes and quads more than squats due to the staggered stance and place more load (and balance demand) on the front leg than traditional lunges. More bang for your buck! The version I’m showing uses a hip strategy/hip hinge/trunk lean to increase the work done by the glutes.

    Bulgarian Start (Photo: Ned Dowling)
    • Feet are staggered with the back foot on a step, box, chair, or bench. 
    • To determine the placement of the front foot, sit on the front edge of the step, box, etc. Straighten the working leg out in front of you. Keeping the heel on the floor, stand up onto that leg. Then place the back leg on the step with the sole of the foot vs top of the foot.
    • As you drop into the lunge, your hips should go straight down.
    • Aim your fingers for the sides of your ankle. This will promote the forward trunk lean.
    • The knee will move forward a bit but shouldn’t be going past your toes.
    • Shoot for 2-3 sets of 10x. You can make it harder by adding weights or increasing the height of the furniture. It can be regressed by keeping your back foot on the ground.
    Bulgarian Finish (Photo: Ned Dowling)

    Side Planks

    Typically thought of as a core strength exercise, which it very much is, these also do a lot to  work gluteus medius, a major stabilizer at the hip (see the bit on pelvic drop above).

    • Lying on your side, prop yourself up between the outside of your bottom foot and your elbow/forearm.
    • Ankle, knee, hip, and shoulder are in a straight line, and your body should be vertical like a wall, not sagging or twisting to one side or the other.
    • This is a timed hold. 30 seconds is a win. A minute is a gold medal but is getting boring and ready for some progressions (try it from your hand instead of elbow, add moving the top leg up and down, or twist like you’re reaching the top hand under your armpit). An easier version is to go from the knees instead of the feet (still keep your knee, hip and shoulder in line but bend at the knees so your feet are behind you).
    Side Plank (Photo: Ned Dowling)


  • Go Sideways for Strong Skating Hips

    Go Sideways for Strong Skating Hips

    One of the beauties of skate skiing for the recreational athlete is that it gets us out of the straight line, sagittal plane motion that is so common with walking, running, and cycling. But this also poses a challenge for those of us who don’t rollerski in the summer: How do we stay conditioned for skate skiing’s lateral motion when there’s no snow on the ground? Fortunately, there’s a long list of exercises that will at least work on the strength and lateral movement at the hips. For this article, I’ve picked some of my favorites, especially ones that don’t require much in the way of special equipment. They are listed in order of lowest to highest intensity. Add these to your routine a couple of times a week—you’re already in the gym at least twice a week for maintenance, right?

    Wall Scrubs
    • Lie on your side with your butt 4-6 inches from a wall
    • Bottom knee is bent and the top leg is straight
    • Push the heel of your top leg into the wall and move that leg up and down
    • You should be putting a lot of pressure into the wall—think about scrubbing the wall vs just painting it
    • Keep your toes pointed forward not up towards the ceiling
    • Pelvis stays vertical and quiet. The motion should be isolated at the hip, not from the pelvis tipping. You can put your hand on the side of your pelvis for feedback to monitor potential movement
    • You’ll need to be wearing just a sock or use a washcloth on your heel to reduce friction on the wall
    • 3 sets of 10-15 reps (if you’re not getting much fatigue with 15x, add a resistance band around your knees)
    Banded Side Steps
    • Put a resistance band around your ankles
    • Bend and the ankles, knees, and hips like the ski stance
    • Keeping tension on the band throughout, step sideways leading with the knee rather than reaching with the foot and shifting your weight
    • Band position variations: band around the knees is a regression offering less resistance and possibly more cuing to lead with the knee vs the foot; band around the feet is harder with more work at the ankles but requires a durable band not the cheap ones we give to patients in PT
    • 2×15-20 steps or whatever length of hallway you have 
    Curtsy Step Downs
    • Stand sideways on the bottom stair or a plyo box
    • The foot at the edge of the stair will be the working leg
    • With the other leg, reach behind the stance leg and tap the floor then finish with knee high
    • The working leg will be doing a single leg squat so look to keep your spine neutral, hinge through the hips, lean forward with the the trunk and your butt goes back
    • Ideally, this is also a balance exercise with the non-stance leg never taking any weight. However, if this is a struggle, use a railing or wall for assistance
    • You can add weight for additional resistance 
    • 3 sets of 10x
    Lateral Bounding
    • Think of these as hopping side steps
    • Start in the ski stance position
    • Push/hop sideways off the stance leg and land on the other leg in a balanced position
    • Switch back to the working leg and go again
    • As described, you’ll be moving sideways like down a hallway. If you’re tight on space, you can go back and forth from right leg to left leg but strive to be honest about the balance before the next hop
    • Look to do 30 contacts/reps on each side split into sets however your space allows (2×15, 3×10, 5×6, etc)
    Lateral Countermovement Jumps
    • Stand sideways on the bottom stair or a 8+ inch plyo box
    • Step off, landing in the ski stance position on the opposite leg
    • Rather than pausing in a balanced position, immediately hop back up to the standing leg on the stair/box
    • Think of the landing leg as being a spring or pogo stick that will bounce back after being compressed—the compression will create the ankle, knee, and hip flexion inherent to ski stance, then we want to rebound off quickly and pop back up to the box
    • Make sure the work is being done by the landing leg vs just stepping back on the box
    • 2 sets of 5-10x. You can add weight or increase the box height for more difficulty (with a med ball or dumbbell held in both hands, move it from chest height while standing on the box to the hip of the landing leg on the floor)
  • Spring Forward: Part II

    Spring Forward: Part II

    Jessie Diggins’ dryland training program includes exercises for strength, agility, power, balance, and endurance. (Photo: Instagram @jessiediggins)

    Ask most endurance athletes what quality they’d like to develop in their sport, and many would say “I want to be stronger.” Ironic, then, because “stronger” means different things to different athletes. To one, it means durable: able to withstand continued stresses and discomforts. To another, it means powerful: able to generate greater force in less time. To still another, it means actually stronger: able to move a heavier weight (regardless of the speed of the movement). When skiers say they want to be stronger, it seems what they mean is they want to be faster, and have that speed be sustainable throughout the distance of their events (those being the qualities that “strong skiers” display). The difficulty in training for that sort of improvement is that the quality they seek—speed—is actually produced by two different things: the push, and the glide. Greater speed comes from pushing harder. Maintaining speed is also facilitated by gliding more efficiently (effectively staying out of the way and letting the ski run). Skiers performing at top levels are adept at both, and both should be addressed in off-season training.

    Magnus Boee’s double poling strength propelled him to an NCAA individual championship in the 30 k Class Mass Start in 2024.
    What is Strength?

    Strength is the quality that allows an athlete to produce greater forces, or withstand greater pressures. In the ski world, it means simply that the stronger skier pushes harder (a measure that will also include a factor of power). When Magnus Boee (University of Colorado) double-poled away from the entire field in the NCAA Mass Start Classic finale, his advantage over everyone else was primarily a factor of strength: he simply put more force into each double pole than did his competitors. True, he also possessed the endurance to maintain that physiologically expensive effort longer than his competitors (and farther up each uphill than anyone else), but Boee’s incredible strength is what made his speed possible in the first place.

    Pushing

    Push harder: go faster. It’s a simple equation that appears true regardless of any athlete’s technique or efficiency. Improving strength and power allows a skier to ski faster. Physiologically, strength takes longer to develop than does endurance; therefore, if one of my goals is to be stronger next season, my regimen of strength training should begin very early. Many coaches would advise that strength, for skiers, is a whole-body thing, with some special emphases being placed on certain muscles that are crucial to ski technique and ski propulsion.

    The exercises that I typically include in ski-strength training programs are those that involve large muscle groups and full body movements (not the practice of isolating muscles like a body builder would). Skiers ski with their whole body; therefore, I like to recommend power-exercises that utilize free weights (and/or body weight) rather than machines. Standing push presses, cleans, upright rows, bent-over rows, squats, one-leg squats, step ups, et. al., allow the athlete to move the weight quickly, encouraging techniques that elicit some “pop.”

    One recommendation: strength training should be conducted when the athlete is fresh, NOT when the athlete is already tired. Simply put, go to the gym first and go for a training run later (not the other way ’round).

    Another recommendation: train one thing at a time (don’t try to make strength training into more endurance training). There’s no need to keep your heart rate high during strength training. While circuit training can be valuable, the fact that your pulse is elevated is actually hindering your physiological ability to train for strength.

    Gus Schumacher strides on his way to a 15th place finish in Stage 3 of the Tour de Ski in Oberstdorf, Germany (Photo: Nordic Focus).
    Gliding

    Holding yourself in the correct body posture to maximize glide during either Classic skiing or Freestyle skiing (hips forward, chest up, ankles flexed) can be an exhausting challenge, one that most ski-athletes find supremely difficult to sustain. Drills and exercises that develop stabilizer muscles (core exercises, balance drills, planks, etc.) can improve an athlete’s gliding characteristics and stability. Those are an important part of any dryland training program, and can produce a bit more speed in next year’s performance (allowing the athlete to maintain proper glide-posture, AND potentially to do so for a longer period of time). Even so, balance/stability training is not a replacement for strength training. Greatest gains in ski-speed come from pushing harder . . . and that means strength training.


    All this is just a long-winded way of professing that training for next season should be far more complex and comprehensive than simply hopping back on my roller skis. Ski racers are athletes who will benefit from a variety of training exercises and workouts in order to develop the numerous components of ski-success. The dryland training season is actually pretty short; there’s simply not much time to develop these new qualities. Getting started in the spring—on strength, on power, on glide—will make for a better, speedier winter.


  • Summer Training: Purposeful, Productive, and a Little Fun

    Summer Training: Purposeful, Productive, and a Little Fun

    Group roller ski at Hardwood Ski & Bike (Photo: Graeme Longford)

    Returning to training after a spring hiatus means laying out a plan for the upcoming training season. In making such a plan, there are a couple of questions that will help to define how the season should go:

    – Early season dryland training: what should early season training prioritize? And how much of a “break” do you advise taking after the ski season concluded?

    – Early season roller skiing: how early is too early? What really are the benefits of roller skiing, and why is the advice typically to utilize this training tool more toward the end of the dryland than at the beginning?

    Often coaches are asked what the weeks and months post racing season should look like. The answer varies from coach to coach but there are some trends that are commonly prescribed. A lot of this variety stems from the wide range of climates and geography that support cross-country skiing in North America. For those climates with snow that hangs on after the races conclude for the year it’s best to keep skiing. At the elite level year-round access to snow has been shown to be a huge advantage. The use of glaciers and ski tunnels show this investment is important to many nations that excel in cross-country skiing. After racing wraps up transition to base training on snow, with fun, technique work and ski play.

    Dryland training in Canberra, ACT.

    Those of us who are not fortunate to often have late season skiing should plan to take four to six weeks of off/unstructured training. This unloading period helps athletes process the ski season, catch up on other aspects of their life put on hold during the racing season and have the mental break needed after a stressful competitive season. This unloading period also allows the body to adapt and recover from the stress of racing. Especially when a season includes a spring championship.

    During this unstructured period, I recommend athletes take the first half off. This would create a two-to-three-week period without any training. This time allows the body to catch up on rest and process all the stressors both physical and mental that were present during the racing season. The second half of this block is unstructured. During this time the athletes train as they feel without a structured plan. Often the focus of this period is strength combined with low intensity aerobic training.

    Rollerskiing in June near Bend, Oregon. (Photo: Dakota Blackhorse-von Jess)

    As the training season begins to ramp up a common question is when should one start roller skiing and how often should this be used in their training. Elite athletes will begin roller skiing in May when the training season often kicks off. This is dependent on a variety of factors but to maintain the specificity needed for elite performances most skiers will begin roller skiing right away. The volume of roller skiing will increase over the course of the summer and become a primary training modality by the fall. Master and developing skiers can delay roller skiing until the late summer or fall in order to prioritize other sports or activities creating a more varied training year. This will minimize burnout and help bring variety to the training over the summer.

    Prior to the arrival of summer, it’s important to set goals for summer training. These should build off of the progress made in the previous season, limiters that have been identified, and the goals for the following season. Deciding what your priorities are will guide the training and help keep you focused. During summer, it is easy to get sidetracked by fun fitness adventures. Rarely do these derail one’s training, but it’s important to keep your actions moving towards your goals. Summer training should be purposeful and productive combined with a little fun.
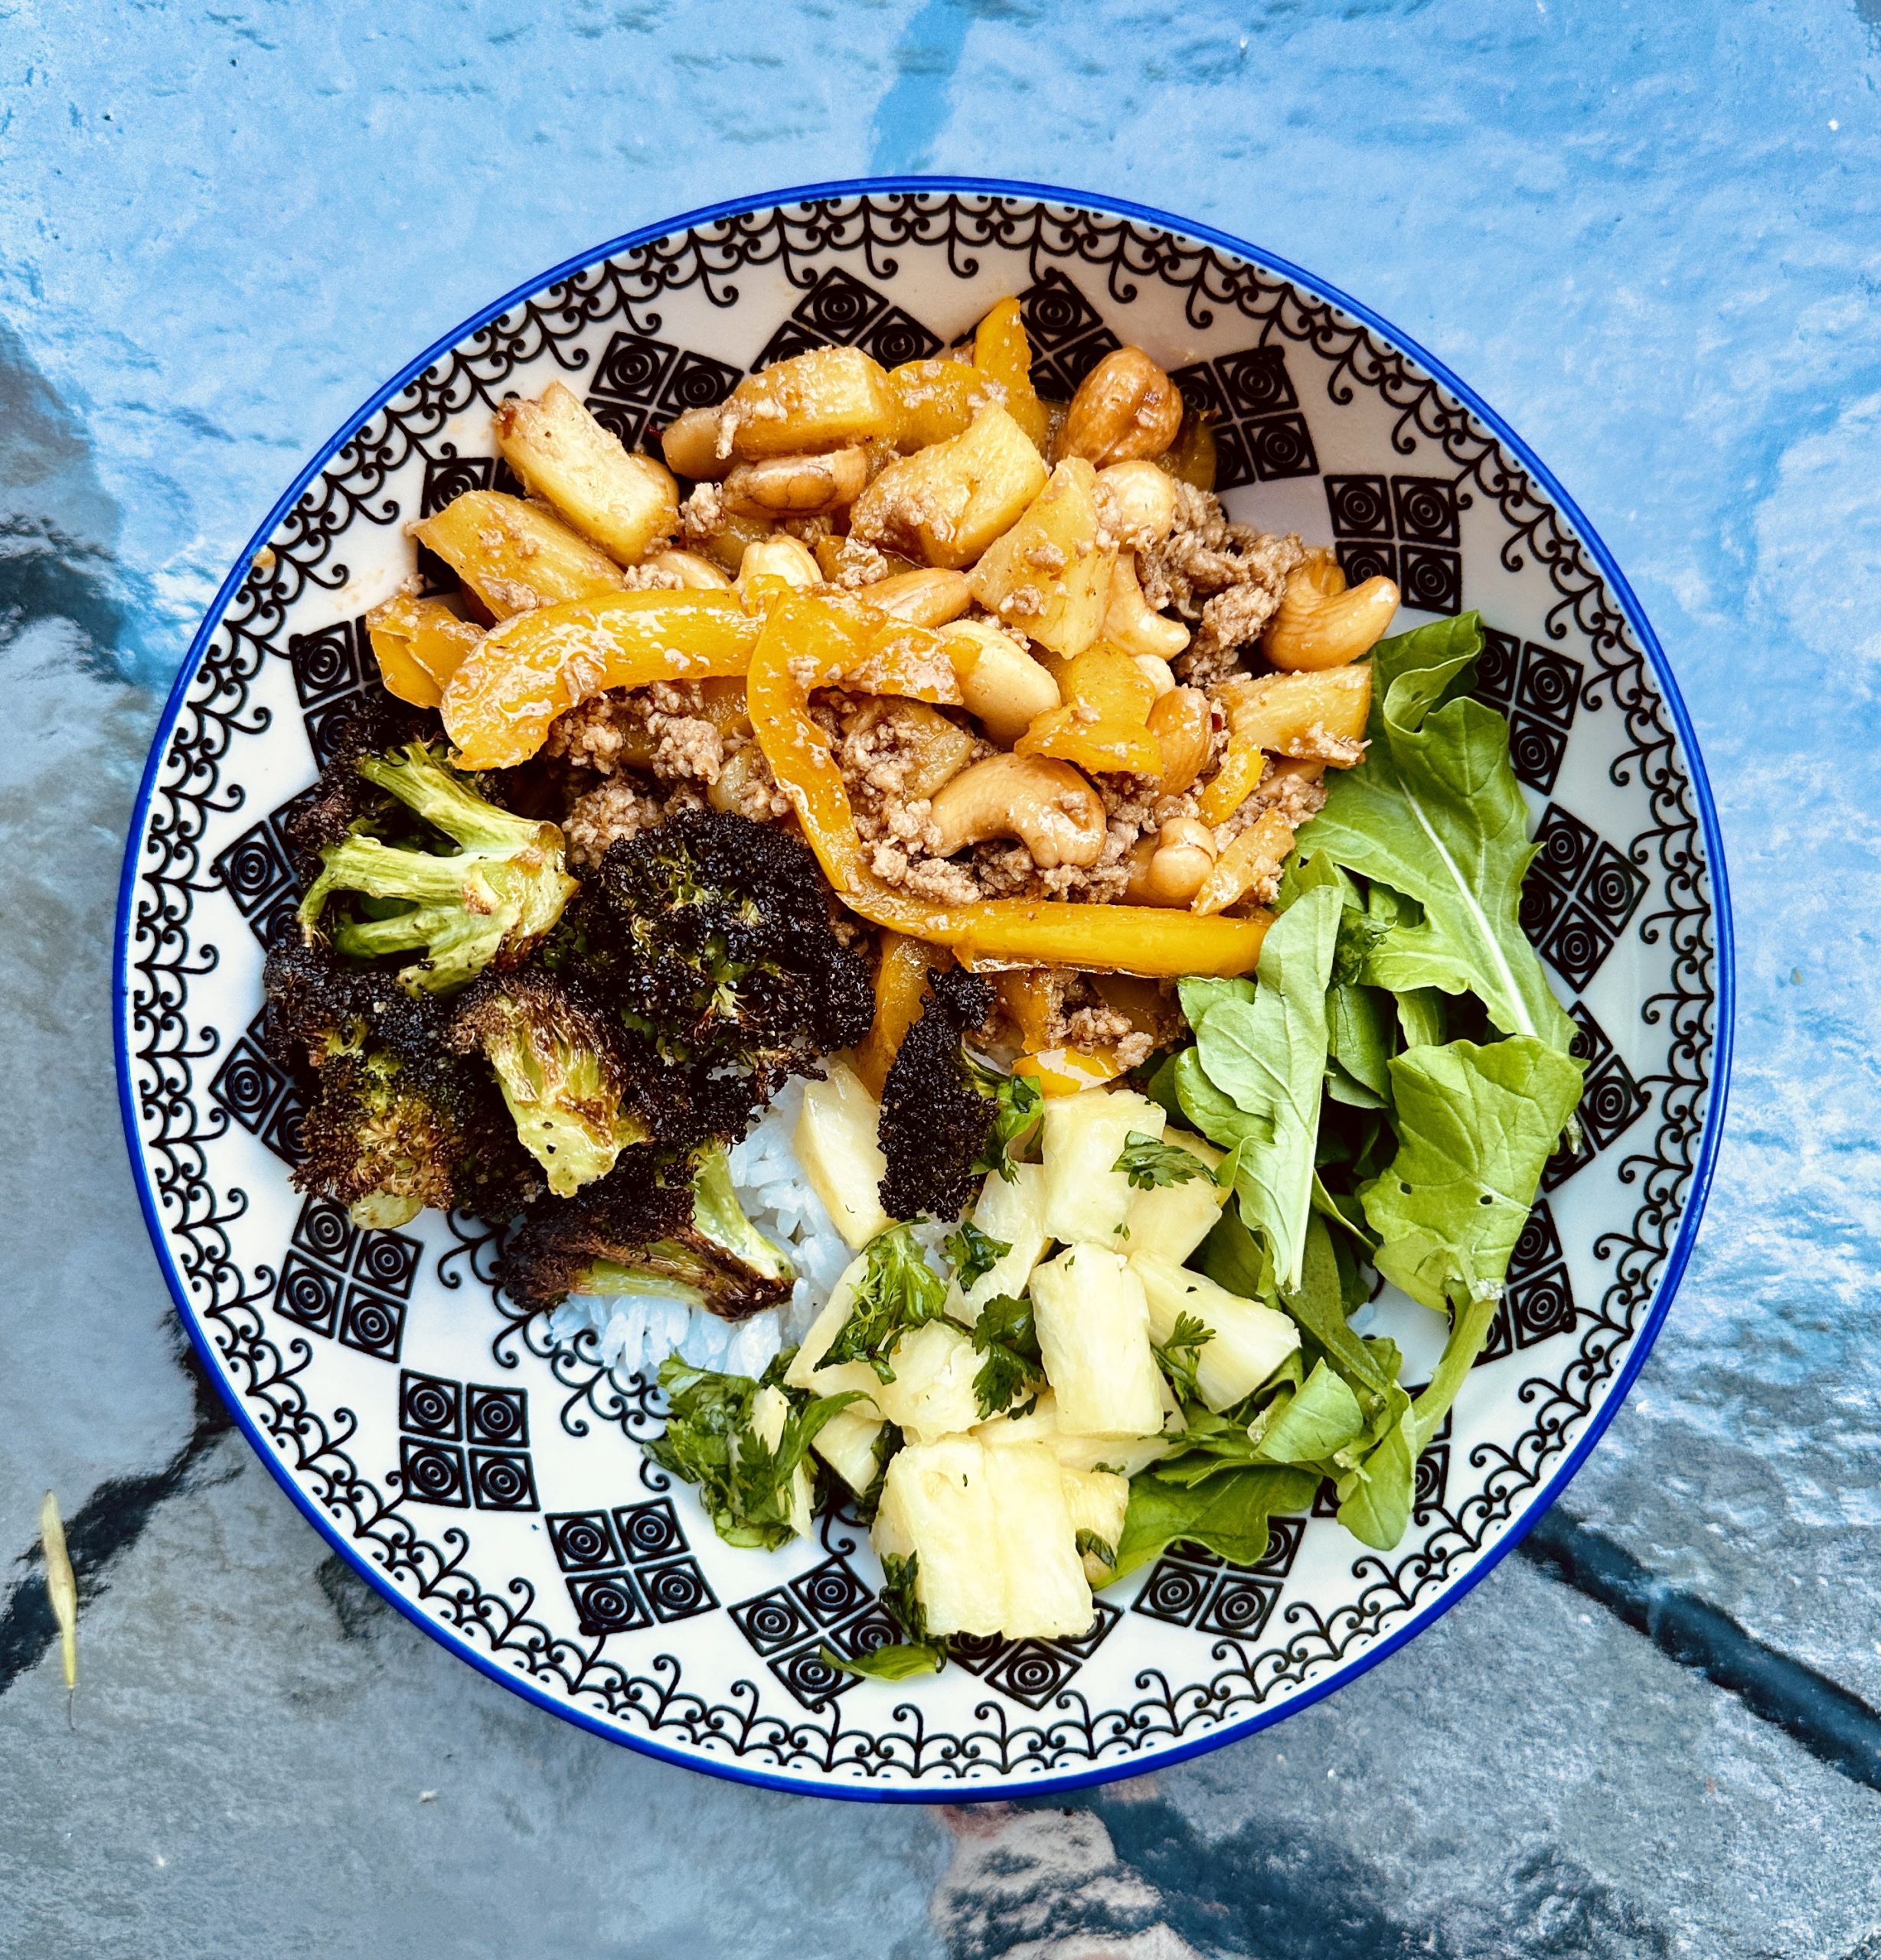
    Rollerskiing at the Stifel U.S. Ski Team women’s camp, N.Y. (Photo: Matt Whitcomb)
  • Spring Forward: Part I

    Spring Forward: Part I

    There are more ways to train than simply skiing. The high rpm, low resistance nature of cycling creates training results that can make you faster next winter. (Photo: FasterSkier)

    Spring is nice, spring is fun, spring is a relief after a long, cold winter. But, for diehard skiers, spring is also the new season in which we begin imagining ourselves as next year’s skiers. The snow is barely gone, but already we’re imagining futures in which we glide through snowy meadows, double pole across the flats, charge confidently up homologated uphills, and V2 boldly across finish lines. Our heads are already in next season. But, in order to realize the technical, athletic, and endurance visions we’ve conjured for ourselves, the work needs to start now. Ironically, the most efficient forms of that work are found not on skis (nor on roller skis), but in a variety of training practices that allows us to leave skis and poles in the closet for a while. Spring training begins now . . .

    The physiological qualities that produce faster skiers are straightforward and simple (even more so for age-group competitors than for World Cup stars): we need endurance, and we need strength. This article will deal with the philosophies of training for endurance, with strength being addressed in a separate installment.

    What is Endurance?

    In the context of nordic skiing, endurance is the ability to perform ski-related movements over time in a manner that is efficient, that maintains high levels of athletic output, and that withstands athletic discomfort. Cross-country skiing is a difficult and challenging sport; those skiers who are the best possess the ability to create high levels of speed, and to maintain those levels of speed over great distances. Much of that performance results from having increased an athlete’s ability to take in, transport, and transfer oxygen. Training does that—endurance training—and the figures we use to measure such abilities are called “VO2 max.”

    By now, everyone even slightly interested in athletics has heard the term VO2 max: a measure of an athlete’s ability to utilize oxygen. We typically imagine that transfer of oxygen to be occurring in the muscle cells. It does, but there’s far more to the oxygen transfer systems than just the ability of cells to suck up oxygen. Nearly as important is the delivery system; that means capillaries, tiny networks of blood vessels where oxygen exchange with the muscles place. Deliver more oxygen to the muscle cells (while simultaneously allowing those muscle cells to shed waste product), and the lactate wall that most of us run into on steep uphills becomes far easier to navigate. Fortunately, certain types of training are the best at inspiring the actual construction of new and more extensive beds of capillaries. More places where the oxygen transfer can take place, better endurance. Skiers want more capillary beds: that’s why they ski slow and easy.
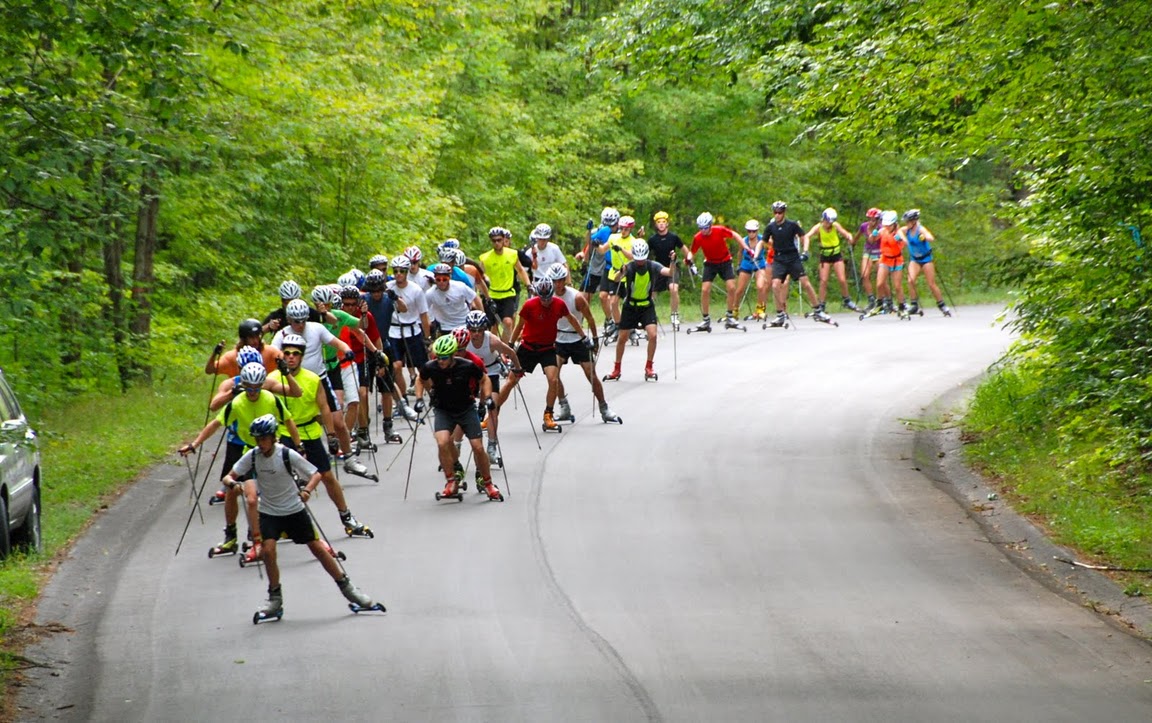
    For the development of endurance (and the building of new capillary beds), the exercises that are recommended are those with low resistance and fairly high RPMs (what cyclists would refer to as “spinning”). In comparing the likely forms of exercise in which skiers might engage in the spring, running is better than skiing at encouraging the growth of capillary beds, and cycling is better than either one. What about my arms, you ask? Isn’t cycling ignoring my whole upper body? Well, cycling has been shown to encourage the development of capillary beds not just in the legs, but in the muscles of all long bones (arms/shoulders included). While cycling isn’t training the particular strength aspects of your upper body, it is training those muscle systems to perform more efficiently when it comes to delivery of oxygen. And there’s always late summer and autumn to deal with training the upper body (that’s what roller skiing is for).

    Team USA teammates Sophia Laukli and Novie McCabe on a training run in Alaska. Laukli’s multi-sport training regimen resulted in her best-ever performances on the World Cup circuit. (Photo: Novie McCabe)

    American World Cup competitor, Sophia Laukli, received headline coverage last year for her ability to compete at world class levels in both summer and winter seasons. Her pursuit of numerous mountain-running marathon races throughout the summer raised eyebrows in the Nordic world: would she still be able to perform in World Cup events in the winter, or would a summer of racing and run-training have burned her out? As it turns out, there was no need to worry about Laukli, as she proved by not only winning  the season-long Golden Trail Series, but also won a FIS World Cup distance event (the climb up Alpe Cermis, final stage of the 2024 Tour de Ski). Laukli has already begun her running training for the trail marathon season. Needless to say, it’s unlikely she’s spending much time on roller skis these days.

    One way or another, if one of my training goals is to develop greater endurance over the summer (and to create a broad endurance base that will improve my body’s ability to absorb all the training I intend to do), then my spring should begin with a considerable amount of long, slow, low resistance, high rpm activity. And there are more efficient ways to accomplish that than simply hopping back onto my roller skis.

    Hunter Wonders and Luke Jager in Soldier Hollow at the USST’s annual training camp. (Photo: Matt Whitcomb)
    Why Not Just Ski?

    Many of us roller ski in the spring simply because we’re lonely for skiing. Well, if we ski simply for the pleasure of skiing, then roller skiing is just fine (though most would admit it’s nowhere near as pleasant as skiing on snow). On the other hand, if our commitment to skiing is such that we truly want to improve our performance, then we should investigate how best to pursue that in the off-season . . . and training on roller skis at the beginning of spring is not the only way.

    Why not? Here are a few reasons for us leave our roller skis in the closet until later in the season:

    1. If my goal is to improve my ski performance next season, then there are better ways to achieve that than to simply continue skiing. What most skiers need is to establish an accurate understanding of their own athletic strengths and physiological weaknesses. Those are the issues to address, especially in the first half of the dryland season. We need more power; we need greater endurance; we need to generate (and hold) higher levels of speed; we need to strengthen core muscles so that our full force is applied in poling; we need to strengthen stabilizer muscles so that we can stand straight on top of the ski instead of caving in. The fastest way to accomplish those things is to put the skis away for a while, and concentrate on workouts, exercises, and disciplines that address each issue independently.
    2. If low resistance and higher rpm’s are two of the qualities that encourage production of new capillary beds, then skiing (and roller skiing) may not be the best exercise choice at this time of year. Even at low ski-speeds, the rpm’s of skiing are far lower than hiking, running, cycling. It may seem strange, but one of the important things to consider in your training is the plan to mix things up, to include in your training alternative activities that better suit the fitness goal. Get on the bike, go for a hike, lace up the running shoes. Plenty of time for roller skiing later in the season.
    3. While the athletic and physiological stresses of roller skiing are similar to skiing on snow, it’s also known that roller skiing is a quite imperfect means of practicing ski-technique. Unlike skiing on the snow, the glide on roller skis is nearly constant no matter which part of the ski is weighted, and no matter how much the wheels are tipped or tilted. Whether on skate or classic roller skis, a knock-kneed skier will roll as fast as a skier who stands directly on top of their wheels. That’s not the case on snow. On classic roller skis, the “kick” can be initiated no matter how imprecise the skier is in applying force. That’s not the case on snow. There are many such technique examples that render roller skiing quite an imperfect imitation of on-snow skiing, and too great a reliance reliance on roller skiing in the off-season is how bad technique habits can be reinforced.

    Simple advice in designing the training you do in the spring: leave the roller skis in the closet a while longer, and work on fitness improvements that will make you faster next season.

  • FasterSkier At The Movies: The Best Cross-Country Ski Movie Ever?

    FasterSkier At The Movies: The Best Cross-Country Ski Movie Ever?

    Warning: This review contains lengthy passages of unrestrained gushing.

    This was state-of-the-art video production technology when “A to B Roller Ski” was made. (Photo: Wiki Commons)

    Is it possible that the best movie ever made about cross-country skiing doesn’t have a single scene which was filmed on snow? The answer is a decided yes. Because that movie is “A to B Roller Ski,” and it shatters the ceiling for what a movie about cross-country skiing can be.

    Moving, inspiring, authentic, pure, poetic, and beautiful, ‘A to B Roller Ski’ tells the story of Latvian born biathlete Raimonds Dombrovskis who in 1988 decided that after his Olympic biathlon dreams had ended due to a life threatening illness, it would be a good adventure to roller ski from Inuvik, Canada— near the Arctic Circle— to Baja, Mexico— a journey of 4,200 miles which took 90 days. Why? Well, “because everyone goes across the continent” he says in the movie. This incredible and crazy true story is a cinematic marvel which like a well-aged fine wine could only have been accomplished with decades of commitment. The movie has been out for years for viewing at film festivals. But now, it’s available for streaming on Amazon.

    Old versus new roller skis from the author’s collection. (Photo: Ken Roth/FasterSkier)

    The concept behind the movie’s narrative is pure folly. Who in any sane mental state would even consider such a journey? From the baseball-size stone filled roads of the Alaska Highway, to the Rocky Mountains, to the deserts of Arizona, Dombrovskis and his faithful canine companion, Bucis, soldiered on and completed a journey that not only seemed impossible, but also seemed likely to end up with a dead protagonist. Remember, this original journey occurred in the late 1980s, on roller skis which were nothing like the ones we have today. There were no heel brakes or speed reducers. Shafts were either aluminum or wood. I had the exact pair of the skis, boots, and bindings that Dombrovskis used for a large part of his trip, and I can tell you from first hand experience that, even on the paved trail at my local park, they were nerve racking. Going down mountain passes on these is unimaginable.

    Suspension roller skis weren’t on the horizon when this 4,200 mile journey was made. (Photo: Wiki Commons)

    The photography is remarkable. There is old footage of the journey from 1988, which given the technology of the time, a handheld VHS camera; and the limited budget—almost none— is beautifully crafted and technically well executed. The photography is perfectly mated with an evocative sound track, and the combination works wonders. There are contemporary interviews seamlessly interwoven into the original footage, which is also nicely crafted. Both the old and new photography help move the story along, and in a 1:38 minute movie, there is never a dull spot.

    The vintage videos of biathletes racing in the Classic technique are enough to make one hope that the IBU (International Biathlon Union) mandates a couple of Classic races a year; just for aesthetics alone.

    Having this kind of all-road technology would have been nice for portions of the journey. (Photo: Wiki Commons)

    The movie is told against the backdrop of Dombrovskis’ emigration from Latvia to America, the end of his Olympic dreams, and the folly of trying to do something so outrageous that you would think it was surely a joke.

    One of the more striking things about the journey is Dombrovskis’ obvious interest in the people he met along the way. Many of them may have been skeptical of him at first, but he’s the kind of guy who makes friends easily, which unquestionably helped him complete this odyssey.

    The original 1988 epic odyssey would be enough for a full feature film. But the story only gets better and deeper when Dombrovskis decides in 2014 to recreate a scaled down version of his journey 26 years later. Dombrovskis looks like he’s still fit enough to make the national Biathlon team when he retraces his steps from 1988, tracking down people he met along the way two and a half decades earlier, which leads to heartwarming reunion scenes.

    One of the nicer sections of the Alaska Highway, 1988. (Photo: Wiki Commons)

    ‘A to B’ is a testament to one man’s belief that nothing is impossible and that the price of not following your dreams is far greater than the cost of pursuing them.

    I’m not certain if non-skiers will gush about it as much as skiers will, but it’s more likely than not that even people with no interest in skiing will find the movie to be at the very least a compelling tale.

    Fortunately, you won’t need one of these to watch the 1988 footage of Dombrovskis’ original journey. (Photo: Wiki Commons)

    So, whatever you’re doing tonight, change your plans, and rent ‘A to B.’ (Depending upon your Amazon setup, if you search for it in Amazon’s catalog you may not find it listed under ‘A to B Roller Ski.’ If you can’t find it, enter “roller ski” in the search bar and the movie will pop up as an option.)

    Fortunately, you won’t need one of these to watch the 1988 footage of Dombrovskis’ original journey. (Photo: Wiki Commons)If you don’t want to risk your $2.99 movie rental money on this review’s recommendation, then take a look at IMDB’s (Independent Movie Data Base) reviews. It gets rated 8.6/10. By comparison, ‘The Godfather,’ often judged to be the best movie ever made, is rated 9.2/10. That’s some pretty lofty company. Here’s a link to the IMDB site where you can watch the trailer.

    It is rare when a movie conveys a naïve purity which is historically accurate and inspiring. The amazing thing about this film is that if someone had created the script from ideas they made up, viewers would have immediately dismissed it as nice, but ludicrous. What makes ‘A to B’ so special is that when outlandish truth mixes just right with awe and splendor, and it’s captured on film, amazing things happen.

    Roller skis have improved over the years. Braking wasn’t generally available when the unbelievable Odyssey of Raimonds Dombrovskis took place. (Photo: Wiki Commons)
  • Fluoro-Free Waxing—Two Years In with Zach Caldwell

    Fluoro-Free Waxing—Two Years In with Zach Caldwell


    SuperTour race weekend in Craftsbury, VT, where Zach Caldwell (left) supported SMS T2 athletes. (Photo: Facebook Caldwell Sport)

    On January 17th, 2022, a US Ski and Snowboard (USSS) ban on using perfluorocarbon-based wax products (“fluoros”) at all International Ski Federation-sanctioned (FIS) races in the country went into effect. The action marked the critical point in a rapid evolution of policies meant to limit competitive nordic skiing’s emission of perfluorocarbons, part of a class of especially environmentally persistent, and potentially health-concerning, chemicals known as PFAs. Overnight, The cumulative knowledge of 40 years on ski preparation nulled. Since then, it’s been a brave new world.

    Step into a wax room these days, and you’re unlikely to hear codewords like “Cera F” and “Jetstream” muffled from behind the gas masks that became standard issue near the end of the fluoro-era. The scramble to take everything into account—from snow temp to air temp, ski selection, grind, and base material too—and funnel it into putting the best ski on the snow for a race is still there. The rules may have changed, but the game is the same.

    Two and half seasons into fluoro-free racing, there have been countless tests by wax technicians across the continent to figure out just what they’re working with on any given race day. Among them has been long-time American “ski whisperer” Zach Caldwell, owner and operator of Caldwell Sport in Putney, Vermont. As New England thawed out from its last snowstorm of the season, and US Skiing from the season that accompanied it, FasterSkier caught up with Caldwell to learn what he’s learned about where the limiter of fluoro-free waxing has started to push ski service.

    Speak to Caldwell, and you’ll quickly get acquainted with jargon that acquaints you with his professorial approach to ski service. He’ll often talk about “solutions,” that is, the singular result of combining the “pie” of factors (see our 2022 discussion on what makes a ski fast featuring Caldwell here) that go into a race-ready ski. In that pie, you’ll find ski camber, ski flex, base grind selection, hand-applied structure, and everything that can be broadly categorized as wax. He also cites how “robust” solutions are the best solutions; that is, where the overall combination of the factors within that ski performance pie can be adaptable to a wide range of conditions. In Caldwell’s view, the ideal ski technician is as much engineer and artist as they are actuary. “Robust solutions limit the risk of sending you in the wrong direction.”

    Zach Caldwell in his element. (Photo: Facebook Caldwell Sport)

    “Wax with fluoro compounds occupied a big part of the whole pie when it came to ski performance,” Caldwell had said previously. His expectation when the US moved to eliminate fluoros from the wax slice of the pie two seasons ago was in line with many ski technicians. “I figured was that we weren’t going to accommodate for the lack of fluoros,” he said. “All we did by eliminating fluoros was make the comparative importance of everything else bigger.”

    The key problems to which fluoros served as a solution were twofold. Fluoros resisted water better than any other compound. Fluoros were also better at helping to keep base-clogging dirt away. Those properties came from a complex interaction of chemical, ski, and snow. When applied to a ski, the chemical differentiation of fluorocarbons from a standard polyethylene ski base meant they formed a “top-coat,” not mixing with the other base wax treatments that helped change the bulk properties of the base. That fluorocarbon top-coat was extremely hydrophobic, which helped discourage water-on-water friction in wetter snow conditions most often found around or above freezing. The fluoro top-coat also abraded with dirt that otherwise would be picked up by the ski base, lending to the sensation of “durability” from skiers. In attempting to replace the water- and dirt-repellency offered by fluoros, ski technicians have most often looked at other slices of the overall solution “pie” to re-produce those qualities.

    The initial expectation from Caldwell was that skiers would look to ski selection and base grind as factors readily available to assist in finding a solution. “When it comes to that, it’s played out 100% as I predicted it would” he said. “We’re selling way more skis, and grinding way more skis [at Caldwell Sport]. There’s a lot more active testing of hand structures.”

    A ski being brushed. After the elimination of fluorocarbon wax products, ski selection and grind have jumped to the front of many skier’s considerations in race preparation. (Photo: NordicFocus)

    In particular, skiers are looking to add more specialized skis to their fleets in the conditions in which fluoros once excelled. Higher camber skis—skis that ride higher above the snow and often have less prolonged surface run times than comparative skis—can help in having skis not pick up as much dirt. Base Grinds and hand structures, especially “V” shaped chevrons and deeper linear rills, can help channel water away from a ski base in wet conditions.

    The push out to the ski itself, and grind selection, has led to a new dynamic in race day solutions. “In the past, you could show up with an inappropriate camber and get those skis into the game in the right conditions by using fluoros,” said Caldwell. “Now, showing up with the wrong ski or wrong hand structure is not doable. You’re unable to compensate with a great wax solution.

    The dynamic of not being able to wax your way out of a mis-matched ski has come as a result of what Caldwell sees in the selection of new fluoro-free waxes that have been offered on the market.

    “I’ve had to revise my expectations around the wax itself,” he said. “I knew we couldn’t replicate the performance of fluorocarbon chemistry, but thought that the difference between the teams that could test application methods and products ad nauseam and those who couldn’t would be emphasized. As it’s turned out, it has felt like many of the solutions just hit the ceiling for performance at about the same place.”

    The result has been twofold. For one, it takes less resources to reach that lower ceiling of performance, and it can often be done by waxes from a much lower price point than the $150-200 fluoro blocks that used to contribute to a race day ski build. There are also more ways to get to an overall ski solution that precludes having found a particular wax product selection and application. Hence, the turn towards ski, grind, and structure selection for many skiers.

    Caldwell sees a particular pressure point in the ski industry given the way many fluoro-free waxes have hit a similar performance ceiling, often at wildly unreliable price points: “Some of the big companies were very quick to introduce fluoro-free lines in an attempt to make a new market follow old rules.”

    “The price points on those first fluoro-free products reflected that the big wax companies knew that there was a high tolerance high price points among consumers,” Caldwell said. “The thing that gets kind of lost is that those consumer tolerances were built around wax solutions that re-defined the sport.  That’s what those 30-gram Swix Cera F vials did in the late 1980s. They were definitely revolutionary. We’re currently in a place now though, where a nominally $1 per application wax job can beat a $10 per application wax job, and after a while, that’s just going to frustrate consumers.”

    Ski Techs sorting through test fleet on a race day. (Photo: NordicFocus)

    Caldwell views the muddy value proposition offered by new fluoro-free waxes as contributing to a cultural shift away from the “essentially technical” nature of nordic skiing. “It’s creating an environment where the incentive is stronger than ever to control the role waxing places in the whole solution on race day.” That chiefly includes wax protocols, often modeled after the one introduced by Rocky Mountain Nordic in 2019 that now are enforced across a host of junior and collegiate circuits in the United States. “If we assume that on any given day, without fluoro, there is a certain amount of speed available,” said Caldwell, “[Then] by limiting the role wax plays, you’re decreasing the amount of creativity that can be brought to bear in getting to that total speed available. You end up with more of a disparity than you would have by allowing wax to be brought into the picture.” FasterSkier previously covered the discussion surrounding competitive and technical balance at play in wax protocols here; however skiers might form opinions on where the technical aspect of skiing meets its competitive culture, Caldwell was careful to point out that having those opinions is one of the essential beauties of the sport: “I was pretty young when skating came into the picture,” Caldwell said. “People lost their minds like it was going to change the sport beyond recognition, but what happened? There’s a dialectic that’s healthy, and we ended up with a sport that still includes classic skiing, and even there, a ‘classic skiing’ that is pretty advanced from what they were trying to preserve, right?”

    “Progress is always going to be there,” Caldwell said. “And trying to halt progress is a bad idea… but that doesn’t mean you don’t try to steer progress.”

    U.S. Ski Team wax truck during pre-season camp in Rovaniemi, Finland. (Matt Whitcomb)

    On the contrary, the gyre of new ideas and new technologies spinning the sport forward keeps Caldwell, a seasoned-ski expert among seasoned ski experts, excited some fifty years into the sport. He hopes it will keep you excited, too. In that regard, he leads by pure example. In the brave new world catalyzed by fluoro-free, he sees a broad horizon to chart out skiers’ relationship to how they view their skis. He spins visions on how the World Cup could start promoting the technical aspects of the sport, broadcasting wax tests and highlighting ski profiles the way F1 motorsport does. He can rattle off, with passion, a broad architecture to incentivize ski companies to start producing their best skis for all skiers. “Imagine a world where Fischer had to produce a 50th percentile ski that Johannes Hoesflot Klaebo could win on!”

    For Caldwell, all of it comes back to a deeply rooted experience in a nordic community he loves. “One of the really cool things about the US is that the nordic community is quite open, uncharacteristically open, compared to other countries. It’s full of a lot of good people, and I think that culture is, at present, one of the most sophisticated cultures in the world when it comes to ski innovation.” As to where are we in the fluoro-free world, two seasons in? “You mean in a world where you can’t brute force your way to good solutions with more resources?” asked Caldwell. “Well, it’s a world that puts a premium on collaboration and creativity? Turns out we’ve been pretty good at that for a long time over here.”

  • Snow Mountain Ranch Gets a Late-Season Boost

    Snow Mountain Ranch Gets a Late-Season Boost

    FasterSkier has been fortunate to have the support of Snow Mountain Ranch for many years now.  If you are looking to extend your ski season we hope you will consider visiting our friends at Snow Mountain Ranch.

    If you’re a kid in Granby or Winter Park, Colo., snow days aren’t a thing—until last Thursday, March 13. According to Mary Ann Degginger, the program director at Snow Mountain Ranch, students in the East Grand School District had their first snow day in 20 years last week.

    “[Winter Park] ski resort got 15 or 16 inches, and the roads are closed, so it’s a good day in the mountains,” she said that afternoon.

    About 12 miles north of Winter Park Resort and 80 miles east of Denver, Snow Mountain Ranch/YMCA of the Rockies in Granby received about 8 inches of snow, which should help extend their cross-country ski season into April. After what Degginger called a slow start to a “spotty” winter, Grand County had a solid second half of the ski season and currently has above-average snowpack in most areas.

    Stampede mass start at Snow Mountain Ranch in early March.

    As of Wednesday, March 20, the Snow Mountain Ranch Nordic Center had all 82.5 kilometers of groomed trails open. The ranch recently held its 40th annual Stampede Races, with about 350 participants over two days for the 3-, 12.5-, 25-, and 50-kilometer skate and classic distances.

    “It’s kind of a big deal,” Degginger said of the final event in the Grand County Nordic Race Series. “If you do both disciplines at 25 or 50 k, you earn the ranch-boss belt buckle. I gave out about 75 belt buckles to people who did both, and I have mad respect for those people. It’s a lot of skiing.”

    She recalled the ideal weather that weekend of March 9-10: “The snow was cold, the weather was warm, it was sunny, and it was beautiful.”


    Looking ahead, Degginger said the Snow Mountain Ranch Nordic Center plans to stay open until April 7.

    “With this last snow we got, I wouldn’t be surprised if the snow was skiable beyond that,” she noted. “A lot of the north-facing slopes and shadier areas will hold their snow for a couple more weeks even after that. So, spring skiing conditions, but warm and pleasant and really good snow, really good tracks. Our groomers are doing a great job of maintaining our snow.”

    At Snow Mountain Ranch, visitors can stay right on the 5,100-acre property, with ski-in, ski-out lodging options and a cafeteria for dining. Vacationers can choose from rustic cabins and hotel-style rooms and, in the summer and fall, yurts, RV sites, and tent campsites.

    “At one of our lodges, all the rooms have balconies or porches on the back, and you can ski right out of the lodge,” Degginger explained. “A lot of our cabins are either ski-in, ski-out, or you might have to carry your skis across the street to get into the trail, [but] really close by.”

    Snow Mountain Ranch winter cabin.

    Those who stay there can expect everything they need and nothing they don’t. The rooms aren’t fancy, but they’re practical. Most don’t have TVs, but they do have WiFi. The idea is to connect with friends, family, and the outdoors while taking a break from the hustle and bustle of everyday life. The YMCA of the Rockies makes a point to offer affordable and family-friendly accommodations along with various on-site activities to keep everyone entertained.

    “We have a ton of amenities geared toward families and stuff to do when they’re not skiing,” Degginger said. “They can go rollerskating, play basketball, go to the swimming pool, or go to the craft shop—lots of different options and things to do when you’re not on the trails.”

    Snow Mountain Ranch also has an indoor archery range and climbing wall. As a nonprofit, the YMCA can provide a wide range of activities and amenities at a relatively low cost to locals and visitors. When asked how their YMCA differs from other community centers, Degginger said people need to experience the YMCA of the Rockies to understand.


    “We have members, just like a normal YMCA, who love to come and ski,” she said. “Some are hardcore skiers who ski every day and Paralympians who come and train here. We [serve] our locals as well as our guests and people who come from far away. If you’re not staying here, you can buy a day pass or trail pass to use the facility for the day, but we’d rather you stay with us.”

    For those who stay overnight (Degginger recommends booking in advance, especially for holiday weeks, summers, and weekends), trail passes are included, along with access to many of the facilities, such as the roller rink, gymnasium, and pool.

    While winter is still going strong at the ranch, she recommended also visiting in the summer, which is the ranch’s busiest season.

    “[We] have a brand-new ropes course opening this year, an aerial challenge course, which will be awesome, and a summer tubing hill, which is like tubing on snow but on a synthetic surface,” she said. “We also have archery, a climbing wall, canoeing, and mini golf—so many activities.”

    In addition, the ranch has more than 5,000 acres of mountain terrain to explore, giving guests plenty of space to roam, and an abundance of wildlife.

    “We have a lot of moose, and we see more and more of them every year,” she said. “I can’t blame them. If I were a moose, this is where I’d want to hang out.”

    “We [also] have some elk that you can hear bugling in the fall, especially up in Rocky Mountain National Park,” she added. “A fun thing to do is go in the evening and listen to the elk bugle during mating season. We have typical mountain predators—mountain lions, bobcats, coyotes, and such—and a lot of cute little foxes running around everywhere, marmots, and all kinds of mountain critters.”

    In the summer, the Nordic Center serves as the dining hall for the YMCA’s overnight camp. That camp initially drew Degginger to the ranch 20 years ago when she applied for a job there.

    “I’m a Midwestern girl who had never cross-country skied before until I came out for an interview for summer camp,” she recalled. “They said, ‘We’re going to take a tour of camp. Put on these skis.’ ”

    That was her first of many times on skis. She got the job and stayed, later becoming the head of programming and the Nordic Center at Snow Mountain Ranch.

    “If you love being outdoors and recreating outdoors, you can’t find a better place to be,” she said. “We’re at the Continental Divide, and Rocky Mountain National Park is not very far away. You can do everything, and it’s absolutely gorgeous.”

    Snow Mountain Ranch Nordic Center
  • How the Heck Do You Actually Get Better?

    How the Heck Do You Actually Get Better?

    The author, Luke Jager (USA), competing in the World Cup Freestyle Sprint in Trondheim, Norway. (Photo: Modica/NordicFocus)

    You’ve plateaued? What’s the deal? Is it insufficient rest; is it that you peaked too early; is it that you need to train harder? There is an article, Facebook post, podcast, YouTube video, and probably a thousand other forms of media dedicated to figuring out just about every component of training. So, with all this information available, why do so many athletes face such an uphill battle to reach their goals? From amateur to elite, being an athlete can sometimes feel like a constant state of frustration at not seeing the gains we want and work for. Why is that?

    Part of the problem may be that many of us don’t really understand what exactly it is we want to get better at. Sure, if you’re a marathon runner, you want to run 26.2 miles faster. If you’re a ski racer you want to finish the course faster, and if you’re a weightlifter you want to be able to pick up more weight off the ground. While these actual tasks seem simple enough to complete, the issue is that the training components that go into accomplishing them are a bit more complicated.

    When we complete a training session, we ideally have something we are targeting. It may be a skill, a pace, a metabolic system, a psychological experience, or—most likely—a combination of all of these things. Chances are, the more experienced, or ‘elite’ an athlete is, the more of this focus is brought to every session. What separates the best from the rest is the understanding of how that session fits into the broader picture of their training needs and how it will ultimately help on race day.

    Assessment of strengths and weaknesses (technique, program, training) allows athletes to make a training plan that will actually make them faster. And isn’t that what everyone really wants? (Photo: Brinkema Brothers)

    We only have so many units of energy to spend on training in any given day. If you have a job, a family, or other life obligations, then that number gets even smaller. The question becomes, “Where can we spend the least energy for the largest return?”

    To answer this question, we first need to figure out where our strengths are and where our weaknesses are within the context of what it is we actually are training to accomplish. This is surprisingly challenging to do. In the heat of a race, when we are falling off the pace and feel ourselves floundering it’s hard to identify exactly what led to the disappointing result.

    In the end it often feels like, “Well, I just wasn’t good enough!” We may feel like we did everything poorly and that the only way to possibly get better would be a hard reset where you just train everything better for next time. These feelings create an emotional bias that is a huge issue because it prevents us from seeing what we did well and where we were competitive with the field, or maybe even stronger than the field. This is problematic for a couple of reasons. First, it’s just a bummer to feel like we aren’t good enough and it can ruin our foundational enjoyment of sport. Second, it traps us inside a box where we can’t see how to grow and improve because we’re focused on a cycle of negativity. This often leads to the feeling that the only possible solution would be a completely cataclysmic reshaping of our training. This muddy puddle of negative emotion prevents us from accurately calculating where our energy units are best spent in training going forward.

    If we are unable to see the nuances of our performances, and recognize that there are strengths and weaknesses present in every single effort we do, then we are going to have a hard time making the training decisions that will lead to actually improving.

    For example, if two people are running a 5k with a goal of breaking 16 minutes and both finish in a time of 16:30, there are a lot of ways that they could have lost that 30 seconds out on the course. Athlete One may have been able to meet their goal speed easily until the last kilometer where they slowed down and lost all of their time in the final few minutes. Athlete Two, on the other hand may have felt that the pace was too fast from the start, but then ran strong and steady at a slower pace throughout the race and finished with energy left in the tank. Either way they both finish at the exact same time, but if they fail to recognize the different strengths and weaknesses they had in both scenarios, then it’s going to be challenging to figure out how to go faster next time.

    In the first scenario, Athlete One successfully trained their body and mechanics to be able to handle the speed of their goal race pace, but they may need to elevate their base fitness so that they can sustain that speed for longer. In the second scenario, it seems that Athlete Two’s fitness was pretty good, but they were not trained to be able to meet the speed requirements of their desired time.

    In each scenario, the training adjustments they need to make to lose the same amount of time are different. To chalk up the entire race as a loss and decide that none of their training was working because neither of them met their goals would be a mistake.

    Luke Jager (USA) in 2022 competing in the World Cup Classic Sprint in Beitostolen, Norway. (Photo: Modica/NordicFocus)

    If our focus is on doing everything better, in reality we might not be doing anything better. We shouldn’t spend our energy units in places where the marginal gains are going to be relatively small. Instead, spend energy in the places that will yield the greatest returns. When it comes to training and performance, the lowest hanging fruits may be the sweetest.

    For Athlete One, every unit of energy they put into a training session that improves their speed may yield only half a second off their 5k time. Every unit of energy they put into a training session that elevates their base fitness and how long they can hold their race pace may take a whole second off their 5k time. If they decide to spend that same unit of energy on a session that targets a little bit of both, they might end up seeing no improvement at all. Even worse would be increasing the energy spent on base training while continuing to spend the same amount as before on speed training. Spending more energy than their energy budget constraint allows will ensure that they don’t make proper adaptations in either arena and will plateau or even get slower.

    The higher the level, the more important these training decisions become in order to continue improving. In an untrained person, doing almost anything will yield improvement over relatively short periods of time. For elite athletes the gains from any training session are marginally very low. So while the lowest hanging fruits are not equally low for everyone, they are still the best path for improvement.

    A growth mindset challenges us to confront the realities of our situation without allowing the bias of our emotions to block the best path forward. In an athletic context, this means thinking about our own experiences to remember where in competitions we felt strong and where we felt less strong in order to determine which kinds of sessions or ‘experiences’ we need to focus on to get better next time.

    In the rest of our lives, a growth mindset allows us to become the best version of ourselves in our relationships, work lives, school lives, and everything in between. Sport makes lessons we learn about ourselves tangible and visible through the medium of results, times, and scores. What we do with these lessons in every other arena of life is what makes it so worth people spending so much time and money taking their kids skiing, biking, running, playing basketball, cricket, and everything else in between.

  • How to Prep Your Skis for the Big Races

    How to Prep Your Skis for the Big Races

    Many of the season’s biggest races are a month away: The American Birkebeiner, High School State Meets, Junior National Qualifiers, and countless important citizens’ races. Here at BNS, we get a lot of questions in the weeks leading up to races about how to make your skis the fastest possible on race day. Truth is, much like training your body to be fast on race day, you have to prep your skis for the big races, too. This means taking care of your skis the right way long in advance, not just the night before a big race. Below are some expert tips below on how to keep your skis in top shape.

    We recommend using Rode Graphite in your skis at least once weekly as a base refresher. If you have waxed with good graphite wax like Rode, you know your bases are simply in much better shape after using it. It deeply penetrates and refreshes your base while offering anti-static properties in newer snows and helps to keep the ski clean by hardening the bases for dirty snow. We like to use Rode Graphite at least once a week. Make sure to brush thoroughly with a steel or bronze brush and then a Holmenkol Horsehair brush to get the excess wax out.

    Wax every time after you ski. Period. Never, ever let your skis sit dry. Even if you are in a rush, quickly dry them off and get a liquid wax in the base. Doing so will keep your skis from slowing down over time. The beauty of the new liquid waxes is that they are easy to use and can be the bridge between hot waxing your skis while keeping your bases saturated. Liquid waxes are phenomenal products but are NOT a complete substitute for hot waxing. We all love liquid waxes. They are easy to use, relatively durable, and leave little to no mess. The kicker is that they simply do not do the job that hot waxing does. We have a pair of skis in the shop that we have been using as a test sample for two years. We have ONLY liquid waxed one of the skis with various brands of liquids. On the other ski, we have hot waxed at least twice a week in addition to using liquid waxes. When you jump on these skis to ski, there is NO question that the ski that has been hot waxed regularly is significantly faster than the ski that has not. Liquid waxes are an incredible supplement to hot waxing, but they are not a substitution. If you care about max ski speed, you must still hot wax your skis.

    Use sharp scrapers and good brushes. The number of skis we see damaged by using old and dull scrapers is massive. We cannot say this enough: get new scrapers or sharpen your scrapers often! It makes the job easier and keeps your skis in much better shape. Also, get new brushes when your brushes start to lose their integrity. Once a brush starts to “spread,” it becomes less effective. It makes the job harder on your elbows and shoulders but also makes it less likely that you are effectively brushing the excess wax from the ski.

    Race week, we recommend hot waxing your skis every night if you can. This will ensure that your bases are in the best shape and have the chance to be the fastest on the big day. On race day, make sure to scrape and brush thoroughly. Excess wax in the skis leads to drag on the snow and makes picking up any dirt and other gunk in the snow much more likely.

    Lastly, if you are unsure what wax to use and don’t have a great way to test, just buy Rode Endurance. It is an incredible wax, super fast, and incredibly durable. Endurance is rarely outside of the top five in tests we run, and we often mix it with the appropriate color wax of the day to improve speed and durability. This wax continues to amaze us as an all-temperature and all-snow condition solution. Get a 180g bar today and be set for racing for a while.

    We wish you the best race season and are here to help. Please do not hesitate to reach out to either of our stores or email roger@bouldernordic.com anytime with specific wax questions.

    Enjoy!