From the FasterSkier archive — posts syndicated from athletes’ and coaches’ own blogs between 2004 and 2012, kept online as published. Current coverage is at fasterskier.com.

Category: Strength

Articles on strength training.
  • Plyometrics: Where They Fit Within a Training Program

    Plyometrics: Where They Fit Within a Training Program

    This article was made possible through the generous support of our voluntary subscribers. If you value coverage like this, please support FasterSkier with a voluntary subscription.

    Where do Plyometrics Fit Within a Training Program

    Hint: You Don’t Start with Plyometrics

    Over the past few years there’s been a noticeable shift in how athletes and coaches talk about training. More emphasis on power. More interest in being “explosive.” That’s a good direction. Cross-country skiing is a power-endurance sport, and the ability to produce force quickly matters — whether it’s a finishing sprint, a tough climb, or simply skiing more efficiently at race pace.

    But as often happens, the optimal application gets missed. What I keep seeing is athletes jumping straight to plyometrics as if that’s where power development begins. It doesn’t. And when you start there, you usually end up with a lot of activity and not much adaptation.

    Plyometrics are not a shortcut. They are part of a progression — the conversion of maximal strength into power. Exercises like bounding, jumps, hurdles, and medicine ball throws can all be effective. But only when the athlete has the capacity to both absorb and produce force. Without that foundation, you’re not really training power. You’re mostly practicing jumping.

    That distinction matters more than most people think.

    I’ve used Tudor Bompa’s periodized strength model since the mid-1990s, and what still holds up is not the exercise list, but the sequencing. He didn’t build the model around movements. He built it around a logical progression. In my experience, that sequencing becomes even more important at the edges of the sport — junior athletes who are still developing and masters athletes who need to be more deliberate about how they load the system.

    And in that sequence, plyometrics come late. Not first.

    The progression is simple:

    1. Anatomical Adaptation (AA) — 4–8 weeks
    2. Maximum Strength (MS) — 6–8 weeks (minimum)
    3. Conversion to Power (CP) — 6–8 weeks
    4. Maintenance (M) — through the competitive period

    No shortcuts. No skipping steps. And no mixing phases and expecting the same result.

    Sweden’s Nicolina Lindquist jumping over Jake Pearson, of Cody, Wyo., during a strength workout at the USBA development camp in 2016 in Jericho, Vt.(Photo: Katrina Howe)

    Anatomical Adaptation

    The Anatomical Adaptation phase is the one most often underestimated, and it’s the reason a lot of strength and power work never turns into what it should. The goal here is not to get strong in the traditional sense. The goal is to prepare the athlete to train.

    That means building connective tissue tolerance, improving movement quality, and addressing the weak points most skiers share: eccentric control, single-leg stability, trunk stiffness under load, and upper body pulling strength. If those aren’t in place, everything that follows is limited.

    The work in this phase should look simple and controlled. Single-leg strength work like split squats, step-ups, and single-leg Romanian deadlifts (RDLs). Eccentric work like slow step-downs and controlled lowering. Trunk work that emphasizes force transfer, not just stability. Upper body pulling through a full range of motion. Even basic plyometric preparation — jump rope, small hops, controlled landings — but with the focus on coordination and tissue conditioning, not power.

    Two to three sessions per week is enough. The progression is not about maximizing loads. It’s about improving control under increasing demand. If this phase is done well, the athlete finishes it ready to train — not already fatigued.

    Max strength. (Photo: Corey Young)

    Maximum Strength

    From there, the focus shifts to Maximum Strength — and this is where many endurance athletes miss the point. Max strength is not circuits. It’s not high-rep fatigue work. It’s the ability to produce force.

    That means high load, low reps, and full recovery. Roughly 80–90% effort, sets of three to six reps, and enough rest between sets to maintain quality. The goal is not to exhaust the athlete. The goal is to improve motor unit recruitment and force production.

    For skiers, the work should still be sport-specific in its intent. Single-leg strength for the lower body — Bulgarian split squats, heavy step-ups. Posterior chain work — deadlifts, RDLs, hip thrusts. Upper body pulling — weighted pull-ups, heavy rows. And trunk work that connects the system under load, not isolates it.

    A session doesn’t need to be complicated. A few key movements, done well, with intent. Two to three sessions per week. Progress by increasing load, improving speed at the same load, and cleaning up movement under stress — not by constantly changing exercises.

    This phase is critical for a simple reason: you can’t convert strength you don’t have into power. In a sport already biased toward endurance, this is often the missing piece.

    Skate jumps with Chelsea Holmes back in 2014.

    Conversion to Power

    Only after that does the Conversion to Power phase make sense.

    Now the goal shifts. You’re no longer trying to get stronger. You’re trying to apply force faster. Rate of force development, timing, coordination, and the elastic qualities of muscle and tendon all become the focus.

    This is where plyometrics belong.

    The difference from the max strength phase is clear. Loads come down. Speed goes up. The movement patterns may look similar, but the intent is entirely different. If it’s not fast, it’s not power.

    That changes how the work is structured. Low volume, high quality. Three to six reps per set. Three to five sets. Full recovery. Stop when speed drops. This is neural work, not conditioning.

    Now the exercises make sense: bounding, especially uphill; single-leg hops; lateral bounds; reactive jumps; drop jumps, box jumps, hurdles. Loaded power work like jump squats and explosive step-ups. Upper body power through medicine ball throws and explosive pulling. And finally, ski-specific integration — bounding with poles, hill sprints, roller ski accelerations.

    If the power isn’t developing there, it’s not transferring.

    A session doesn’t need much. A handful of exercises, done with speed and intent. Two sessions per week is usually enough. More than that and you start turning power training into accumulated fatigue.

    This is also where athletes often get it wrong. They expect this phase to feel hard in the traditional sense. It shouldn’t. It should feel sharp. Explosive. Fresh. If it feels heavy and slow, you’re no longer training power.

    In the yearly plan, this phase typically sits in late summer or fall — after strength has been established and before racing begins. You’re not building the system at that point. You’re sharpening it.
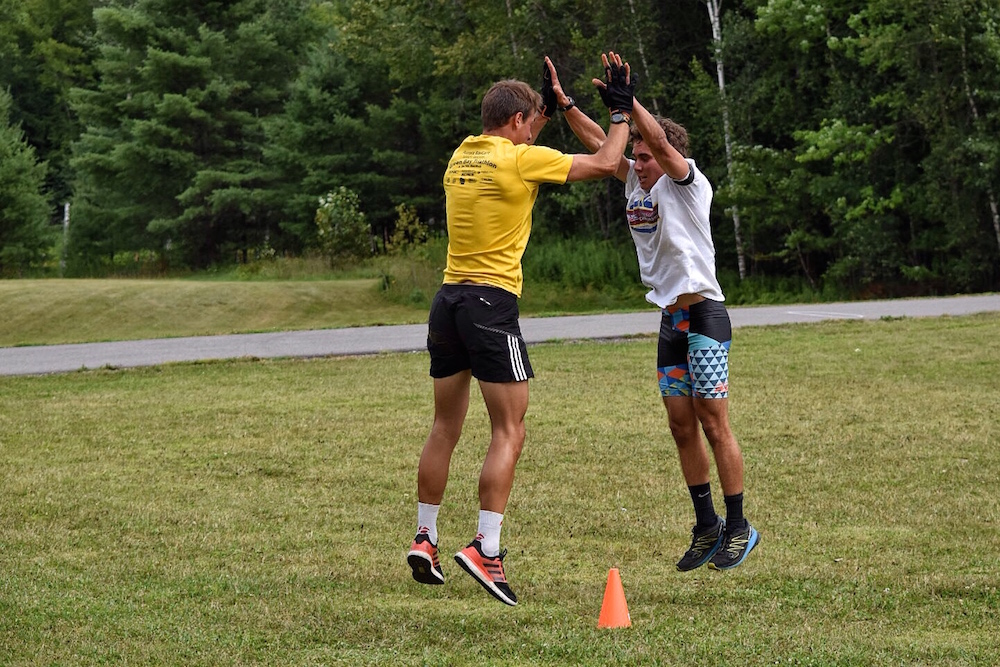
    Paul Schommer (l) and Jake Brown doing high-five partner burpees during a strength workout at the U.S. Biathlon development camp in Jericho, Vermont. (Photo: Katrina Howe)

    What This Looks Like in Practice

    What this looks like depends on the athlete. Younger athletes should spend most of their time on movement quality and basic strength, with only low-level plyometric work. Developing athletes need to build real strength first, then layer in plyometrics gradually. Senior athletes need to respect the sequence across the year — spring to rebuild, summer to get strong, fall to convert, winter to maintain.

    None of this is complicated. But it does require patience.

    There’s nothing wrong with plyometrics. Used at the right time, they’re one of the highest-return tools we have. But they’re not a starting point. They’re a finishing layer.

    Strength gives you the foundation. Plyometrics teach you how to use it.


    Help Support Our Olympic Coverage!

    If you value the thoughtful work and access FasterSkier provides, please consider becoming a Voluntary Subscriber. Your support directly fuels our work to cover the people, places, and moments that make our sport special.

    Join the FasterSkier community!


  • Smooth Transitions: Moving Wisely From Pavement To Snow

    Smooth Transitions: Moving Wisely From Pavement To Snow

    Our bodies are very good at adapting to change, as long as it comes slowly enough. That first frosty day in autumn always feels brutally cold. Take the same temperature in March and we’re in shorts and short sleeves. Our response to exercise load is no different. Taken as a slow and progressive build up, our bodies will respond with increased strength and capacity to stay on the right side of the load vs tolerance equation. But when it comes on too quickly–too much too soon–our bodies tend to complain.

    Jessie Diggins (USST) stay familiar with snow feels while training at the Snow Farm in New Zealand in 2018. (Photo: ColinWitherill/Warren Miller Entertainment)

    The first day on snow is a highlight of every season. Long hours of sweat in the summer sun finally bear fruit with that ephemeral glide of skis on snow. We’ve finally escaped the harsh pounding of running, the clack of rollerski poles on pavement, the constant threat of distracted drivers in 4000 pound death machines hunting you on the road bike (apologies for the drama). It’s definitely easy to get carried away. Before we know it those first giddy strides have turned into a three hour ski when you only packed food and water for any hour. Best case scenario, you’re a bit sore for a couple of days. Worst case, you’ve irritated or injured something that could derail your whole ski season.

    The obvious solution is to progress slowly. For those fortunate enough to have easy access to ski tracks, this takes some self control but is very doable. For those who are not able to get on snow frequently enough to have a progressive build, it’s going to take more prep work to ensure that your body is ready for you to go full gas as soon as the skis hit the snow. 

    If you’ve been rollerskiing, you definitely have a head start. But rollerskiing is not snow skiing. Snow will present different challenges, and therefore different loads on the body. Classic striding is more nuanced and often requires more work to set the kick than simply relying on ratcheted wheels. Pole plants, while nice and quiet, lack the snappy feedback as the snow compresses under the basket (and maybe let you get away with low hands on initiation without the tell tale skid of pole tips on pavement). Balance on the glide ski is now subject to variations in terrain, snow characteristics, and especially grooming quality. 

    November conditions in Lefthand Canyon (Photo: Sophie Spalding).

    If you haven’t been rollerskiing (I don’t blame you), it’s likely that your arms haven’t seen much load over the summer. Your legs have probably been the focus with running, cycling, and hiking. But these are very straight line motions—fine for classic skiing but not the best prep for the lateral demands of skating.

    Ideally you’ve been doing strength training, ski specific drills, and stability work all summer. If not, this article is your friendly reminder that it’s not too late to get yourself ready. If you are a Faster Skier regular (thank you!), then you’ve likely come across some of my previous articles and hopefully you’ve incorporated the associated exercises into your regular “pay to play” maintenance workouts. Here are some highlights which are particularly appropriate to this conversation: 

    Single leg stability and balance: In Good Standing – Fundamental Elements of Ski Stance 

    Lateral hip strength: Go Sideways for Strong Skating Hips

    Reinforcing the big toe: An Ode to the Big Toe 

    Shoulder health: Building a Better Skier Part 4: The Shoulder

    Higher level dynamic exercises: Adding Power to the Push Off: Understanding the Rate of Force Development 

    So what does a “slow progression” on snow look like? A good example is what the Sifel US Cross Country Ski Team calls The Pace Project. As a tool for race prep, the goal is to ski repeats on a (typically) 5k loop with subtle changes in effort, subtechnique/gearing, nutrition, etc in order to learn the best recipe for repeatedly clocking your fastest times. As an early season, toe in the water vs head-first dive kind of progression, the goal would be to ski the loop (or whatever strip of snow you may have) at a pace where your time, perceived effort, and heart rate stay fairly consistent lap after lap. If your heart rate, perceived effort, and time are all going up, you’re overcooking it and not sticking to the plan. If effort and heart rate are consistent but you’re getting slower, it’s unlikely that you’re burning all of your matches, but your technique is starting to suffer. This might be a good time to take a step back and re-focus on technique. The idea is to ski in control–not necessarily easy, but under a sustainable effort for the duration. If you’re counting laps, look to add a lap every few sessions on snow. The general guidance is frequency before duration before intensity. If increasing frequency isn’t an option, then definitely build up duration prior to adding high intensity.

    Zak Ketterson capitalizing on some early snow time at Frozen Thunder back in 2021. (Photo: Team Birkie)

    When dryland prep and on-snow progression have been combined, the body should be able to stay ahead of the load and tolerate the transition smoothly. Glitches definitely happen and shouldn’t be ignored. However, a niggle or small amount of pain that subsides within a few hours is unlikely to represent a concerning injury. If the pain keeps occurring, if it becomes moderate or severe, or if that mild pain is lasting into the next day, it’s a good idea to take some relative rest and seek the help of a physical therapist (ideally one who knows the specific demands of Nordic skiing). 

    Now go do some balance exercises, a snow dance or two (afterall, dancing has been shown to decrease back pain with skiing), and don’t forget to scrape the storage wax off your skis!


  • 5 Activation Exercises To Get You Ready for Any Workout 

    5 Activation Exercises To Get You Ready for Any Workout 


    From a young age, my track coach insisted that we did a thorough dynamic warm-up before starting any training session to activate the right muscles and avoid injury. I have my track coach to thank for teaching me this at a young age. Especially as I get older, my daily activation exercises are crucial in keeping injuries at bay and getting my body warmed up before the “warm up”. For me, the challenge is activating and using the right muscles when I am training, especially when I am tired. I have found that incorporating 5 activation exercises daily is a way to activate those muscles and sneak in my PT exercises so that my body is ready to go when I start training.

    When I first started incorporating activation/PT exercises, I had a hard time doing them at the trailhead or parking lot because laying on the ground was difficult and I didn’t want to carry a lot of equipment with me. These 5 exercises are designed so that you can do them anywhere, anytime, with just one piece of equipment, an ankle band, and only take a few minutes! Give them a try and note how your body feels, especially during your warm-up and throughout your workout. 

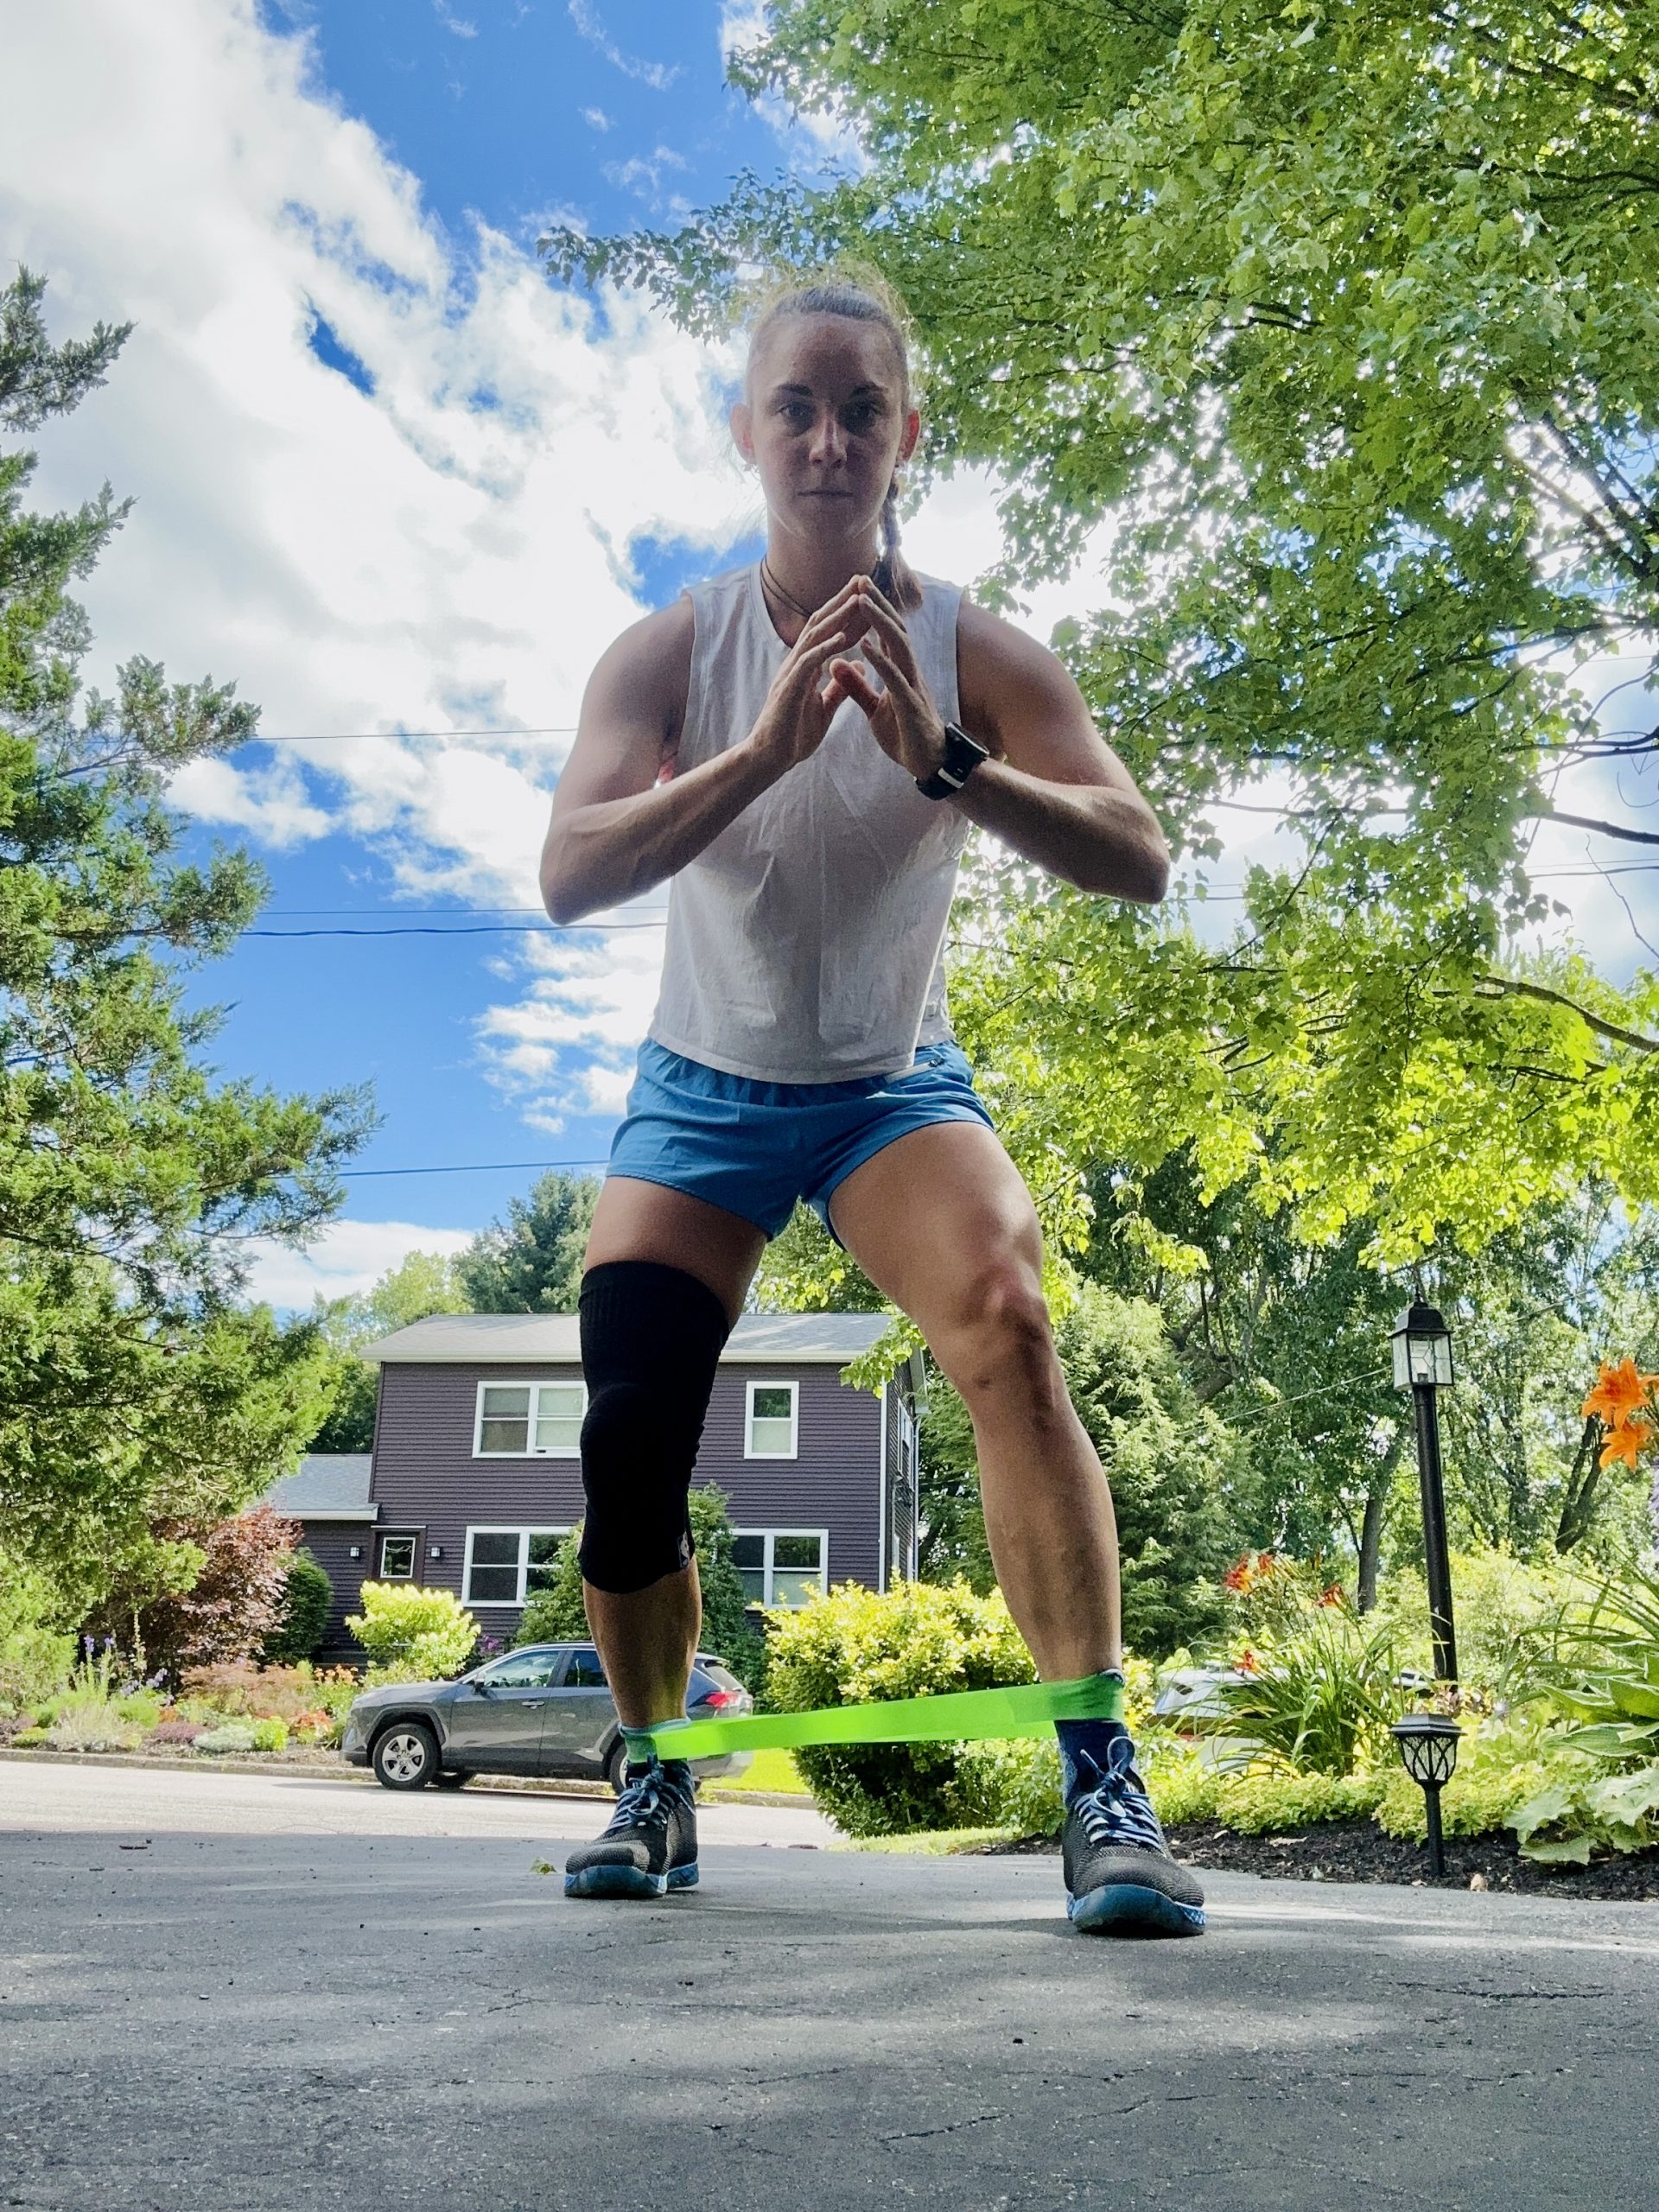
    What you need: 1 ankle band, that’s it! I always keep a green one in my bag. 

    Where to do it: Anywhere! At home before you go exercise, or in the parking lot/trailhead. 

    Banded Skate Walks

    Activating: glutes, core, balance

    Place a band around your ankles. Slightly round your back and engage your core. Slowly skatewalk backwards, placing your right leg back. Bring your left foot in without placing it on the ground, and transfer your weight entirely onto your back right leg like you are about to do a single-leg squat. Engage your right glute and slowly skate the inside left leg back and out. Repeat for 6 steps back, and 6 steps forward. 


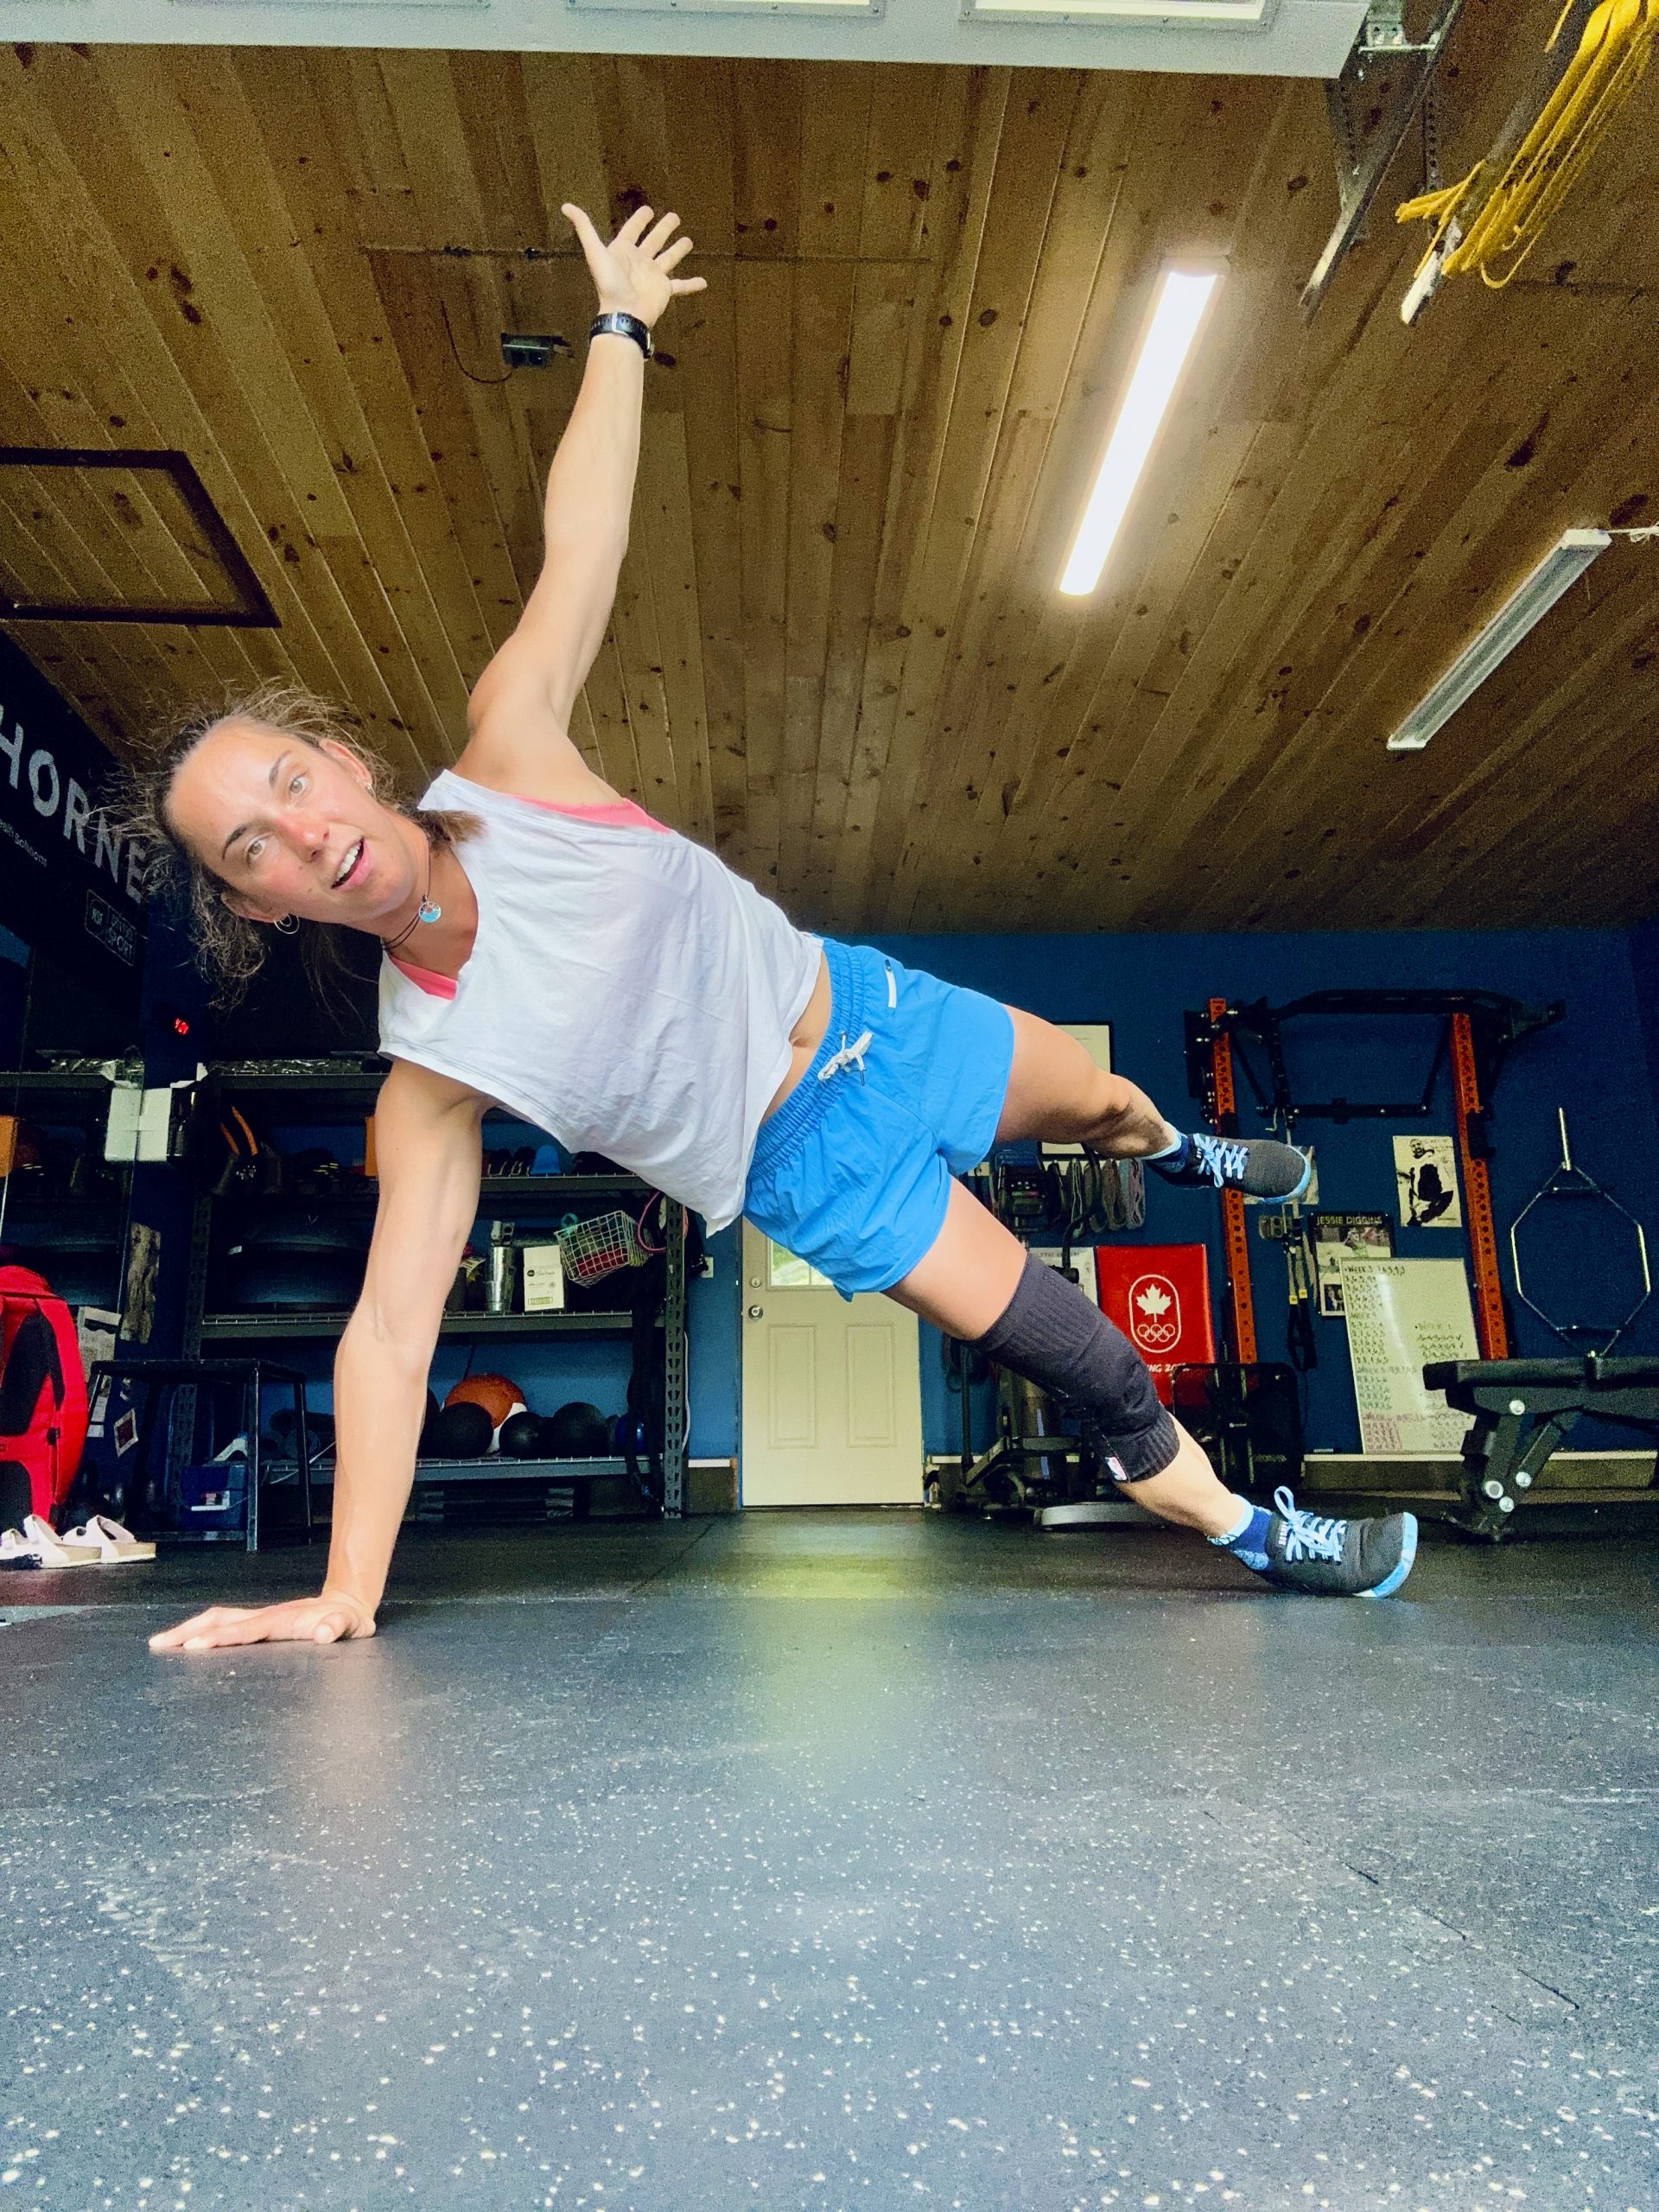
    Side plank star 

    Activating: core, glutes, obliques, shoulders 

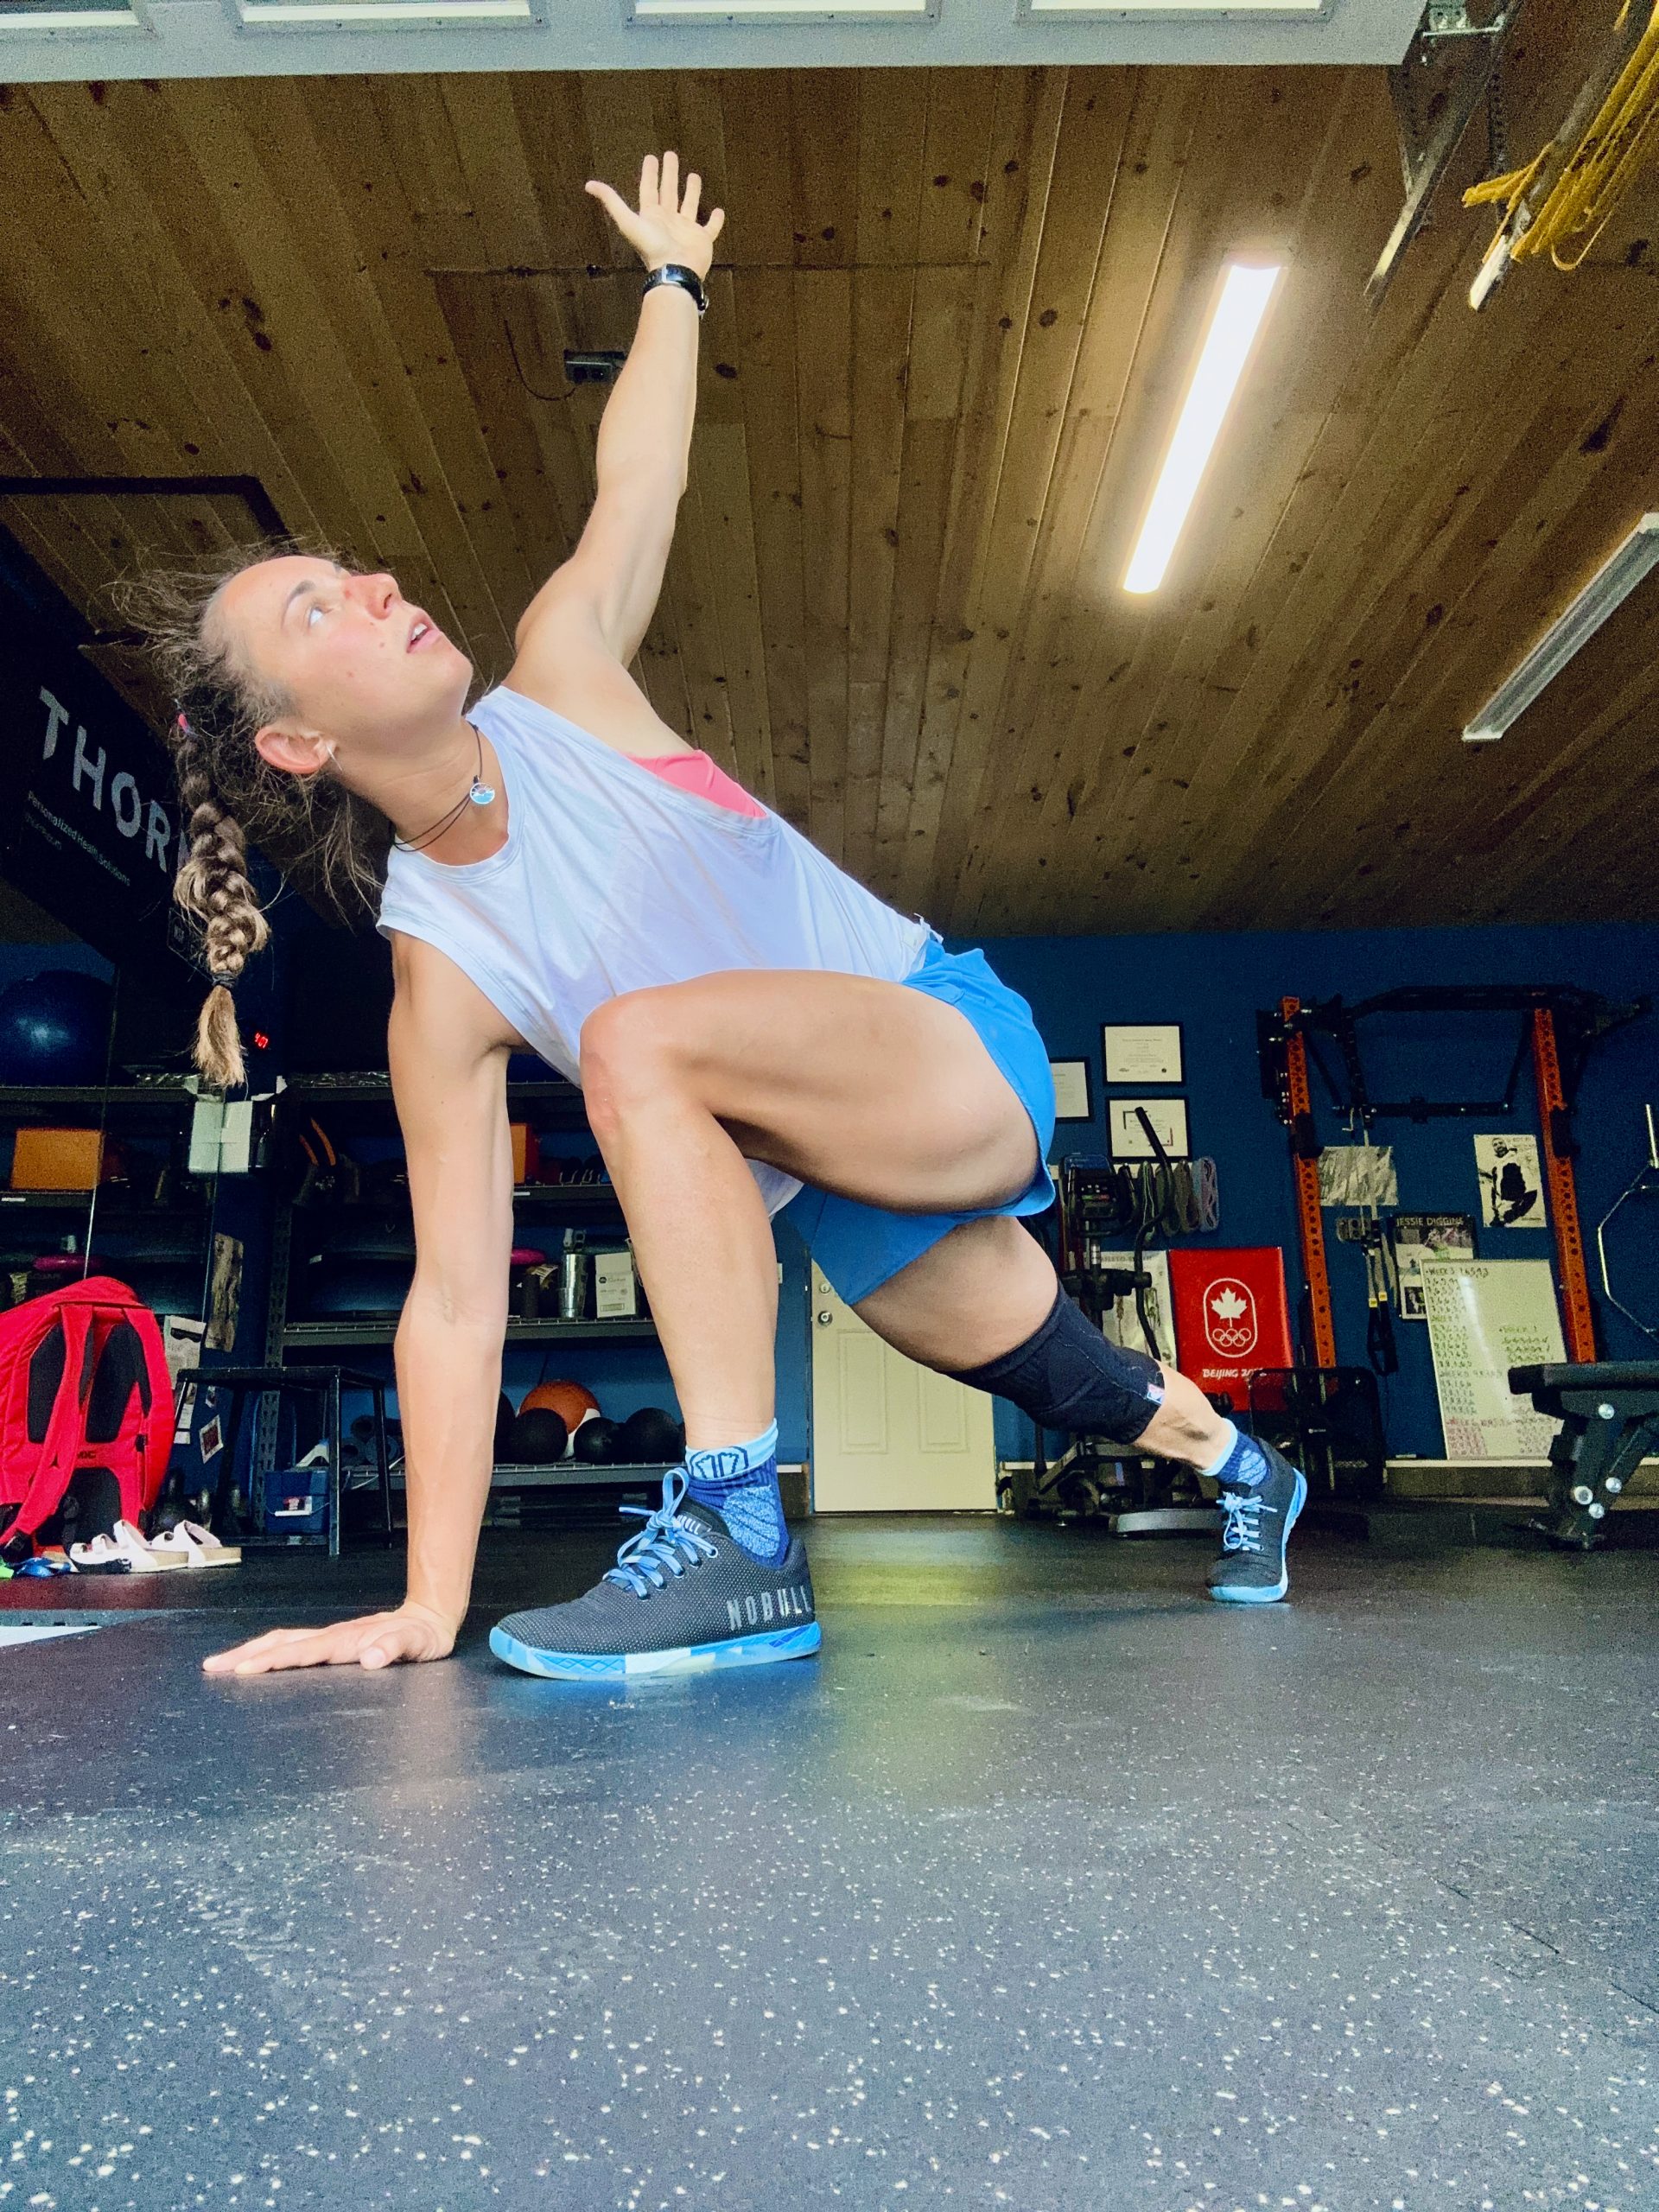
    Place your right hand (or elbow on the ground if it is soft) and right foot on the ground and come into a side plank. Make sure your body is in a straight line and your back is slightly rounded, with your core engaged to start. Lift your left arm and leg up straight into the air, and bring your left leg slightly back, activating the left glute. Raise and lower your left leg 10x before switching sides. Remember to maintain a straight line with your upper body.


    Bird Dogs 

    Activating: hamstring, glutes, core, obliques, back, lats

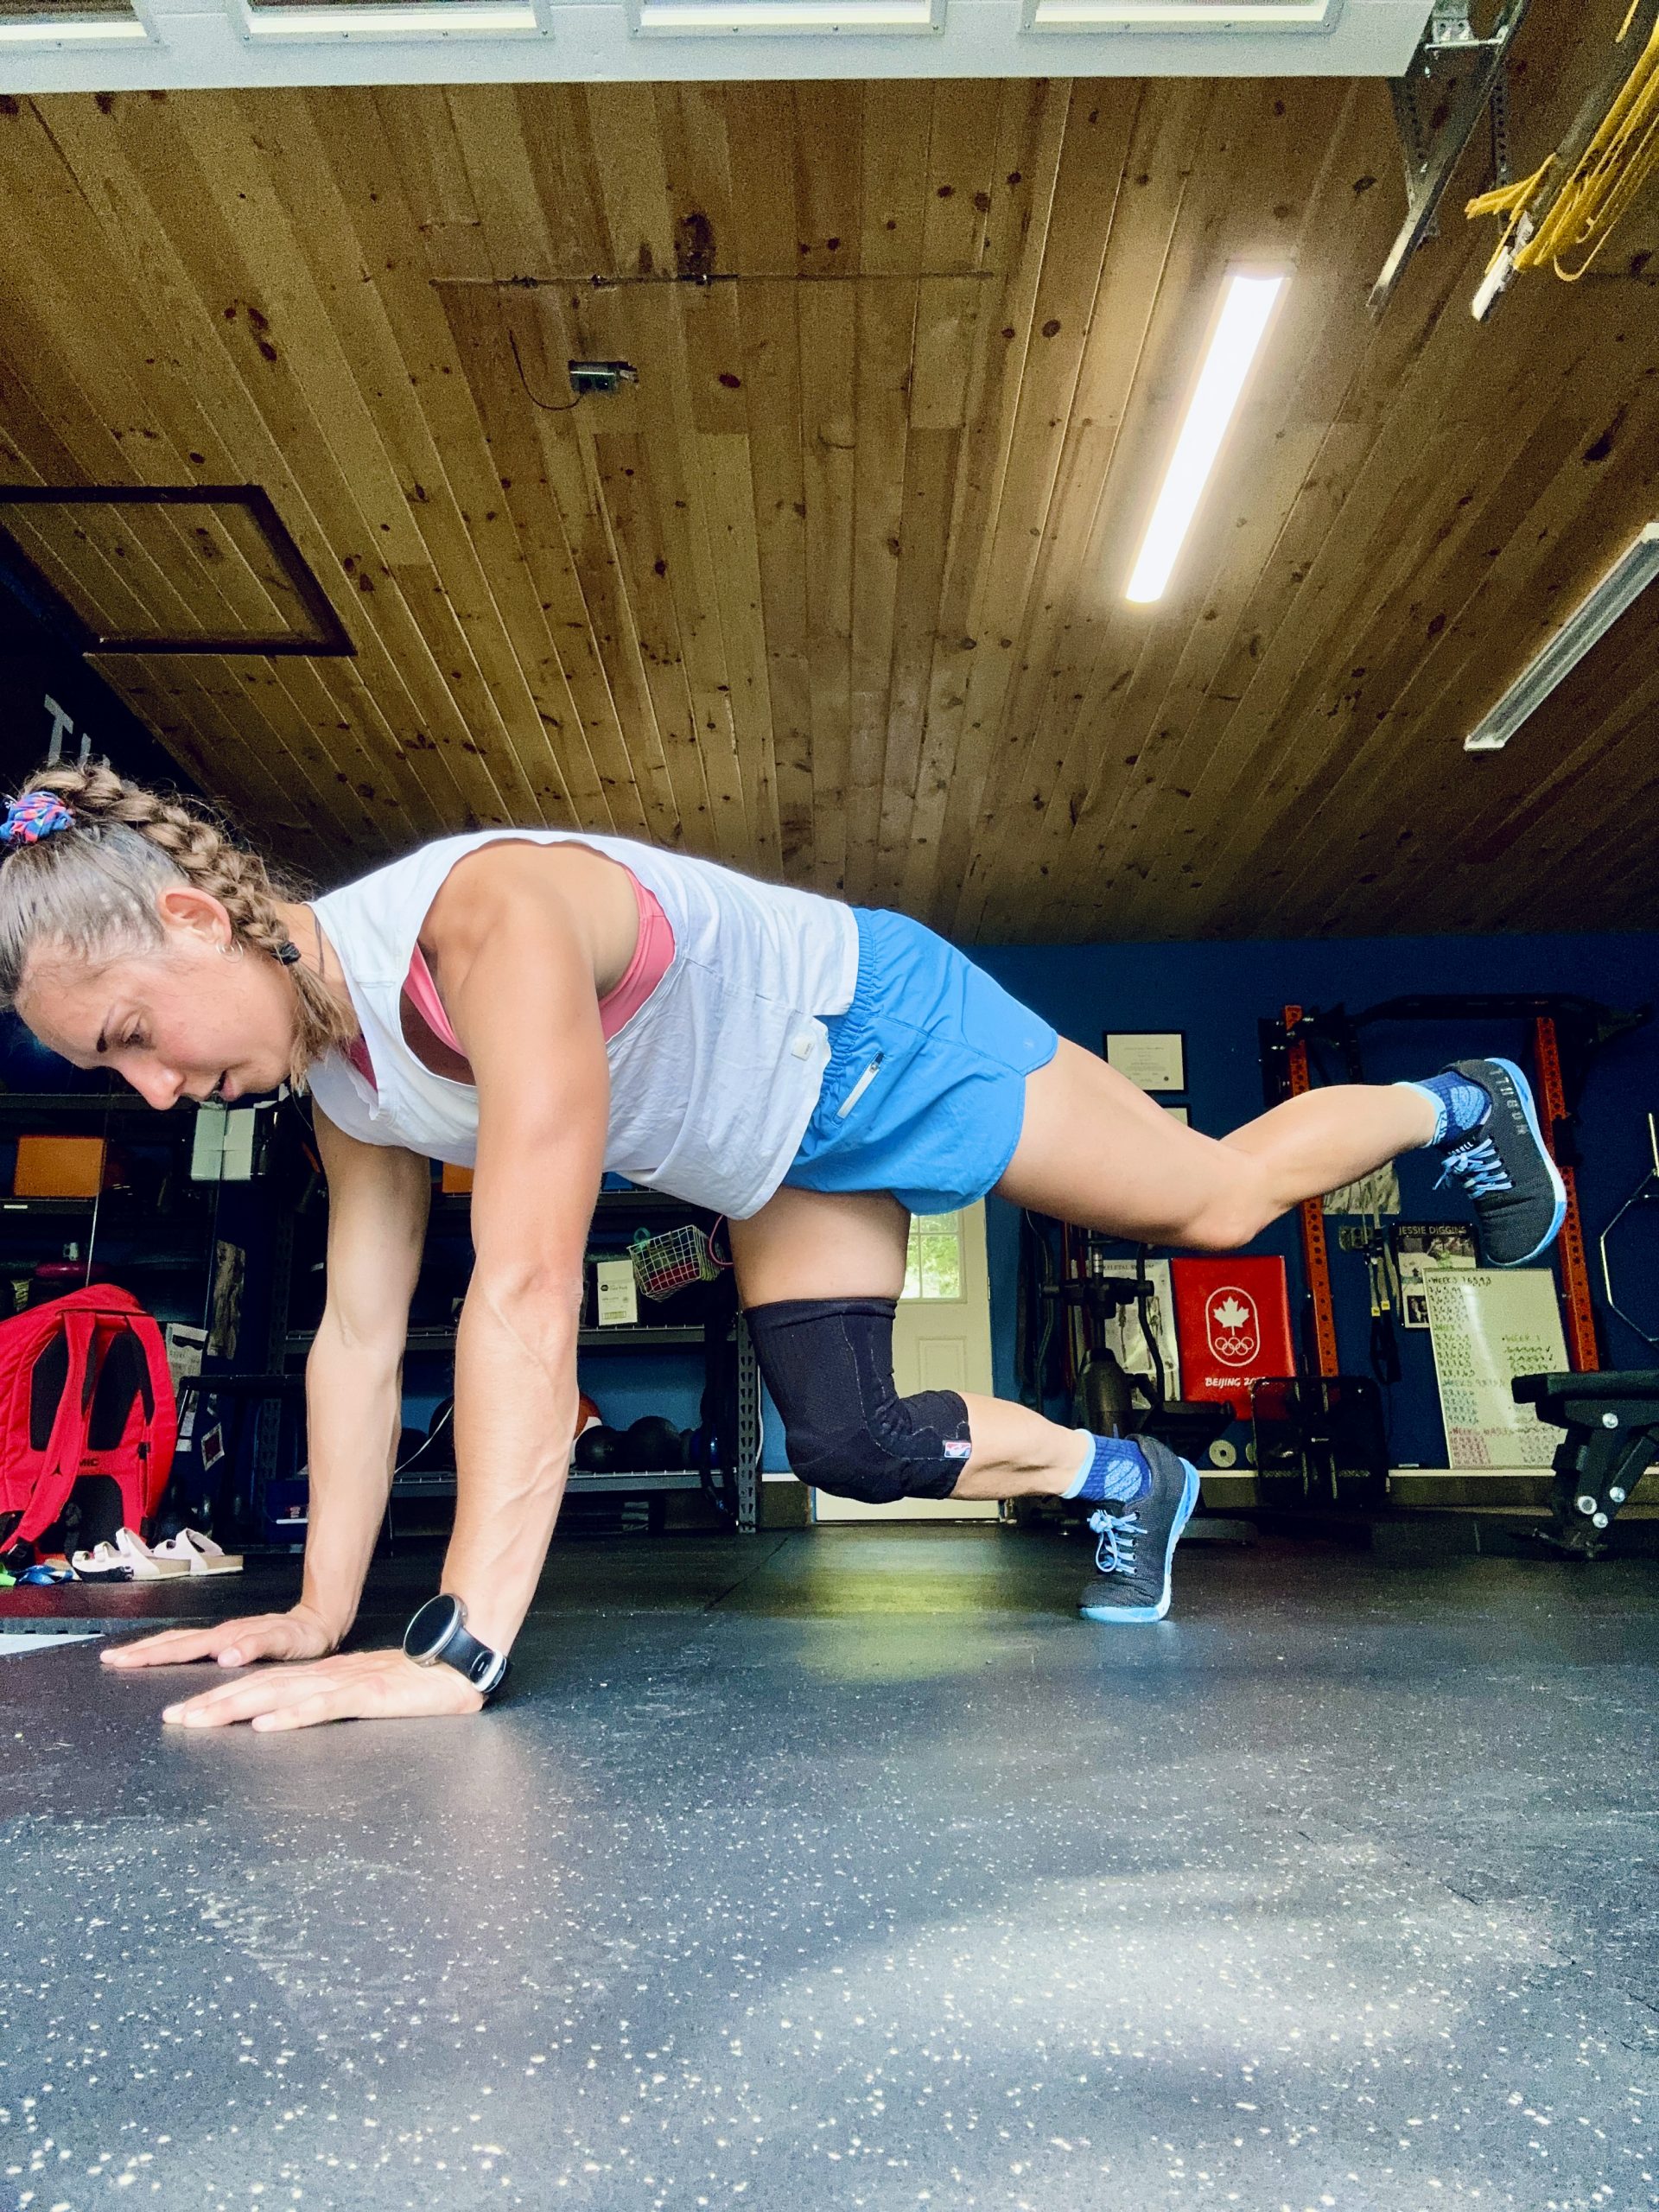
    Place your hands and knees on the ground in a tabletop position. Slightly round your spine and engage your core. Lift yourself a few inches off the ground, maintaining the position. Start by kicking one leg back and bringing it back in, maintaining the stable and flat starting position. Kick out the other leg and return it. If you want to add an extra layer of difficulty, reach out one arm and then the other. Repeat this 5x, extending one limb at a time. Focus on pulling your arms and legs closer to one another to get your core firing.  


    Front Lunge and Twist 

    Activating: quads, hamstrings, glutes, core 

    Engage your core and then lunge forward with your left leg. Place your hands on the ground on either side of your left leg. Keep your chest tall. Keeping your left arm on the ground, reach your right hand up towards the sky, twisting your upper body. Place your right hand back down, and reaching your left hand to the sky. Return your left hand to the ground and press through your right leg to return from your lunge to the standing position. Repeat on the other side. Do a total of 4x per leg.


    Plank Shoulder Tap + Kickbacks

    Activating: everything 🙂 

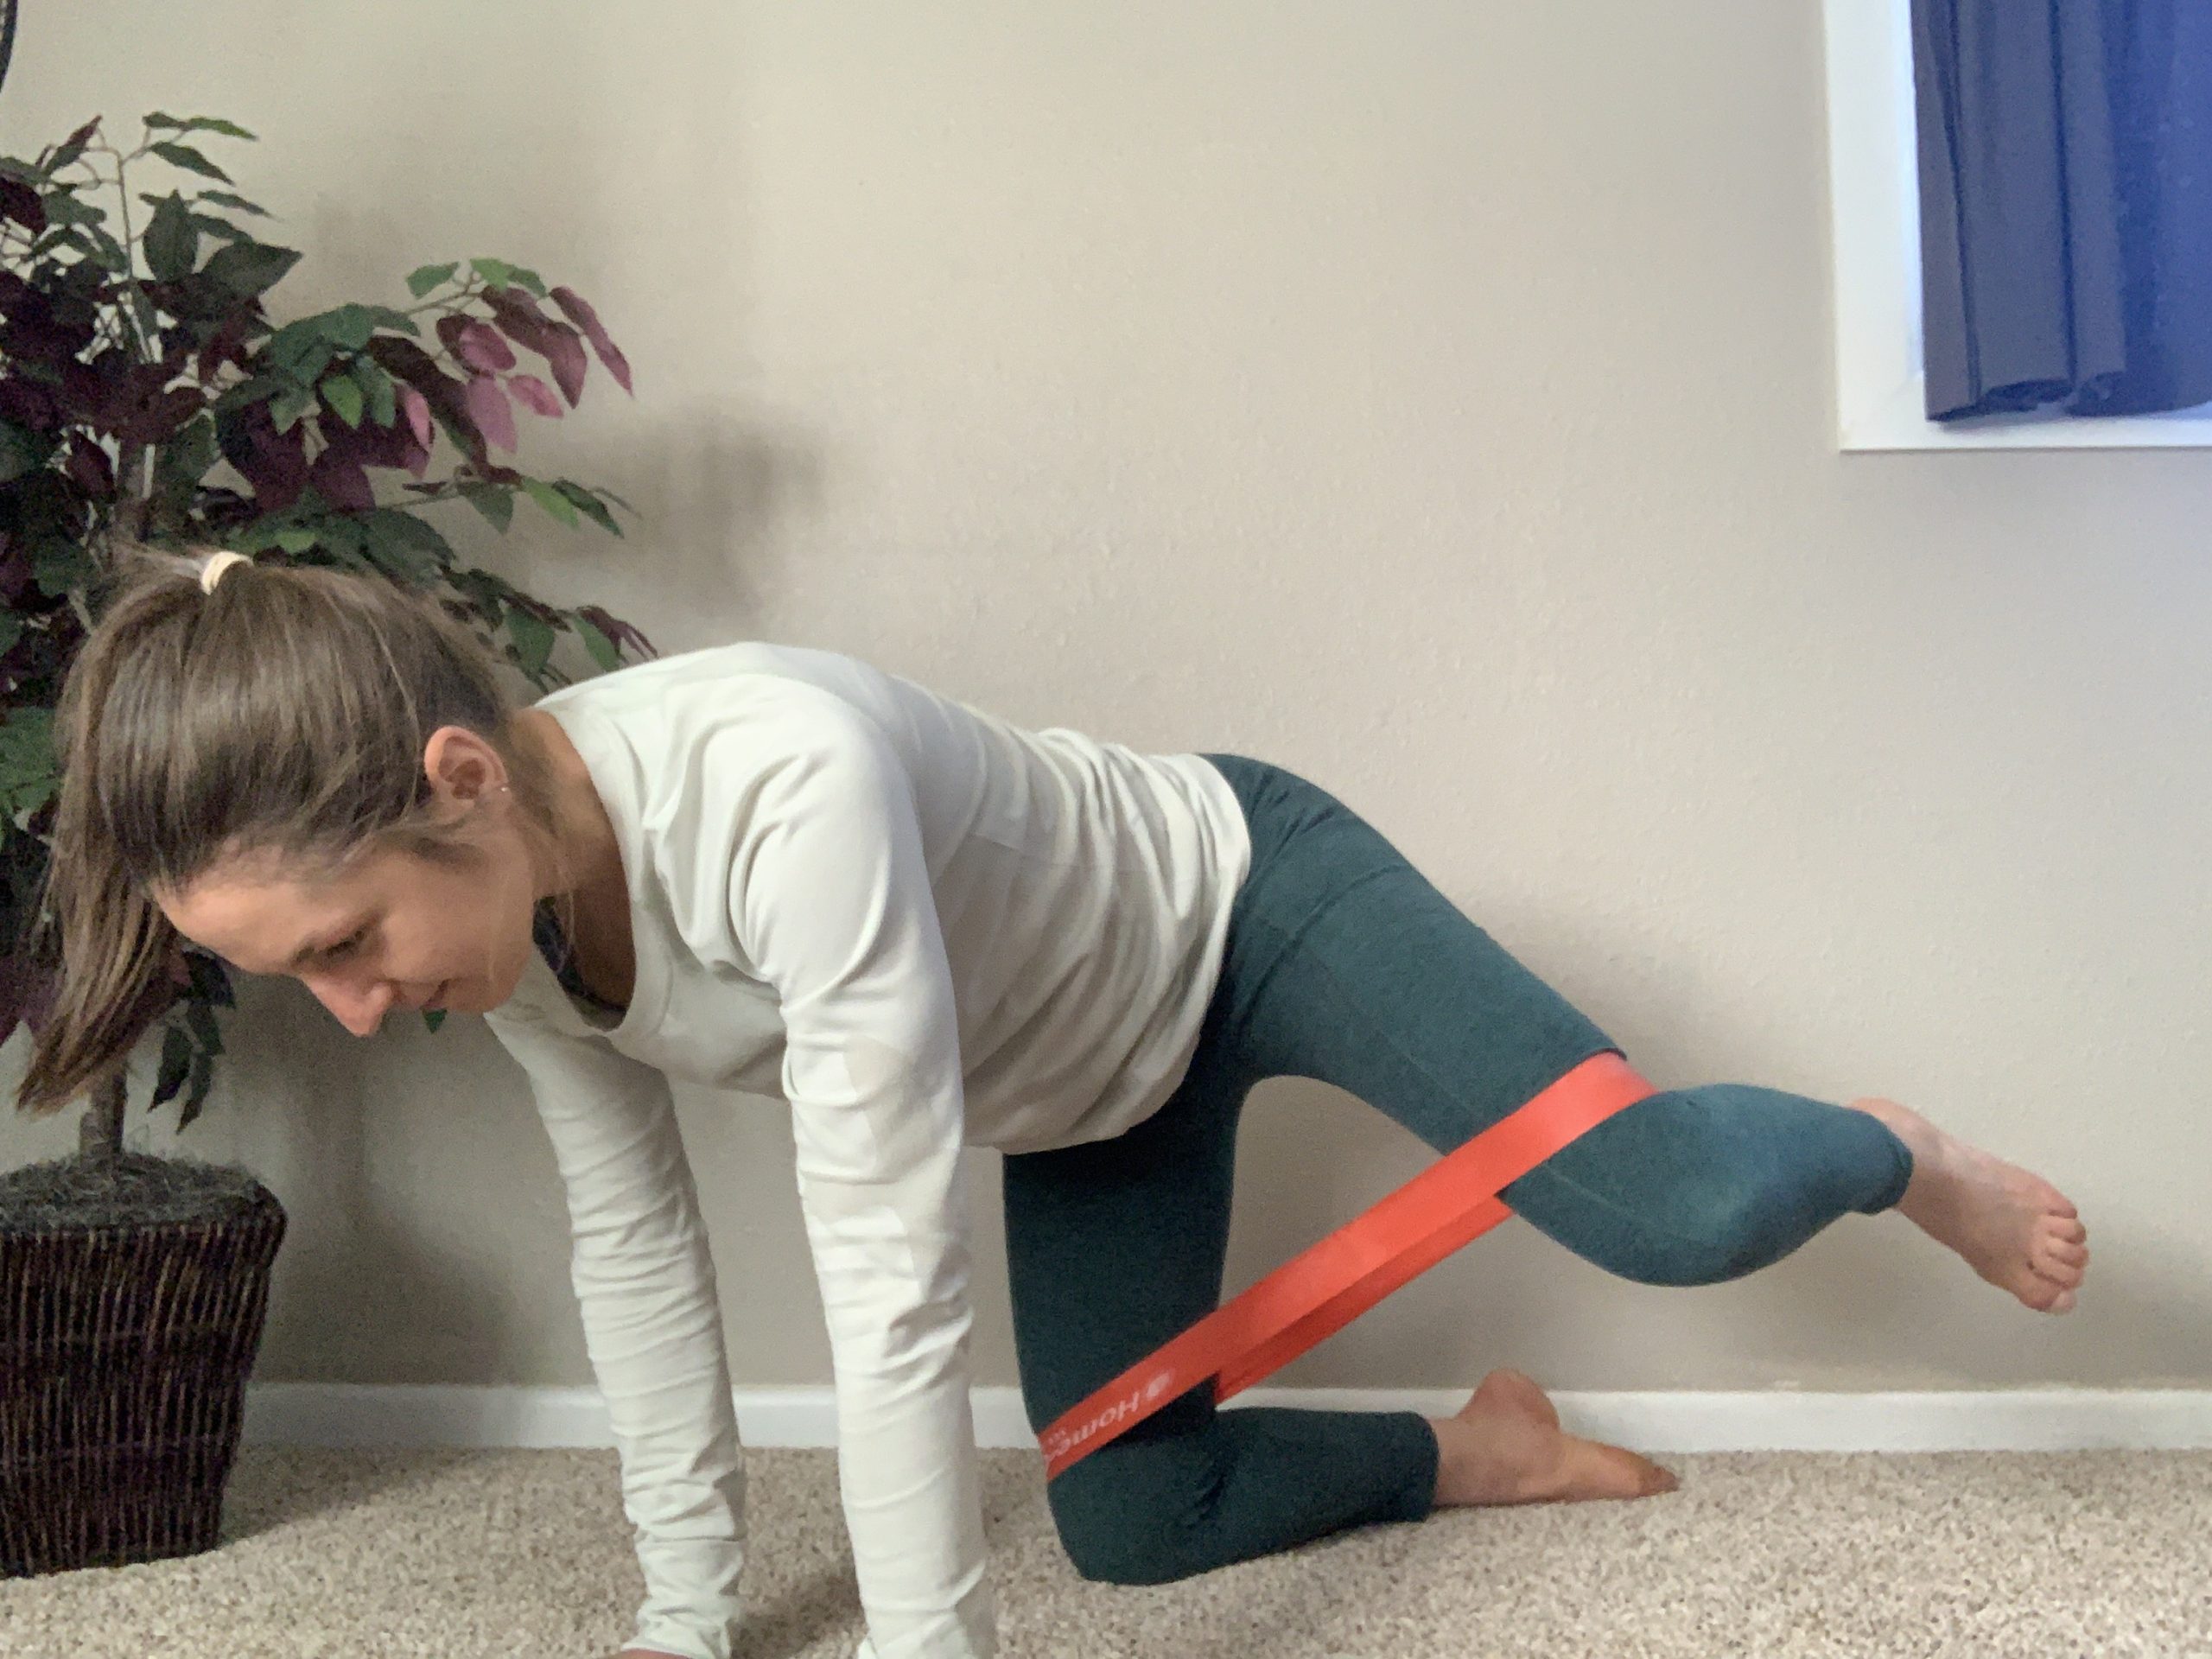
    Start on the ground in a straight-armed plank position with a band around your ankles.  Make sure you are in a straight position, engaging your core before you start the movements. Lift your right hand to tap your left shoulder and return it to the ground without twisting or rotating your back, keeping it steady. Now bring left hand to your right shoulder and return it to the ground. Kick your right leg up to the sky, keeping it straight and activating your posterior chain. Return the right leg back to the ground and do the same with the left. Alternating left and right arms and legs for 4 cycles.


  • Lessons in Process Goals

    Lessons in Process Goals

    I think Jessie Diggins has taught the world many things. Maybe it’s how to find your grit and accept the pain while you push your body to new limits. Maybe it’s a better understanding of eating disorders, where to find help, and knowing you’re not alone. Or maybe it’s the art of applying face glitter on race day. I’ve learned a bit about all of those things (when Jessie says you’re getting glittered, you’re getting glittered), but mostly I’ve learned how to be a better physical therapist.

    As most cross country ski fans know, the 50km race in Holmenkollen, Norway is the Super Bowl of the sport with tens of thousands of fans lining the race course. Until the 2023 edition, women were only permitted to race 30km because no one, or at least the old men in charge, thought they could handle the longer distance without irreparable harm. After years of pushing, the women were finally going to race the golden distance equal to the men. This meant a lot to Jessie and she was one of the favorites to win.

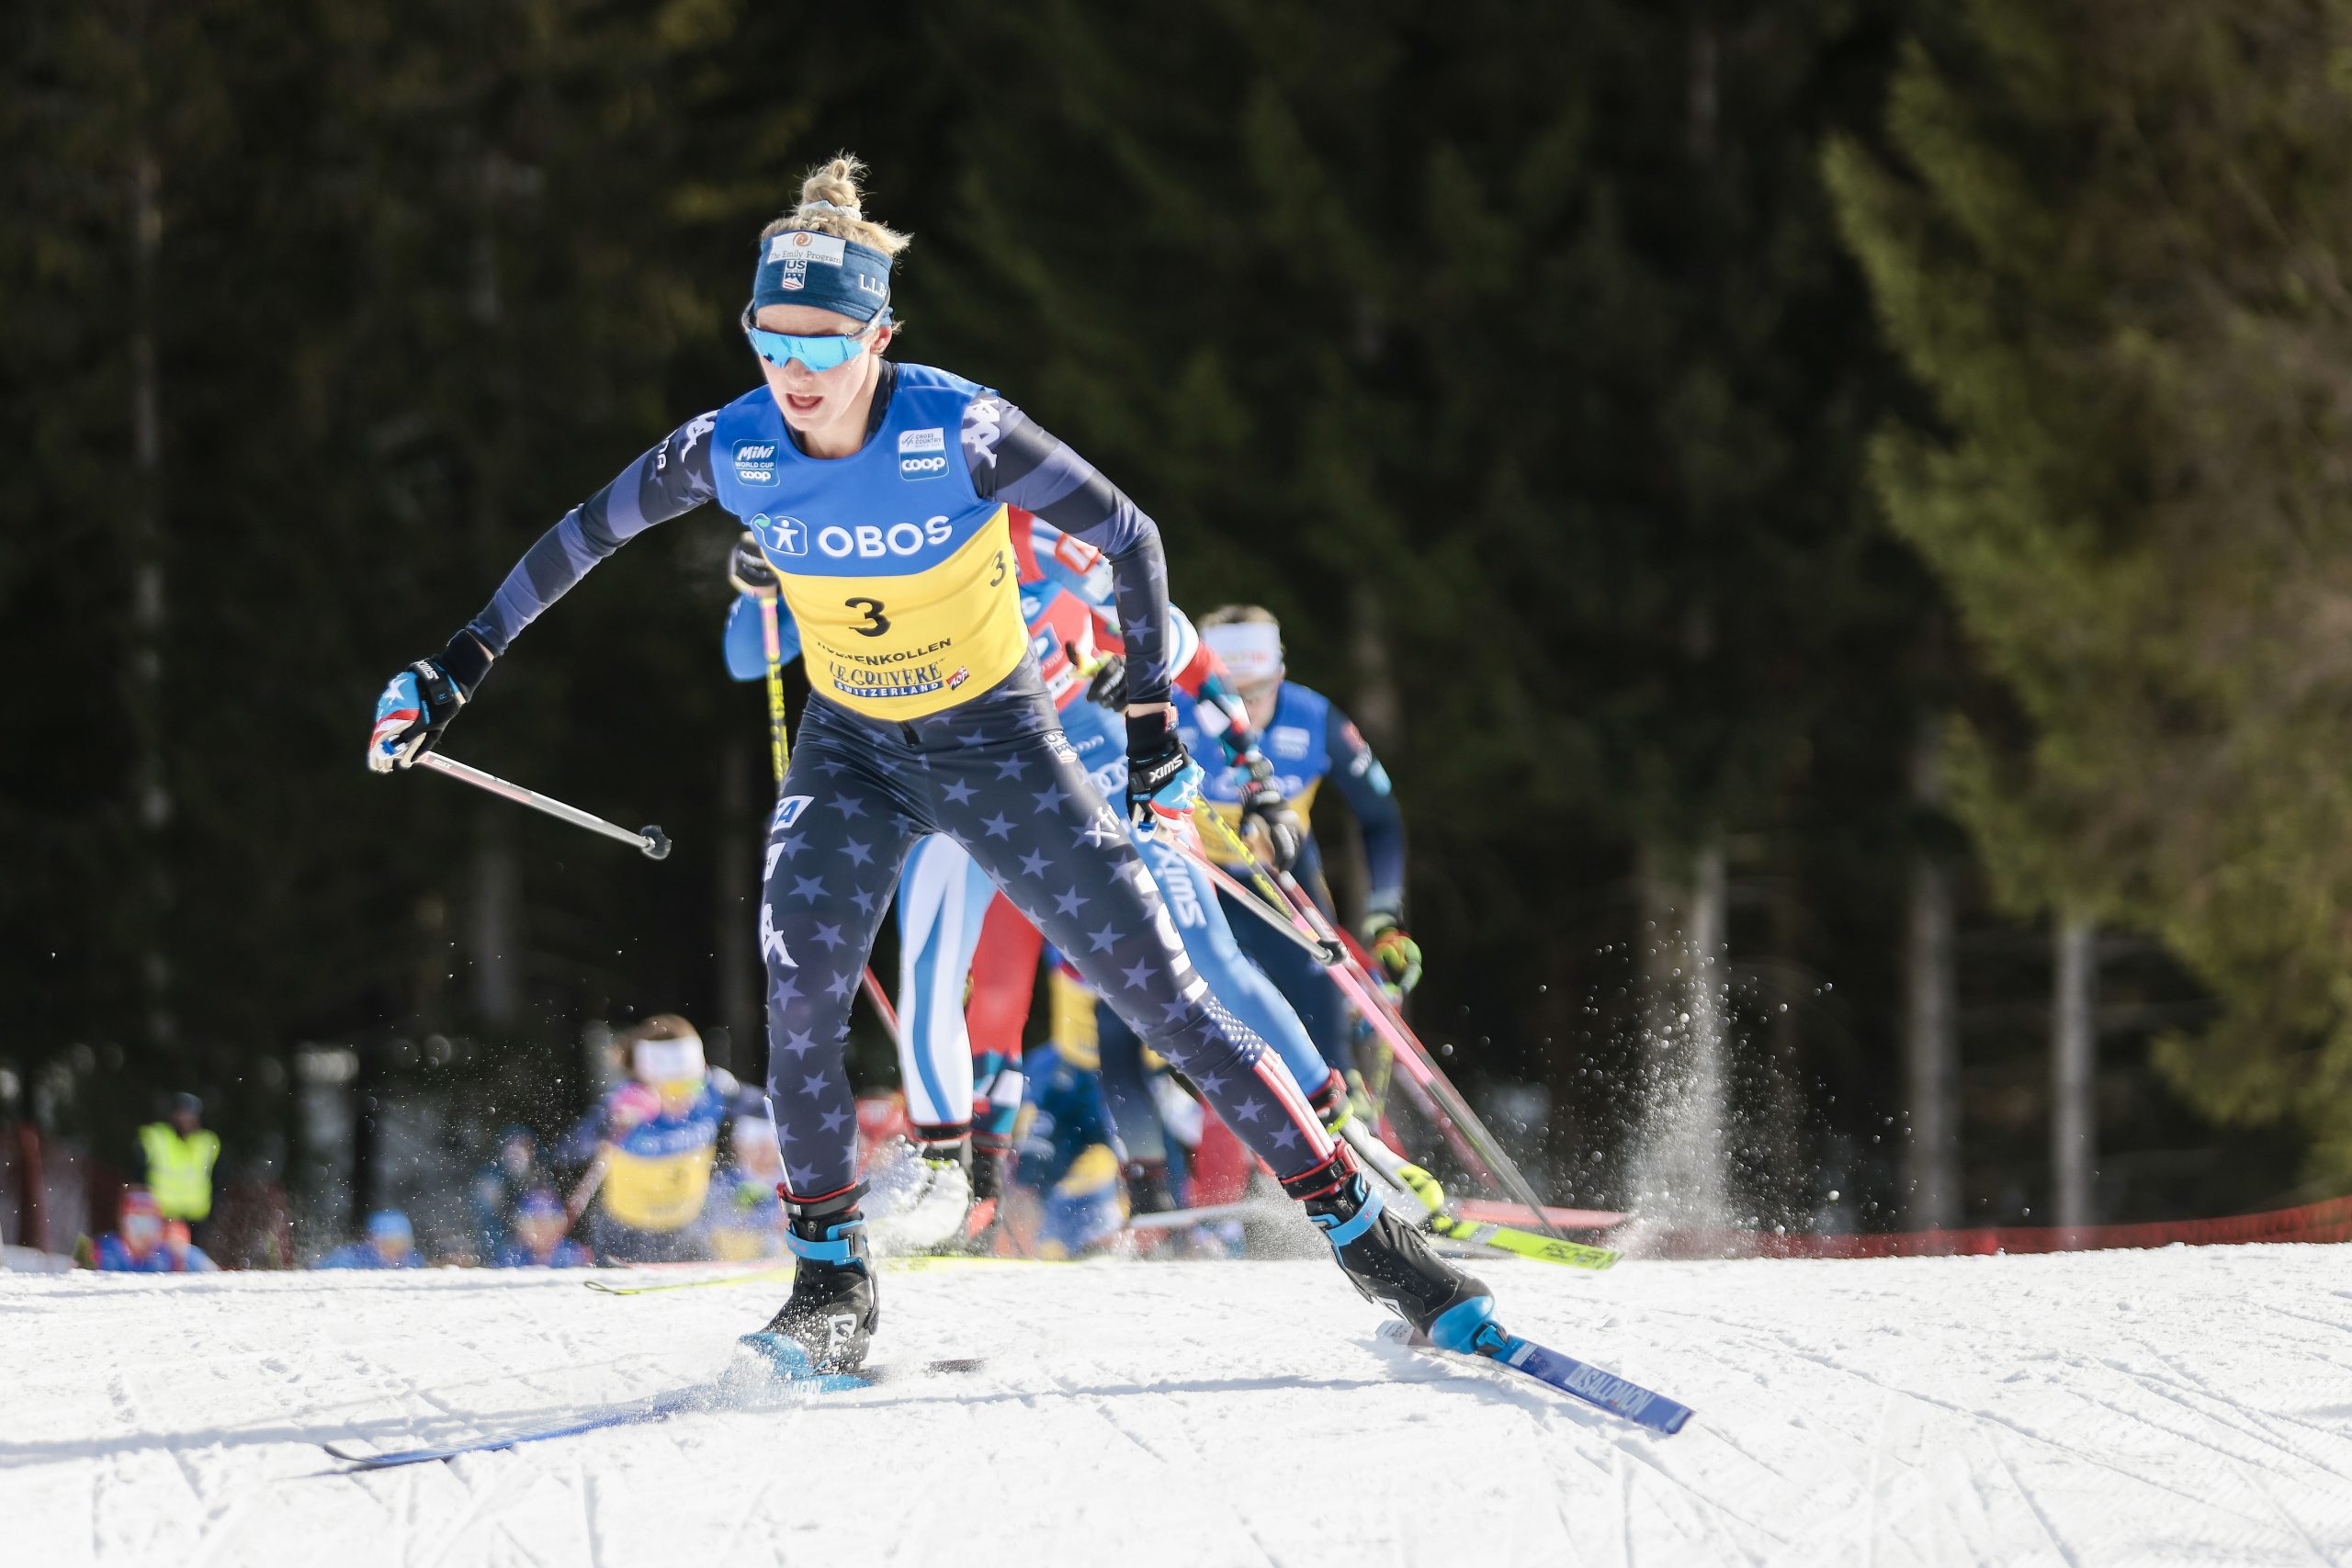
    Jessie Diggins (USA) on her way to a podium finish during the first 50k version of the famed Holmenkollen in Oslo (NOR). (Photo: NordicFocus)

    On the eve of that race, I was on physio duty with the US Ski Team and Jessie was on my treatment table for me to work out some kinks and help prep her body for the race. Small talk can help the time pass and maybe take the sting out of my thumbs digging into tired muscles. At some point during that treatment session I asked what her goals were for the big race. I expected her to say a win, or more humbly a podium place, or maybe even talk about sprinting for bonus points at the top of the hill. But her goals had nothing to do with the results of the race and everything to do with how she was planning to execute her day. She described her breakfast plan, her warm up plan, and her race plan which was all about staying relaxed, not stressing if she was out of position, getting her drink feeds, and enjoying the fact that she, a woman, was finally getting to race 50km at Holmenkollen. Yes, she admitted that a win would be really, freaking cool, but she was focusing her energy on the things that she could control. She knew that another skier being better on the day was out of her control. She knew that a miscalculation in ski prep, leaving her with slower-than-the-pack skis, was out of her control. Instead, she chose to focus her energy and set goals based on what she could control, not based on her place at the finish line. She was focusing on how to do what she does.

    Psychologists call these process goals vs outcomes goals. Think of process goals as characteristics of how you do what you do, not whether you hit objective markers. For Jessie, these were her strategies for how she was going to approach and execute her race day, not what the results sheet said afterwards. If you’re doing an interval session, the outcomes goals are the time splits, heart rate, lactate, etc that you’re targeting while the process goals are the characteristics or nuances of the workout: technique, form, pacing, breathing, posture. Again, these process goals are not the what but more the how. The same distinction could apply to school work where the test score is the outcome goal and the attention in class, quality note taking, focused studying, and a good night’s sleep are the process goals.

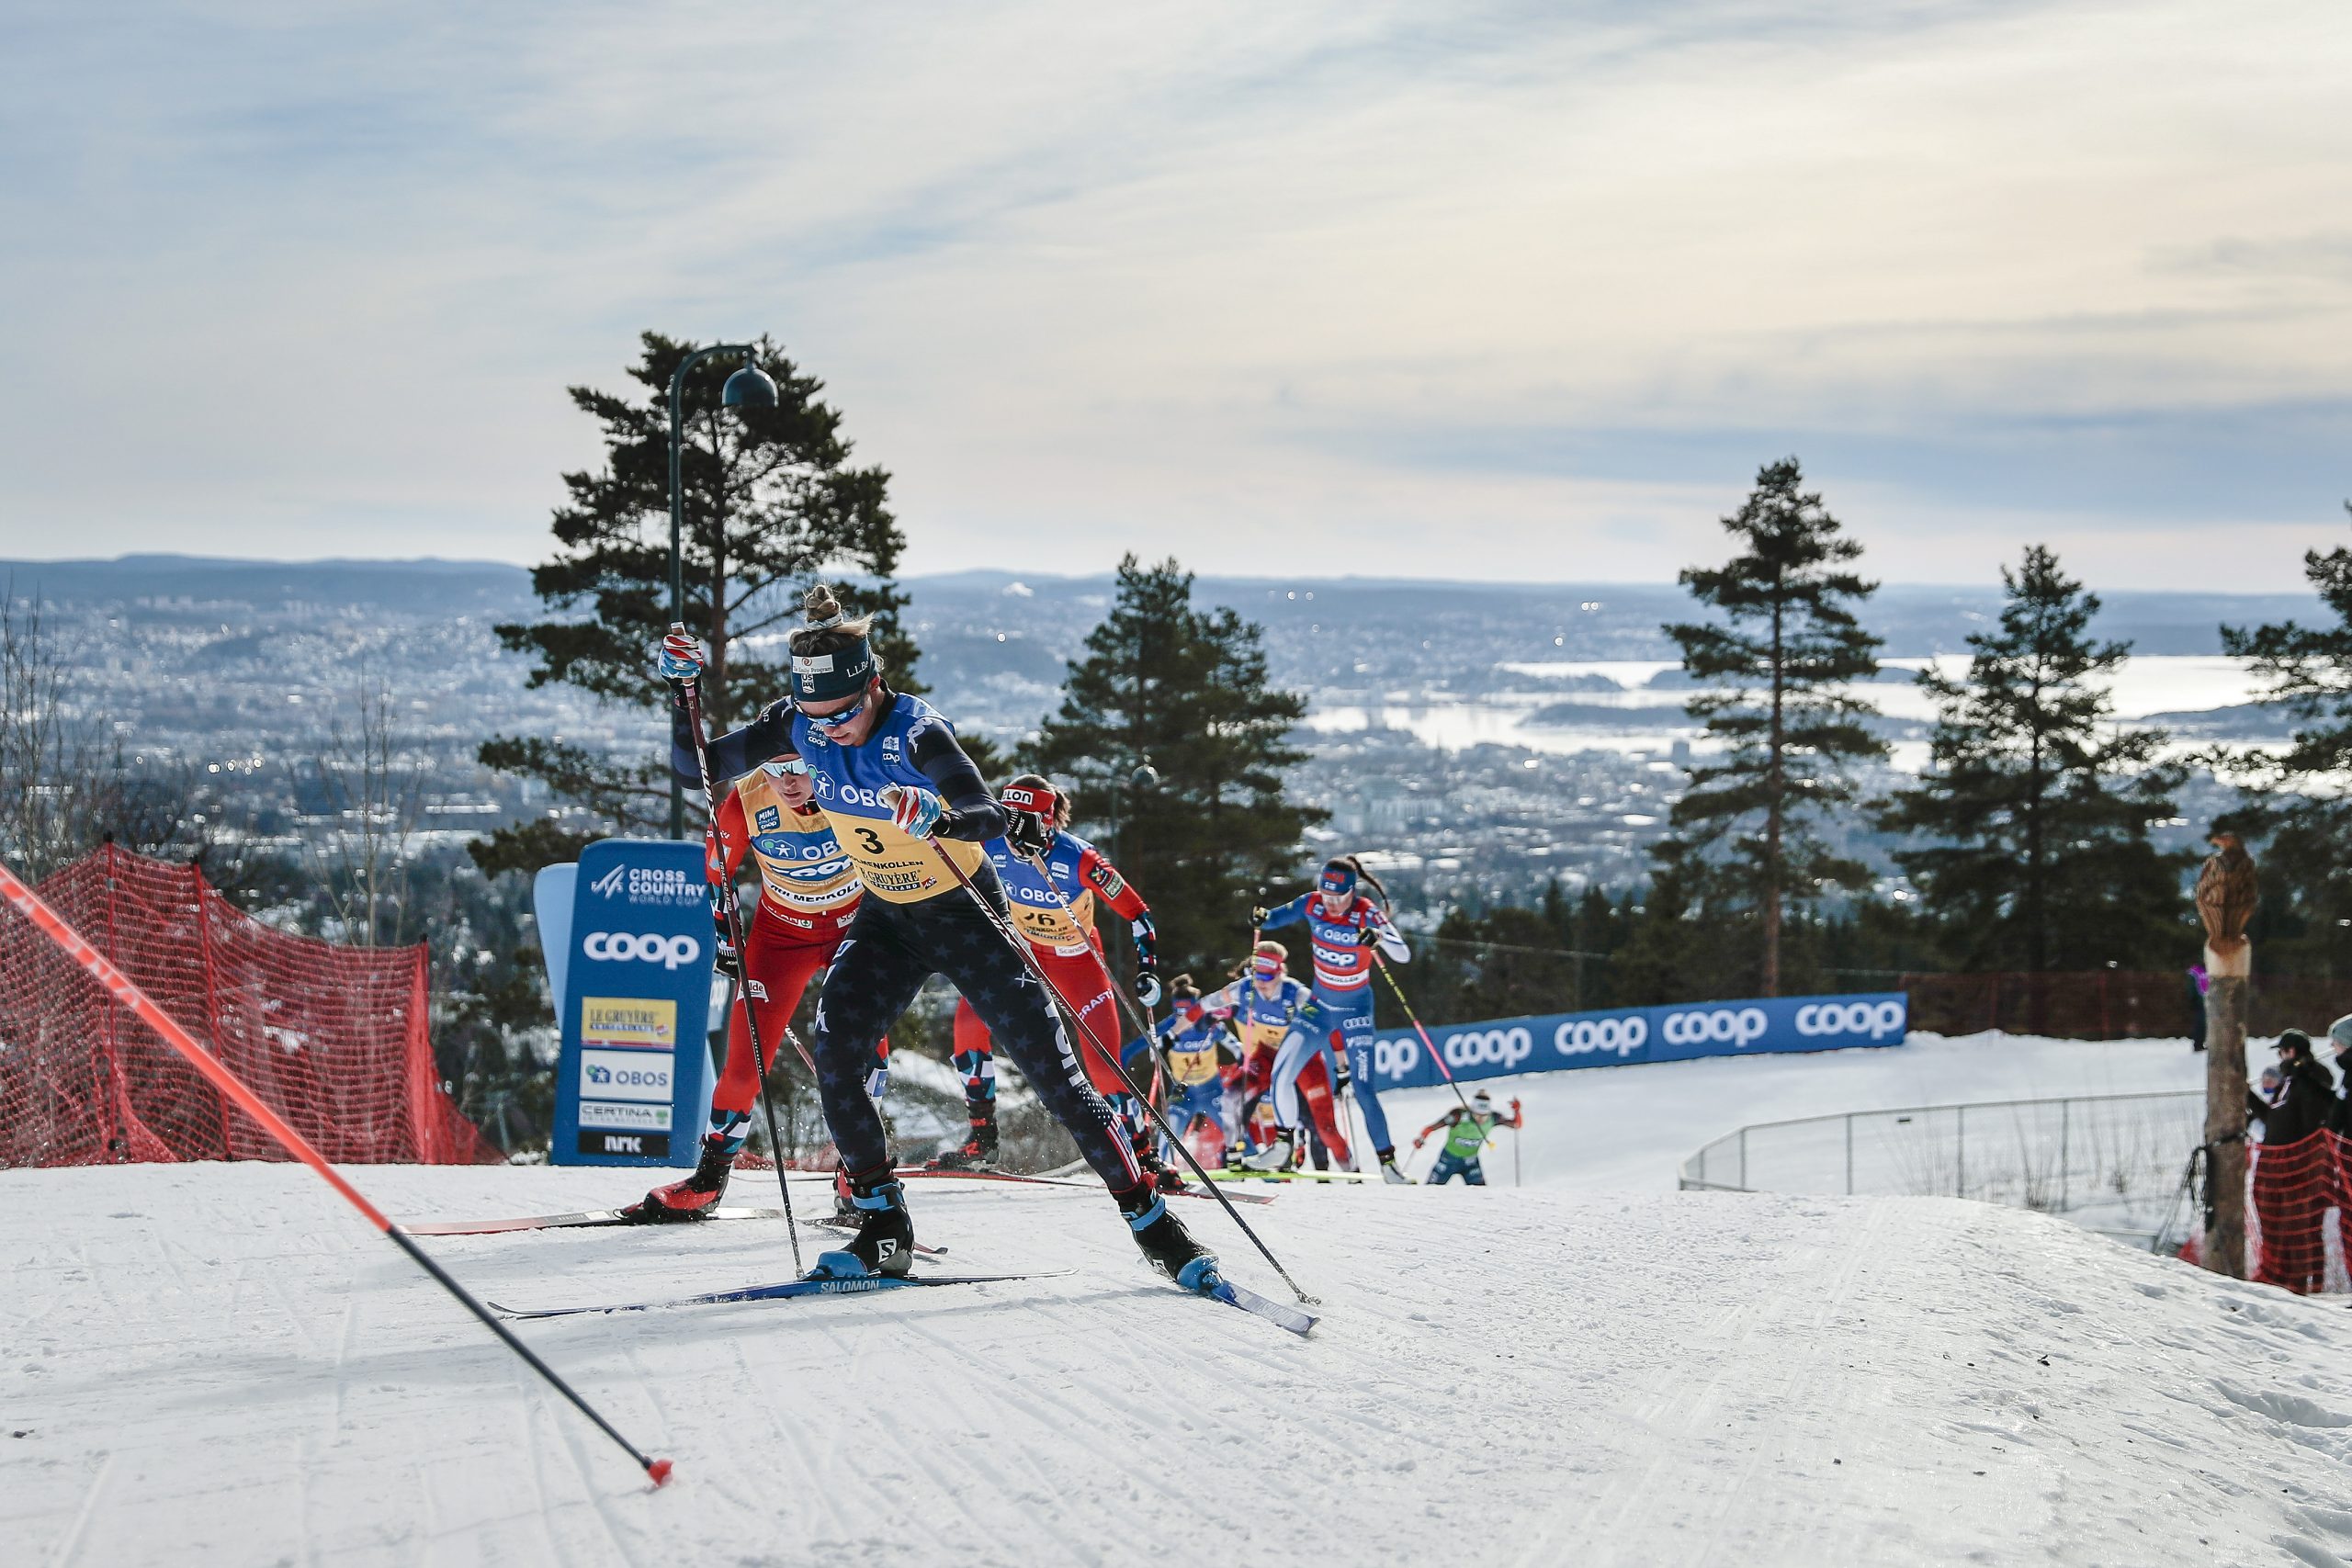
    Diggins climbs away from the stadium on one of the early iconic climbs on the Holmenkollen course with Oslo (NOR) in the background.
    (Photo: NordicFocus)

    Applied to sport settings, this meta-analysis makes a very strong case for setting process vs outcomes goals. As the authors note in the article, “process goals were more beneficial for increasing performance and self-efficacy than other goal types, [which] is a noteworthy finding, given self-efficacy has been shown to enhance decision-making, increase motivational intentions, and is positively correlated with sport performance.” And there’s no reason to think that the same couldn’t be said about the application of process goals outside of sport.

    I have been a physical therapist for nearly 20 years. For the vast majority of that time, my self-efficacy was tied to the outcomes of my patients. My mood at the end of the day was very dependent on their progress. The first thing we PTs ask when you come into the clinic is, “How are you doing? How’s your pain?” If the answer is “better” then I’m calm, relaxed, and clear to think of how else I can help this patient. If the answer is “the same” or “worse” then my heart rate and stress go up and my clouded mind has a harder time focusing on the decisions required to recalibrate my treatment plan. One or two of these patients a day and I can weather the storm. If that’s most of my day, I’m going to leave the clinic in a self deprecating funk as the worst PT on the planet.

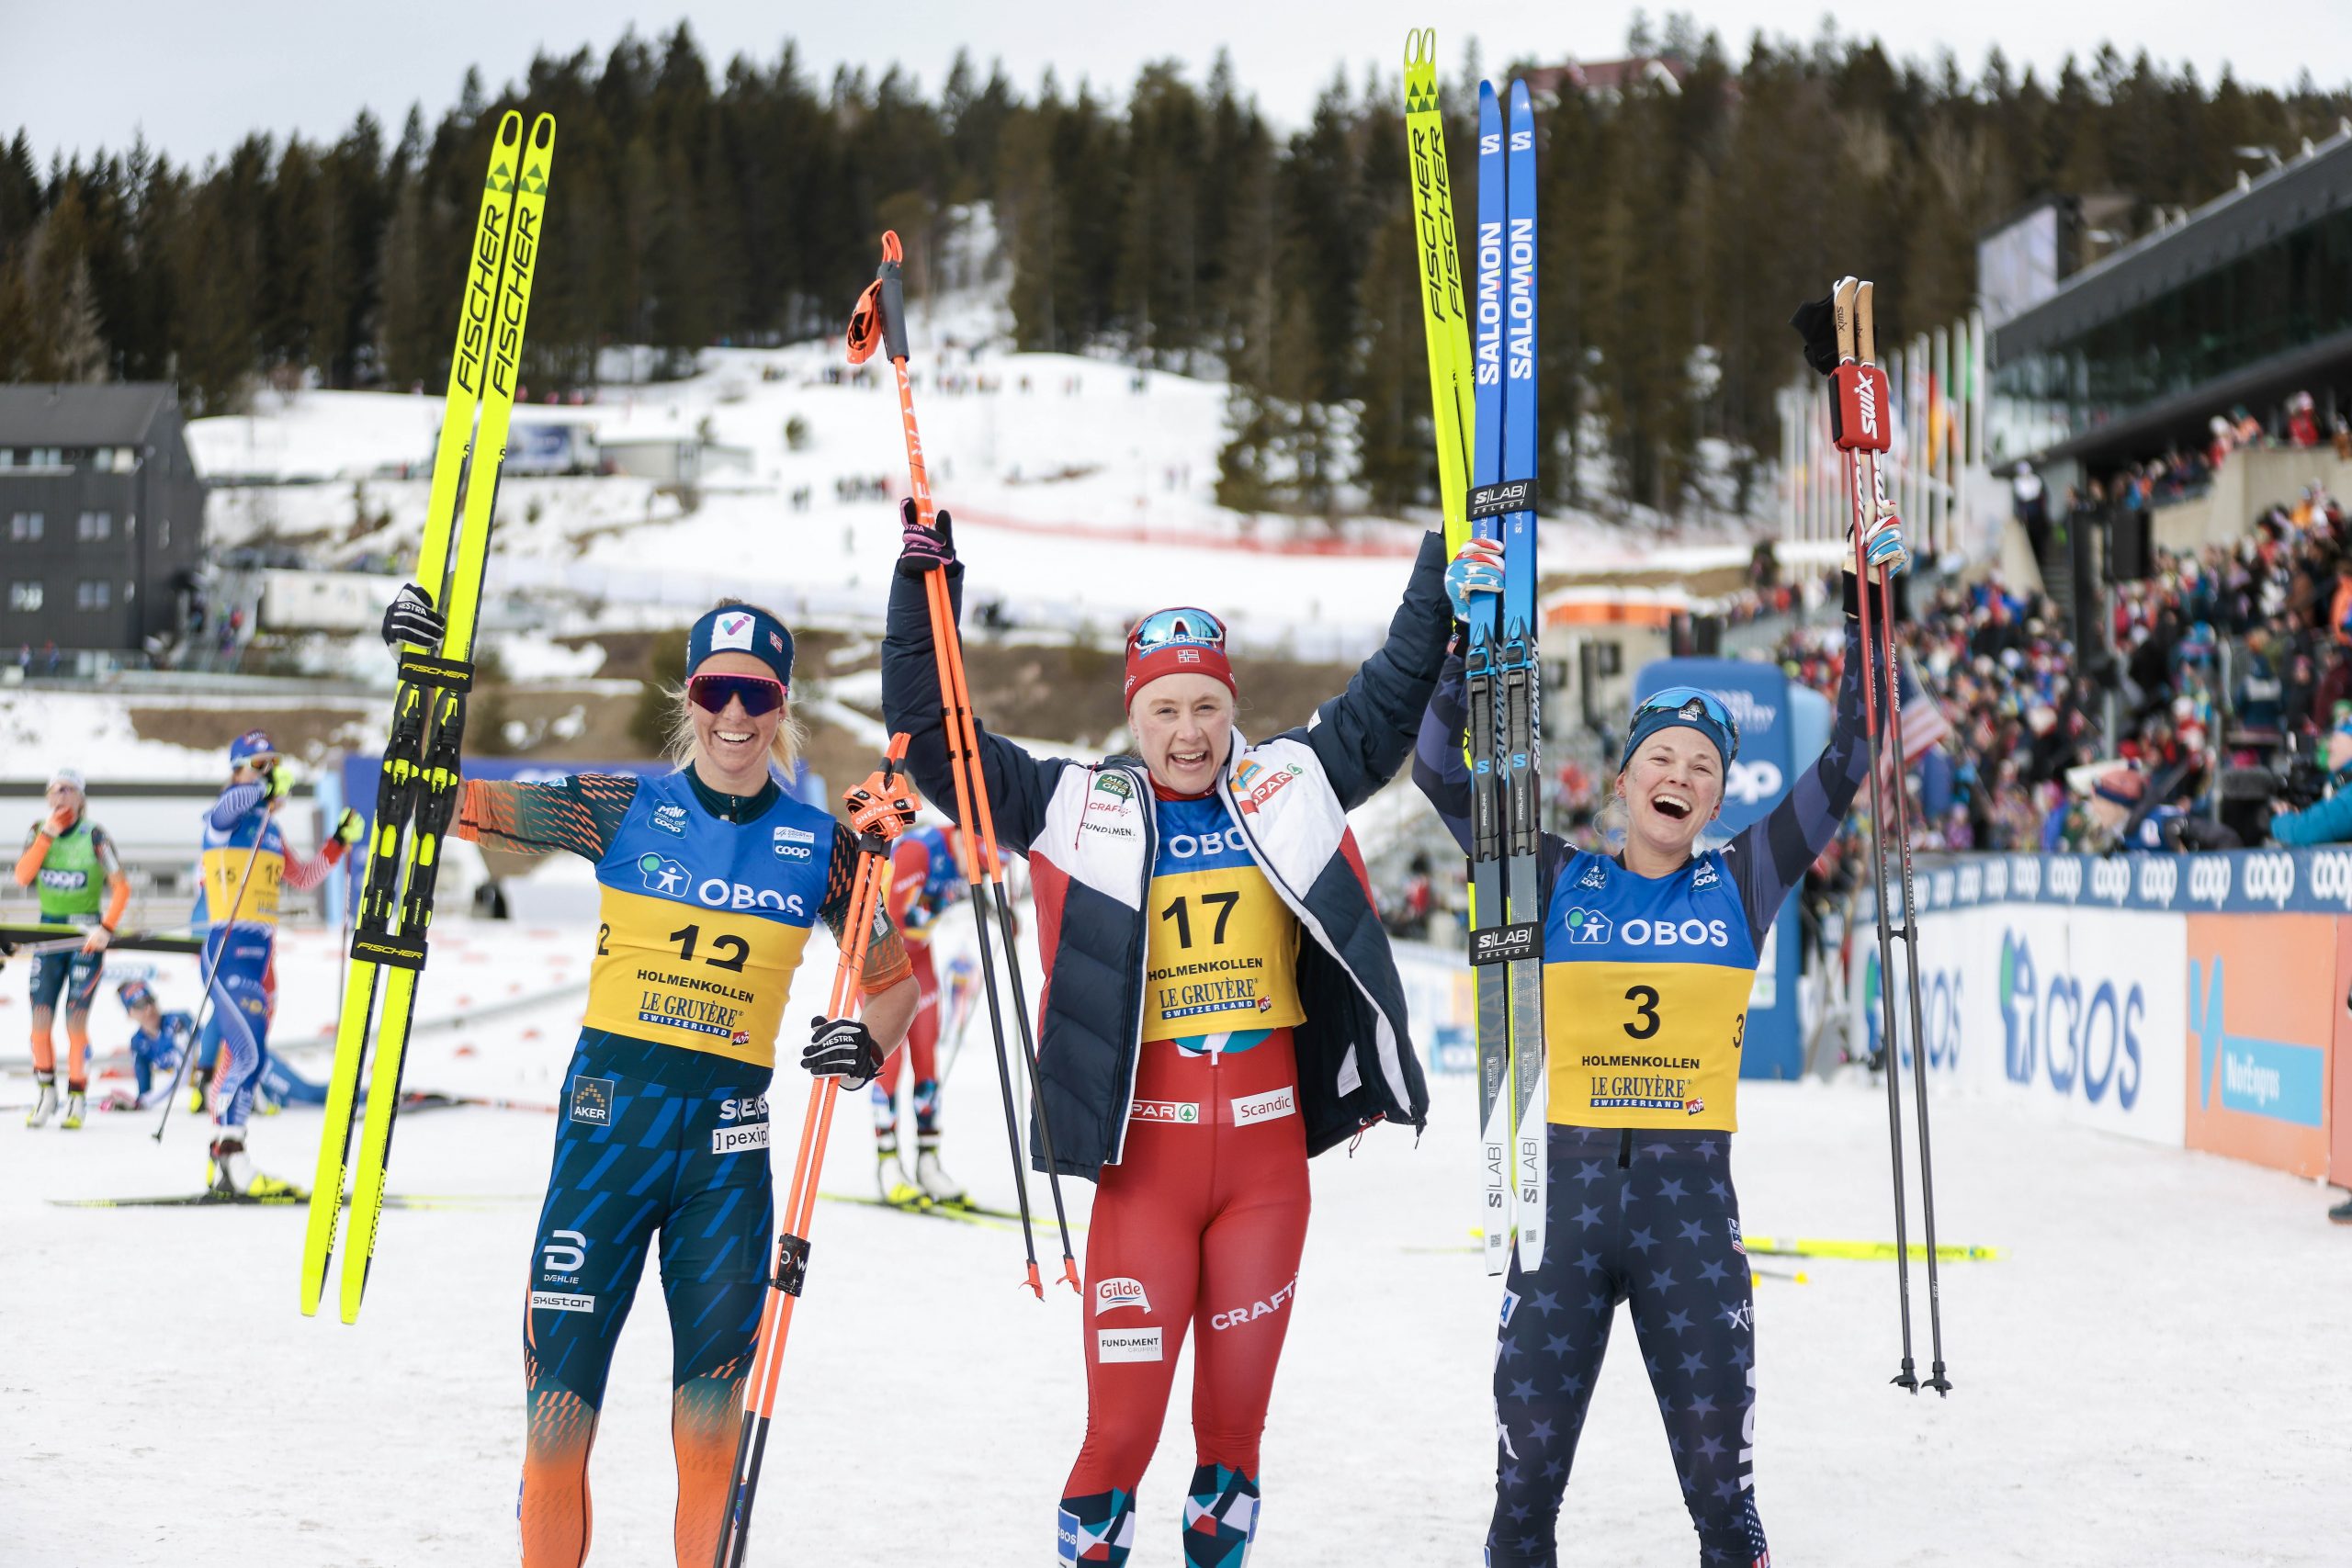
    Jessie Diggins finished in third place in the historic
    Holmenkollen behind Astrid Oeyre Slind (2nd place – NOR) and Ragnhild Gloeersen Haga (1st place – NOR). (Photo: NordicFocus)

    My patients’ outcomes–their pain, strength, mobility, function, quality of life–are exactly that. They are outcomes goals. And they are very important. But that pre-race conversation with Jessie made me realize that they’re not always within my control. Once the patient leaves the clinic, I have no control over whether they do their home exercises, whether they’re cutting back on training as we discussed, or whether their life stressors are a significant contributor to their symptoms. I can only control how I do what I do. But if I know that I’ve checked my boxes—listening to the patient, gathering and analyzing information, creating a reasoned treatment plan, and implementing that plan—then I’ve done the best that I can do regardless of the outcome.

    This shift in focus from patients’ outcomes to my processes has not diminished my empathy, compassion, or desire to help patients achieve their goals; however, it has enabled me to leave the clinic on a high note far more often than not. I went from being another burn-out statistic (studies like this one place blame on a lack of “basic psychological needs of autonomy, competence, and relatedness”–not dissimilar from what are considered the attributes of process goals) to enjoying my time in the clinic. My work is still very cognitively and emotionally challenging, but I find that my cup is full more often than it is empty. And placing more focus on how I do what I do has improved my performance with patients, ultimately making me a more effective PT.

  • Running From Injury

    Running From Injury

    For better or worse the old cliche, ski racers are made in the summer still applies. Cross country runners are made in the summer too. Conveniently, running is excellent training for skiers and obviously runners. Inconveniently, there tend to be a lot of injuries associated with running. And even more inconveniently, we don’t have a ton of research to tell us why or what to do about it. 

    The clearest correlation to running related injury appears to be training error, which is estimated to account for 60-70% of injuries. But less clear, as this paper digs into, is which variable is most at play: volume, duration, frequency, or intensity? In an attempt to quantify “training error” and provide some guidelines, we have what’s come to be known as the 10% rule. The basic premise here is that you shouldn’t increase your weekly running volume by more than 10% over the previous week. But the 1st rule about rules is that there are no rules. So, this is more guidance than gospel. 

    In addition to being a standout skier and soccer player Sammy Smith ran cross-country. (courtesy photo)

    What might be closer to a rule is that injuries happen when the load that’s placed on the body exceeds the body’s ability to tolerate that load. In this equation, we can modify load via training parameters like the variables that the article above attempted to dissect: weekly volume, duration of runs, frequency of runs, and intensity (speed and/or elevation gain and loss). We might further modify running load via surface (pavement vs dirt), footwear quality, and running form (more on that in a minute). On the other side of the equation, we can modify the body’s ability to tolerate load via exercise and preparation for the demands of running (much more on that in a few minutes).

    Just like there is no perfect skiing technique, there is no perfect running form. However, in both sports we do have an optimal range, and when movement patterns fall outside of that range they become inefficient. Decreased efficiency equals both decreased performance and increased load, neither of which are desirable. Inconveniently (again), it’s very hard to define what proper running form looks like. It’s maybe easier to define what it doesn’t or shouldn’t look like. Even then, there are only a handful of moderate correlations between aberrant running form and injury. 

    At the top of the list is overstriding, aka landing with your foot well out in front of your body’s center of mass. (This is not to be confused with heel striking—landing with initial foot contact through your heel as opposed to mid foot or forefoot. Heel striking isn’t necessarily overstriding though most overstriding does tend to be characterized by heel striking.) The primary issues with overstriding are an increase in peak/impact forces and a decrease in control of the knee, both of which are going to increase load on the body. Without diving too deep into the rabbit hole, the best way to correct an overstride is to increase the cadence or steps per minute—more steps at the same speed equals a shorter stride length. To train this, you need to be on a treadmill at a fixed speed (if you try to increase your cadence outside, you’ll likely just run faster) with your steps timed to the rhythm of a metronome. The target is to increase your steps per minute by 10%, which has been shown to effectively decrease loading rates.

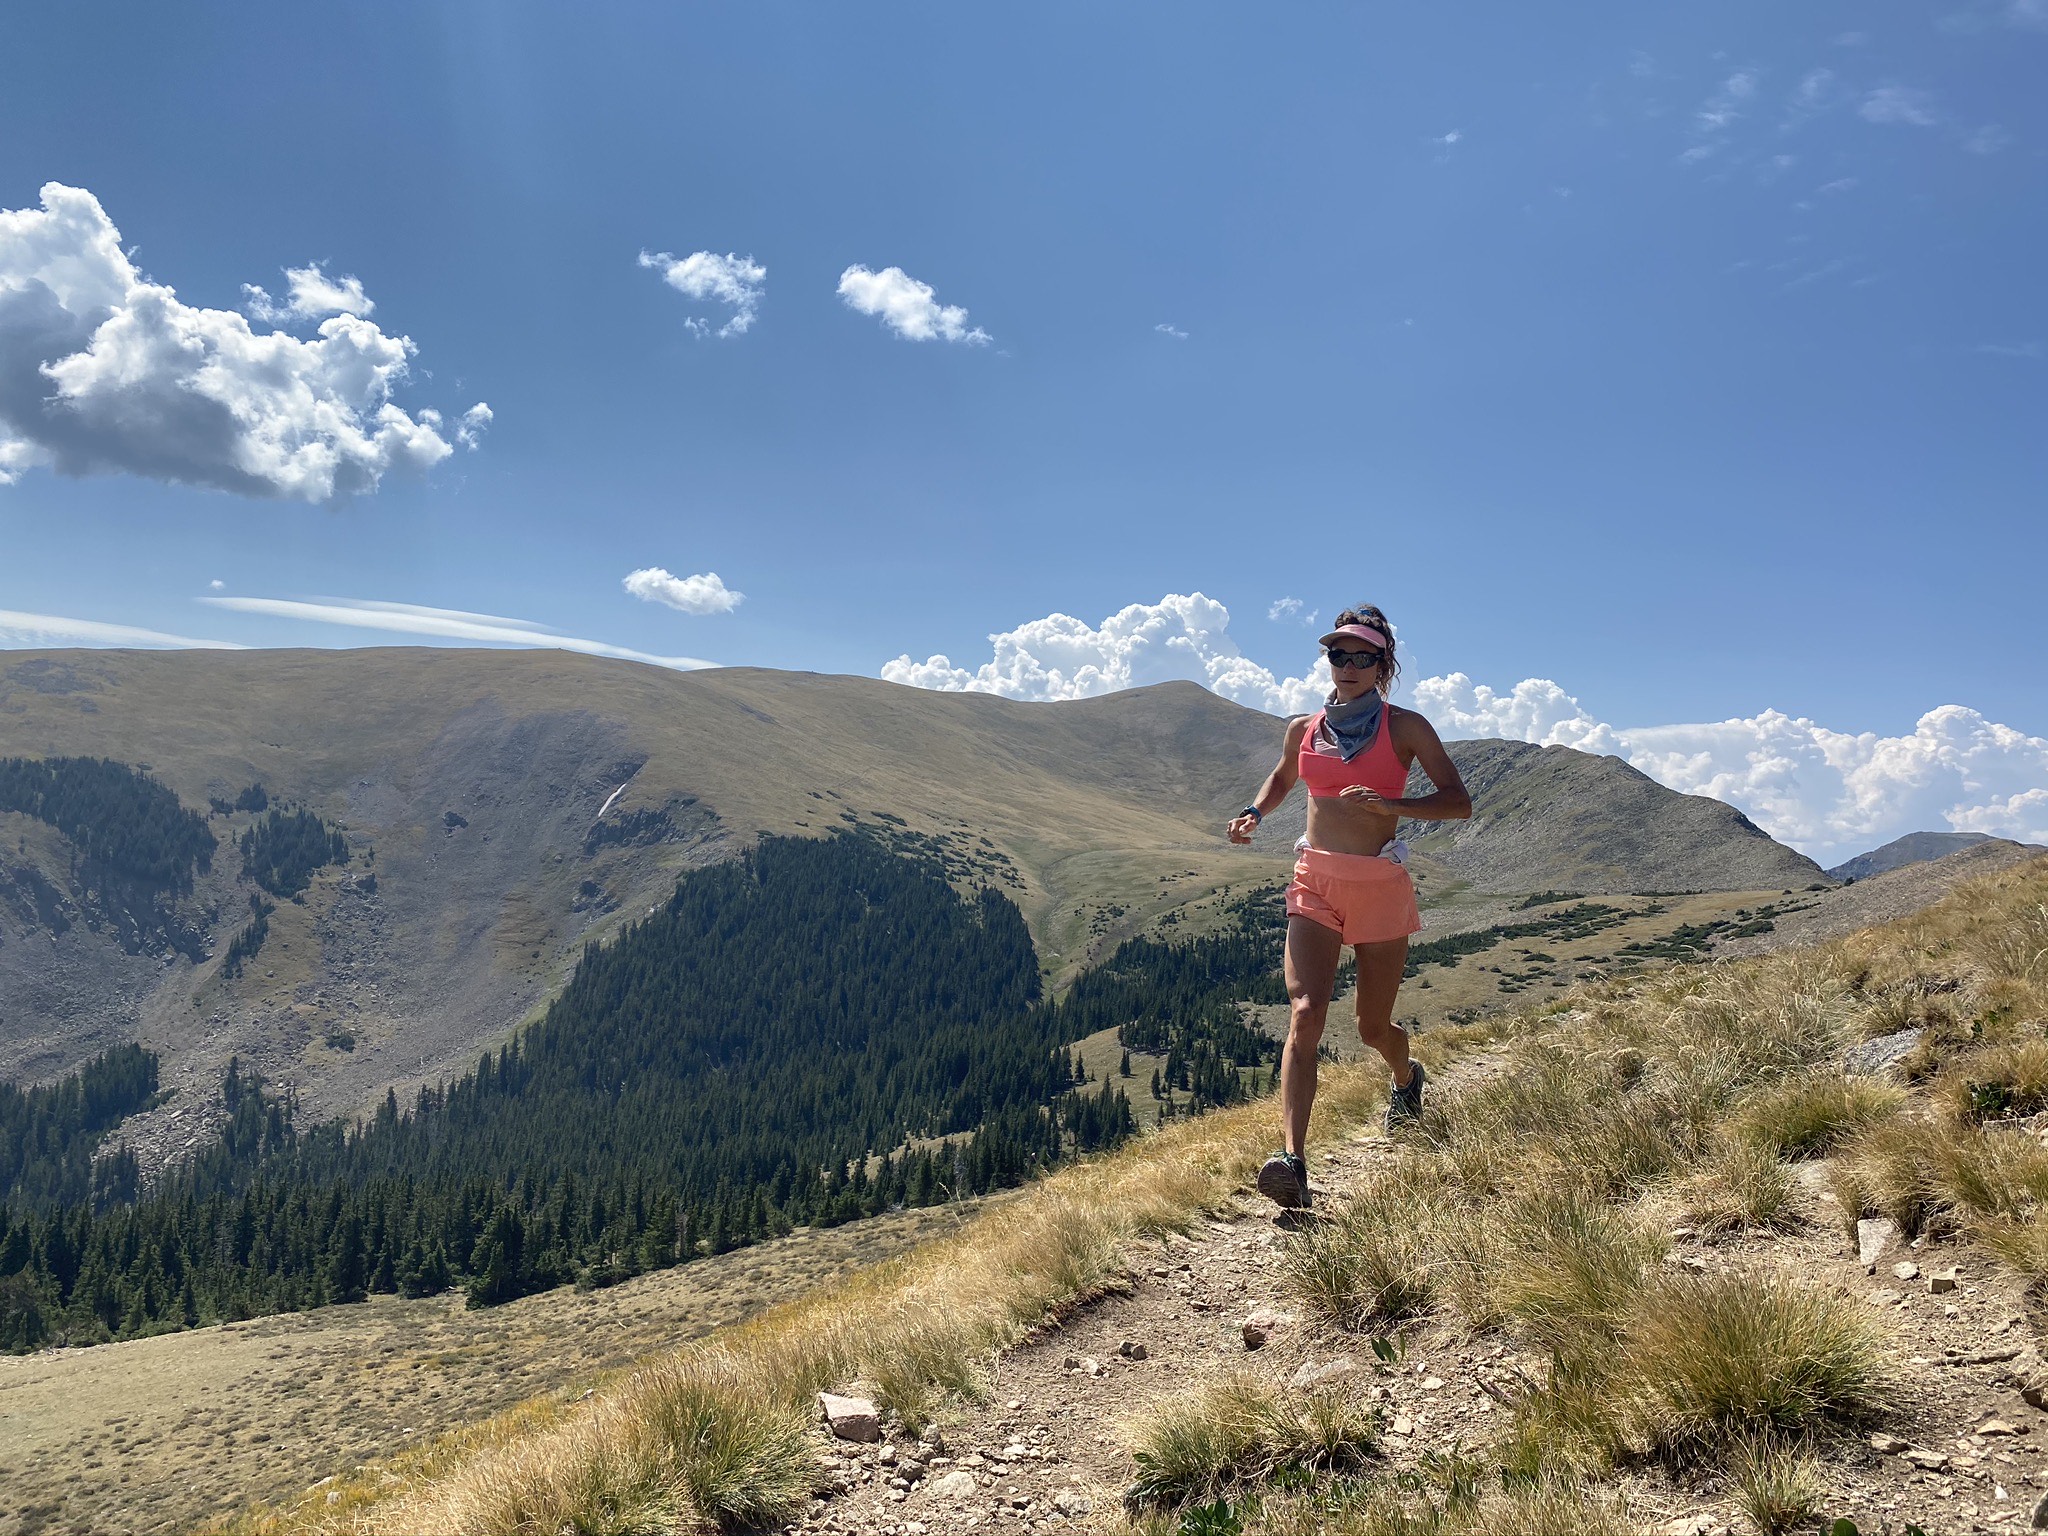
    Jessica Yeaton enjoys training in the terrain near Albuquerque, NM. (Courtesy photo)

    Next up is a lack of pelvic control or what’s often called hip drop or femoral adduction. This occurs when the muscles of the stance leg are overwhelmed and unable to control the hip, and therefore the pelvis. As a result the pelvis drops on the opposite side, altering knee kinematics in the process, and frequently causing knee pain. We look to correct this through exercises targeting hip strength, coordination, and control as well and balance and stability in single leg stance. Conveniently (finally), this would be all of our ski-specific dryland exercises and drills. If you are a FasterSkier regular, then you’ve already seen numerous exercise suggestions here, here, here, here, and here, all of which are quite appropriate for running injury prevention.

    That’s a great segue into the other side of the equation: the body’s ability to tolerate load. To paraphrase Geoff Burns, PhD from a recent Science of Sport podcast on running biomechanics, It’s not any one component—joint or muscle—that correlates with injury or performance, but how the system behaves as a whole. We must behave like pogo sticks. More force in equals more force out. But the body must be able to withstand these forces and be able to direct them appropriately. 

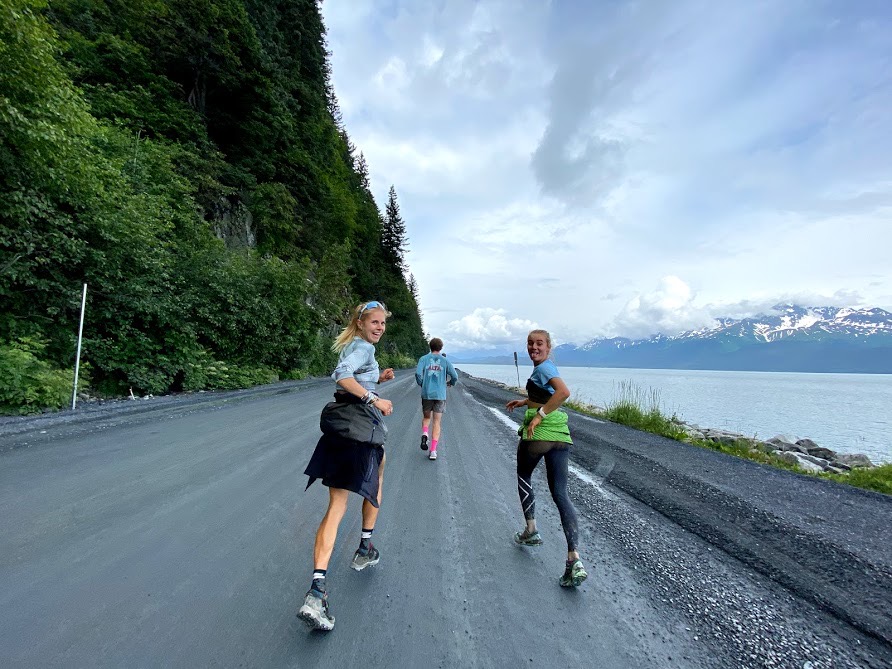
    Novie McCabe and Sophia Laukli on a training run in Alaska. (Photo: Novie McCabe)

    Essentially, Dr Burns is saying that running is an inherently high load activity and the body must be adequately prepared (strength, stability, mobility, etc) to handle these loads. Despite Instagram posts proclaiming Five Exercises Every Runner MUST Do! there is no magic exercise. I literally asked three different colleagues, all running injury specialists, What are your top three exercises for preventing running injuries? Inconveniently (here we go again), I got three different answers. 

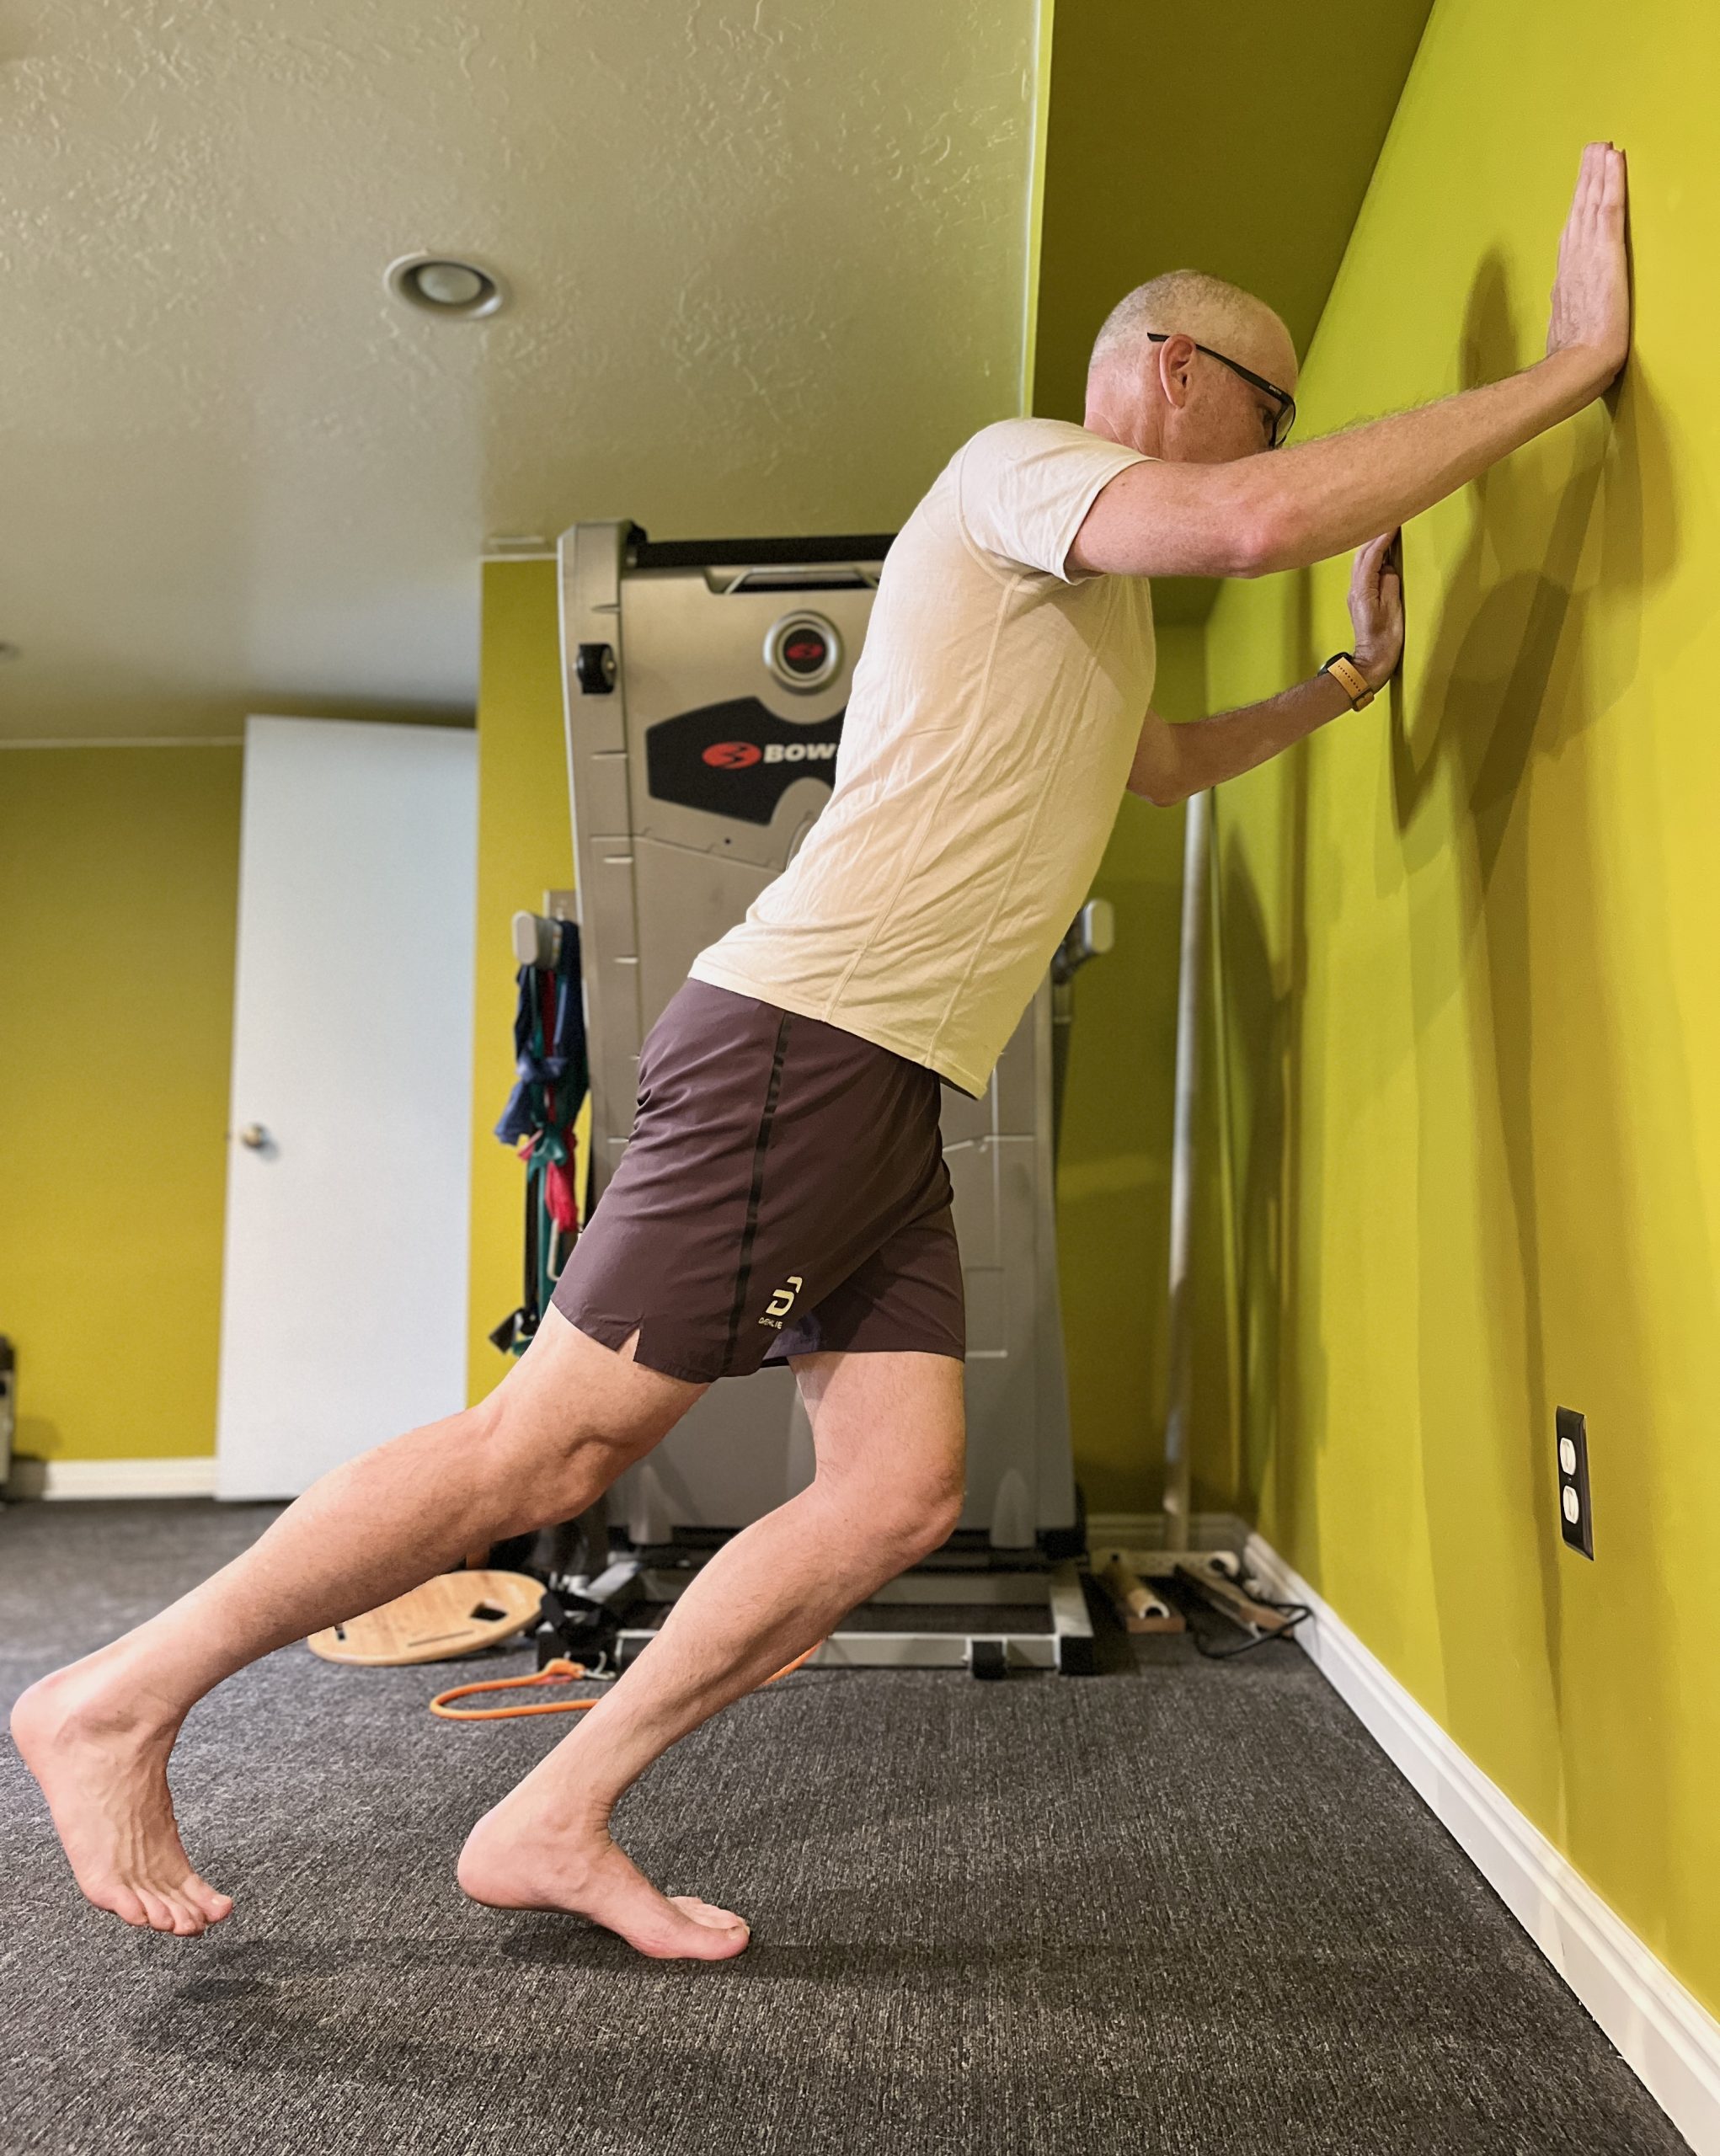
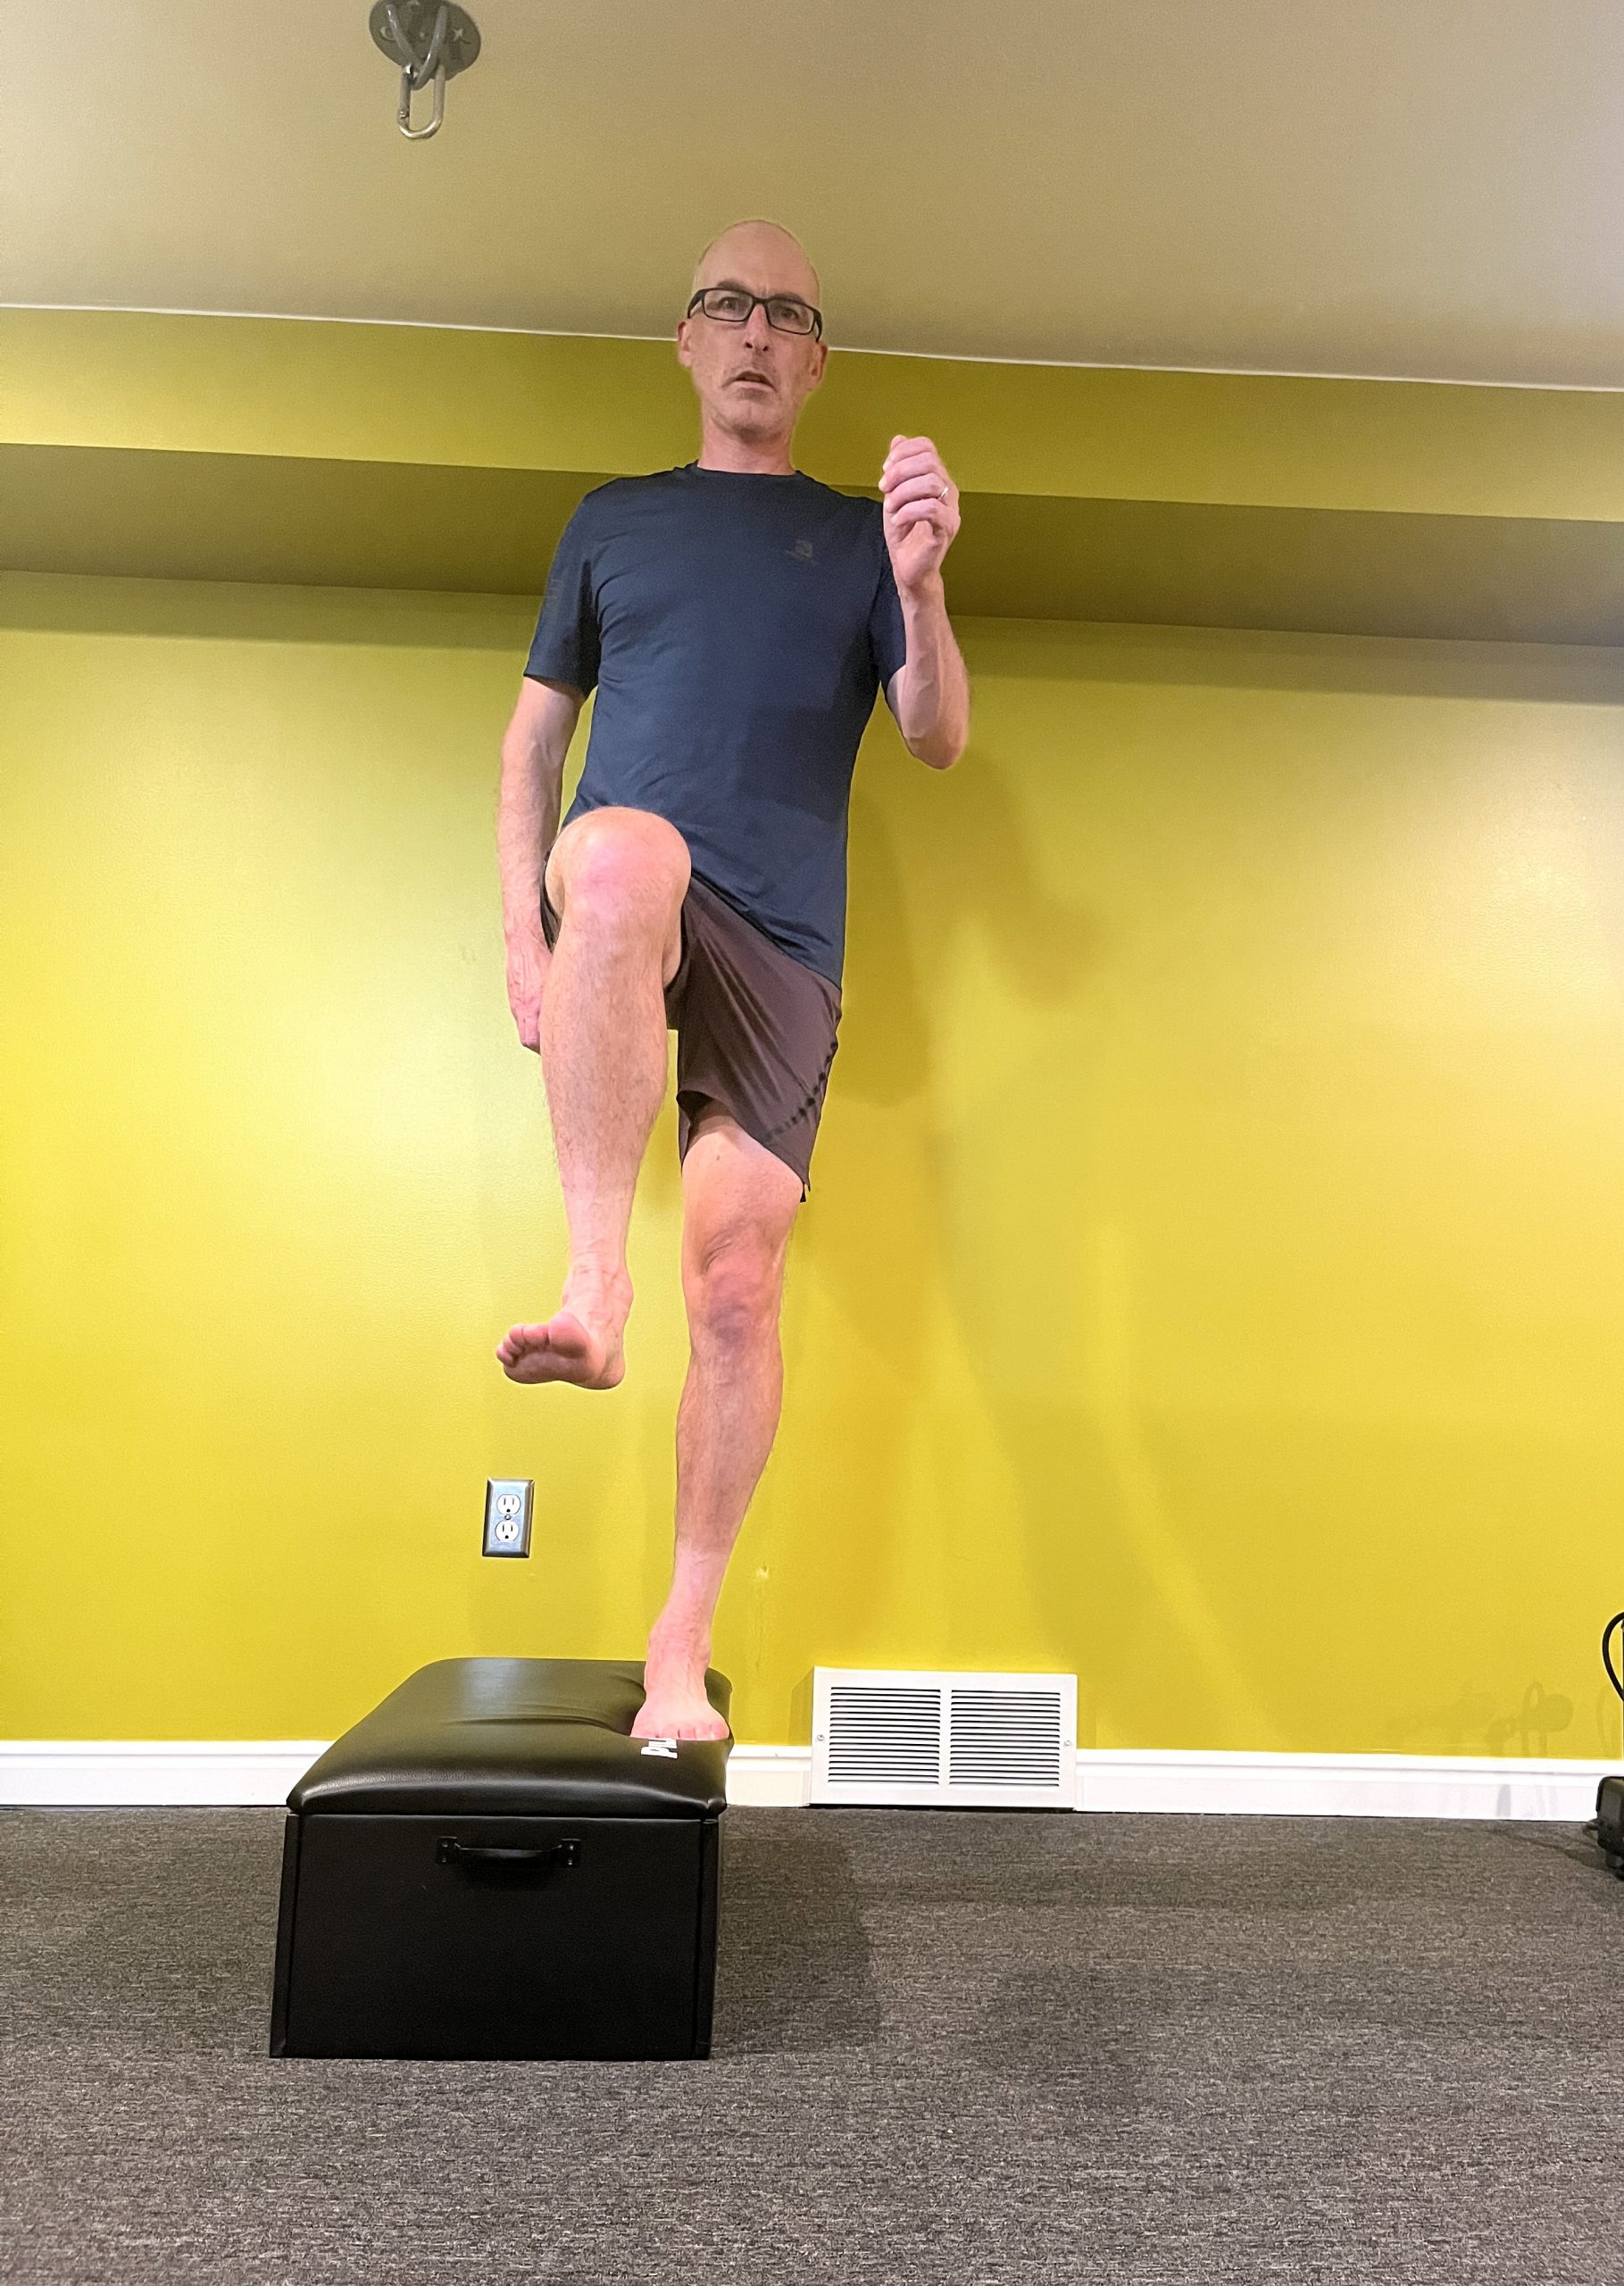
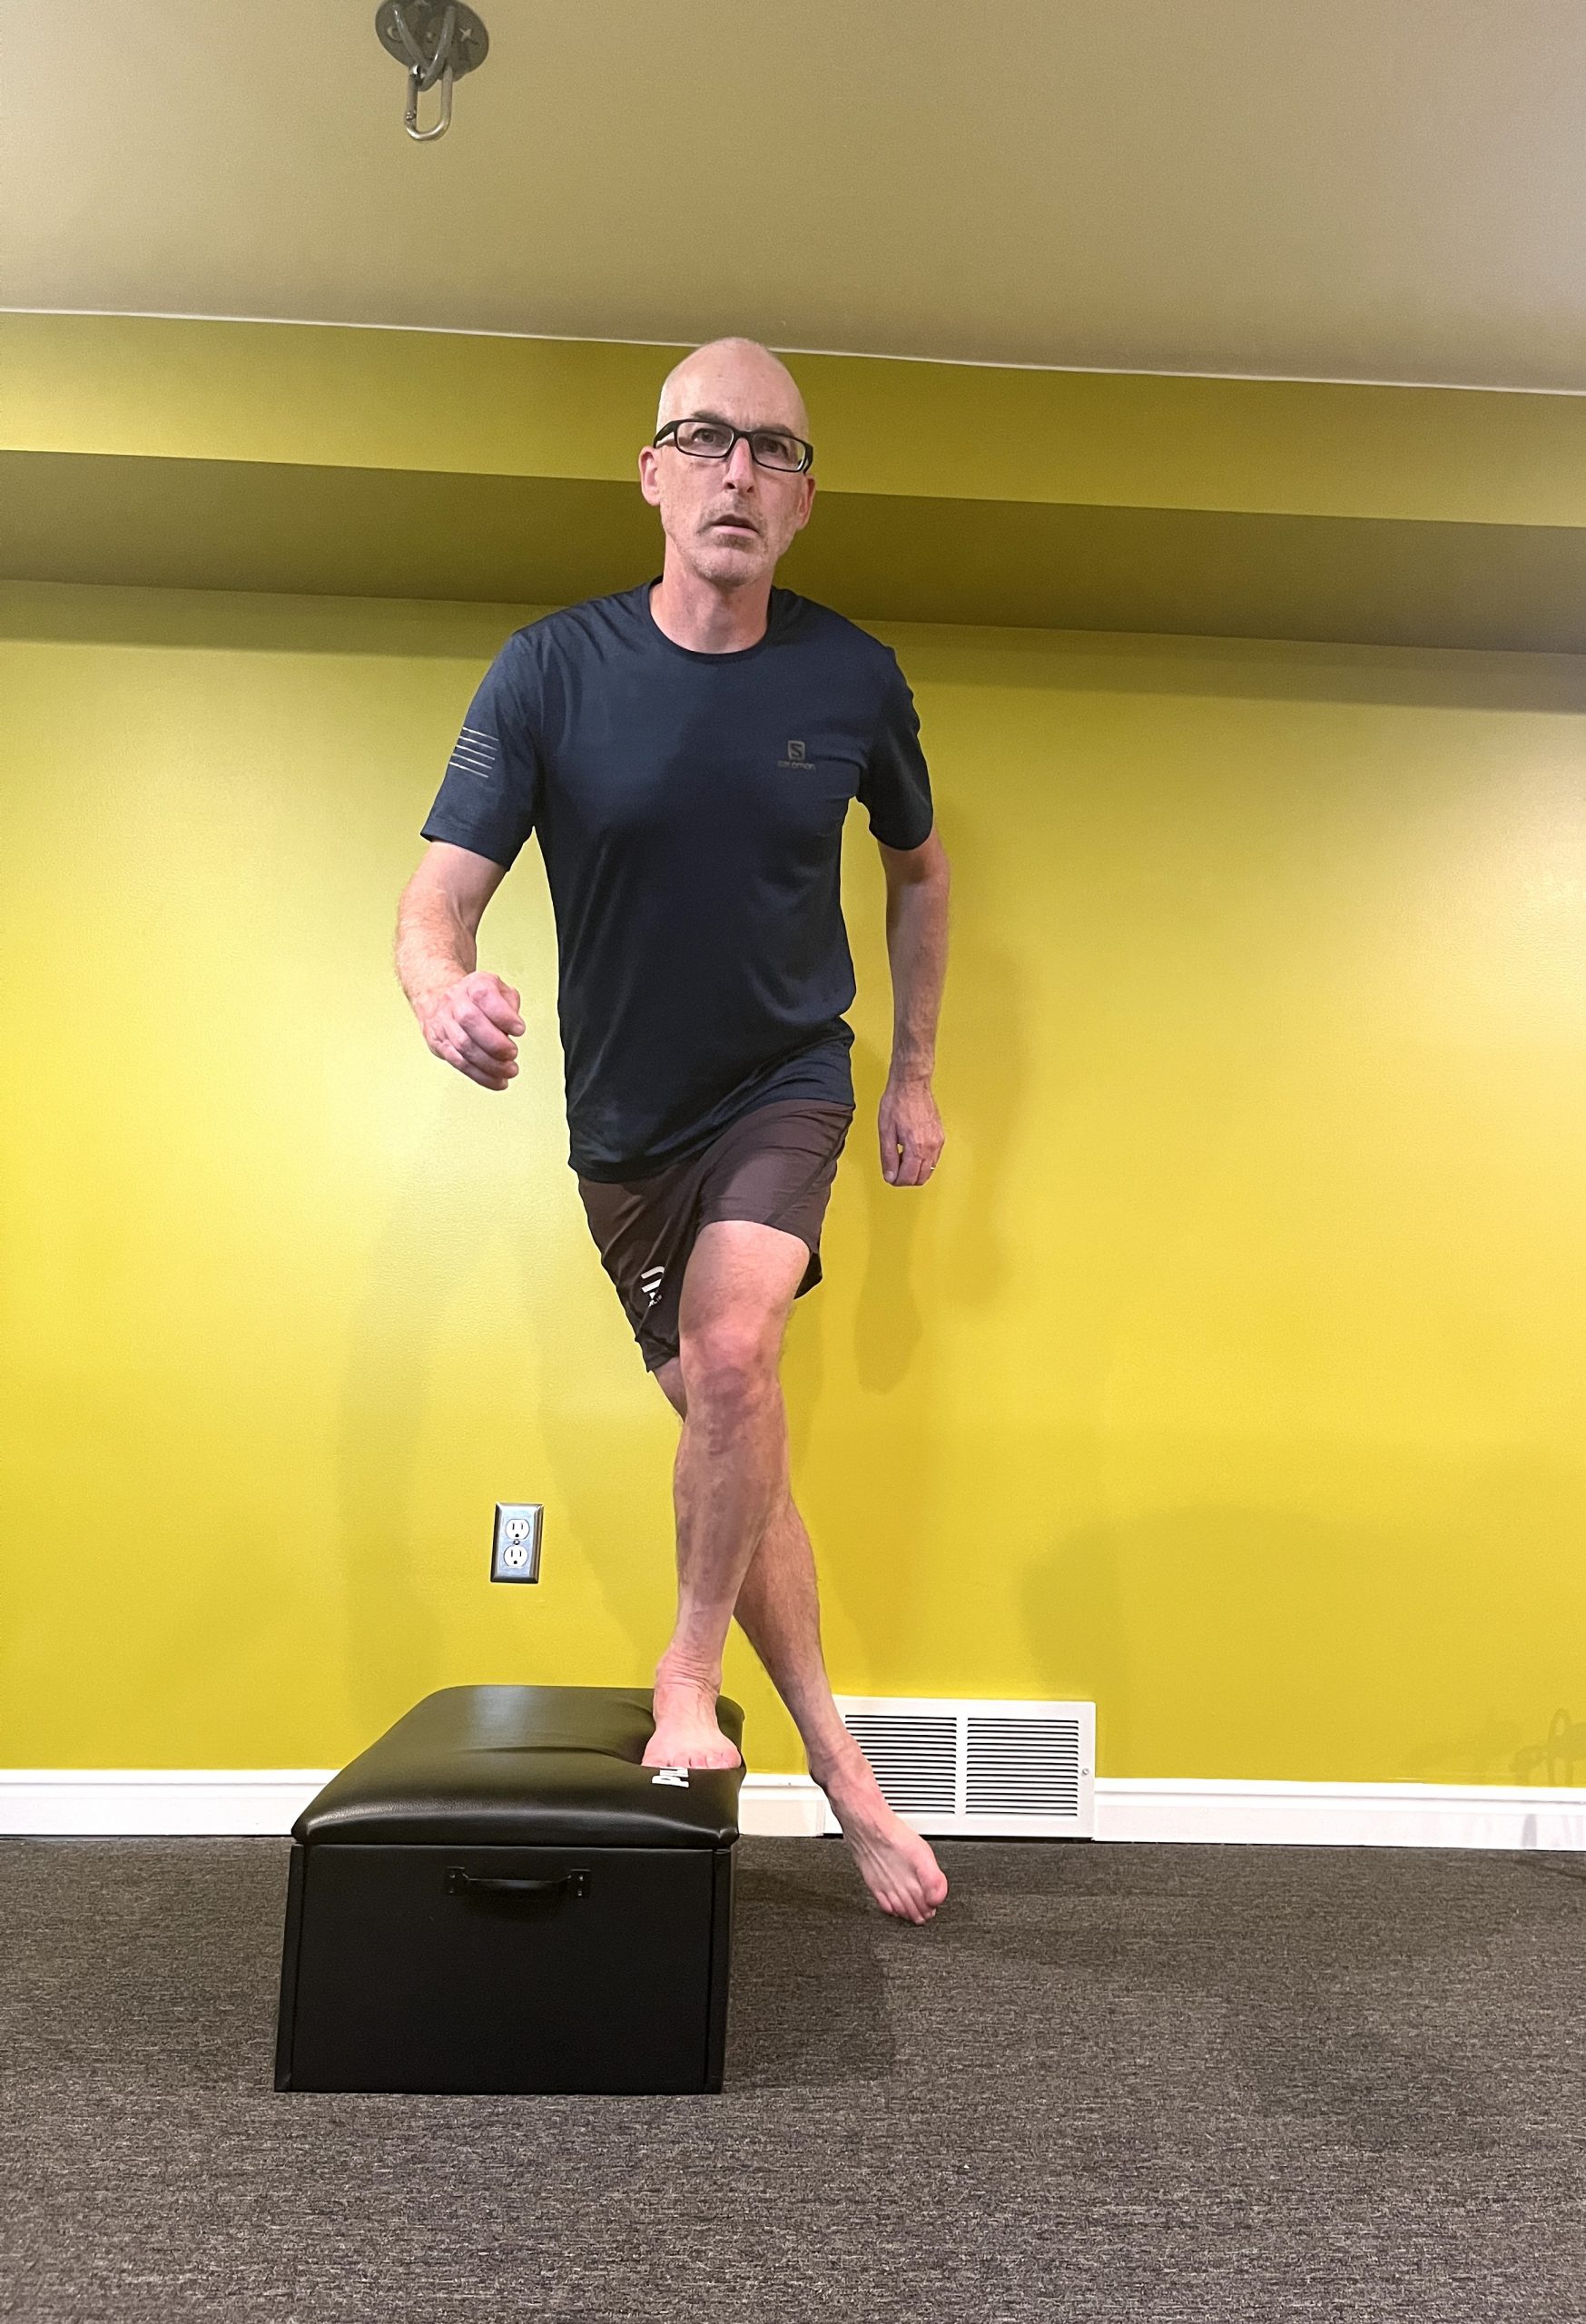
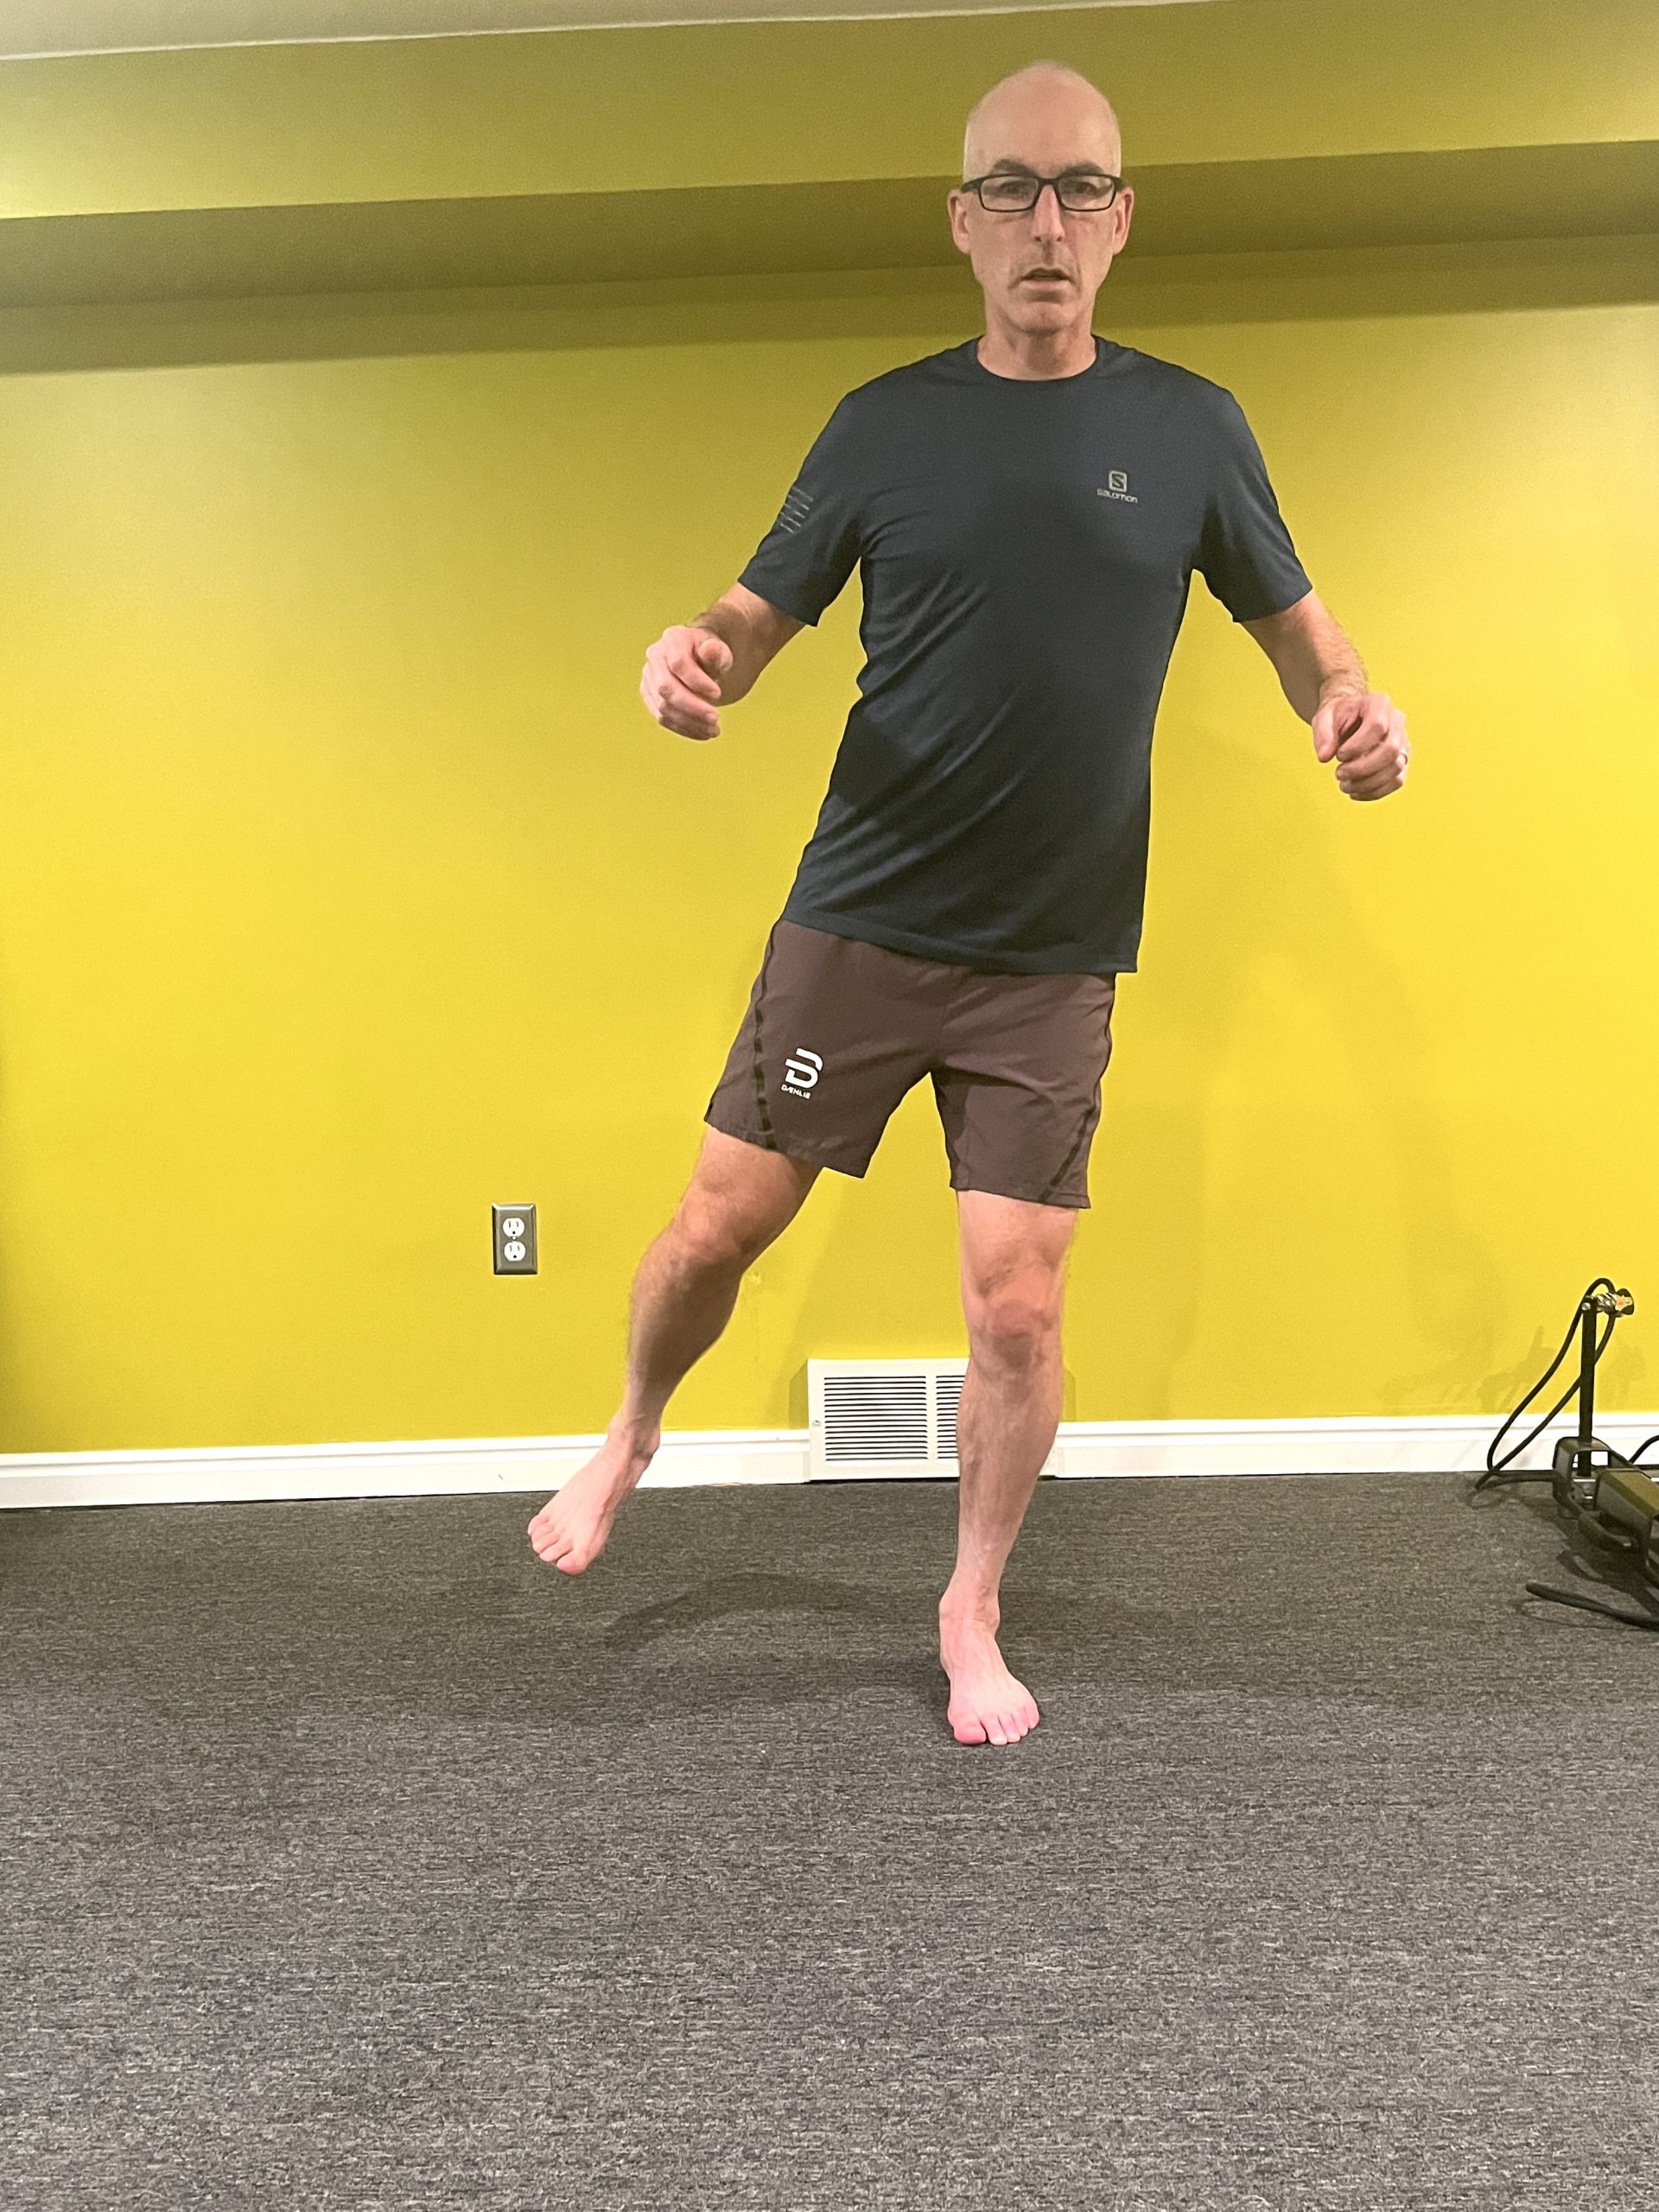
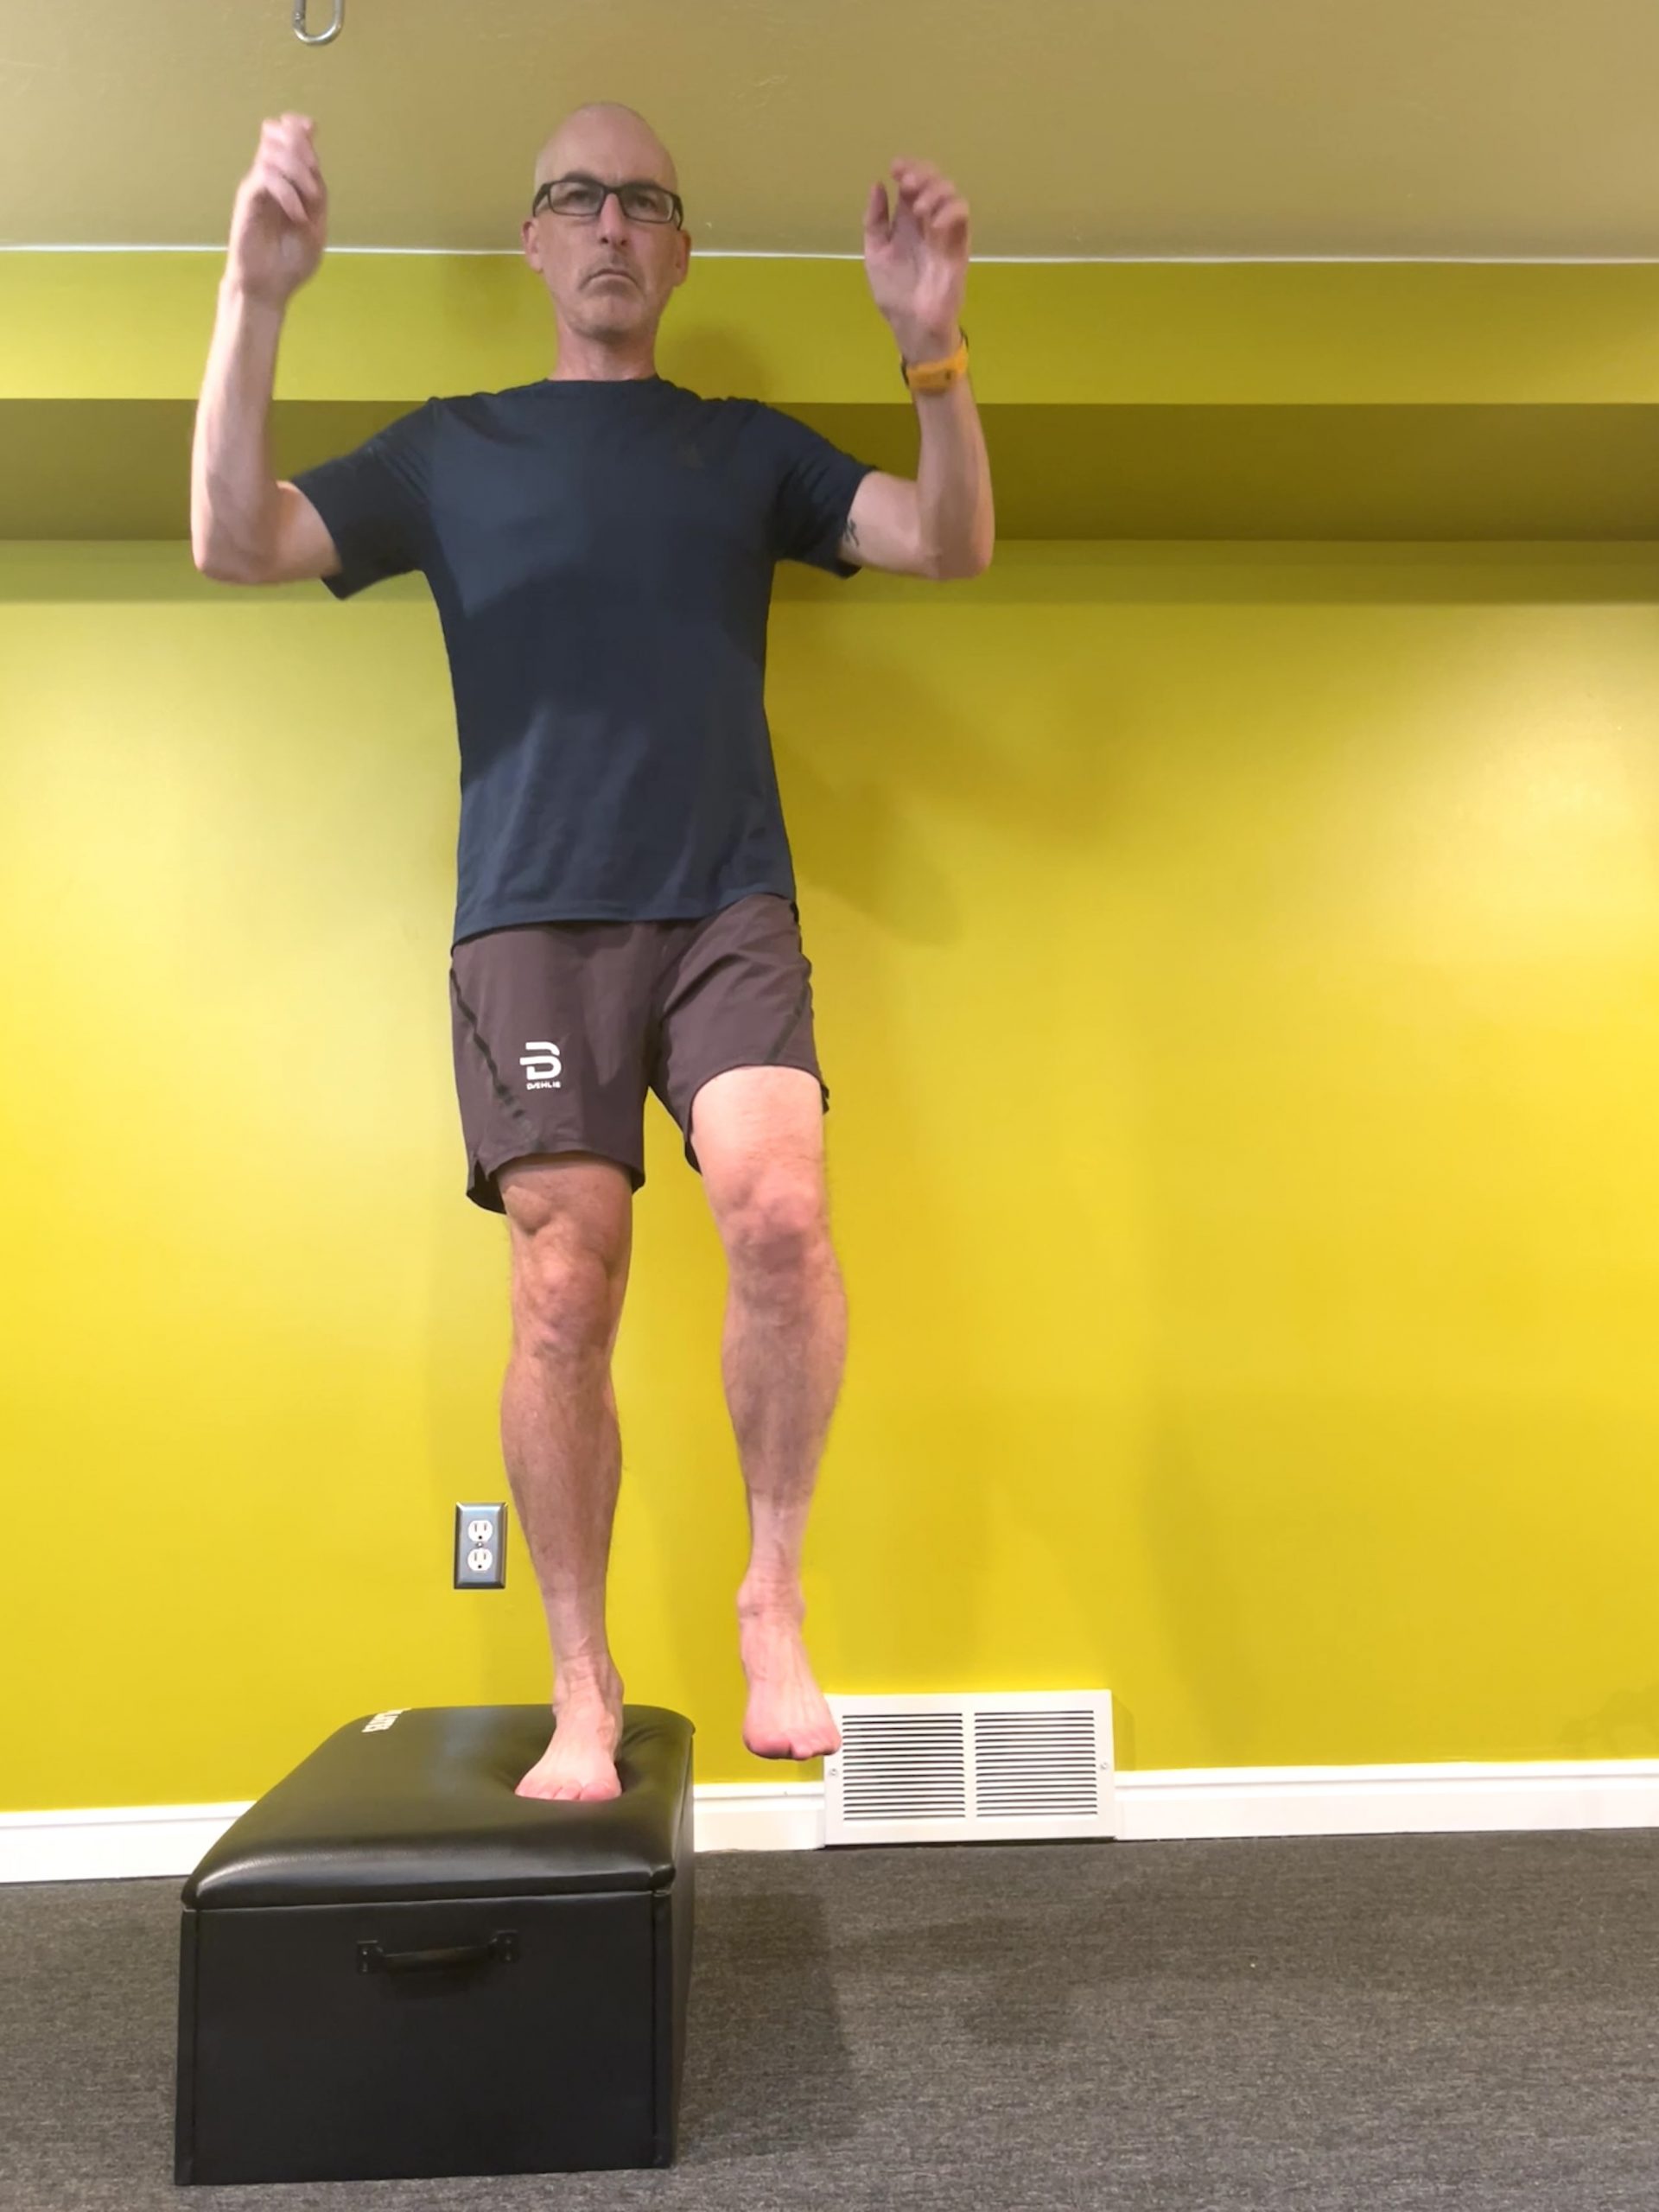
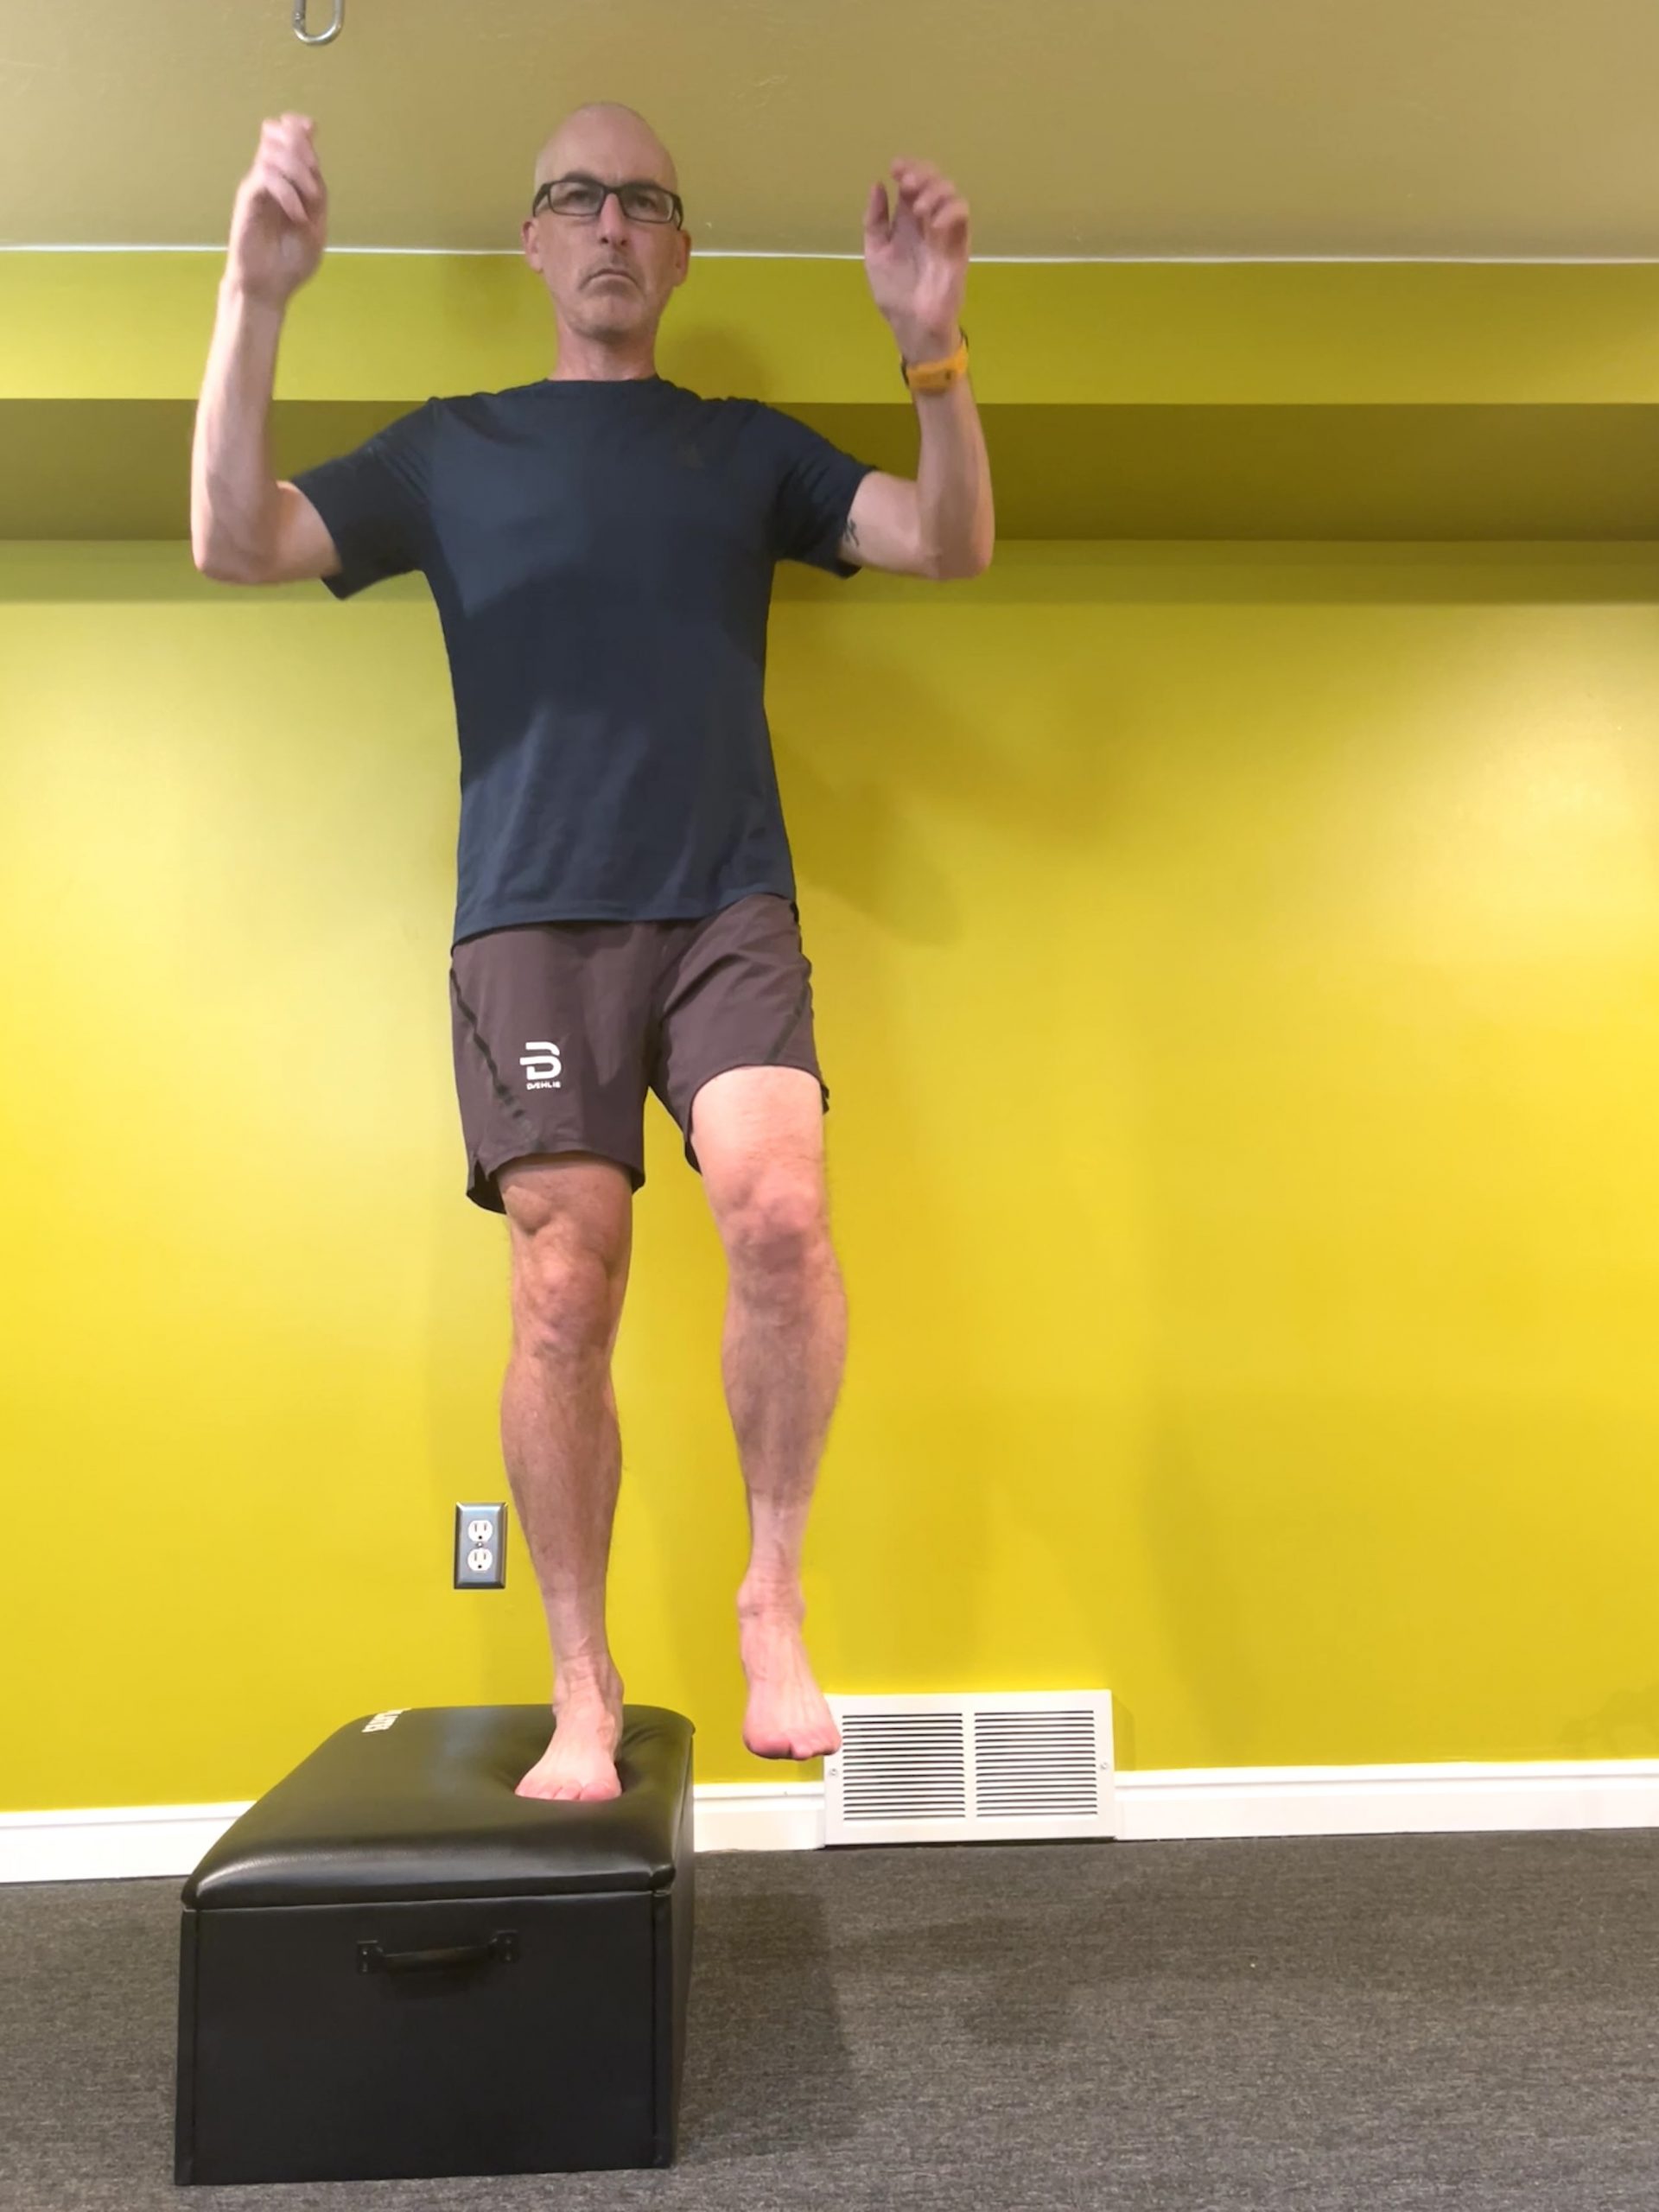
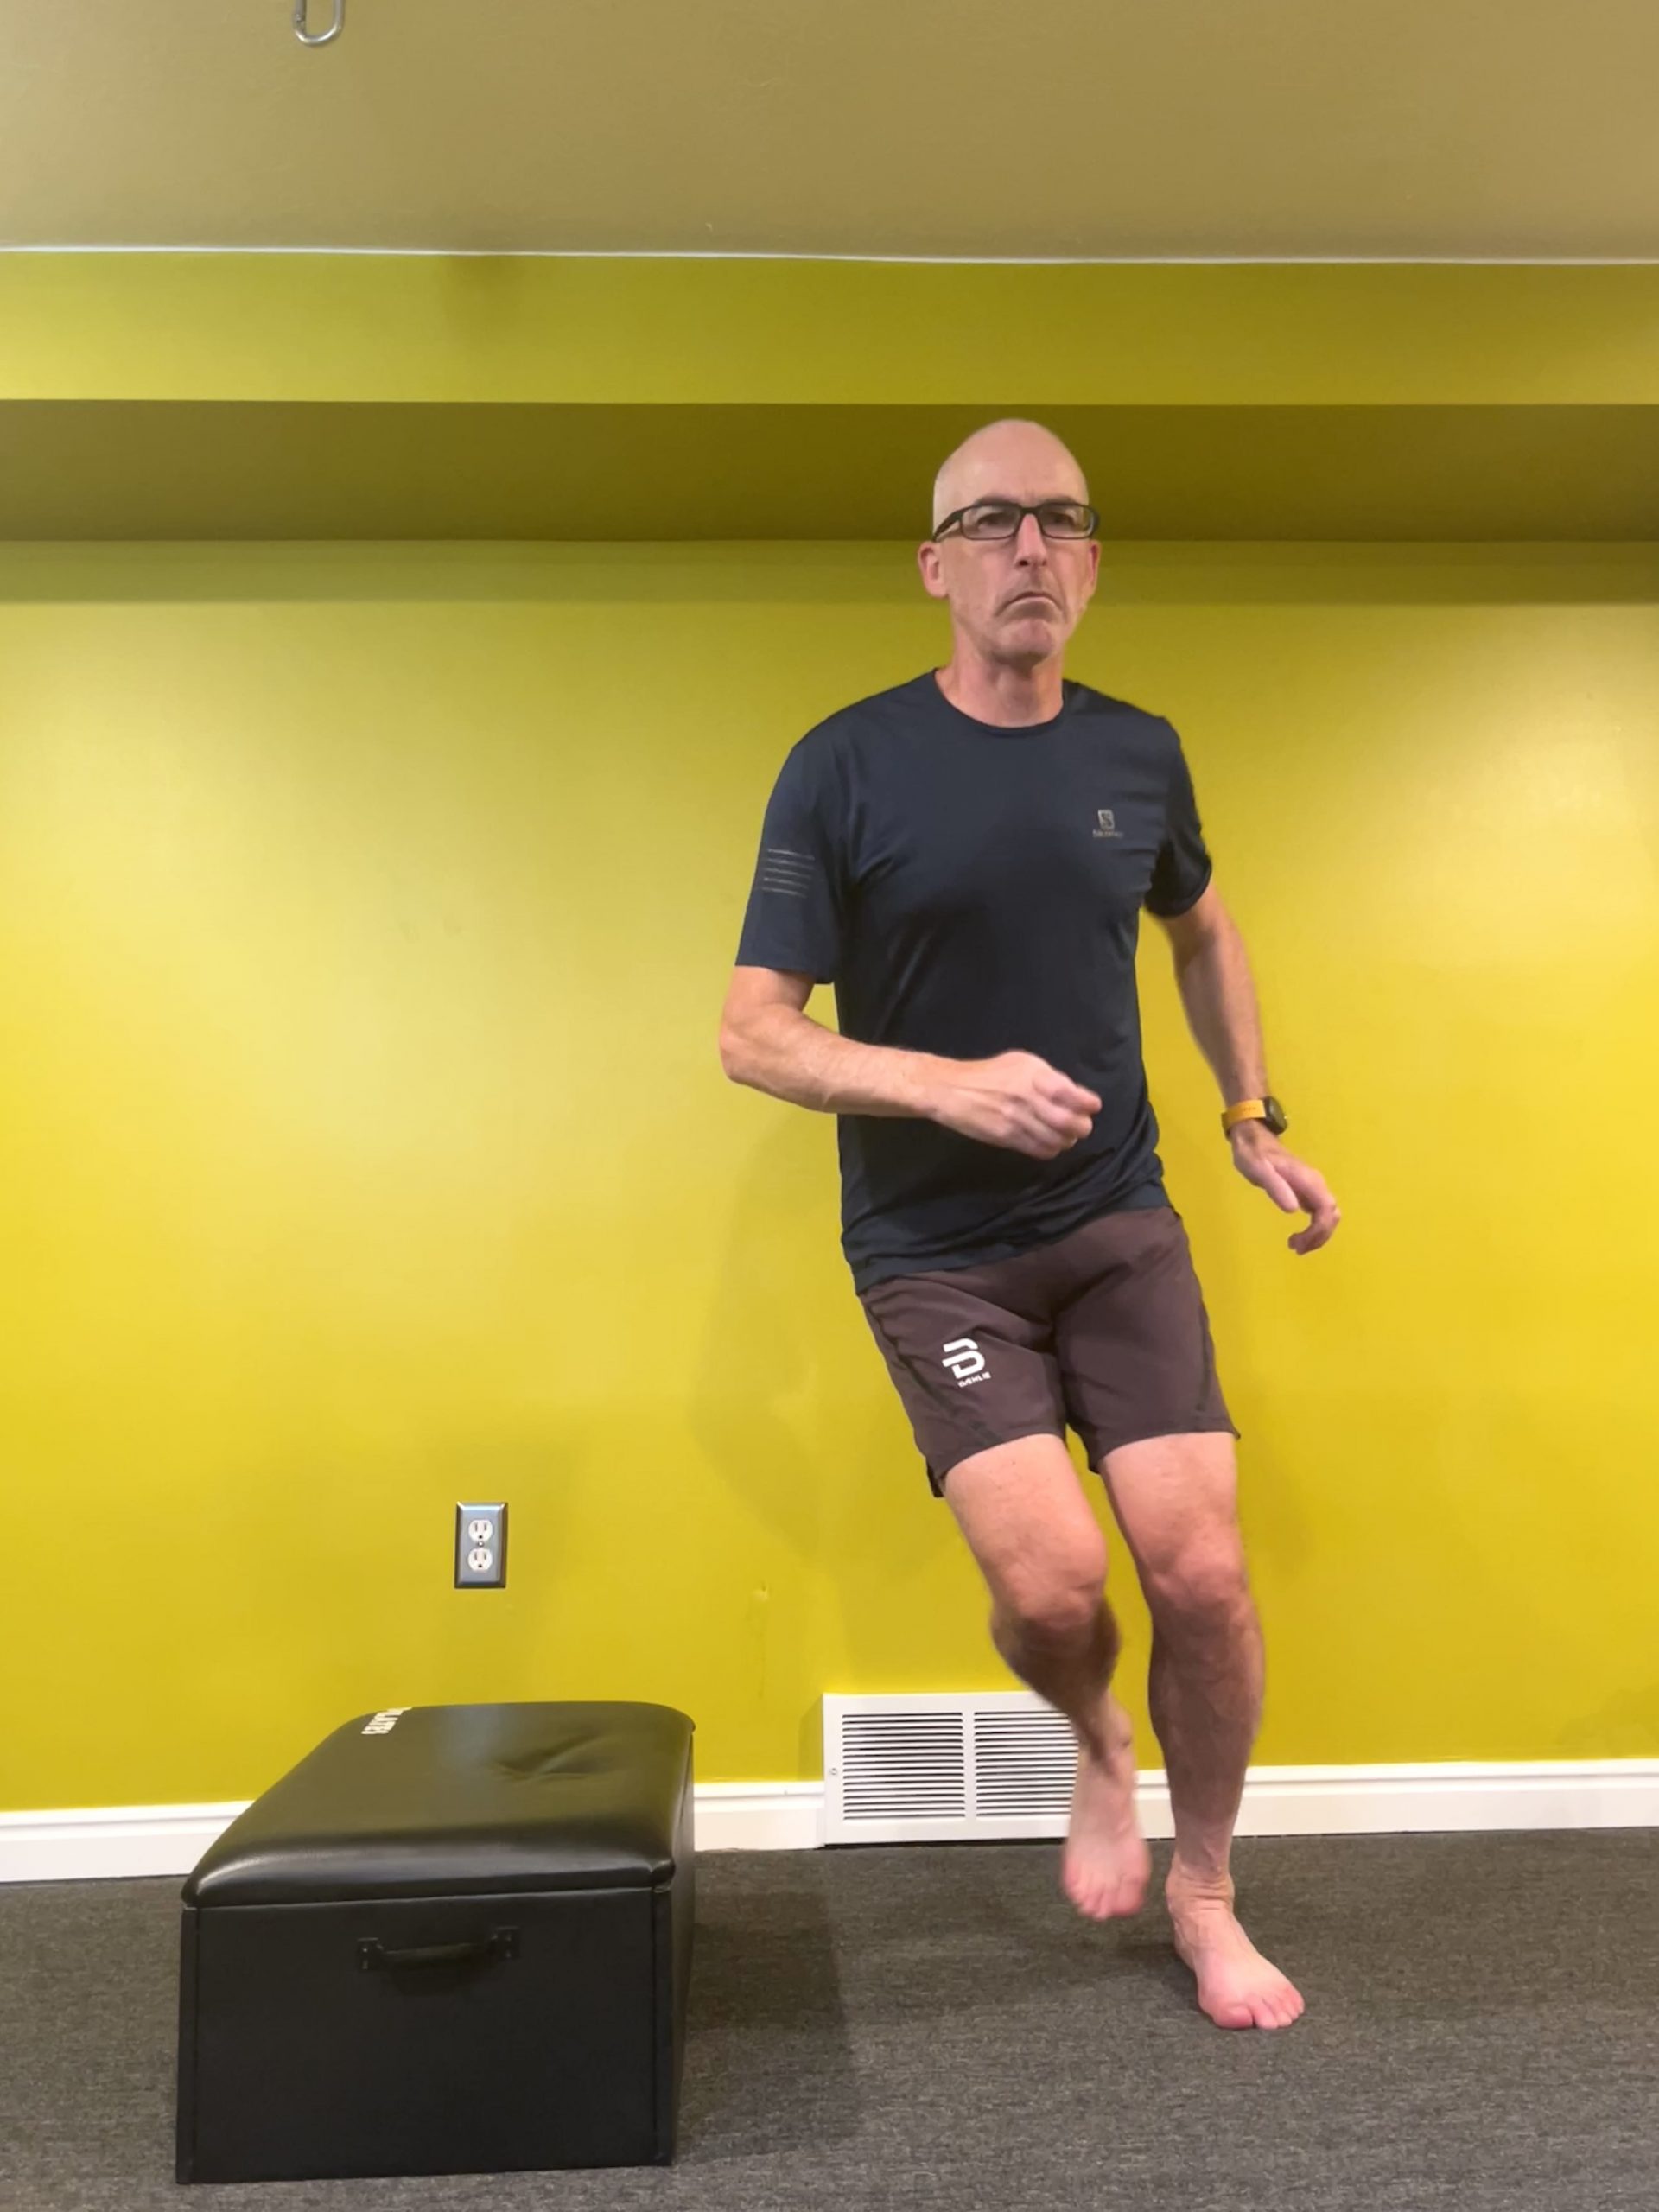
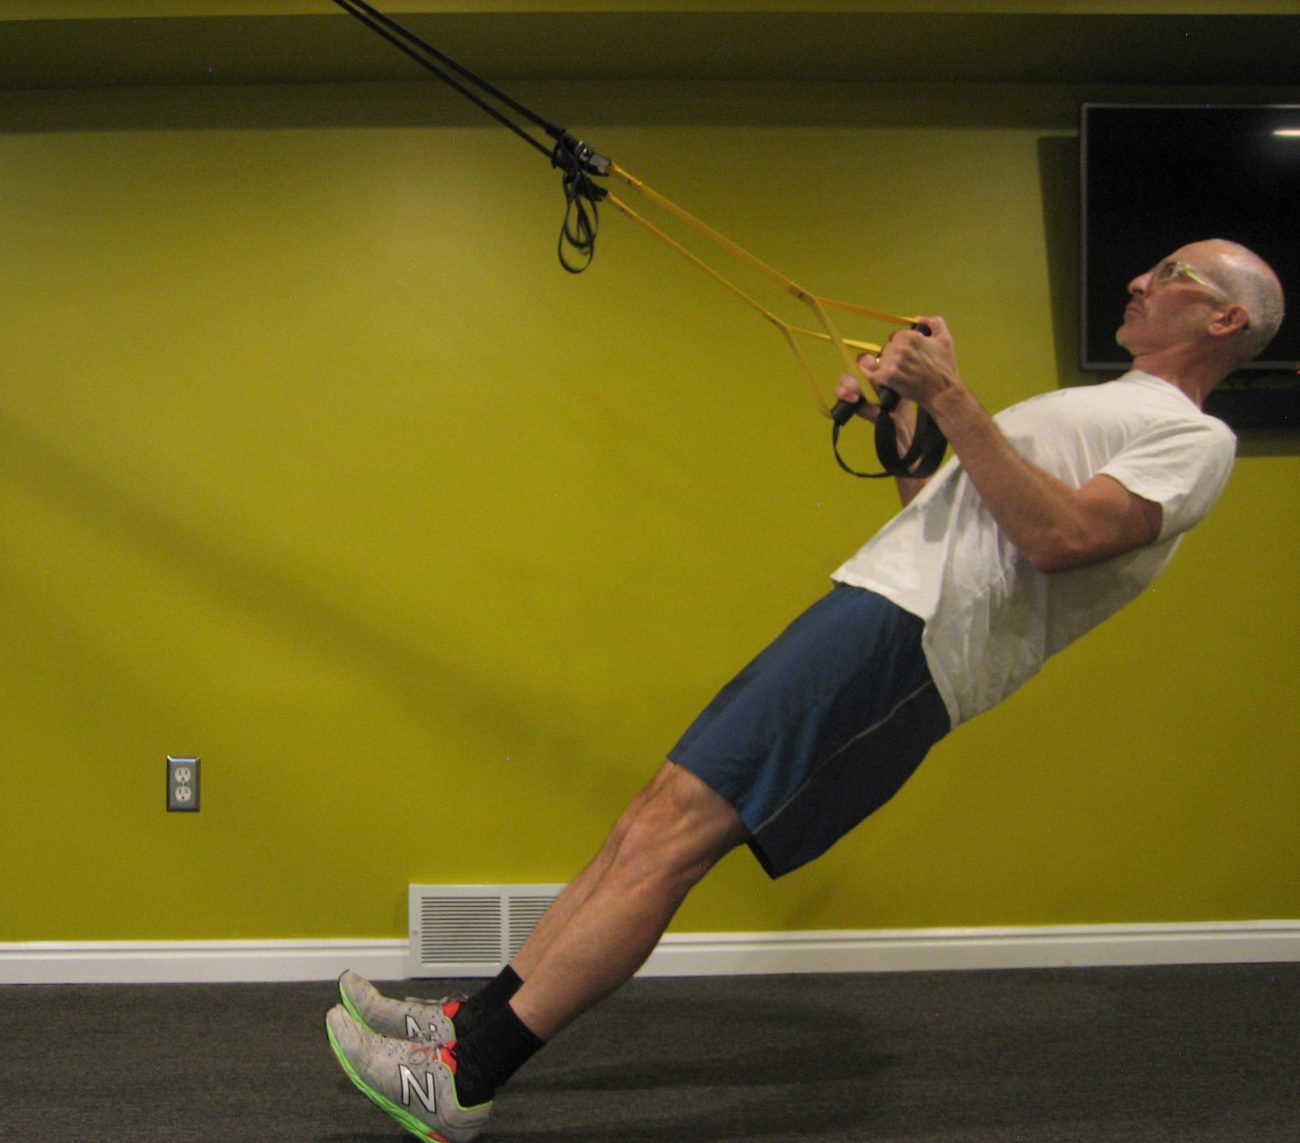
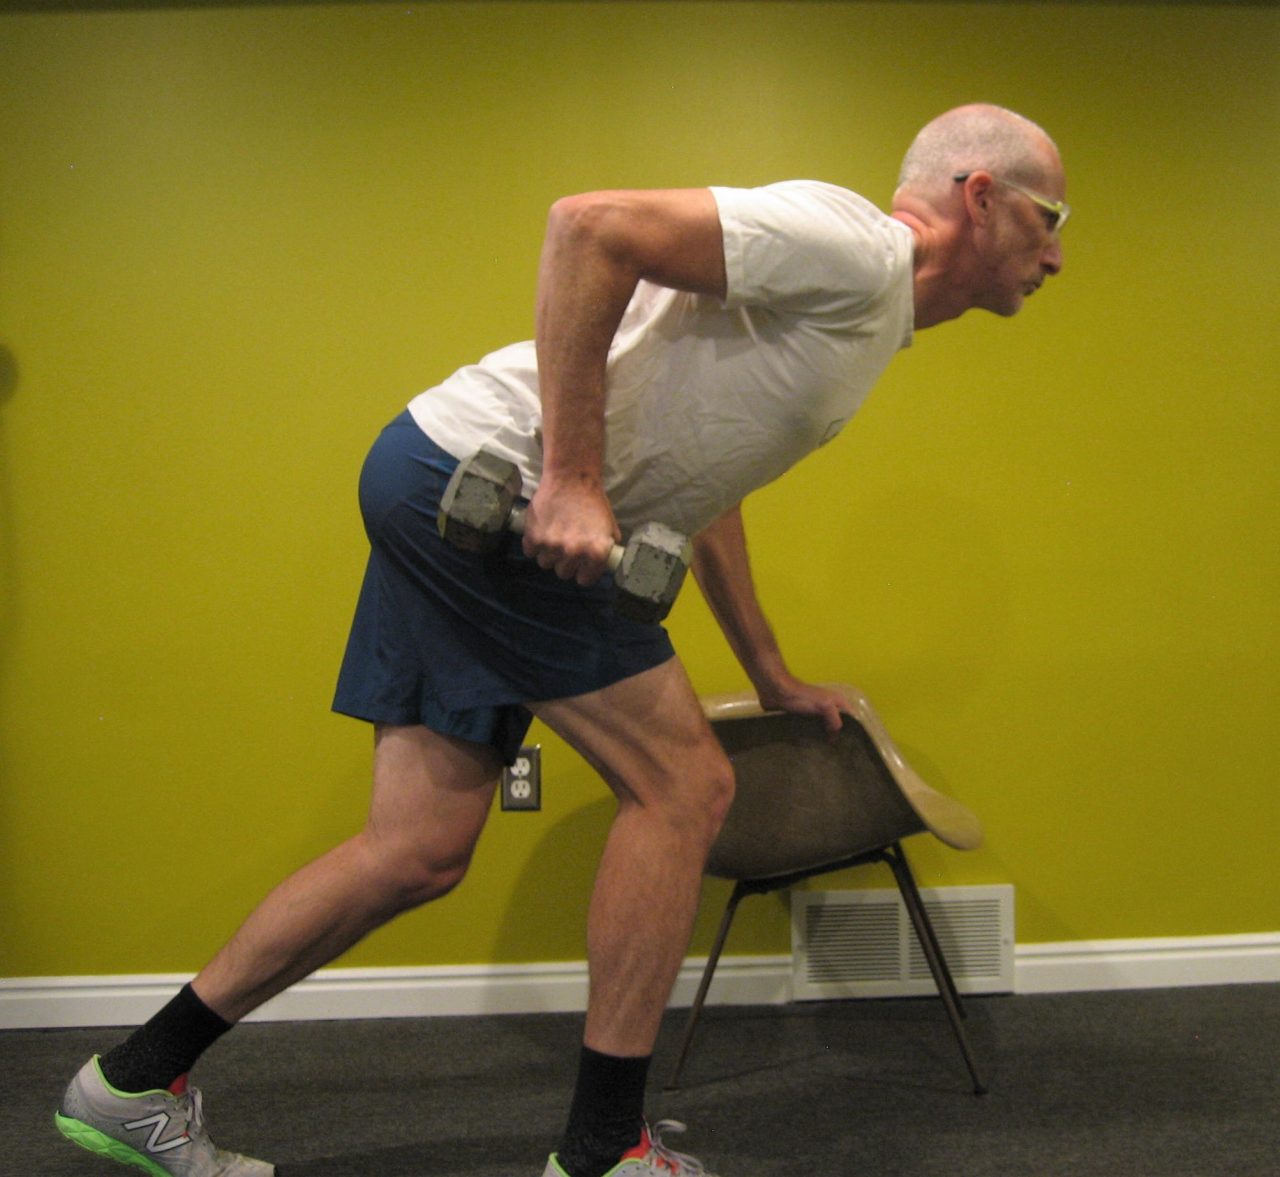
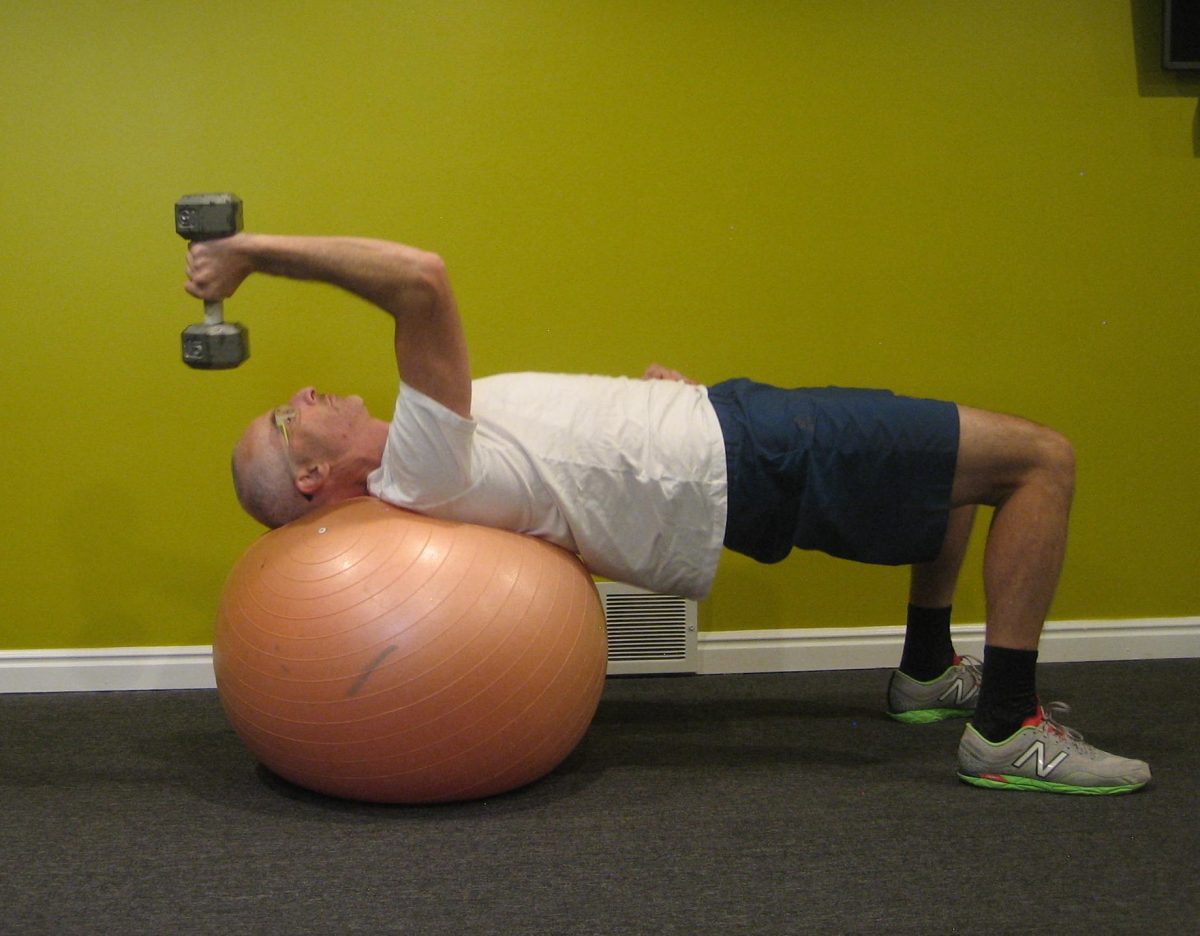
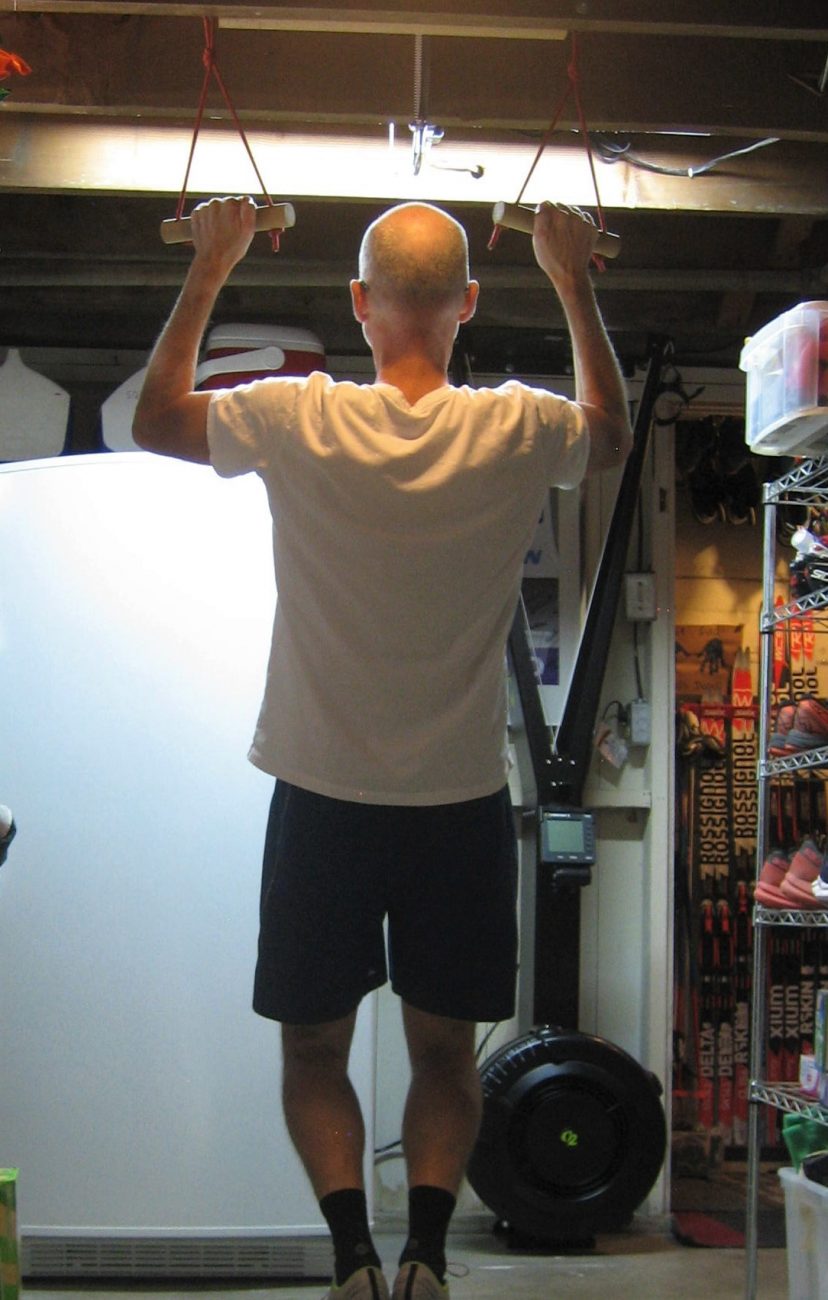
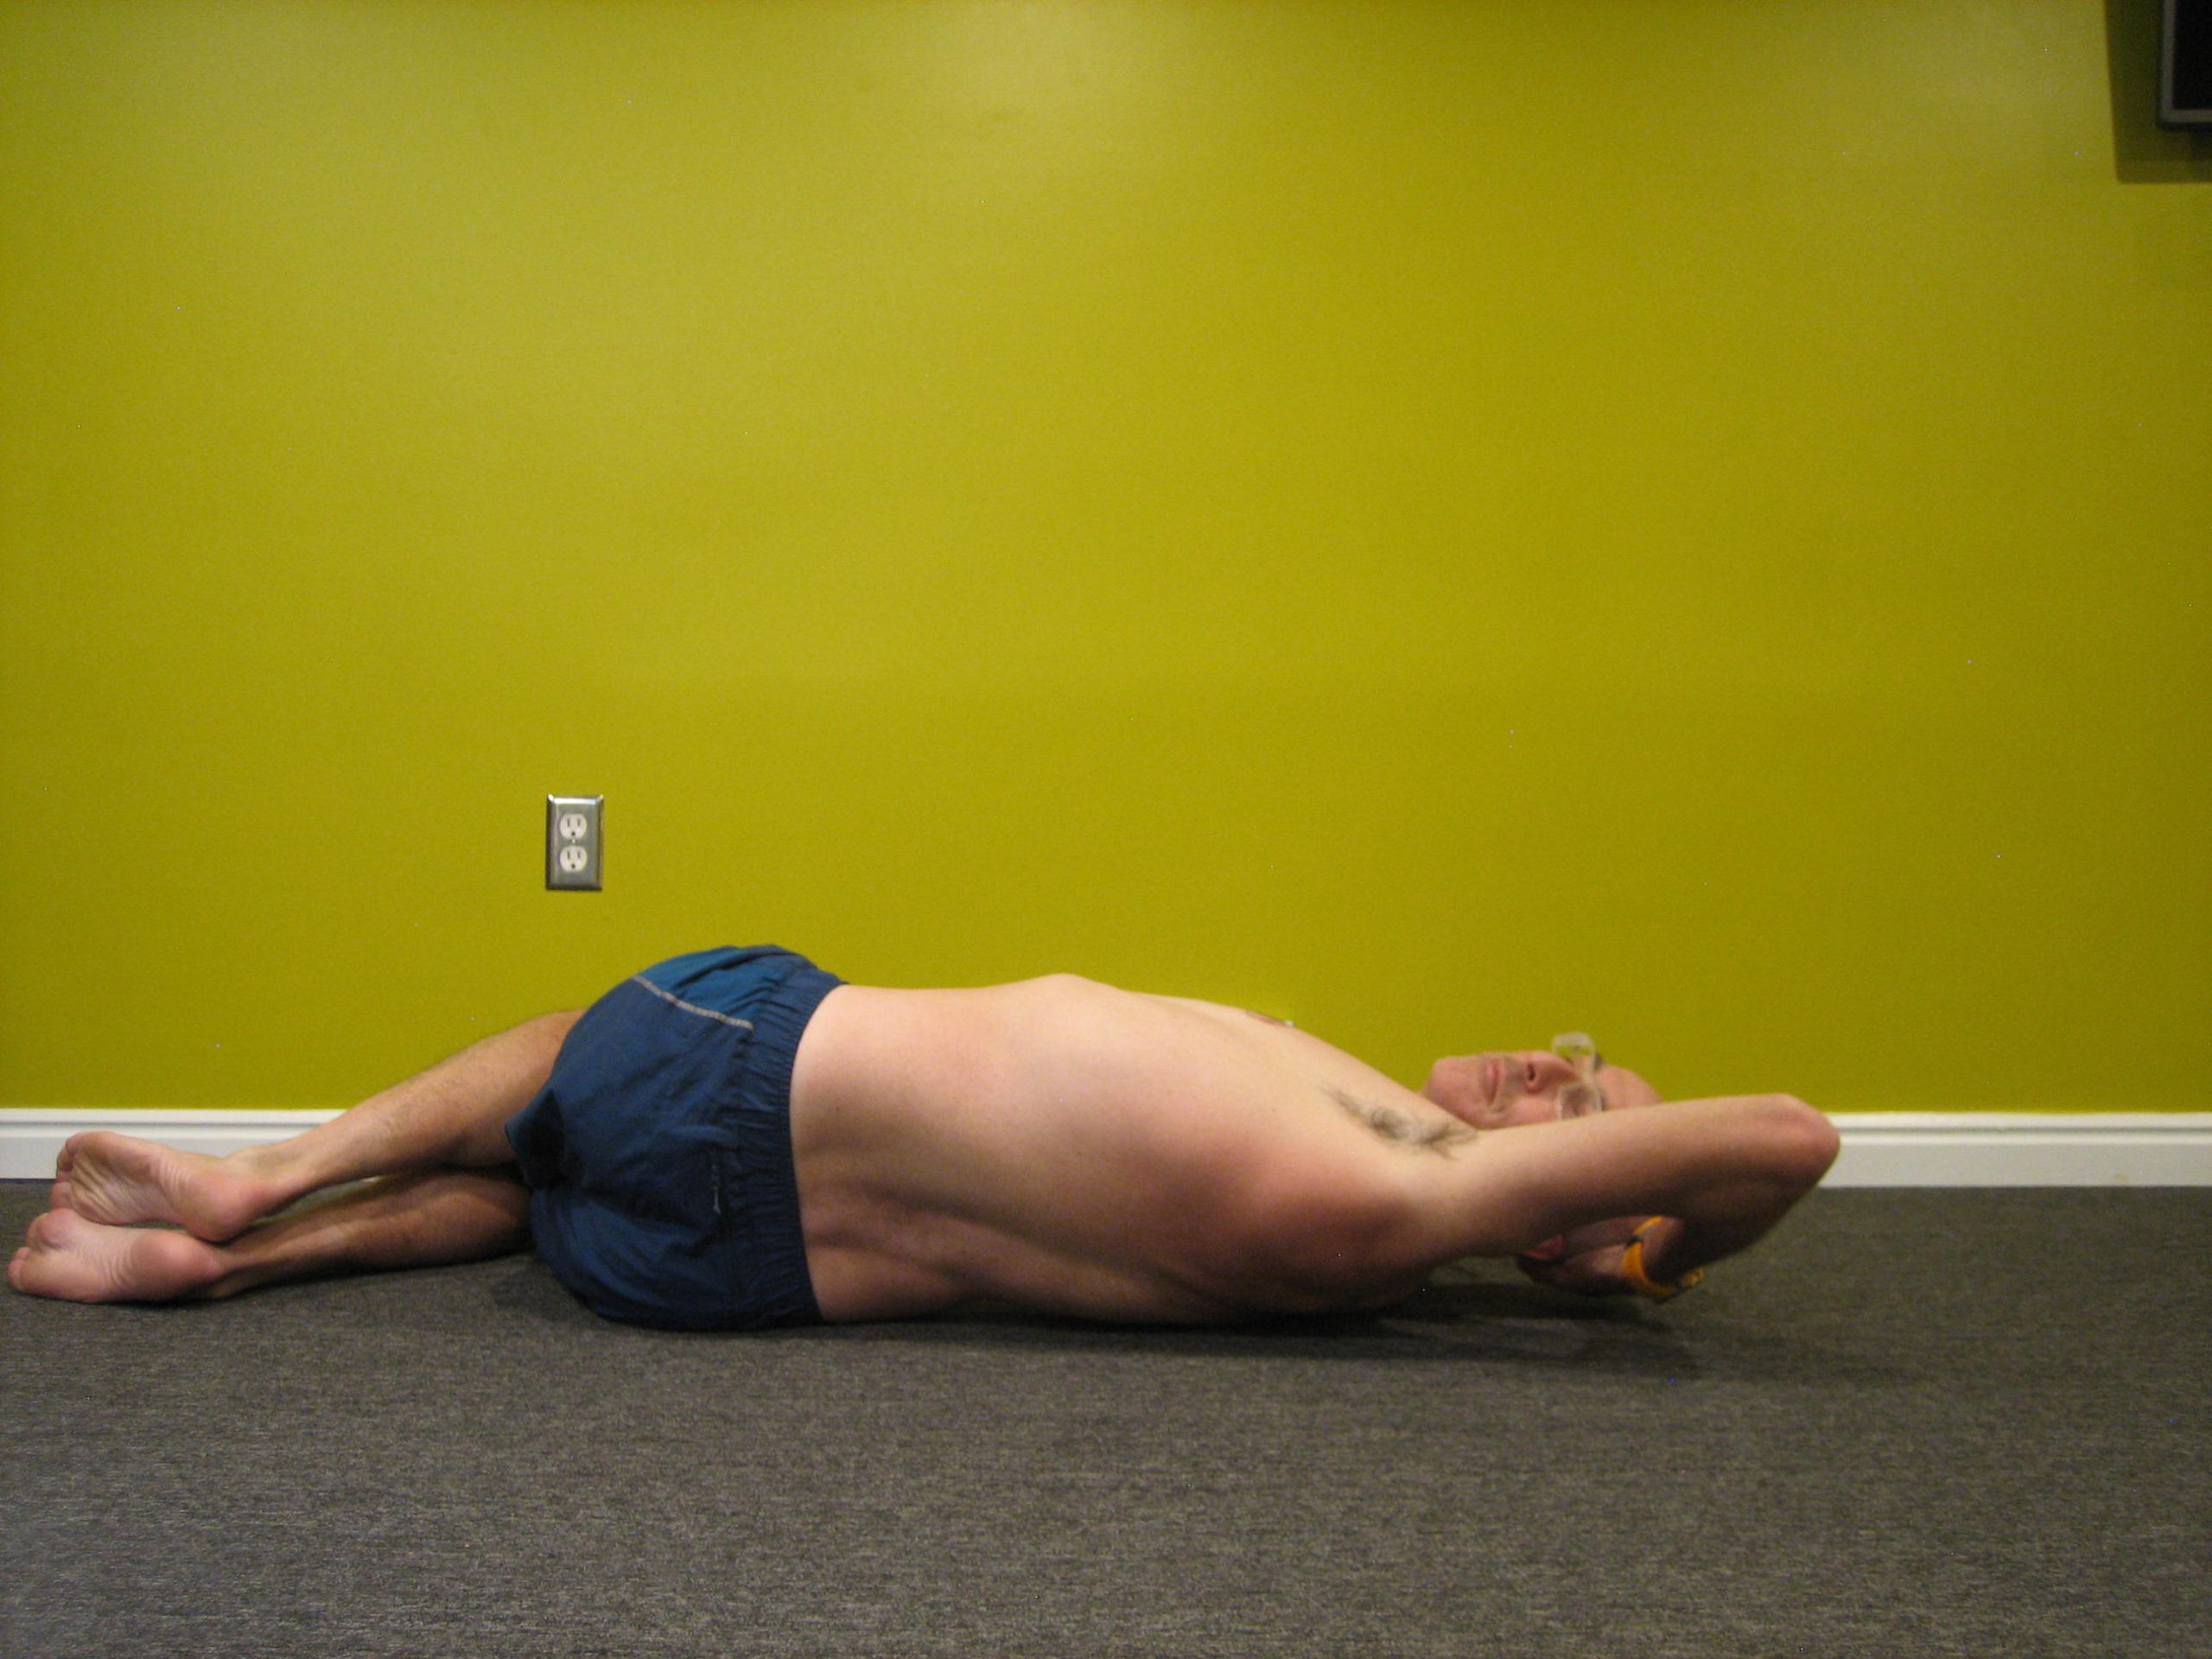
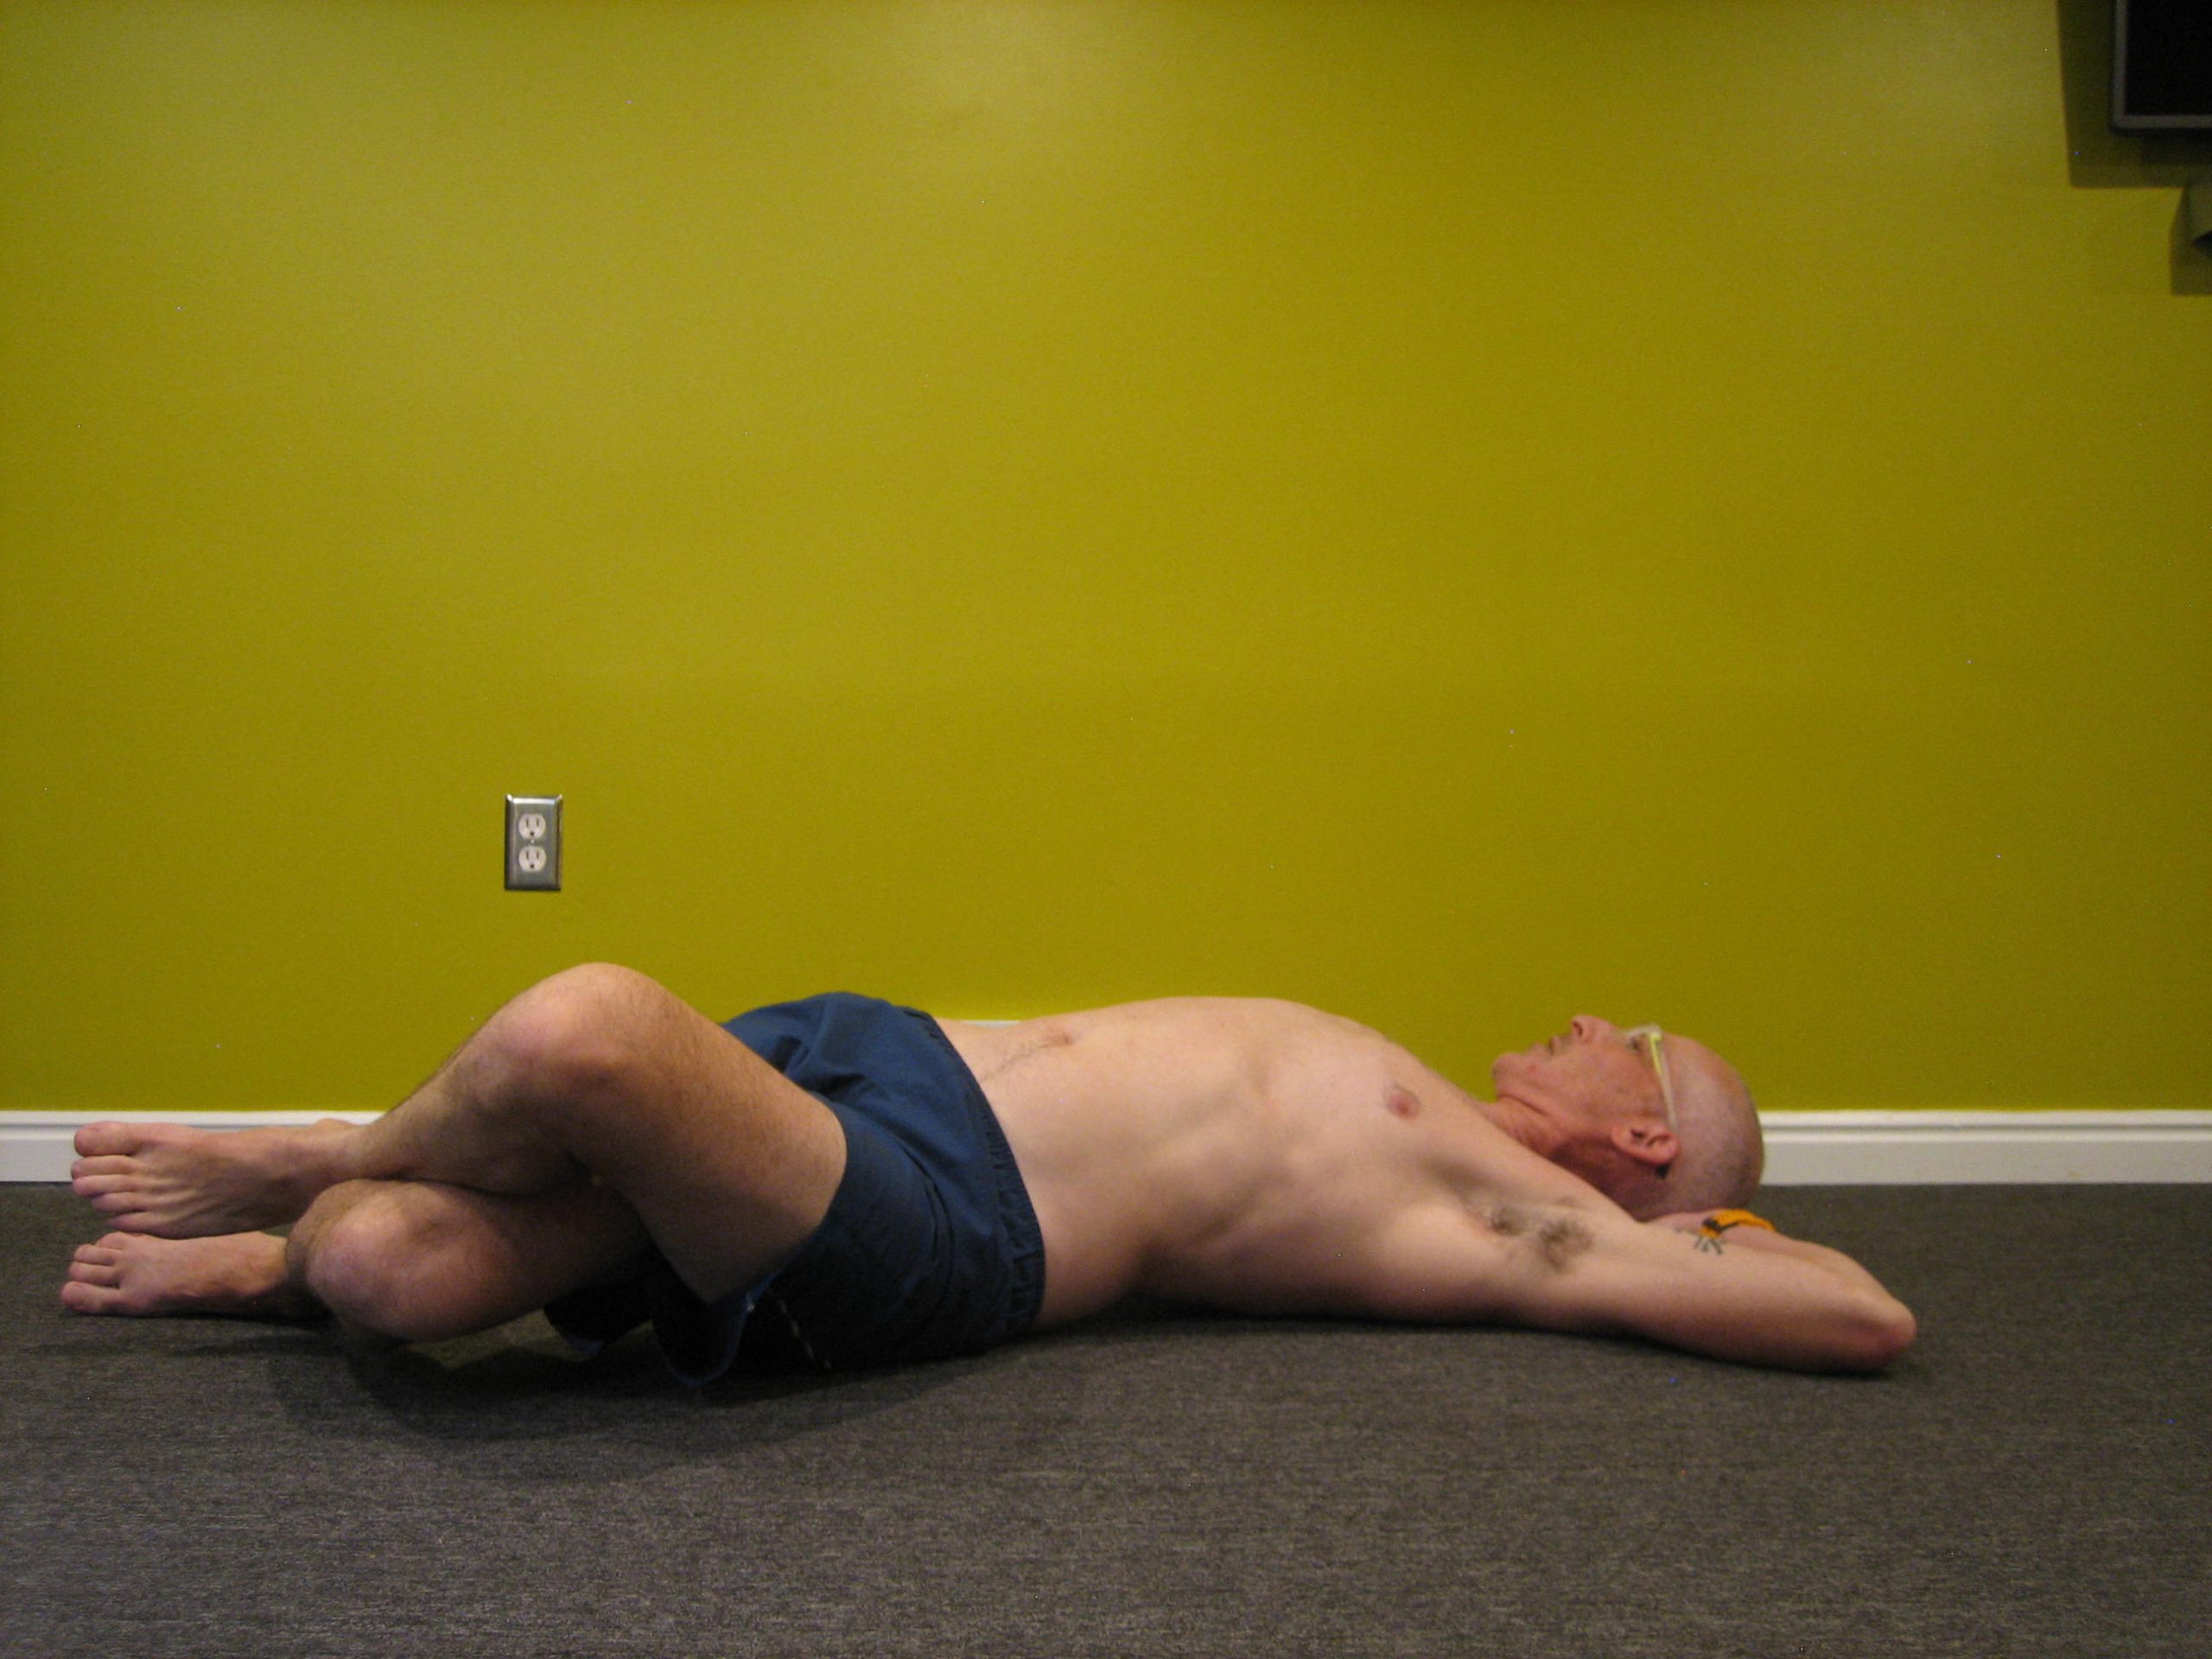
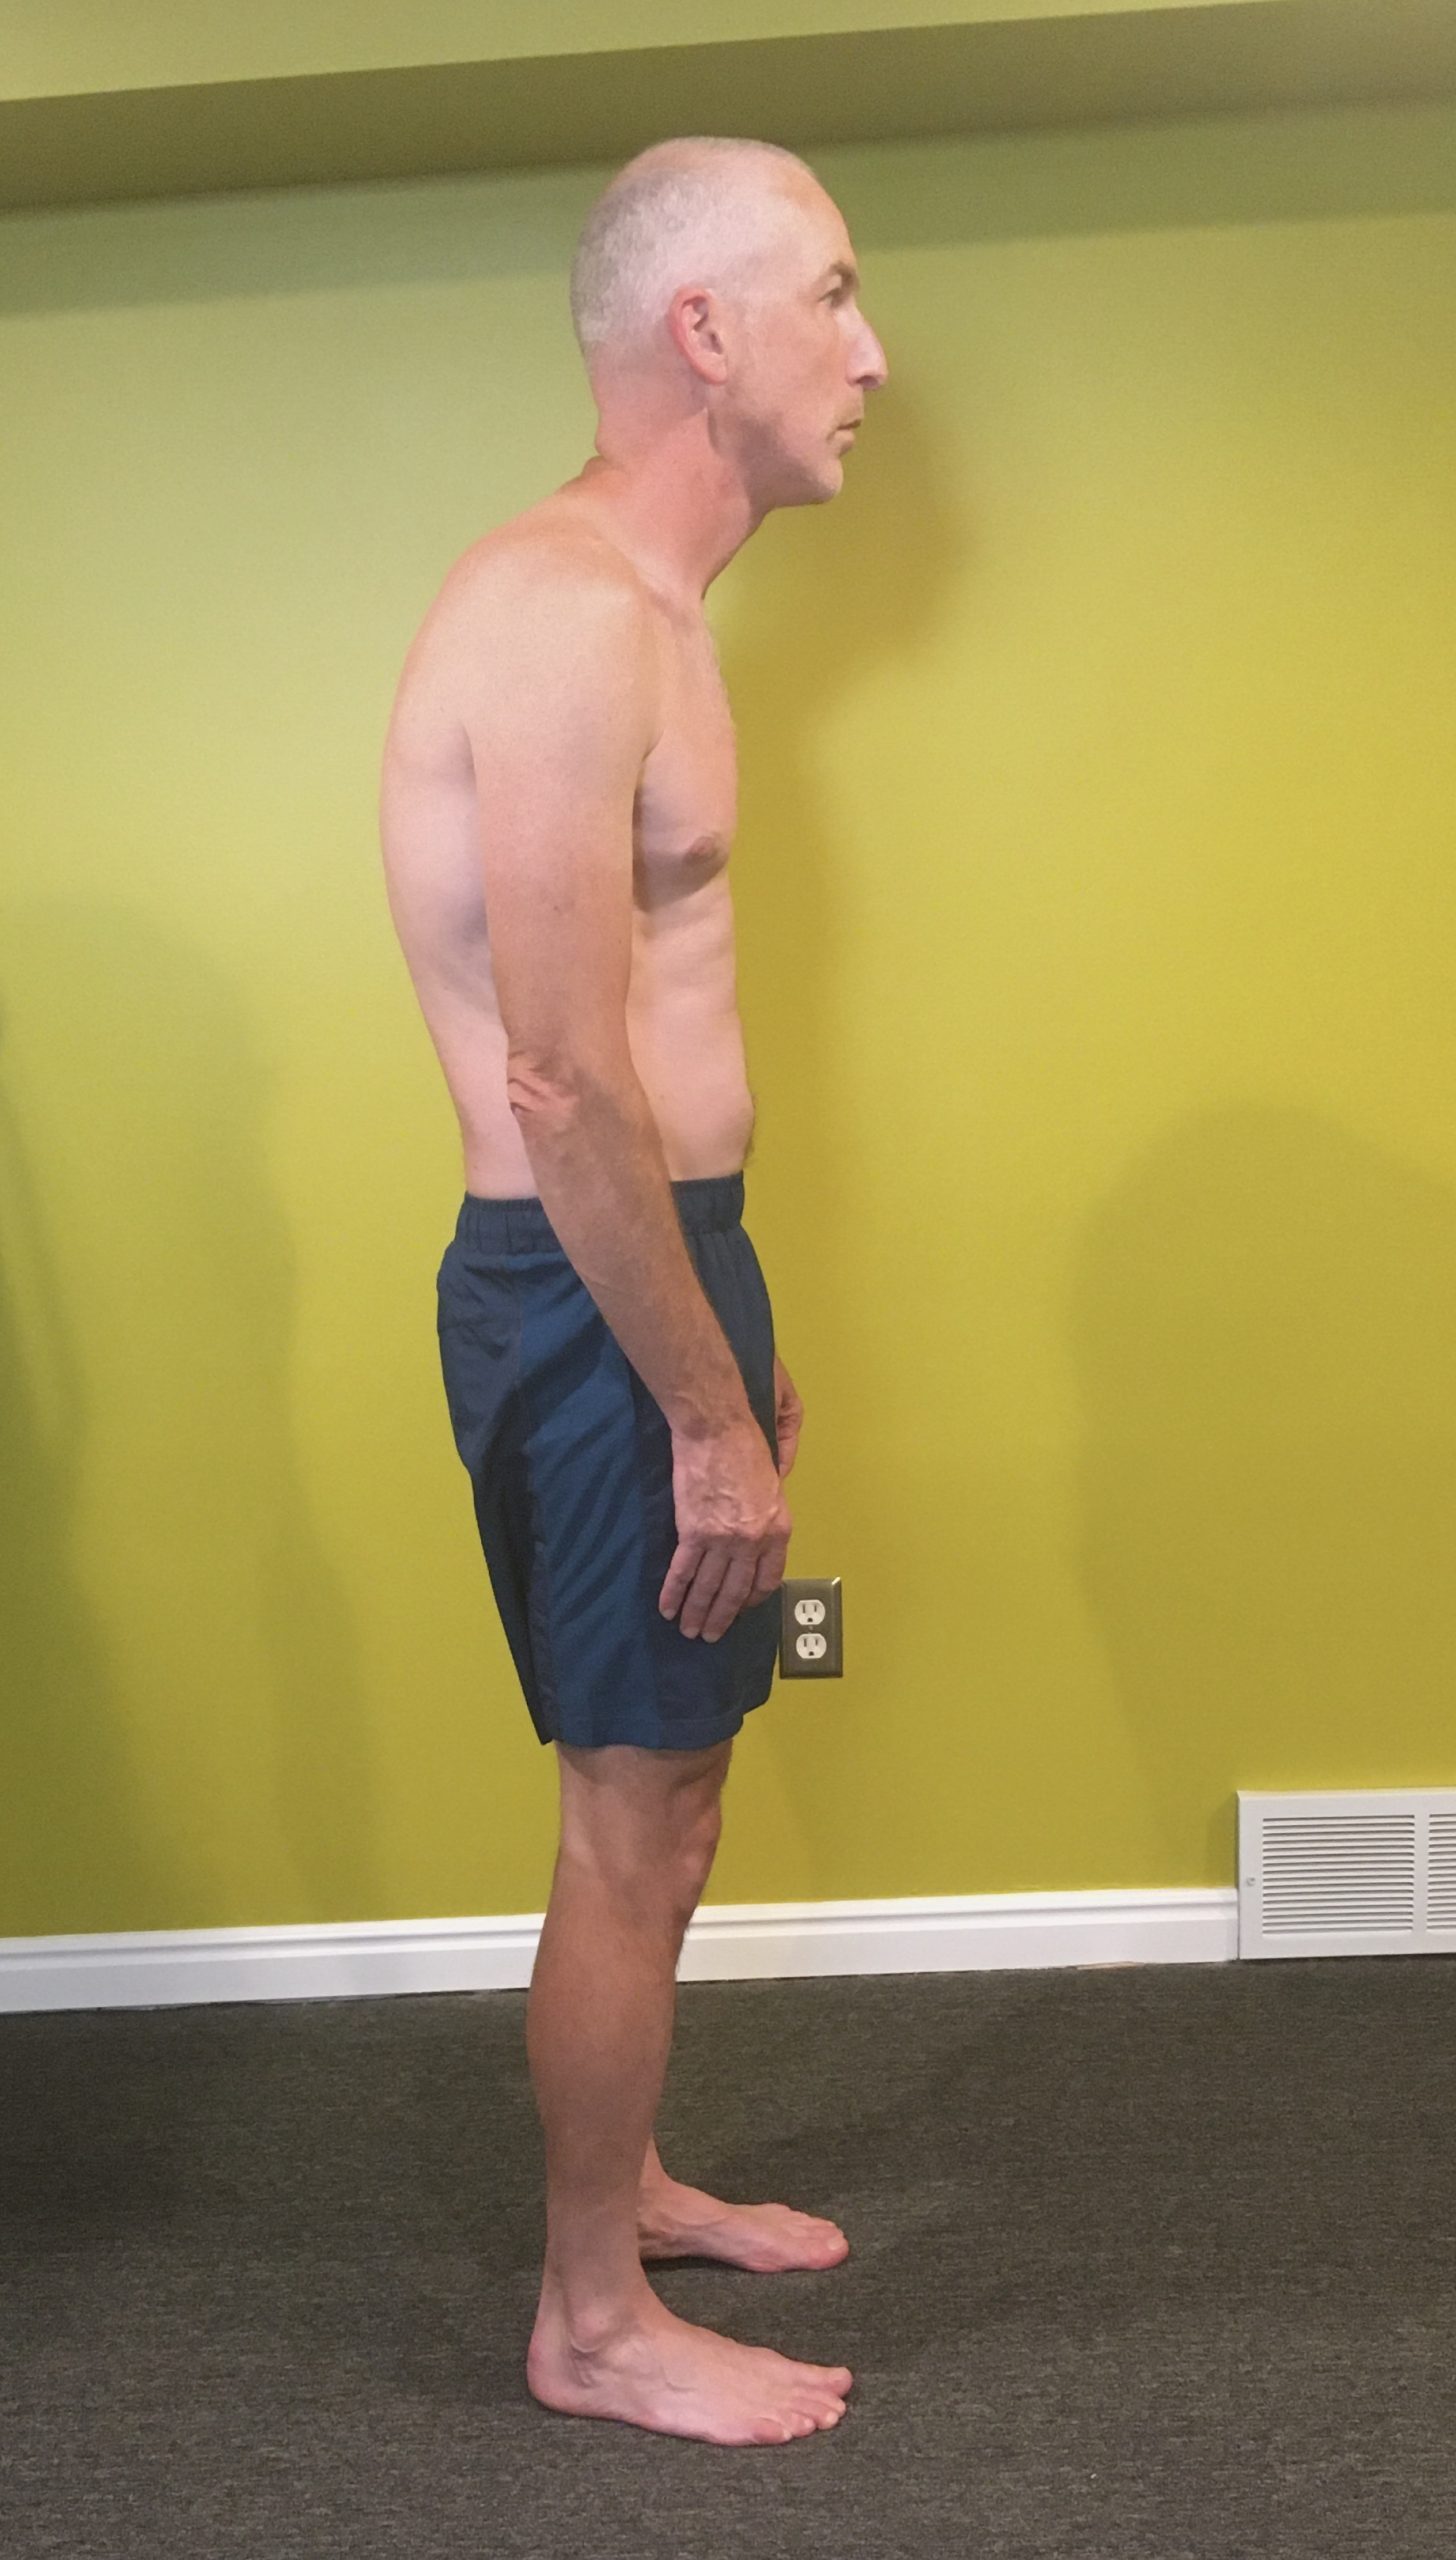
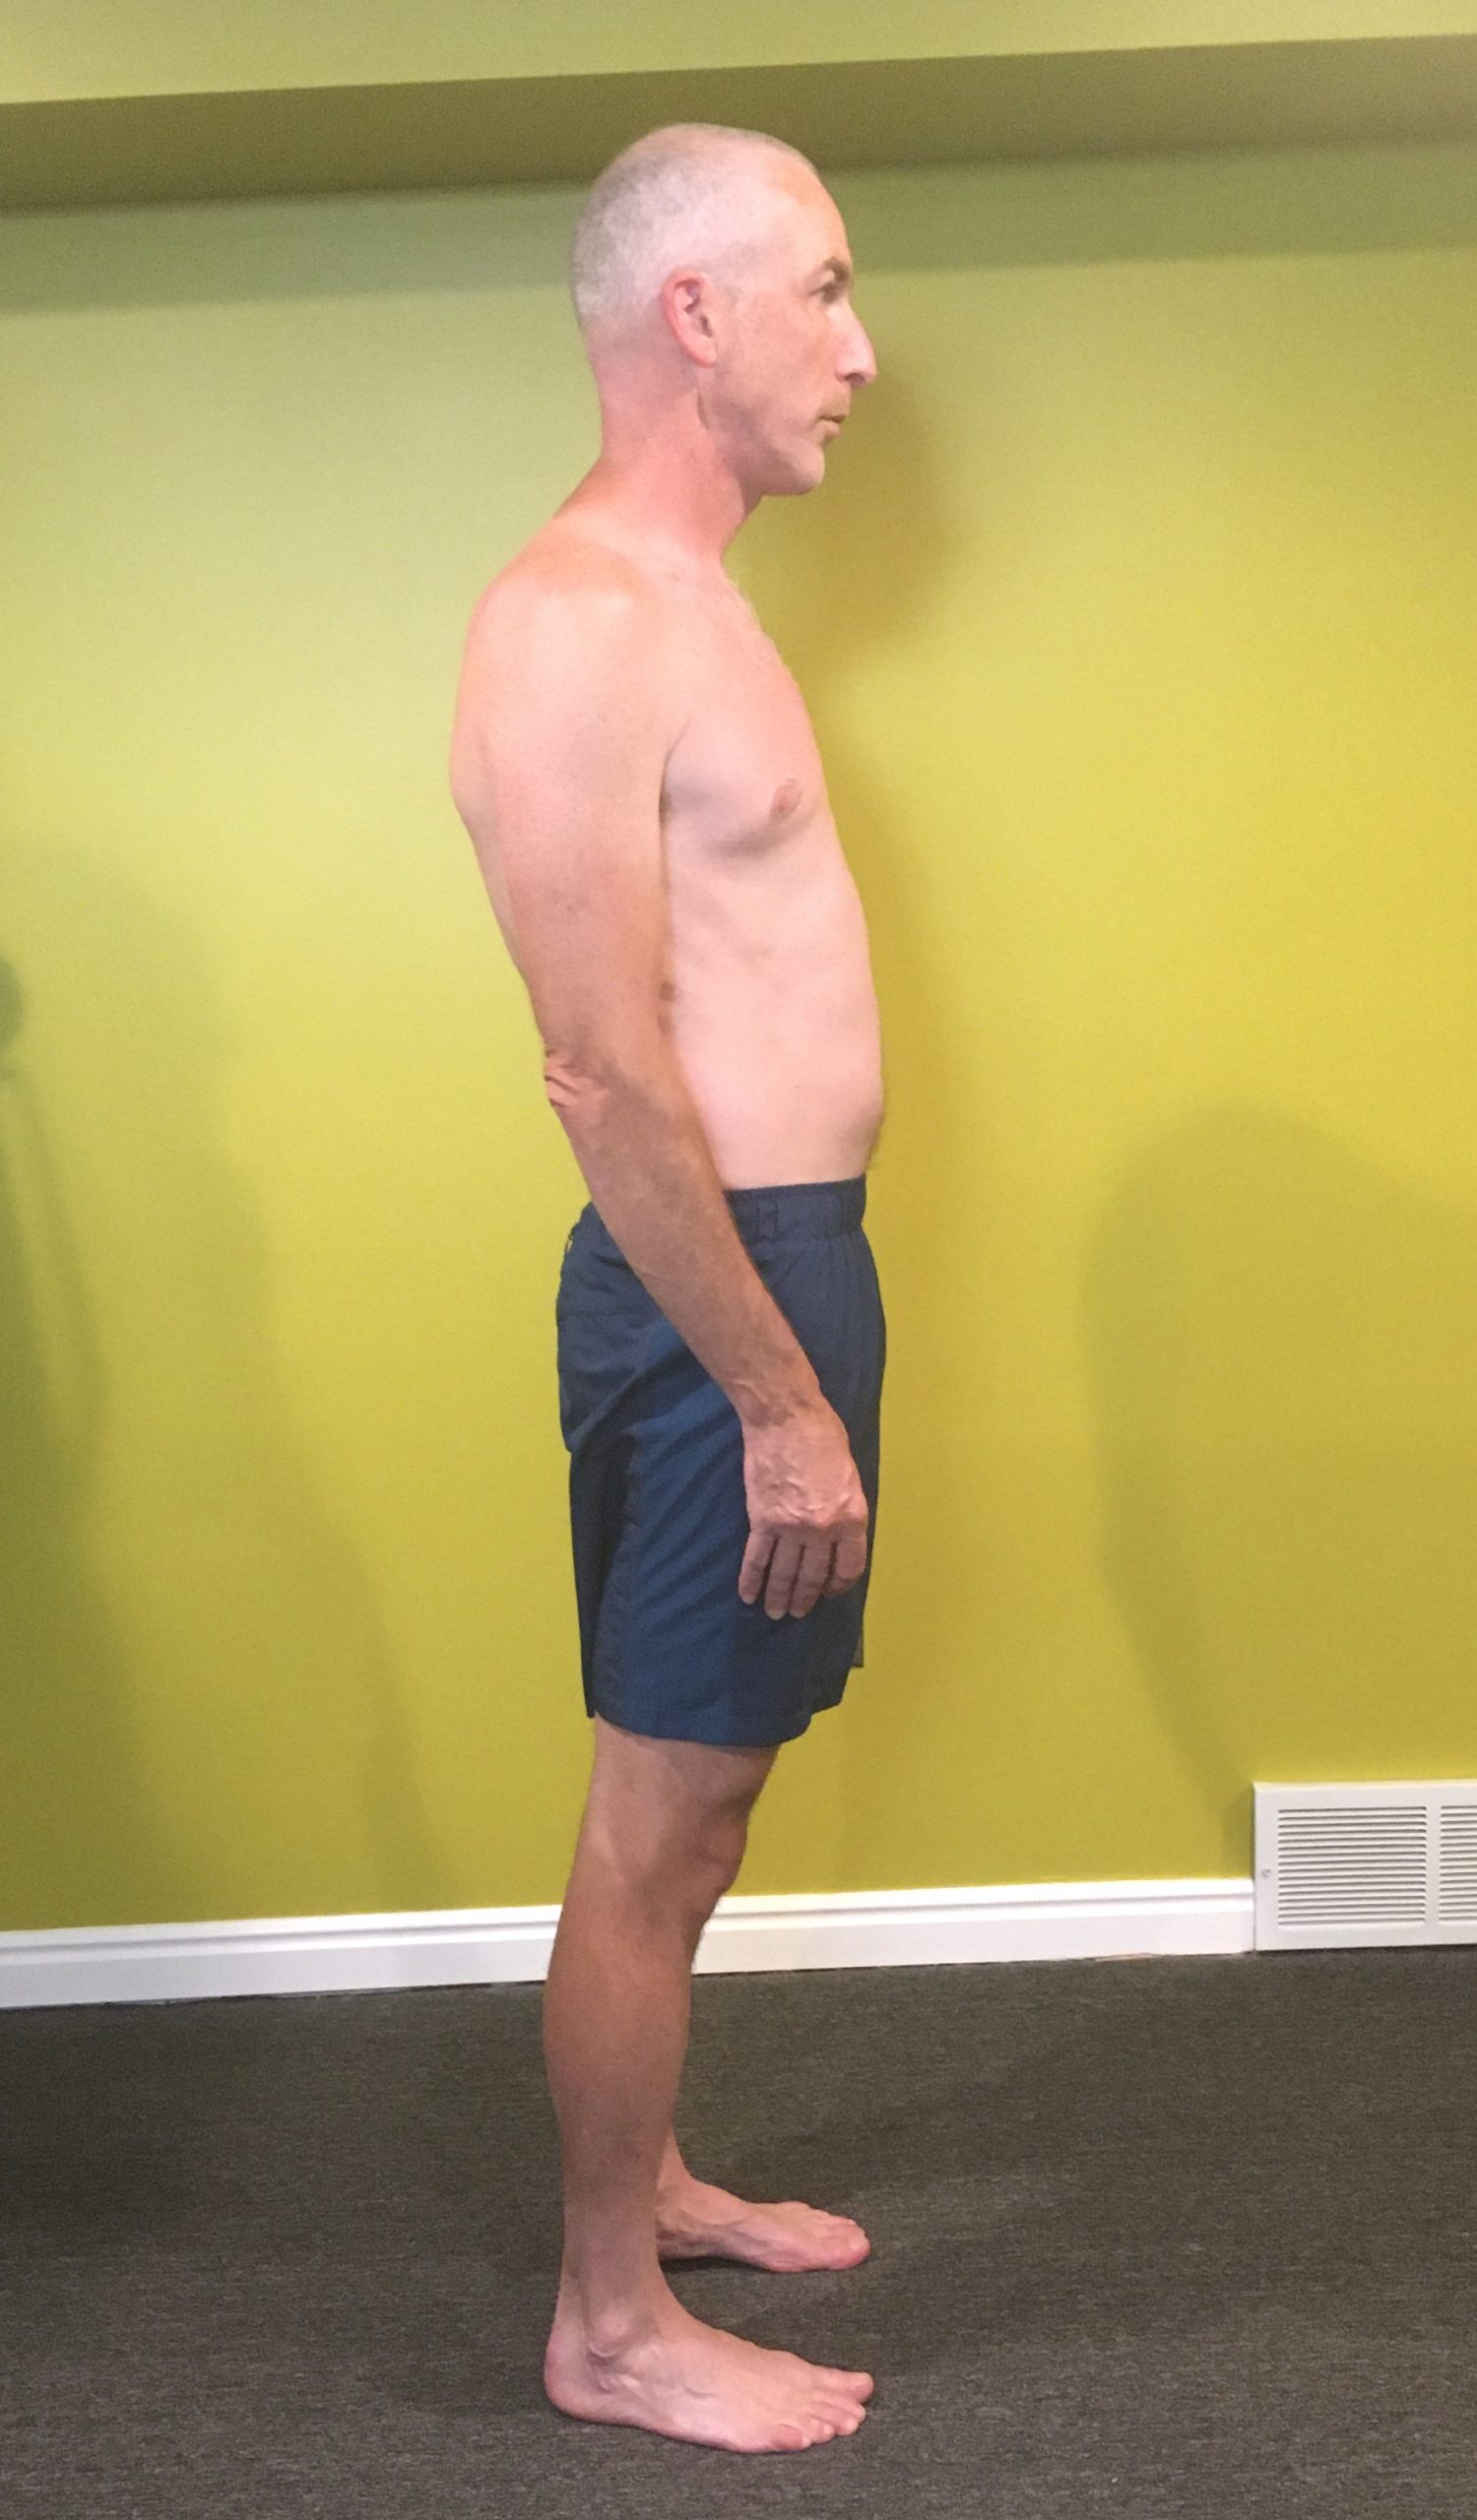
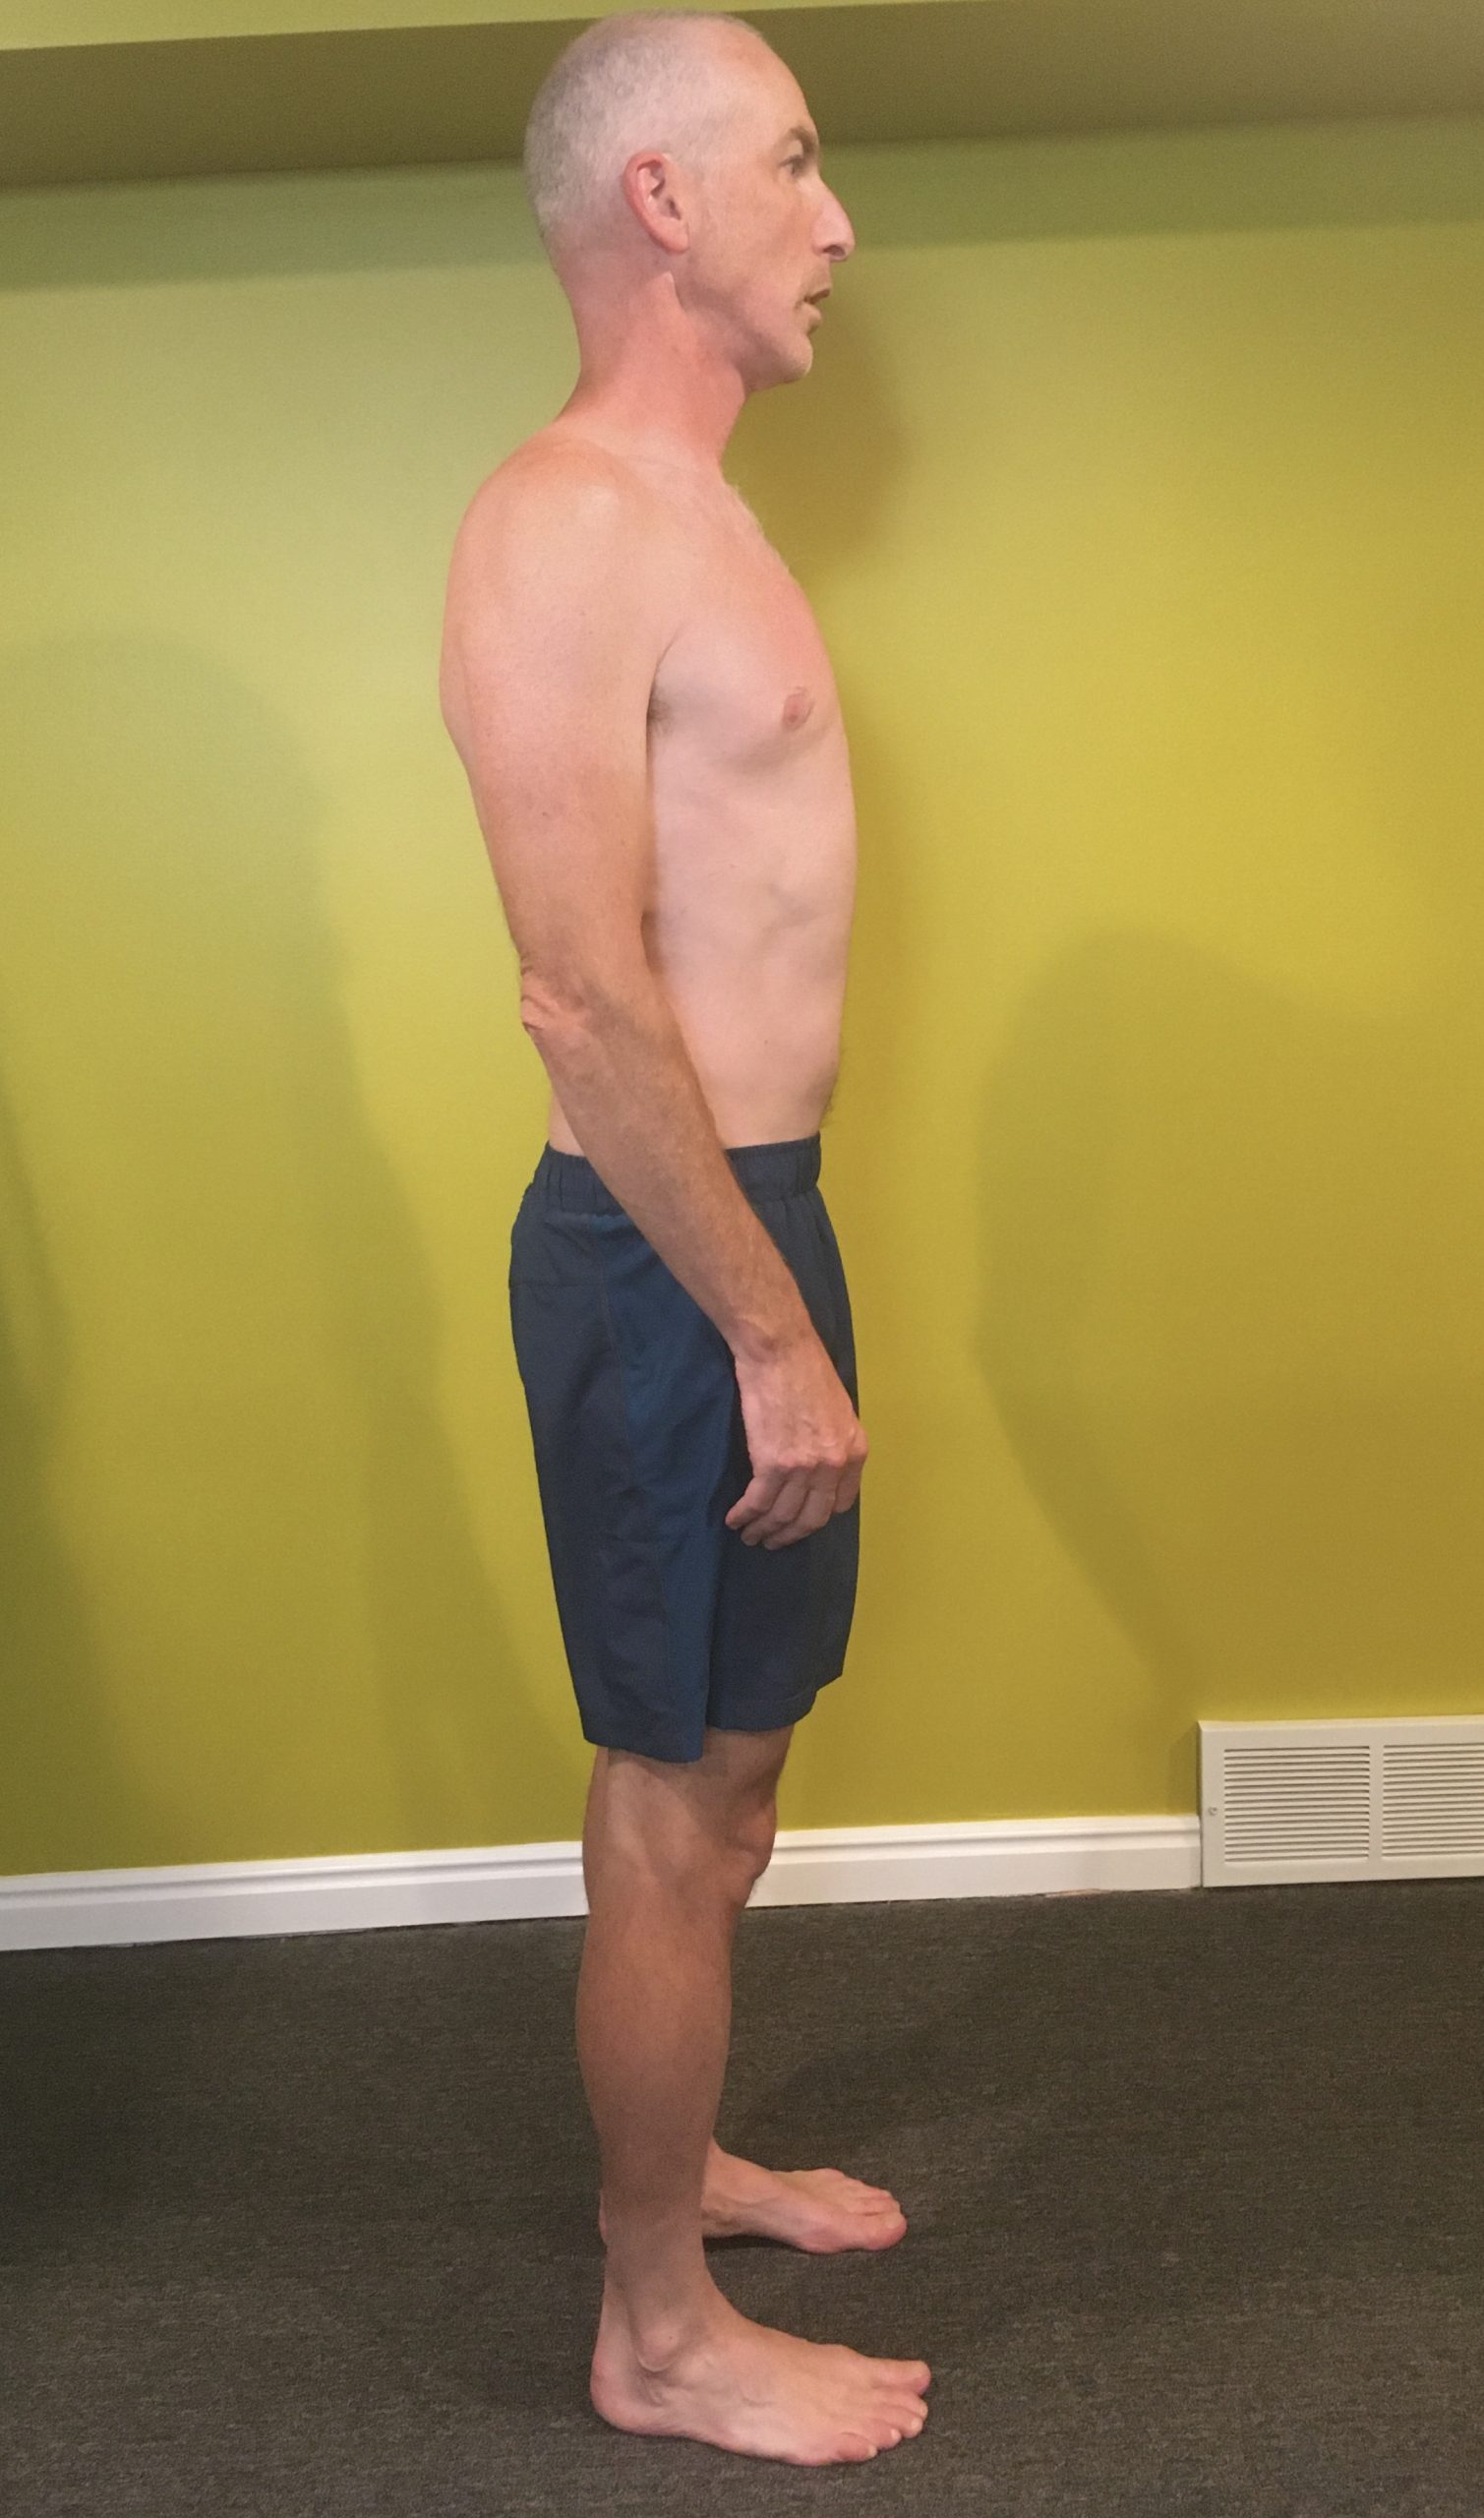
    Not to use that as a cop out, or get away without including pictures of my bald head and yellow-walled basement, here are MY top three exercises for runners (and skiers). These, plus all of your other strength training and pay-to-play maintenance exercises, should be in the mix two or three times a week. As with any exercise, the goal is to challenge or nudge the body in order to get the desired adaptations. This, as with all training, is a bit of a Goldilocks thing: too hot and the body is unhappy and let’s you know about it; too cold and nothing happens. Please be aware that these exercises (and the ones in my previous articles linked above) may not be your Goldilocks. If you are currently dealing with a running related injury (or any musculoskeletal pain), please visit your friendly, neighborhood physical therapist instead of searching for an internet cure.


    Triple Extension

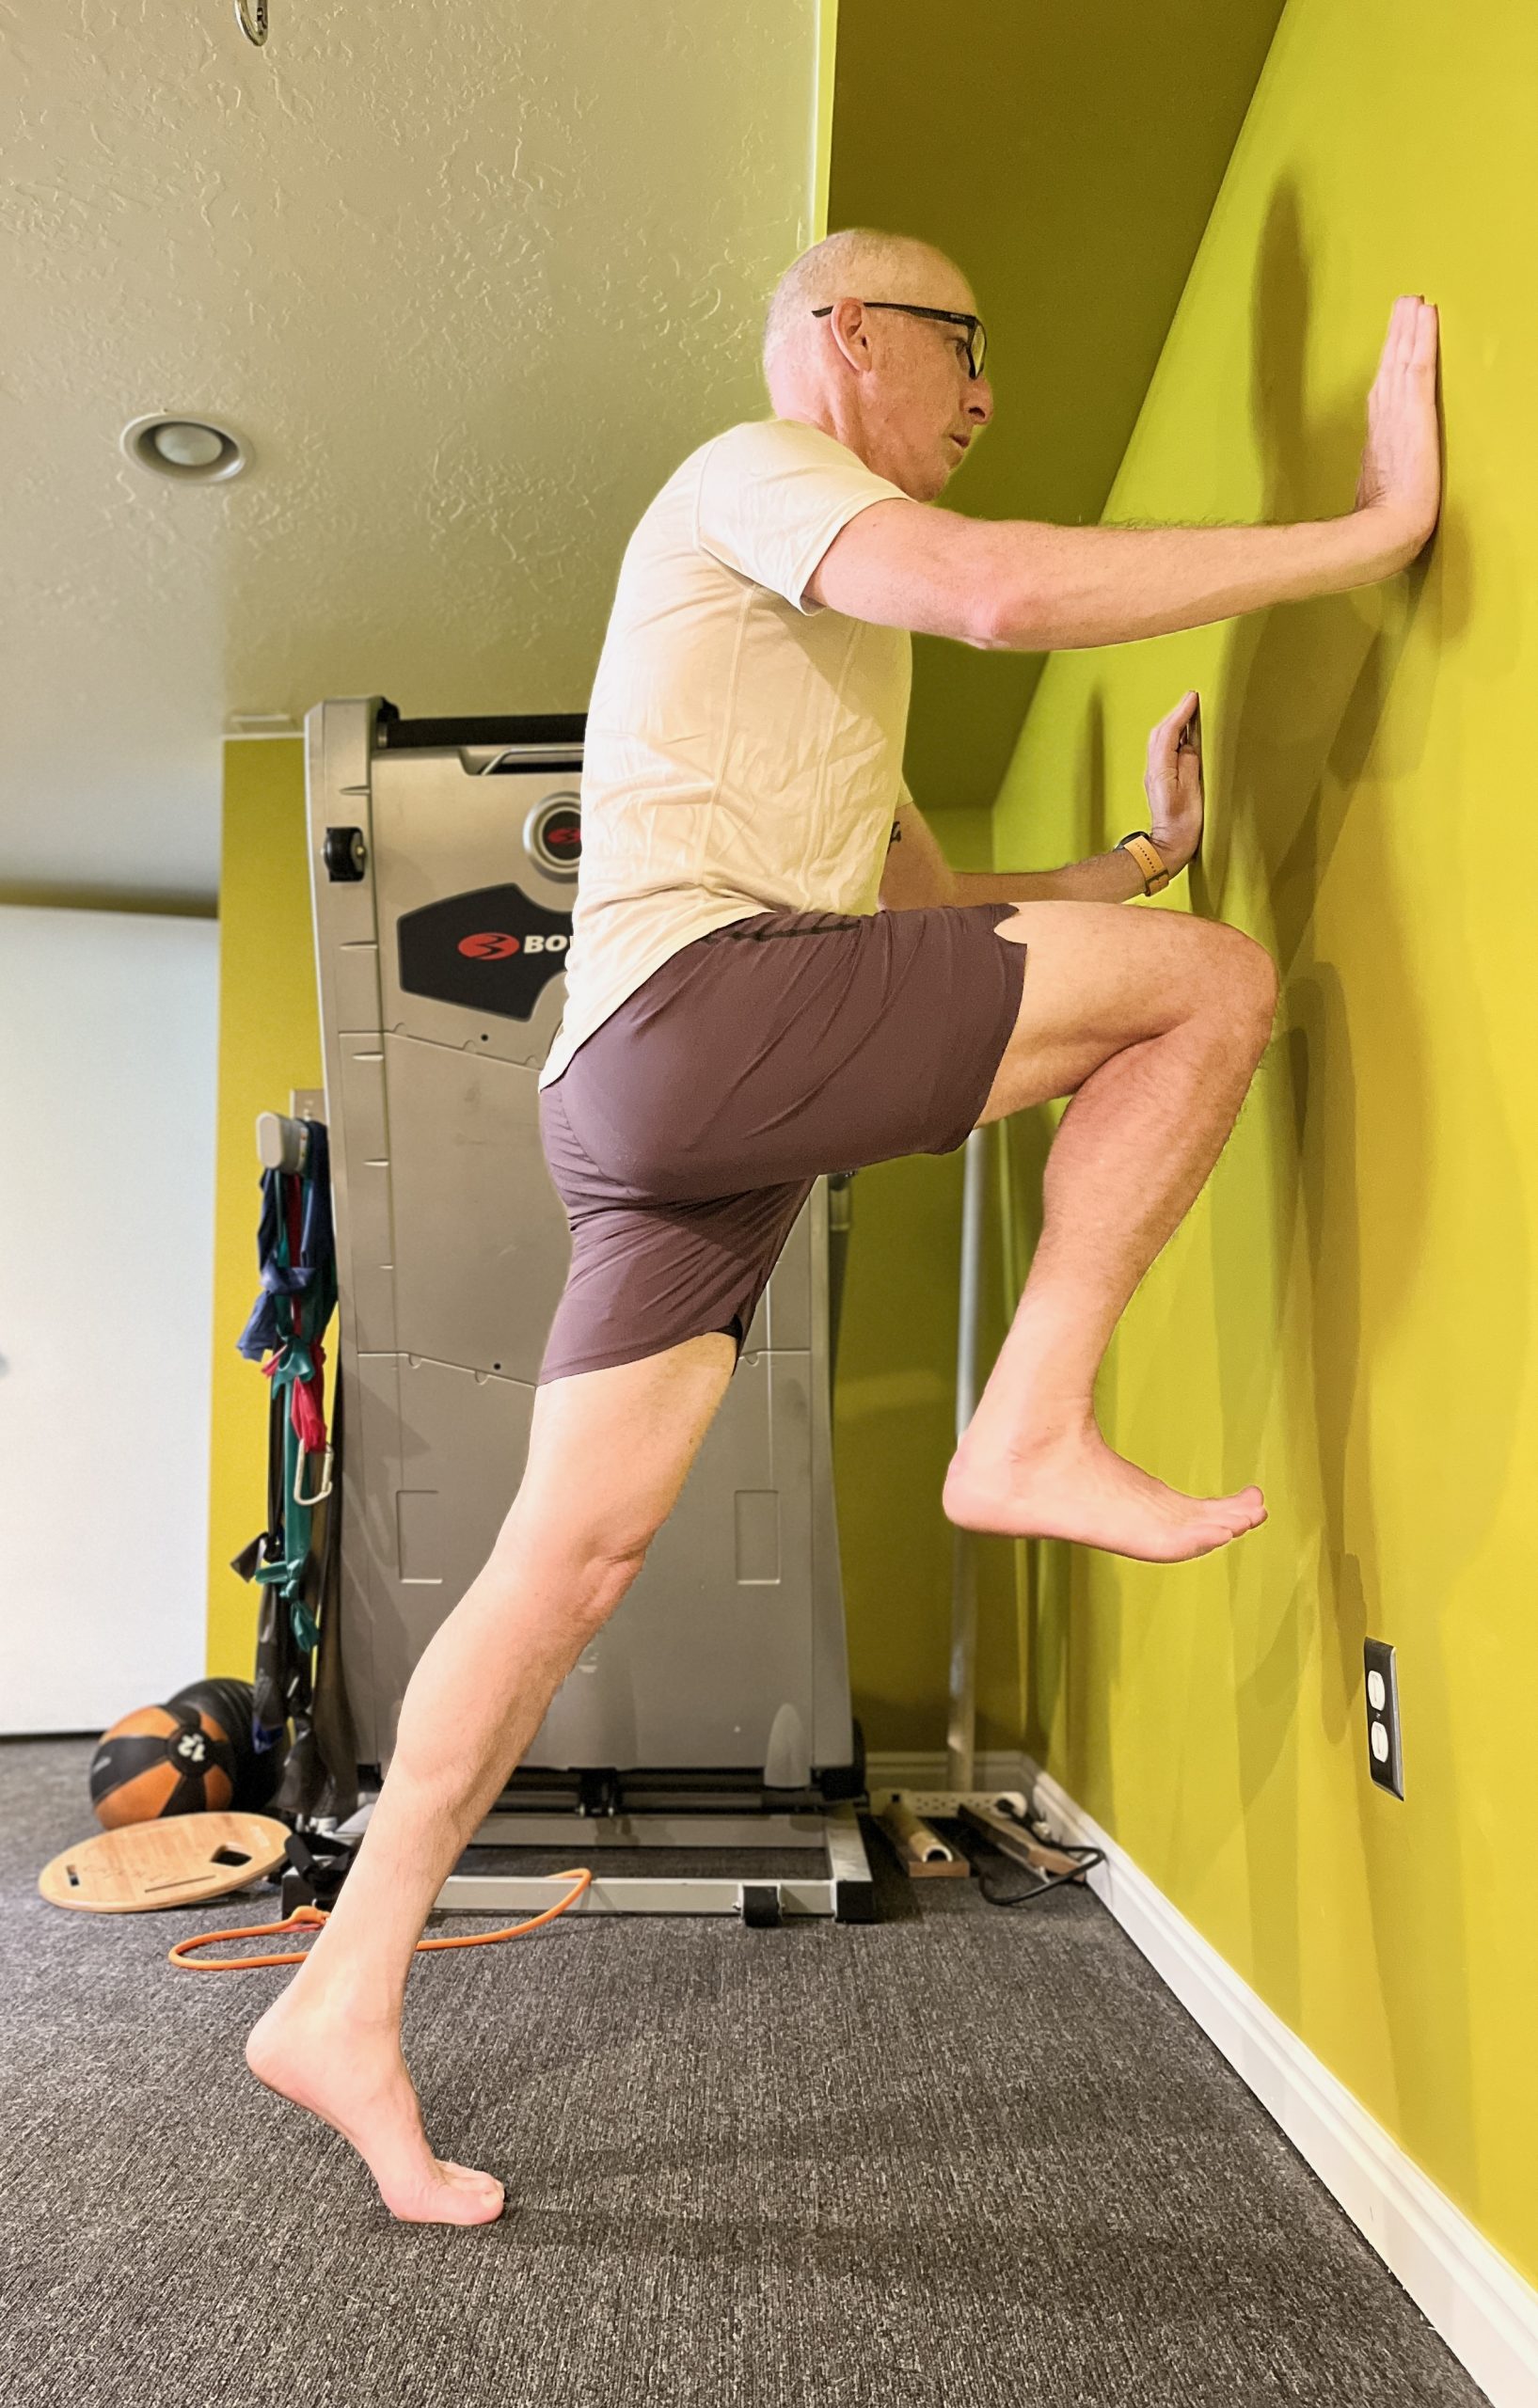
    This is a classic running form drill to promote pushing through the hip, knee, and ankle. The shape–the ability to fully extend the hip and knee while going high on your toes–is arguably more applicable to sprinters than distance runners; however, it makes my list due to the work done by the calf muscles which are major players in running.

    Triple Extension Start (Photo: Ned Dowling)
    • Stand on one foot about 3 feet away from a wall. Hands are on the wall at about shoulder height. Imagine the wall is falling on you and you need to push it back upright. At the foot, your weight is biased toward the front of the foot so the heel is just high enough off the ground that you could slide a credit card under it.
    • Still holding up the wall, drop down into a low squat with your opposite leg trailing behind. 
    • With a quick push, stand as tall as you can. You should have equal weight from the inside to outside of the foot, and the knee and hip should be straight, but thinking about getting tall often accomplishes the task.
    • If doing this exercise on one leg is too challenging, you can do it both legs together.
    • Aim for 2-3 sets of 10x on each side. This is also a good running warm up.
    Triple Extension Finish (Photo: Ned Dowling)

    Bulgarian Split Squats aka Trail Leg Lunges

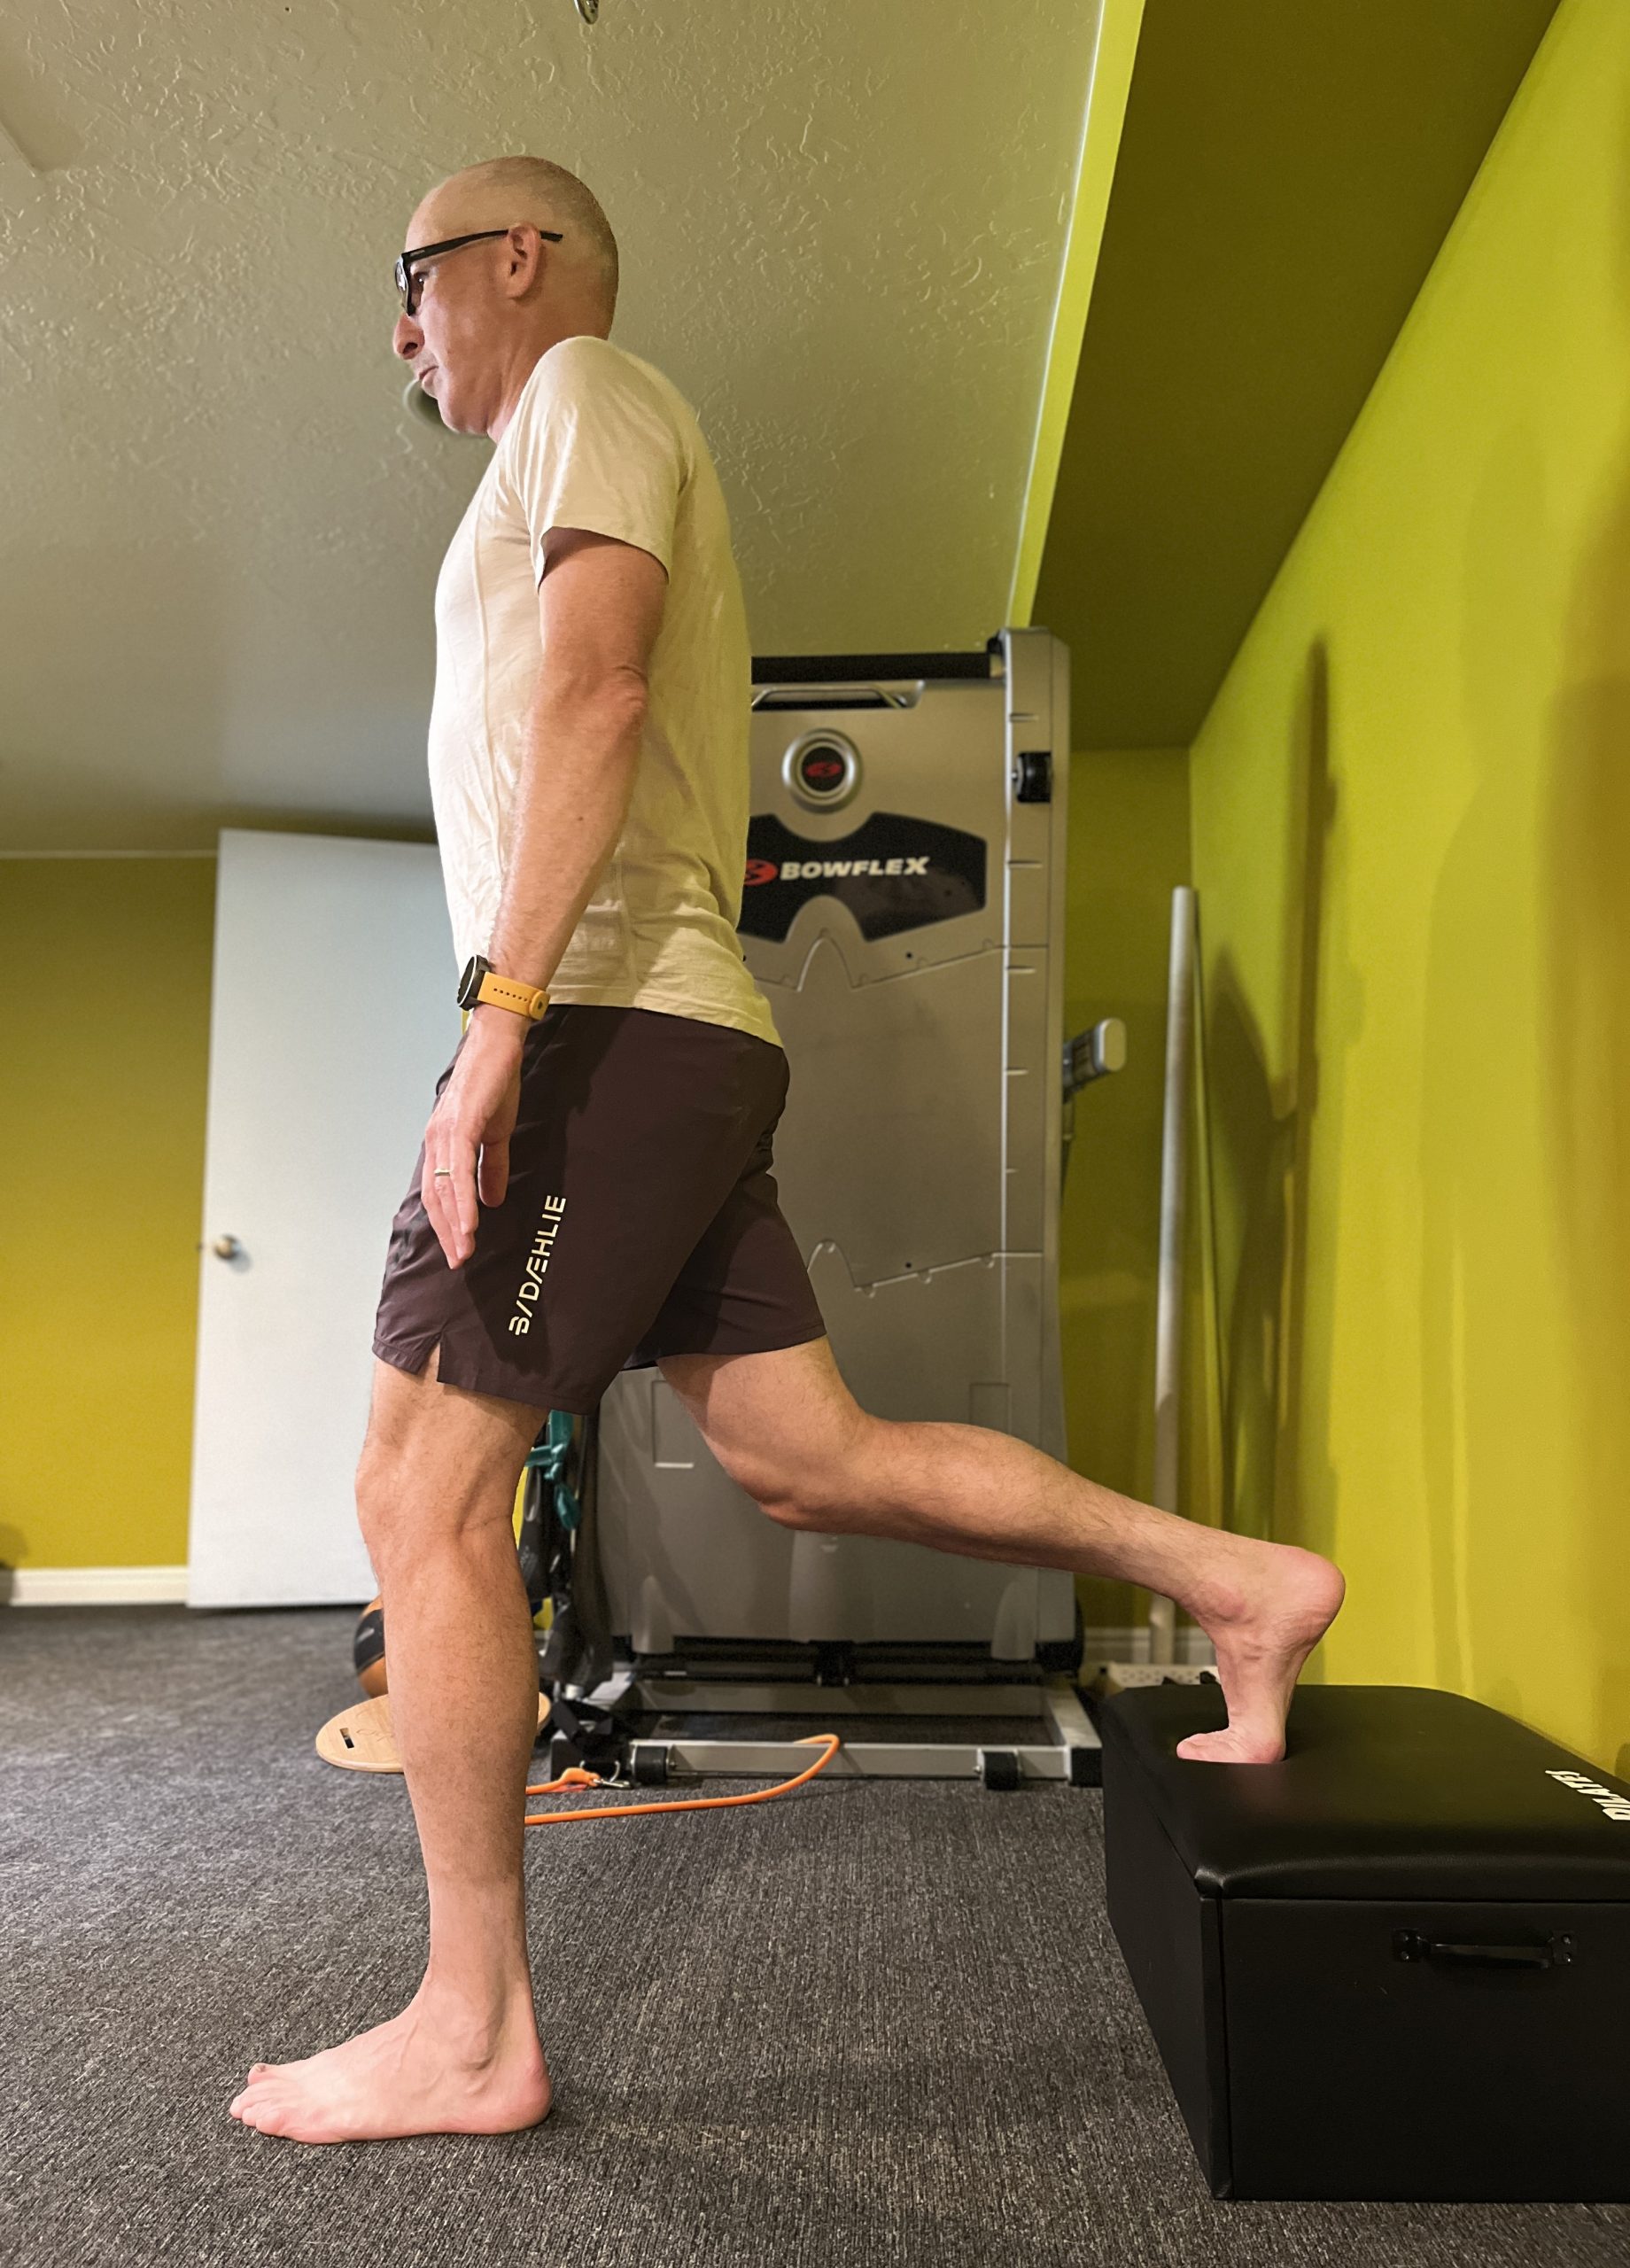
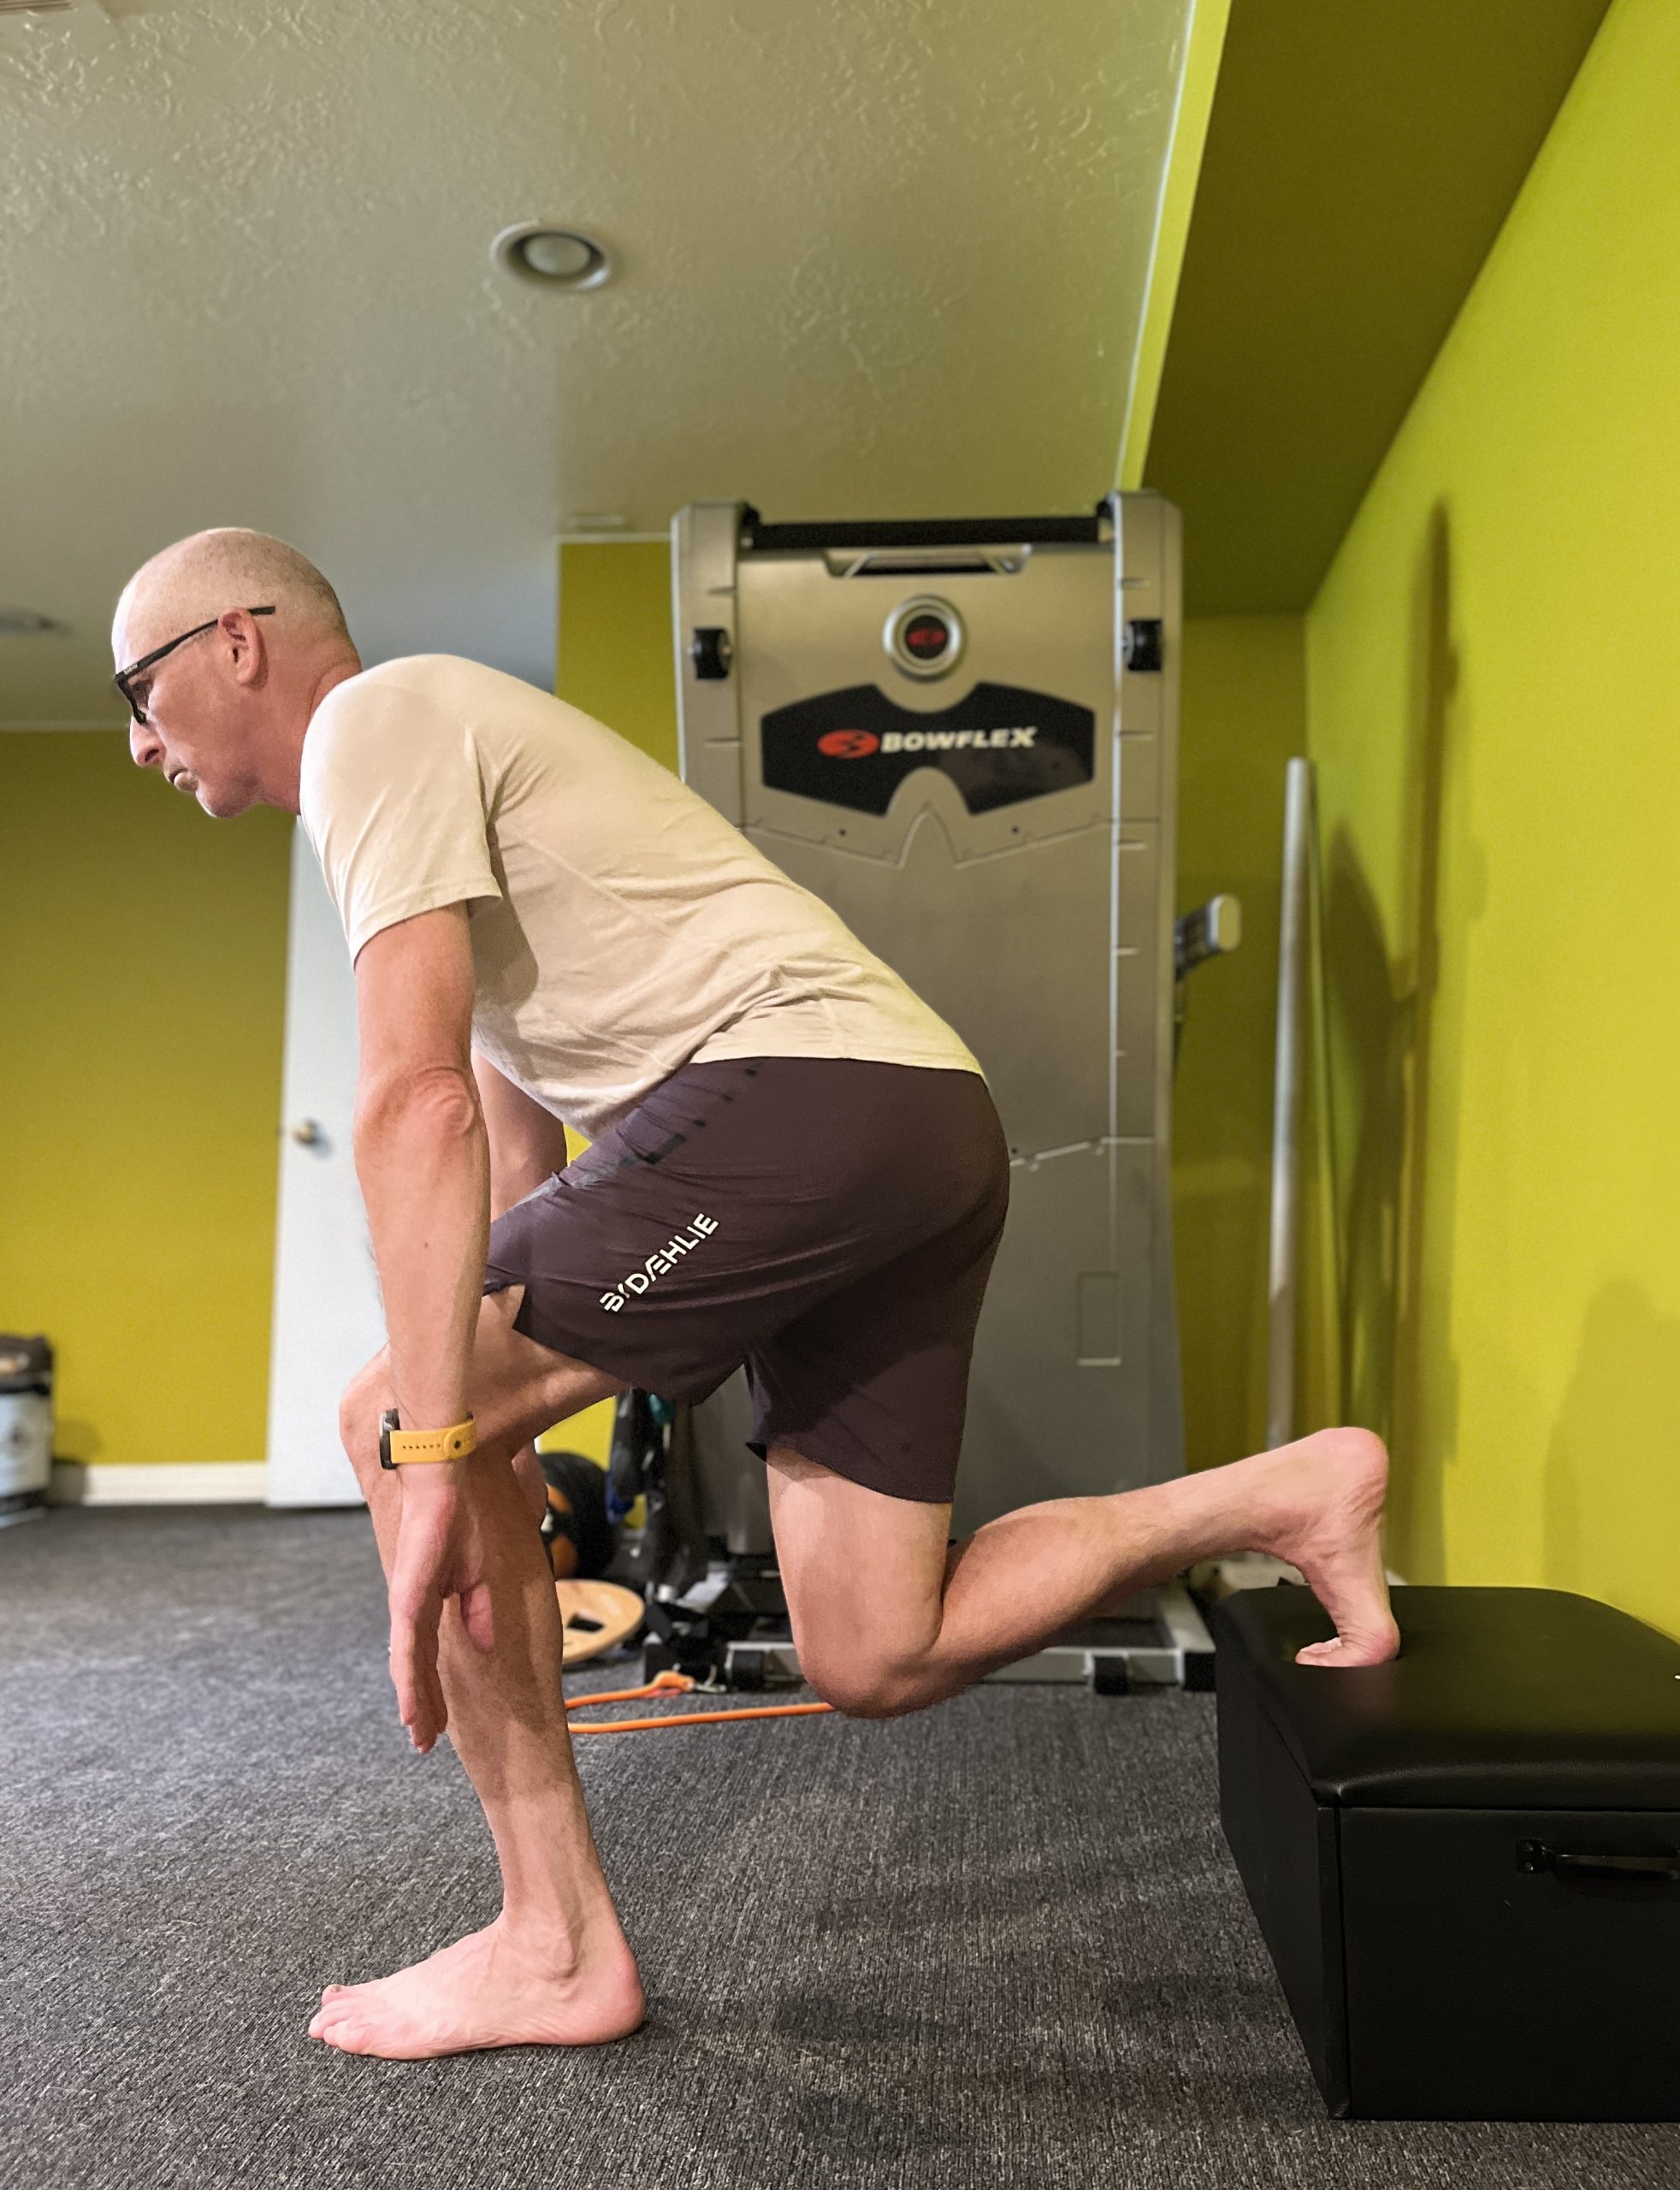
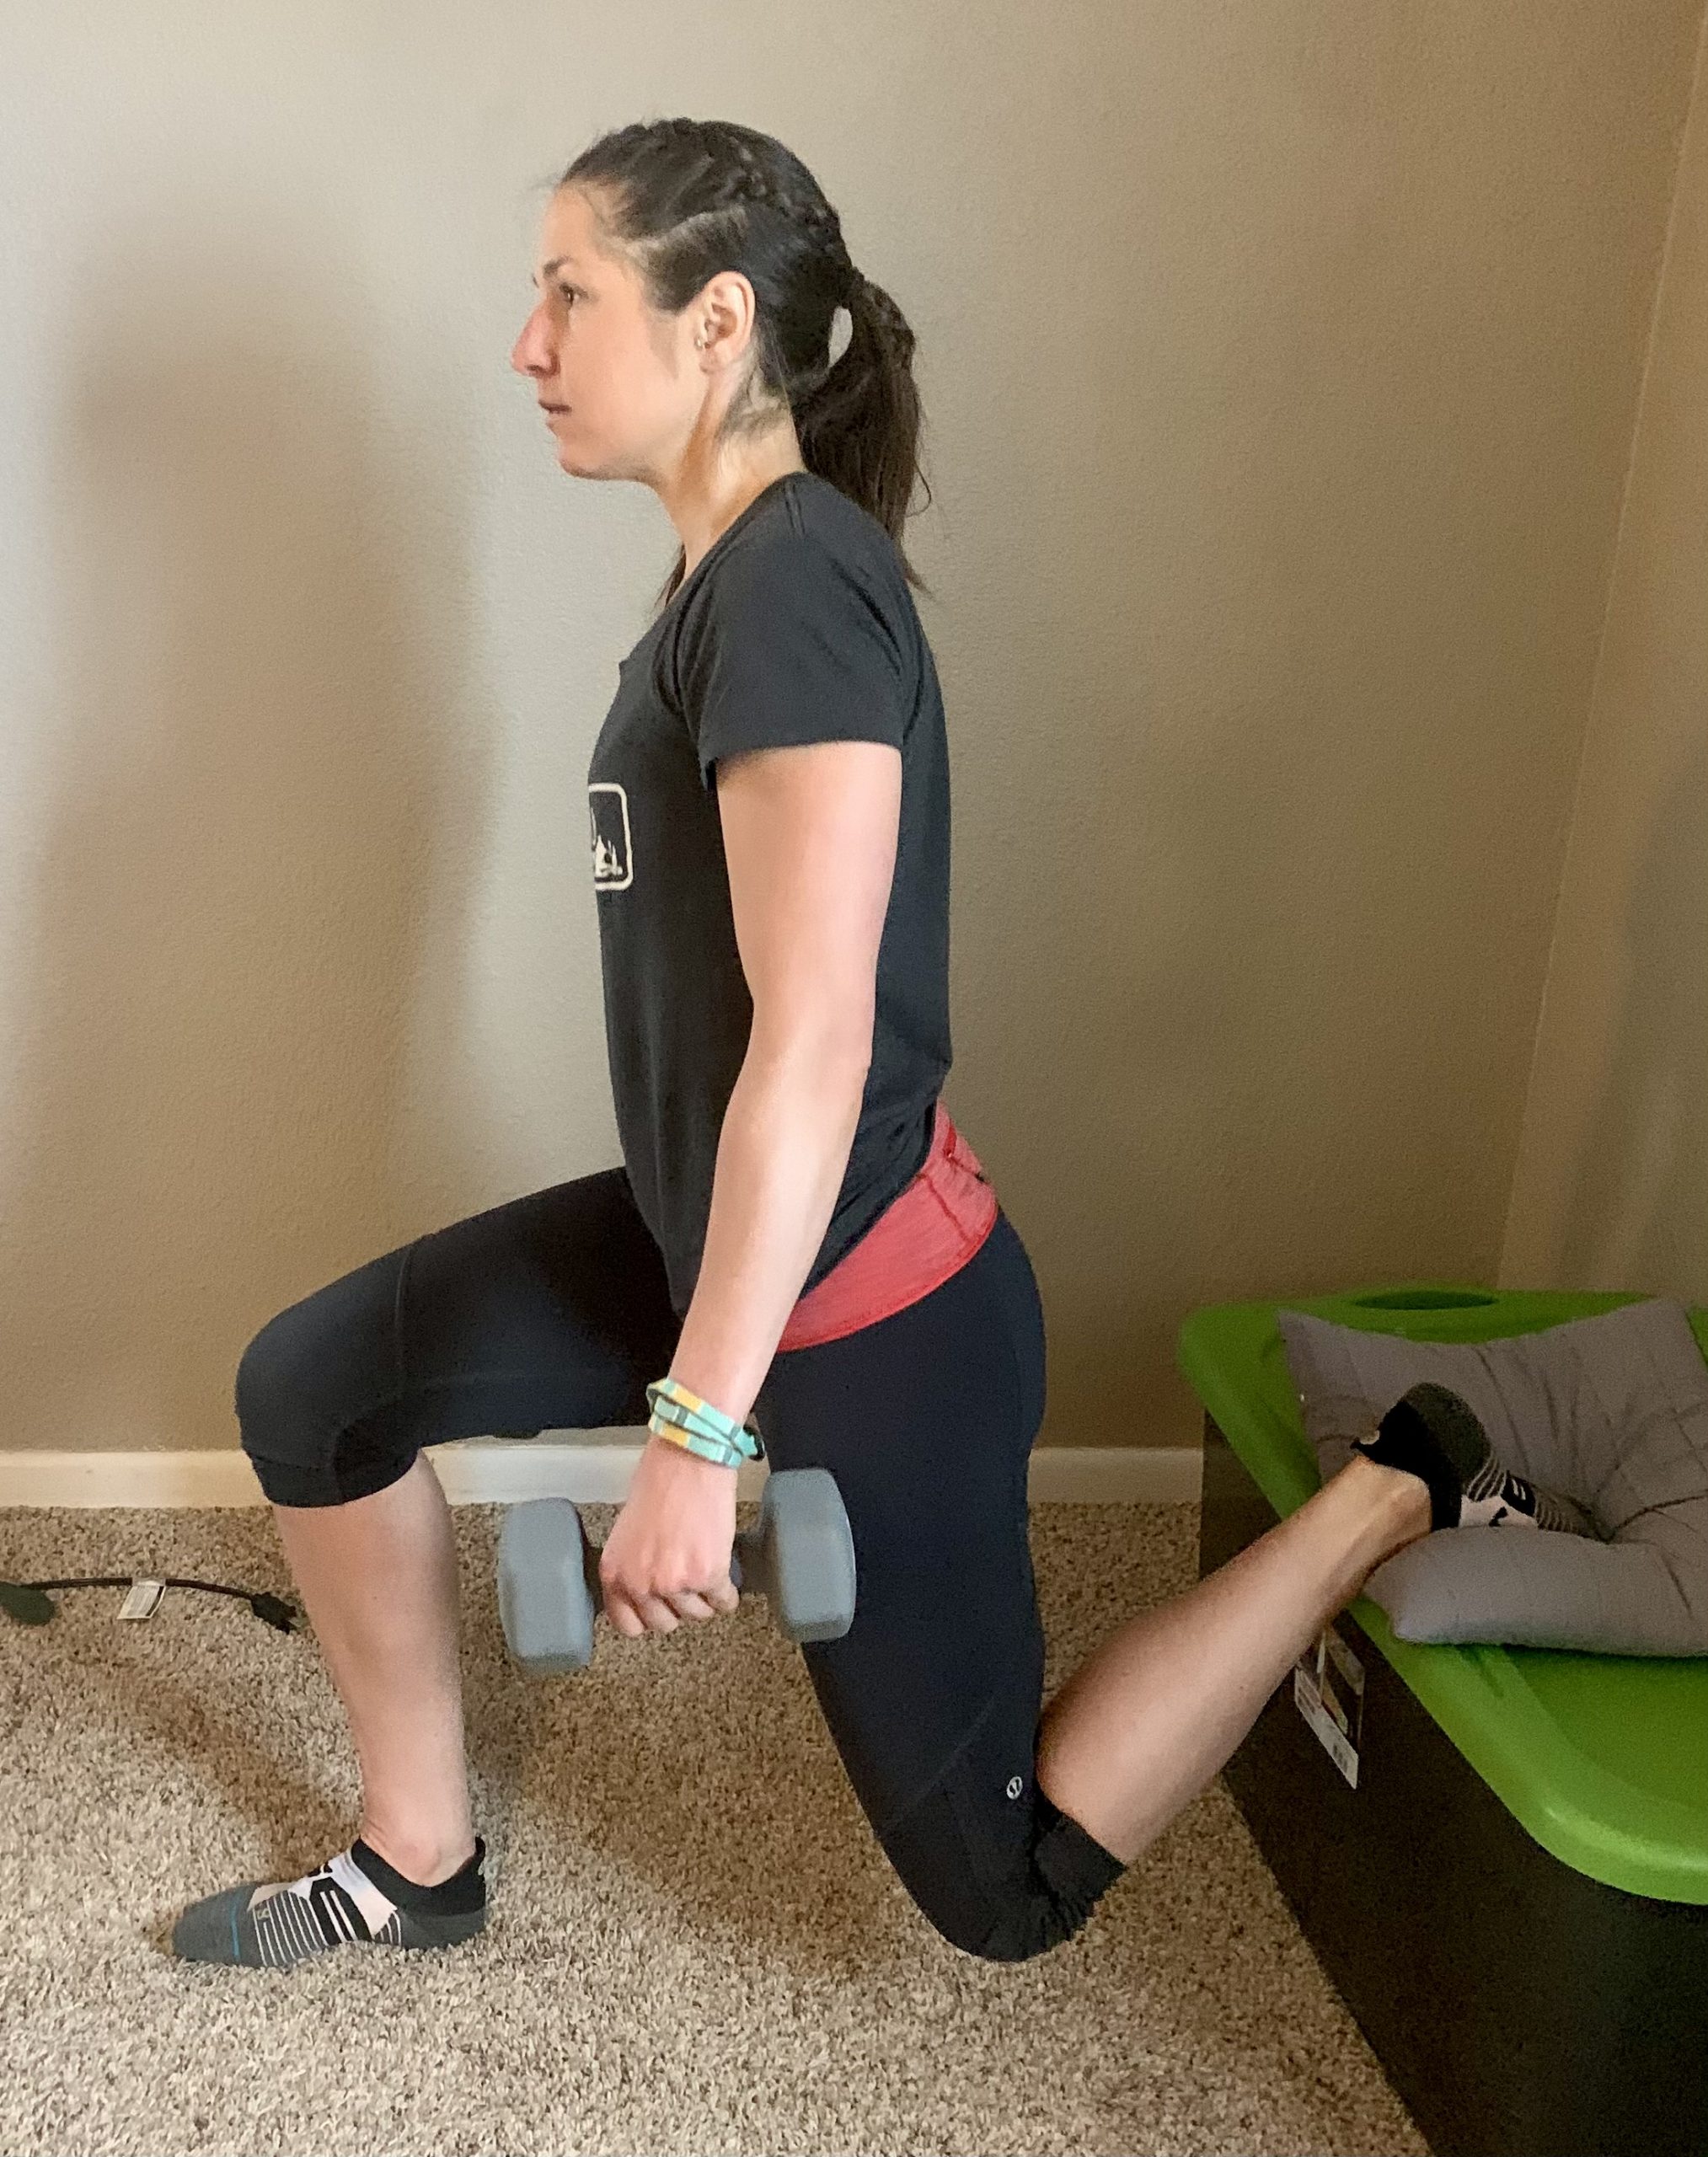
    These work the glutes and quads more than squats due to the staggered stance and place more load (and balance demand) on the front leg than traditional lunges. More bang for your buck! The version I’m showing uses a hip strategy/hip hinge/trunk lean to increase the work done by the glutes.

    Bulgarian Start (Photo: Ned Dowling)
    • Feet are staggered with the back foot on a step, box, chair, or bench. 
    • To determine the placement of the front foot, sit on the front edge of the step, box, etc. Straighten the working leg out in front of you. Keeping the heel on the floor, stand up onto that leg. Then place the back leg on the step with the sole of the foot vs top of the foot.
    • As you drop into the lunge, your hips should go straight down.
    • Aim your fingers for the sides of your ankle. This will promote the forward trunk lean.
    • The knee will move forward a bit but shouldn’t be going past your toes.
    • Shoot for 2-3 sets of 10x. You can make it harder by adding weights or increasing the height of the furniture. It can be regressed by keeping your back foot on the ground.
    Bulgarian Finish (Photo: Ned Dowling)

    Side Planks

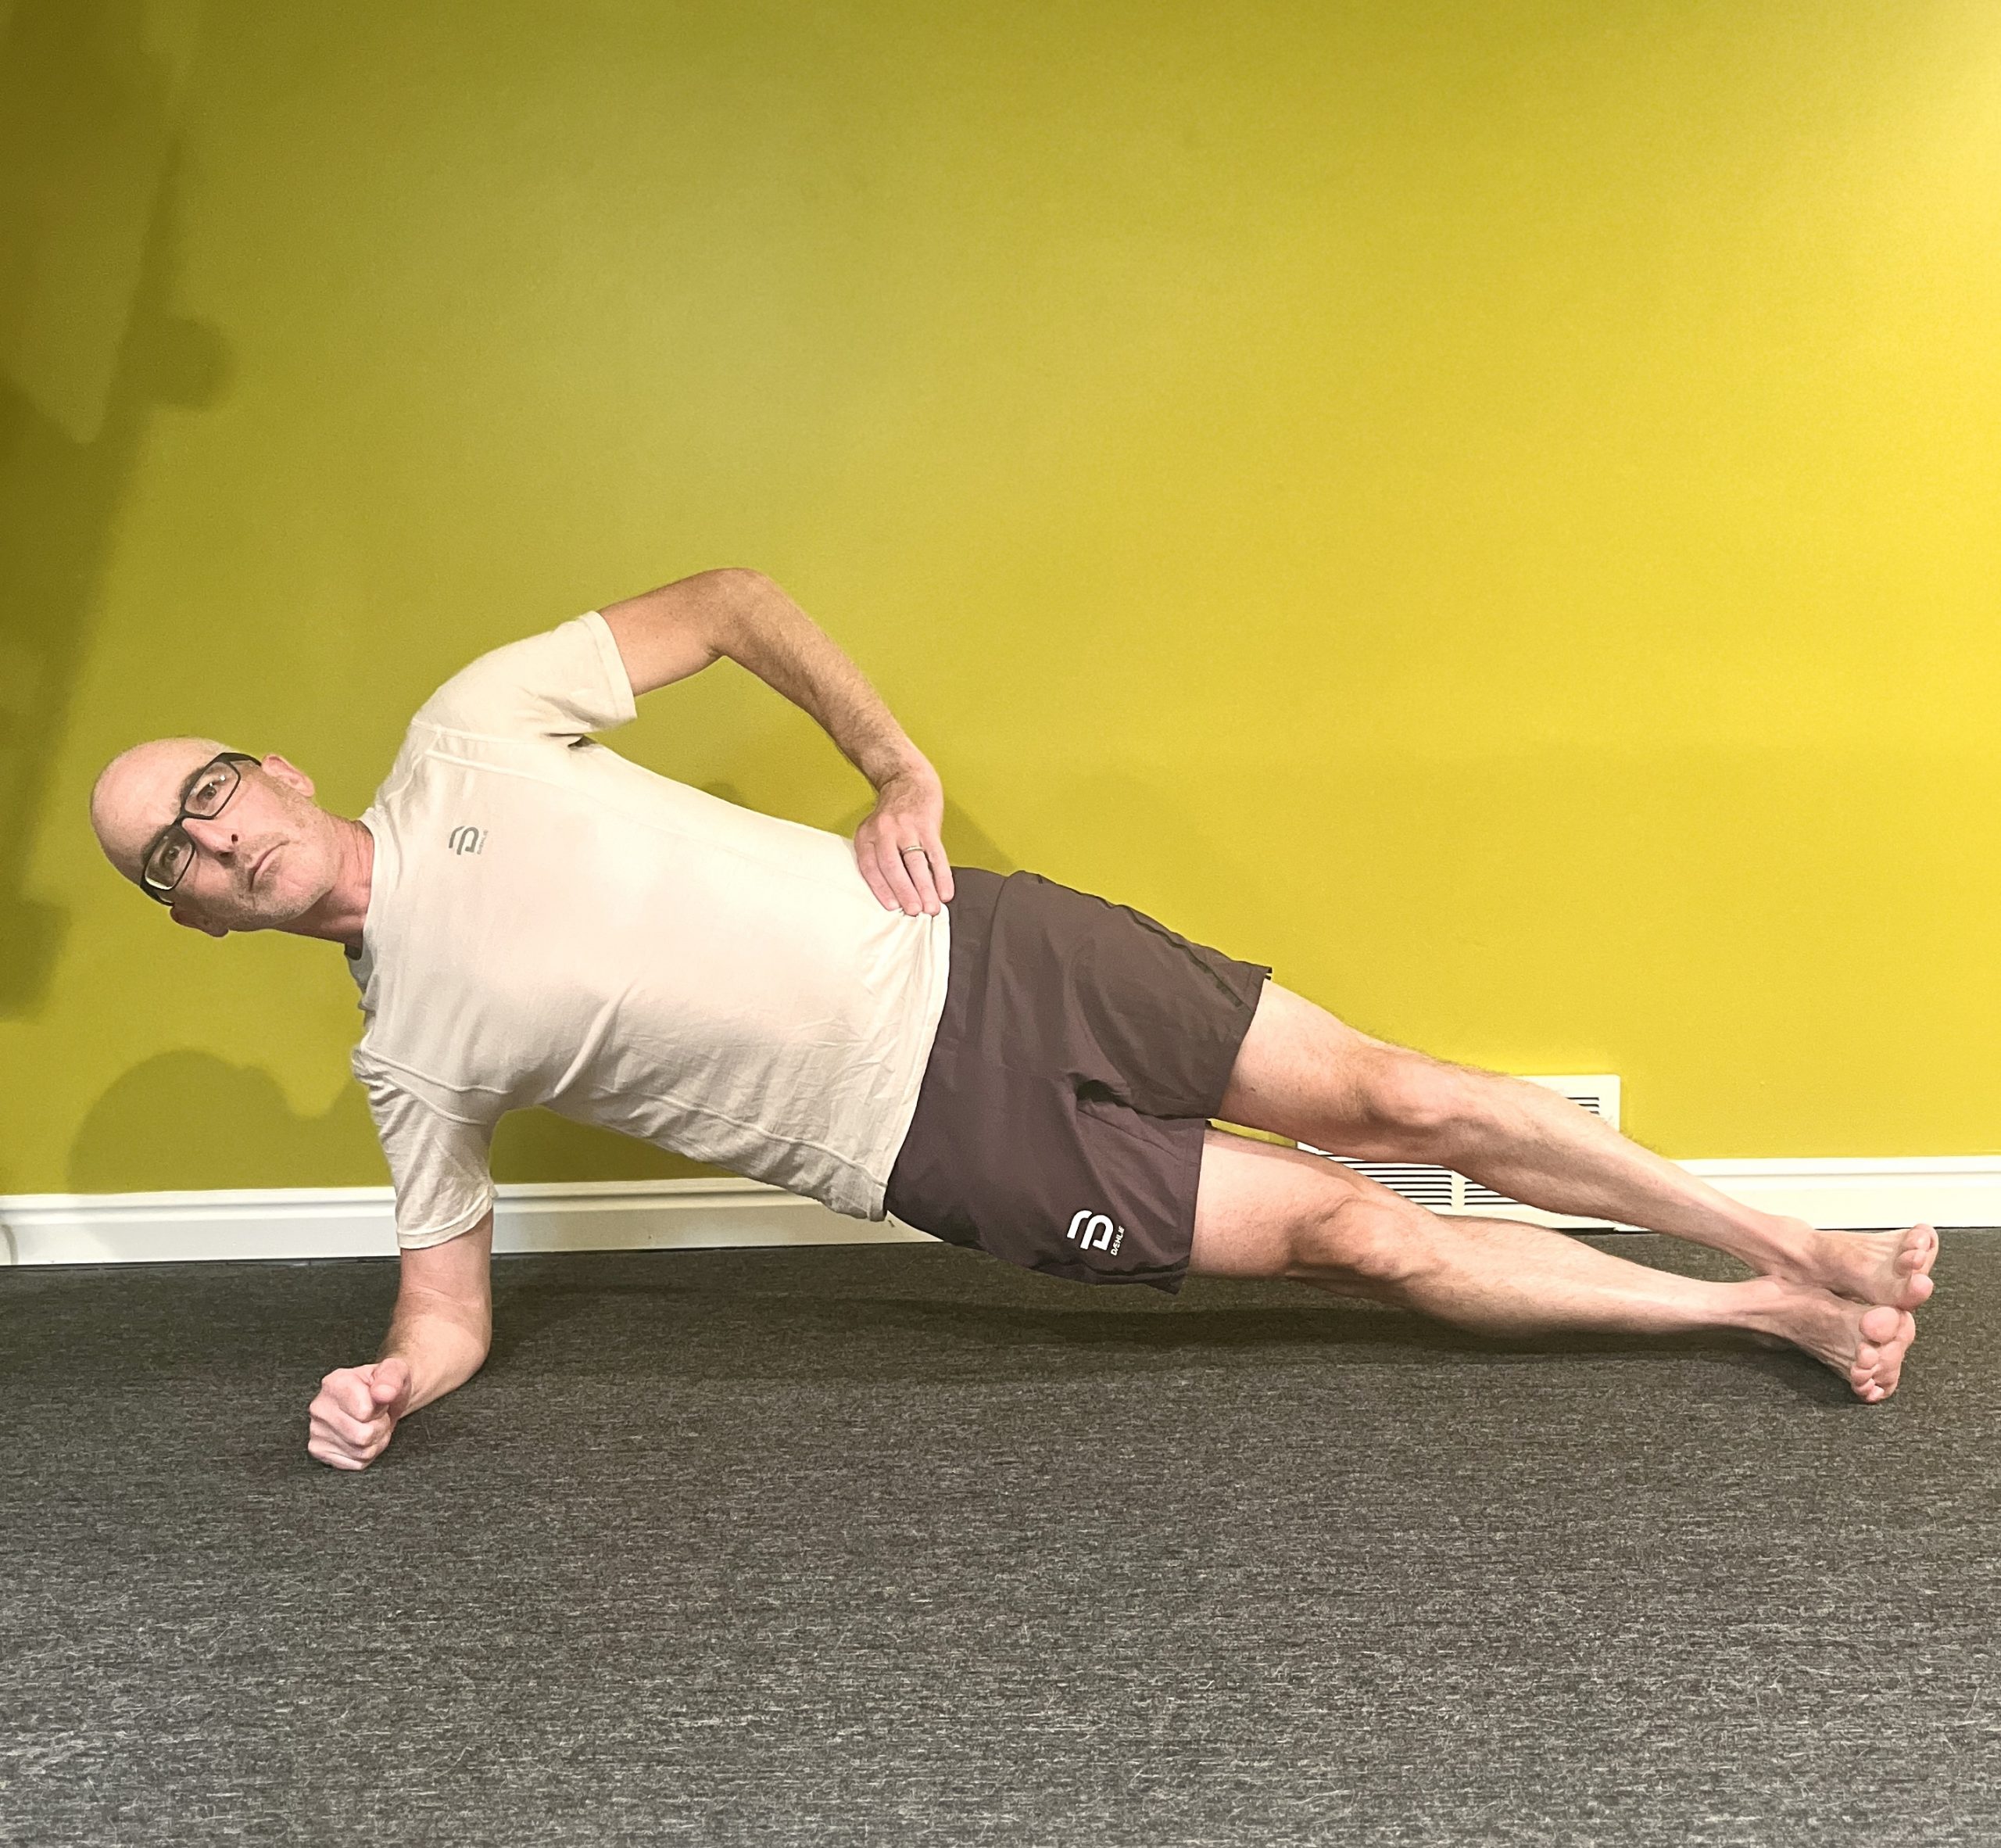
    Typically thought of as a core strength exercise, which it very much is, these also do a lot to  work gluteus medius, a major stabilizer at the hip (see the bit on pelvic drop above).

    • Lying on your side, prop yourself up between the outside of your bottom foot and your elbow/forearm.
    • Ankle, knee, hip, and shoulder are in a straight line, and your body should be vertical like a wall, not sagging or twisting to one side or the other.
    • This is a timed hold. 30 seconds is a win. A minute is a gold medal but is getting boring and ready for some progressions (try it from your hand instead of elbow, add moving the top leg up and down, or twist like you’re reaching the top hand under your armpit). An easier version is to go from the knees instead of the feet (still keep your knee, hip and shoulder in line but bend at the knees so your feet are behind you).
    Side Plank (Photo: Ned Dowling)


  • Go Sideways for Strong Skating Hips

    Go Sideways for Strong Skating Hips

    One of the beauties of skate skiing for the recreational athlete is that it gets us out of the straight line, sagittal plane motion that is so common with walking, running, and cycling. But this also poses a challenge for those of us who don’t rollerski in the summer: How do we stay conditioned for skate skiing’s lateral motion when there’s no snow on the ground? Fortunately, there’s a long list of exercises that will at least work on the strength and lateral movement at the hips. For this article, I’ve picked some of my favorites, especially ones that don’t require much in the way of special equipment. They are listed in order of lowest to highest intensity. Add these to your routine a couple of times a week—you’re already in the gym at least twice a week for maintenance, right?

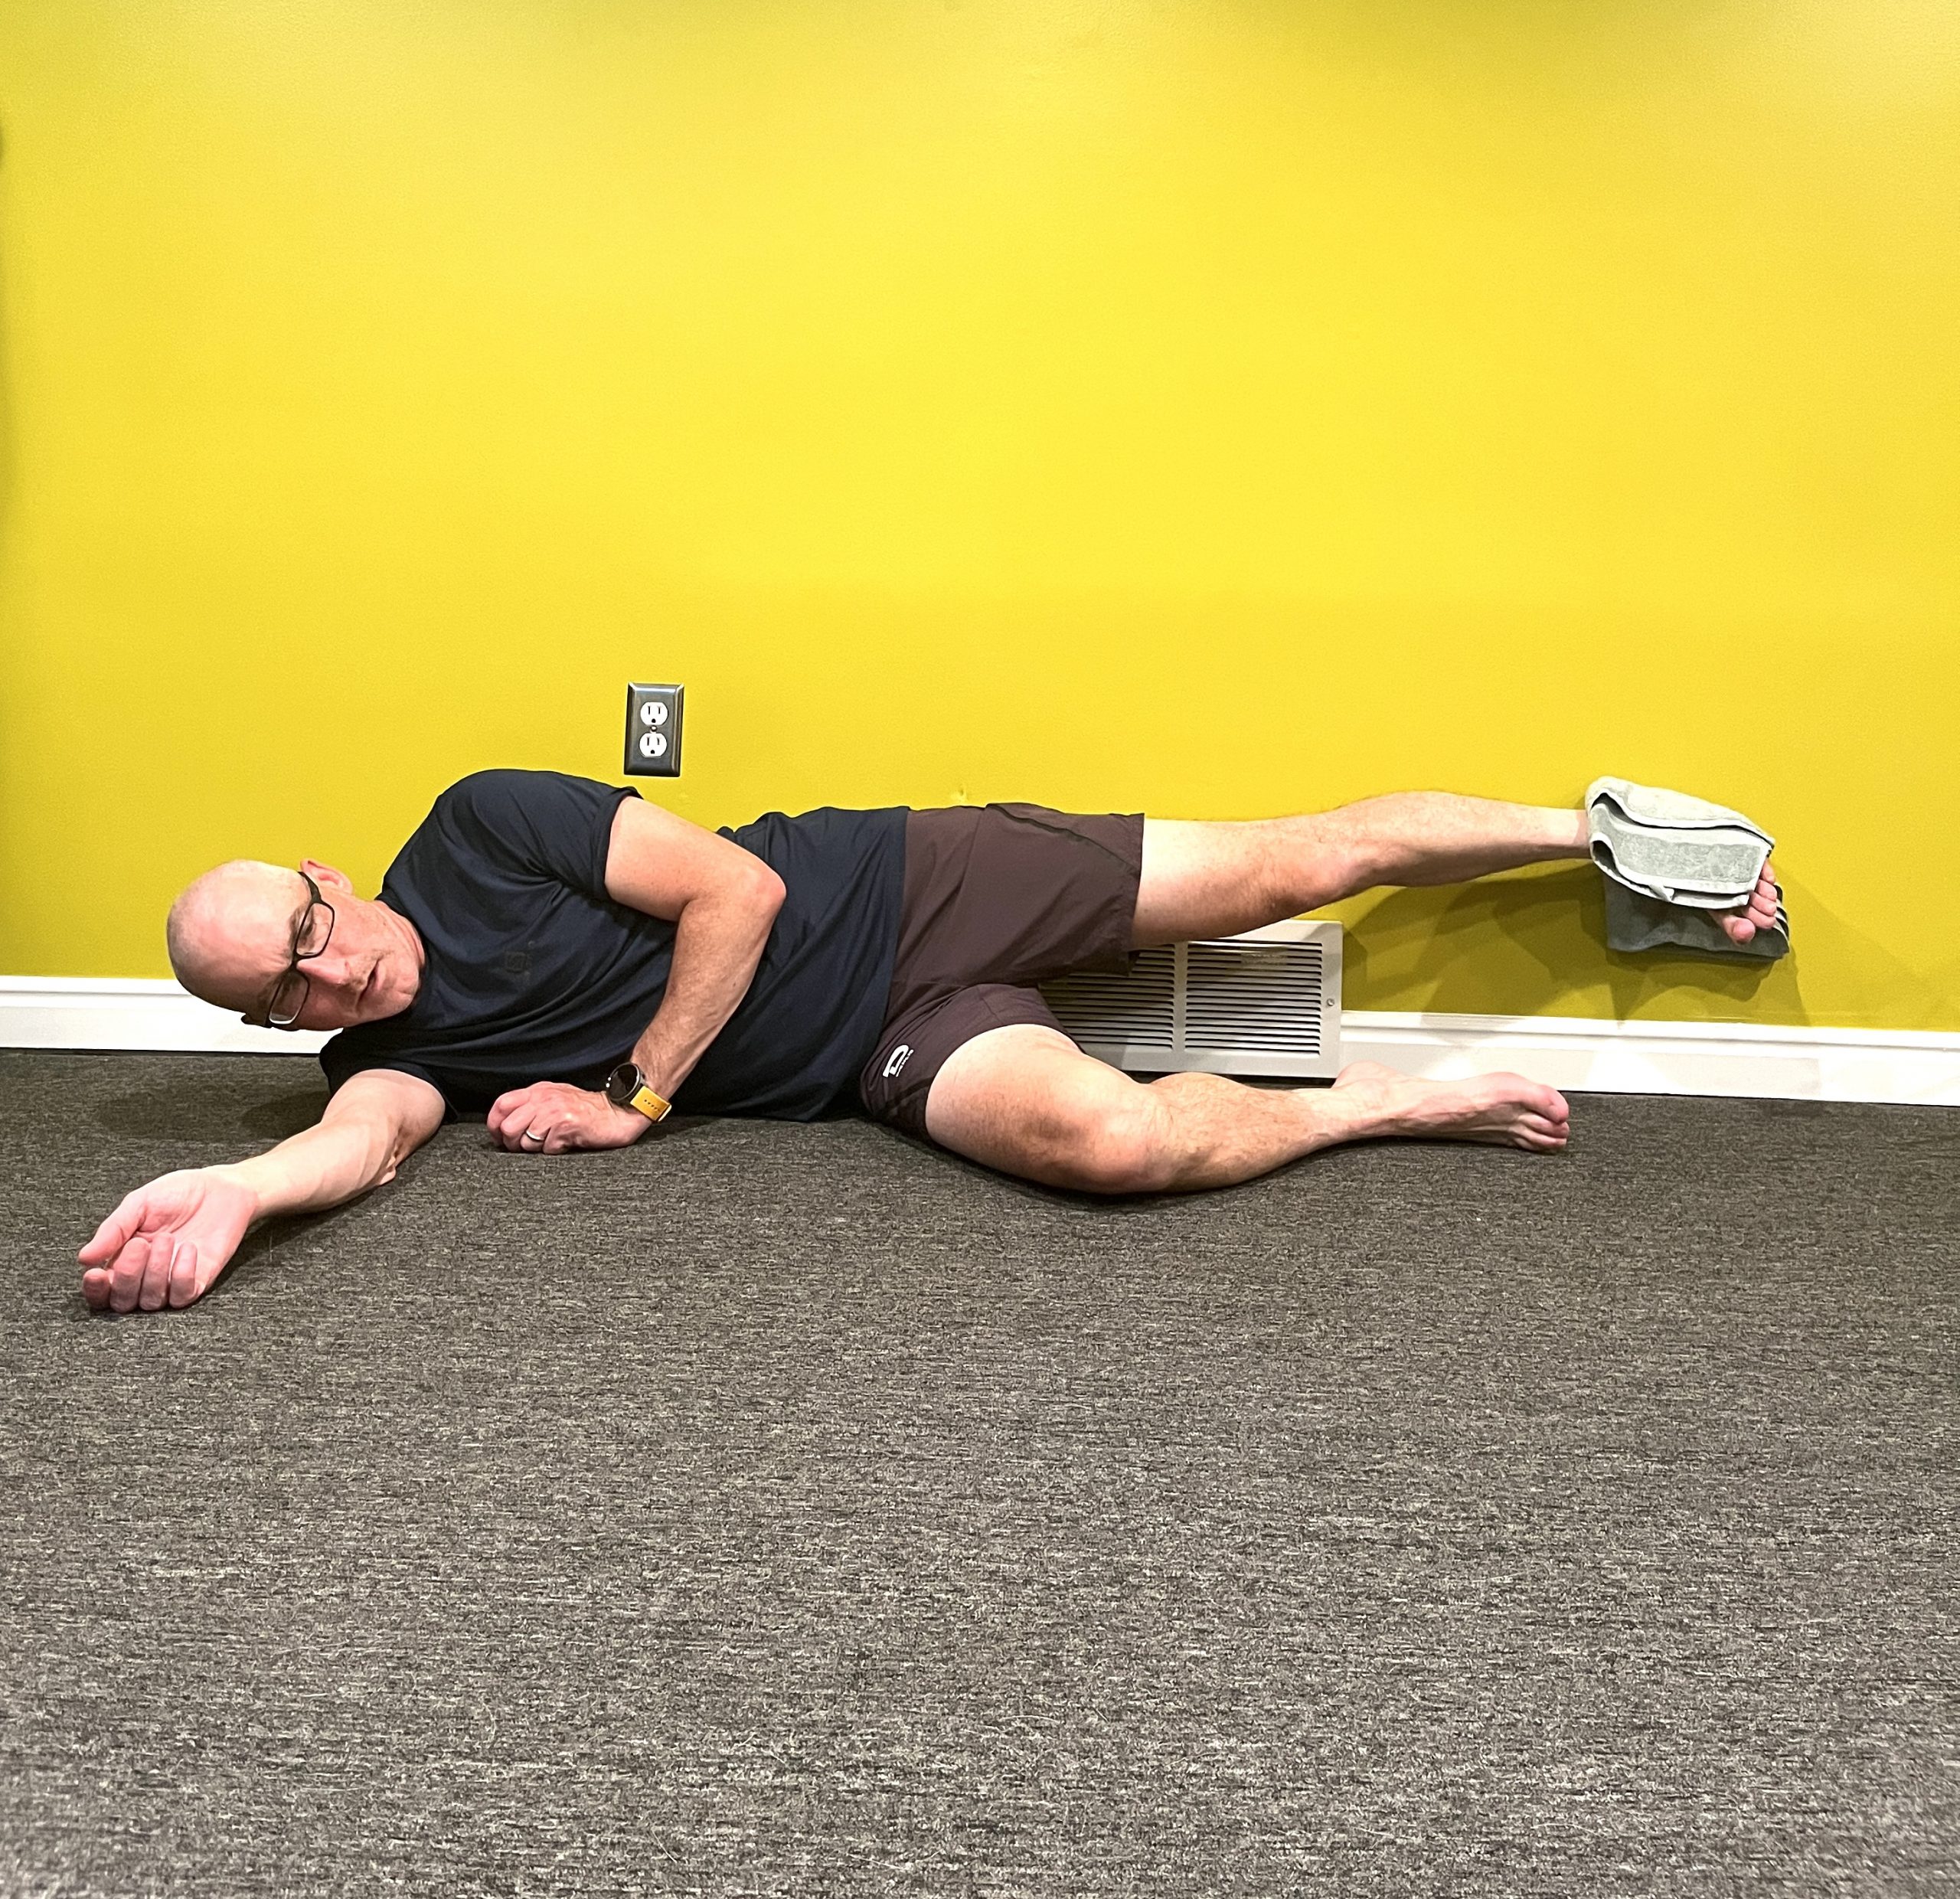
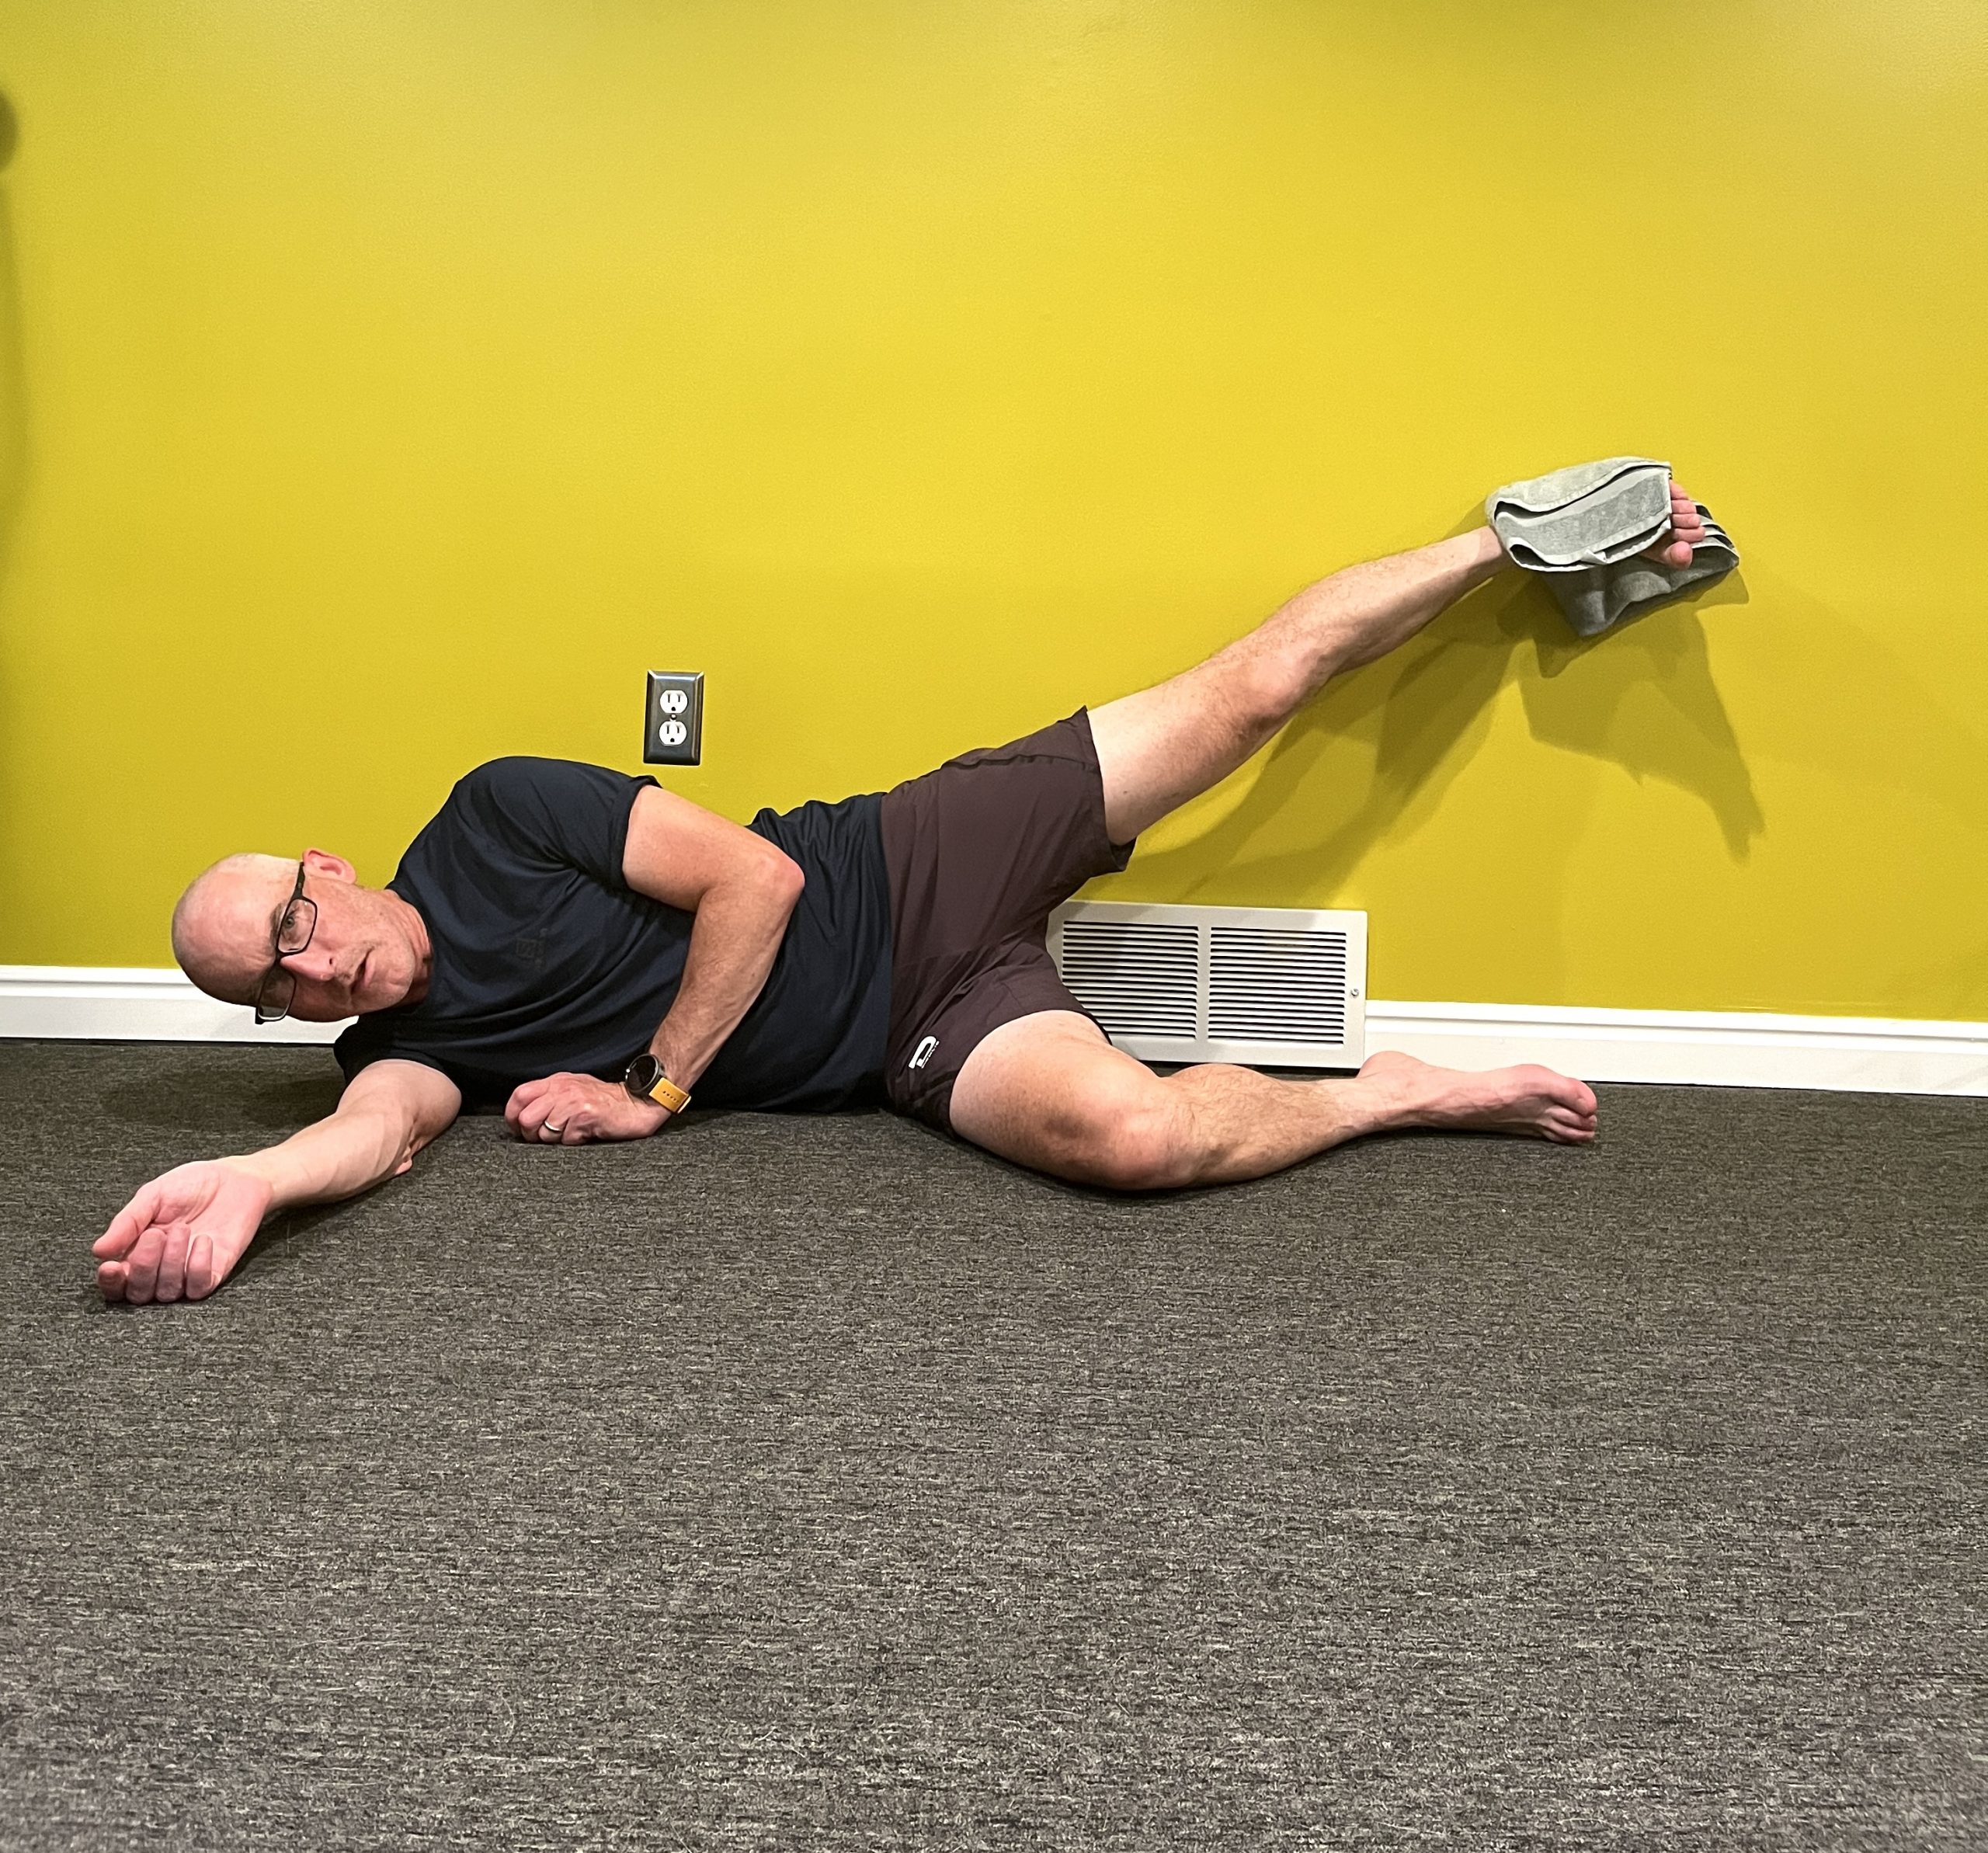
    Wall Scrubs
    • Lie on your side with your butt 4-6 inches from a wall
    • Bottom knee is bent and the top leg is straight
    • Push the heel of your top leg into the wall and move that leg up and down
    • You should be putting a lot of pressure into the wall—think about scrubbing the wall vs just painting it
    • Keep your toes pointed forward not up towards the ceiling
    • Pelvis stays vertical and quiet. The motion should be isolated at the hip, not from the pelvis tipping. You can put your hand on the side of your pelvis for feedback to monitor potential movement
    • You’ll need to be wearing just a sock or use a washcloth on your heel to reduce friction on the wall
    • 3 sets of 10-15 reps (if you’re not getting much fatigue with 15x, add a resistance band around your knees)
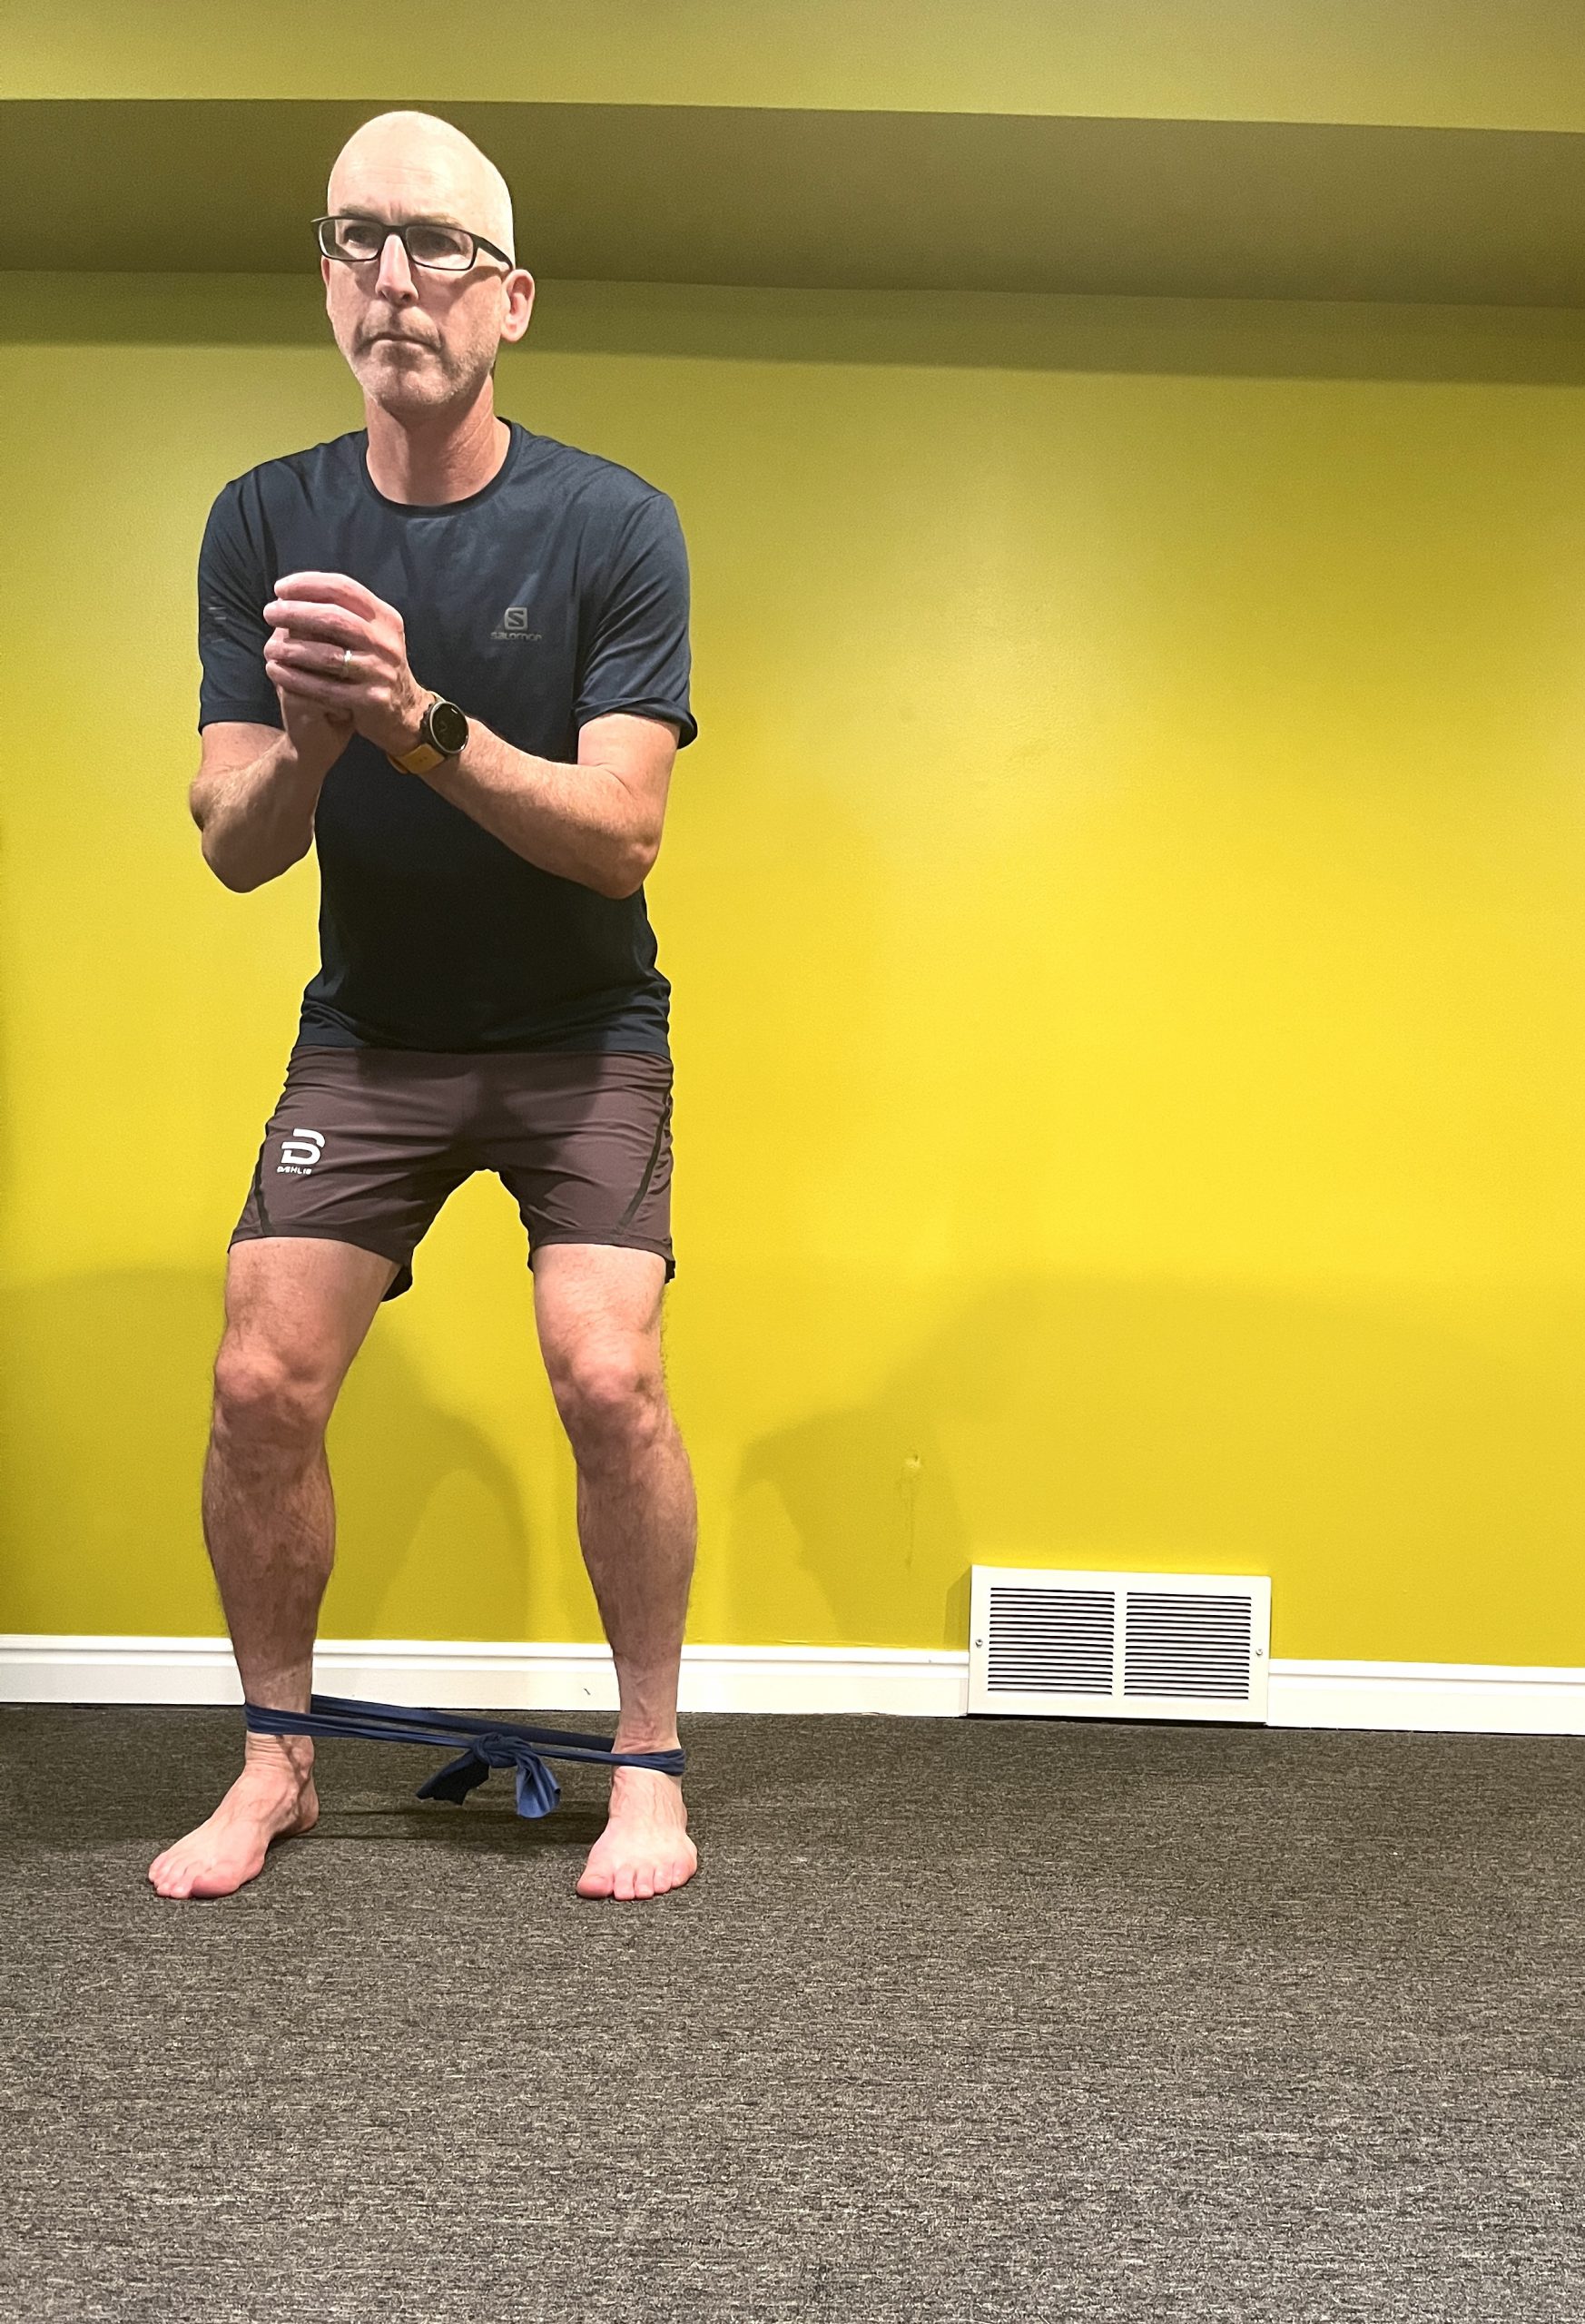
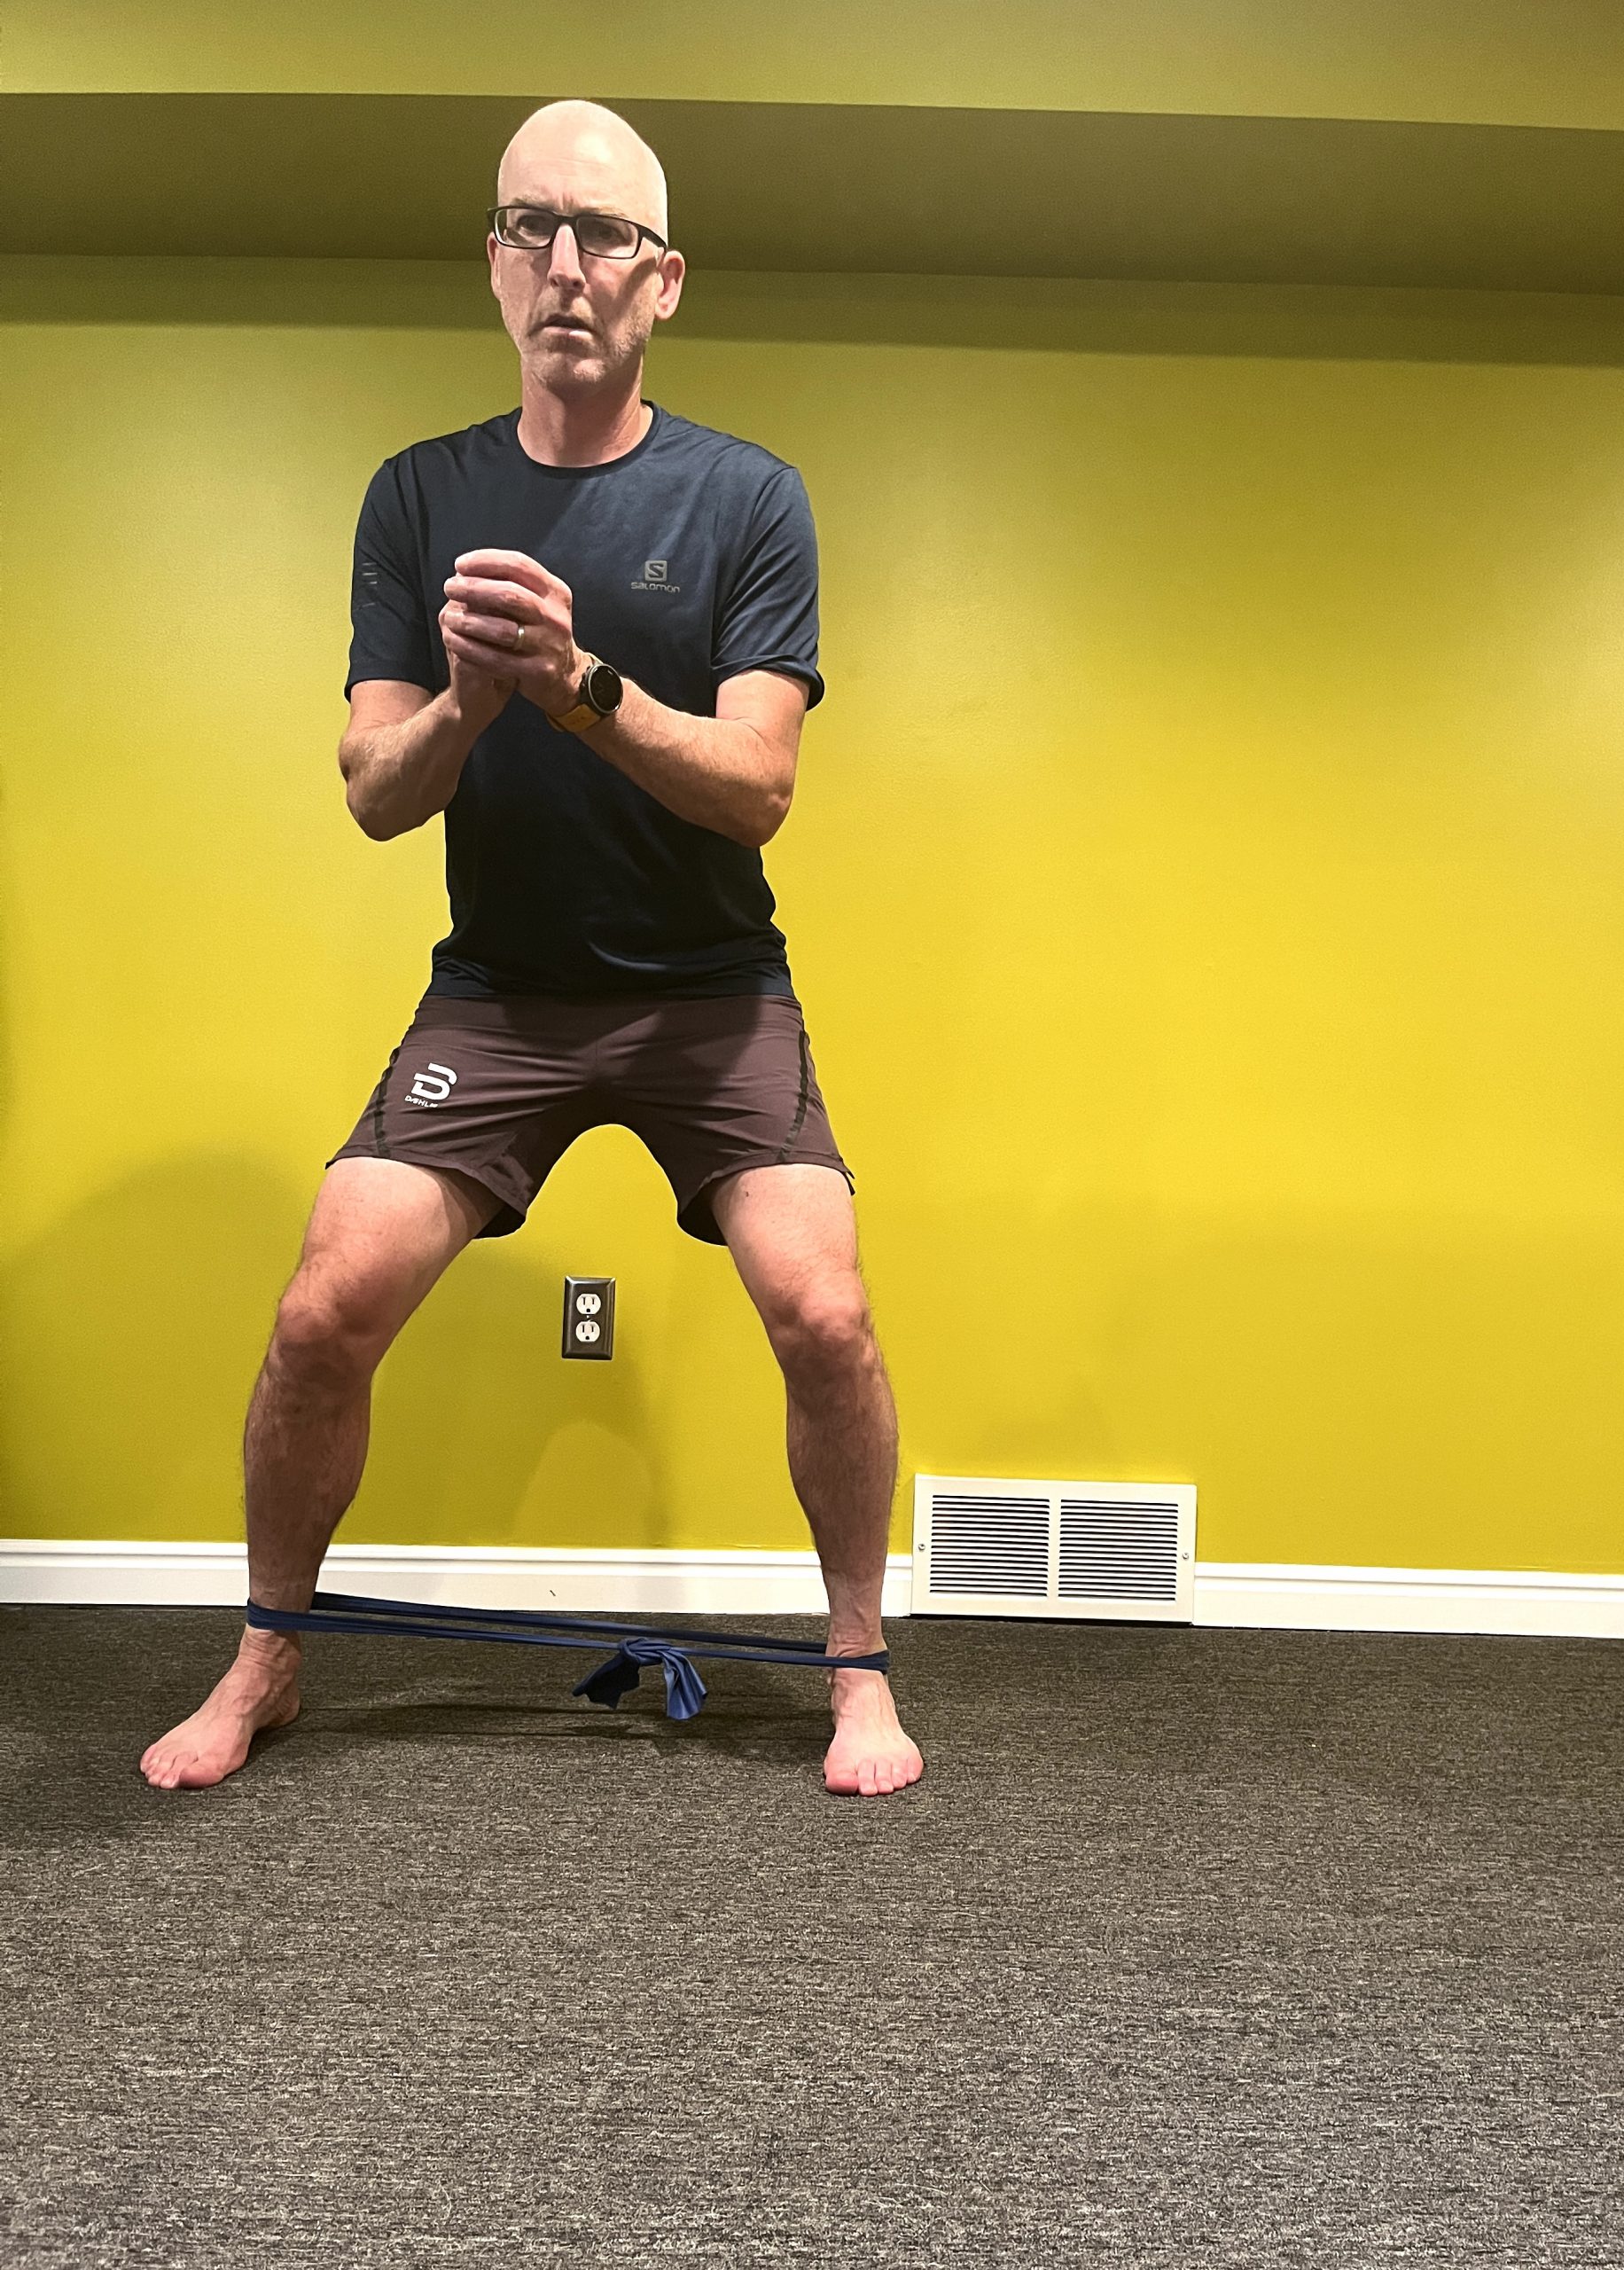
    Banded Side Steps
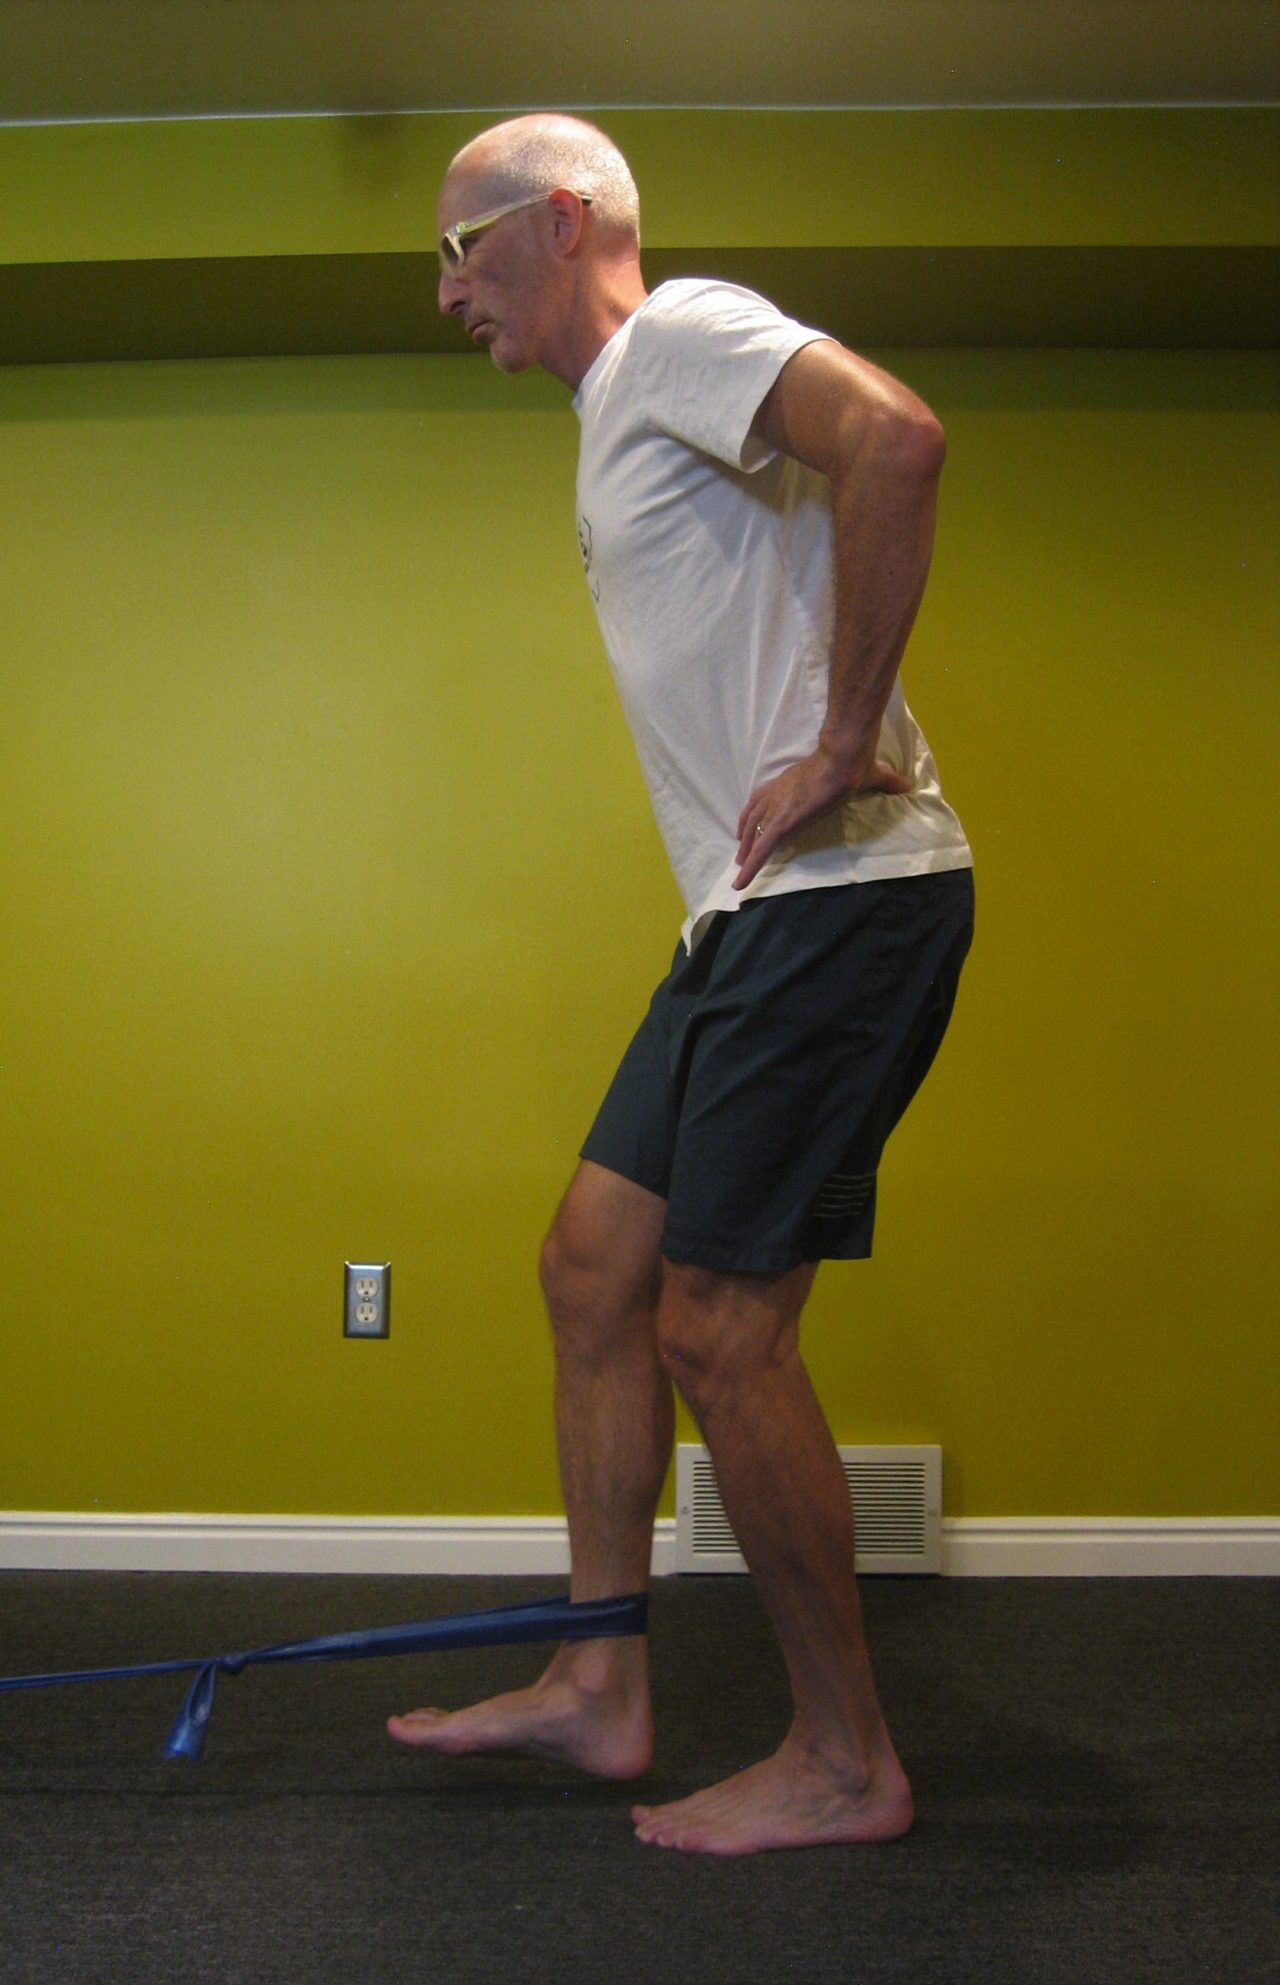
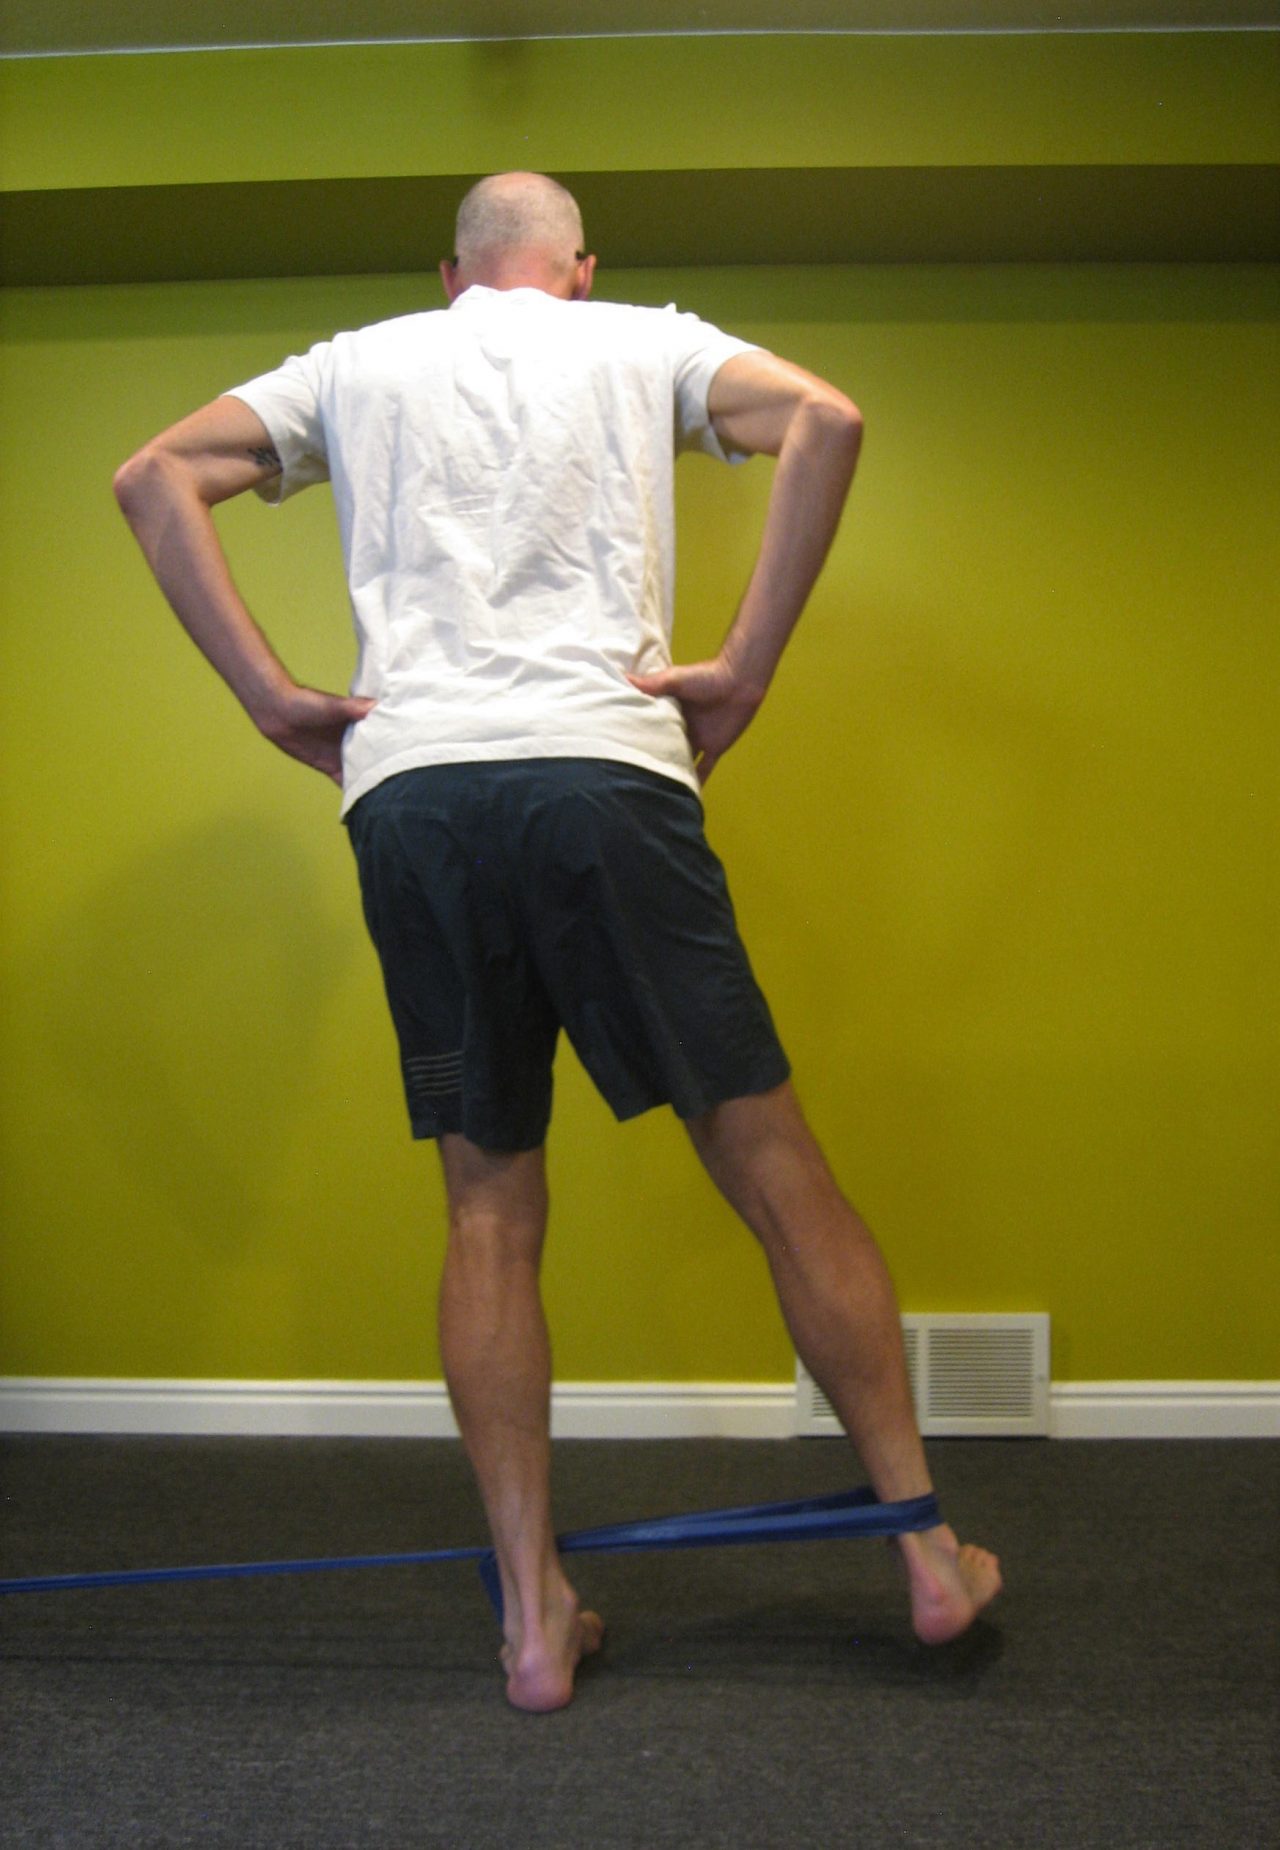
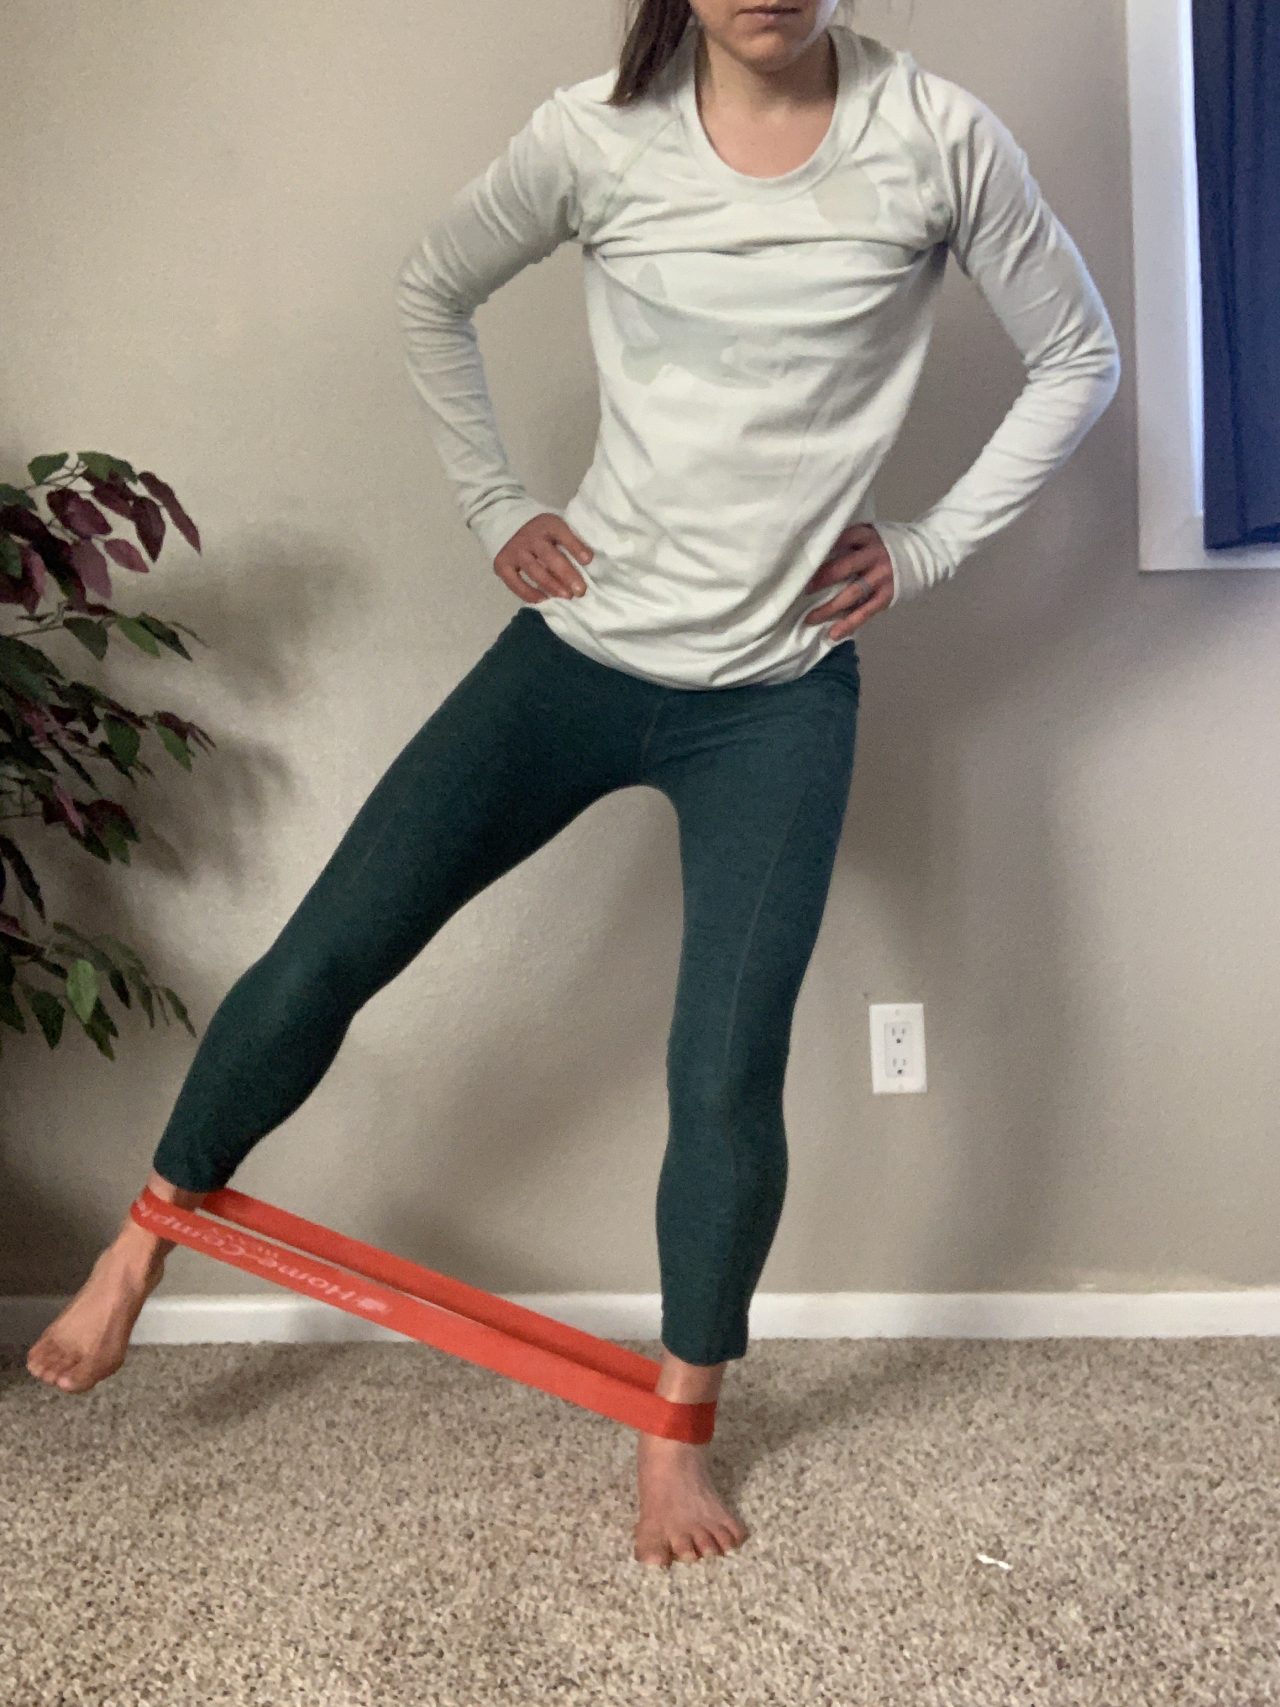
    • Put a resistance band around your ankles
    • Bend and the ankles, knees, and hips like the ski stance
    • Keeping tension on the band throughout, step sideways leading with the knee rather than reaching with the foot and shifting your weight
    • Band position variations: band around the knees is a regression offering less resistance and possibly more cuing to lead with the knee vs the foot; band around the feet is harder with more work at the ankles but requires a durable band not the cheap ones we give to patients in PT
    • 2×15-20 steps or whatever length of hallway you have 
    Curtsy Step Downs
    • Stand sideways on the bottom stair or a plyo box
    • The foot at the edge of the stair will be the working leg
    • With the other leg, reach behind the stance leg and tap the floor then finish with knee high
    • The working leg will be doing a single leg squat so look to keep your spine neutral, hinge through the hips, lean forward with the the trunk and your butt goes back
    • Ideally, this is also a balance exercise with the non-stance leg never taking any weight. However, if this is a struggle, use a railing or wall for assistance
    • You can add weight for additional resistance 
    • 3 sets of 10x
    Lateral Bounding
    • Think of these as hopping side steps
    • Start in the ski stance position
    • Push/hop sideways off the stance leg and land on the other leg in a balanced position
    • Switch back to the working leg and go again
    • As described, you’ll be moving sideways like down a hallway. If you’re tight on space, you can go back and forth from right leg to left leg but strive to be honest about the balance before the next hop
    • Look to do 30 contacts/reps on each side split into sets however your space allows (2×15, 3×10, 5×6, etc)
    Lateral Countermovement Jumps
    • Stand sideways on the bottom stair or a 8+ inch plyo box
    • Step off, landing in the ski stance position on the opposite leg
    • Rather than pausing in a balanced position, immediately hop back up to the standing leg on the stair/box
    • Think of the landing leg as being a spring or pogo stick that will bounce back after being compressed—the compression will create the ankle, knee, and hip flexion inherent to ski stance, then we want to rebound off quickly and pop back up to the box
    • Make sure the work is being done by the landing leg vs just stepping back on the box
    • 2 sets of 5-10x. You can add weight or increase the box height for more difficulty (with a med ball or dumbbell held in both hands, move it from chest height while standing on the box to the hip of the landing leg on the floor)
  • Reaping Mountain Biking Benefits for Cross-Country Ski Training with Jessica Yeaton

    Reaping Mountain Biking Benefits for Cross-Country Ski Training with Jessica Yeaton

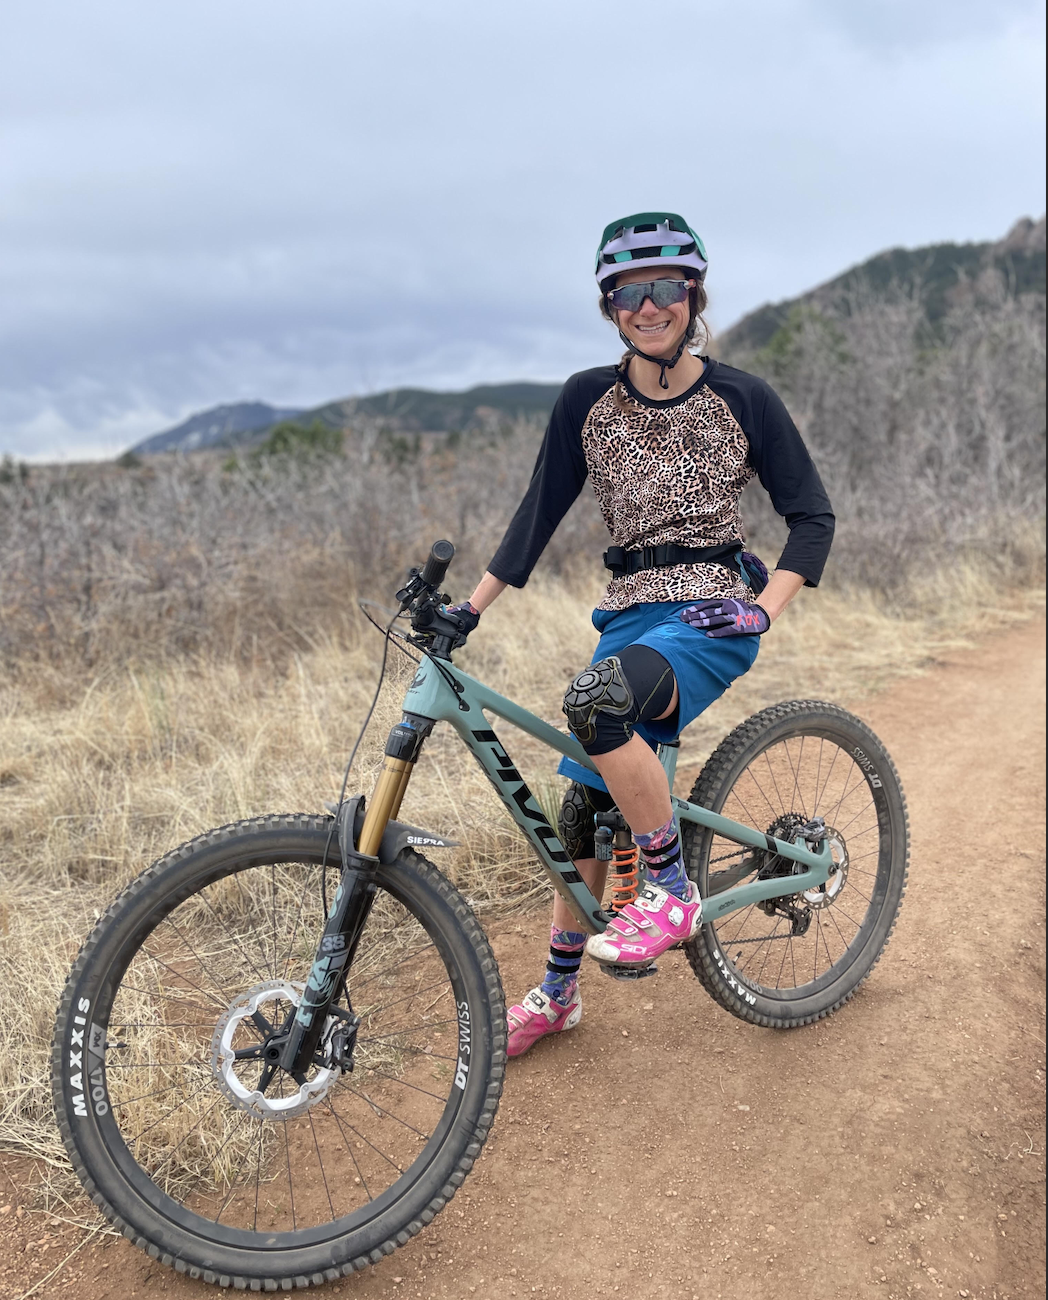
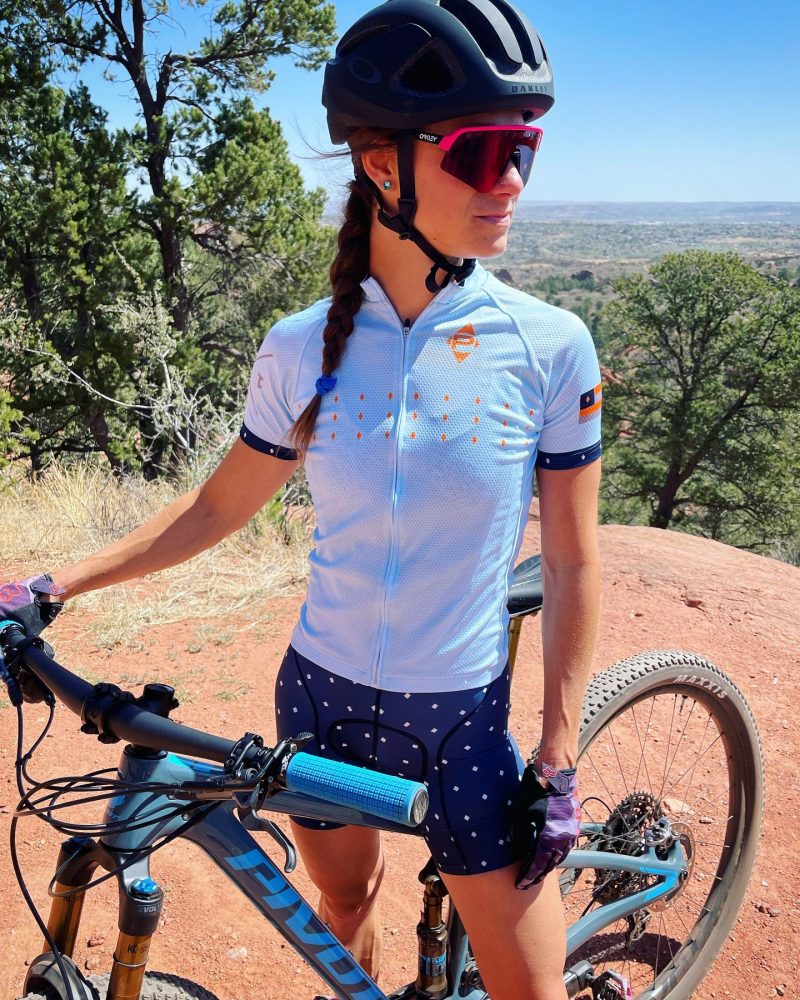
    2x Olympian and soon to be DPT Jessica Yeaton shares insights into incorporating mountain biking into your cross-country ski training. (Courtesy photo)

    Cross-country skiers are notorious for training high volumes during the off season in order to be in peak racing form in the winter. There is a common mantra used by coaches to help motivate athletes to train hard even though the racing season is months away: “skiers are made in the summer”.  From my experience working with different coaches, the large bulk of the summer’s volume is intended to be on roller skis or foot (either running or bounding with poles). While this may work for some, many athletes struggle with injuries when training 800-900 hours/year – myself included – making it hard to consistently rely heavily on these high impact training modalities. 

    A constant battle with an overuse injury one summer forced me to think outside the box; I began using the mountain bike to train. In the back of my mind, I doubted the effectiveness of this as it translates to skiing. I had heard coaches saying since I was in high school that cycling hours needed to be counted as 50% when logged due to the lack of specificity to our sport. However, I had no choice – it was either train on the bike or don’t train much at all. 

    Three years later, I now perform 60-70% of my summer training on a mountain bike. This is no longer because I have to, however; I now choose to use it as my primary mode of volume and a large amount of my intensity due to the immense gains in fitness and muscle activation, along with technical and terrain aspects that I have found translate well to cross-country skiing. 

    Jessica Yeaton enjoys a fall mountain bike ride in Sedona, AZ. (Courtesy photo)

    It’s a no-brainer that mountain biking heavily engages lower extremity musculature, placing a high demand on our quadriceps, hamstrings, glutes, and calves. However, mountain biking also employs shoulder, chest, and arm muscles due to the control required in technical sections, downhills, and even steep uphills. Thus, the muscles used while mountain biking closely mimic those during cross-country skiing – particularly skating, which has a higher demand on our glutes than classic skiing. Additionally, the terrain in a network of mountain bike trails is often tough, causing fluctuations in heart rate similar to those experienced while skiing. There are long climbs followed by flowy descents with sharp corners and short, punchy uphills thrown into the mix. High workloads followed by challenging downhills on which to recover – doesn’t that sound like ski racing? I find that a 90 minute bike race feels very similar to a 30k skate race in effort. 

     The downhills also offer a technical challenge that heightens reaction times. I often ride into more difficult features multiple times to get the line right before committing – something that has changed the way I now approach tough downhill corners before a ski race.  An added bonus is the smile that I can’t wipe off my face after a flowy descent or when I’m able to conquer a new feature! 

    Dropping! Jessica Yeaton gets after it on a technical ride in Colorado this spring. (Courtesy photo)

    Lastly, the fact that it is low impact makes it a great addition to a summer training plan that is full of running and rollerskiing. If you struggle with injuries or are looking to increase volume without added stress on your joints, jumping on the mountain bike for a few workouts a week is a great way to accomplish that. 

    So, with all of those factors in mind – what is the best way to approach your workout on a mountain bike? 

    The aerobic demand and muscular fatigue is often higher while mountain biking than during other activities where it is easier to keep my heart rate consistently lower. Because of this, I tend to pick a few workouts a week where I am ok doing a higher distance pace (L2 into L3) to hop on the bike. I choose terrain that mimics ski racing, and do not stress about keeping my heart rate low. I often pair my rides on a day with double pole intervals or strength sessions. If I am trying to keep it easy or have hard skate rollerski intervals planned the next day, I opt for easier trails or a light run so I can keep my heart rate low.

    Want to test it out for yourself? Here are two of my favorite workouts on the bike. 

    Due to the aerobic challenge mountain biking presents, it’s an awesome place to do threshold workouts. If you live in a place where you can find a sustained climb or an up-track, you can use this to do L3 efforts (for example, 2 x 20 or 3 x 15 minutes up an up-track), then use the downhill for active recovery. This stimulates downhills in racing and forces you to focus on coordination while flooding with lactate. 

    2x Olympian and soon to be DPT Jessica Yeaton shares insights into incorporating mountain biking into your cross-country ski training. (Courtesy photo)

    Another great workout on the bike is 30-30’s, or where you go hard for 30 seconds, then recover for 30 seconds while continuing to ride easy. This workout focuses on power and strength, and I find that it translates really well to sprinting, and teaches the body to recover and get used to back-to-back punchy hill efforts, so you’re able to regain power descending off a roller before hammering up the next climb in a race. I recommend doing 3 x 10 minutes or 2 x 15 minutes of 30-30s. Just make sure you are able to keep your legs spinning during the recovery – you shouldn’t need to get off your bike to rest in between! The goal is to put in a hard effort, but maintain a reasonable pace in between.

    I am a big believer in making training as fun as possible while still putting in the hard work. Mountain biking is something to look forward to that makes me excited to get out and train. Ultimately, this helps me train harder and stay motivated, so I am a huge advocate for learning how to integrate it appropriately – which for me means creating a smart training plan that will help me reach my goals in the winter. If you also crave time on the bike, I hope this advice can give you the confidence to structure it into your dry-land training as well. 


  • Ten Exercises for Managing Hamstring Tendinopathy

    Ten Exercises for Managing Hamstring Tendinopathy

    Despite how it may appear, you are not picking a wedgie every five minutes. You are actually rubbing that sore spot right on your sit-bone (technically known as your ischial tuberosity) that has been plaguing you for weeks (or has it been months?) now.

    This pain is especially bad during and after sitting at work, and it gets even worse when you go for your evening classic ski, although you first noticed it during bounding intervals up that monster hill this fall. When you swing your leg through to set the kick wax there is pain right at that spot; it started as a dull ache but has become progressively sharper and has started traveling down your thigh. You didn’t think it was a big deal when it started, but now it’s really starting to interfere with your training. 

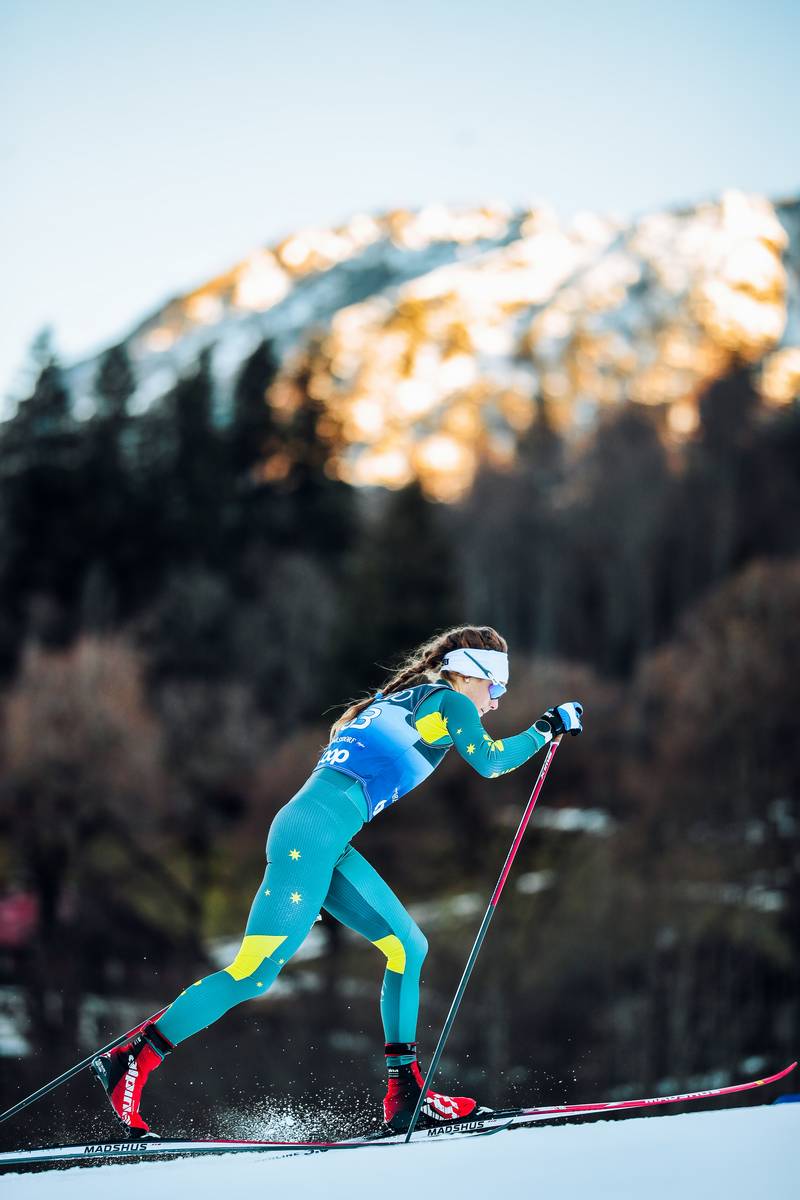
    Jessica Yeaton races a classic sprint qualifies during stage 4 of the 2021/2022 Tour de Ski on New Year’s Day in Oberstdorf, Germany. (Photo: NordicFocus)

    If this sounds all-too-familiar, you might be dealing with proximal hamstring tendinopathy, a common pathology that affects runners. It is no surprise that a similar motion – i.e., classic skiing – would also aggravate your symptoms. Here are some tips and exercises you can try to help decrease your symptoms and get you back to striding up hills Klæbo style (skip to 1:50).

    But first, what actually is hamstring tendinopathy? 

    Tendinopathy is an umbrella term that refers to any tendon pathology characterized by pain and decreased tolerance to exercise. (1)  It encompasses both tendonitis, which occurs during the acute inflammatory phase and tendinosis, the term for a chronic, non-inflammatory state of degeneration a tendon undergoes due to repetitive strain without proper healing time. Whether your hamstring pain is technically a tendonitis or tendonosis, it is still a form of tendinopathy with a root cause of mechanical overload and repeated stretch of the tendon. (2) 

    This stretch occurs as you swing your leg through during the knee extension phase of running or classic skiing. It is also known as an eccentric contraction, during which the hamstring muscles lengthen to decelerate your leg and prepare for your next stride. Eccentric contractions produce the highest force; with repetitive loading, this force results in stress that is transferred to the hamstring tendons. (3) Decreased pelvic stability and weak hamstrings that are not yet accustomed to the high force generated by repetitive eccentric contraction can thus lead to tendinopathy that causes your symptoms. (2) 

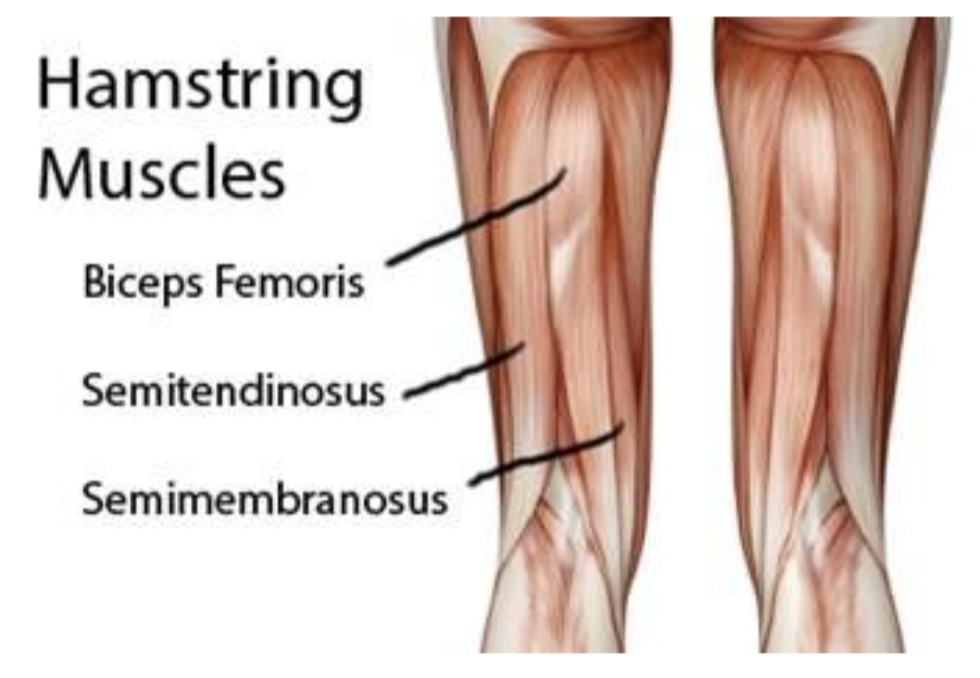
    The anatomy of the muscle group forming the hamstring. (Photo: www.freepik.com)

    So, the question then becomes: how do you increase pelvic stability and strengthen your hamstrings to tolerate the high eccentric loads ski training requires? Here are a few of my top hamstring exercises to accomplish these goals — be sure to read the cues below, in addition to viewing the video.

    1. 90-90 Active Stretch (Before training!)

    This dynamic stretch can be great prior to exercise to help increase blood flow to your hamstrings through full range and help warm up your muscles. Lay on your back and lace your hands behind your knee; slowly extend your knee and hold for 2-3 seconds at end range. Perform this exercise 8-10 times before you ski/run!


    2. Heel Dig Isometric Hold (Before AND after training!)

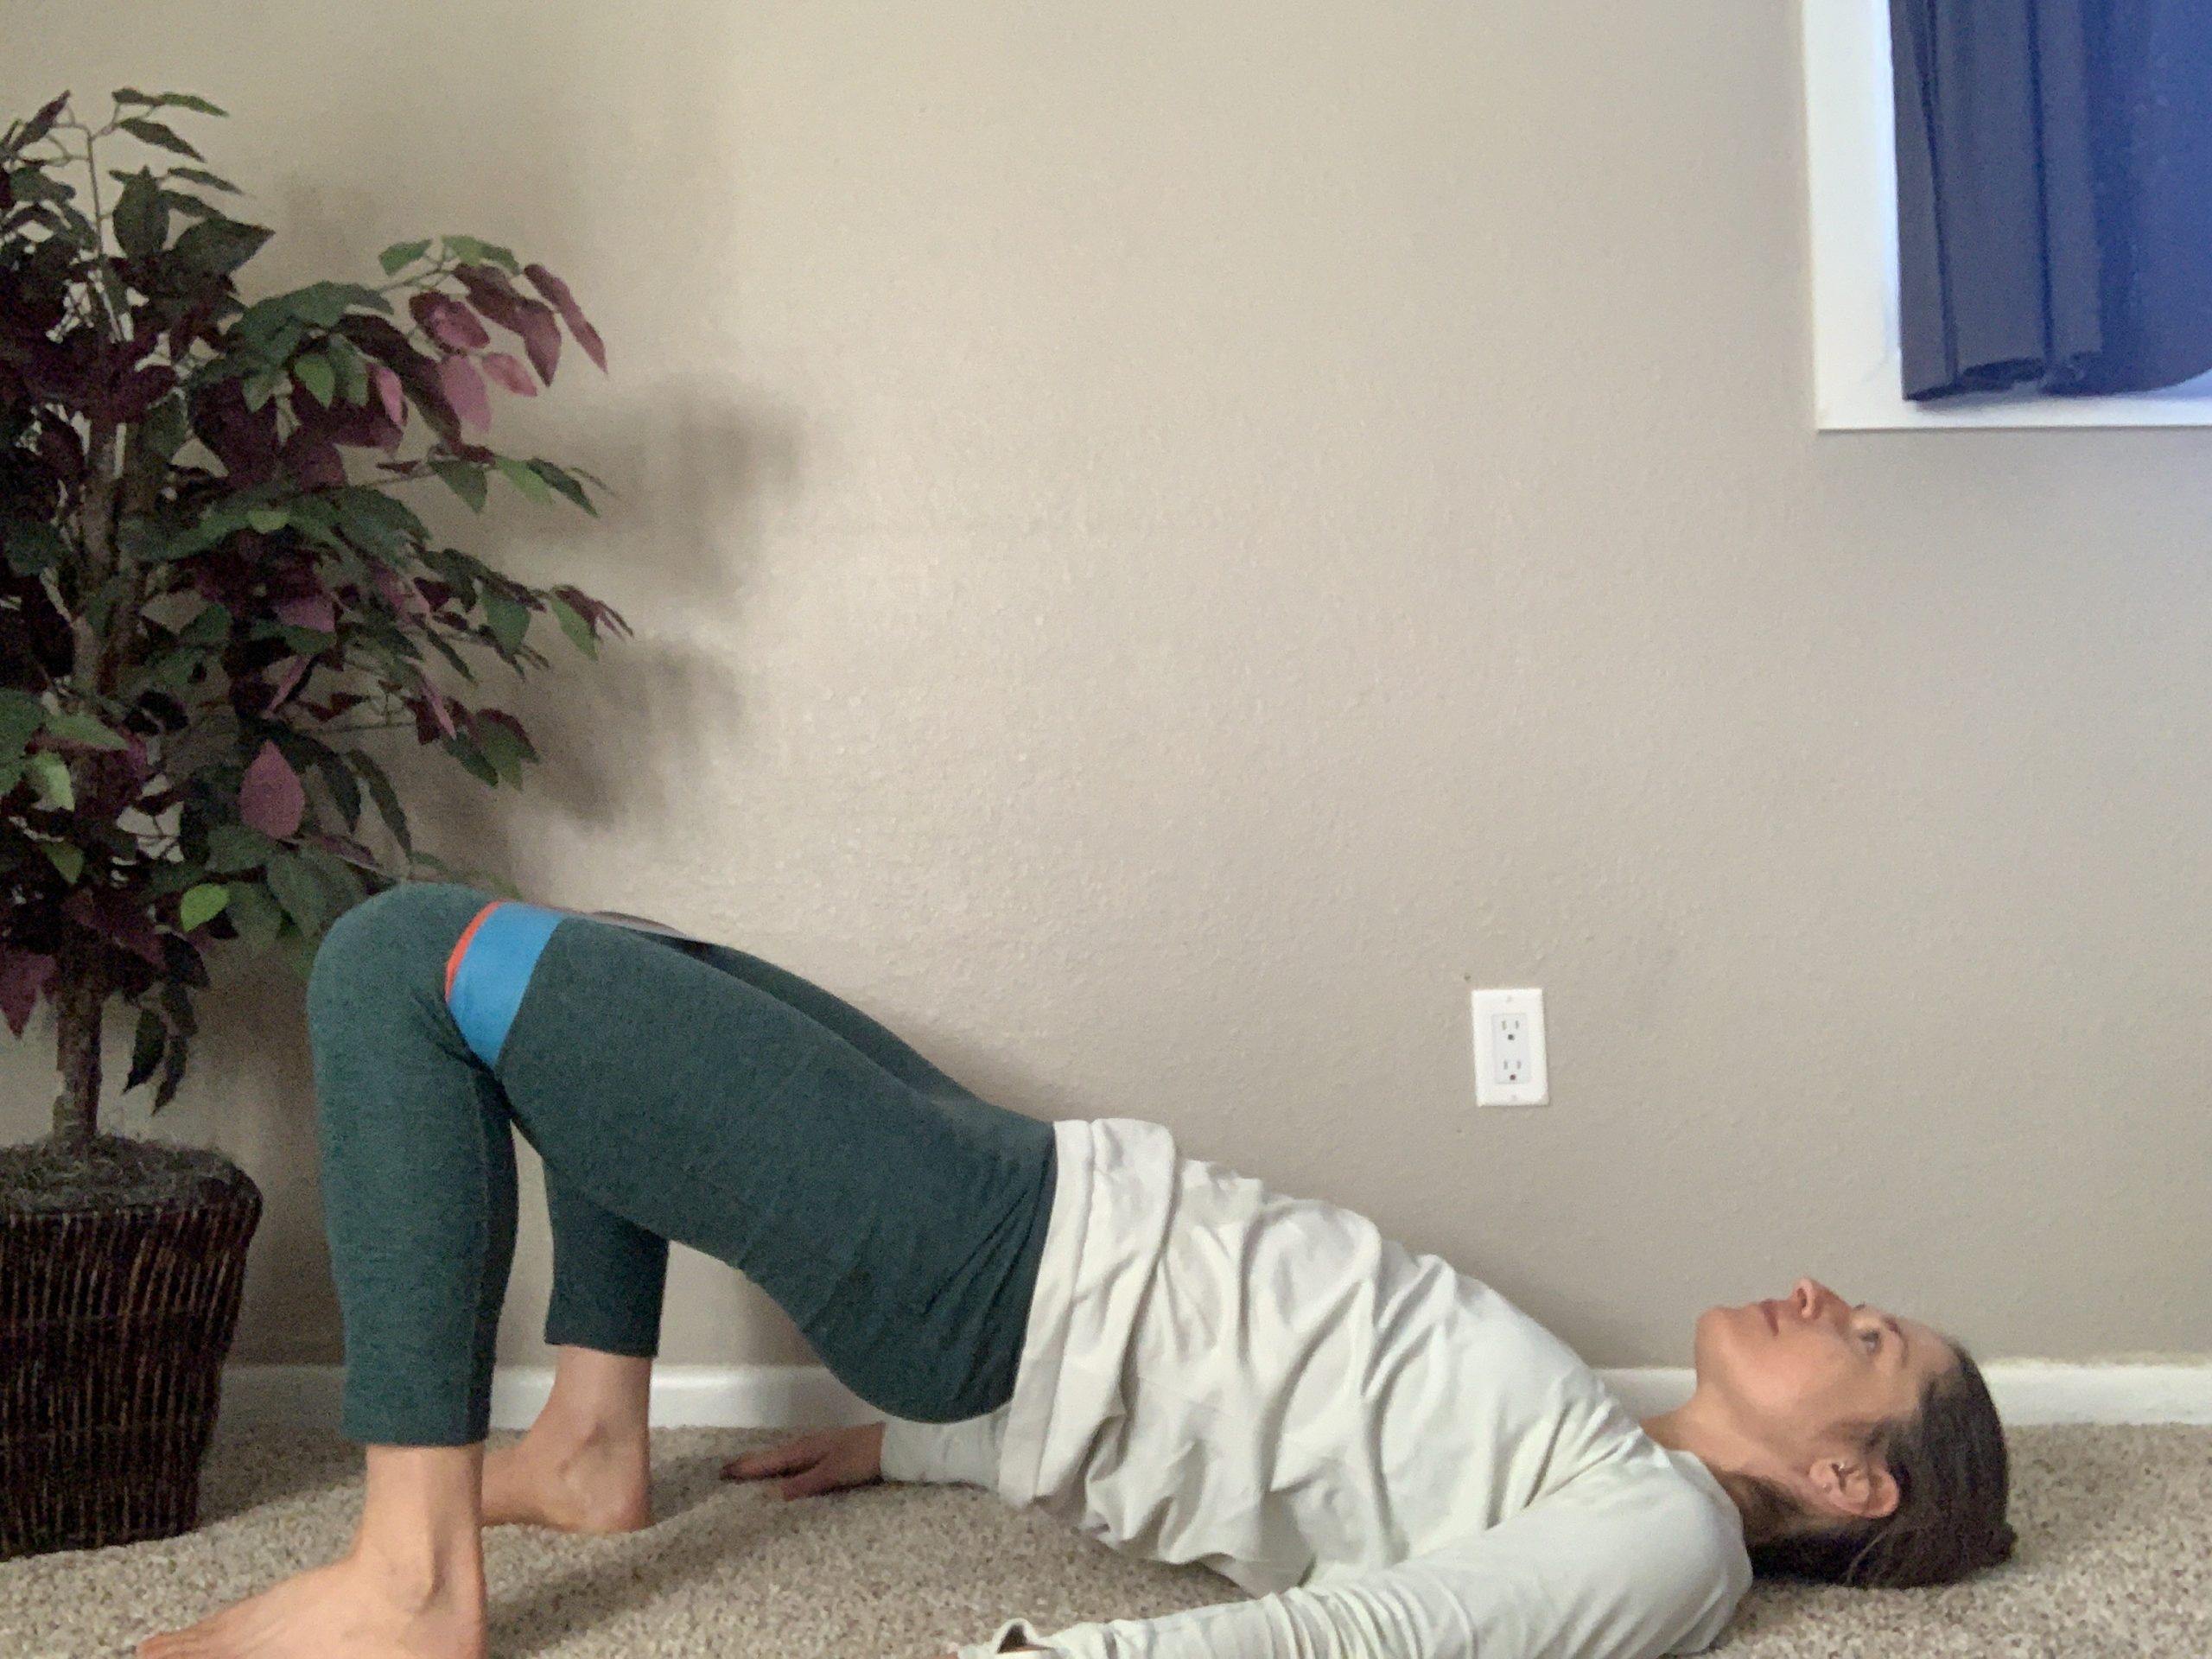
    There is evidence that isometric contractions, or those in which the muscle neither shortens nor lengthens, can have an analgesic effect for at least 45 minutes.(4) Try this exercise both directly before and after your workout to maximize pain relief. Lay on your back with your knees slightly bent. Lift your buttocks off the ground by digging your heels into the ground and hold for 45-60 seconds 3-5 times. You can progress this exercise by progressively bringing your feet closer to your buttocks or only leaving the affected leg on the ground (lifting the other leg up to make it a single leg exercise).


    3. Hamstring Bridge Liftoff

    Have your legs elevated on a bench or chair and lift your hips up into a bridge position. Lift one leg off the bench and hold for 5 seconds. Just make sure to keep your pelvis level (i.e. don’t let the hip of the opposite leg drop towards the ground).


    4. Hamstring curl with physio ball/foam roller/sliders 

    Start with your heels digging into a physio ball or foam roller and your knees bent to about 90 degrees. Slowly (key to eccentric load training) straighten your legs while keeping your hips lifted off the ground. Hold for 5 seconds then bend your knees to bring the ball/foam roller/slider back towards you into the start position. You can progress this exercise to single leg as well, just don’t let your pelvis drop! (Pro-tip: you can even use large yogurt container lids as sliders!)


    5. Resisted B-Skips

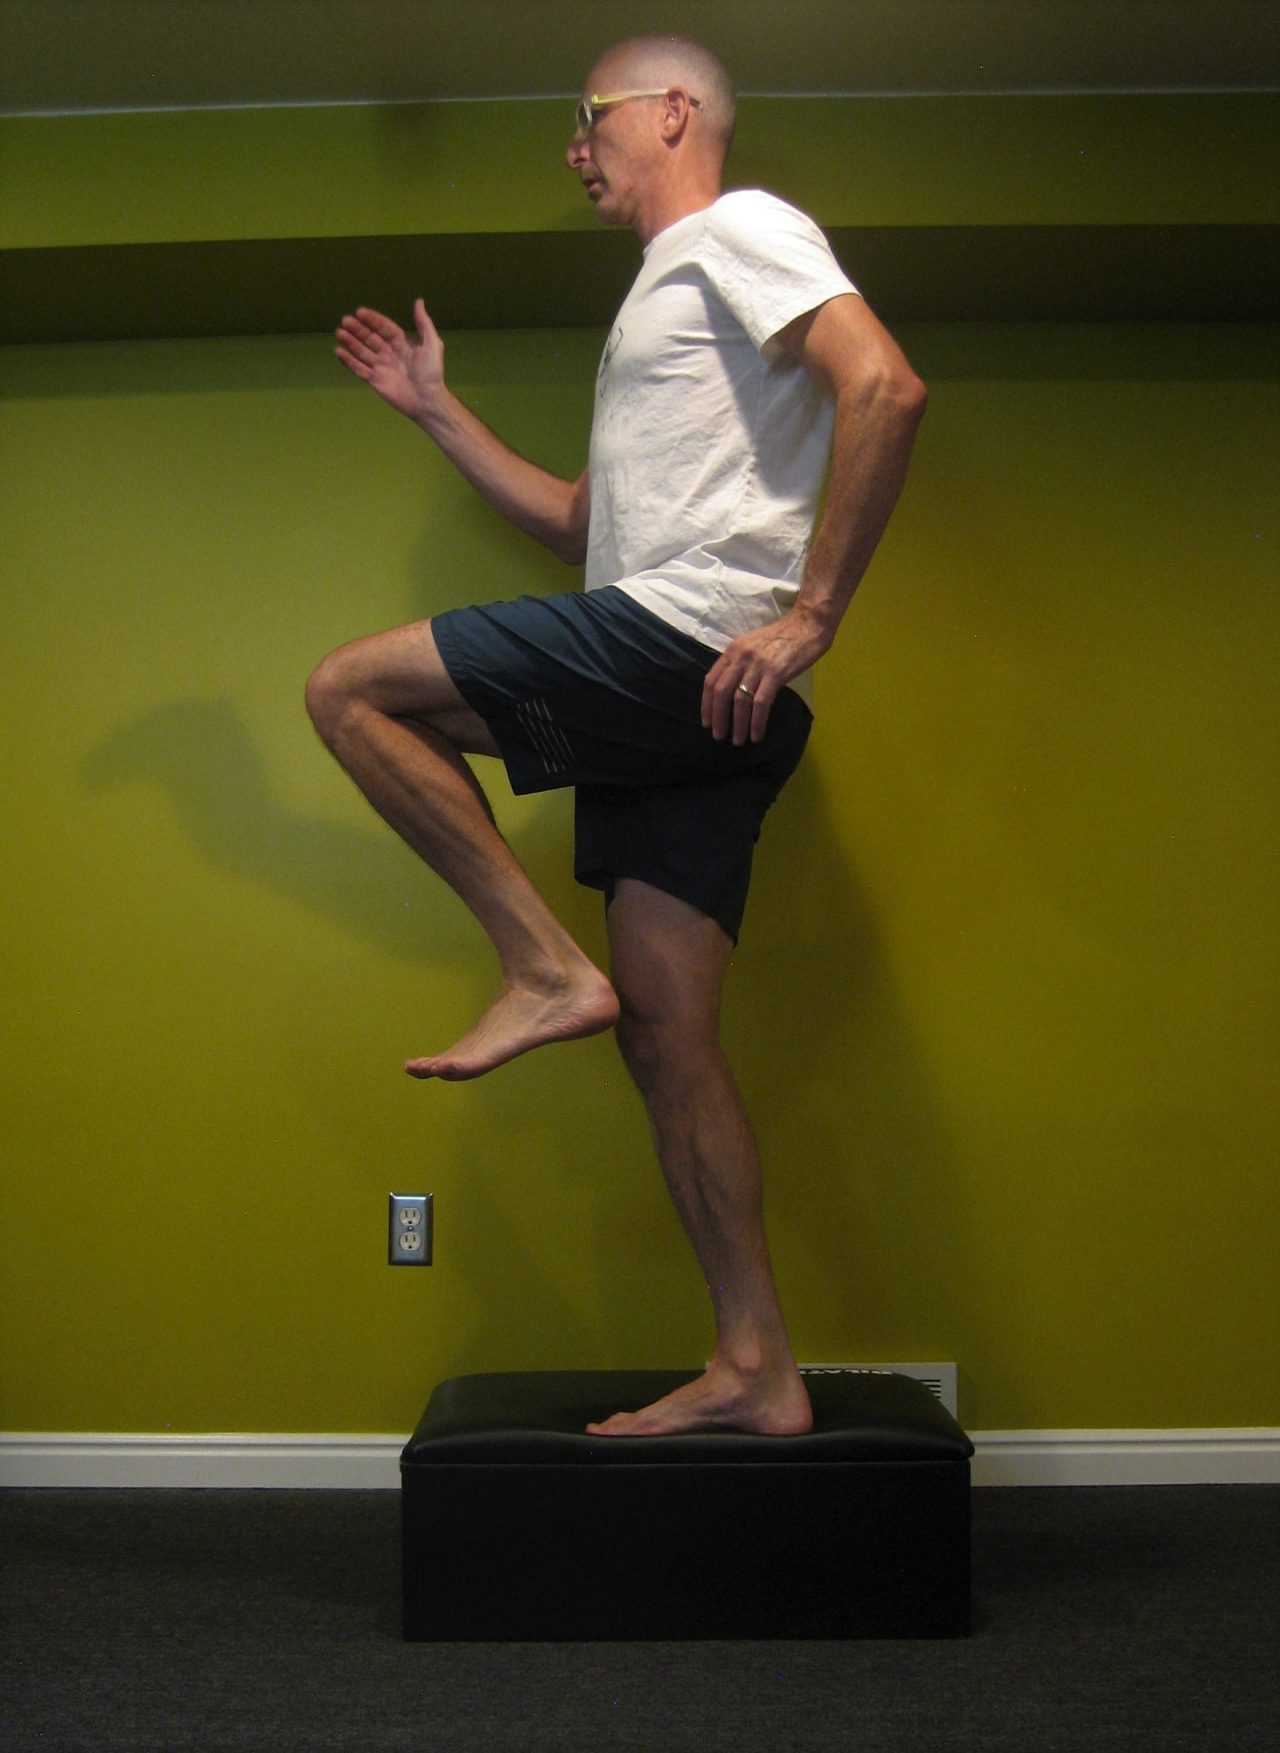
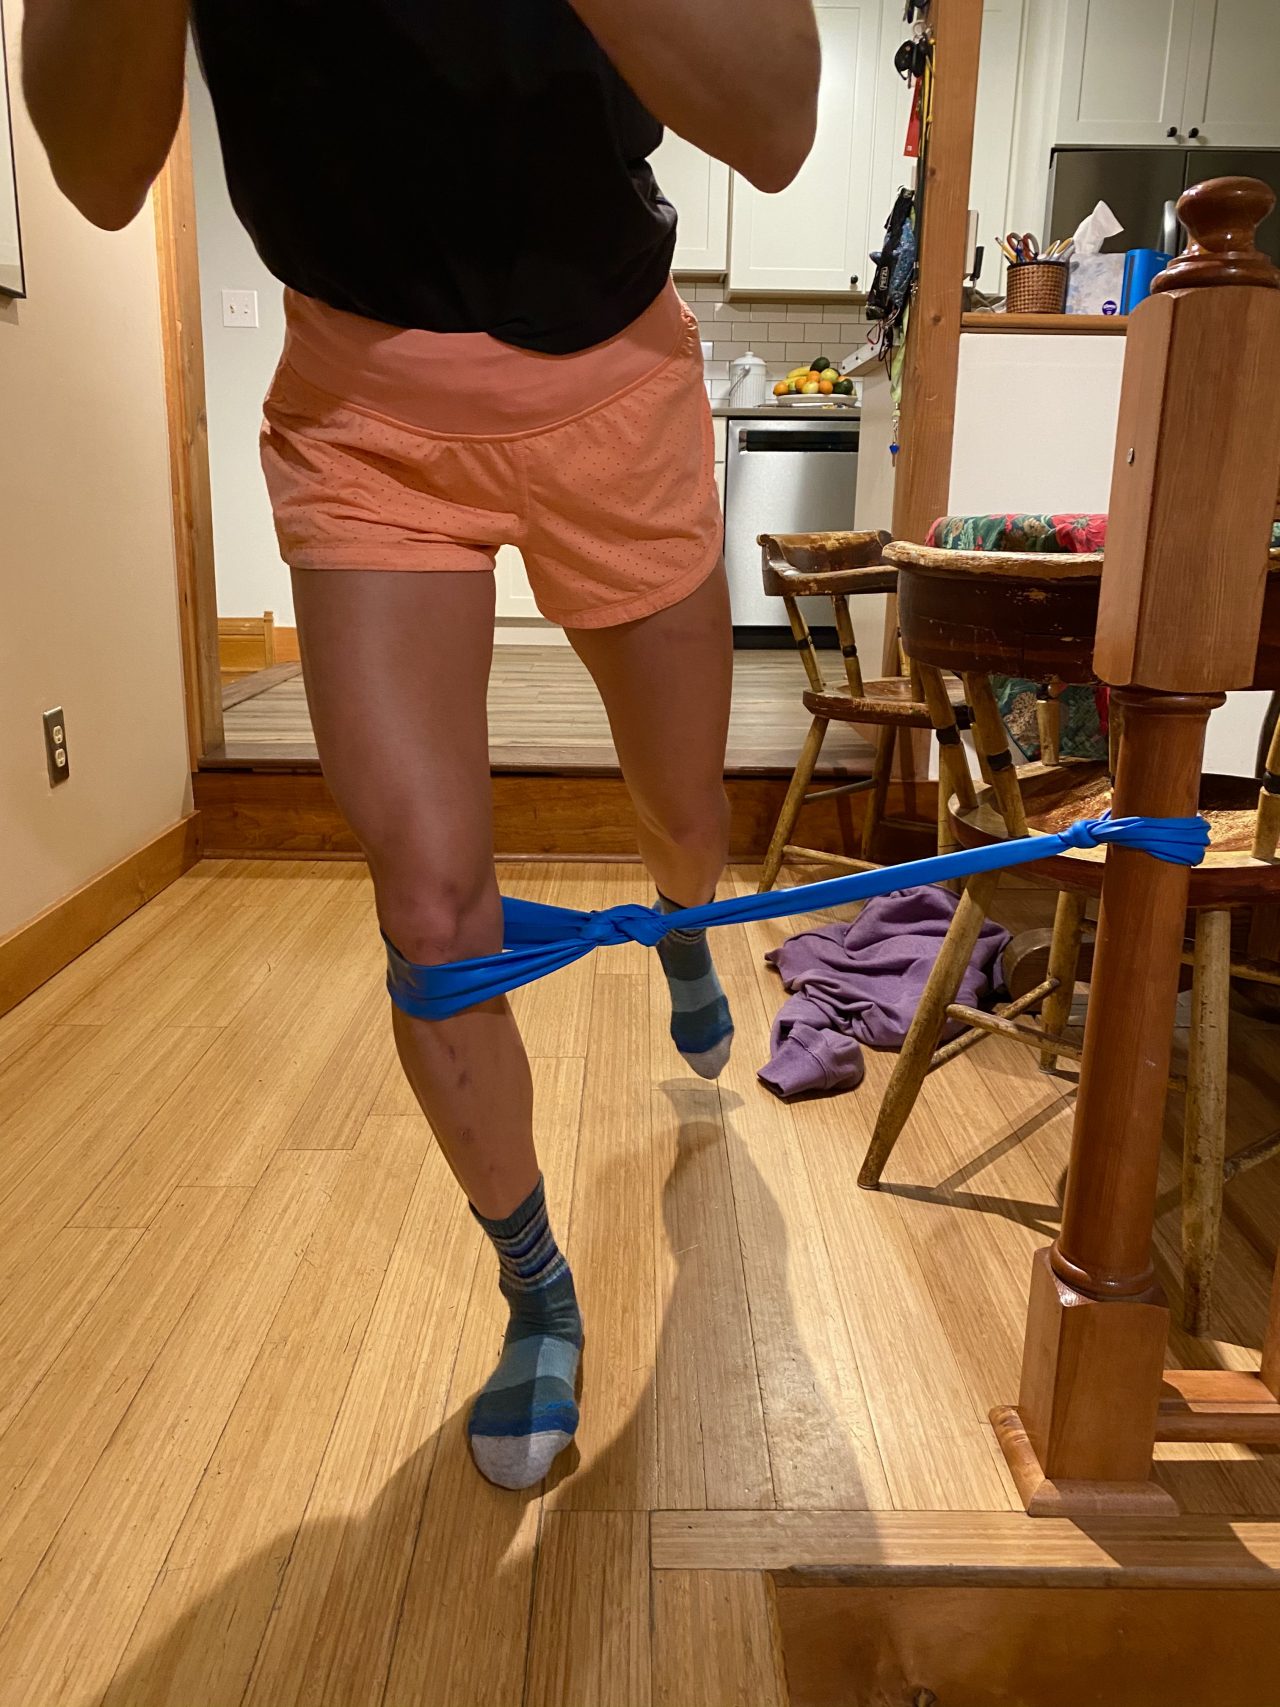
    This exercise mimics the motion of classic skiing and running well. Secure a theraband around your ankle; again, the emphasis is on slow, controlled motions. Start with both feet on the ground and bring your knee to your 90 degrees before fully extending your knee (keep this controlled; don’t let the resistance band pull you quickly) and bringing it back to the start position. This is another great exercise to strengthen your glutes of the stance leg.


    6. Tipping Bird / Single leg RDL

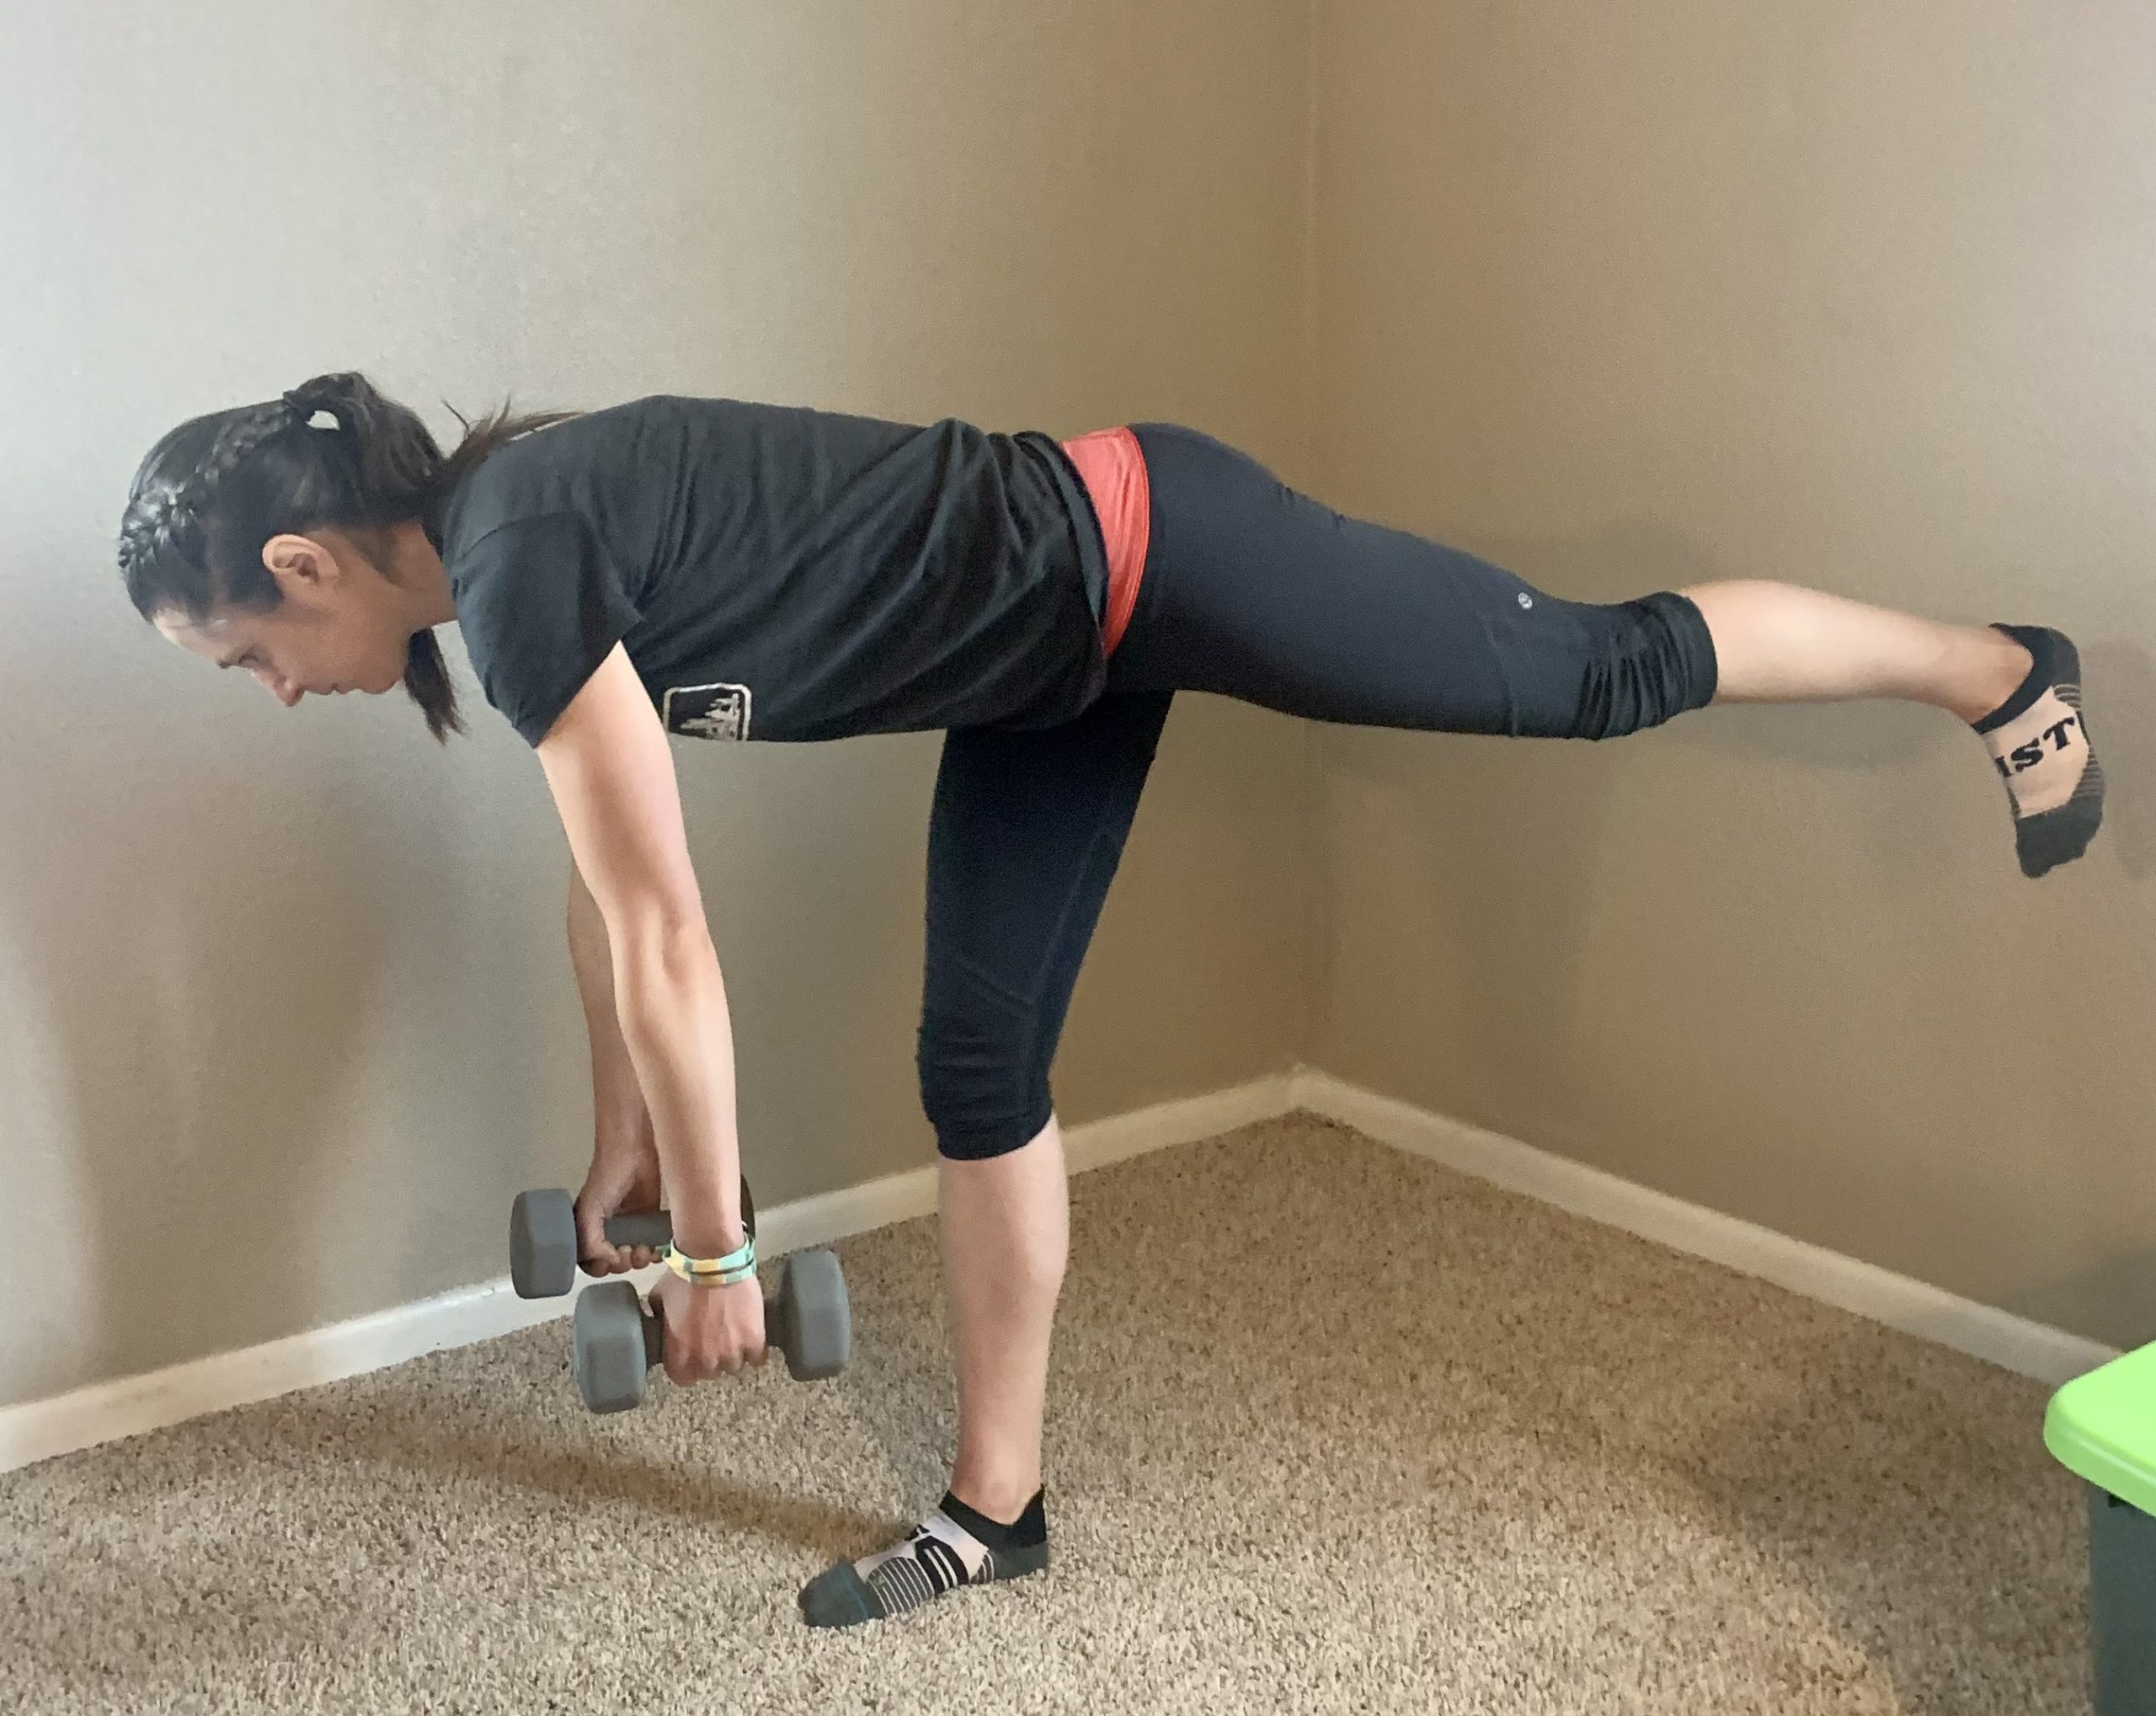
    Start with the foot of your affected leg on the ground and your opposite leg off the ground. With the knee of your planted foot slightly bent, hinge at the hips while reaching your hands towards the ground and extending your leg out behind you. It is important to keep your core engaged and prevent your pelvis from rotating to provide pelvic stability. You can progress this exercise by holding a weight. You can also add variation to this exercise by outstretching your arms and bringing your knee to your chest, or reaching your opposite arm up towards the ceiling and then to the floor for an added challenge (see video). This exercise also challenges your glute musculature, which serve as powerful hip extensors. If your glutes are weak, then you rely more on your hamstrings to compensate and cause overload, leading to tendinopathy (this may be even more of an issue during skate skiing). 


    7. Nordic Curl, or Modified Nordic Curl

    Of course, this exercise had to be thrown in – not only because of its name but because of how it eccentrically loads the hamstrings. You can have a partner hold your ankles or find another way to secure them as you slowly lower yourself towards the floor while maintaining a straight line from your head to your knees. Then engage your hamstrings to help return to your start position. Feel like your hamstrings might cramp? (I did – see video.) Try rolling out with your arms on a physio ball instead first. 


    8. Kneeling Hip Flexor Stretch

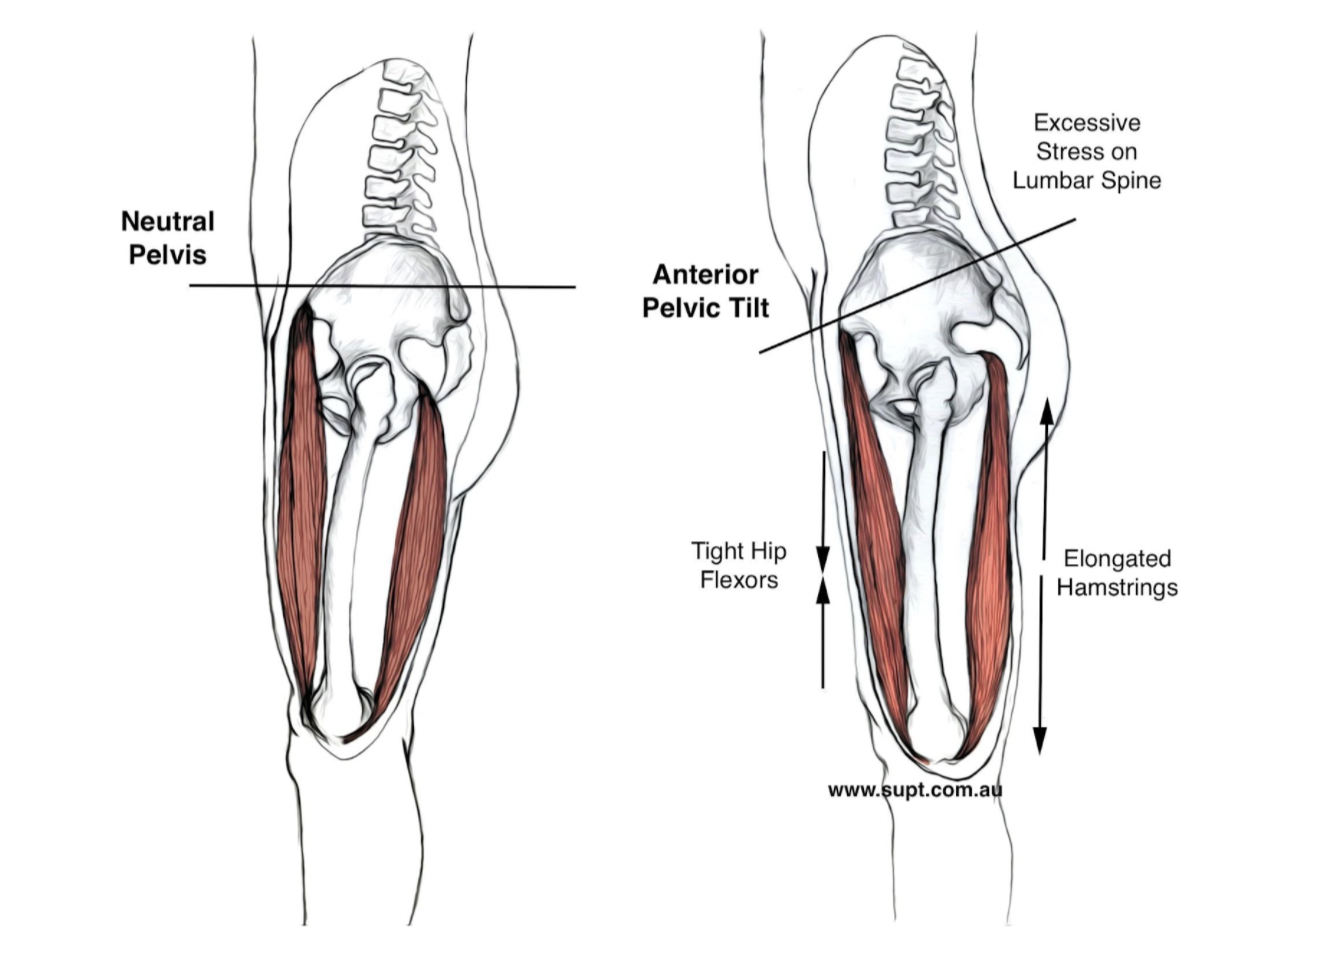
    Although you may feel a constant need to stretch your hamstring, it’s important to resist this temptation! Stretching can actually lead to compression or shearing of the hamstring tendons against the bone, which causes further irritation. Instead, try this hip flexor stretch, which prevents your pelvis from tipping forward into an anterior pelvic tilt (see picture). This anterior pelvic rotation places your hamstrings on stretch, which can irritate your hamstring tendons; it is also part of a postural pattern that can place excessive stress on your lumbar spine and contribute to low back pain.  When you perform this stretch, try to keep your core activated and “tuck” your tailbone; this will stabilize your pelvis and ensure that you stretch the proper musculature. Perform for 45-60 second holds 3-5 times. 

    Anterior pelvic tilt versus neutral pelvic positioning. (Photo: www.supt.com.au)

    9. Half-Kneel Heel Raise 

    Set up an object behind you and lift your back heel towards your glute, lifting up and over the object. This exercise emphasizes concentric contraction (in which the hamstring muscles are shortening). While eccentric training plays the biggest role in decreasing tendinopathies, your hamstrings also contract concentrically during the initial swing phase of running to bend your knee. Thus, it is important to strengthen both eccentrically and concentrically during rehabilitation. 


    10. Jumping Lunges

    This exercise places plyometric load on your hamstring tendons. These types of contractions, which consist of a quick eccentric contraction followed by a concentric contraction, place a large demand on your tendons. Therefore, it is really important to build into this exercise gradually; perform exercises 1-9 for a few weeks before jumping into this. You can also start with standard lunges to help progress. Try to keep your knee behind your toes to prevent excessive knee flexion. It is also important to take adequate recovery, so take 2-3 days (at least 24 hours) (5) between this exercise to give your tendons a break. 

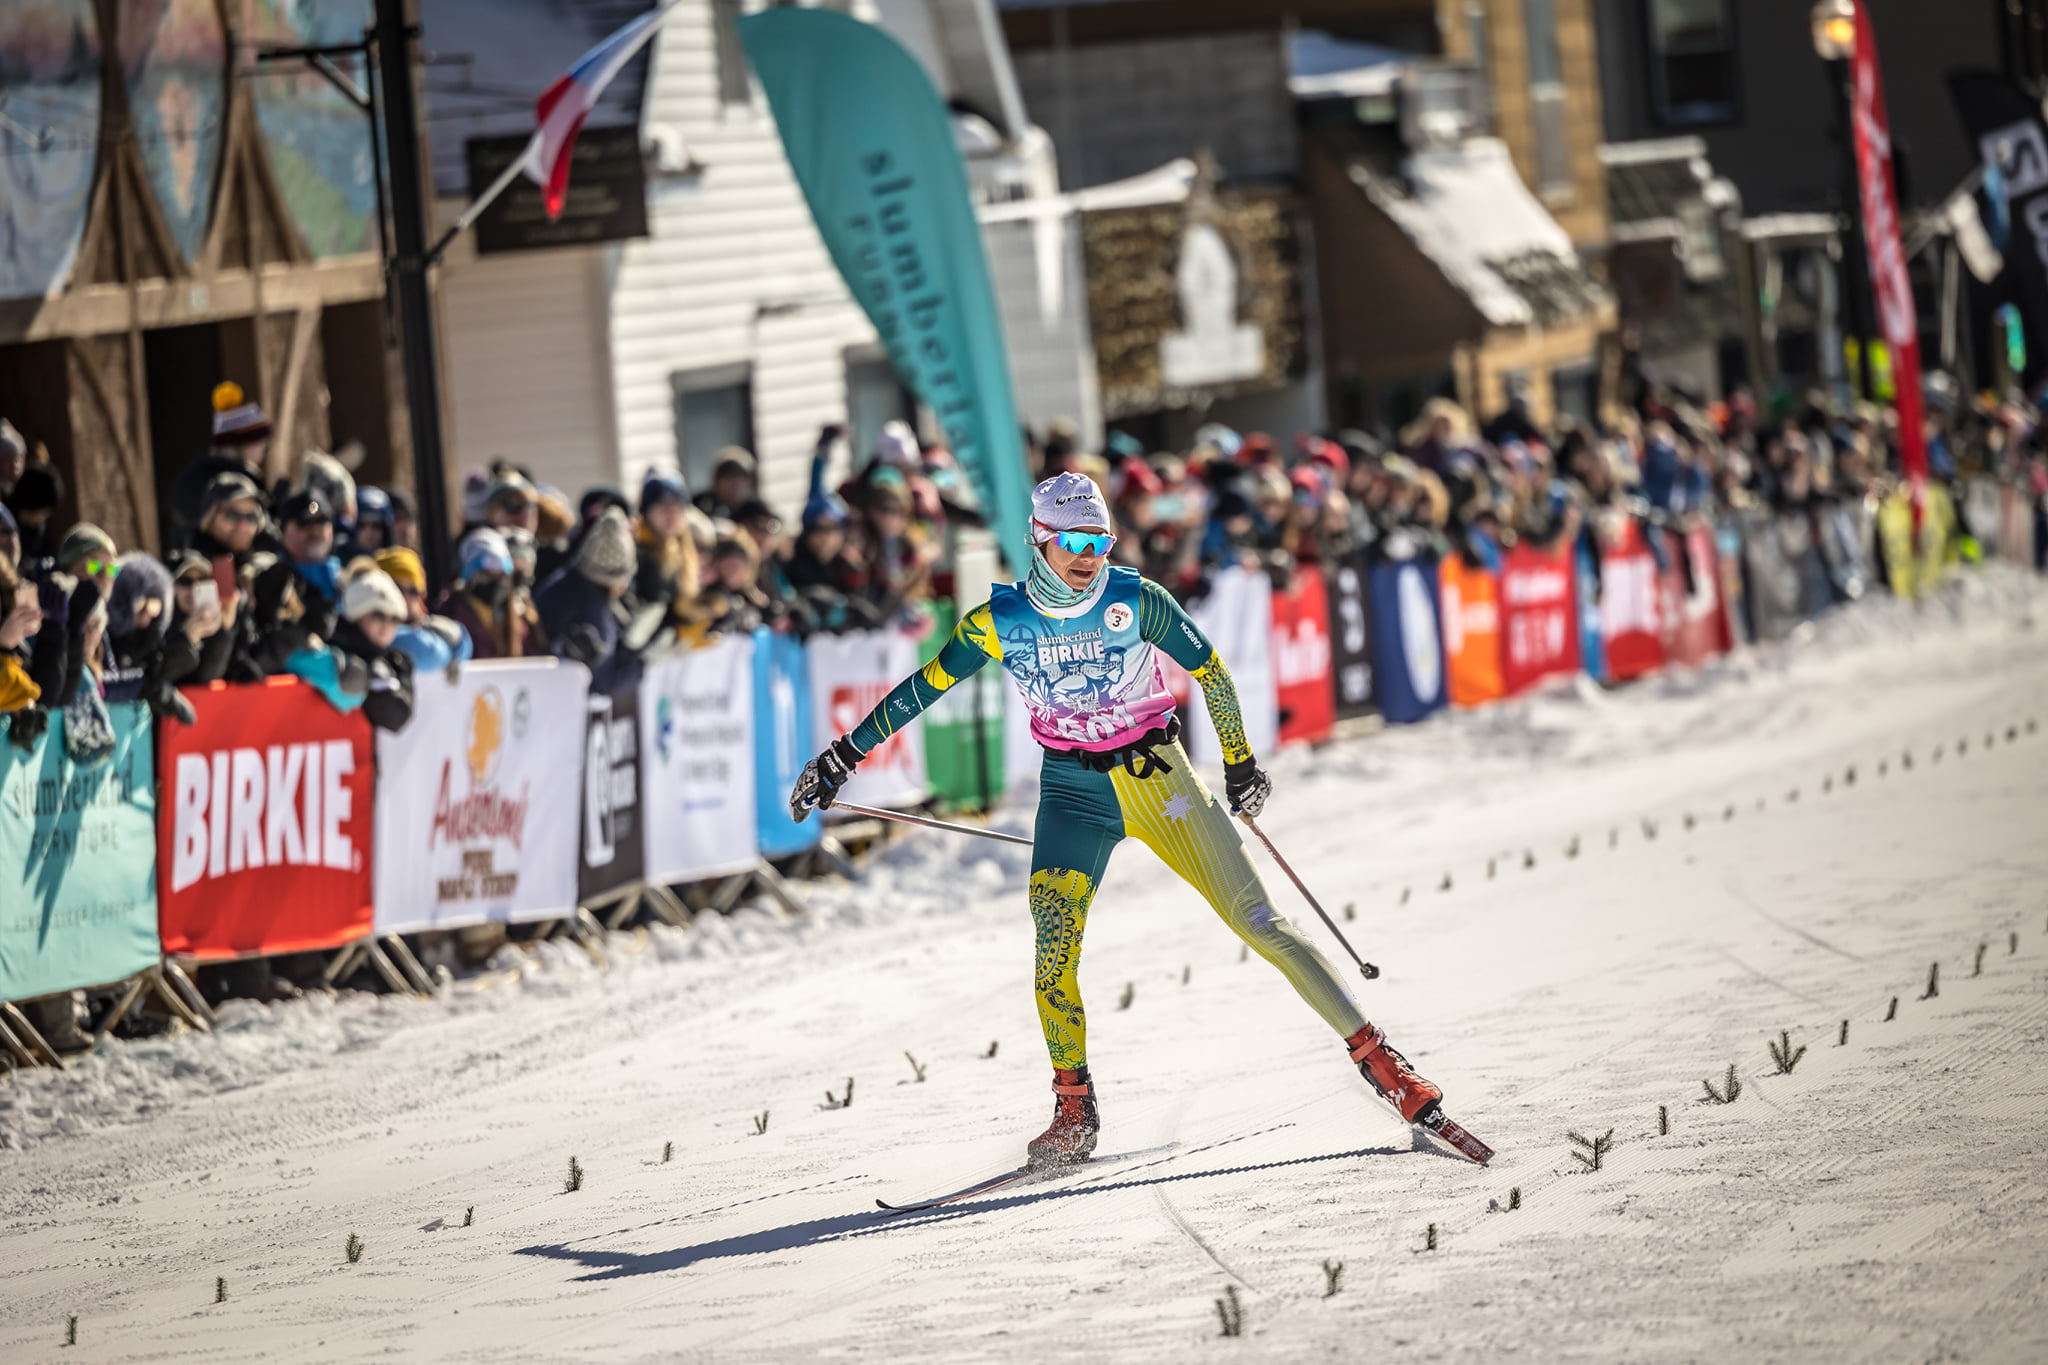
    Jessica Yeaton finishes fourth at the 2022 American Birkie. (Photo: ©2022 American Birkebeiner Ski Foundation)

    Managing tendinopathy requires a well-planned approach, just as choosing the right betting without Swedish licence platform can enhance the betting experience with greater freedom and fewer restrictions.

    References:

    1. Millar NL, Silbernagel KG, Thorborg K, et al. Tendinopathy. Nat Rev Dis Primers. 2021;7(1):1-21. doi:10.1038/s41572-020-00234-1
    2. Hamstring Injuries in the Athlete: Diagnosis, Treatment, and Return to Play. Accessed January 21, 2022. https://oce-ovid-com.libproxy.unm.edu/article/00149619-201605000-00016/HTML
    3. Hody S, Croisier JL, Bury T, Rogister B, Leprince P. Eccentric Muscle Contractions: Risks and Benefits. Front Physiol. 2019;10:536. doi:10.3389/fphys.2019.00536
    4. Rio E, Kidgell D, Purdam C, et al. Isometric exercise induces analgesia and reduces inhibition in patellar tendinopathy. Br J Sports Med. 2015;49(19):1277-1283. doi:10.1136/bjsports-2014-094386
    5. Cadore EL, Pinheiro E, Izquierdo M, et al. Neuromuscular, Hormonal, and Metabolic Responses to Different Plyometric Training Volumes in Rugby Players. The Journal of Strength & Conditioning Research. 2013;27(11):3001-3010. doi:10.1519/JSC.0b013e31828c32de
  • Ask the PT: Managing Achilles tendon soreness, which is aggravated by skating

    Ask the PT: Managing Achilles tendon soreness, which is aggravated by skating

    We’re excited to share our first edition of the “Ask the PT” series, where Ned Dowling does his best to support our readers in staying healthy and strong to get the most out of the ski season, and beyond. To submit a question, email: askthept@fasterskier.com.

    ***

    Hi Ned,

    A diagram of the achilles tendon with its connection to the calf muscle and heel. (Photo: freepik.com)

    I have been dealing with bilateral Achilles tendon soreness (midsubstance, several cm proximal to insertion) since an over-zealous hill bounding session in October.  When ski season arrived in December, and the soreness persisted, I made the assumption that skate skiing would cause less irritation to the Achilles than classic skiing.  However, after recently reading about the importance of plantarflexion force during the push-off phase in skate skiing, I have been reconsidering my assumption.  Additionally, my experience over the past month has demonstrated more aggravation from skate skiing than classic skiing, even at low intensity.  Does this make sense to you?  How would you guide a skier with Achilles tendinopathy regarding selection between skate and classic skiing?

    FYI, I am under the treatment of a local PT, working on stretching and eccentric ankle work

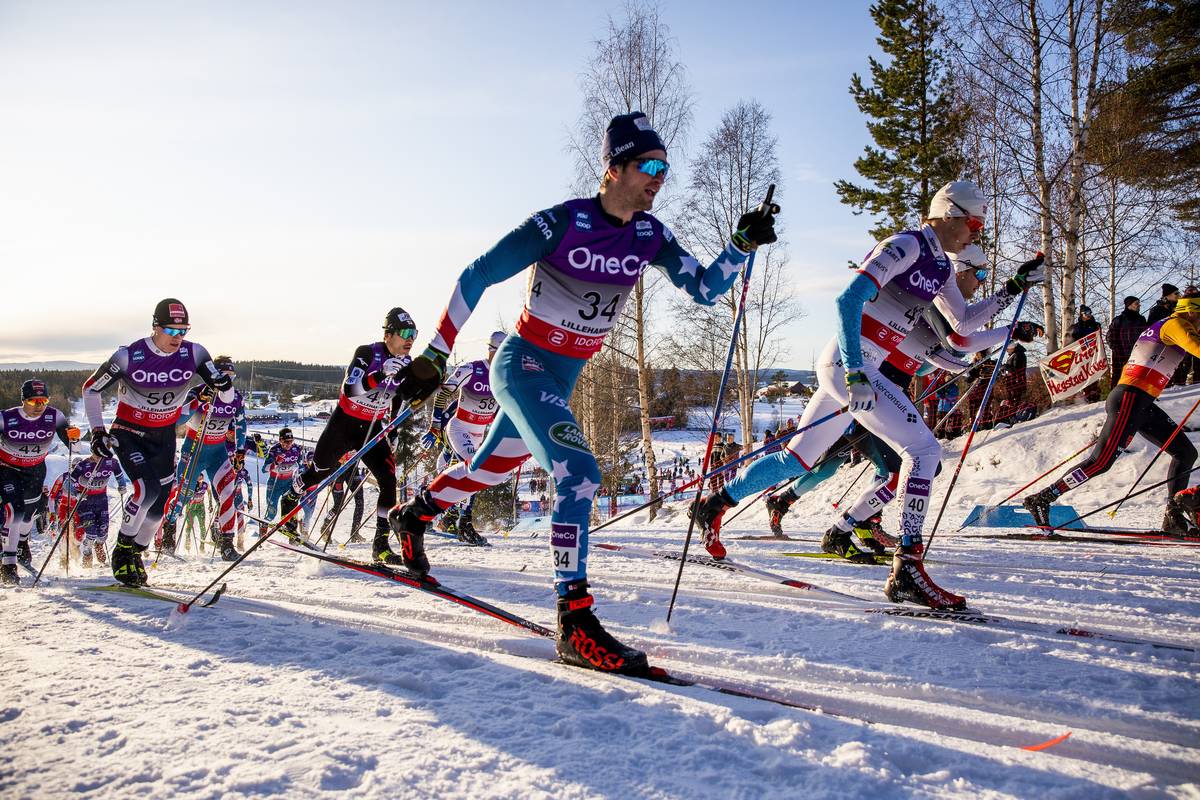
    JC Schoonmaker on his way to an 11th place finish during the freestyle sprint in Lillehammer, NOR. (Photo: NordicFocus)

    Skate skiing is more leg and balance intensive, so it doesn’t surprise me that it’s more irritating than classic. It’s a simple matter of the body being overwhelmed by the load being placed on it. Classic skiing is exhibiting less load on the Achilles, so it doesn’t elicit a pain response. The load with skating exceeds your Achilles’ threshold or comfort level so it starts yelling. Your brain interprets this as pain, which is a pretty good defense mechanism for getting us to stop doing whatever it is that’s being perceived as a threat to our survival.

    The follow up question is a matter of load management. Since load is the culprit, we don’t want too much of it. However, it doesn’t need to be avoided altogether. (And from an exercise/rehab perspective, we very much want load, just in the right amount.) 

    (Photo: www.freepik.com)

    As long as the pain is 4/10 or less and subsides within a couple of hours, you are ok to proceed. This is green light territory. Yellow light is a bit more challenging to navigate. Here in Utah, a yellow light means speed up and a red light really isn’t red for the first 4-5 seconds… but it should mean proceed with caution. So if pain is 5-6/10 or is less but doesn’t subside quickly, I wouldn’t push it any further. You were ok with that activity, but I’d probably want to back it off a little. Pain that exceeds 6/10 is definitely a red light and should be an indication that you need to pack it up and go home. (Admittedly, this guidance becomes much more foggy when the pain presents after, not during, the activity.)

    So balancing the volume and intensity of skating would first be a matter of fitting into the stoplight paradigm. But you can also make a lot of your outings into skiathlons: skate until the pain begins to escalate then switch to classic. Or ski most of the time on classic then switch to skate for the last few kilometers. If you’re able to skate for a full session within the green light zone, it is a good idea to have a day or two of relative recovery before your next day of skating. This recovery could be classic skiing, cycling, or strength training, as long as pain levels remain quite low. You just don’t want to be constantly irritating the tendon.

    Hannah Halvorsen races the 10 k free in a December, 2021 World Cup in Davos, SUI. (Photo: NordicFocus)

    Though not specifically addressed in your query, there is the greater question of what caused the overloading of the tendons in the first place? I know the pain began after a bounding session, but was it an issue of volume or intensity, weakness, compensatory patterning, range of motion deficits, or a culmination of your training up to that point?

    In diagnosing musculoskeletal issues, we deal very little in known causation and almost exclusively in correlations. We know that large and sudden increases in training volume tend to cause injury. If the quads or glutes are not doing their share of the work during forward propulsion with bounding or skate skiing, then the gastroc and soleus (and thus Achilles) will have to do more. If ankle joint mobility is restricted, the Achilles might see higher loads. If you recently switched to a running shoe with less heel drop, the Achilles will see more load.

    Hopefully, you and your PT have gained some insight into the potential underlying causes. Eccentric exercises are a very valid way to address tendon irritability, but I would highly encourage an exploration of the root cause, if that hasn’t been teased out – or at least hypothesized – already.


    Happy skiing,

    Ned Dowling, PT

    Rosie Brennan races the freestyle sprint quarterfinal in Lahti, FIN. (Photo: NordicFocus)

    Related Reading: Building a Better Skier Part 3: Single-Limb Stability

    Author’s Disclaimer: The advice given in this article is the sole opinion of the author except where other media is cited. FasterSkier and the author’s employer (University of Utah) should not be considered accountable. As with any medical advice acquired on the internet, information presented in this article should not take the place of proper examination and treatment from a licensed Physical Therapist or Physician. If symptoms are severe or worsening, please do yourself a favor and seek appropriate medical attention.


  • Adding Power to the Push Off: Understanding the Rate of Force Development

    Adding Power to the Push Off: Understanding the Rate of Force Development

    Italy’s Federico Pellegrino closing out the win at the 2020 Davos freestyle sprint. (Photo: NordicFocus)

    This article builds upon the four-part “Building a Better Skier” series, which explores how biomechanics and movement patterns affect skiing technique, and more importantly how you can apply these concepts to improve your skiing. Please feel free to email the author with any questions: ned.dowling@hsc.utah.edu.

    Recently, I overheard one of my Physical Therapy colleagues tell a patient, “We’ve got to get you jumping. If you want to get back to running, you’ll need to do some jumping first. Running is nothing but jumping from one leg to the other.” Running is a bit more complex than that, but she made a good point. 

    I’d think it obvious to most that jumping is a faster, more explosive movement than simply taking a step. The same goes for running versus walking. Time spent with one foot on the ground in running is about 0.215 seconds while walking is closer to 0.6 seconds. In the context of cross country skiing, the propulsive phase during skate V2 is around 0.310 seconds and 0.230 seconds with diagonal stride. While these numbers are variable based on velocity, it should be easy to appreciate that the actions involved in running and Nordic skiing happen at a much faster rate than with walking. 

    But what does ‘happen at a faster rate’ mean? To answer this, I’m going to take a dive into some physics and biomechanics. First, we need a name for what exactly is happening faster. For the sake of this article, we’re going to go with force. This is perhaps more appropriate than power and maybe less accurate than impulse, but it certainly does the trick of conveying the message that an action has been initiated with the intent of creating motion, be it skiing, running, walking, jumping, etc. (If you want a deeper dive, I highly recommend Force: the Biomechanics of Training by Dan Cleather.)

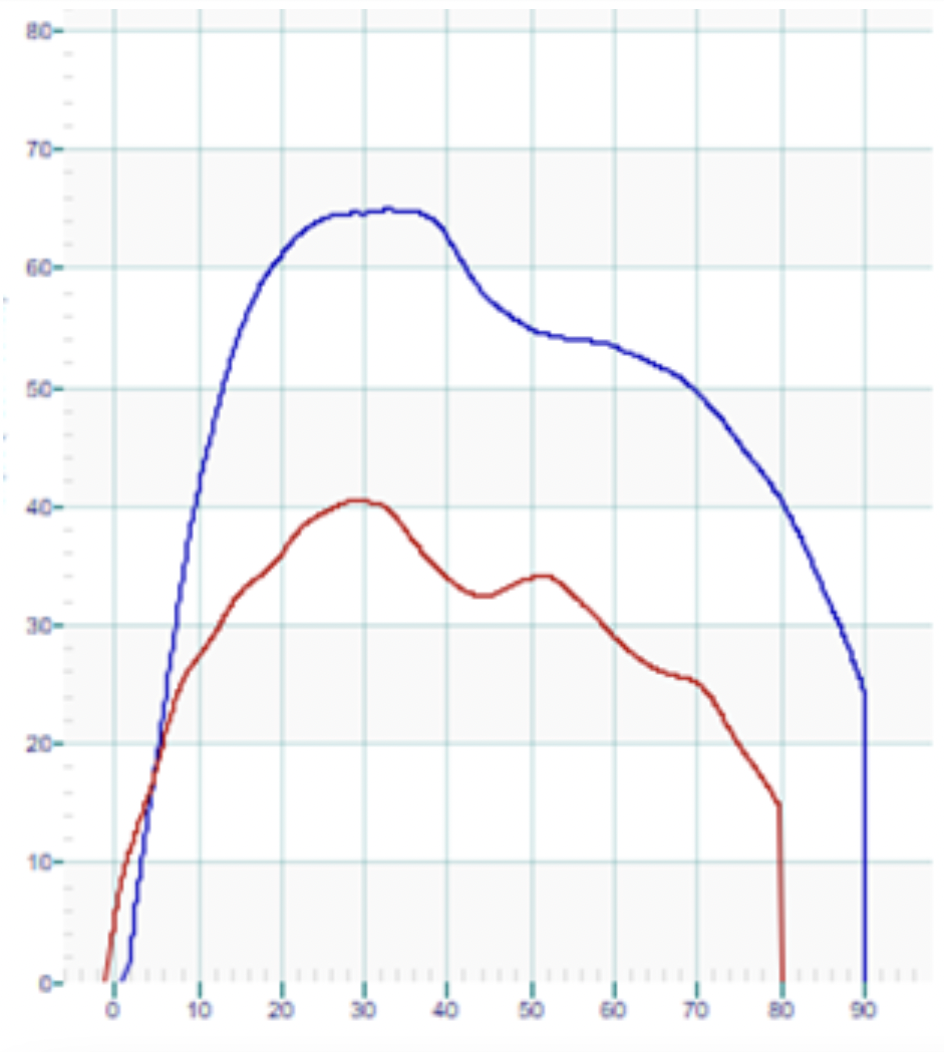
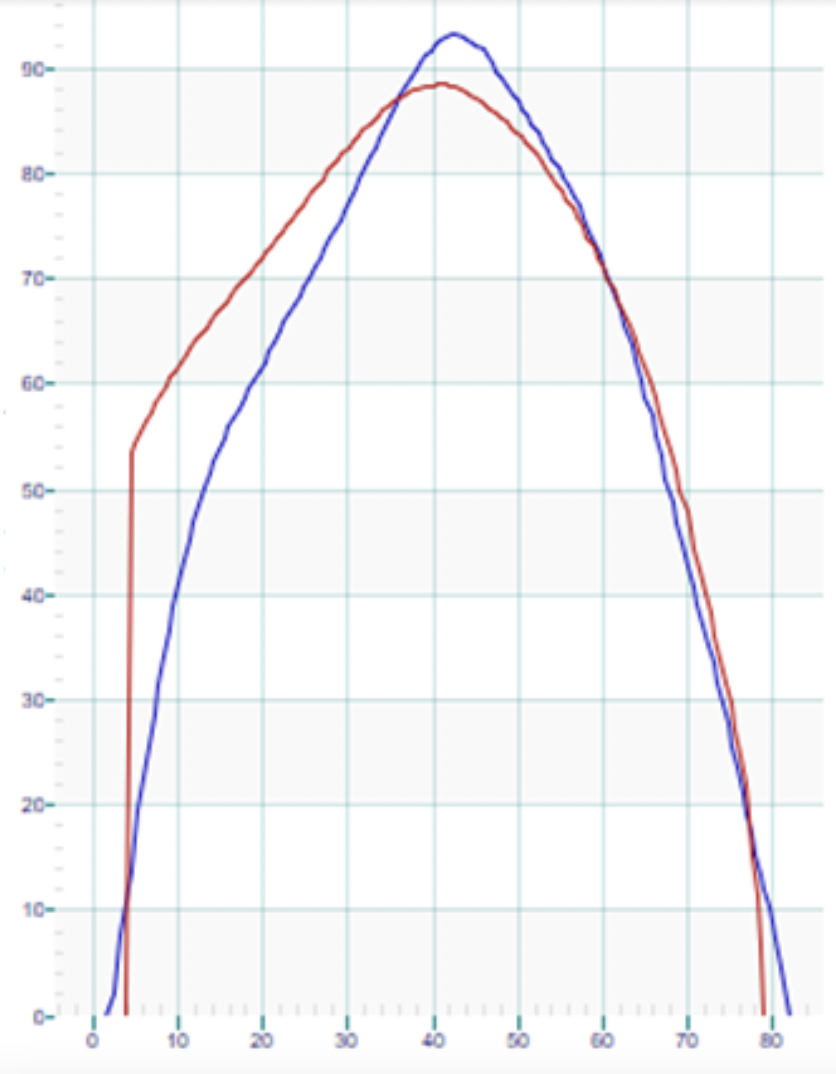
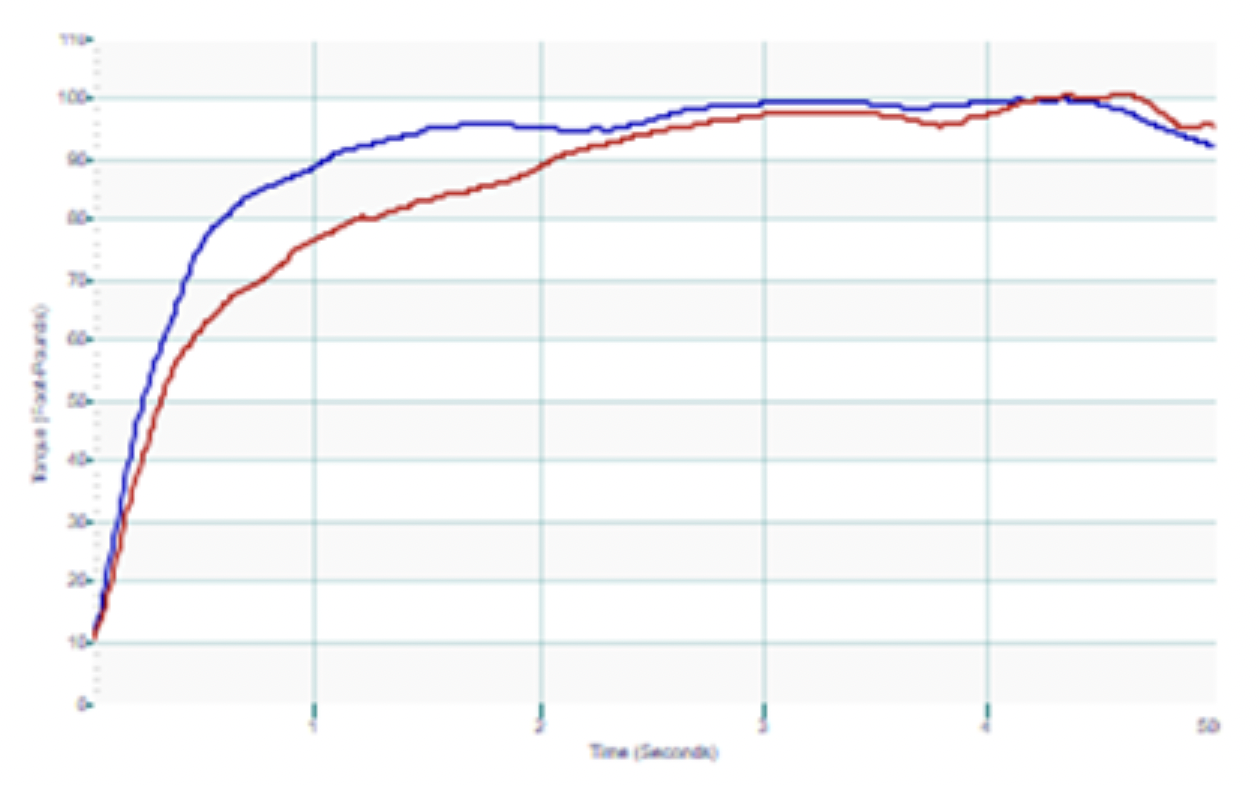
    To overcome gravity and the friction (or suction) of snow, force is required. Our velocity or speed is largely dependent on the magnitude of the force we generate. However, force is not simply an instantaneous measurement. We can talk about peak force or average force, but these miss the big picture. With skiing, whether we are talking about legs propelling skis or arms pushing on poles, force can be plotted on a graph where the Y-axis is the magnitude of force, the X-axis is the amount of time that force is applied, and the area under the resulting curve is the total quantity force applied to the ski or pole during one cycle.

    In this graph, the peak force (y-axis) is much greater for the blue line. The greater magnitude of force is also held for a longer period of time (x-axis). Thus, the area underneath the blue line is considerably greater than the area under the red line. All else being equal, the skier producing the blue line will be faster.

    Here we see similar peak forces (y-axis), but the red line doesn’t maintain its force and drops off more rapidly (x-axis). The area under the blue line is larger as a result.

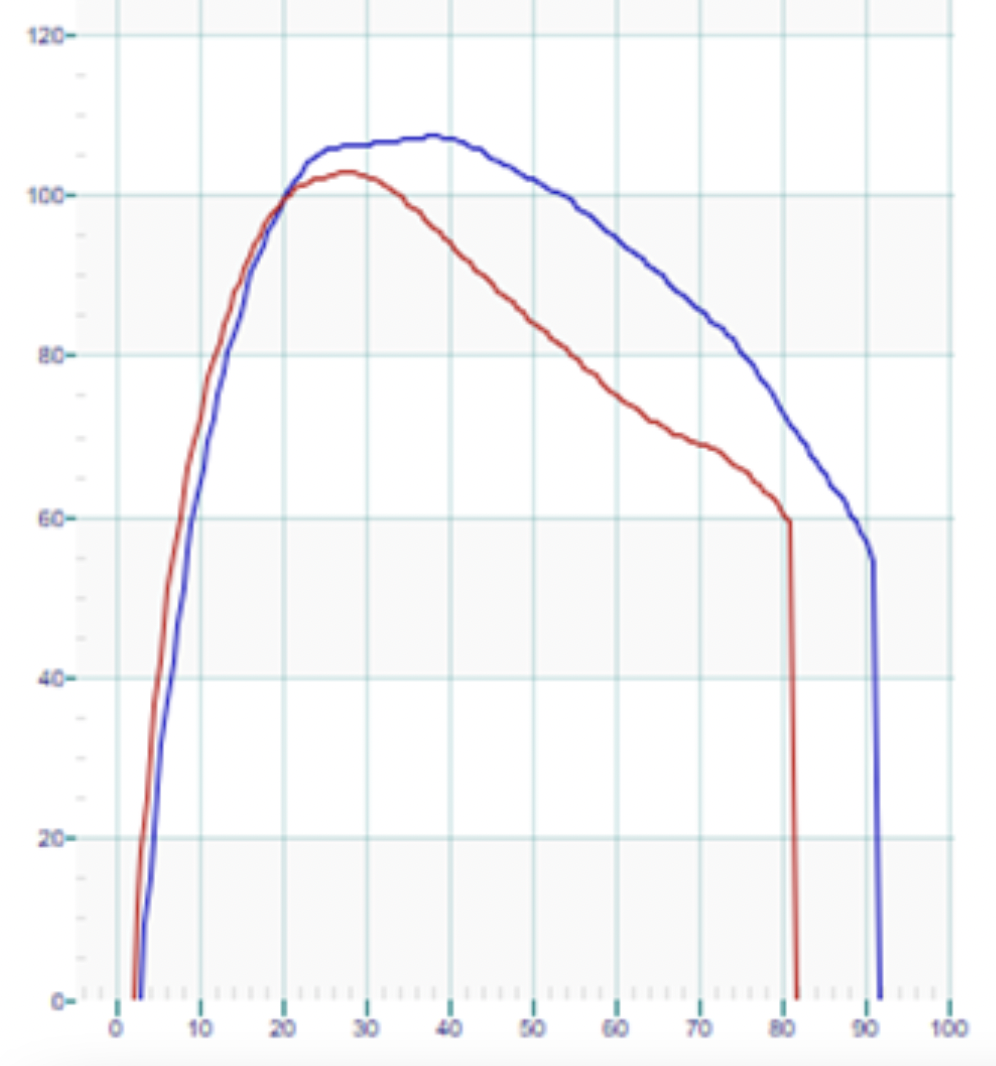
    In this graph, the red and blue lines have very similar peak forces (y-axis) and duration (x-axis). However, there is a major difference in how they get there. The red line reaches its peak force faster. As a result, the area under the red line is larger than the blue. This is because, even though peak force and duration are the same, the red athlete’s peak force happened faster.

    Here’s another example of similar peak force, but the blue line has a much steeper curve and is reaching peak force more quickly.

    The slope of the line, “rise over run” if you remember way back to middle school, represents how quickly force is generated. This is called the rate of force development (RFD), and since it is the name of the article and we’ve spent so much time just getting to this point, it must be important.  

    I already pointed out that force development in powerful skiing happens quickly. In their article, General strength and kinetics: fundamental to sprinting faster in cross country skiing (also cited above), the authors set out to draw correlations between biomechanics, kinematics, and strength in elite skiers. Among their primary findings were: 1. “Analysis of kinetics and kinematics revealed that it was not exclusively the magnitude of applied forces during skiing, but the timing and proper instant of force application were major factors discriminating between faster and slower skiers.” And 2. “General strength and power per se seem not to be major determinants of performance in elite skiers, whereas coordination of these capacities within the different and complex skiing movements seems to be the discriminating factor.” 

    A primary takeaway is that RFD is related to maximum velocity. This sounds intuitive enough: a sprinter on the track is generating more force per stride over 100 meters than a distance runner racing the 5k. But they go on to conclude that as the skiers increased their speed, they decreased their stride time/duration of force (X-axis). How can speed be increasing if the duration of force is decreasing? Won’t the area of the graph get smaller? 

    Some of the speed increase is the result of higher peak forces, but it was also attributed to increased RFD. If we manipulate the graph such that peak force is achieved more quickly — meaning a steep spike at the onset of the force — we can afford to decrease the force more rapidly while still generating a larger area under the curve. 

    With regards to physical attributes, the authors discovered that maximum strength was not correlated with maximum skiing speed; however, jump height (aka RFD) was closely correlated. In the study, maximum strength was considered isometrically, meaning that the muscles were resiting a static load (think planks) versus a push or pull against a load. 

    It also should be noted that a quicker, but shorter, stride must be accompanied by a faster stride cycle or cadence in order to be effective. This will be well understood by anyone who rides a bike with a power meter: if you are trying to maintain 300w on a climb and shift into an easier gear, your cadence has to increase or the power will drop off. The change in gearing creates less max force through the pedals but is compensated by increasing the speed at which the crank is turned.

    Simi Hamilton pushes over the roller during a 2020 skate sprint in Dresden, Germany. (Photo: Nordic Focus)

    RFD sounds awesome. How do I get some?

    Simply put, you train it. In order to increase the speed at which muscles contract and generate force, we must increase the speed of muscle contractions in training. On the low-load end of the spectrum, this can mean simply speeding up standard strength exercises like squats, leg press, and lat pulls. 

    At the higher end of the spectrum are jumping and plyometric training. Plyometric training significantly improves vertical jump height, which was already noted to be correlated with increased skiing speed. 

    Plyometric exercises incorporate a pre-load or “stretch” phase prior to a rapid contraction. For example, if we consider a vertical jump, starting the jump from a squat position is a simple contraction of the muscles responsible for hip, knee, and ankle extension. But if the jumping motion begins in standing before dropping into a squat and quickly rebounding for the vertical jump, the same muscles that generate the jumping force are lengthened before contracting. This harnesses the energy produced by the elastic recoil of muscles and tendons. 

    Think about putting a fairly tight rubber band around your wrist. The rubber band is actively contracting against your wrist and the pressure, or force, is evident. Now pull back on the rubber band and let it snap against your wrist. This amount of force is significantly and noticeably (sorry!) greater. Our muscles and tendons do not harness that much elastic energy, but you get the idea.

    A pause for words of advice/caution: If the previous paragraph made your knees tremble or your back start to tighten, keep in mind that all exercises exist on a spectrum. With any exercise program, the load or difficulty must start with what is doable. There is a fine line between doing enough to stimulate adaptations in the body and doing too much, increasing the potential for injury. If you are managing a chronic musculoskeletal issue or returning from injury, it is highly recommended that you consult with a Physical Therapist or Athletic Trainer for a more personalized RFD program. Plyometric exercises can be done in a pool with a significant decrease in resistance. The overall load in the water is decreased, but the RFD benefit is retained.

    Plyometric Exercises to Increase RFD:

    Hopping: Whether on two feet or one, hopping drills will help strengthen the feet and ankles while developing RFD in the calf muscles. These have the lowest loads and can be valuable exercises themselves or as part of your warm up. Jumping rope falls in this category and has been shown to improve running speed.

    This video demonstrates a handful of “pogo” style hopping drills. Notice how the knee and hip stay fixed with force being generated by the ankle.

    Jumping: Vertical jumps, broad jumps, box jumps, drop jumps, bilateral, unilateral, backwards, sideways–the variety is only limited by your imagination. However, to get the most out of the plyometric stretch cycle, it is arguably best to make these countermovement jumps where the body drops down before exploding upwards (or sideways, forward, etc.).

    In this video, Dave Quammen of Park City Sports Medicine demonstrates a series of two-legged jumping drills. Challenge can be increased with added repetitions or with reversing direction with the forward jumps. Try these on one leg for a significant increase in load/difficulty. 

    Bounding: With or without poles, bounding follows the basic premise of adding “pop” to a normal stride for increased RFD and exaggerated height, distance, or speed. While boulding can be done on flat ground, there are added benefits to going uphill: because height and flight time are reduced so are the impact forces when landing. It also takes more effort to go uphill, so the workout is more efficient (more bang for the buck), and it just feels more natural.

    Demonstration of more running-oriented hill bounding, from Lydiard Training.

    Ski bounding with poles is a traditional dryland exercise that not only improves RFD but works the core and arms at the same time — valuable training even if you only skate ski. It can be done on a long gradual hill for endurance work, but short, steep hills will emphasize RFD.

    The U.S. Ski Team completes a set of longer duration L4 ski bounding intervals way back in 2012. Camera quality has since improved, but the background song is still a classic. Note how the technique is very different from running even though the speed might be similar. 

    Again, with the basic concept of creating quick, explosive movements, there are far more ways to develop RFD than this summary can hope to cover. The remaining topic, then, is dosage. 

    Plyometric exercises are demanding and stressful to the musculoskeletal system. Delayed onset muscle soreness is to be expected, and at least one recovery day is mandatory. Aside from muscle soreness, any pain that is beyond mild or takes more than a couple of hours to subside should be considered a contraindication and deserving of a consultation with a sports medicine provider. 

    For most readers, doing the exercises once or twice a week is an adequate stimulus for both improvement of RFD and appropriate recovery. As for duration or repetitions: when in doubt, start small. In the jumping video above, Dave demonstrates two repetitions of each jump. If we consider the full video to be one set, then starting with 2-3 sets is likely reasonable. Then, increase repetitions to progress the program. Keep in mind that quality is key — if you feel your technique or stability start to wean, it’s best to stop there. Total exhaustion is not the goal. 

    Precede plyometrics with a light cardio warm up. If coupling plyometrics with core or strength training in the same session, it is generally recommended to do the plyos first before you are too fatigued.

    Sophie Caldwell Hamilton powers through the heats during a classic sprint in Oberstdorf, Germany in March 2021. (Photo: Nordic Focus)
  • Building a Better Skier Part 4: The Shoulder

    Building a Better Skier Part 4: The Shoulder

    Rosie Brennan powers through the final meters for a commanding second place finish in Stage 4 of the 2021 Tour de Ski. (Photo: NordicFocus)

    This is Part 4 of a series delving into how biomechanics and movement patterns affect skiing technique. If you haven’t already, start with the introduction, Part 1 which introduces the concept of a neutral spine posture, Part 2 which describes spine stability and mobility, and Part 3 on single limb stability.

    ——————————————–

    Upper body power is a major contributor and perhaps even a determinant of cross country skiing performance. Poling accounts for up to 60% of propulsion in skate and classic diagonal and, obviously, 100% with double pole. For those who train for skiing year round, upper body work is an essential part of the routine. However, for those whose summers are focused on running, cycling, or hiking, arm strength is often forgotten once the snow melts.

    Let’s take a closer look at the structures and muscles involved in the upper body during the various poling motions of skiing. 

    The muscles that comprise the shoulder girdle can be roughly divided into two groups: the stabilizers and the movers. Coordinated motion requires “dynamic stability”, i.e., for the two groups to together such that the stabilizer muscles control extraneous joint motion while the movers perform the primary action. 

    The shoulder has a tremendous amount of motion available and relies heavily on the coordinated effort of multiple muscles to maintain proper alignment and movement of the joint. At the same time, it is capable of generating large amounts of power, whether that’s throwing a 90mph fastball, hammering a nail, or repeatedly pushing on a ski pole.

    The shoulder stabilizers can be further divided into those acting on the glenohumeral joint (the primary ball-and-socket shoulder joint) and those supporting the scapulothoracic joint (shoulder blade on the ribcage). 

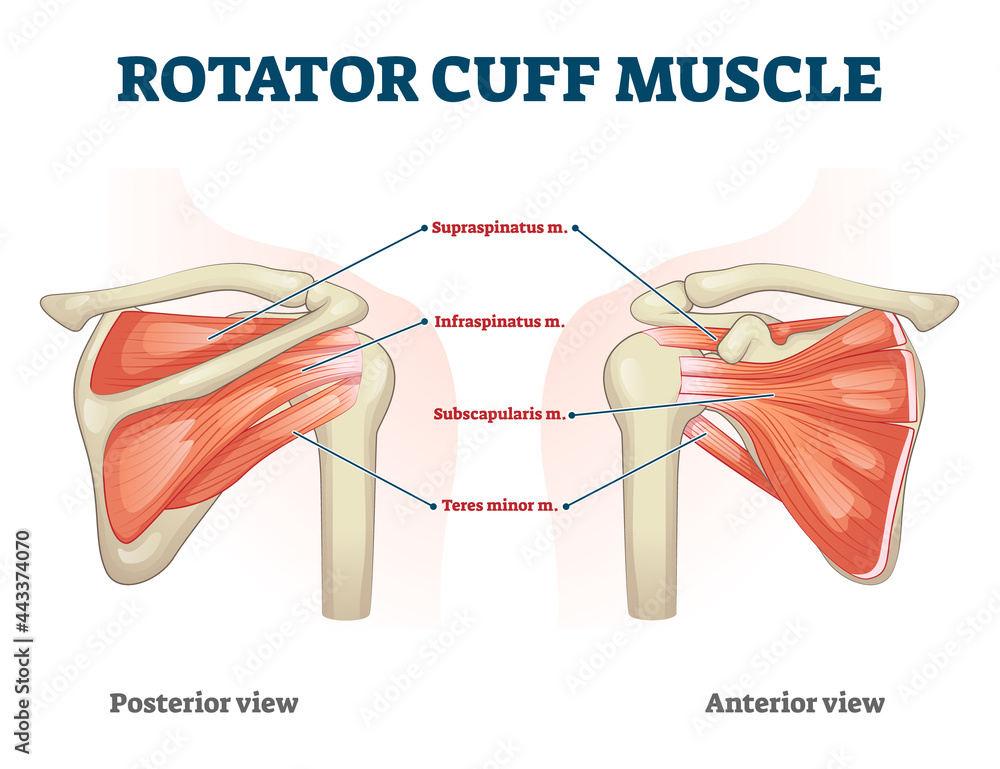
    The rotator cuff is a group of four muscles — supraspinatus, infraspinatus, teres minor, and subscapularis — that attach to both the scapula and humerus in close proximity to the joint. They are not particularly strong muscles, but they play a vital role in coordinating the movement of the glenohumeral joint. 

    A diagram of the muscle group involved in the shoulder’s rotator cuff. (Photo: www.freepik.com)

    The only rigid or bony attachment of the arm to the body is via the collarbone. This small bone is not enough to support the load of push ups, pull ups, or double poling. The base of support truly lies in the muscular attachment of the shoulder blade to the ribcage. For the sake of the simplicity of this article, we’ll limit the discussion to four muscles, one of which doesn’t count. (Side note: a classic physical therapy trivia question is to name all 17 muscles that attach to the scapula–clearly I’m skipping a few here.) 

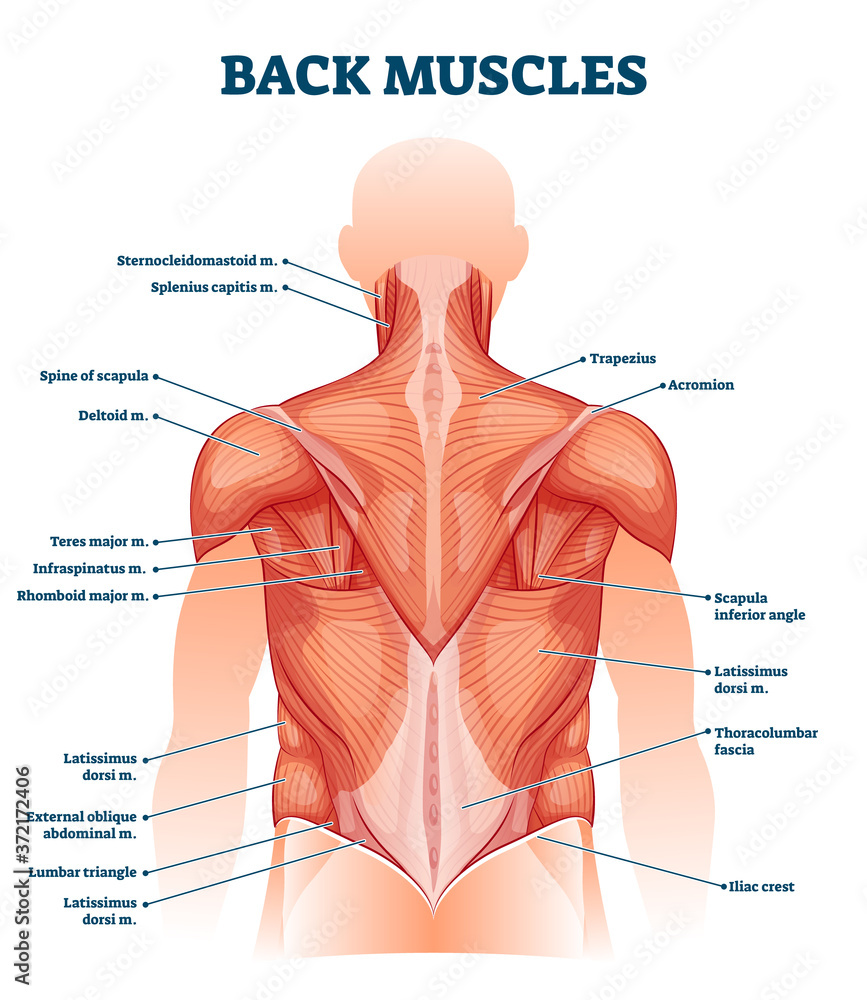
    The primary stabilizers of the scapular are lower trapezius, middle trapezius, and serratus anterior. I’ll contend that the upper trapezius is a stabilizer but doesn’t count because it tends to exert force in the wrong direction (and is frequently overactive so needs little in the way of direct strengthening).

    The trapezius muscles stabilize and move the scapula along the ribcage. (Photo: www.freepik.com)

    As with any dynamic stability in the body — abdominal muscles for the lumbar spine, glutes for the hip, or the aforementioned muscles in the shoulder girdle — strength is important but intermuscular coordination is key. This is especially true at the shoulder due to its wide range of available motion and corresponding muscular complexity. 

    The following are exercises targeting the stabilizers, both at the shoulder joint and scapula.

    Exercises for the Stabilizers:

    (The intent of these exercises should be thought of more as activation drills and less about the heaviest weight you can find. Yes, we are looking to induce some fatigue but the emphasis is not on power.)

    Side Lying External Rotation: Lie on your side. Keep the top elbow bent at 90° and against your side. Rotate about the shoulder until your forearm is at about 45° to the horizontal. Try not to pull with your shoulder blade. A little bit of weight goes a long way.

    External Rotation + Uppercut: With a resistance band anchored on the opposite side, elbow fixed at 90°, and forearm against your belly. Rotate the forearm away from the belly to a neutral position (knuckles pointed forward). Then raise the arm by spinning through the shoulder. Again, the elbow should stay at 90° throughout. Only raise the arm to shoulder height. Motion should be isolated at the shoulder joint — don’t let the shoulder blade move. Finish by lowering the arm down and rotating the forearm back to the belly.

    Scaption: Raise both arms up your sides at 45° (not in front, not to the side, but halfway in between). Stop at shoulder height. Keep the shoulder blades fixed down and back. Start with light weights.

    Wall Slides: Loop a very light resistance band around both hands and stand facing a wall. Place both hands on the wall at about shoulder heights with elbows bent and palms facing inward. Stretch the band by squeezing your shoulder blades down and back, not just pulling from the arms. Keep the shoulder blades pinned down and back, band tensioned, and slide your hands up the wall until your elbows are at about shoulder height. Slide back down to the starting position. Ideally, the shoulder blades stay retracted throughout the set of repetitions, but you can stop and reset them between reps or as needed.

    Serratus Punch: The serratus anterior muscle attaches to the ribcage, inserts on the scapula, and, acting alone, protracts the scapula, or pulls it forward. As a stand alone movement, this scapular protraction is not especially functional unless you are a boxer hitting with a jab. However, the serratus anterior is a team player and becomes very functional when co-contracting with the posterior scapular muscles (especially middle and lower trapezius) to stabilize and coordinate movement of the scapula. The exercise will work the serratus anterior independently. 

    Lie on your back holding a dumbbell in each hand. Knees are bent and elbows are straight. Push the dumbbells towards the ceiling by moving the shoulder blades forward on the ribcage. This is the opposite of the motion described in Wall Slides. The neck and thoracic spine stay relaxed. This can also be done with a resistance band.

    Rows: The emphasis of the rowing motion is on squeezing the shoulder blades down and back as you pull the resistance towards you. This is the same motion described in Wall Slides and the opposite of the Serratus Punch. There are multiple means of adding resistance to the movement: resistance band, cable machine, single dumbbell/kettlebell, TRX, etc. 


    In the propulsive phase of poling, the prime mover at the shoulder joint is the latissimus dorsi — often referred to as the “lats”. This big, broad muscle extends the shoulder, pulling an outwardly extended arm to the side as in freestyle swim strokes and pull ups. The lats are aided by the posterior portion of the deltoid muscle and teres major. 

    A diagram of the back muscles, including the latissimus dorsi. (Photo: www.freepik.com)

    The elbow joint is also involved with the triceps playing a rather complex role. This muscle, or more technically speaking, this group of muscles has a common insertion on the ulna and acts to straighten the elbow. However, the long head of the triceps, attaching to the scapular vs the humerus, is also able to play a role in shoulder extension. I say the triceps play a complex role because motion about the elbow varies with technique and terrain. In Skate V1 and V2 alternate and in Classic striding, there is a fair amount of elbow extension. However, in V2 and uphill double poling, there is very little motion at the elbow. 

    Notice how little motion takes place at the elbow during V2.


    A clinical case study: (Disclaimer: the subject of this case is the author, a potential duplicity that is frowned upon in academia.) In the lead up to ski season, I began doing “budget SkiErg” workouts double poling with resistance bands. After several weeks of twice a week workouts, I began to develop left posterior elbow pain. It didn’t take much to figure out I had irritated the insertional tendon of the triceps. So I stopped the workouts and focused on eccentric strengthening of the triceps, which has become the standard of care in the treatment of tendinopathies. 

    Come ski season, I could skate without any problems, but I continued to have elbow pain with more than about 45 minutes of classic. One night at dinner I was venting to my wife about my now chronic elbow pain. Ever the voice of reason, she asked what I would do if I was seeing myself in the clinic. What would I, the PT, do differently for a patient who is not responding? I replied that I would examine, biomechanically, how the patient is poling. So I started to think about how I was doing what I was doing. 

    My hypothesis was that I was using my triceps too much to generate shoulder extension. I started doing shoulder extension exercises with my elbow fixed at 90°. I focused on leading the motion with the back of my elbow, not my hand. Within a couple of weeks, the elbow pain was gone. The lesson from my mistake is that functional movement patterns often require a high degree of coordination. Because of our bodies’ anatomical redundancy, it is easy to fall into a suboptimal pattern that is inefficient in the best case and in the worst has potential for injury.

    Interestingly, the biceps appear to be very active during double poling, which seems counterintuitive since the action of the biceps is in the opposite direction of the propulsive phase of poling. The biceps do contribute to shoulder flexion so they are likely involved during the return phase. But, more likely, the majority of their action is co-contraction with the triceps to stabilize the elbow and hold it in the desired position. Perhaps this is rationale to include some biceps strengthening for more than just filling out the sleeves of your cycling jersey.

    David Norris models single-stick poling technique during a skiathlon in Lillehammer, Norway in December, 2019. (Photo: NordicFocu)
    Exercises for the Movers:

    Shoulder Extension: This is most easily done with a dumbbell, but a resistance band will work as well. As described in the case study, keep the elbow locked at 90° and focus on spinning at the shoulder joint by leading with the back of the elbow.

    Strengthening the Triceps: Like with Rows, there are numerous ways to work the triceps with no single exercise being the best. Resistance band, cable machine, dumbbell, push ups, and dips are all appropriate.


    Strengthening the Lats: The basic lat workout is pull ups. If these are too difficult to do at least 3 reps, then put your feet on a chair or on a long resistance band loop attached to the pull up bar (just make sure the band stays on your feet and not in between them!). Lat machines in the gym are a great alternative as you can select resistance that is lighter than body weight (or more than body weight if you can whip out 10+ regular pull ups)


    Epilogue: The goal of the Building a Better Skier series has been to identify some key biomechanical and kinematic components of cross country skiing and to provide exercises with the specific intent of facilitating these movement patterns and strength requirements. By no means has the depth of these articles been exhaustive. Nor have the lists of exercises covered all possibilities. Hopefully, these articles have been easy to follow and the exercises have been included in your twice weekly strength/dryland/pay-to-play routine. Even better, I hope the work done now will pay dividends when the snow falls this winter. Best of luck with the remainder of summer (the heat, the smoke, the pandemic), the glorious autumn, the struggles of shoulder season, and the winter we’ve all been waiting for.


  • Building a Better Skier Part 3: Single Limb Stability

    Building a Better Skier Part 3: Single Limb Stability

    This is Part 3 of a series delving into how biomechanics and movement patterns affect skiing technique. If you haven’t already, start with the introduction, Part 1 which introduces the concept of a neutral spine posture, and Part 2 which describes spine stability and mobility.

    The ability to balance and be stable on one leg is where the rubber meets the road (or ski hits the snow). True, we generate propulsion with strength and endurance, but if that power is not transferred into glide, it becomes wasted effort. This is quite literally what separates the efficient from the inefficient. Or, the fast from the not so fast.

    This study set out to quantify the difference in glide between elite and sub-elite skiers (national vs regional skiers). As expected, they found that the higher caliber skiers did, in fact, glide better. In trying to quantify the why, fitness aside, they found that the national level skiers had a different pattern of foot pressure in the boot. Where the regional skiers only pressured the medial side (big toe side), the national skiers loaded their feet across the whole foot. 

    What’s really happening here is that the national level skiers were better at shifting their weight over the glide foot/ski. This “commitment” to the glide ski is one of the hardest things to master, especially for adults learning to Nordic skiing later in life. 

    When standing on two feet, your center of gravity falls in the middle between your feet. If you want to balance on one foot, your weight has to shift. You can’t just pick up one foot. To achieve this weight shift, you can lean your trunk, which will allow you to balance, but it is not a stable or powerful position. If you shift your pelvis to the side of the stance leg, you can accomplish the requisite weight shift AND place your body in a position where muscles are engaged and ready to roll .

    The skiers in this video are fine examples of appropriate, hip-centric weight shifts. Notice how the upper body stays very quiet and still. There is no side to side movement. The pelvis, however, can clearly be seen moving side to side to move the skier’s center of gravity fully over top of the glide ski.

    This is all easier said than done. Go stand in front of a mirror — a bathroom vanity mirror is fine because you only need to see your shoulders. Balance on one foot. Do your shoulders stay level? Now move the opposite leg to the side and back a few times. Are your shoulders still level? If they are not, then it’s unlikely that you are shifting your weight appropriately. If you are struggling with balance on a smooth, flat floor, you can appreciate the challenge of finding stability while gliding down an undulating track on a toothpick of a ski.

    Another major component of single limb stability is the coordination of joint flexion at the hip, knee, and ankle. Anyone who’s had a ski lesson has heard the phrase nose, knees, and toes —  or that the shin and trunk should be parallel. These cues are all about getting the ankle, knee, and hip to flex together. The goal is to put the body in a position that is both inherently stable due to muscle activation and preloaded for propulsion. This is what I’ll be referring to as the basic shape.

    Norwegian biathlon star Johannes Thingnes Bø models “nose, knees, toes.” Notice that the shin and trunk (green lines) are parallel. (Photo: Ned Dowling)

    The next experiment requires a partner. Balance on one leg staying very upright with your knee and hip straight. Have your partner push you (gently!) from each side. Did you maintain your balance? Now aim for the nose, knees, toes position and have your partner push on you again. Which position was more stable? (If you had difficulty finding this position, there will be more cues with the exercises below.)

    If the distribution of foot pressure and coordinated joint flexion are two major components of single leg stability — which has been shown to be a major component of skiing efficiency — then it seems highly rational that we should strive to perfect these traits on dry land before we expect ourselves to do it on skis (including and arguably even more so on rollerskis). We must be able to form the basic shape.

    Adequate strength of the gluteal muscles is a prerequisite. If you don’t already incorporate glute exercises in your strength program, you can get some great ideas from previous FasterSkier articles here and here.

    Foot and ankle mechanics are also a primary contributor. In the basic shape, we are asking the ankle to flex forward at the same time that the foot has to accept our full weight. Insufficient or excessive flexion, or poorly controlled mobility through the foot and/or ankle can force the tibia (shin bone) to rotate inward, taking the knee with it. Lack of glute strength and control can have the same effect from the top down. With this extraneous  motion coming from either direction, the result is an increased valgus (medially-directed) force on the knee, which equates to increased loads in both the tibiofemoral and patellofemoral joints. Clinically, this is the most common cause of knee pain with Nordic skiing.

    If the prescription for controlling top-down motion is glute strength and coordination, the bottom-up is addressed through strength of the muscles in the foot and ankle. Conveniently, these can often be addressed by simply working on single limb stability — as long as you pay attention. Quality control is mandatory!

    A note on orthotics: In many circles, custom orthotics have fallen out of vogue especially since studies like this one have found them to be no better than exercise at helping knee pain. But the demands on the ankle joint are quite different in Nordic skiing than with walking or running, which are more commonly studied. Skiing generally requires a much greater amount of dorsiflexion. As mentioned above, we want this dorsiflexion to happen without internally rotating the tibia. The addition of external support to the foot has the potential to control this aberrant motion. I am a strong proponent of at least some upgrade of insoles in ski boots (and cycling shoes for the same reason). Most stock insoles are terrible, even the ones that came in my very expensive carbon boots. Out-of-the-box options from Superfeet, Sole, Powerstep, and Curex are all quite good and far less expensive than custom. For some, these might not provide enough support and custom orthotics with a strategic build up of additional material would be better. 

    How do you know? A quick test I do in the clinic is to have my patient balance and do a couple of single leg squats while barefoot. Then I have them do the same thing with a more supportive insole. Then I place a piece of ¼” (4mm) thick folded cardboard under the insole at the ball of the foot and have them repeat the balance and squats. I’m looking for whether they become “easier,” “less painful,” or appear better controlled to my eye. If the extra material under the insole made for improvements, then we talk about custom orthotics. If it made no difference, then I just advise an upgraded insole. Ultimately, we are looking to improve both the alignment of the knee as the ankle dorsiflexes AND improve balance.

    All of that said, here are my top three exercises/drills for ski-specific balance–the basic shape. Ideally, these are done barefoot, without the additional support of an insole and shoe (opposite of the previous conversion), so the muscles have to work harder and get stronger. The basic cues are the same for all three:

    • Tripod Foot: A tripod gets its stability from three legs and we want three primary pressure points on the foot–the ball of the foot, the pinky side ball of the foot, and the heel. Weight should be slightly biased forward off of the heel. The toes should be on the floor but relaxed and not gripping for dear life.
    • Nose, Knees, Toes: My preferred way of thinking about this is if snot is dripping from your nose, you want it to land on your shoe not down the front of your shirt. Bend at the ankle, knee, and hip to accomplish this. 
    • Weight Shift: comes from the pelvis/hip not leaning the trunk. Park yourself into the hip. If your glutes aren’t burning, you’re doing it wrong (or the exercise is too easy).
    • Posture: neutral spine is the goal. Forward trunk lean occurs through the hips, not the spine.
    • Forward Gaze: Avoid staring at your feet. You’ll need to keep your head up to look down the track while skiing, so best to get used to it in training. It will also remove some visual dependency and help with maintaining a neutral spine.
    • Quality vs Quantity: the emphasis is on how you do the exercise, not just going through the motions. 
    The author models “the basic shape”.

    Start by forming the basic shape. If this is challenging to maintain, then do not progress until it becomes natural and thoughtless.

    Exercise #1: Step Ups

    Stand sideways on a step (preferably the bottom, not top, step). Lower your outside foot towards the floor. As you lower, you should be going into the basic shape. Return to the tall starting position. Don’t worry about trying to fully touch the floor–that’s not the goal. The goal is to move up and down, in and out of the basic shape. For added challenge, hold a dumbbell in the outside hand. 2-3 sets of 10-15 reps should be adequate to bring on some fatigue and challenge your balance.

    Exercise #2: Single Leg Series with Band

    Loop a long exercise band around one ankle and face the anchor point of the band. Than, assume the basic shape standing on the unbanded leg. While maintaining the basic shape, pull straight back against the band to bring the foot in line with the standing leg, then follow through to kick the foot a few inches behind. Turn your body 90 degrees in either direction and repeat the process; extending the banded leg outward to work the gluteus medius muscles of the outer hip, or pulling the banded leg toward the standing leg to stimulate the inner adductor muscles. Ultimately, you will face four different directions but the force against the band is always in direct opposition to the anchor point of the band.

    If you can only source a “mini-band” loop, put it around both ankles and skip the pulling-in motion. A little resistance goes a long way with this exercise. Aim to perform 10-15 repetitions in each direction and do two laps on each leg.

    Exercise #3: Lateral Hops

    Form the basic shape on your right leg. Step onto the left leg, shifting your weight from the pelvis, and again form the basic shape. Progressively increase the distance between steps, turning it into more of a sideways hop than step. Keep the unloaded leg extended to the side as if skiing — do not let it flag behind the stance leg unless you are a speedskater.

    Keep it honest: make sure you are sticking the landing and holding your balance for a second or two on each leg before pushing off to the next side. This is meant to be a balance exercise, not plyometric strength work. The next progression is to hold a resistance band anchored from the side. I prefer to base this exercise on time (1-2 minutes) vs repetitions so there’s no question of whether that botched one was good enough to count.

    Notably absent from this article is the neurological component of balance. Many of my PT colleagues would absolutely berate me over this; however, I wanted to stick to the basic kinesiology and this article is long enough already. The brain receives massive amounts of information from vestibular, neural receptors in joints and soft tissue, and vision. In fractions of a second, it processes this information and directs muscles to act. If any link in that system is compromised, so too is your balance. If you think about the difference between skiing on a sunny, bluebird versus flat light or a storm, you can quickly appreciate how vision affects balance. There are certainly ways to challenge and train these systems, but that is beyond the scope of this article. However, an excellent way to progress any balance exercise is to do it with your eyes closed. 

  • Building a Better Skier Part 2: The Spine, When to Move it, and When to Keep it Still

    Building a Better Skier Part 2: The Spine, When to Move it, and When to Keep it Still

    Finland’s Krista Pärmäkoski racing during the 2021 Tour de Ski. (Photo: NordicFocus)

    This is Part 2 of a series delving into how biomechanics and movement patterns affect skiing technique. If you haven’t already, start with the introduction and Part 1, which introduces the concept of a neutral spine posture.

    There are many ways to conceptualize biomechanics, but they all need a starting place. If we think about ski technique, where do we want to start? On the glide leg? With the poles? At the hips? For this series, I have opted to start with the core and work outward. I could have started with the foot and moved upward; however, I see posture as an integral part of any movement. If the posture is compromised to begin with, then that deficit permeates the activity. 

    As was emphasized in Part 1, posture exists on a bandwidth of acceptability–everyone is a little different. But postures that fall outside of the bandwidth, especially when occurring within a dynamic activity like cross-country skiing, compounds load on the body. In the best case scenario, this increased load is inefficient and bleeds power. Worst case scenario, the additional load can exceed the body’s tolerance and lead to musculoskeletal injury.

    And yet the spine does move. Perhaps one of the best examples is the thoracic rotation that occurs with running. The shoulders do not stay pointed straight ahead. As the right leg and left arm swing forward (with the left foot on the ground) the shoulders are going to rotate to the right. This should be a product of rotation in the thoracic spine. If the thoracic spine has limited mobility, the motion will occur elsewhere, most often in the lumbar spine which has less motion available and will likely be less tolerant of this load. A case in point may be this recent study which found that the addition of thoracic mobility exercises decreased the incidence of low back pain in cross country skiers. 

    If you’re not already, sit with a neutral spine posture. Cross your arms with hands-on opposite shoulders. Rotate your body to the left and to the right. Make a mental note of how these movements felt. Now let your back flex forward in a slumping position. Try the same rotation to the left and right. I suspect they felt different. When the thoracic spine is flexed, its ability to rotate is decreased.

    Use it or lose it. Our bodies are use it or lose it machines. If we do not stretch a muscle to its full length, it will tend to shorten. If we do not move a joint to its end range of motion, it will tend to stiffen. As we get older, this becomes even more pronounced. If you are of Masters age, you should probably think of stretching and mobility exercises as more about maintaining what you have versus expecting to gain flexibility. The older we get, the less pliable our bodies become. But there’s a lot to be said for maintenance.

    Here are my three favorite thoracic mobility exercises – (aim to do these daily–1 or 2 minutes on the foam roll, 10x to each side with the rotation).


    Foam roll thoracic extension: lie on your back with a foam roll perpendicular to your spine. Support your head with your hands. Drop your shoulders towards the floor. Pause here for a few seconds then return to your starting/neutral position. Scoot on the floor so the foam roll moves up your spine. Repeat the extension motion dropping the shoulders towards the floor. Continue this process until you have worked the length of your thoracic spine. Avoid going into the lumbar spine as the fulcrum of the foam roll tends to be too sharp. On the upper end, once the foam roll is under the shoulder blades, it’ll be tough to get much motion. This exercise can also be done with an exercise ball.


    Book openings: Begin lying on your side with your knees bent and hands behind your head. Rotate your trunk like you are trying to get the top shoulder down to the floor. Pause here for a second or two and return to the starting position. This should be done on both sides.


    Lower Trunk Rotation: Lie on your back with both knees bent. Cross one leg over the other. Let the legs drop towards the floor to the side of the top leg. Pause here for a few seconds and return to the starting position. Do this on both sides.


    Stability could be defined as the opposite of mobility. If we are striving to maintain available mobility of the thoracic spine, perhaps it makes sense that we are striving to maintain stability at the lumbar spine. Anatomically, the body is well equipped to stabilize the lumbar spine. We have multiple layers of abdominal and back muscles that create a stable platform for the arms and legs. While the lumbar spine is lacking in rotary motion, it has quite a large range of available motion for bending forward, backward, and to the sides. Depending on the activity, this available motion needs to be either locked out like keeping a rigid trunk with skating V1 or well-controlled while bending over to put on your socks.

    If we are working under the assumption that neutral spine is the ideal, then it makes sense that our core strengthening or stability work should be done in neutral spine. Traditional sit-ups that involve considerable lumbar flexion are great for building those six-pack abs that look good on Instagram, but the exercise itself only contributes to a greater tendency to over-flex the spine during activity. “Flatten your back into the floor” is a frequent cue with core exercises. While this cue, and the associated posterior pelvic tilt, is effective at recruiting abdominal muscles, it also has the effect of training the body to rely on a flexed position for muscle activation. 

    Lie down on the floor with your knees bent and feet on the floor. Your lumbar spine will now be in its neutral position. If you slide a hand under your low back, your hand will likely have a bit of wiggle room between the floor and your back. This is the natural lordotic curve, and we want to maintain this during exercise (and activity). It’s easy to feel the increase in pressure on your hand when you tighten your abs and flatten your back. Conversely, if you tilt your pelvis in the other direction, arching your low back, you will have much more wiggle room. This excessive lordosis tends to be less stable since the abdominal muscles are in a lengthened, disadvantaged position for dynamic stability with much of the burden placed on the static stability of the joints.

    If you had a hard time controlling movement or differentiating between the flat, neutral, and arched positions, the following exercises can be helpful to train your awareness and coordination.


    ***

    Lumbar spine proprioception


    Pelvic tilts: Lie on your back with both knees bent. Start by trying to tilt your pelvis towards you. Think of trying to flatten your low back into the floor or of shortening the distance between your ribcage and pelvis. Now tilt the pelvis in the other direction like arching your back away from the floor. These motions should be isolated at the pelvis and lumbar spine–your legs shouldn’t feel like they are doing any work.


    Cat/Cow: This involves the same pelvic tilt motions but without the feedback of the floor. Again, the idea is to isolate the motion at the lumbar spine not by arching the upper back.


    A quick Google search for “core exercise videos” brings up over 66 million results. Clearly, we are not lacking in the number of possible exercises. But what about quality? In the treatment of chronic low back pain, there is no best exercise. From the perspectives of performance enhancement and injury prevention, while there is an argument for simply being strong, there is perhaps a better argument for incorporating exercises that help the body meet the specific demands of the activity or sport. If good ski technique demands maintenance of a relatively neutral spine, then exercises should be performed in a neutral spine. If the sport includes load through the upper extremities, like poling with skiing or weighting the handlebars with cycling, then core exercises that include weight-bearing through the arms should be included. Skate skiing places a large rotational force through the core; thus we ought to have exercises that train the body to counter-rotation. Conversely, running and classic diagonal stride involves thoracic rotation so it makes sense to train the body to perform lumbar stability and thoracic rotation simultaneously. 

    Here are my Top 3, best-bang-for-the-buck-exercises in each category. Remember, the goal is to maintain neutral spine. If you are unable to control the motion, then the exercise represents too much resistance/load and needs to be regressed. These are quality-intensive exercises. A reasonable program would include 2 or 3 sets of 5 to 10 repetitions (depending on fatigue) of each exercise. Doing the routine twice a week should be adequate.


    ***

    Stability exercises: these will challenge your ability to maintain a neutral lumbar spine


    Femur arc progression: Begin by lying on your back with knees and hips bent at 90°. Your back will be in its neutral position, which you are striving to maintain (there will be a little wiggle room between your low back and the floor–the amount will vary by the individual but the goal is the same). The basic femur arc is performed by lowering one foot to the floor while keeping the knee bent at 90°. The motion is isolated at the hip. There should be no motion in the low back–it will have a tendency to want to arch away from the floor as the leg goes down. Return to the starting position and repeat on the other side. Continue alternating legs. Progressions include straightening the knee as the leg lowers, lowering both legs together with bent knees, lowering both legs together with straight knees. 


    Mountain Climbers: These can be done with frisbees on carpet, socks on hardwood or tile, or with a TRX. The goal is to move alternating legs back and forth with no motion in the low back. There will be a tendency to flex as you pull a leg underneath you. This should be controlled by the core but also recognize that if you are trying to pull the leg through too far, you will run out of hip range of motion and be forced to flex the spine.


    Roll Out: Start on hands and knees with your hands on frisbees or a laminated placemat on the carpet, a towel on hardwood, TRX, or an old-school ab roller. The roll/slide-out motion will be a combination of shoulders and hips, but the spine stays in its neutral position.


    ***

    Anti-rotation exercises — as the title would imply, the resistance will try to twist your spine and your goal is to fight it


    Plank with Shoulder Tap: From a straight arm plank with shoulders, hips, and knees in line, tap a hand to the opposite shoulder. There will be a bit of a weight shift that needs to happen to maintain stability, but this should be in the form of a side-to-side movement of the pelvis, not a rotation. This can be made easier by doing from your knees. Make it harder by substituting the shoulder tap with a dumbbell row. 


    Paloff Press: The Paloff Press is a great lesson in the physics of levers. Stand using both hands to hold a resistance band or handle from the cable column weight machine. Push your hands straight out in front of you. As your arms straighten, the length of the lever increases and the resistance will exert more rotational force. Fight the twist. For more of a challenge, other than just increasing the resistance, stand with your feet together or in a lunge (with the band coming from the opposite side of the front leg).


    Lunge with unilateral shoulder extension: Go into a static lunge with a resistance band in the opposite hand of the lead leg. Keeping the elbow straight, pull on the band until your hand is just past your hip. This can also be done with a cable column weight machine.


    ***

    Combination lumbar stability with thoracic rotation: simply put, the lumbar spine stays still while the thoracic spine rotates 


    Seated Unilateral Row: This is a twist (sorry, bad pun) on a standard one-arm row. Sit on an exercise ball or chair facing the resistance band’s anchor. As you pull on the band, bend your elbow so your hand aims for the side of your ribcage, and rotate your chest and shoulders towards the band. Your butt should stay firmly planted and not rotate.


    Lunge Rotation with Band: Stand with the resistance band coming from one side. Go into a lunge with the opposite foot forward (band from the right = left foot forward). Keep your hips pointed forward while your upper body rotates against the resistance. 


    Seated Rotation (aka Russian Twist): This exercise gets a bad reputation because it’s very easy to do incorrectly, potentially placing a lot of load on the lumbar spine. It is often done in a V-sit position (like the photo but with the feet off of the floor), which is very difficult to maintain without collapsing into lumbar flexion. Add the potential to rotate through the lumbar spine and the combined motions create high loads. But we’re going to keep the lumbar spine neutral and isolate the rotation to the thoracic spine. The key points are attaining and maintaining a neutral spine while sitting with your knees bent and feet on the floor. Think about the rotation coming from the shoulders. Your belly button should stay pointed straight ahead. You can start without weight and progress to a medicine ball, dumbbell, or resistance band coming from the side. 

    Notably absent in this list are exercises that target the glutes. As the primary stabilizers of the hip joint, the gluteal muscles should not be ignored in any “core” routine. However, for the sake of organizing this series, the glutes will be addressed in Part 3 on single-limb stability. If you want a head start, this Faster Skier article includes some excellent exercises. 


  • Building a Better Skier Part 1: Posture

    Building a Better Skier Part 1: Posture

    Posture matters. Norway’s Therese Johaug racing last season in Lahti, Finland. (Photo: NordicFocus)

    Building a Better Skier is a multi-part series born from the inquisitive mind of a physical therapist and late-blooming Nordic skier. (You can find the intro to the series here.) The objective is to explore how biomechanics and movement patterns affect skiing technique, and more importantly how you can apply these concepts to improve your skiing. To cover this topic thoroughly would likely require a hefty book, so apologies in advance if these articles lack depth or specificity. Please feel free to email the author with any questions: ned.dowling@hsc.utah.edu.


    Posture is loosely defined as our body’s position or the way we hold ourselves. We tend to think of posture only in a static form like sitting or standing. But posture can be observed with dynamic activities like running, cycling, or skiing. Truly, we can talk about posture with anything the human body encounters. 

    The primary influencers of posture are mobility and awareness. (It could be argued that strength plays a role in posture, and that is true for many sedentary people, but the readers of FasterSkier are far from sedentary.) 

    The mobility or range of motion that is readily available through joints and soft tissue (muscle, tendon, ligament, and fascia) will affect our posture simply because we will always default to moving through the path of least resistance. If a joint is stiff, we will find a way to move around it. If a muscle is tight, it changes the position and efficiency of its associated joint. But also, if the ligaments around a joint have become loose like with recurrent ankle sprains, the muscles and associated tendons will have to work harder to maintain stability. Like with skiing technique, and posture in general, mobility occurs along a bandwidth. There is no single optimal measure, but there is a range that if exceeded on either end will lead to inefficiency. The old saying that everything in the body is connected is not an understatement, but it is a bit of an oversimplification. That everything in the body has the potential to affect everything else in the body might be more appropriate. 

    The awareness of our body’s position in space is called proprioception. This is a broad concept that simply relates to the incoming signals the brain receives from the body so it knows how to move the body—how far, how fast, how powerfully—across multiple joints, muscles, and tendons. The brain receives this information via nerve receptors in our muscles, tendons, joints, and arguably even skin and fascia. It is what allows you to close your eyes and touch your nose without poking out your eye. Also without looking, you know that as you read this your left elbow is not fully straight and could tell us the angle of the joint with pretty good accuracy. 

    So if we put the two concepts of mobility and awareness together, the former will dictate what shapes the body is capable of making and the latter will determine how accurately those shapes are made. If you are trying to make a hypothetical circle but a joint is restricted, you’ve only made an oval. If your mobility is good, but you are lacking in awareness, then you’ll be making squares or pentagons because you can’t smooth out the motion required for a circle.

    While I’ve just made the case that posture is a product of the whole body, it is commonly thought of as related to the spine. As the foundation of our movements and literally the center of the body, the spine is an ideal place to start. 

    The human spine itself consists of 24 vertebrae with a skull on top and ending with the sacrum and coccyx. That stack of bones is held together by countless ligaments. Between each vertebra is a disc that acts as a spacer, a shock absorber, and as a pivot point for motion. The vertebrae articulate with each other through small sliding joints located bilaterally. The orientation of these joints, which changes with the region of the spine, will determine the available motion and optimal movement pattern. Running through the center of the spine is the very precious spinal cord. Simplistically, the spinal cord is a superhighway with on and off-ramps between every vertebra. It carries information both to and from the brain. Movement and dynamic stability are provided by numerous muscles, which we will get to in more detail shortly. 

    Anatomy of the spine or spinal curves infographic illustration. (Photo: www.freepik.com)

    Basic anatomy having been covered, perhaps the more important implication for posture is the architecture of the spine. Contrary to the instructions to “sit up straight,” the spine, when looked at from the side, is not straight. (It’s not always straight from the front either, but the functional implications of scoliosis are beyond the scope of this article.) The spine, in fact, curves in a bit of an S from the head down in what is referred to as neutral spine. The cervical portion, comprising the 1st seven vertebrae, makes a concave curve. The next twelve vertebrae in the thoracic region have a convex curve. The last five in the lumbar are again concave. 

    The appropriate amount of curve in each region is also on a bandwidth; however, the curve in one region can have profound effects on another such that they cannot be looked at in isolation. Stop reading for a moment and “sit up straight.” Now tilt your head and look up at the ceiling. Make a note of what that felt like or what you saw on the ceiling. Next slump down like a texting teenager. Look up at the ceiling again. Any difference? You probably noticed that it was much harder to look up from the slumpy position. This is because the increased flexion or convex curve of the thoracic spine changes the starting point for the extension (looking up) motion that occurs in the cervical spine. Think about how this might affect your neck when sitting on a bike. You can do the same experiment with your arms. Sit up tall and raise your arms overhead. Then repeat in a slumped position. Much easier when done in a neutral spine. 

    A functional application here is how easily (and quickly) you can get your poles up to begin the next stride.

    So what exactly does “good posture” or a neutral spine look like? Remember that a neutral spine occurs along a bandwidth of variability. Just as we all share the same basic anatomy, we all come in different shapes and sizes. However, the ears, shoulders, hips, knees, and ankles should generally line up while standing. Sitting is the same with a straight line connecting ears, shoulders, and hips. Again, there should be an inward curve at the low back and an outward curve through the mid to upper back. The neck will also tend to have an inward curve. 

    In clinical practice, the majority of postural deviations appearing outside of bandwidth tend to fall into two categories: excessive thoracic kyphosis (to much flexion or outward curve in the upper back) or too much lumbar lordosis (excessive extension or inward curve at the low back). It is also worth noting that in clinical practice, the research would tell us that there is no evidence of “poor” posture causing musculoskeletal pain and is merely correlated with pain—not everyone who slumps all day has neck pain; not everyone with “sway back” has back pain. 

    But posture that falls outside of the bandwidth creates an increased load on the body. The majority of nontraumatic musculoskeletal injuries arise as a result of an imbalance between load that is placed on the body and the body’s ability to tolerate load. So from a clinical perspective, improving posture is unlikely to be the Holy Grail, but it may be part of the solution, especially when a change in posture creates a change in pain levels.

    Thoracic kyphosis tends to be an issue of mobility and/or awareness, at least in static postures. With dynamic movements, the complexity of the task may outweigh either the neuromuscular coordination or simply the requisite strength to maintain a neutral spine. Both of these scenarios will be discussed further in the next article. 

    Thoracic kyphosis

    Excessive lumbar lordosis that is observed in standing, but decreases in sitting, tends to be much more complex. A simple explanation may be that the knees are hyperextending while standing. This has a simple solution: Stop hyperextending your knees! But this is way easier said than done. 

    Lumbar lordosis

    This is a pattern that has developed over years and is a tough habit to break. A much more complex pattern is one of relatively tight hip flexors along with relatively weak glutes and hamstrings. This effectively tilts the pelvis forward thereby increasing the curve in the lumbar spine. Again, this scenario might not be an issue with static posture but will be exacerbated by activities requiring hip extension such as running and skiing. This will also be covered further in the next section. 

    Sitting is the new smoking. If you spend long hours sitting in front of a computer, STOP! Not your job, but the prolonged sitting. Height adjustable desks have become much less expensive and allow you to move frequently between sitting and standing. My typical advice is to change positions every 20-30 minutes. Standing is likely better, but put in one position too long and we’ll still get lazy with posture. If you don’t have this option, getting up and moving every hour can help. 

    With both sitting and standing at the computer, keep your elbows at your sides and bent 90 degrees or a little less. When sitting, keep your pelvis vertical and all the way back in the chair. You should be on your sit bones. If you roll back onto your tailbone, it’s all over. The pelvis needs to remain vertical (or horizontal from front to back) in order to maintain a neutral spine. A lumbar support, or even a folded towel, placed in the small of the back will make it easier to maintain this position.

    Maintenance of neutral spine with dynamic activities is no different, just harder. Again, posture falling outside of bandwidth equates to increased load which equates to inefficiency. Cycling is the easiest, at least conceptually, to transfer the ideals of sitting posture. It just requires tilting the pelvis forward on the saddle. “Bellybutton to the top tube.” Bike fit and hip mobility will both have a significant impact on how comfortably this can be accomplished. 

    Neutral spine

    Running, swimming, and classic skiing get more complex due to the inherent rotation involved; however, a neutral spine as observed from the side remains ideal. A full discussion of form and technique for these sports, excepting Nordic skiing, is well outside the scope of these articles. It should also be noted that the human spine is fully capable of motion in all planes. It should not be inferred that the spine should be forever fixed in neutral. 

    Stay tuned for the next part of this series which will dig deeper into spine mobility, stability, and proprioception.


  • Making a Healthy Transition to Running as the Seasons Change with Jessica Yeaton

    Making a Healthy Transition to Running as the Seasons Change with Jessica Yeaton

    The author crosses a snow field on a long run near her home in Colorado last summer.

    Last year at this time, I was primarily gym-ridden. After roughly five months on snow, my fitness was high but my tolerance for the impact and specific demands of running were low. Throwing better judgement to the wind, I gave in to the allure of warm days, rapidly drying trails, and beloved road loops around town, and paid the price.  

    Despite running between zero and ten miles total between December and the end of February, I took off for my first run of the season: 4.5 miles. That first week totalled 20 miles in four runs. Much lower than summer totals, but far greater than the sum of the months prior.

    Two weeks later, I did a 90 minute trail run with roughly 1,200 feet of climbing and descending. What started as the sensation that a tendon on the lateral side of my right knee was snagging with each leg swing quickly turned into a sharp stabbing pain. I hobbled my way home and by that afternoon, I couldn’t walk downstairs without sidestepping or even make it down the gentle slope of my front yard. Sound familiar?

    This experience is not uncommon. When snow conditions deteriorate in the spring but weather is perhaps not yet conducive to cycling or rollerskiing, our options for aerobic exercise that provides the same satisfaction as the kilometers we logged all winter are limited. The best available early season option is often running, so we lace up our cobwebbed sneakers, and fight the temptation to jump back in too quickly. 

    While some may tolerate a rapid transition, there are a myriad of running related injuries that could easily crop up. Last year at this time, FasterSkier featured recommendations from Dr. Ross McKinnon, DPT, to address the topic of a healthy transition to running. His advice included a slow increase in running volume, working on running mechanics, beginning with soft surfaces, and making sure your shoes are up to the task. 

    To add on, we reached out to DPT candidate, Olympian, and former APU Teammate Jess Yeaton for additional information to support a healthy return to running. 

    Jess Yeaton heads for home to win the 2018 Mt Marathon race in Seward, AK. (Photo: Anchorage Daily News/Lauren Holmes)

    Seconding Dr. McKinnon’s first recommendation, Yeaton began with the importance of committing to a gradual return.

    “I think the absolute biggest thing is taking a slow progression back and not increasing your weekly mileage too much, as well as adding in exercises that target strengthening glute med.”

    The gluteus medius muscle, or glute med, is a fan shaped muscle on the outside of the hip which connects the iliac crest to the top of the femur. The glute med plays a vital role in single leg stability, in particular, in maintaining level positioning of the hips and proper alignment of the leg during each stride. After all, running is essentially a repetitive high-impact single leg motion, so stability at the hips and through the core are key.

    By strengthening the glute med, runners can reduce “hip drop” and prevent the knee from caving inward with each stride. These phenomena reduce the body’s natural mechanisms for absorbing the impacts of running. They put abnormal strain on various ligaments, tendons, and joints down the chain, leading to IT Band Syndrome, knee and low back pain, and more. 

    The gluteus medius, or glute med, provides stability at the hip, a source of injury risk for runners. (Photo: Human Anatomy and Physiology Lab, LumenLearning.com)

    “Examples of [exercises to strengthen the glute med] would be things like donkey kicks, fire hydrants, bridging up with both legs and then holding with one leg,” Yeaton explained. “I actually had to do a community project working with a running group here in Albuquerque for school and made a video with some of these exercises, which is available on YouTube.”

    In the video, Yeaton demonstrates forward and lateral walks with an exercise band looped above the knees. Maintaining tension in the band activates and strengthens the glute med, promoting better stability in single leg movements, such as running — or skiing!

    Yeaton also contributed to an article on single-leg stability geared toward better balance on skis this fall, which can be found here. 

    In the gym, you could try single leg deadlifts with a kettlebell or free weight to build stability. To execute this move correctly, it is important to keep the hips level to the floor and avoid the tendency to rotate away from the standing leg. While keeping a flat back, focus on hinging  from the hip and staying within the range of motion that your hamstring flexibility allows rather than reaching the weight toward the floor, which often leads to rounding at the low back. In addition to challenging your single leg balance, you should feel this in the glute and hamstring of the standing leg. 

    Aim for a flat back with hips squared forward, and keep the toes of the lifted leg pointed toward the ground.

    Another option for enhanced glute med strength is to try a split squat with the rear leg elevated, also known as a Bulgarian split squat. With one foot resting on a box, stair, or bench, complete a single leg squat, creating a 90-degree bend in the knee of the standing leg. The knee of the elevated leg should drop straight down toward the ground, while the other knee stays stacked over the ankle and in line with the foot. 

    Be sure to keep your chest up and core tight to reduce wobbling and work the correct muscles.

    By pushing your heel into the ground as you come out of the squat, you can keep the action in your glute muscle, rather than letting the quadriceps muscles on the front of the upper leg take over. Again, the positioning of the hips is important; here they should stay squared forward throughout the movement. 

    Yeaton also noted that she commonly sees skiers develop calf and achilles related injuries from jumping back into running too quickly and recommended variations of calf raises and heel drops to combat these issues. 

    “Another one you could add is doing calf raises with a ball between your ankles, which puts you in a supinated position (meaning the foot is rotated slightly inward), which helps target tibialis posterior. I’ve noticed this muscle is a BIG problem for a lot of skiers.”

    Keeping pressure on the ball as you rise onto your toes and slowly lower cues and strengthens the tibialis posterior.

    The tibialis posterior lies underneath the gastrocnemius, more commonly known as the calf muscle. Running the full length of the lower leg, the tibialis posterior begins behind the knee and connects to the arch of the foot. It helps to flex the foot and reduce pronation, where the arch collapses and the ankle tracks inward. This is commonly seen in runners.

    To perform the exercise, hold a soft ball, such as a tennis ball, between the heels of your feet. Slowly rise onto your toes while maintaining the positioning of the ball, hold briefly at the top, then return slowly to standing. 

    “For achilles strength, you can do heel drop exercises on the stairs. Push up into a calf raise on both feet, then lower down slowly on one foot. The eccentric, or the slow, controlled lowering part is what’s important.”

    Use both feet to rise onto your toes, then slowly lower with just one foot to target the achilles.

    Returning to the concept of a gradual increase in running volume, Yeaton recommends actually calculating how quickly you are ramping up. Yeaton recommends the 10% rule — meaning volume should increase by no more than 10% per week. She referenced a 2014 study titled “Excessive progression in weekly running distance and risk of running-related injuries: an association which varies according to type of injury”, which followed roughly 900 runners for one year, tracking mileage increase and injuries. The research showed that athletes who increase by 30% or more were at a higher risk for injury, whereas those who increased by 10% or less were the least likely to incur a running-related injury. 

    “I think this is crazy when skiers put a number to it, because that really isn’t much of an increase… from what I’ve seen, what most athletes consider taking it slow and easing back in is really a pretty significant progression.”

    Obviously, there are caveats — if you start with one three mile run, you’ll probably be okay running more than 3.3 miles total the next week. If you ran 12 miles over four runs last week, you probably shouldn’t run 13 in one go the following week. However, paying attention to frequency, distance, and intensity of your runs as you progress can play a vital role in keeping your body happy.

    Anecdotally, running 5-7 miles once per week through this winter has made a big difference in my ability to progress this spring. 

    So there you have it. Work on hip stability and core strength (bonus: this will help your skiing too!), incorporate calf raises and heel drops, and keep an objective eye on your progression. Have fun and stay healthy!

  • Strength On-The-Go with Kern and KO

    Strength On-The-Go with Kern and KO

    Julia Kern (top) and Katharine Ogden (boom) keep race strong while on-the-go. (Photo: NordicFocus)

    As the World Cup season winds down, FasterSkier caught up with two U.S. Ski Team athletes who’ve been living on the road all winter to learn about their strength routines during COVID. Even without a global pandemic, on-the-go strength training can be a challenge. Julia Kern and Katharine Ogden shared their approaches in the following interview: 

    FasterSkier: In a typical week how many times are you doing strength? What does this look like?

    KO:  I do strength 1-2 x per week and it usually involves a jog, some activation stuff like band walks etc. and then some pretty basic leg and arm exercises like weighted lunge, dips, push-ups and pull-ups. Then I do some core exercises and some indoor floor core. 

    JKern: In a typical week, I do strength twice a week. One session is more powered oriented, which I do before a race weekend and the second session is more strength oriented, which I do after the race weekend. Usually I hop on the spin bike to warm up, and then do my PT exercises and activation before moving into plyometrics. If I can find somewhat dry ground outside, I prefer to do them outside, but if that is not possible on the icy roads and sidewalks, I do more stationary plyometrics inside or up and down staircases in the hotel. After that, I move into the strength specific upper and lower body exercises mostly outside except when I use the pull up bar wedged in a door frame inside somewhere. For core, I usually do TRX exercises hanging off the pull up bar inside or on a bar outside before moving inside for some final floor core exercises. 

    Julia Kern enjoying sunny Davos for some outdoor strength, seen here using TRX bands. (Photo: Kern’s IG)

    FasterSkier: I would imagine there’s already some variability in access to quality gyms or gym equipment  while on the road, how much have new COVID protocols changed how you would normally do strength throughout the winter?

    JKern: In a way Covid has actually made strength on-the-go easier. In the past, we had our go-to gyms at every venue on the World Cup that we would have to schedule in advance on specific days. Often these were public gyms which are filled with the general public and germs, and had limited scheduling opportunities. This year our team decided not to step foot in a single gym. Instead, the team purchased two door frame pull up bars, two TRX, two sets of free weights, bands, sliders, and a med ball to make an at home/on the road gym set up. We would write in our team training plan document what day and time slot we would use the equipment, staggering by pod and disinfecting between every use. It actually allowed for a lot more flexibility since we could do strength any day at any time pretty much right out of our room. It doesn’t take a lot of equipment to get in a good workout. Body weight strength [sessions] have been some of the hardest strength workouts I have done. 

    FasterSkier: Seems like you’ve been doing a number of strength workouts outside, on a scale from adventure to annoying where does this fall?

    KO: I like the outdoor workouts. It’s nice to not have to wear a mask outside and it’s kind of fun and a creative challenge. It sucks when it is really cold though. 

    JKern: I absolutely love doing strength outside! We were lucky enough to spend a cumulative five weeks in Davos this year, where we were outside but had a deck above us so that if it was snowing we were still covered. Stuffy, germ filled public gyms are easy to beat with strength in the fresh air. 
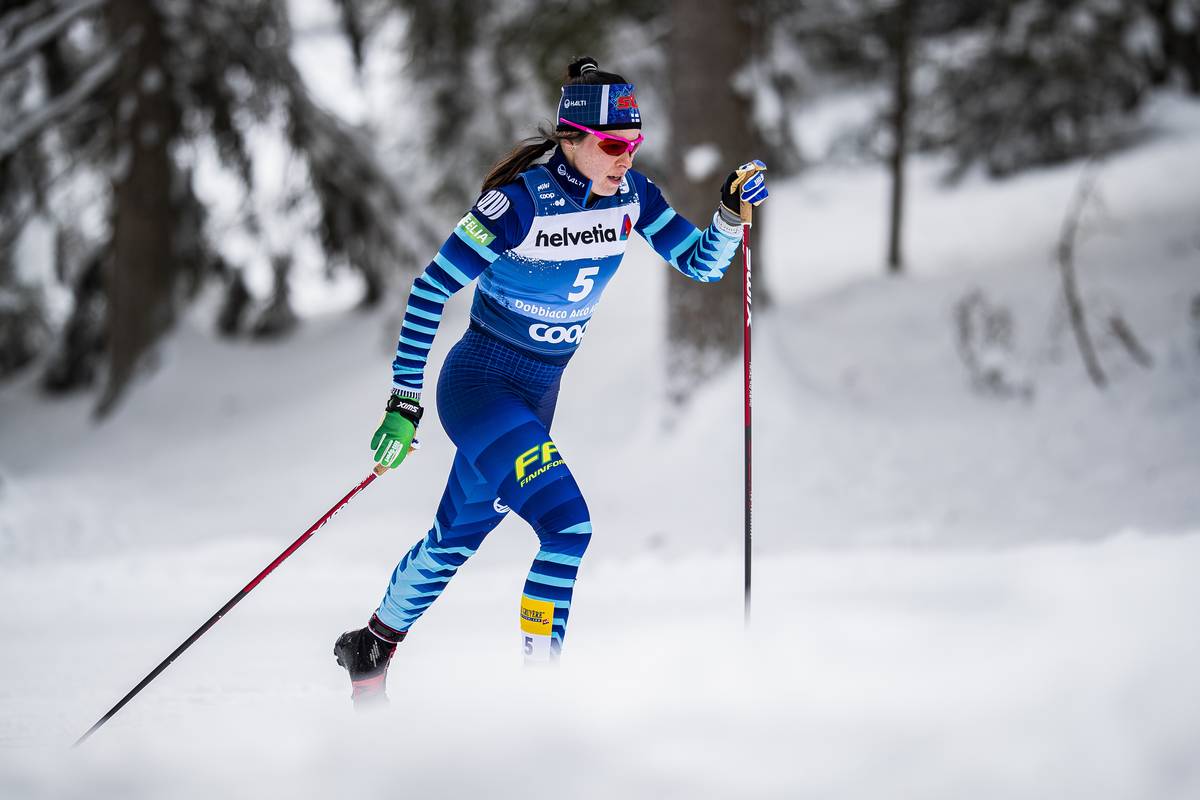
    Katharine Ogden racing the 30 k classic mass start event at the 2021 World Championships in Oberstdorf Germany. (Photo: NordicFocus)

    FasterSkier: What’s the most creative/innovative/interesting strength exercise or setup you’ve done this winter?

    KO: I haven’t been doing a ton of innovating but I do like doing push ups with my feet elevated on things like an uphill, a snowbank, a bench, etc. 

    JKern: Side plant slider exercises in the middle of the ski trail while doing band pulls with the band attached to a ski trail sign. This was not my idea, my teammate suggested it when I was struggling to find a smooth surface to do sliders on besides pavement. 

    FasterSkier: Favorite on-the-road exercise?

    Jkern: Med ball slams! Nothing is as satisfying as slamming a med ball down as hard as you can…plus it can also act as a very heavy basketball or soccer ball.

  • Developing Single-Leg Stability for Improved Glide

    Developing Single-Leg Stability for Improved Glide


    If you’ve found your way here, you are likely familiar with the three tenets of cross country skiing: push off, weight transfer, and glide. Whether it’s diagonal stride in the track or V2 on the corduroy, your ability to experience a complete weight transfer, ride a flat ski, and carry momentum is heavily dependent on the stability of your standing leg. 

    Why is developing that balance and stability a challenge? For those who choose modalities other than roller skiing to enjoy the outdoors in the offseason, consider what types of motion those activities entail. Cycling, running, hiking, and walking are all very linear movements with fairly rapid tempo, meaning there is little emphasis on the lateral push off or extended single leg balance that are the cornerstones of cross country ski technique. 

    Simi Hamilton skiing to a World Cup career best 34th in a distance classic event. He popped the result in Ruka, Finland’s 2019 15 k classic. (Photo: NordicFocus)

    Be it your first season on skinny skis or your 50th, strengthening the lateral musculature of the hip and the tiny stabilizer muscles throughout the leg will help you develop confidence in your weight transfer and glide to help you hone your technique and enjoy sliding on snow this season. 

    There are lots of ways to improve single-leg stability; yoga, Pilates, even simply standing on one leg while brushing your teeth or doing the dishes is helpful. But if you want a few simple and targeted exercises, we have a few beneficial suggestions. Here we use mini resistance bands, which can be found for less than $20, to combine dynamic and isometric (holding in place against resistance) moves that target the musculature of the hip, improving strength and stability down the chain.

    The progression is endorsed by Doctor of Physical Therapy candidate, Australian National Team and APU Elite Team skier, 2018 Olympian, and 2020 Birkie Champion Jessica Yeaton. 

    Clamshells 

    Lie on your side with the band just above your knees. Hips and ankles should be in line with the knees bent roughly 90 degrees in front of the body. Then, rotating from the hip like a hing, open the top leg, holding at the top for two seconds, then slowly rotating back to the starting position. You should feel this in the outer part of your hip, specifically in the gluteus medius muscle which is responsible for abduction and external rotation of the leg from the hip. In layman’s terms, this means it helps keep your knee from caving inward in compensation for poor hip stability when you’re gliding on your ski and helps power your skate push off.  

    Try 2-3 sets of 10 to start, adding a longer hold or additional repetitions as you build strength.

    Some essential reminders from Yeaton: “Keep your top hip rolled forward, avoid flaring your ribs, keep your ankles together, and think about rotating at the hip rather than just lifting your knee. Again, the key is to keep your hip rolled forward and don’t let it roll back, or else you are working the wrong muscles.”

    Fire Hydrants

    Starting on hands and knees with the core engaged and the band above the knees, rotate from the hip to lift one knee off the ground. Hold at the top for two seconds, then slowly release. Keep a flat back and make sure you are not compensating by shifting your hips to the side or rotating from the spine. Keeping a ball or a light book on your low back can be a helpful cue — if it slides off, you are probably rotating your hips rather than just rotating the leg outward.  

    Try 2-3 sets of 10 to start, adding a longer hold or additional repetitions as you build strength.

    Glute Bridge With External Rotation

    For both of the exercises below, the band should again be placed just above the knees. 

    Level 1:

    Lying on your back with knees bent, feet hips width apart, and heels close to your butt, push your hips up into a bend. This should put your knees at a roughly 90 degree angle. Keeping the hips high, rotate the knees outward from the hips, further stretching the band.

    Try 2-3 sets of 30 second holds, increasing the time or repetitions as you progress.

    Level 2:

    Beginning again from the bridge position, extend one leg while focusing on keeping the hips level and not shifting side to side. You should maintain some tension in the band to keep the outer hip muscles firing, but do not need to try to add additional tension to the band.

    Again, try 2-3 sets of 30 second holds, increasing the time or reps to add challenge. 

    Yeaton reminds, “Really focusing on keeping your hips level. Don’t let the hip of the leg you are lifting off the ground drop — that’s the most important part.” 

    Skate Pushes

    With the band just above the ankles, stand on one leg with a skate ski body position. There should be a bend at the ankle, the angle of the shin and back should be parallel, and hips should be stacked over the heel. Slowly extend the free leg outward as if you were pushing off perpendicular to the trail. Hold at the top for two seconds and release slowly to the start position.

    It’s important to keep the motions slow and controlled. Just like in skate skiing, you do not want to compensate by tipping your torso to the side or letting the standing hip pop outward. A mirror can be helpful to help you maintain good form. If you’re finding it hard to maintain balance and form, try decreasing the resistance level of the band, or simply try it without the band until it becomes easier.

    Try 2-3 sets of 10 to start, adding a longer hold or additional repetitions as you build strength.

    Single-Leg Squat With Band

    If you found yourself wobbling and struggling to maintain good form with the skate pushes, it might be best to focus on the first three exercises for the time being. For those looking for a more advanced challenge, here is what Yeaton called her “favorite” exercise for single-leg stability. 

    This exercise uses a full sized resistance band wrapped just below the knee of the standing leg. Fix the other end to something stable, like a table or the vertical rung of a railing. The band should be providing resistance that tries to rotate your knee inward, and you’ll be focusing on keeping the knee in line with the toe to resist the band. 

    With the free leg extended behind, focus on maintaining pressure through the outside of the foot and keeping the hips squared forward as you drop into a single-leg half squat. You should have flexion at your ankle, knee, and hip, so the hip is stacked over the knee, just like when you’re out for a ski.  

    “Don’t let your hips rotate towards the resistance, or again, you aren’t working the right muscles!” Yeaton warns. 

    Yeaton adds, “Another option is to tie the band around the opposite leg (leg in the air), which can actually make it even harder to stabilize and keep your hips in line and not rotating.”

    Note: These exercises can all be made more challenging by incorporating a Bosu half ball or inflated disk to decrease the ground stability. 

    Wishing you improved balance and glide, and snowy trails to practice on! Give these exercises a try and you’ll be gliding like Sophie Caldwell in no time!

    Picture perfect. Sophie Caldwell on her way to qualifying in first in the 2019 Davos, Switzerland skate sprint. (Photo: NordicFocus)


  • Wednesday Workout: Strong From Home with Carolyn Parker of the Ripple Effect Training Center

    The small mountain town of Carbondale, CO is home to the Ripple Effect Training Center.

    Like many mountain towns, Carbondale, Colorado is a magnet for athletes. The definition of that word is used broadly — though there are plenty, it is not just home to the uber endurance junkie. Within 30 miles, you can find world-class rivers for whitewater kayaking or fly fishing, five ski resorts, a variety of rock climbing and bouldering objectives, and miles of single track to be run, hiked, or ridden. With this unbelievable backyard, we are a town full of people who like to play outside. 

    Another common thread that links many of us is our belief in and gratitude for “the Injury Unicorn”, Carolyn Parker, who is the owner and lead trainer at the Ripple Effect Training Center. We flock to Carolyn to help us identify the source of our problems and to guide us to a solution through functional strength and mobility. In her words, it’s “outcome based training.”

    Carolyn Parker, founder and lead trainer at the Ripple Effect Gym in Carbondale, CO, shares a workout to develop functional strength and mobility from home without any equipment. Parker has been training athletes since obtaining her certification through Gym Jones in 2010. (Photo: rippleeffecttraining.com)

    Carolyn and her team have helped athletes correct muscle imbalances, increase power and strength, and recover from surgeries or pregnancy. She has helped athletes chase a Grand Canyon speed record in a raft, keep their body healthy for 100 mile running races, and even relearn to walk after spinal cord injuries. Her training supports the longevity and progress of athletes of all levels so we can stay healthy and continue to adventure in the mountains for years to come.

    The Ripple Effect dogma is this:

    “Our goals are to train the mind of the individual alongside the body, for the mind compels the body to endure and to achieve. To injury proof the body all the while encouraging the athlete to excel. We have created an environment of support, where honesty, character and integrity are paramount; and where motivation, instruction, and guidance are given to those with the desire to change.

    “These practices do not apply to just the ‘elite’ of the athletic world. They apply to each and every one of us. We are all athletes! We all desire health, strength, happiness, and the capacity to excel in whatever we choose to do, at any level.”

    When the gym was forced to close due to public health orders in mid March, the Ripple Effect crew hopped to and created a set of workouts athletes could complete from home without any equipment. The workout below is from that list and shared with permission. 

    The team at Ripple Effect is also leading small group and private instruction via Zoom. Parker also offers virtual or in person coaching to develop a periodized training program using the equipment available to you to help you reach your goals in the mountains. You can find out more by contacting Ripple Effect through their website or by following along on Instagram.  

    ———————————————————————————————————–

    Warm up with 10 minutes of walking, light jogging, heavy house work like vacuuming, wrestling with kids, or a Zumba video. You get the idea — get your heart rate up a bit and get your body warm.

    Activation/Mobility:

    • 2 x 8 shoulder opener with belt, ski pole, or towel
    • 2 x 5 push-up, knees or toes.
    • 3 x 5 air squats

    Then: 

    • 4 x 30 sec push-ups/30 sec plank – 4 min total
    • 1:00 rest
    • 4 x 30 sec air squat/30 sec hold in the bottom of the squat – 4 min total
    • 1:00 rest
    • 4 x 30 sec sit up/30 sec with straight leg elevate 6” off the floor – 4 min total
    • 1:00 rest
    • 4 x 30 sec windshield wiper/30 sec flutter kick – 4 min total
    • 1:00 rest
    • 4 x 30 sec lunges in place/30 sec “rest” jog in place – 4 min total
    • 1:00 rest
    • 4 x 30 sec bicycles on back/ 30 sec mountain climbers – 4 min total

    Cool down with some light mobility exercises. 


    Celebrating her 50th birthday with a dream trip ski mountaineering in Antarctica. (Photo: Instagram @blitzkriegbarbie)

    Carolyn Parker is the founder and lead instructor at the Ripple Effect Gym in Carbondale, Colorado. She has been training athletes since obtaining her certification through Mark Twight / Gym Jones in 2010. Outside the gym, Parker is a life-long climber and AMGA certified mountain guide who has made the successful transition into full time coaching work. She has lead 5.12 rock, A3+, M8 mixed, and skis 50 degree couloirs. Parker has ski guided Mont Blanc, the famous Chamonix-Zermatt Haute Route, and the Italian Ortler Traverse multiple times. In 2001 she attempted to climb Makalu by a new route on the South Face with a small 4-person team. Most recently she has been competitive in mountain races and adventures, such as the Imogene Pass run, R2R2R in the Grand Canyon, the Sandia Crossing, the Four Pass Loop Elk Mountains, and the Power of Four Skimo Race. In 2019, she celebrated her 50th birthday by guiding a group of friends on a ski mountaineering trip to Antarctica, among other burly and spectacular mountain adventures. 

    Disclosure: The author is a paying member of the Ripple Effect Gym. Her goal is to be as badass, strong, and kind of a human being as Parker at 50. 


  • Want to Work Out With Johannes Høsflot Klæbo?

    01.12.2019, Ruka, Finland (FIN): Johannes Hoesflot Klaebo (NOR) - FIS world cup cross-country, pursuit men, Ruka (FIN). www.nordicfocus.com. © Modica/NordicFocus. Every downloaded picture is fee-liable.
    Johannes Høsflot Klæbo on course with fading December light in Ruka, Finland. (Photo: NordicFocus)

    A new reality is setting in. As a nation, we are isolating ourselves at home, minimizing our contact with others to flatten the curve. Depending on your geographical location, you may still have access to scarcely populated nearby ski trails, routes to run, or  bike paths to ride while still socially distancing. However, with schools closed, gyms shut down, and the challenges of working remotely, you may be finding that maintaining your usual exercise routine is challenging. 

    To help those looking for a quick strength routine that can be completed from home, Johannes Høsflot Klæbo went live on his YouTube channel this morning to lead a workout that can be completed without any special equipment. Klæbo addresses the audience in Norwegian, but he models each exercise, making it easy to follow. The full body workout includes familiar moves like sit ups, burpees, push ups, toe touches, mountain climbers, and planks, among others. 

    Stay healthy (and strong) and enjoy!

  • Wednesday Workout: Inside or Out, Improve Your Double Poling

    Wednesday Workout: Inside or Out, Improve Your Double Poling

    We are trying to stay slightly ahead of the overuse injury and poor air quality curves. You may be midway through your summer training schedule and dealing with a bum ankle. Or you live in a place like much of the Western U.S. that has been or will be affected by poor air quality due to wildfires. 

    Whatever the causation, skiers can find themselves in make-do mode. If the air quality index (AQI) is high where you live, or a bum ankle precludes running or roller skiing, you have training options. And to remain optimistic, what you might think of as a compromise, can, in fact, benefit you in the short and long term. 

    Talk to most elite athletes who have trained abroad, and they will tell you that double pole specific workouts are the norm. Double pole capacity remains one mandatory piece of results success. This is where a Ski-Erg and upper body specific strength programs come in handy.

    antabuse online

    Many athletes are lucky to have access to a ski-erg. If you don’t, please don’t stress. According to a study published in 2017 that compared the effects of strength training and specific ski-erg training on junior cross-country athletes, both groups made double poling gains. 

    The researchers examined double-poling gross efficiency, maximal speed (V max), and peak oxygen uptake (VO2 max). 

    No ah-hah moments in terms of an either-or. “No between-group differences were found for any of the investigated variables,” was a key conclusion.

    Sadie Bjornsen of the U.S. during the second leg of the 2019 World Championship 4 x 5 k relay in Seefeld, Austria. (Photo: John Lazenby/lazenbyphoto.com)

    For those with access to a ski-erg, here’s a 2017 Wednesday Workout from a newly married Sadie Bjornsen. (Congrats!) If your local air quality is sub-par, we’re hoping the ski-erg is located indoors. (If you have a bum ankle, grab a chair, sit down in front of the ski-erg, and begin pulling.


    The Start: “I start my workout with a fifteen-minute warm up. During this time, I often shut my eyes, and visualize skiing. This helps bring in true ski form, and feel my movements, rather than just fall into a ‘SkiErg-specific technique.’”

    Getting Speedy: “During this time, I will do some little ten-second increases in power to warm up my back and arms, and get ready to go hard.”

    The Workout: “After fifteen minutes, I begin the workout known as 30-30’s. This means 30 seconds of intervals followed by 30 seconds of recovery, then repeat for 30 minutes. What may feel easy at first, quickly catches up after 10 minutes, so I always start this workout more conservative than feels appropriate.”

    Keeping It Going: “After about five minutes of 30 seconds on, 30 seconds off, I start to see a common number of watts I am exerting during the 30 seconds. This is where I set a goal. Maybe it’s 190 watts I am hitting, I want to continue to reach that level or more for the next 25 minutes of this workout. This becomes increasingly hard around 20 minutes, and requires a certain amount of mental power. The 30 seconds of rest begins to pass too quickly, and I find myself becoming really focused in my own little world… forgetting where I am (maybe a garage, maybe a gym).”

    Finishing Up: “By the end of 30 minutes of 30-30’s, I am pretty worked, and feel like I have just done a race out on the snow. This is when I bring myself back to my surroundings, and finish with a fifteen minute easy warm down to help flush my arms out.”

    Final Thoughts: “Not only does this one hour pass really fast, but it is a really focused workout that feels like it truly helps build specific power. I always make sure I finish this workout with a little five minute walk. This helps flush all my muscles, but also helps make sure my back goes back to moving naturally after a pretty intense workout.”


    And to keep things fair between the siblings, here’s a 2017 non-ski-erg double pole specific workout from Erik Bjornsen. This session is more suited for those smoke-free days. 


    The Workout: Solo, high-focus, double-pole distance session

    Erik Bjornsen of the U.S. skiing to 17th overall during the 15 k classic at the 2019 World Championships in Seefeld, Austria. (Photo: John Lazenby/lazenbyphoto.com)

    Find suitable terrain and timing: “I choose the terrain based on how hard I want the workout to be. I try to fit this workout in mid-week between intervals sessions,” he wrote in an email. “The point is to get the biggest benefit without fatiguing the body too much.  

    “Most often I head up Campbell airstrip road. It’s a five-mile-long road, with a majority of the terrain measuring out at a gentle 5% incline,” Bjornsen continued. “There’s one steeper climb in the middle that’s about 500 meters long. For this workout, I go out and back twice.”

    Warmup: 15-minute easy Level 1 (roller)ski to the start.

    Go-time: Typically takes him 1 hour and 20 minutes to rollerski the 5-mile section twice.

    “The steep 500-meter section is VERY hard to double pole — that portion of the road is something you would for sure stride in a race. During this workout, I try to spend an hour at L2 [Level 2] and end up bumping up to L3 [Level 3] only when double poling up that steep segment (2 X 5min in L3). I like having the two short but demanding double pole sections in this workout.

    “The important part of this training session is not the 2 x 5-minute L3 sections, it’s the time before and after that L3 effort. You have to figure out how to get the muscles to recover from the hill while still double poling and determine what gear/tempo to use while still applying power efficiently — and recover at the same time.”

    Cool down: 15-minute easy ski home.

    Notes:

    • “The idea is to work specifically on double pole and upper body strength. You get an opportunity to work on all gears, from long double pole to very quick choppy double pole up the steep section.

    • “You can gain a lot from just focusing on two intensity sessions a week throughout the summer. This is a way I find I’m able to gain quite a bit from specific double pole training. But ideally, you don’t fatigue the body so much that it takes energy away from the true intensity sessions.”

    Lastly, here’s the strength protocol from the 2017 study we mentioned up top. After a specified warm-up, here is what the researchers prescribed for the non-ski-erg test group.

    (1) for different training days, the participant was allowed to alternate between five repetitions maximum (RM) of snatches, squats or deadlifts at 60–85% of body mass,

    (2) 8 RM sit-ups or vertical sit-ups,

    (3) 6 RM pull-downs, chin-ups or seal row

    (4) 6 RM of pushdowns, bar-dips or narrow bench press

    (5) 6 RM of belly-backs with or without dumbbells.

    “All five exercises were conducted with two sets per exercise and 1-min rest between sets. Thereafter, the participants completed 5–10 min with different core-stability exercises, which were followed by 90 s of cable crunches, 60 s of pulldowns with a rope, and 30 s of triceps pushdowns with a rope without rest between exercises. After 1-min rest, these three exercises were repeated once. Finally, 3 sets of 45 s of medicine-ball slams (3–5 kg) with 15-s rest between sets were conducted. After the group-specific training session, the [strength] group performed 20 min of roller skiing using the double-poling technique in the heart-rate intensity zone MIT”

    Happy double poling.