From the FasterSkier archive — posts syndicated from athletes’ and coaches’ own blogs between 2004 and 2012, kept online as published. Current coverage is at fasterskier.com.
Our bodies are very good at adapting to change, as long as it comes slowly enough. That first frosty day in autumn always feels brutally cold. Take the same temperature in March and we’re in shorts and short sleeves. Our response to exercise load is no different. Taken as a slow and progressive build up, our bodies will respond with increased strength and capacity to stay on the right side of the load vs tolerance equation. But when it comes on too quickly–too much too soon–our bodies tend to complain.
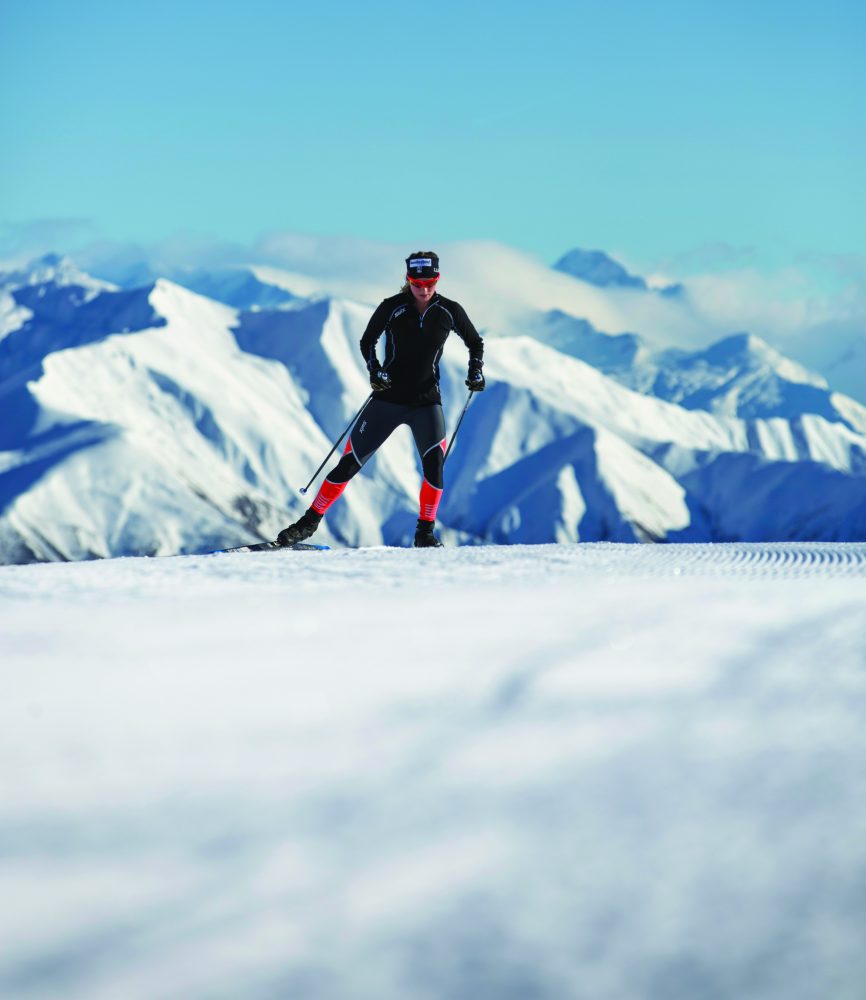
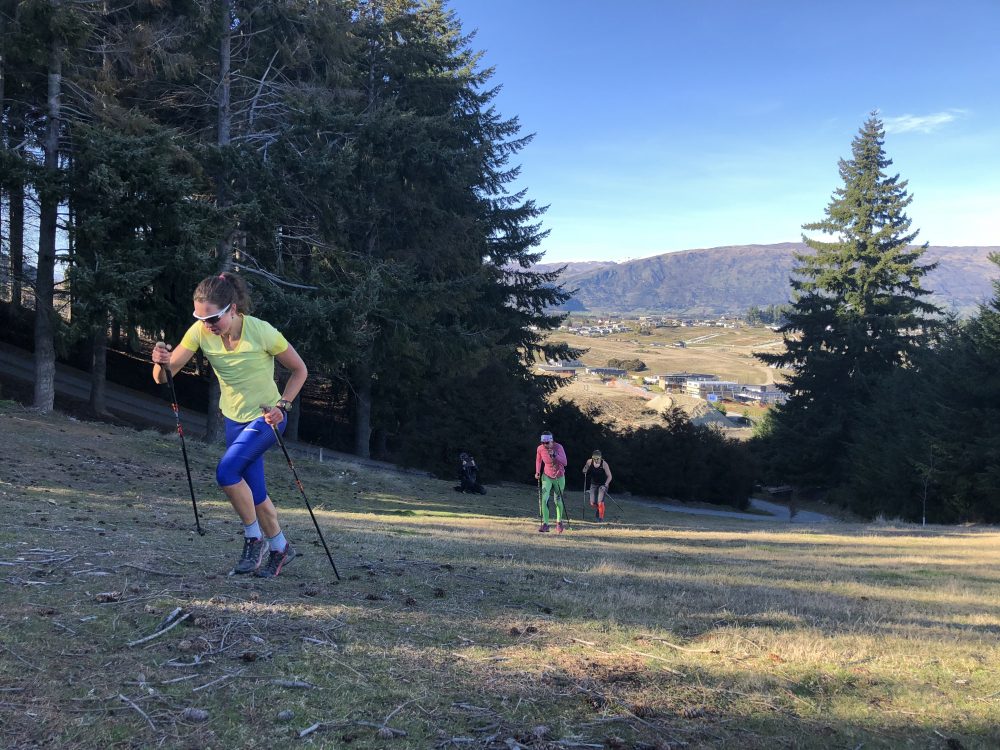
Jessie Diggins (USST) stay familiar with snow feels while training at the Snow Farm in New Zealand in 2018. (Photo: ColinWitherill/Warren Miller Entertainment)
The first day on snow is a highlight of every season. Long hours of sweat in the summer sun finally bear fruit with that ephemeral glide of skis on snow. We’ve finally escaped the harsh pounding of running, the clack of rollerski poles on pavement, the constant threat of distracted drivers in 4000 pound death machines hunting you on the road bike (apologies for the drama). It’s definitely easy to get carried away. Before we know it those first giddy strides have turned into a three hour ski when you only packed food and water for any hour. Best case scenario, you’re a bit sore for a couple of days. Worst case, you’ve irritated or injured something that could derail your whole ski season.
The obvious solution is to progress slowly. For those fortunate enough to have easy access to ski tracks, this takes some self control but is very doable. For those who are not able to get on snow frequently enough to have a progressive build, it’s going to take more prep work to ensure that your body is ready for you to go full gas as soon as the skis hit the snow.
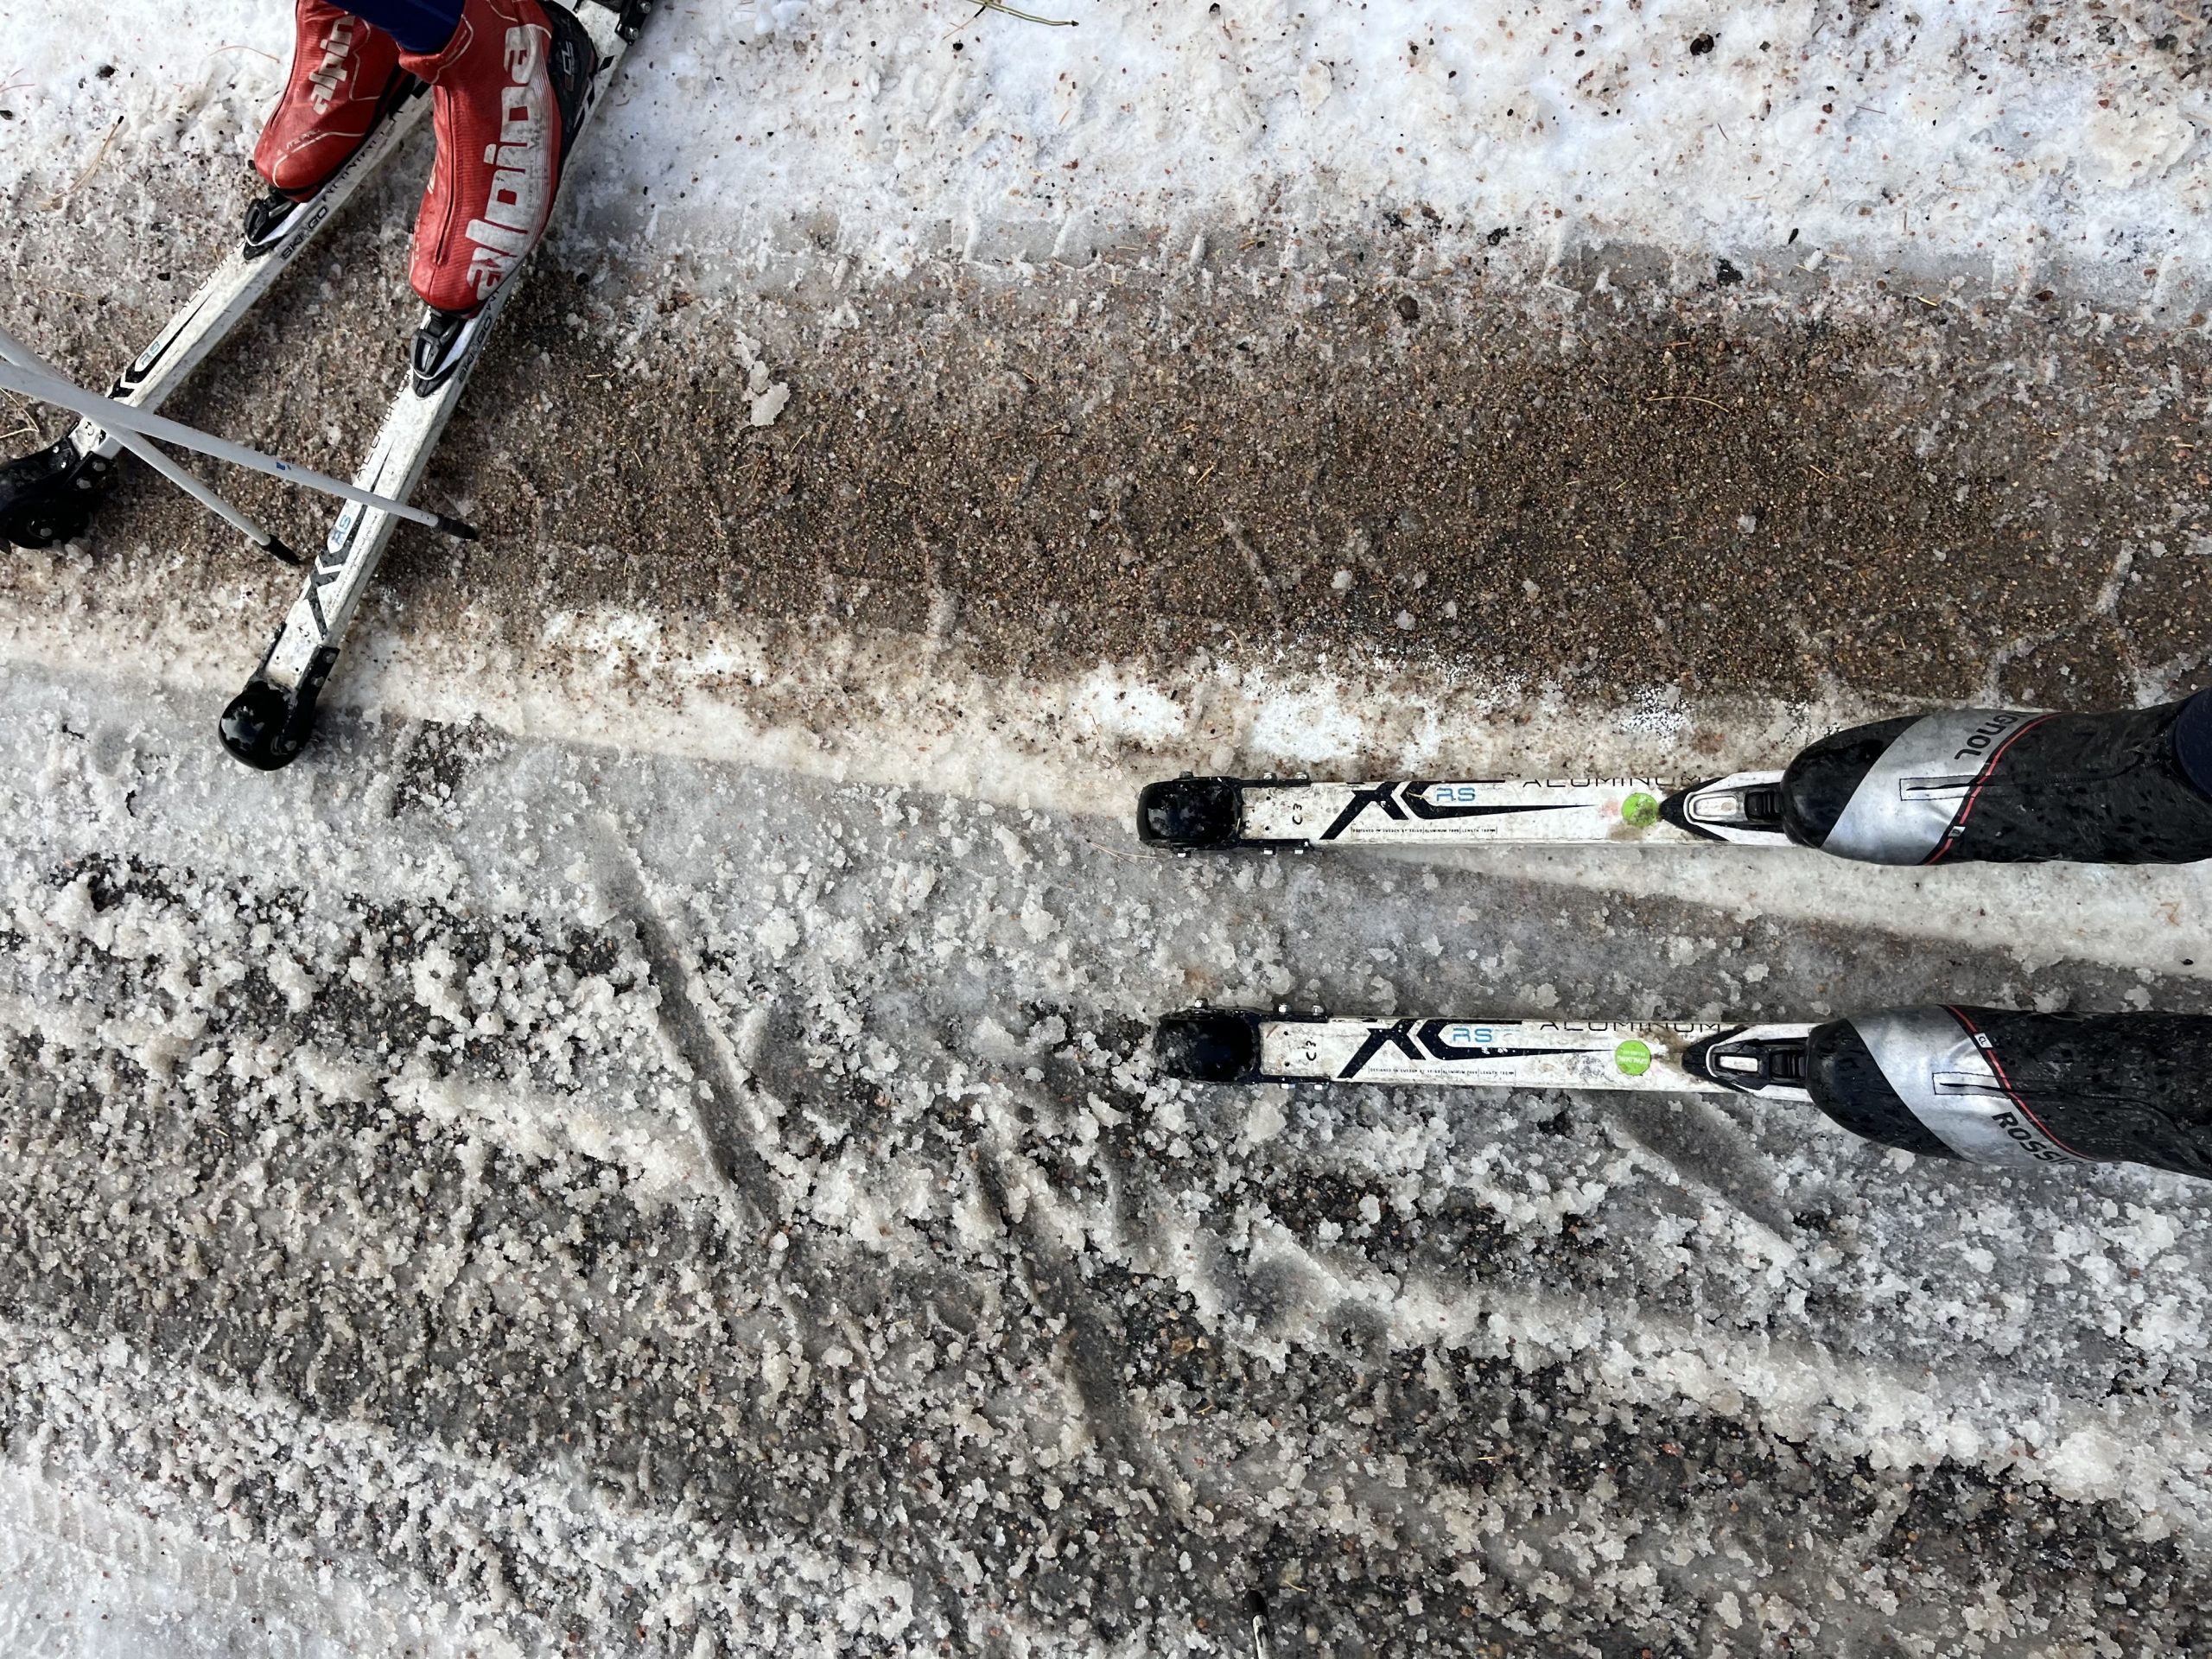
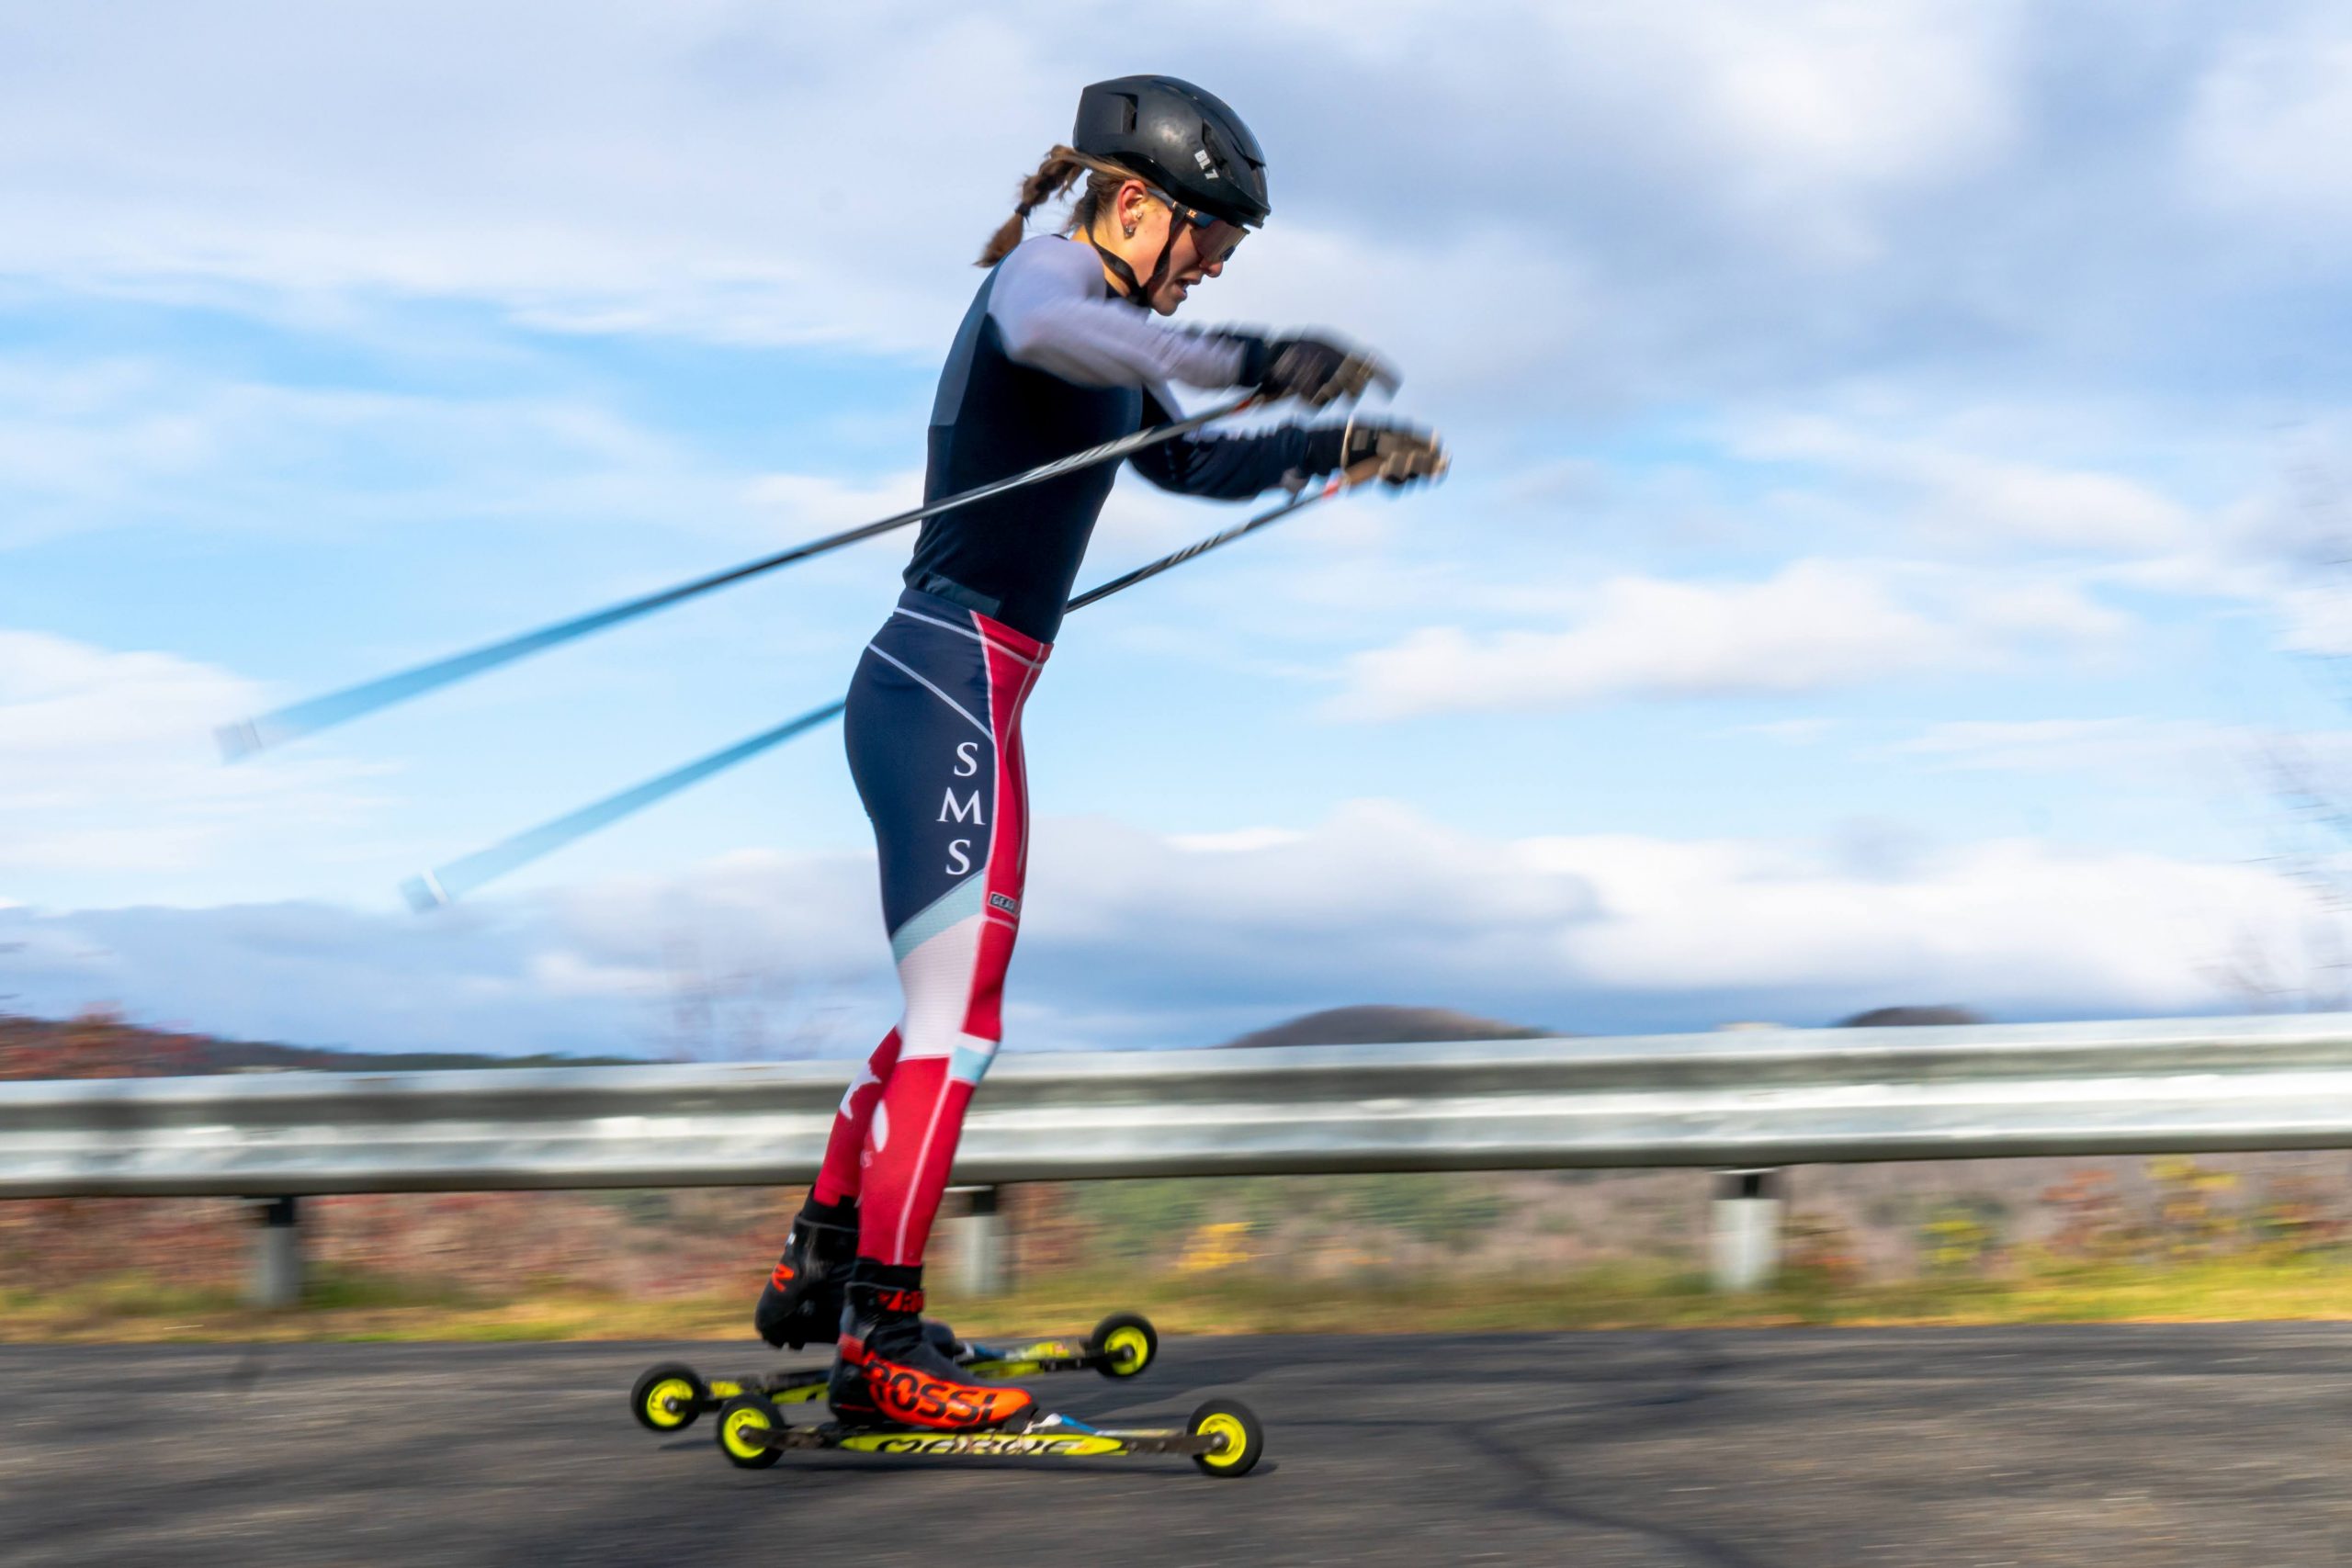
If you’ve been rollerskiing, you definitely have a head start. But rollerskiing is not snow skiing. Snow will present different challenges, and therefore different loads on the body. Classic striding is more nuanced and often requires more work to set the kick than simply relying on ratcheted wheels. Pole plants, while nice and quiet, lack the snappy feedback as the snow compresses under the basket (and maybe let you get away with low hands on initiation without the tell tale skid of pole tips on pavement). Balance on the glide ski is now subject to variations in terrain, snow characteristics, and especially grooming quality.
November conditions in Lefthand Canyon (Photo: Sophie Spalding).
If you haven’t been rollerskiing (I don’t blame you), it’s likely that your arms haven’t seen much load over the summer. Your legs have probably been the focus with running, cycling, and hiking. But these are very straight line motions—fine for classic skiing but not the best prep for the lateral demands of skating.
Ideally you’ve been doing strength training, ski specific drills, and stability work all summer. If not, this article is your friendly reminder that it’s not too late to get yourself ready. If you are a Faster Skier regular (thank you!), then you’ve likely come across some of my previous articles and hopefully you’ve incorporated the associated exercises into your regular “pay to play” maintenance workouts. Here are some highlights which are particularly appropriate to this conversation:
So what does a “slow progression” on snow look like? A good example is what the Sifel US Cross Country Ski Team calls The Pace Project. As a tool for race prep, the goal is to ski repeats on a (typically) 5k loop with subtle changes in effort, subtechnique/gearing, nutrition, etc in order to learn the best recipe for repeatedly clocking your fastest times. As an early season, toe in the water vs head-first dive kind of progression, the goal would be to ski the loop (or whatever strip of snow you may have) at a pace where your time, perceived effort, and heart rate stay fairly consistent lap after lap. If your heart rate, perceived effort, and time are all going up, you’re overcooking it and not sticking to the plan. If effort and heart rate are consistent but you’re getting slower, it’s unlikely that you’re burning all of your matches, but your technique is starting to suffer. This might be a good time to take a step back and re-focus on technique. The idea is to ski in control–not necessarily easy, but under a sustainable effort for the duration. If you’re counting laps, look to add a lap every few sessions on snow. The general guidance is frequency before duration before intensity. If increasing frequency isn’t an option, then definitely build up duration prior to adding high intensity.
Zak Ketterson capitalizing on some early snow time at Frozen Thunder back in 2021. (Photo: Team Birkie)
When dryland prep and on-snow progression have been combined, the body should be able to stay ahead of the load and tolerate the transition smoothly. Glitches definitely happen and shouldn’t be ignored. However, a niggle or small amount of pain that subsides within a few hours is unlikely to represent a concerning injury. If the pain keeps occurring, if it becomes moderate or severe, or if that mild pain is lasting into the next day, it’s a good idea to take some relative rest and seek the help of a physical therapist (ideally one who knows the specific demands of Nordic skiing).
From a young age, my track coach insisted that we did a thorough dynamic warm-up before starting any training session to activate the right muscles and avoid injury. I have my track coach to thank for teaching me this at a young age. Especially as I get older, my daily activation exercises are crucial in keeping injuries at bay and getting my body warmed up before the “warm up”. For me, the challenge is activating and using the right muscles when I am training, especially when I am tired. I have found that incorporating 5 activation exercises daily is a way to activate those muscles and sneak in my PT exercises so that my body is ready to go when I start training. When I first started incorporating activation/PT exercises, I had a hard time doing them at the trailhead or parking lot because laying on the ground was difficult and I didn’t want to carry a lot of equipment with me. These 5 exercises are designed so that you can do them anywhere, anytime, with just one piece of equipment, an ankle band, and only take a few minutes! Give them a try and note how your body feels, especially during your warm-up and throughout your workout.
What you need: 1 ankle band, that’s it! I always keep a green one in my bag.
Where to do it: Anywhere! At home before you go exercise, or in the parking lot/trailhead.
Banded Skate Walks
Activating: glutes, core, balance
Place a band around your ankles. Slightly round your back and engage your core. Slowly skatewalk backwards, placing your right leg back. Bring your left foot in without placing it on the ground, and transfer your weight entirely onto your back right leg like you are about to do a single-leg squat. Engage your right glute and slowly skate the inside left leg back and out. Repeat for 6 steps back, and 6 steps forward.
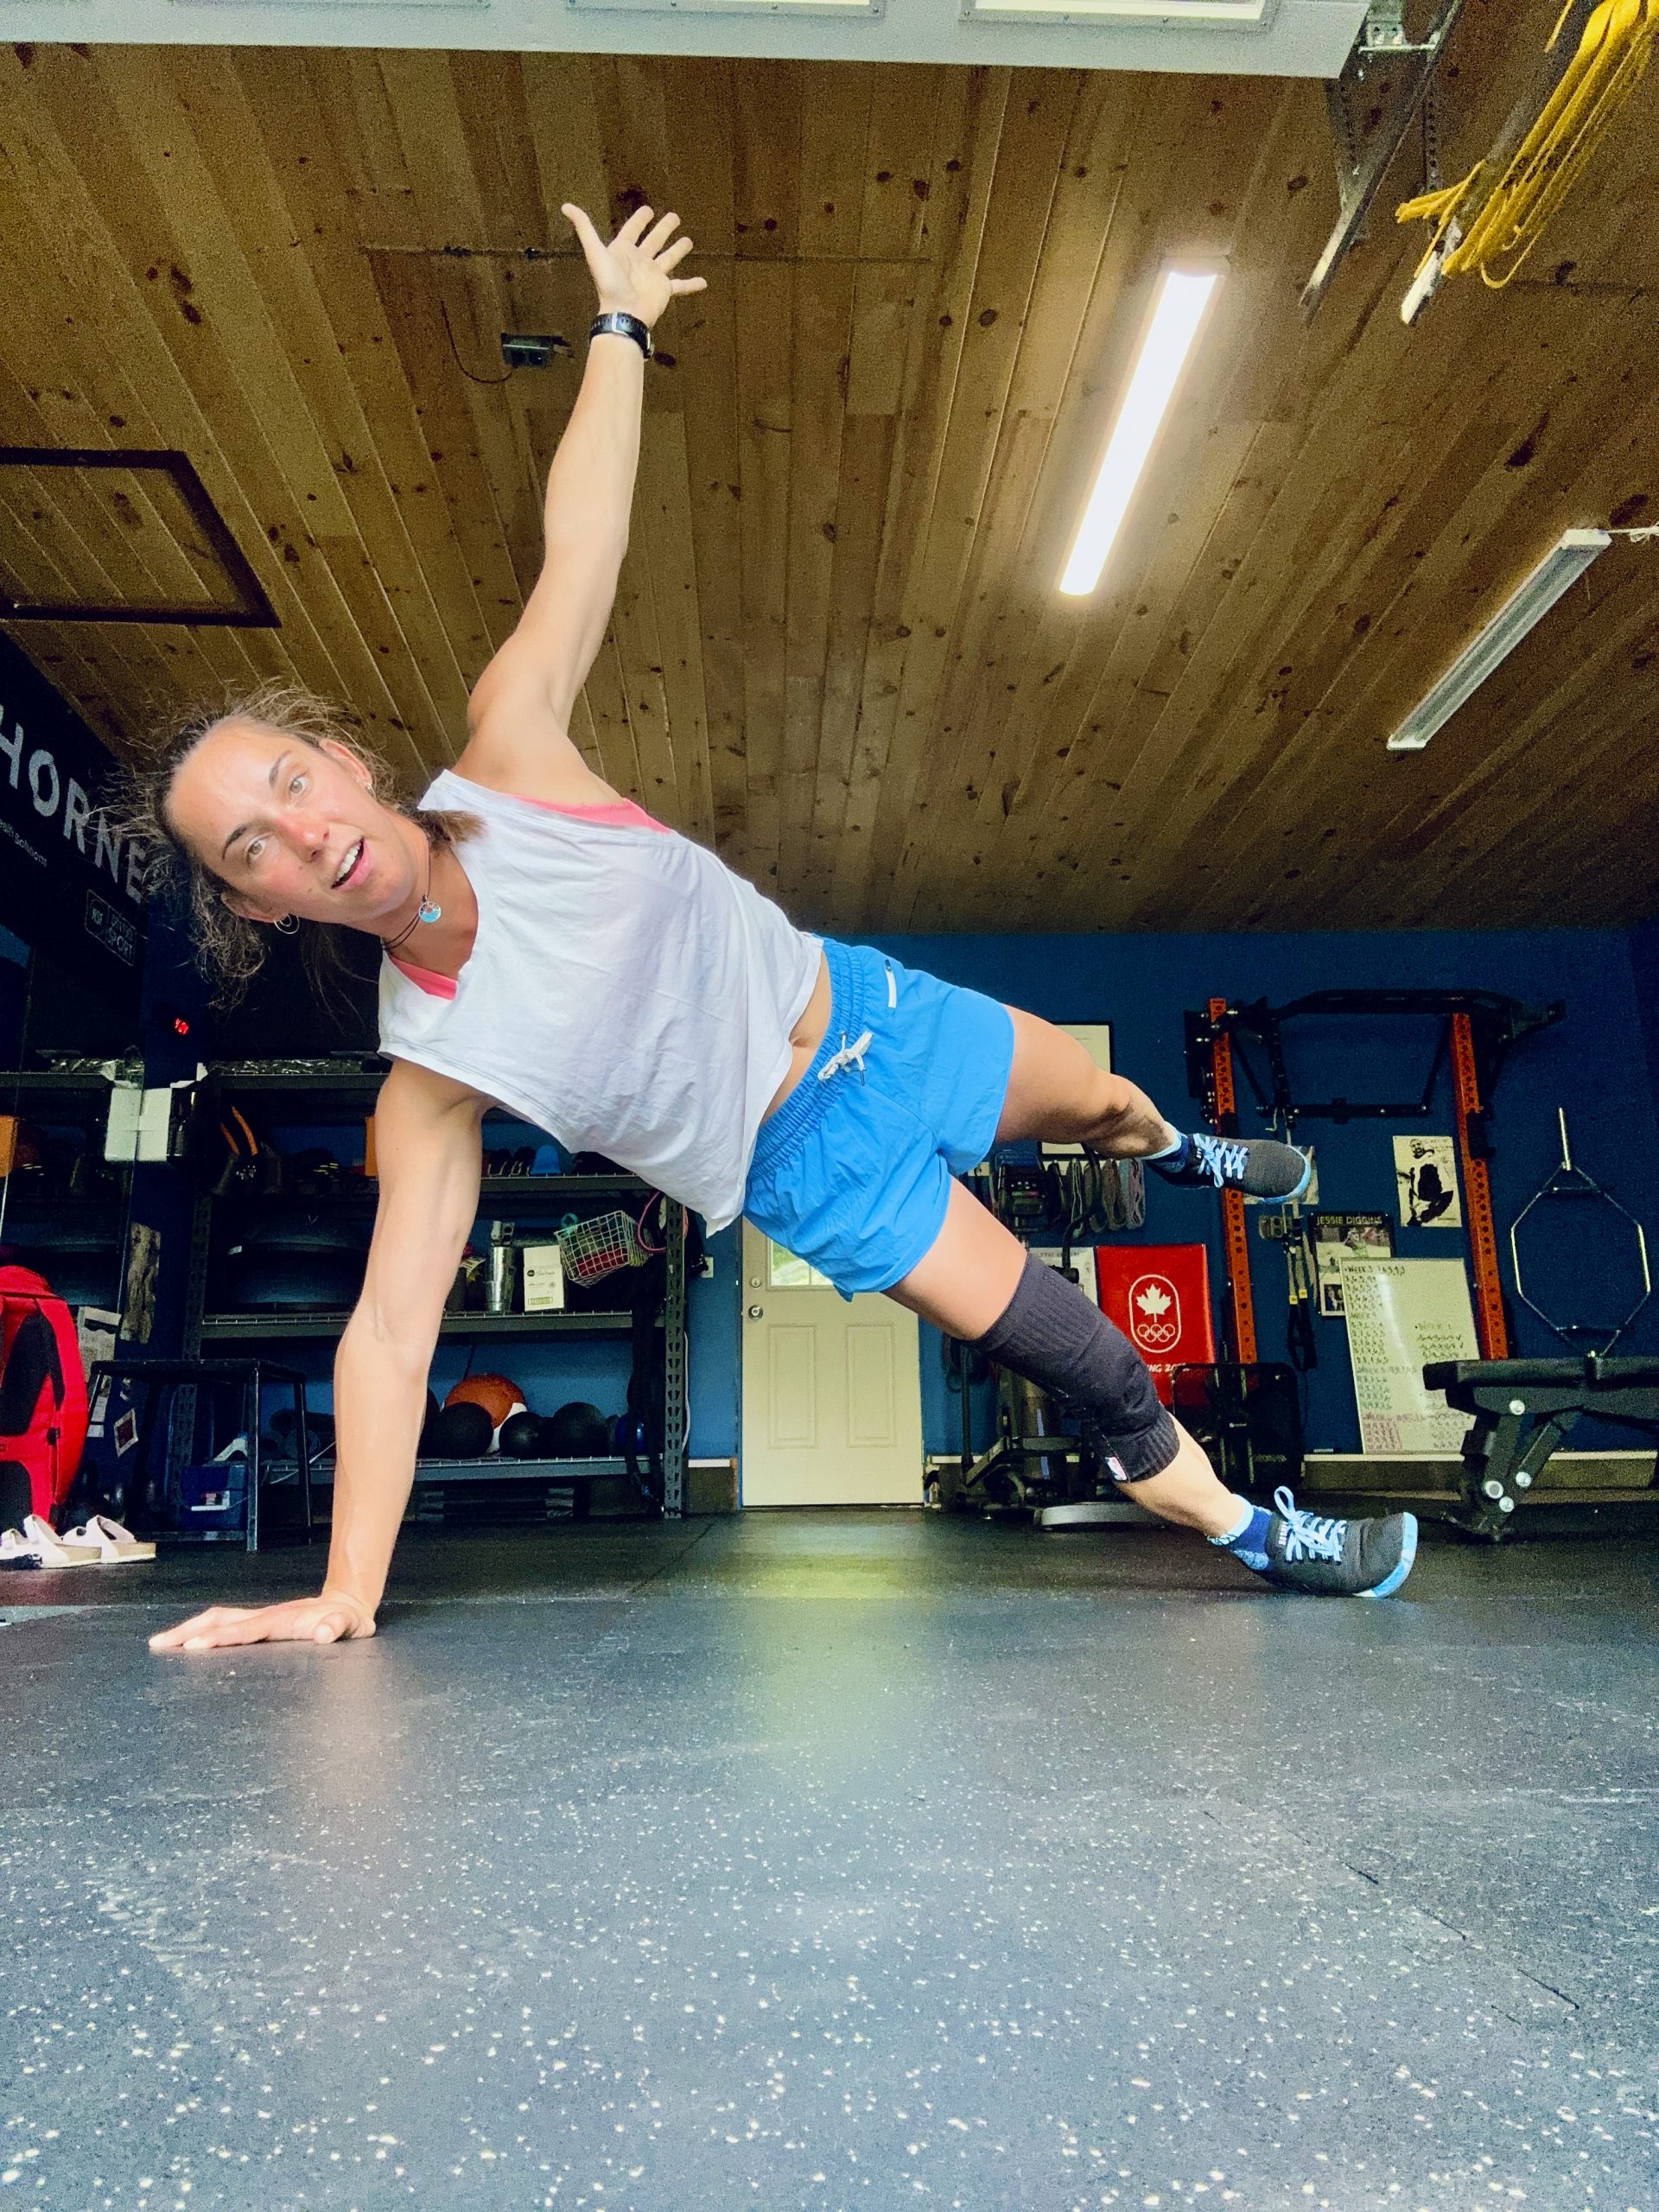
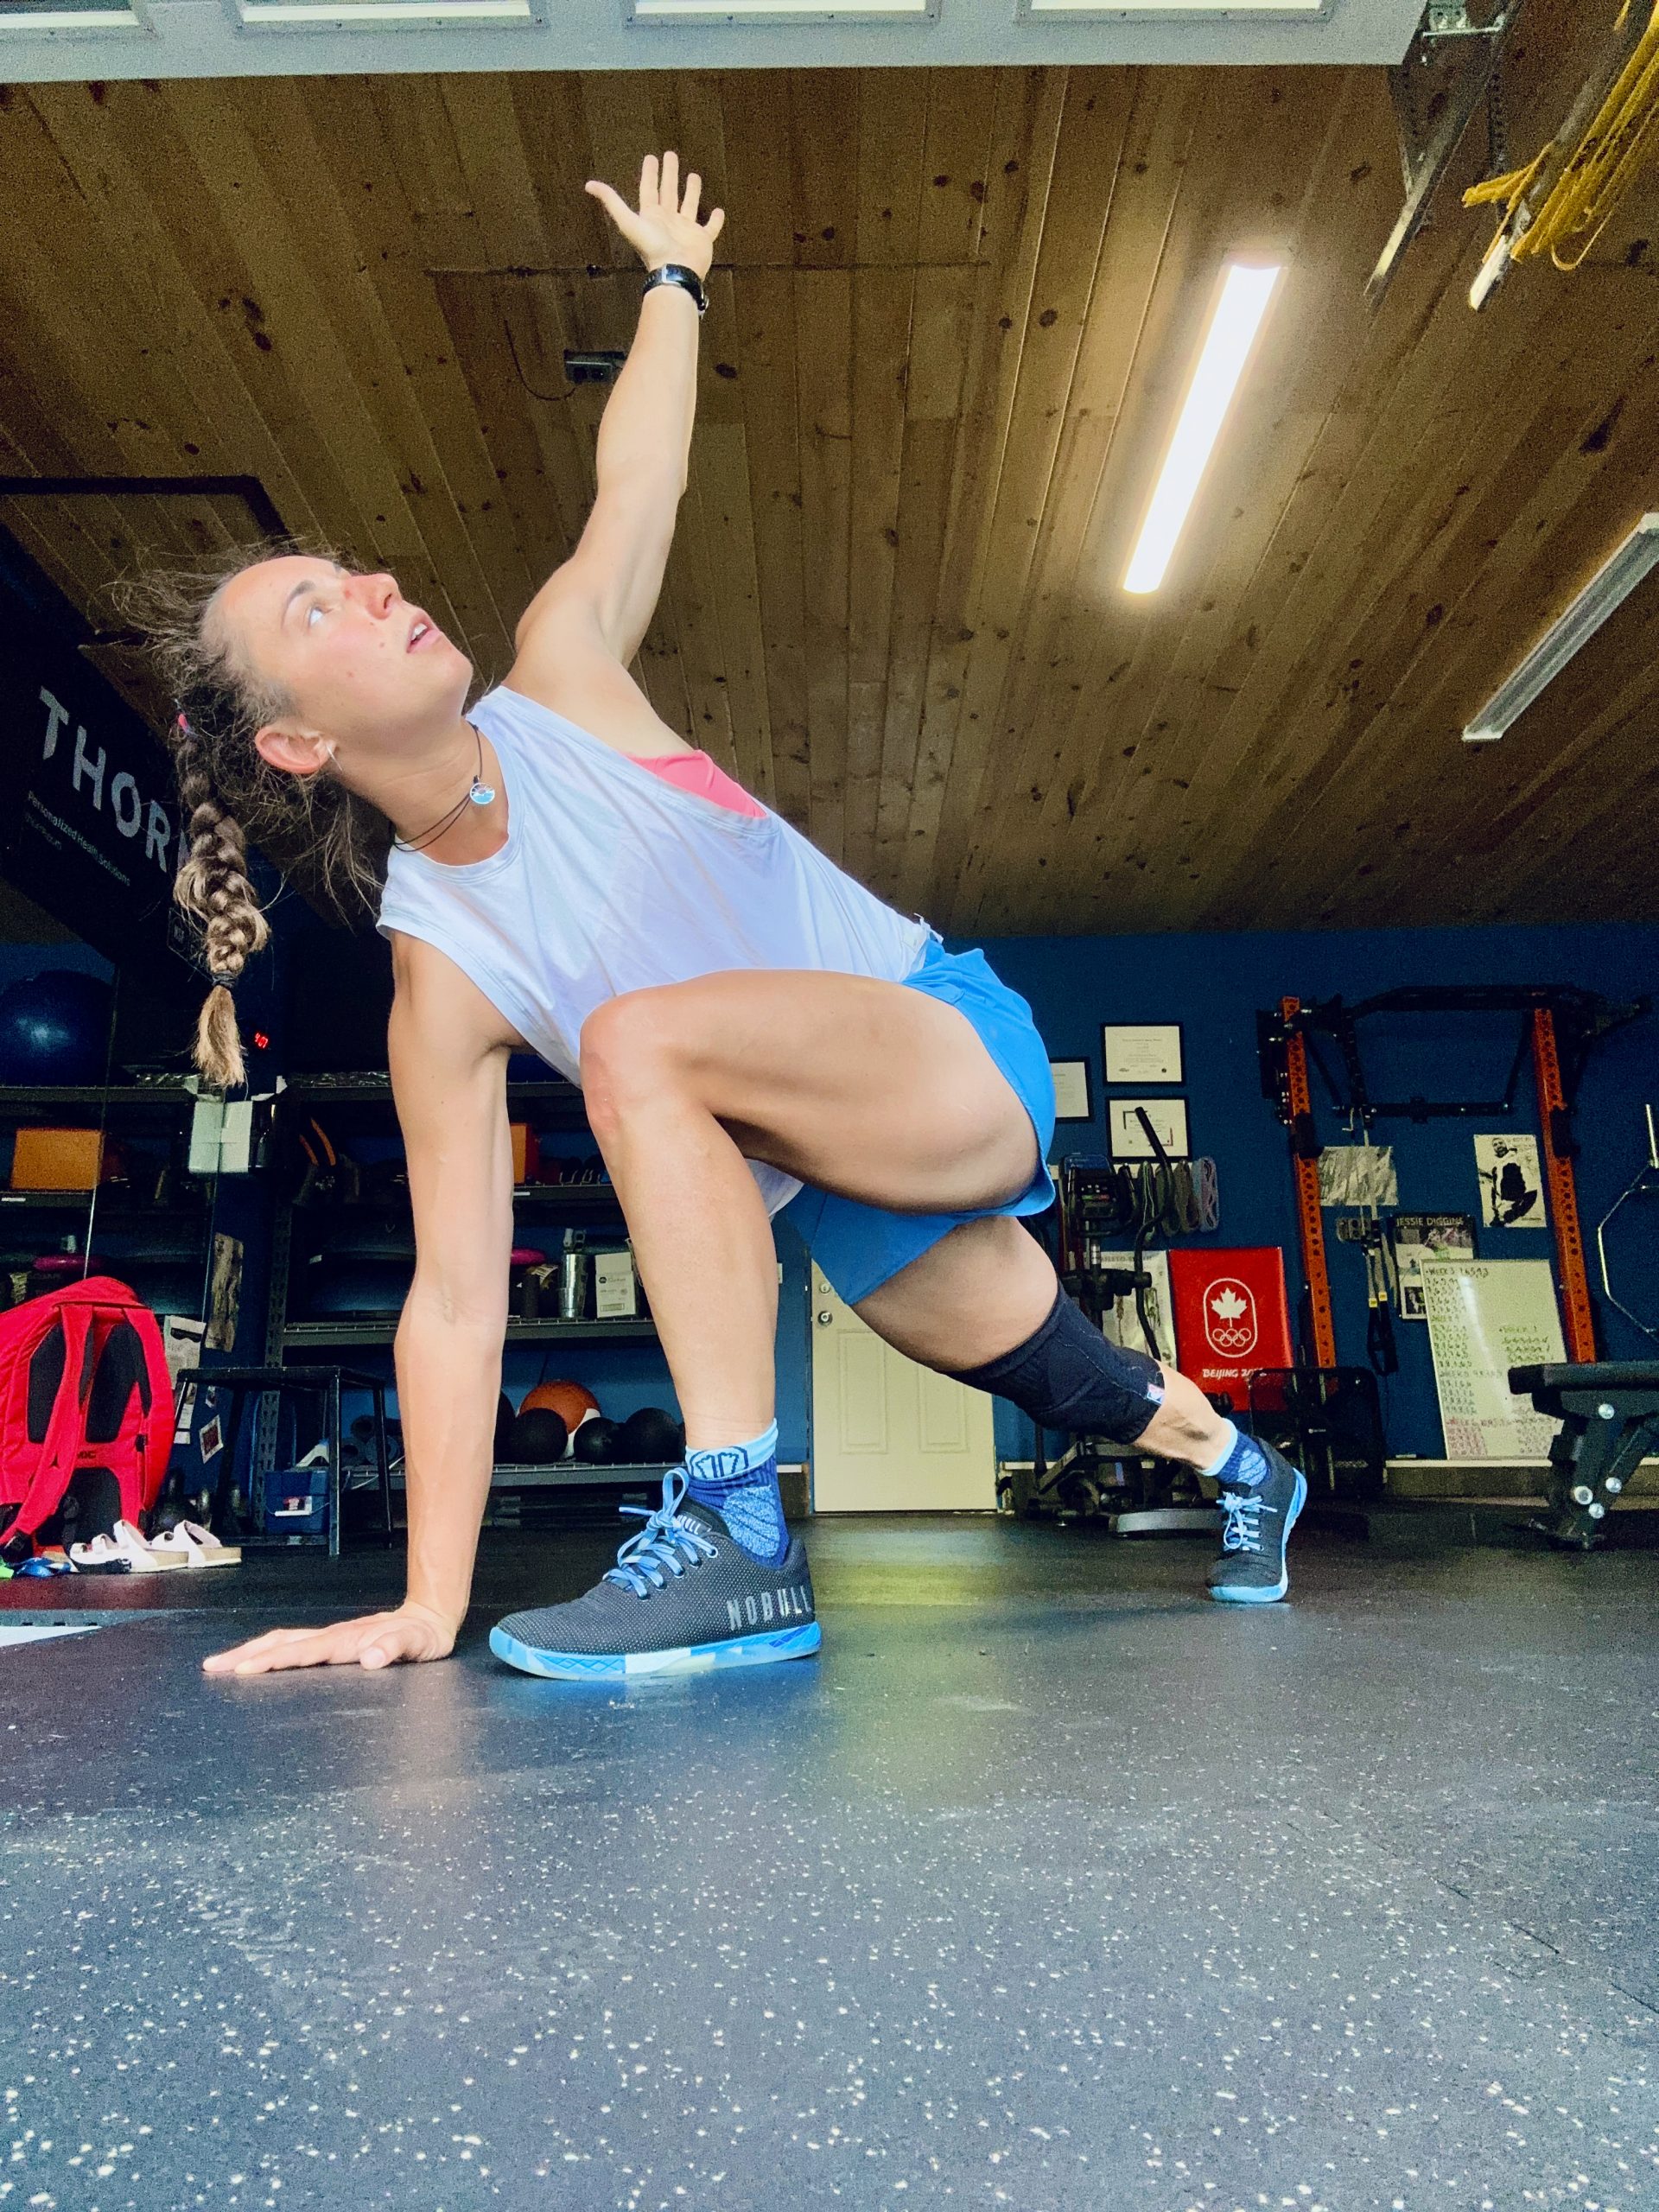
Side plank star
Activating: core, glutes, obliques, shoulders
Place your right hand (or elbow on the ground if it is soft) and right foot on the ground and come into a side plank. Make sure your body is in a straight line and your back is slightly rounded, with your core engaged to start. Lift your left arm and leg up straight into the air, and bring your left leg slightly back, activating the left glute. Raise and lower your left leg 10x before switching sides. Remember to maintain a straight line with your upper body.
Place your hands and knees on the ground in a tabletop position. Slightly round your spine and engage your core. Lift yourself a few inches off the ground, maintaining the position. Start by kicking one leg back and bringing it back in, maintaining the stable and flat starting position. Kick out the other leg and return it. If you want to add an extra layer of difficulty, reach out one arm and then the other. Repeat this 5x, extending one limb at a time. Focus on pulling your arms and legs closer to one another to get your core firing.
Front Lunge and Twist
Activating: quads, hamstrings, glutes, core
Engage your core and then lunge forward with your left leg. Place your hands on the ground on either side of your left leg. Keep your chest tall. Keeping your left arm on the ground, reach your right hand up towards the sky, twisting your upper body. Place your right hand back down, and reaching your left hand to the sky. Return your left hand to the ground and press through your right leg to return from your lunge to the standing position. Repeat on the other side. Do a total of 4x per leg.
Plank Shoulder Tap + Kickbacks
Activating: everything 🙂
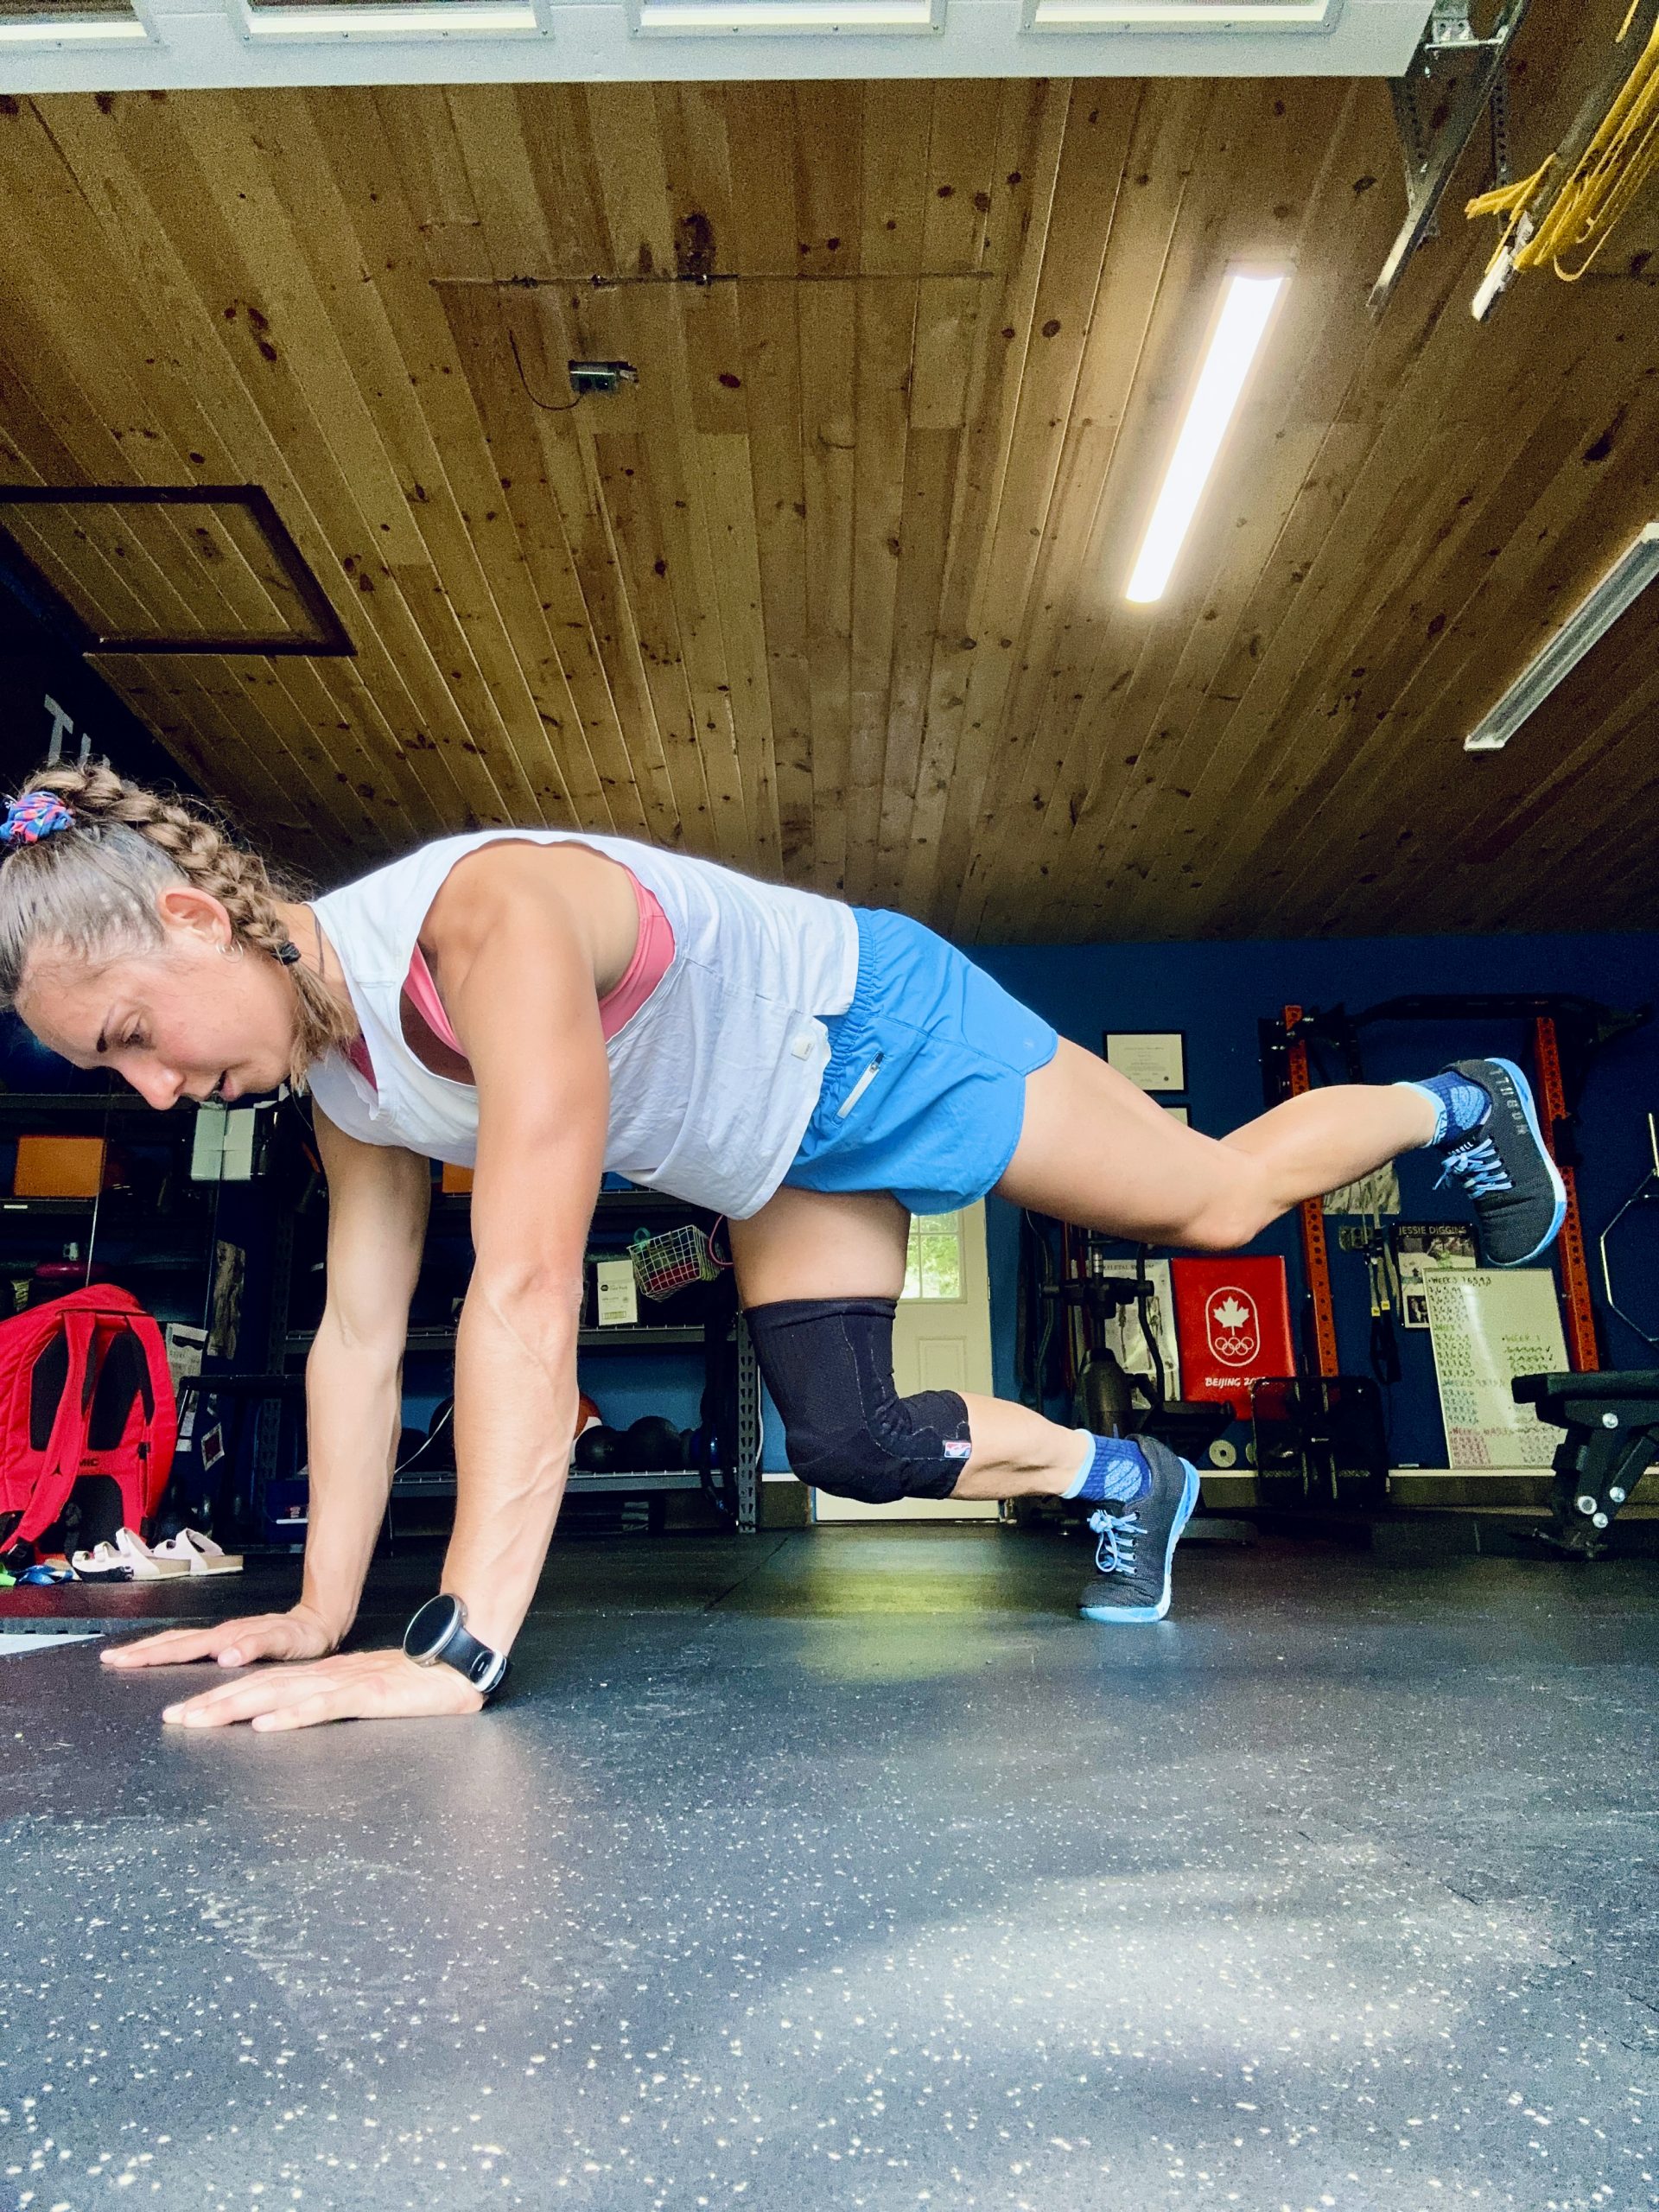
Julia Kern – Plank Shoulder Tap + Kickbacks
Julia Kern – Plank Shoulder Tap + Kickbacks
Start on the ground in a straight-armed plank position with a band around your ankles. Make sure you are in a straight position, engaging your core before you start the movements. Lift your right hand to tap your left shoulder and return it to the ground without twisting or rotating your back, keeping it steady. Now bring left hand to your right shoulder and return it to the ground. Kick your right leg up to the sky, keeping it straight and activating your posterior chain. Return the right leg back to the ground and do the same with the left. Alternating left and right arms and legs for 4 cycles.
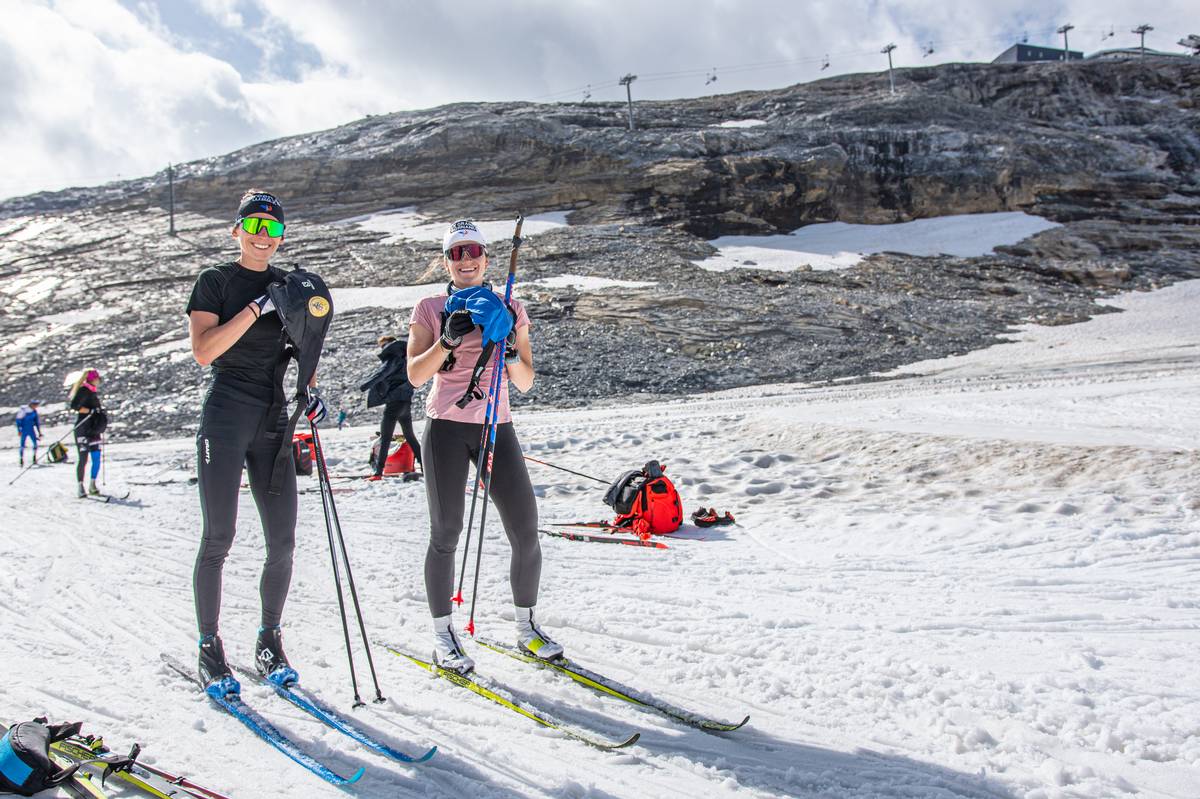
French skiers Delphine Claudel and Lena Quintin stop to refuel during a training camp on the Glacier de la Grande Motte near Tignes, FRA. (Photo: NordicFocus)
I grew up playing soccer. Every practice was hard. “No pain, no gain,” and all of that. By tenth grade, I was burned out and quit.
I started rock climbing. Every day at the crag was about pushing your limits. This was before indoor gyms or any concept of training other than doing as many pull ups as possible. I plateaued, got frustrated, and quit.
Then I had a go at running. I read some books, but skipped the training methodology parts and cherry picked the workouts. Every run was hard. Every interval was done to exhaustion. I plateaued, got frustrated, and quit.
Then I got into cycling. I began to hear of “easy” rides. I knew pros who rode around for four or five hours at such a pedestrian pace that they were talking the whole time. ‘How insanely boring!’ I thought. ‘Where’s the fun in that?’ So I went hard every time because it’s more fun. And guess what? I plateaued, got frustrated, and quit.
Fortunately, I didn’t learn my lessons the really hard way – through injury – but I still learned them the really stupid way – by throwing away any potential I might have had.
You can’t go hard all of the time. It’s as simple as that (at least on paper).
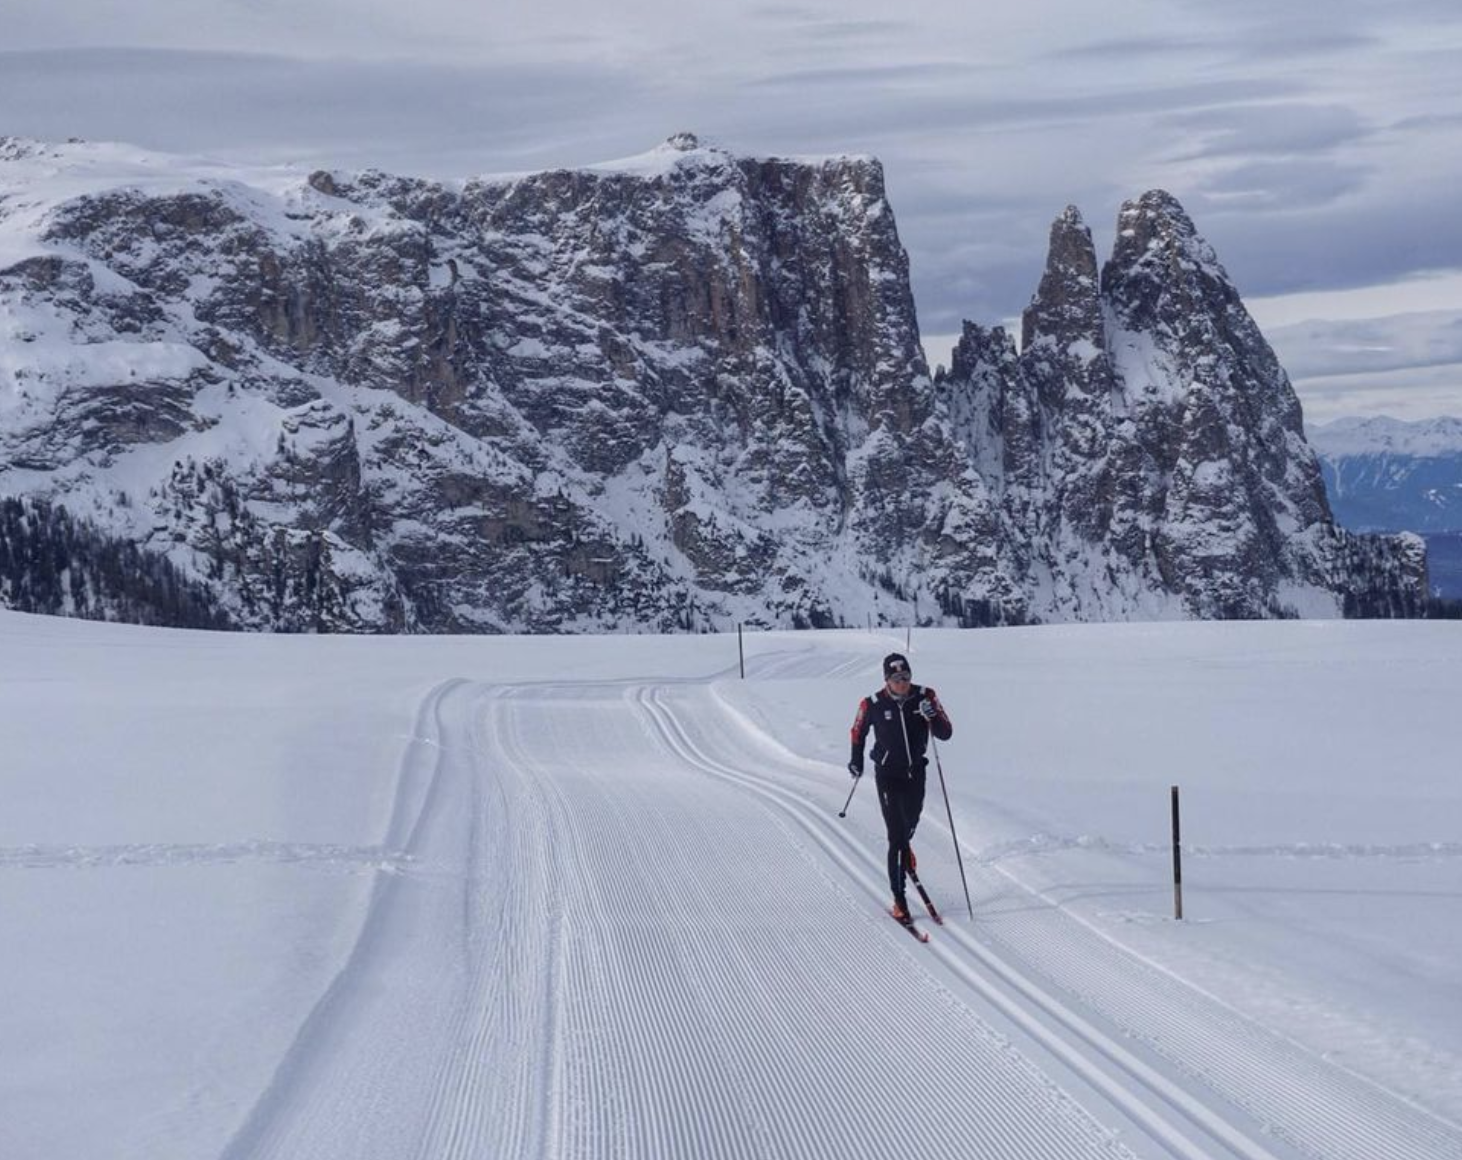
Scott Patterson enjoying a training day in Seiser Alm, ITA in January 2021. (Photo: Caitlin Patterson / Instagram @scottgpatterson)
The Basics of Polarized Training
Make your easy days easy and your hard days hard.
That is the backbone of a Polarized Training model. I had no problem making my hard days hard–they were all hard days after all. Full gas. Gun to tape. But in hindsight, I realize how depleted and chronically fatigued I was. I thought that was the desired effect, but it meant my training became less and less productive.
It’s the easy days that are actually the hard part.
First: I hear your inner dialogue. “Who wants to go easy? It’s unproductive. It’s a waste of precious time. It looks lame on Strava.” But the science says everyone should want to go easy. Metabolic efficiency is the name of the game.
If hard workouts train the engine to create more horsepower, then the easy sessions improve the gas mileage.
Secondly: let’s define easy. Training intensity is commonly split into five zones. (Some systems use three and others use seven, but I’ll be referring to a five zone system.) Zones 1, and especially 2, define the ranges of easy. Heart rate is the typical metric, especially for cross country skiers and runners, while cyclists typically use power.
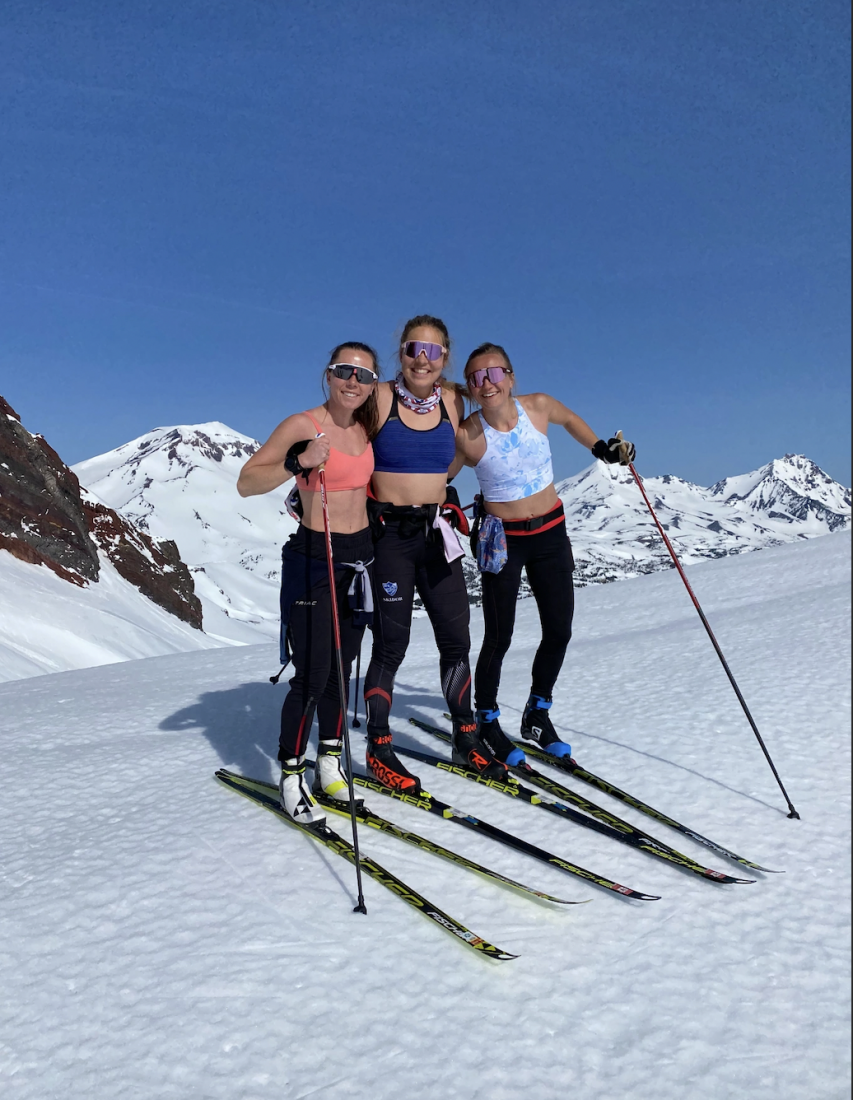
SMS T2 athletes Lauren Jortberg, Lina Sutro, and Alayna Sonnesyn find bluebird conditions for a crust ski up Broken Top near Bend, OR in May. (Photo: SMS T2 Blog)
Identifying Your Easy Zones
The theoretically simple method for establishing heart rate zones is to work backwards from your maximum heart rate where each zone represents a percentage of the max. The challenge is that there’s very little agreement on how to best calculate one’s max heart rate without actually experiencing it.
A more accurate method is to undergo a lactate threshold test, where heart rate zones are calculated based on the amount of lactate measured in the bloodstream. More accurate, but more difficult to conduct, and not universally accessible.
So how can we determine what is easy and what is too hard?
In an effort to keep easyeasy, I’m going to define it as conversational pace. You should be able to talk in complete sentences without having to… pause… to take in… more air… to finish your sentence. This is mediocre science and not especially objective, but with some practice, it’s not difficult to find that upper limit of talkability.
If you’re a numbers person, you can likely conduct your own ramp test where – after a warm up period – you progressively increase speed/effort while reciting poetry or singing along to what’s in your AirPods. Mark the heart rate where you lose the rhythm, and that’s a decent estimate of your upper limit for Zone 2.
Your new goal on easy days will be to keep your heart rate below this threshold, not necessarily at this level. For those accustomed to pushing the pace on every session, slowing down enough to keep your heart rate in the appropriate zones might feel like a big adjustment. There’s no real way around it – you’ll need to buy in, and trust the process/science. Maybe use it as an excuse to get out with a training buddy who is generally slower than you and give the whole “pedestrian pace, talking the whole time” thing a go.
Worst comes to worst, you give it an honest try and decide you prefer to just go hammer, then go back to your old ways. That’s the beauty of being a recreational athlete – at the end of the day, we’re just pursuing hobbies we find rewarding and enjoyable.
* A note for Strava users: don’t rely too much on the Relative Effort number. As a metric of intensity over time, it seems optimized to capture long, hard efforts like an hour-long tempo run where your heart rate stays high for the entire hour. It doesn’t handle intervals very well since the rest periods sort of cancel out the high intensity efforts.
For example, Strava gave 60 points to a 55 minute tempo run with an average heart rate of 158; however, an 57 minute interval session (9x600m on the track) with an average heart rate of 147 only got 35 points. To me, both sessions were equally hard, but the tempo run scored 25 points higher.
Strava does allow you to use your perceived exertion in place of heart rate for calculating Relative Effort. When I enabled this override, the tempo run scored an 87 while the track workout got a 147. (My easy efforts aren’t affected much.) Personally, I’ve found the Relative Effort score, along with the weekly log and Fitness and Freshness, far more useful (and accurate?) with this tweak. Here’s a deeper dive into that black hole.
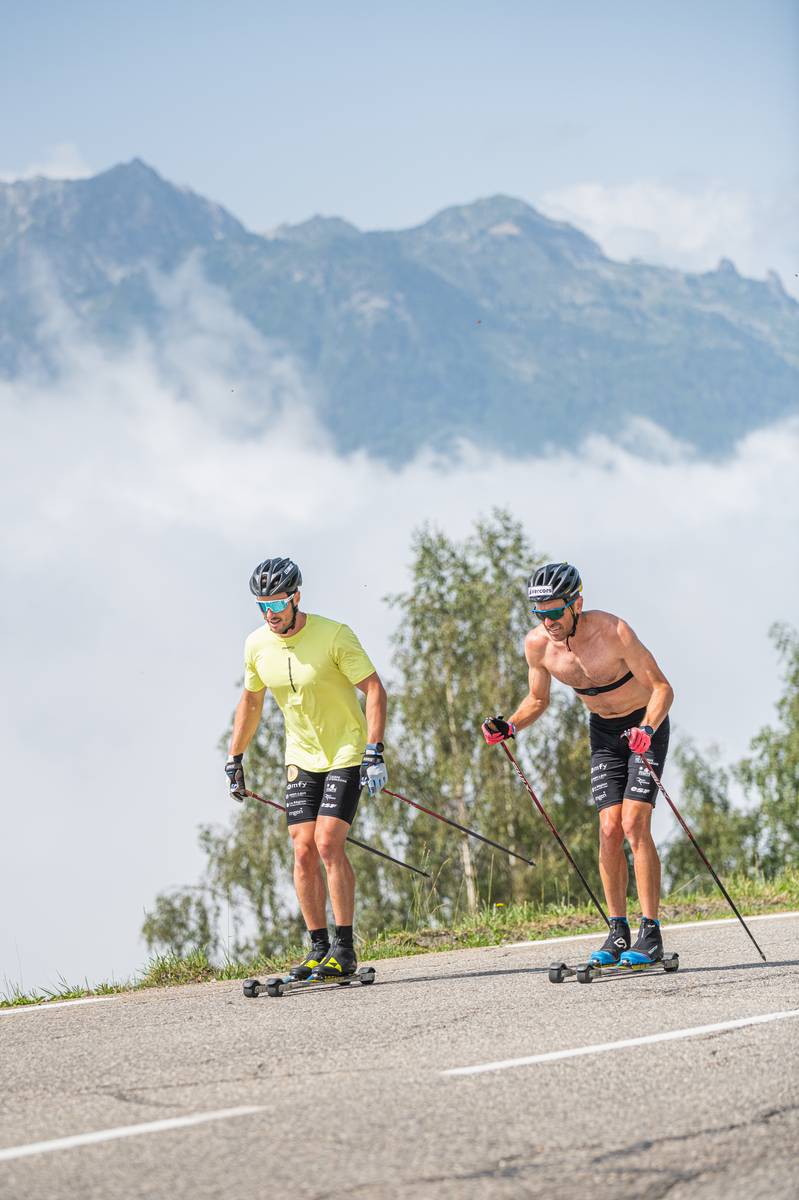
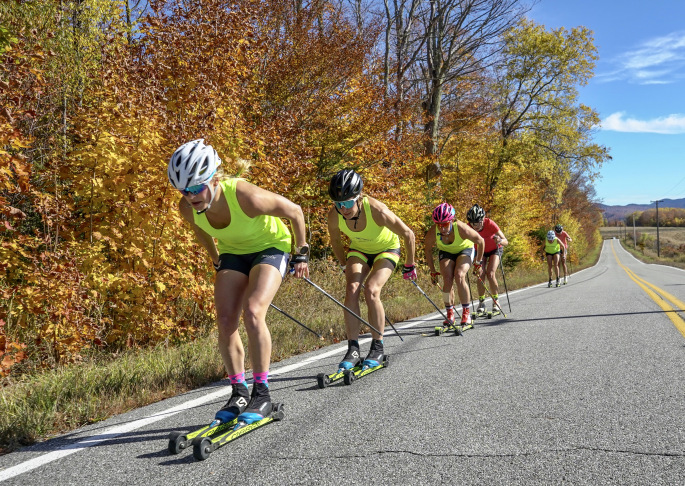
French athletes Lucas Chanavat (left) and Maurice Magnificat (right) out for a rollerski during a training camp in Tignes. (Photo: NordicFocus)
The Purpose of Polarized Training
Now we can talk about why the easy is important.
Stress + rest = growth/adaptation/strength/speed. That is the basic formula. Our bodies are designed to adapt to load, but we have to give ourselves the opportunity to make those adaptations. Too much volume or intensity and the body will stop absorbing. Not enough recovery and the body will stop adapting. Best case, your performance plateaus. Worst case, you get injured.
The Krebs Cycle. The stuff of High School nightmares. But the essence of the endurance athlete. The Krebs Cycle is the pathway by which our bodies put gas in the tank. It is the process by which our mitochondria – magical little intracellular thingies – convert carbohydrates, fats, and proteins into the specific energy required by muscles to contract. In oversimplified terms, the more efficient the mitochondria are, the faster and longer we can go. And it appears that the best way to train mitochondrial efficiency is with training in Zone 2. (If you want to seriously nerd out, this podcast with Dr Iñigo San Millán, perhaps the Father of Zone 2, is a deep dive in a submarine to depths of the ocean.)
The easy/Zone 2 is considered so important that it typically makes up 70-80% of elite athletes’ training volume. The other 20-30% is hard (high Zone 3, Zone 4, and rarely into Zone 5). For the athlete who doesn’t have all day, every day to train, that means you only get a couple of hard sessions per week. Keep the rest easy.
Some that’s hard, lots that’s easy – that’s the essence of putting Polarized Training into practice.
Example Training Plan Template
Monday
Easy short or Rest if needed
Tuesday
Hard long
Wednesday
Strength/core maintenance
Thursday
Hard short (intervals)
Friday
Easy short or Rest if needed
Saturday
Easy long OR Hard long AND Sunday is Easy
Sunday
AM: Hard short (intervals) + PM strength/core maintenance
My training template is based on my work schedule and typical life obligations. I’ve given myself a max of three hard sessions a week with one of them longer (2-3 hrs ride or mountain run–the fun stuff!) and the others around an hour of intervals. My strength/core maintenance sessions typically fall into the easy category and don’t require much recovery (no delayed onset muscle soreness). But my schedule is also very flexible. If I’m tired, I can move a hard session to another day or skip it that week. If I get too busy or stressed, then I can modify the program without too much frustration.
I’m fortunate that I can train/play seven days a week, as long as I’m recovering adequately. However if your schedule only allows for training three days a week, you can still apply the basic formula and have one hard day and two easy days.
Richard Jouve doublepoles up an incline during a team training camp in Tignes, FRA. (Photo: NordicFocus)
For some of you, this may be common sense and describe how you’ve been training for years. For others, this is quite a departure from your norm and will take a concerted effort to implement. But whether your goal is optimal performance or staying healthy for years to come, investing in a polarized plan, and especially leaning into the Zone 2 work, will pay dividends.
Lastly, I think any discussion about training principles/plans needs to have the overriding theme of ‘push yourself, but be kind to yourself’.
Be flexible. Training plans aren’t written in stone. Don’t beat yourself up if work, family, weather, fatigue, or lack of motivation keeps you from your intended workout. Take a walk, play with the kids, lie down on the sofa—whatever it takes to reset and be ready for another day. One workout will not make or break, but constant self-criticism will sink the ship.
2x Olympian and soon to be DPT Jessica Yeaton shares insights into incorporating mountain biking into your cross-country ski training. (Courtesy photo)
Cross-country skiers are notorious for training high volumes during the off season in order to be in peak racing form in the winter. There is a common mantra used by coaches to help motivate athletes to train hard even though the racing season is months away: “skiers are made in the summer”. From my experience working with different coaches, the large bulk of the summer’s volume is intended to be on roller skis or foot (either running or bounding with poles). While this may work for some, many athletes struggle with injuries when training 800-900 hours/year – myself included – making it hard to consistently rely heavily on these high impact training modalities.
A constant battle with an overuse injury one summer forced me to think outside the box; I began using the mountain bike to train. In the back of my mind, I doubted the effectiveness of this as it translates to skiing. I had heard coaches saying since I was in high school that cycling hours needed to be counted as 50% when logged due to the lack of specificity to our sport. However, I had no choice – it was either train on the bike or don’t train much at all.
Three years later, I now perform 60-70% of my summer training on a mountain bike. This is no longer because I have to, however; I now choose to use it as my primary mode of volume and a large amount of my intensity due to the immense gains in fitness and muscle activation, along with technical and terrain aspects that I have found translate well to cross-country skiing.
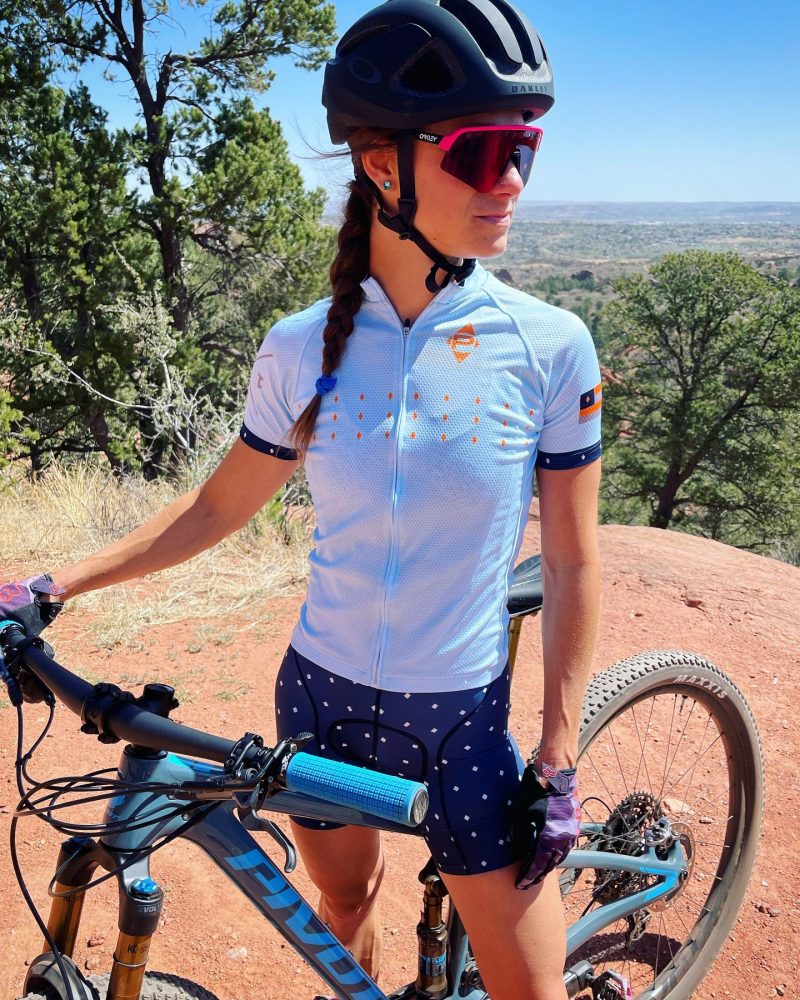
Jessica Yeaton enjoys a fall mountain bike ride in Sedona, AZ. (Courtesy photo)
It’s a no-brainer that mountain biking heavily engages lower extremity musculature, placing a high demand on our quadriceps, hamstrings, glutes, and calves. However, mountain biking also employs shoulder, chest, and arm muscles due to the control required in technical sections, downhills, and even steep uphills. Thus, the muscles used while mountain biking closely mimic those during cross-country skiing – particularly skating, which has a higher demand on our glutes than classic skiing. Additionally, the terrain in a network of mountain bike trails is often tough, causing fluctuations in heart rate similar to those experienced while skiing. There are long climbs followed by flowy descents with sharp corners and short, punchy uphills thrown into the mix. High workloads followed by challenging downhills on which to recover – doesn’t that sound like ski racing? I find that a 90 minute bike race feels very similar to a 30k skate race in effort.
The downhills also offer a technical challenge that heightens reaction times. I often ride into more difficult features multiple times to get the line right before committing – something that has changed the way I now approach tough downhill corners before a ski race. An added bonus is the smile that I can’t wipe off my face after a flowy descent or when I’m able to conquer a new feature!
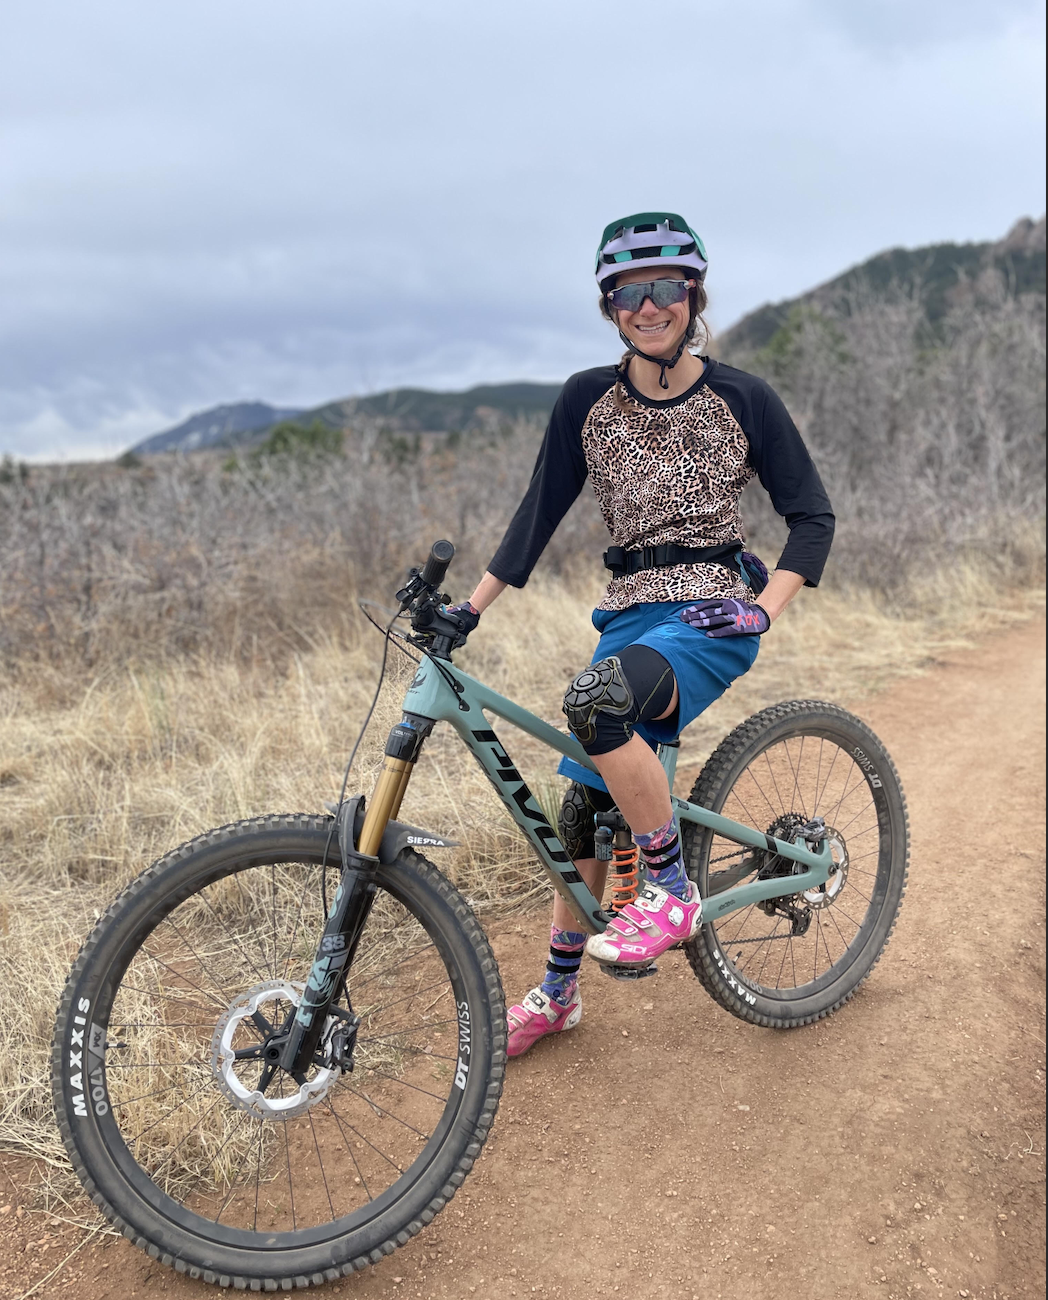
Dropping! Jessica Yeaton gets after it on a technical ride in Colorado this spring. (Courtesy photo)
Lastly, the fact that it is low impact makes it a great addition to a summer training plan that is full of running and rollerskiing. If you struggle with injuries or are looking to increase volume without added stress on your joints, jumping on the mountain bike for a few workouts a week is a great way to accomplish that.
So, with all of those factors in mind – what is the best way to approach your workout on a mountain bike?
The aerobic demand and muscular fatigue is often higher while mountain biking than during other activities where it is easier to keep my heart rate consistently lower. Because of this, I tend to pick a few workouts a week where I am ok doing a higher distance pace (L2 into L3) to hop on the bike. I choose terrain that mimics ski racing, and do not stress about keeping my heart rate low. I often pair my rides on a day with double pole intervals or strength sessions. If I am trying to keep it easy or have hard skate rollerski intervals planned the next day, I opt for easier trails or a light run so I can keep my heart rate low.
Want to test it out for yourself? Here are two of my favorite workouts on the bike.
Due to the aerobic challenge mountain biking presents, it’s an awesome place to do threshold workouts. If you live in a place where you can find a sustained climb or an up-track, you can use this to do L3 efforts (for example, 2 x 20 or 3 x 15 minutes up an up-track), then use the downhill for active recovery. This stimulates downhills in racing and forces you to focus on coordination while flooding with lactate.
2x Olympian and soon to be DPT Jessica Yeaton shares insights into incorporating mountain biking into your cross-country ski training. (Courtesy photo)
Another great workout on the bike is 30-30’s, or where you go hard for 30 seconds, then recover for 30 seconds while continuing to ride easy. This workout focuses on power and strength, and I find that it translates really well to sprinting, and teaches the body to recover and get used to back-to-back punchy hill efforts, so you’re able to regain power descending off a roller before hammering up the next climb in a race. I recommend doing 3 x 10 minutes or 2 x 15 minutes of 30-30s. Just make sure you are able to keep your legs spinning during the recovery – you shouldn’t need to get off your bike to rest in between! The goal is to put in a hard effort, but maintain a reasonable pace in between.
I am a big believer in making training as fun as possible while still putting in the hard work. Mountain biking is something to look forward to that makes me excited to get out and train. Ultimately, this helps me train harder and stay motivated, so I am a huge advocate for learning how to integrate it appropriately – which for me means creating a smart training plan that will help me reach my goals in the winter. If you also crave time on the bike, I hope this advice can give you the confidence to structure it into your dry-land training as well.
I hate rollerskiing. As much as I try to be a good Nordie, I just can’t get over my fear of hitting the pavement. Between a history of bike racing and the rollerski learning curve, I’ve already lost enough skin. I know it’s good for me and might make me faster on snow, but I’m too old to put up with my heart rate being affected more by fear-induced adrenaline than by quality training.
My legs and lungs get plenty of work all summer from running, cycling, and strength training, but my typical dryland routine does little for the arms. I’ve tried to swim, but I haven’t progressed past drinking half the pool.
A few years ago, I set up some resistance bands to train the arms for double poling. After developing triceps tendinopathy, taking a snapped band to the crotch, and generally finding the bands to be either too hard or too easy, I realized my workouts were far from ideal.
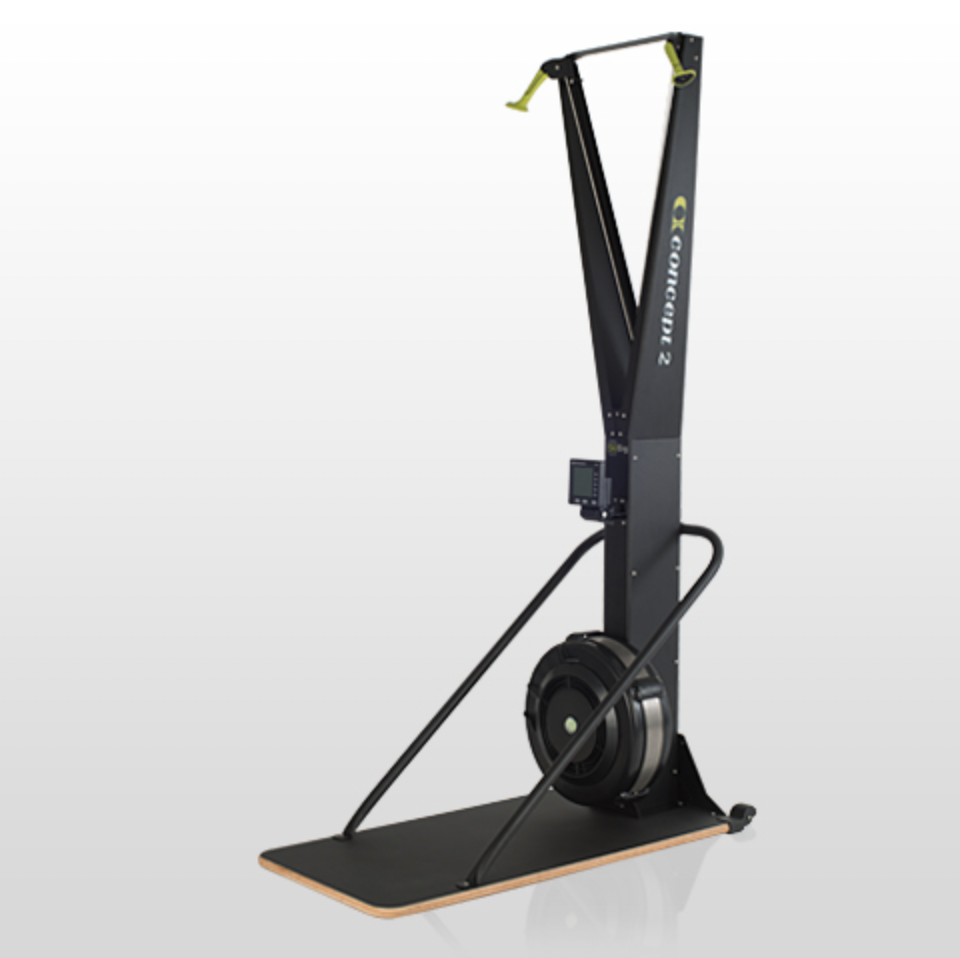
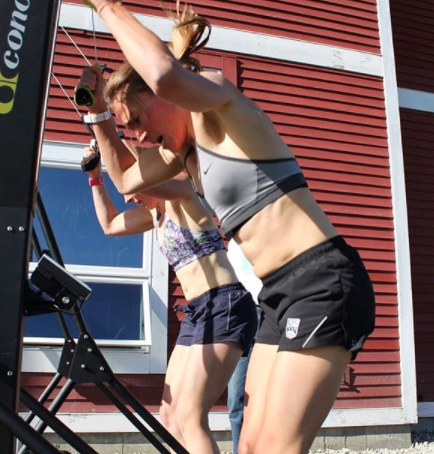
(Photo: Concept2.com)
What the bands gain from their price-point, they yield in utility. By their nature, the more you stretch a band, the more resistance it provides. This is the opposite of what happens with poling on snow, where the greatest resistance (or force requirement) takes place near the beginning of the pushing phase and decreases through the end of each cycle.
Staring in the face of another hot (and smoky) summer, I splurged on a Concept2 SkiErg last spring. Thus, I was immediately able to avoid rollerskiing (without feeling guilty) while simultaneously shielding myself from the heat and poor air quality. Solved were the resistance bands’ problems of poor adjustability and inverse force curve. This utility continued during the purgatory of shoulder season in the fall, and carried me through the local trails’ annual mid-season melt out here in Salt Lake City.
Cool tool. What do I do with it?
For some expert information, I asked Miles Havlick, head Nordic coach for the reigning NCAA national champion University of Utah Ski Team, some questions about how they incorporate the SkiErg into their training.
What are your typical resistance settings? What’s the max you’ll use?
We almost always use the max resistance setting of 10 during SkiErg workouts. The majority of the time we do sprint type workouts on the SkiErg machines with interval lengths of less than 5-minutes in duration. However, during longer sessions we will lower the resistance in order to keep the intensity lower.
Author’s comment: 10 is hard! Keep in mind these are elite skiers. In a video blog from Jens Burman, he notes that his max resistance is 7.
Better for easy, Z1-2 endurance or higher intensity intervals?
In my opinion, it is better for high intensity sessions targeting more anaerobic or strength training. Although the muscles are fairly similar to actually double poling, we prefer to perform longer L1 sessions on rollerskis which offers more variety in terrain and more closely resembles double poling on snow.
Author’s comment: In my opinion, pavement hurts more than snow and I haven’t lost any skin to L1 sessions on the SkiErg.
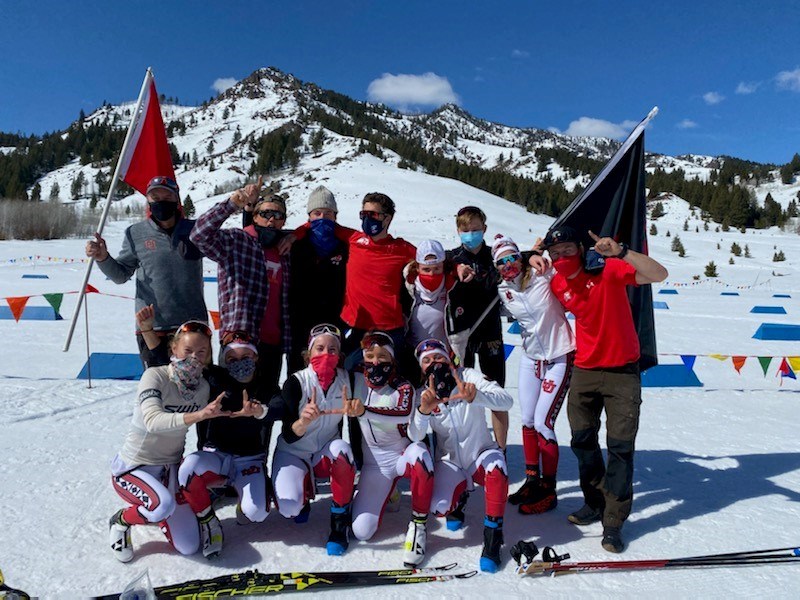
Head coach of the University of Utah nordic team, Miles Havlick (far right), was named RMISA coach of the year in 2021 following a record setting season for the Utes. (Photo: utahutes.com)
Do you cue or work on technique during SkiErg sessions?
We certainly do. It is easy to get higher power numbers when using techniques that are not as effective on snow, however, we are training to be better on snow. Therefore, we are always trying to emulate the most effective on-snow double pole technique on the SkiErg machines.
Author’s comment: more on this below.
Do you incorporate drills like balancing on one leg or BOSU?
We have played around with it but we do not regularly utilize this. It is effective for making L1 workouts more interesting, however during higher intensity bouts, it seems to detract from the quality and focus of the on-snow movements that we are trying to emulate.
Training sessions on the SkiErg can cover both ends of polarized training with the capacity for both longer duration, low intensity workouts with emphasis on metabolic efficiency and for shorter, high intensity intervals to work power.
SkiErg Technique
While perhaps the best indoor replacement, pulling on the SkiErg is definitely not the same as poling on snow or rollerskis. The notable difference is the lack of balance with a forward trunk lean. Without bindings and the ski to counterbalance, there is much more tendency to fall forward on your face. Or, perhaps, more tendency to sit back so you don’t fall on your face. This is a likely reason why coaches can be critical of spending too much time on a SkiErg, with a nod toward the potential non-ski-specific movements Havlick alluded to when he commented that they are always attentive to form.
With that in mind, there are absolutely some technique fundamentals that can be reinforced on the SkiErg.
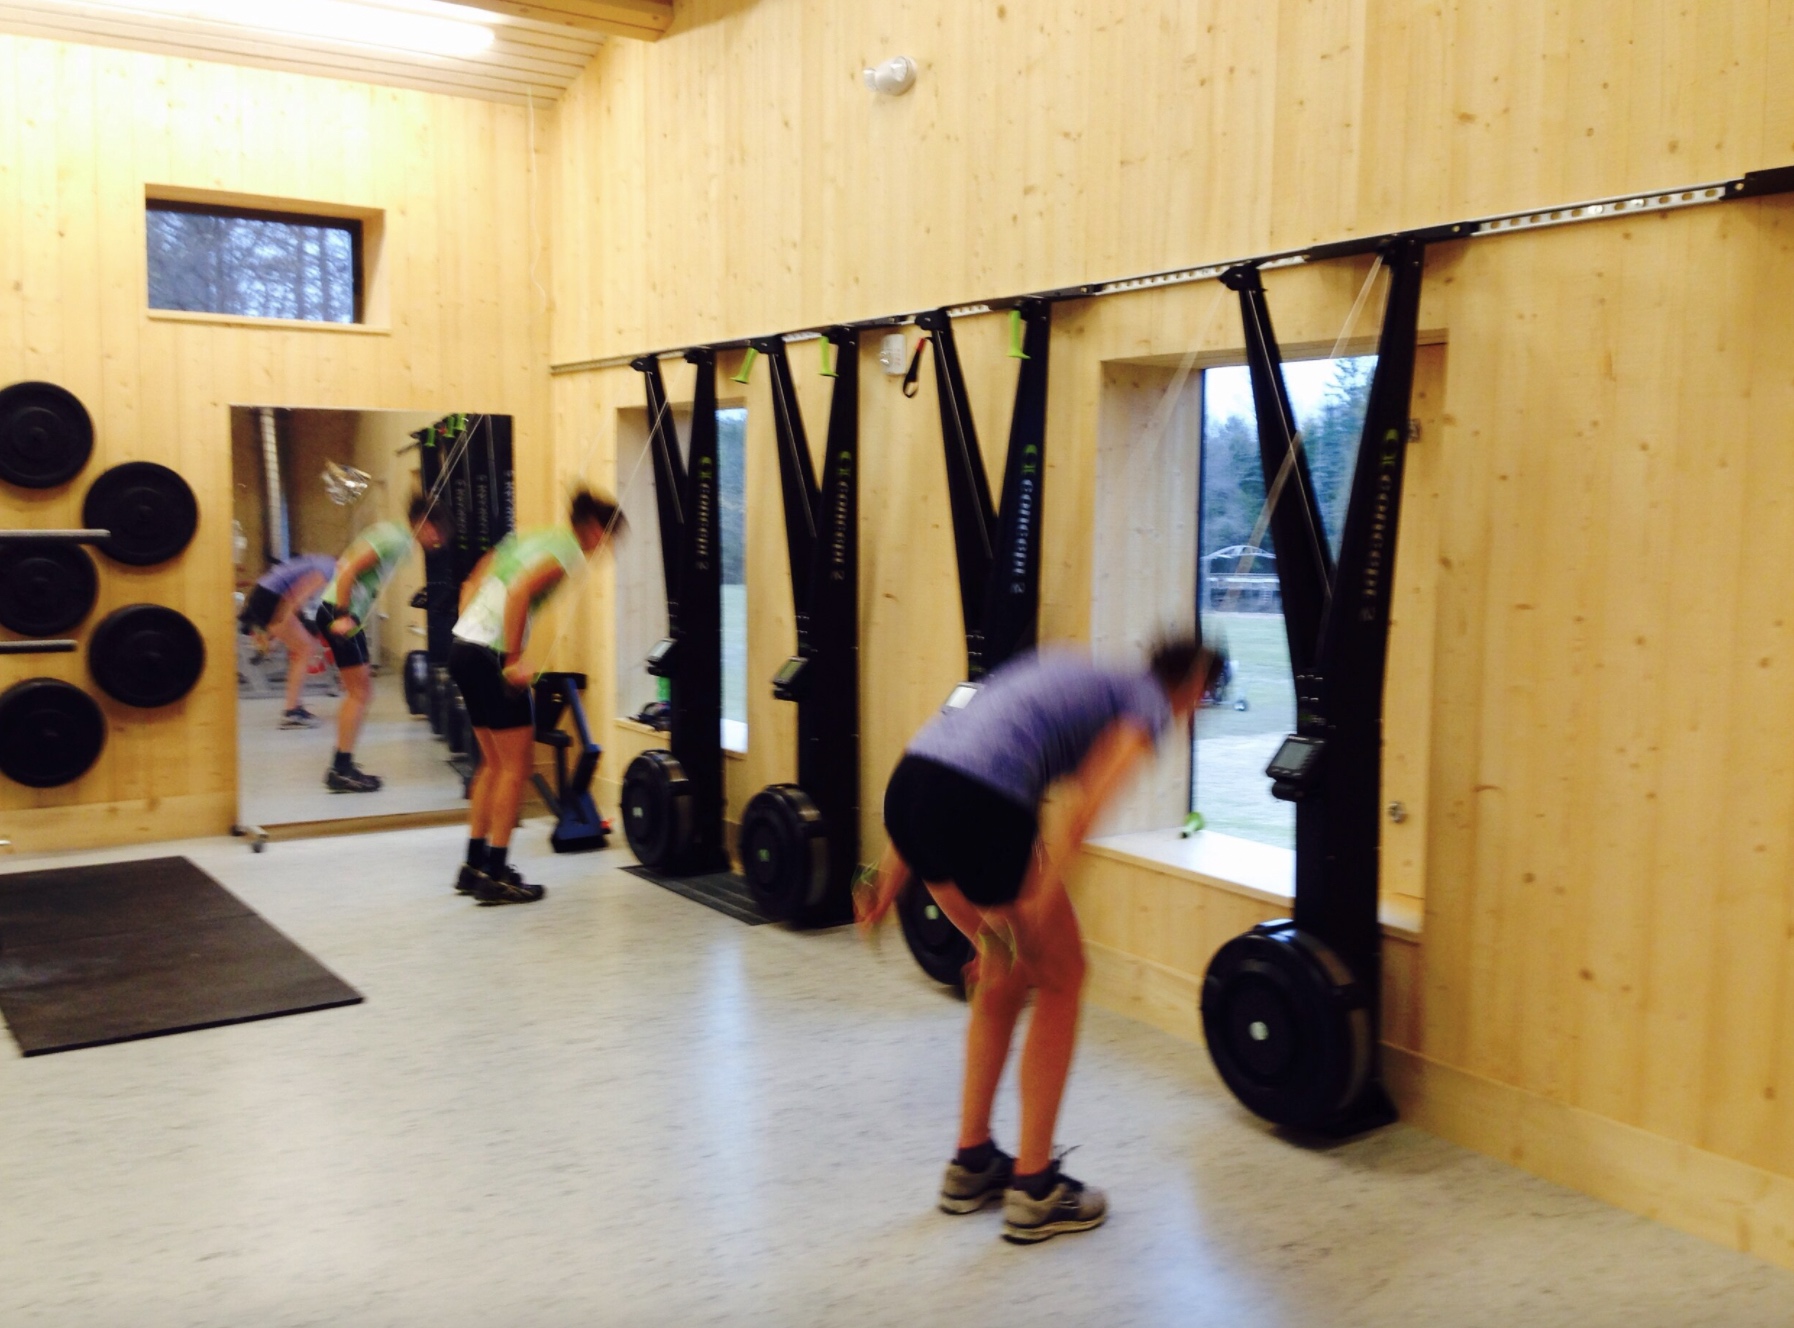
A pair of Craftsbury Green Racing Project athletes complete a 1k time trial on the SkiErg in November, 2014. (Photo: GreenRacingProject.com)
The Arms
The monotony repetition of the poling motion creates a great opportunity to reinforce some key components:
Hands high: don’t be lazy, get those hands up
Elbows fairly fixed with short swings under higher resistance (think uphill double pole or V1)
Elbows extend with long swings under lower resistance (think fast V2 or V2 alternate)
Smooth on the power: like starting a car from a dead stop but getting up to speed quickly – if you just stomp on it, the wheels will spin. With poling, we want to achieve peak force quickly but smoothly; setting the poles, then delivering power to them as the upper body drops powerfully onto the poles and the pole angle decreases to deliver the force behind the skier as a push off, versus just stabbing the poles as hard as we can into snow. The latter strategy does not propel forward motion as the peak force is directed into the ground, which incurs vibrational losses in the pole shaft, and robs the system of energy before the pole angle changes toward one more effective for force delivery.
The Hips
“Hips high” might be one of the more overused and less understood cues in Nordic skiing. Without digging too deeply here, the basic premise while on the SkiErg is starting the poling motion from a tall position. As the body compresses with the arm pull, hinge at the hips and ankles. Then, focus on quickly getting back to the tall start position by extending the hips via contraction of the glutes (aka “squeeze your butt cheeks”). Your knees should be relaxed and bend slightly on each cycle, but you’ll want to avoid significant knee bending as it likely indicates that you are sitting back too much. I’ve personally found that one of the biggest gains I’ve found on snow is through focusing on quickly returning to the high hands and hips start position, over and over and over on the Erg.
As much as high intensity double poling is a full body effort (not just the arms), in skiing it is more about movement across the hips and ankles vs the knees. In CrossFit gyms, this is not necessarily the case. They are after maximum generation of force, not skiing efficiently. Please don’t do this.
Balance
While Havlick mentioned that they rarely incorporate balance drills into SkiErg sessions, I think they can be very useful for reinforcing single leg stability, especially if there is a specific component to address like foot pressure distribution, ankle dorsiflexion, or lateral weight shifts from the hips. As with any balance exercise, it is generally more beneficial to work on consistently accomplishing appropriate balance on the floor before moving on to an unstable surface like a BOSU or Dynadisc.
Looking for more? Find a 2017 Wednesday Workout with Sadie Bjornsen here, featuring 30 minutes of 30/30’s on the SkiErg.
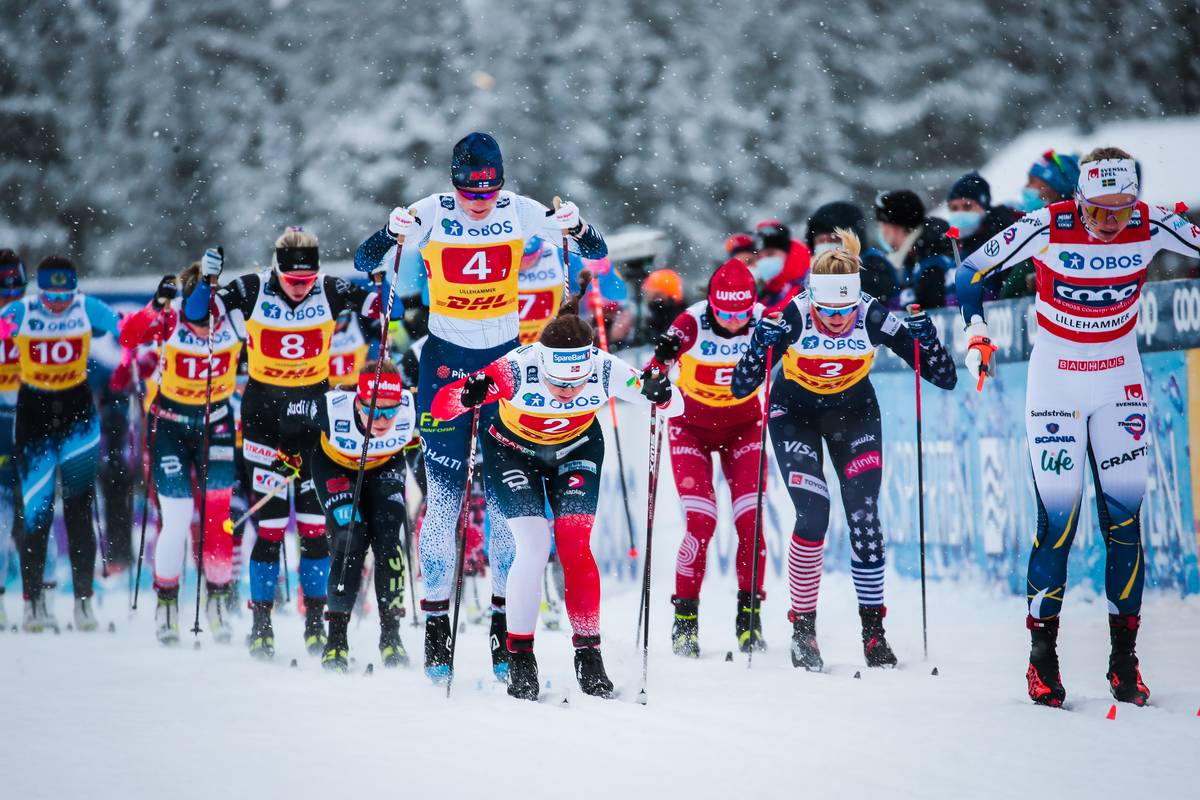
Doublepole form on display at the start of the 4×5-kilometer relay in Lillehammer. Hailey Swirbul (bib 3) skis the scramble leg for the U.S. (Photo: NordicFocus)
Author’s Disclosure: Concept 2, manufacturers of the SkiErg, is a sponsor of FasterSkier; however, I purchased mine at full price before I was affiliated with this fine website. In addition to the SkiErg, Abilica makes a very similar device. The Italian company Ercolina makes an upper body ergometer that has the advantage of being much more compact and portable, but it is also more expensive and very hard to find in the US.
David Norris and Scott Patterson complete a set of pre-race classic intervals to optimize their performance in the next day’s races. (Photo: Tom Horrocks)
All the athletes are all stripped down to their race suits and zooming around the course with laser focus. They are breathing hard; in fact, some of them seem to be skiing at max effort. If it weren’t for the lack of announcements, race bibs, and cheering from the crowd (pre-COVID, of course) you might actually think it’s race day – but it’s not. It’s actually the day before the race, and many of the athletes are performing their race-prep workout.
For most cross-country skiers, a race-prep workout entails skiing fairly hard, often involving a similar pace to that of the race the following day. This may seem counter-intuitive, as you might think that energy conservation is key to peak performance. I distinctly remember being a middle-school cross-country runner and taking the day before the race entirely off; my race-prep “workout” would then consist of 20 minutes of walking to ensure that my legs didn’t get “too tired”. Sadly, this leisurely myth was debunked, and I have learned over the years that race-prep the day prior is actually a great time to put in some harder efforts to optimize performance.
Here are a few of the reasons why it’s a great idea to push yourself out of your comfort zone the day before, and a few suggestionsfor improving your race-prep workout before your next race.
Hailey Swirbul completes a pre-race training session in Davos, SUI in December, 2021. (Photo: NordicFocus)
While rest is important, taking a day off can often make your legs feel heavy or sluggish the next day. This is one of the main reasons why it is important to get out and ski the day prior to a race, even if minimally. Many athletes opt to take two days prior to the race completely off instead.
One of the biggest goals of a race-prep workout is to help switch your legs on and avoid any lethargic feelings on race day. It is not uncommon for athletes to report feeling “terrible” and having heavy legs during a race-prep workout. Rather than serving as a bad omen for the race the next day, it actually can be a positive sign that both feelings and performance will improve on race day. That being said, the length of the race helps determine the intensity of the workout the day prior. The shorter and more intense the race is the next day, the harder the pre-race workout will be, and vice versa.
U.S. Ski Team member and soon to be two-time-Olympian, Rosie Brennan, offered her advice for a race prep-workout and how it differs depending on the type of race. Rosie excels at both sprint and distance racing; last season she won both the sprint and distance world cup races in Davos, Switzerland. Additionally, while many other world cup athletes specialize in sprint or distance events, Rosie’s race calendar consists of a mix, which has given her plenty of practice perfecting her race-prep.
“For sprint days, I do one lap of the course L3, take a break, and then one lap L4. After that I will run through a few speeds on key sections of the course.”
Before distance races, Brennan states that her preparation is a little more variable. “If I’ve been racing a fair amount, I will generally do one 10 min interval that is mostly level 3 and kicks up into level 4 the last few minutes. If I haven’t raced in a while or feel like I need to rev the engine a little more, then I will do something like 3×4 minutes progressive, starting in level 3 and moving into level 4 for the last interval.”
Race prep is also used to feel the rhythm of the course and practice corners, transitions, downhills, or other key spots on course at race speed. That is the beauty of skiing so quickly during these workouts – you can really get a feel for the way the course will ski the following day. Brennan says that race prep helps her to get a feel of how the course and snow might ski at race speed. “This allows me to better develop a race plan or do some visualization of how I want to ski on race day”, she states.
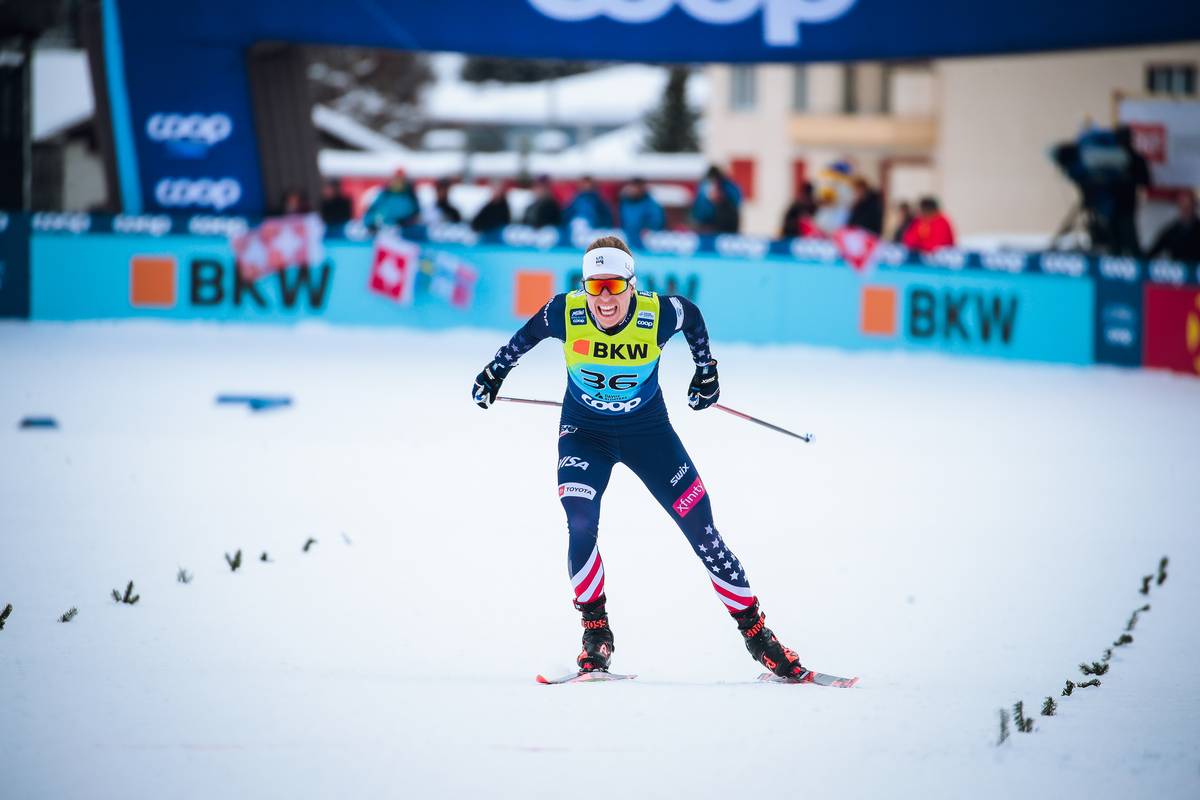
Rosie Brennan powers through the final stretch to finish 4th in Davos in December, 2021. (Photo: NordicFocus)
Although race-prep is often performed at a zone 3-4 pace, or just below/touching into anaerobic threshold, the total work time rarely exceeds 10-12 minutes. For elite cross-country skiers, a typical interval set is generally between 25-60 minutes of work time depending on the target heart rate zone. By keeping the total time of race-prep significantly lower than a standard interval set, it ensures that the overall fatigue is minimized while still allowing for adequate practice of critical spots on the race course.
Another goal of the workout the day before pertains to fueling. Muscle glycogen, or the major source of carbohydrate for energy during exercise, is pertinent to optimal performance. The greater muscle glycogen stores are, the longer the time to exhaustion, and the faster you can ski. Hard race-prep intervals serve as a stimulus for the resynthesis of muscle glycogen. Following this workout, muscle glycogen is rapidly replenished due to increased insulin sensitivity and cell membrane permeability to glucose. (1)
That being said, it is critical to adequately fuel post-workout to ensure that this happens. So, while the race-prep workout might be slightly taxing in the short term, it ultimately assists our bodies in jump-starting the fueling process and ensuring that our muscles are ready to perform an even higher-intensity workout (race) the next day.
A group of American men complete their pre-race workout. (Photo: Tom Horrocks)
Ultimately, race-prep helps prepare our bodies both physically and mentally for a race effort the following day. When performed correctly, the stimulus of intervals the day prior to a race can prime our muscles and spark our metabolism for peak performance. While your legs may not seem super fresh during the session, trust that race-prep helps pave the way for better feelings on race day.
Sources: 1. Ivy JL. Muscle Glycogen Synthesis Before and After Exercise. Sports Med. 1991;11(1):6-19. doi:10.2165/00007256-199111010-00002
Last year, in an effort to create a standardized workout that could be easily replicated and repeated, national team coaches presented the concept of the “U.S. Pace Project.” The concept is straightforward: a shift away from time-based intervals to distance-based, centered around repeated laps of a 5-kilometer course.
This familiar distance is key. In a call in July, Matt Whitcomb, U.S. Ski Team Head Coach, and one of the creators of the project explained that: “5k is essentially the building block of just about every race we ever do. It’s a very tangible distance that everybody knows right from childhood.”
Jessie Diggins races the Keys to the Castle Rollerski Race in Lake Placid. (Photo: Matt Whitcomb)
Whitcomb continued that while the session itself is not revolutionary, it has provided a shared pathway for clubs to explore pacing during intensity sessions. Usually athletes will complete three rounds of the same 5k course, and repeat the workout intermittently throughout the training season to track overall progress or fine-tune pacing strategy. Given the ease of implementation, clubs of all levels nationwide can adopt the concept.
“Clubs are encouraged to find a 5 kilometer stretch of rolling road, something that can replicate race terrain as best and as safely as they can,” Whitcomb explained. “If it’s on a rollerski track, that’s even better.”
As the training year progresses, so does the nature of the Pace Project. “This is a workout that is meant to build in intensity throughout the year, but also in creativity,” Whitcomb stated.
Creativity, in this context, is an ongoing experiment with pacing, fueling, technique, and effort, followed by a discussion of individual outcomes amongst the group. Essentially, the U.S. Pace Project is a personal study for athletes to find their own fastest and most efficient approach to racing.
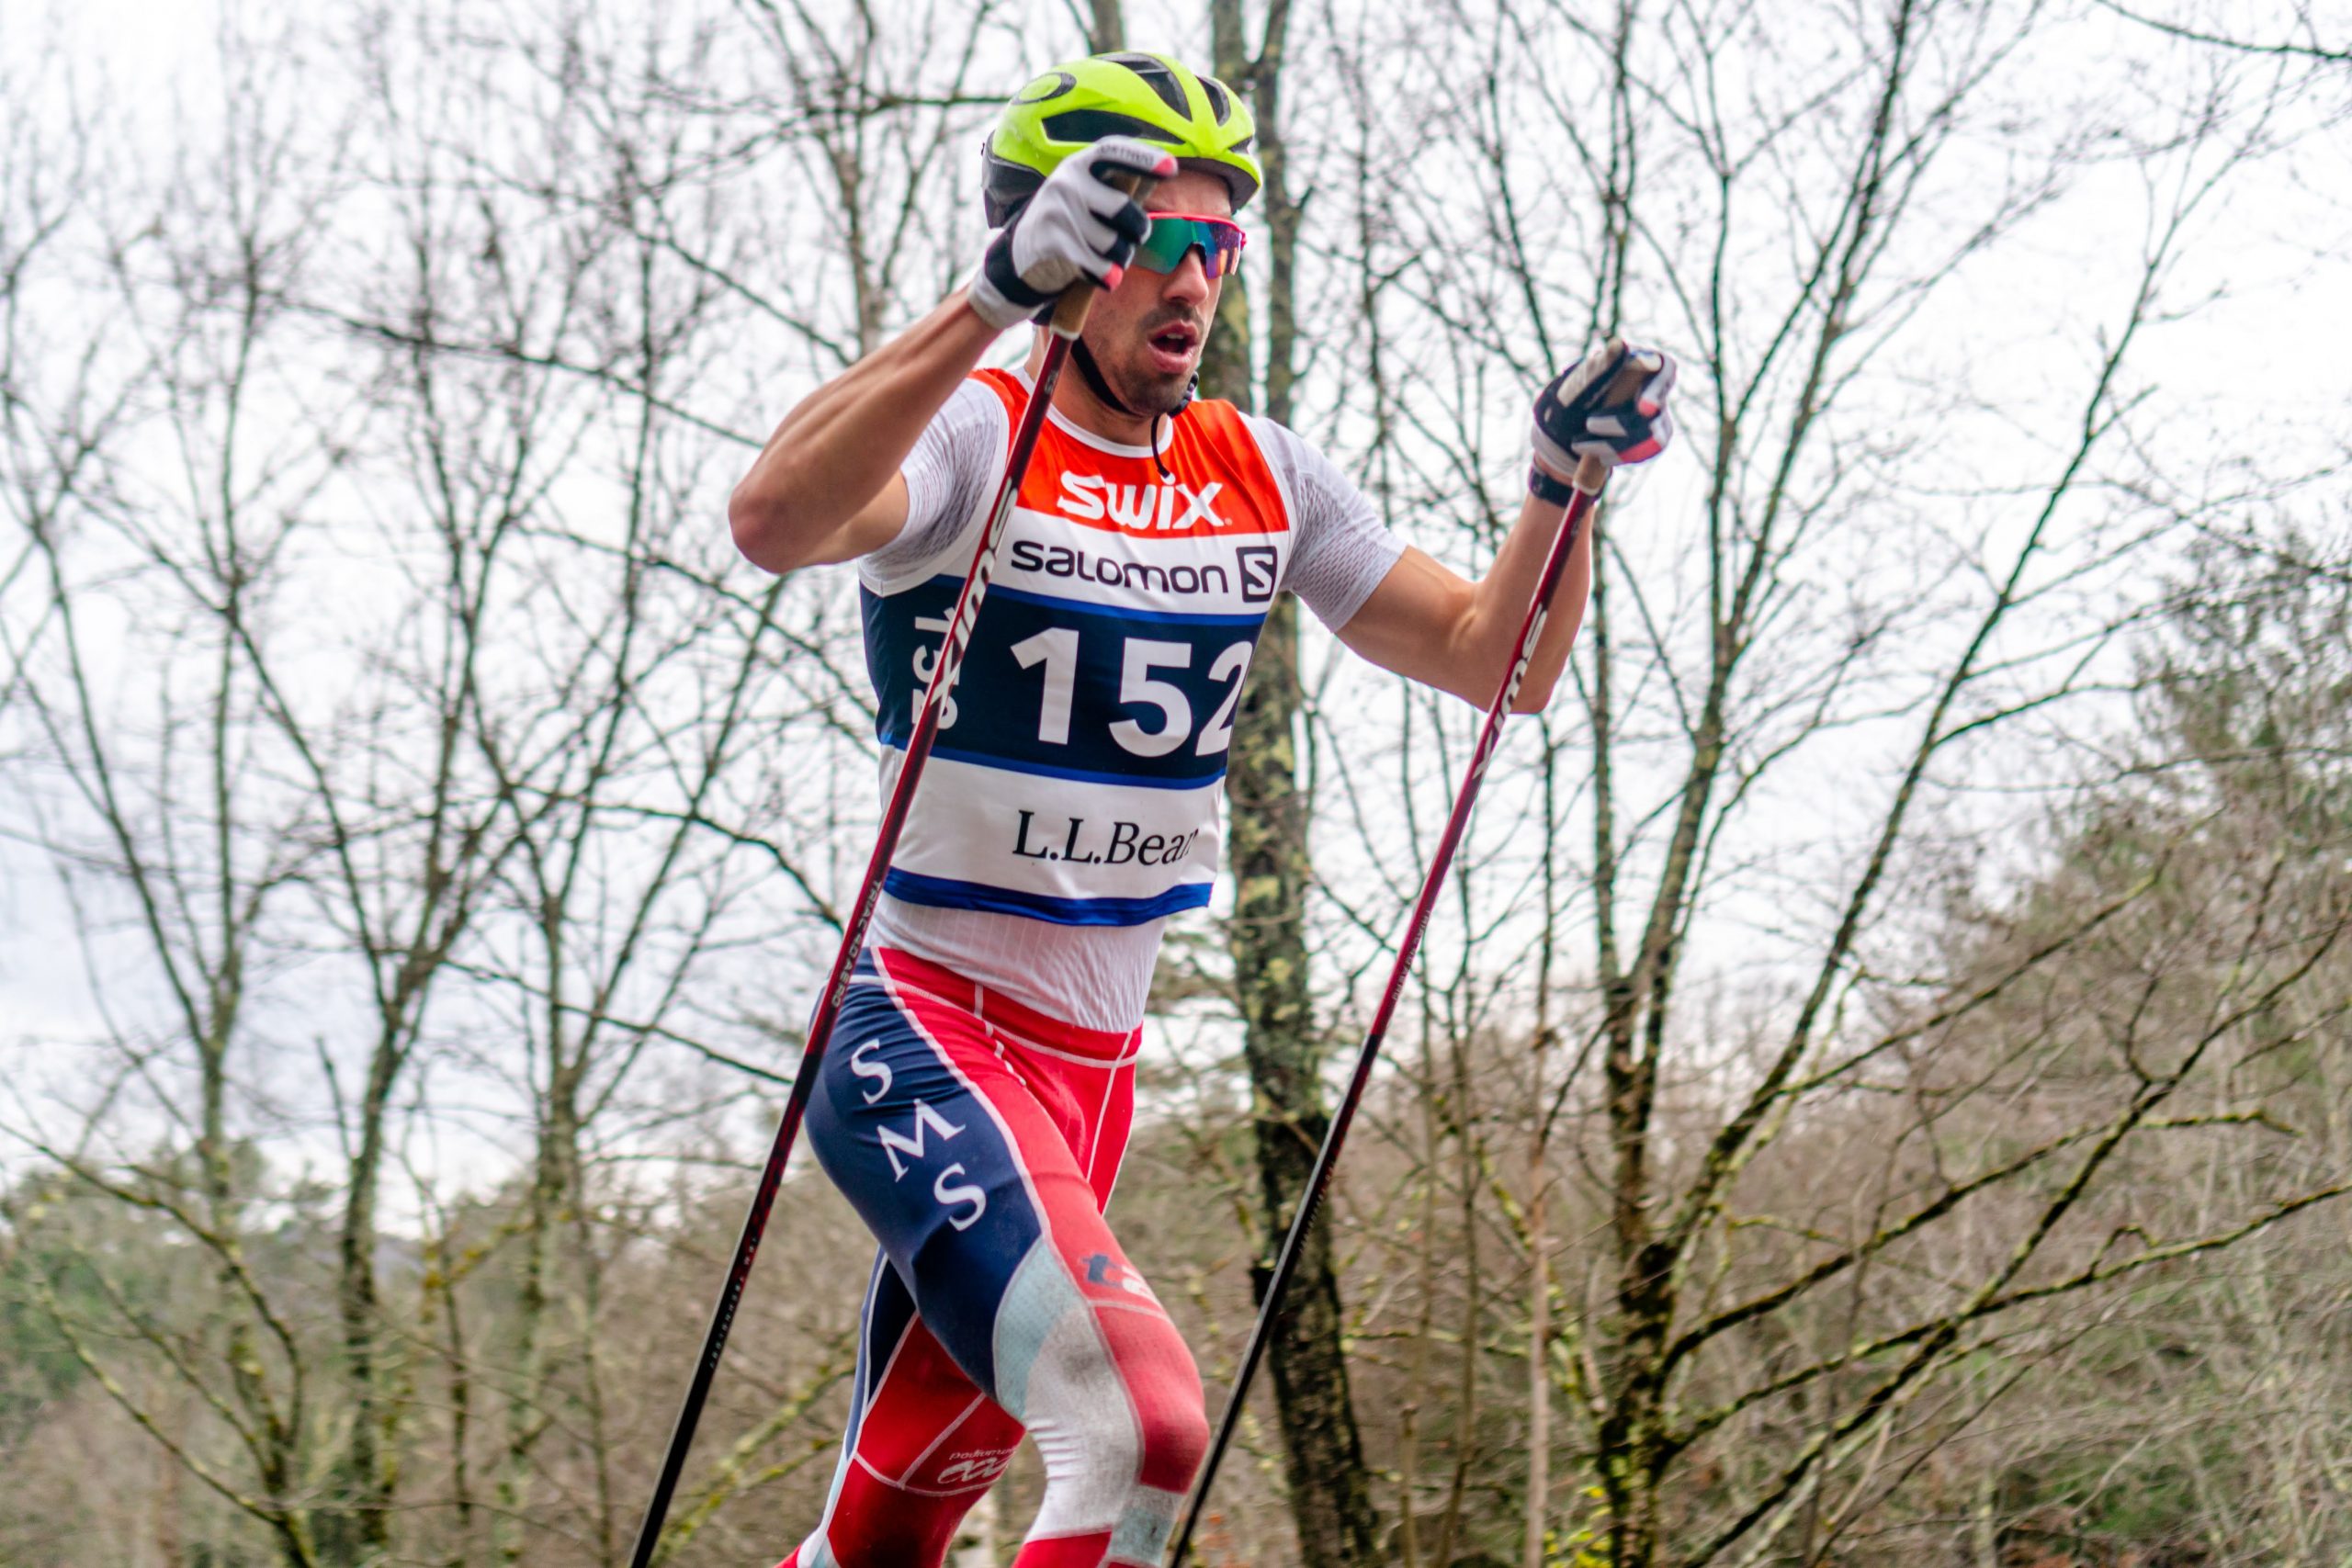
Ian Torchia races NENSA’s Trapp Invitational Rollerski race in November, 2021. (Photo: George Forbes/SMS)
Another motive behind the project, according to Whitcomb, is to promote the sharing of insights between athletes and coaches nation-wide as they incorporate and discuss the takeaways from the Pace Project format. He explained that time-based intervals offer less concrete information to learn from, as there is more room for variation in training venue and conditions.
“[The sport] is challenged with regards to metrics,” Whitcomb said. “So this is meant to catalyze more objective feedback and learning.”
As many national team members train in Stratton, VT in the summer, SMS T2 head coach Pat O’Brien provided a look into his experience facilitating the workout with his athletes and his current takeaways.
“If you give the athletes a set distance workout, they are going to learn how to manage their energy over that distance,” O’Brien said, citing supporting research by Norwegian based Sports Science Professor Steven Seiler.
“The whole point,” O’Brien continued, “is in a training type environment, go out and play around with different [approaches]. It might not all work. It might fail. But it’s better to learn those lessons in a training environment than in a race.”
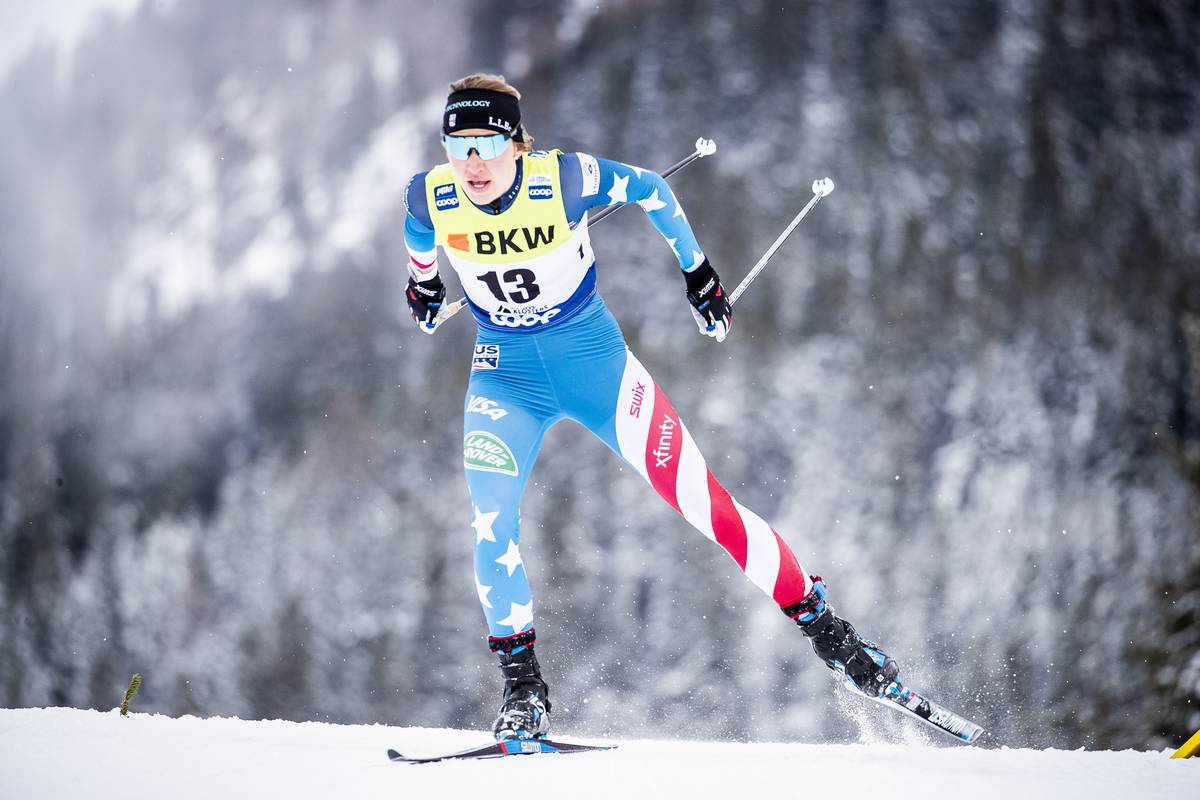
Ben Ogden (bib 13) races the Keys to the Castle Rollerski Race in Lake Placid. (Photo: Matt Whitcomb)
While a nationally shared workout is new, the project itself grew out of conversations with previous American athletes who incorporated similar workouts as a fitness benchmark.
“I think the most notable one is Kris Freeman,” O’Brien explained. “He was truly one of the best in the world at the 15k distance. He would do a repeated workout of 3x5k, and he knew if he could sustain three repeats on [a particular] 5k stretch of road, he was in good shape.”
O’Brien said that inspiration had also come from one of his mentors, Sverre Caldwell, former Nordic Director at SMS.
“Back in the early 2000s, the Stratton program had a string of successes with high schoolers going on to these great sprint results when sprinting had just started coming out,” he said. “What was interesting talking to [Caldwell] was they didn’t go out seeking to pace sprints. He wanted to make his athletes stronger and tougher, so he devised a double pole test.”
The test involved double poling up a specific hill, which happened to take high schoolers like Andy Newell about three minutes. “It was not intentional, but they got good at figuring out how to go up that hill as best they could for about three minutes, which happened to be about how long a sprint was. They didn’t go out with the intention of being great sprinters, but if you give the athletes a set distance workout, they are going to learn how to manage their energy over [that distance].”
These ideas have fused into the Pace Project. Still in its infancy, it remains an elastic concept meant to help American skiing in a number of ways. Part nationally shared workout, part personal experimentation project, part data gathering opportunity, there are many objectives at play.
“The pacing project is an idea where if we subject ourselves to all these different stimuli, we can be more flexible,” O’Brien said. “The point is, we’re always going between environments, and we’re always trying to get athletes better at finding what their red line is, so to speak.”
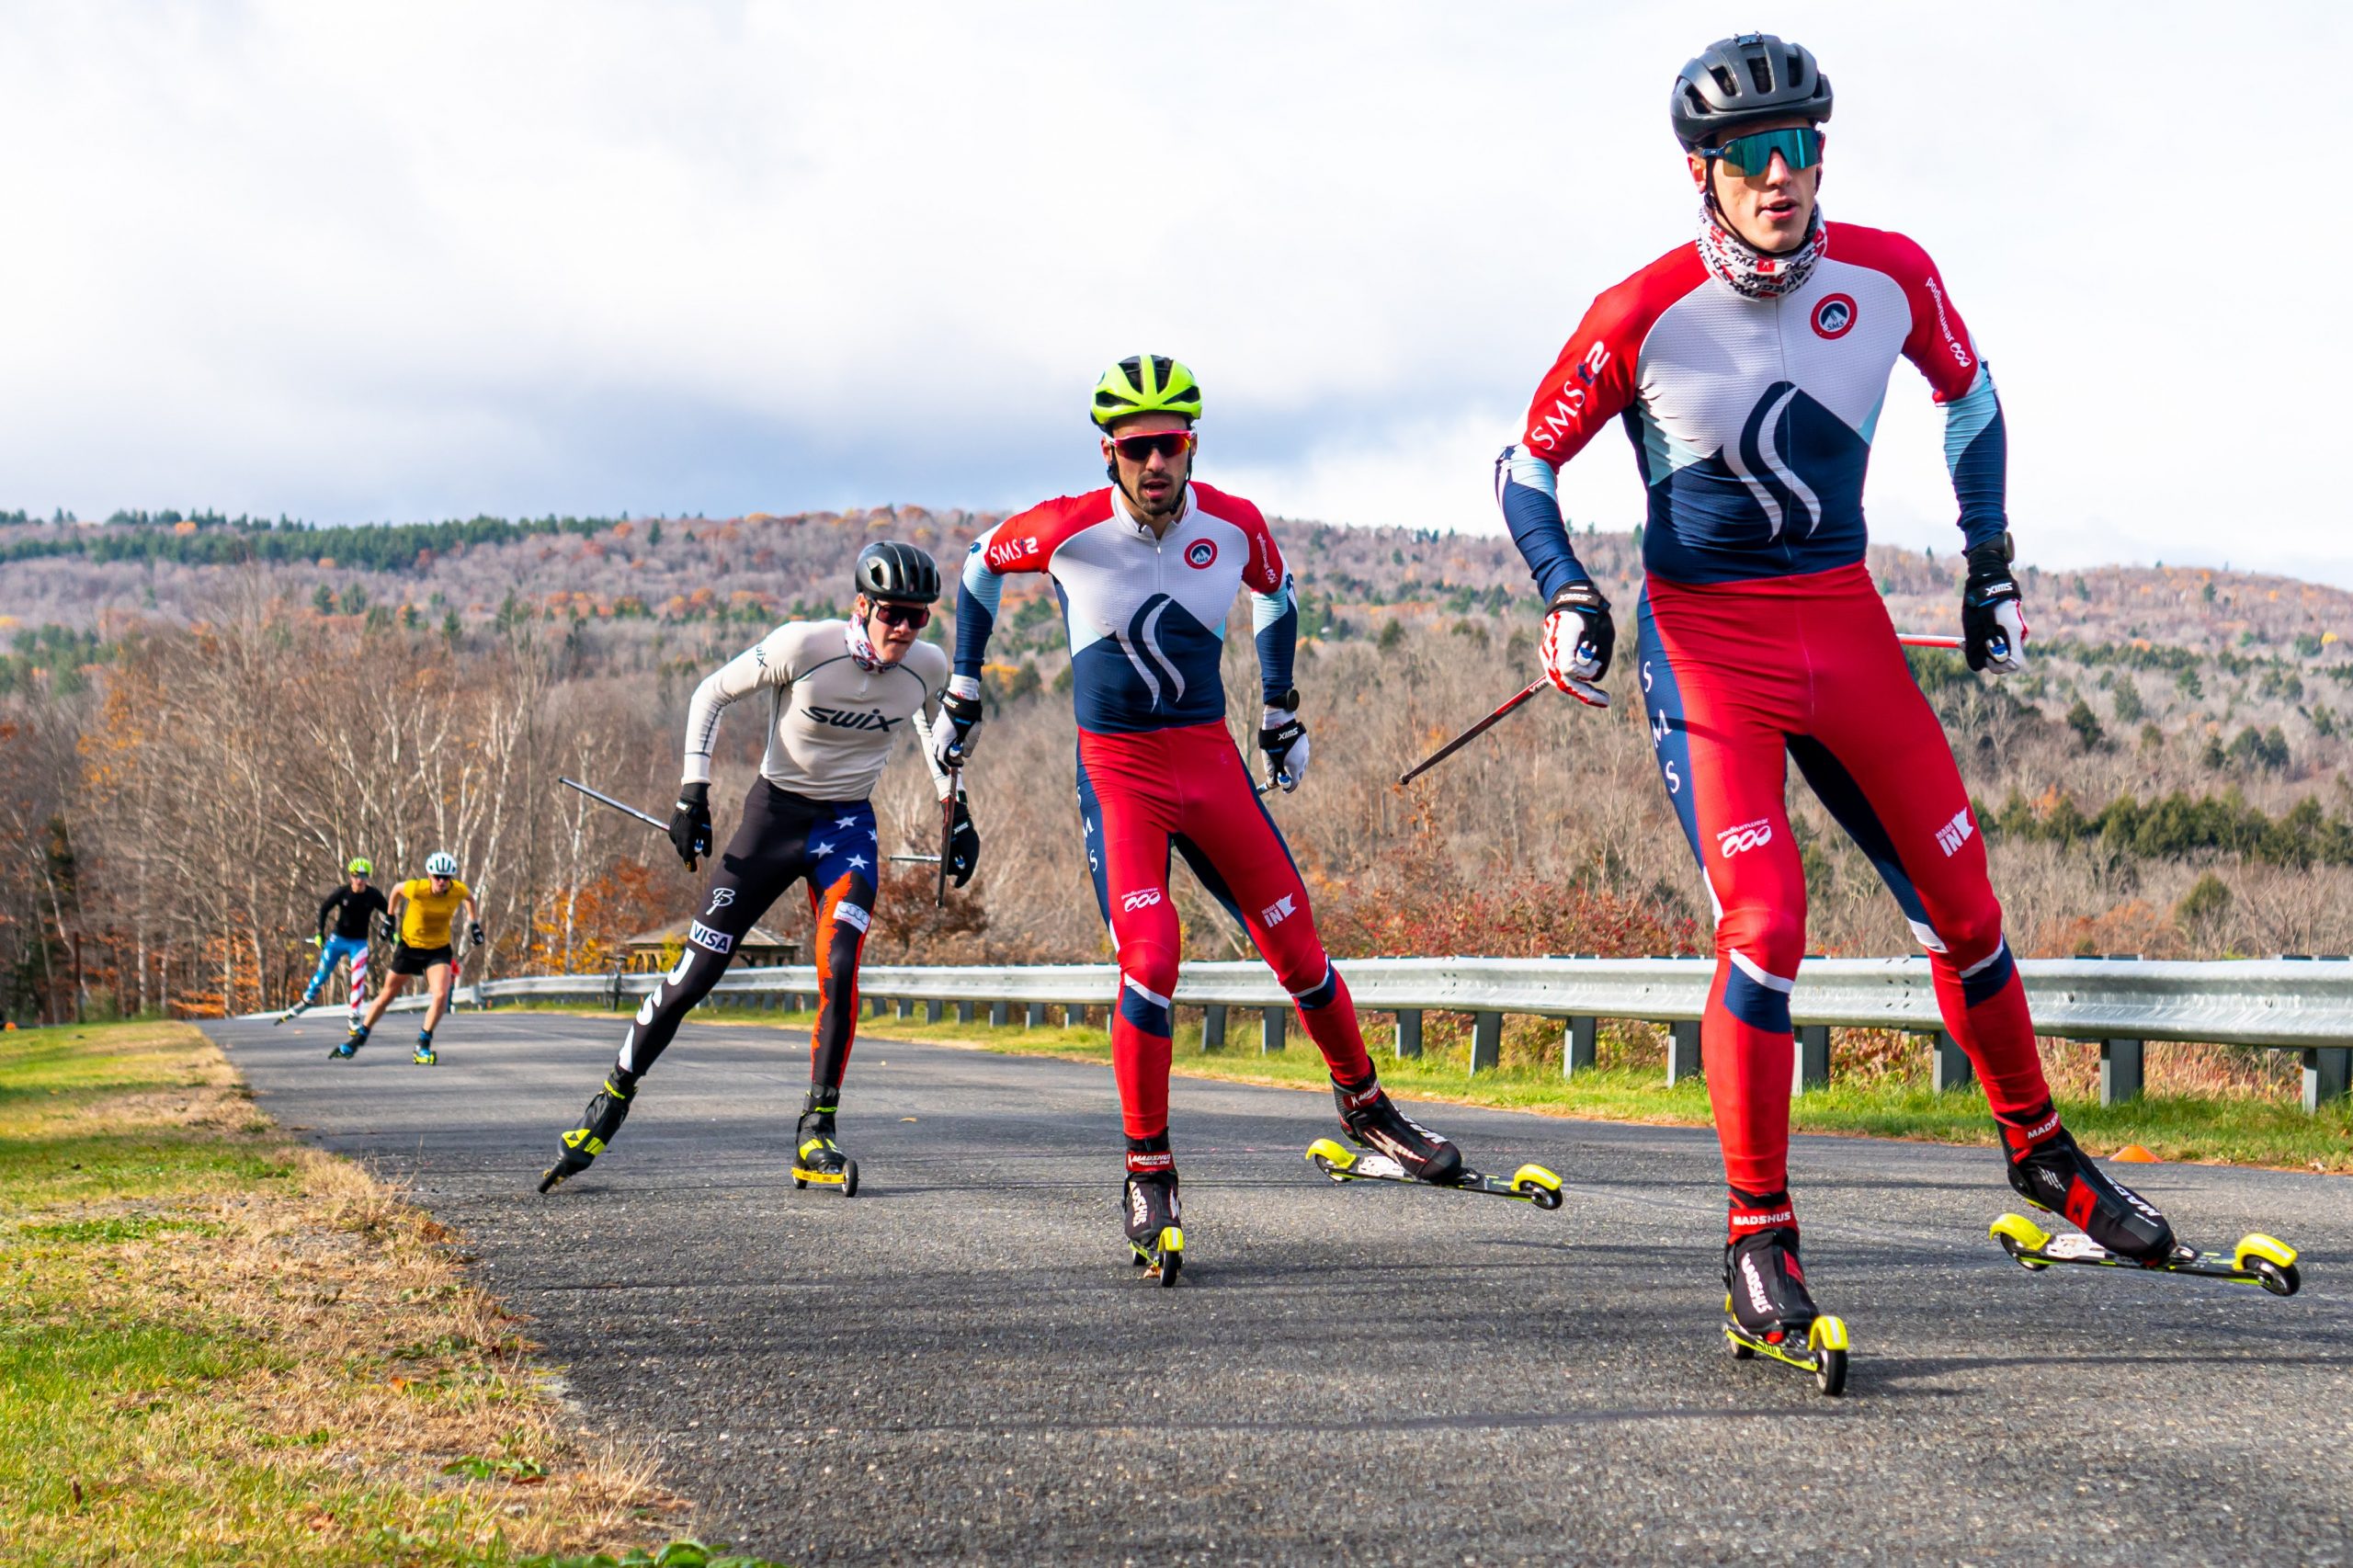
Bill Harmeyer and Ian Torchia lead the charge during a fall training session. (Photo: George Forbes/SMS)
O’Brien explained that coaches had been seeking a way to reap the benefits of racing without the physiological toll they require.
“How can we construct workouts that challenge you in a similar way to what you experience in a race without the same cost?” he asked rhetorically.
The Pace Project seems to be filling this gap, by offering athletes a chance to experiment with novel pacing strategies outside of a race environment.
“I don’t care if someone goes into it too hard and blows up,” said O’Brien. “We’re not looking for an objective time, It’s about how athletes pace themselves.”
O’Brien stressed that the key to the pace project lies in athletes figuring out what works best for them, both in what technique they use on specific sections of the course, and for overall pacing.
“Every athlete has a style,” he said, “a way they want to move. [It’s] not ‘you should do this because it works for you.’ I think that’s how we unlock our athletes’ best potential.”
The Pace Project has received favorable reviews from athletes and coaches beyond the SMS T2 team. The SVSEF Gold team in Sun Valley, Idaho use their 1.2k rollerski trail for pace sessions according to Head Coach Chris Mallory.
“This workout basically brings a little more focus to threshold workouts,” wrote Mallory in an email. “Athletes can play around with different pacing strategies, whether it’s starting more conservatively, using different techniques, or skiing different parts of terrain harder or easier to see what works best for them… It’s nice to have something that’s repeatable, where you can measure progress.”
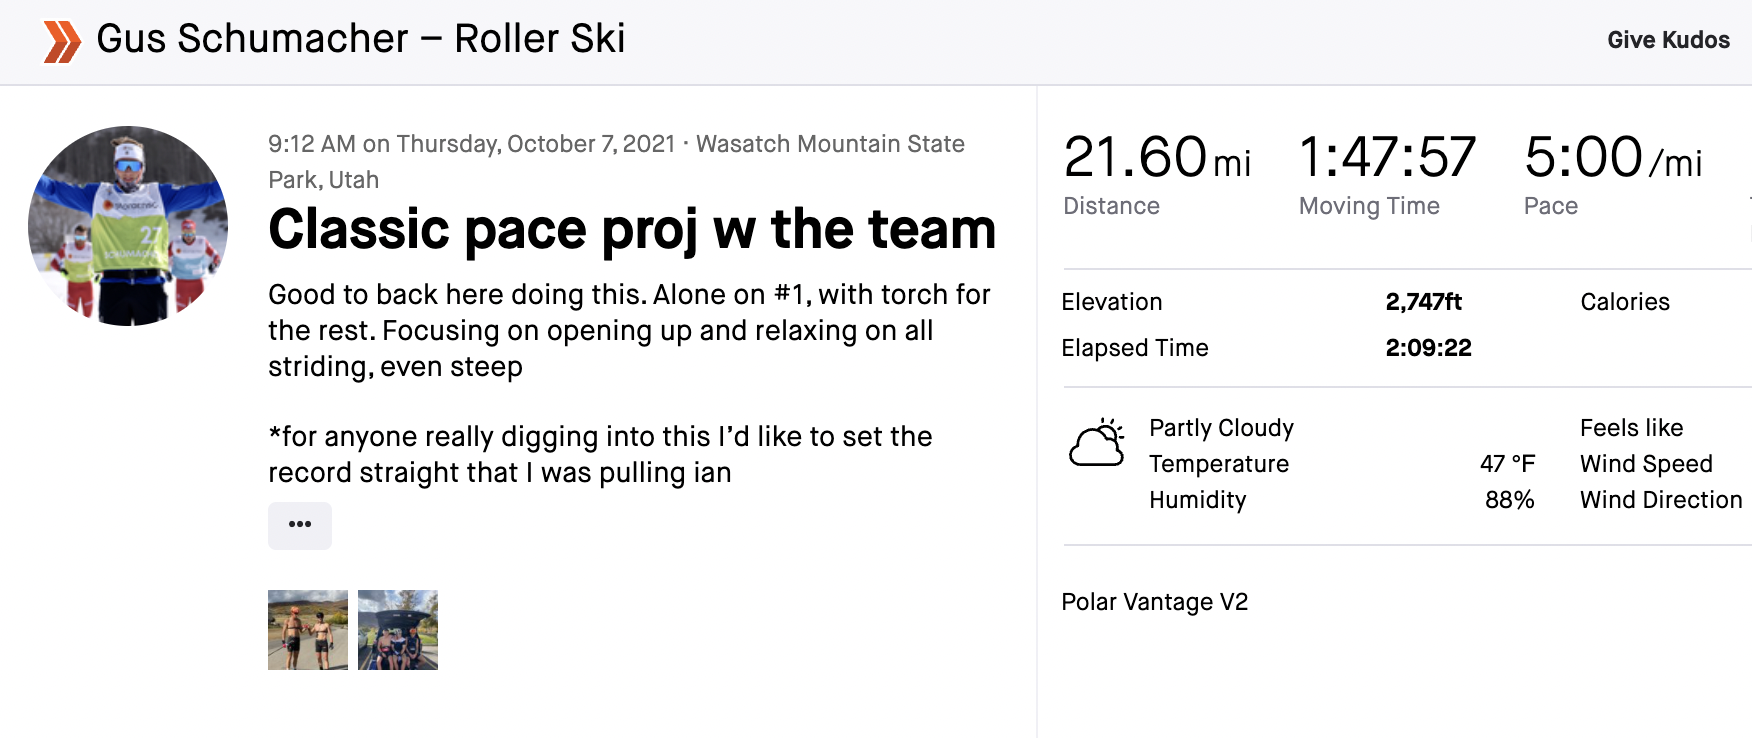
Strava users who follow some of the top domestic skiers may have seen some of them completing these workouts, like this example of Gus Schumacher’s October iteration. Schumacher explained in an email the role the workout has played in his summer training this season:
“[The Pace Project] is a cool format because it allows for a lot of different strategies, similar to racing. Usually in the earlier summer we’ll use it as a way to get L3 while lapping a track with similar features to a race course. Later however, like at our camp in Park City, it was fun to use it as almost a race simulation.”
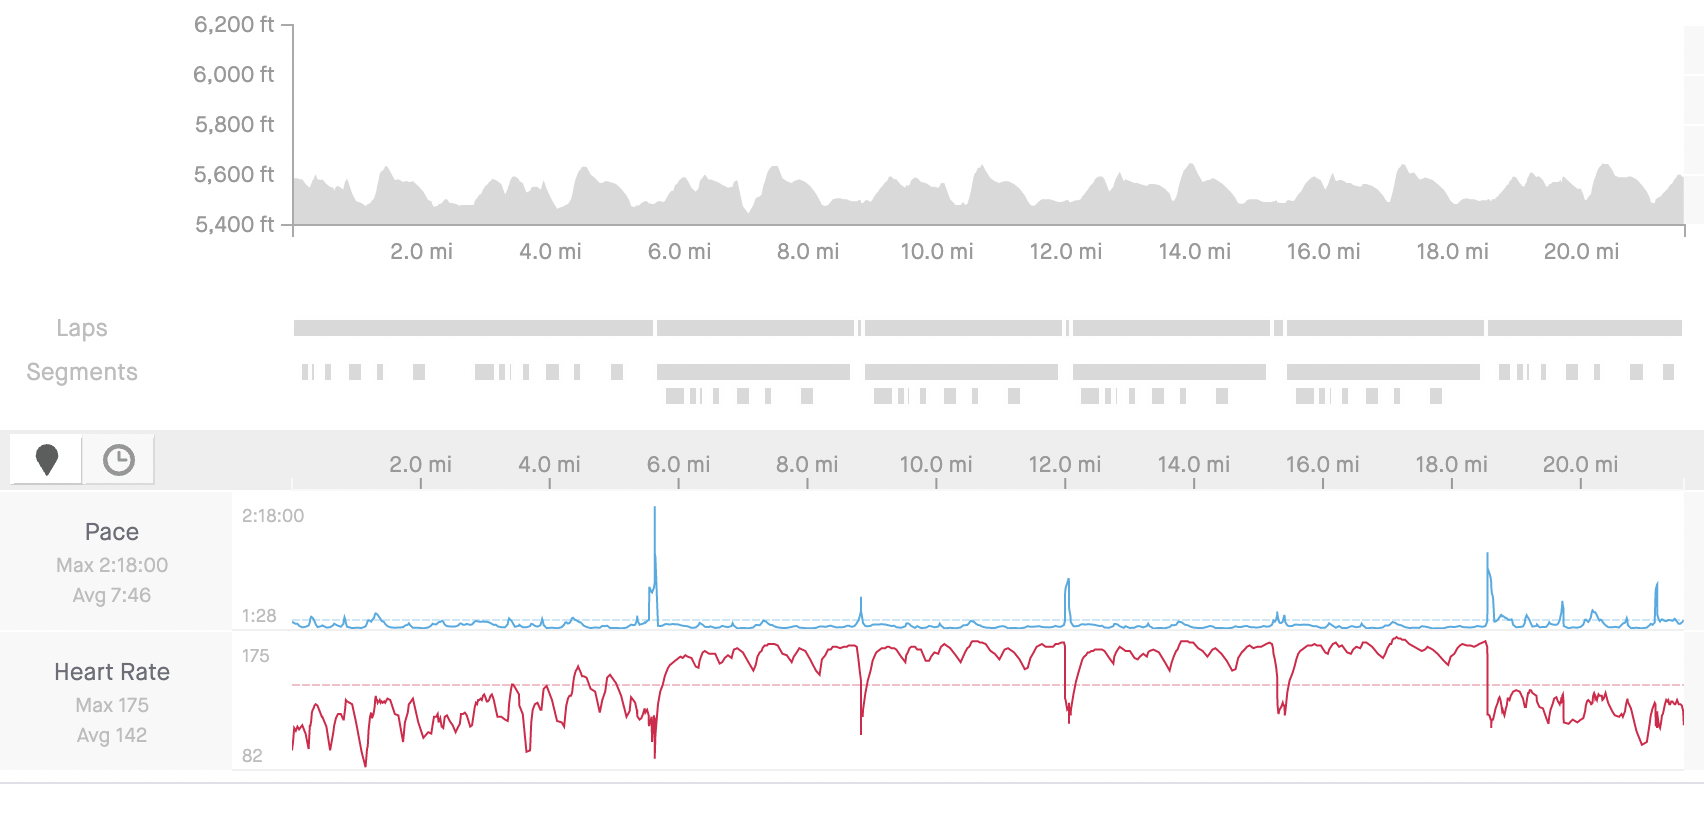
Gus Schumacher completes a 4 x 5k pace project session during a fall training camp in Soldier Hollow. (Photo: Strava)
Schumacher described one of his sessions in October: “I started the first 2 minutes hard like I would in a mass start,” he wrote. “After that I eased back to a sustainable pace, then in the last one I finished hard. This made it feel a lot like a race without the same cost (because of 3 minute rest between each interval). Breaking it up into segments also allows us to change our strategy more from lap to lap, which can help with testing new pacing strategies, especially at altitude.”
Reflecting on the outcomes for coaches, Whitcomb said that he was pleased with how the Pace Project sessions had increased the conversations between athletes.
“What we’ve observed is that there’s more interesting discussion before and after these sessions, than there is for just your standard threshold interval workouts.”
Over the summer, Whitcomb stopped by Stratton during a SMS T2 pace session and remarked on the depth, variety, and value of the subsequent conversations.
“Of the ten athletes that were there that day, there were ten different approaches to this workout, because Bill Harmeyer is setting his sights on one specific goal on that day, and Jessie Diggins on perhaps another goal, and everybody’s learning and discussing and crowdsourcing ideas effectively.”
Alayna Sonnesyn pushes the pace in a fall training session. (Photo: George Forbes/SMS)
While the value of the project lies in its idiosyncratic freedom, the aim is competitiveness.
“Hopefully,” Sun Valley’s Mallory suggested, “it helps our nation to continue to make progress in distance racing.”
We’ve reached mid-December. With any luck, your local trail system is beginning to fill in, you’ve scraped off your storage wax, and you’ve put in at least a handful of easy days getting reacquainted with your boards. Whether or not you rollerski during the summer, skiing on snow has its own jive and it’s normal to feel a little like Bambi your first few sessions.
In my experience as a coach and masters athlete, I find it best to lean into the Bambi phenomenon. Don’t expect to pick up where you left off last season. Accept that you’ll feel a little loose and wobbly and go back to the basics. Spend plenty of time skiing without poles and keep things very easy, continually emphasizing form over speed or power.
(Find more on this from the FasterSkier archives here.)
Early season intervals build the strength, fitness, and stamina to help you thrive as winter provides the goods.
Okay. Now that that’s done and you’re no longer rusty, are you feeling dialed in and ready to get your heart rate up a bit? Great. That’s what this interval session is designed for.
Objective #1: Pick up the pace and effort without losing your form.
Regardless of ability, we can all recognize that skiing harder does not always equate to skiing faster. Particularly when we’re learning or regaining technique, skiing harder might mean skiing less efficiently and wasting energy with extraneous movement. During this session, your focus should be on keeping the intervals in control so your technique isn’t compromised as fatigue and intensity increase.
Objective #2: Ease in. Don’t be too hot out of the gate.
The variations below both involve relatively short periods of rest, meaning your heart rate will stay elevated, even during the rest periods. The fitness boost is similar to doing long threshold intervals, just broken into smaller and more manageable chunks.
Going out too fast on your first few sets will quickly dig a hole, compromising either the consistency of the effort during the subsequent intervals or your technique on tired legs or both! The season is young. Easy on the gas.
The Workouts:
Now that we’re on the same page in terms of when to introduce an interval session and what to keep in mind, here are two bread and butter workouts to help boost your fitness and enhance your skiing this season. These can be incorporated throughout the season, but they make great candidates for early season training as the duration of the intervals is short enough to wrap your head around.
8-10 x 1 minute on / 1 minute easy ski (2-3 sets)
Though simple, this workout will leave you feeling tired, satisfied, and accomplished, remembering just how many muscles you use when you’re skiing. Try it on varying terrain to work through each of your gears and practice transitioning smoothly between them.
Reinforcing the importance of easing in, after the first few intervals of the set, you should feel like the minute of rest is plenty of time to catch your breath as you continue on easily. It’s more about stamina than speed here. Don’t worry – by the last few, you’ll be thinking, “Wow, that minute of rest went by fast!”
Take 5-6 minutes to ski very easy between sets so your heart rate has the chance to come back down. Aim for two sets of eight intervals on your first go, then introduce a third set or bump up to ten intervals the following round.
Totaling 16-30 minutes worth of “work”, the load is equivalent to skiing hard for 5-10 kilometers, broken into bite-sized pieces. When using this for the first time, keep the effort equivalent to a 40-60 minute race to ensure you can maintain form and effort throughout. Dial-up the effort to a 5k pace as your fitness and ski form improve throughout the season.
The author during an early-season interval session in Crested Butte, CO.
8 – 10 x 2 minutes on / 2 minutes easy ski (1-2 sets)
This variation challenges you to hold onto your technique for a longer effort, with increased rest between to account for the extra load. These sessions help improve both your mental and physical stamina, as you focus on your technique under the duress of the challenge.
Since one set equates to 16-20 minutes of work, it’s important to scale back the intensity compared to the 1 on/off, perhaps starting the first few at an effort you might be able to sustain for 60 minutes in a race, then hitting the last few a bit harder if you’re feeling up for it.
This time, give yourself 6-8 minutes of easy skiing between sets. You’ll feel the accumulation of fatigue as you work your way into the second set!
What are the pros doing?
FasterSkier reached out to three-time World Junior Champion Gus Schumacher via email to see how he tests the intensity waters once he is back on snow, which given his residence in Anchorage, Alaska tends to arrive earlier than it might for those of us at lower latitudes. Turns out, it’s pretty similar — just without the breaks!
Taking it. Gus Schumacher of the U.S. wins the World Junior’s 10 k classic. (Photo: Doug Stephen)
“The workout I like to do early in the season to get some ski legs under myself again is a longer level 3 (medium intensity) interval session. Normally I’d do 12-15 minute intervals for a total of 45-60 minutes of on time. This workout is nice because it gives you time to settle into the intensity and adjust to new movements on snow. During this time, big strides in technique can be made, because you ski with more similar power and motions to racing. It’s also a workout that doesn’t have to be overly taxing, giving it a good return on technique work without being overly physical.
“It also has the benefit of building or maintaining base fitness that can be added to as skiing starts to feel more normal. It can easily be adjusted to your level, the goal is basically to just give you some time on skis at a faster pace!”
If you’ve found your way here, you are likely familiar with the three tenets of cross country skiing: push off, weight transfer, and glide. Whether it’s diagonal stride in the track or V2 on the corduroy, your ability to experience a complete weight transfer, ride a flat ski, and carry momentum is heavily dependent on the stability of your standing leg.
Why is developing that balance and stability a challenge? For those who choose modalities other than roller skiing to enjoy the outdoors in the offseason, consider what types of motion those activities entail. Cycling, running, hiking, and walking are all very linear movements with fairly rapid tempo, meaning there is little emphasis on the lateral push off or extended single leg balance that are the cornerstones of cross country ski technique.
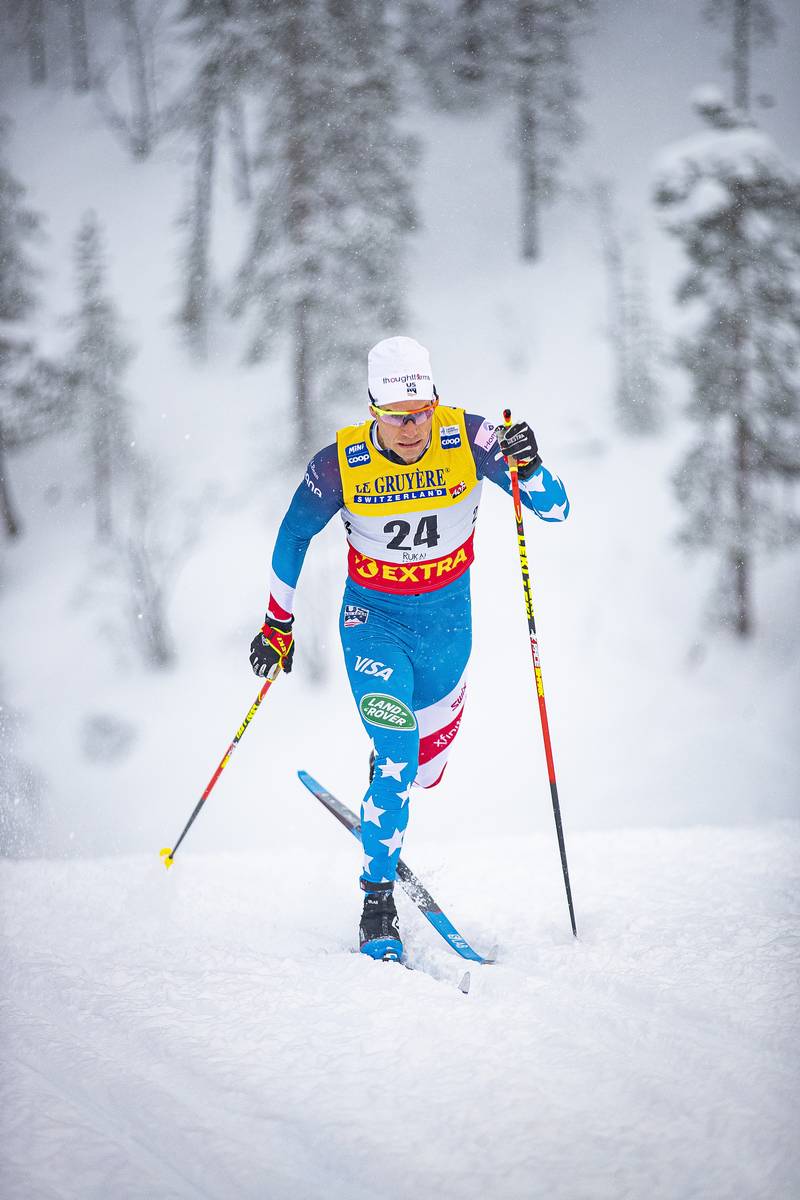
Simi Hamilton skiing to a World Cup career best 34th in a distance classic event. He popped the result in Ruka, Finland’s 2019 15 k classic. (Photo: NordicFocus)
Be it your first season on skinny skis or your 50th, strengthening the lateral musculature of the hip and the tiny stabilizer muscles throughout the leg will help you develop confidence in your weight transfer and glide to help you hone your technique and enjoy sliding on snow this season.
There are lots of ways to improve single-leg stability; yoga, Pilates, even simply standing on one leg while brushing your teeth or doing the dishes is helpful. But if you want a few simple and targeted exercises, we have a few beneficial suggestions. Here we use mini resistance bands, which can be found for less than $20, to combine dynamic and isometric (holding in place against resistance) moves that target the musculature of the hip, improving strength and stability down the chain.
The progression is endorsed by Doctor of Physical Therapy candidate, Australian National Team and APU Elite Team skier, 2018 Olympian, and 2020 Birkie Champion Jessica Yeaton.
Clamshells
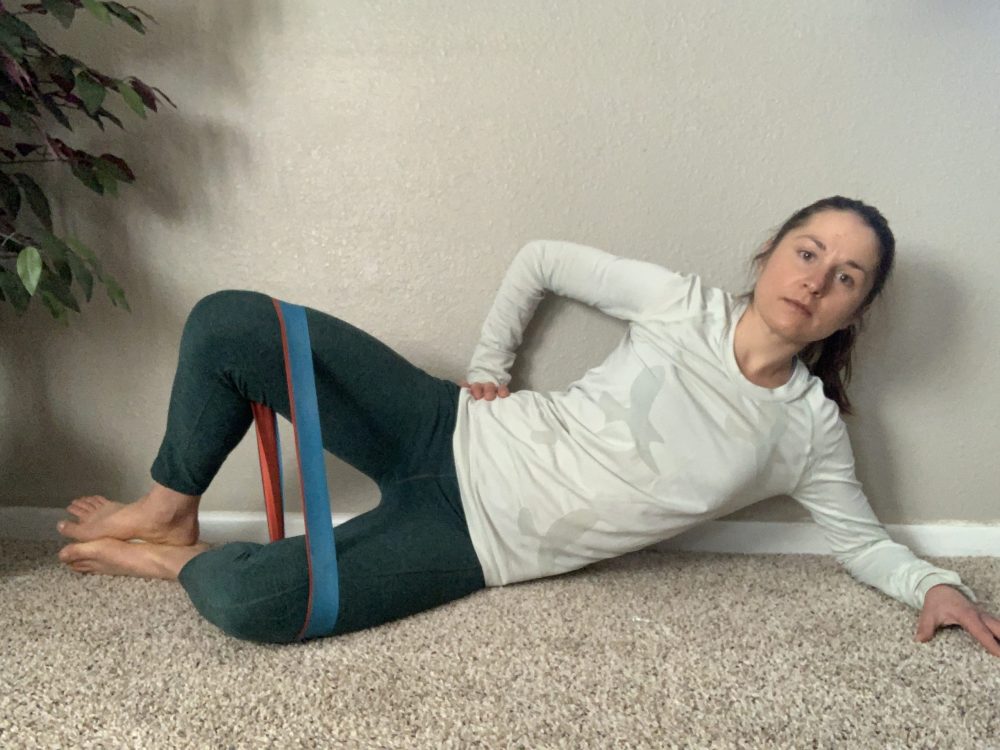
Lie on your side with the band just above your knees. Hips and ankles should be in line with the knees bent roughly 90 degrees in front of the body. Then, rotating from the hip like a hing, open the top leg, holding at the top for two seconds, then slowly rotating back to the starting position. You should feel this in the outer part of your hip, specifically in the gluteus medius muscle which is responsible for abduction and external rotation of the leg from the hip. In layman’s terms, this means it helps keep your knee from caving inward in compensation for poor hip stability when you’re gliding on your ski and helps power your skate push off.
Try 2-3 sets of 10 to start, adding a longer hold or additional repetitions as you build strength.
Some essential reminders from Yeaton: “Keep your top hip rolled forward, avoid flaring your ribs, keep your ankles together, and think about rotating at the hip rather than just lifting your knee. Again, the key is to keep your hip rolled forward and don’t let it roll back, or else you are working the wrong muscles.”
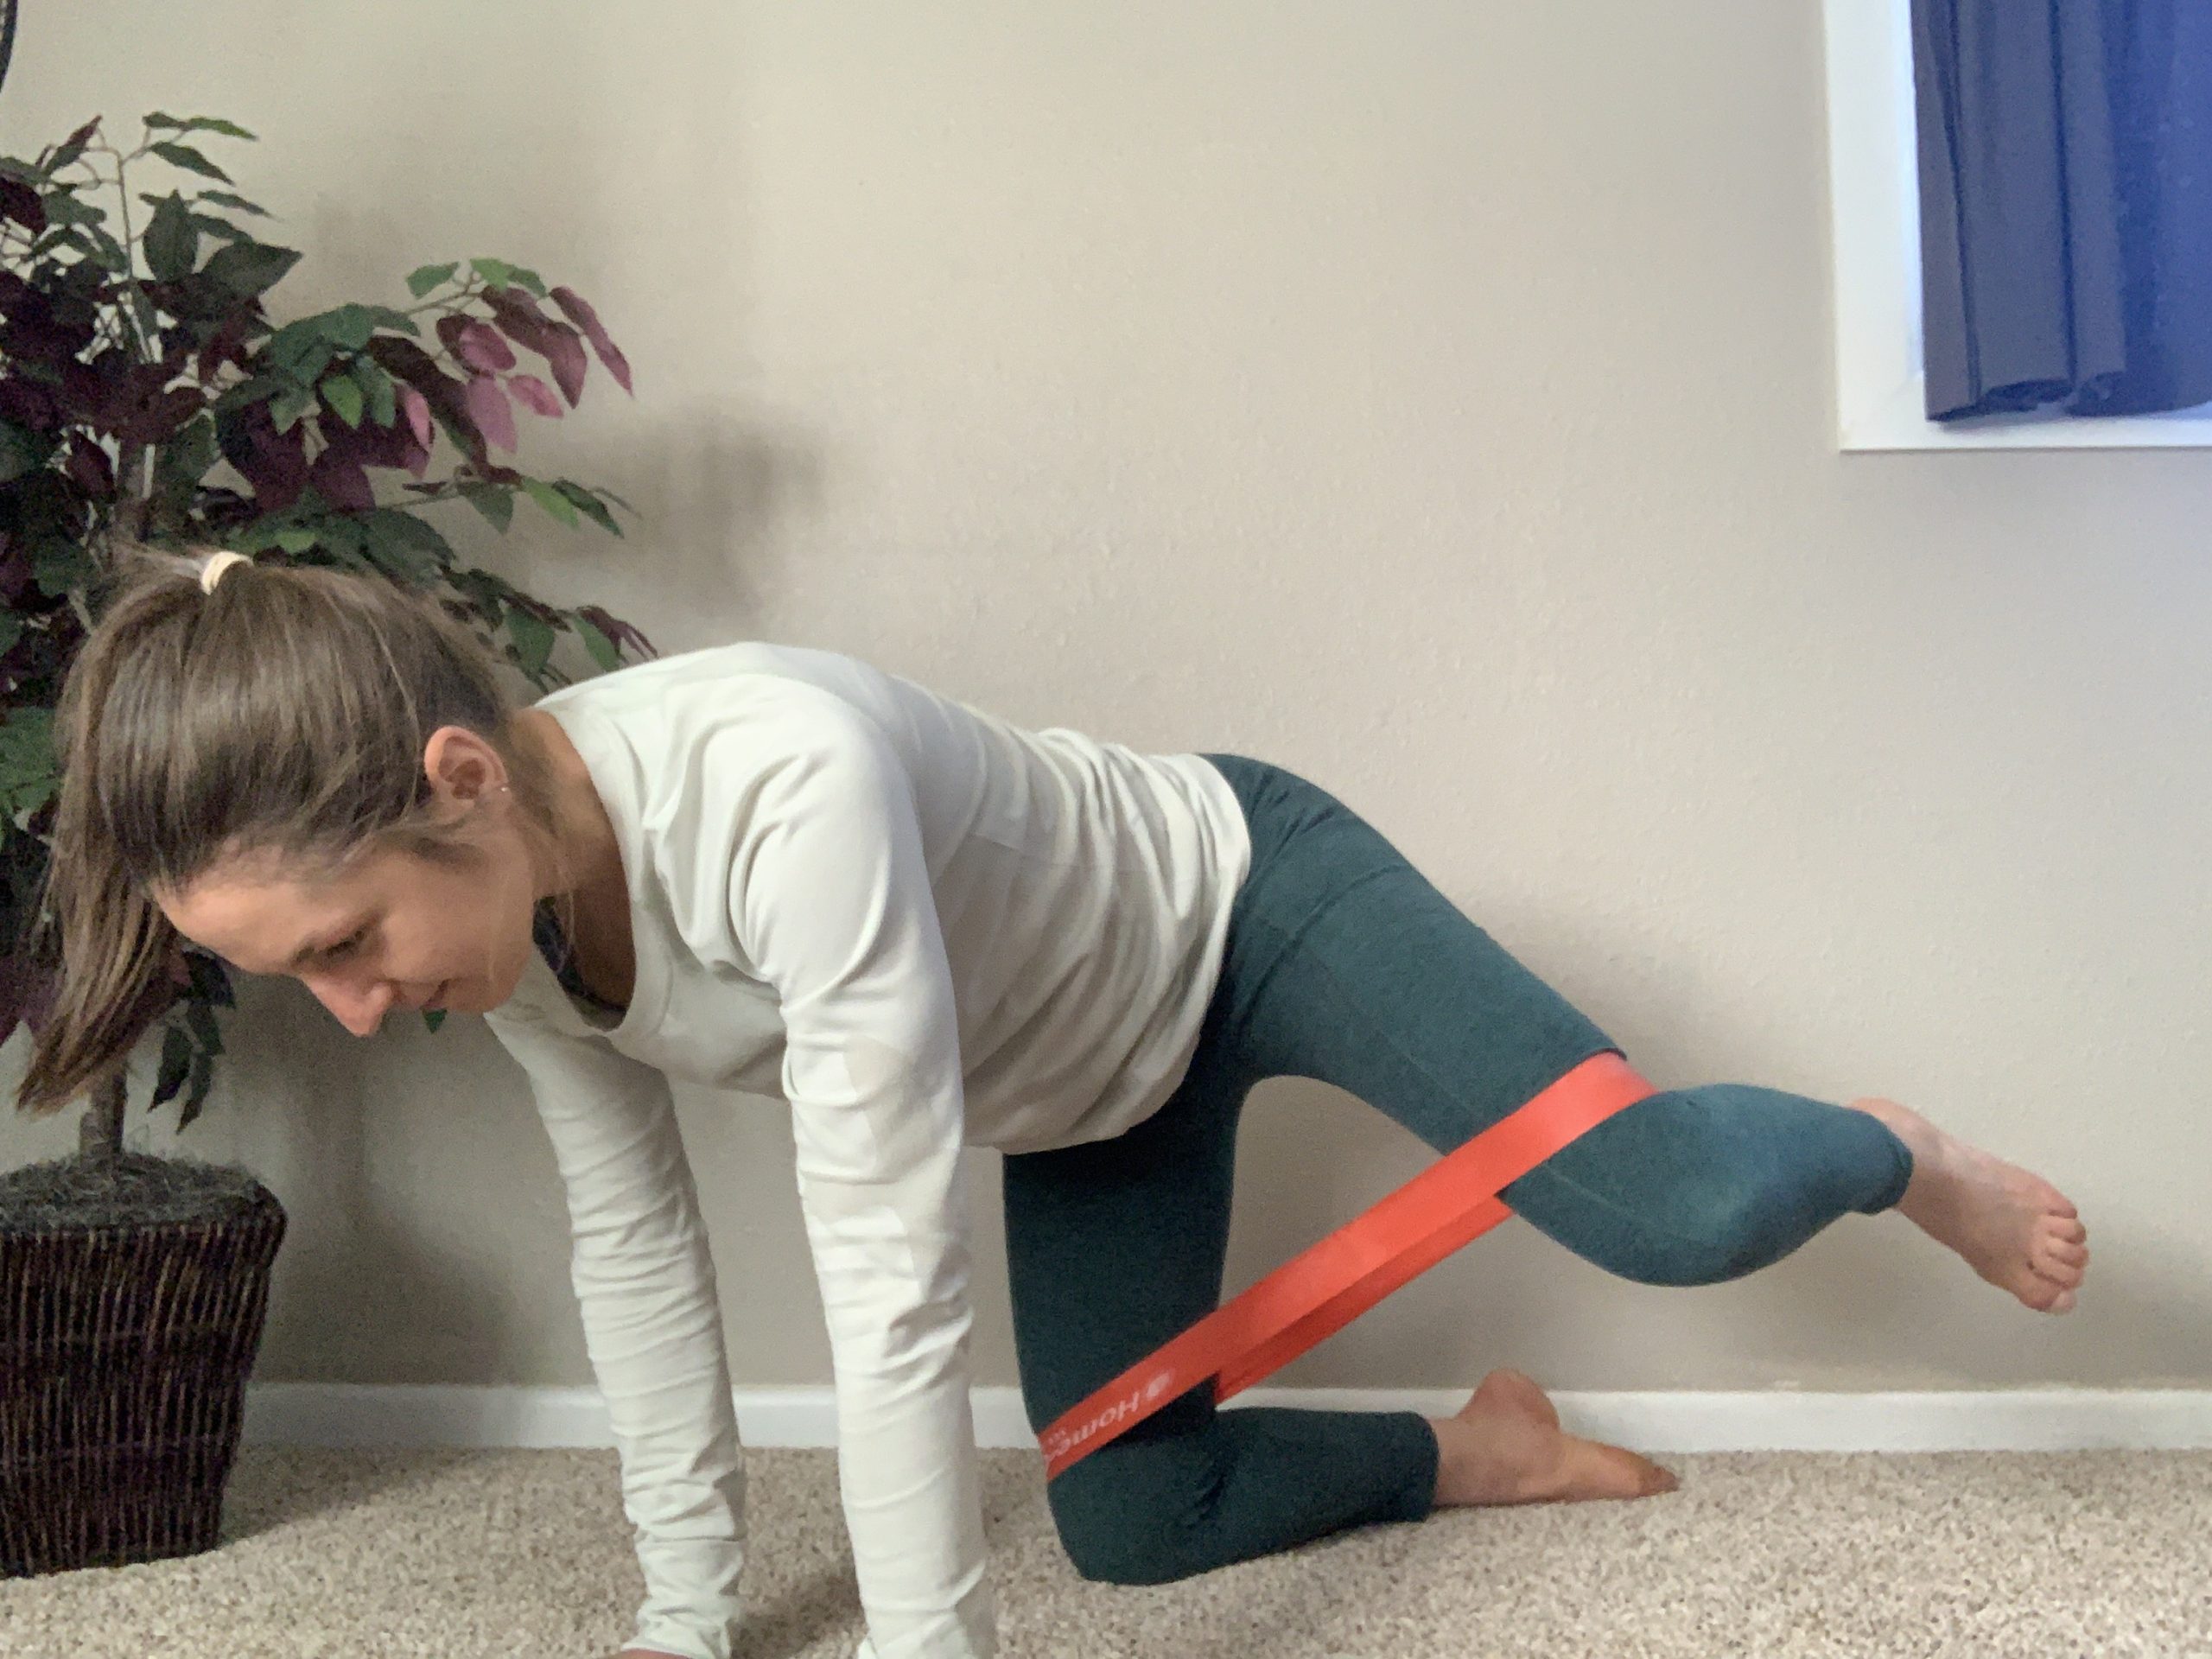
Fire Hydrants
Starting on hands and knees with the core engaged and the band above the knees, rotate from the hip to lift one knee off the ground. Hold at the top for two seconds, then slowly release. Keep a flat back and make sure you are not compensating by shifting your hips to the side or rotating from the spine. Keeping a ball or a light book on your low back can be a helpful cue — if it slides off, you are probably rotating your hips rather than just rotating the leg outward.
Try 2-3 sets of 10 to start, adding a longer hold or additional repetitions as you build strength.
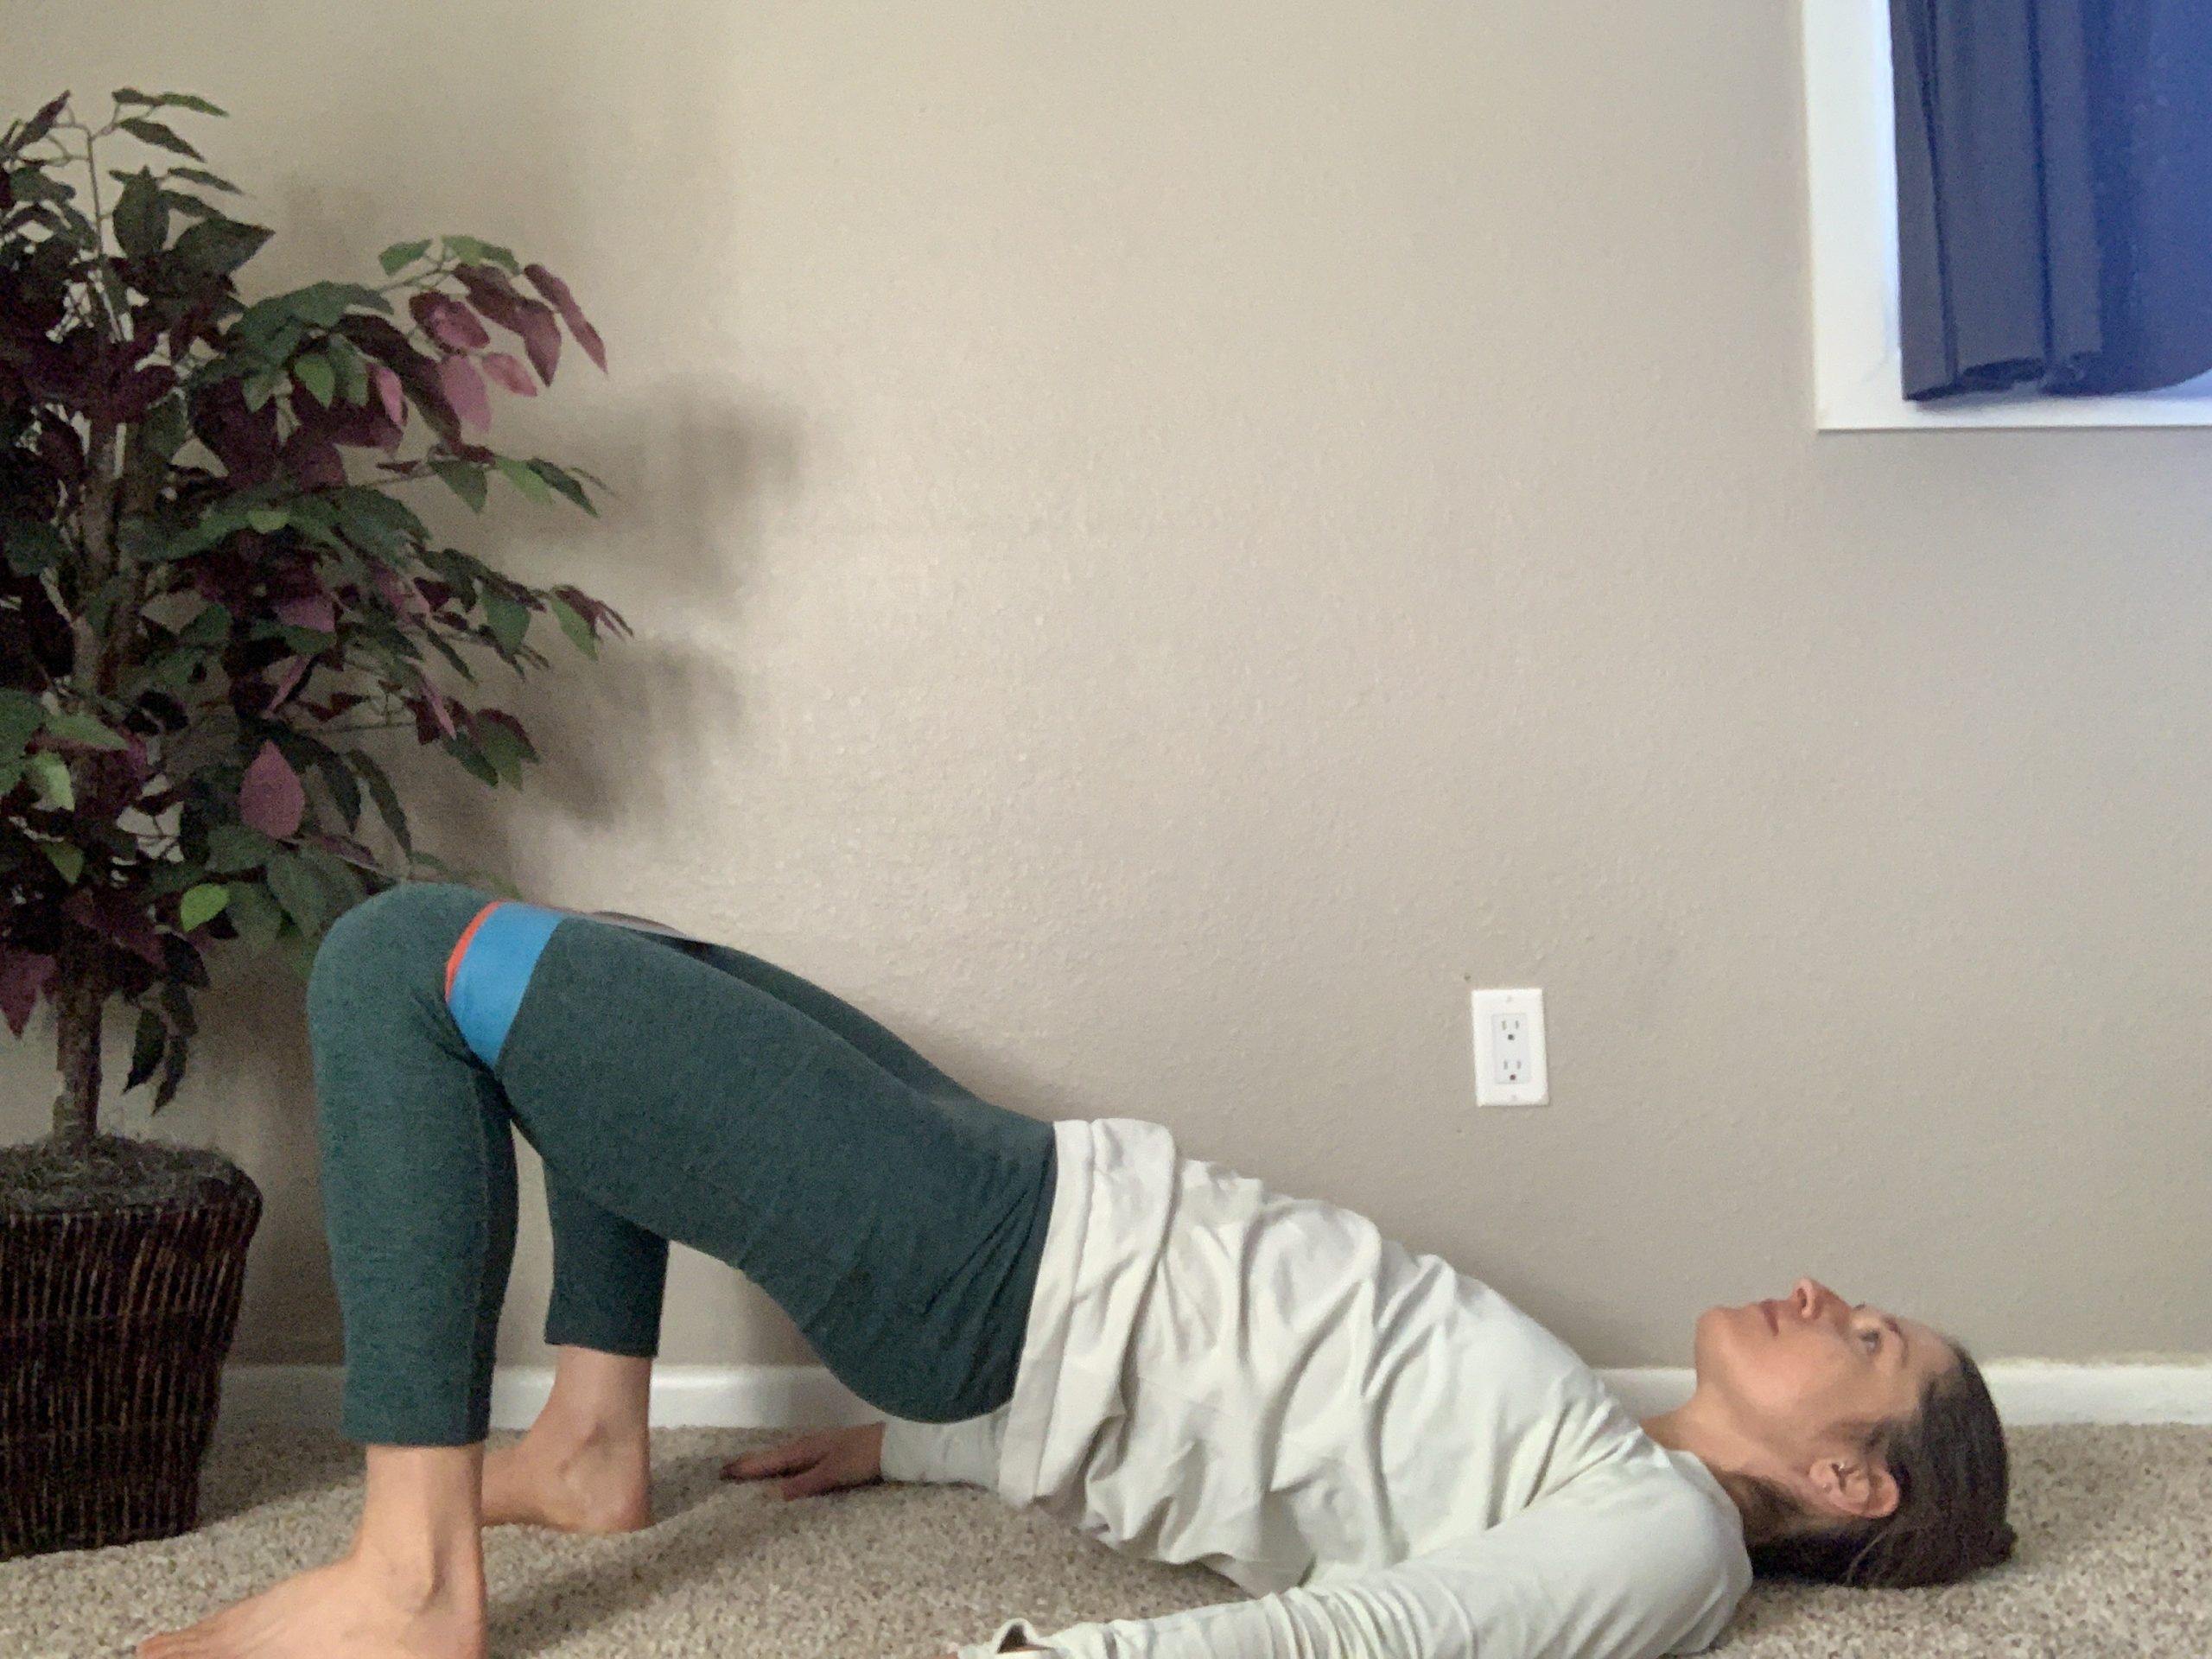
Glute Bridge With External Rotation
For both of the exercises below, the band should again be placed just above the knees.
Level 1:
Lying on your back with knees bent, feet hips width apart, and heels close to your butt, push your hips up into a bend. This should put your knees at a roughly 90 degree angle. Keeping the hips high, rotate the knees outward from the hips, further stretching the band.
Try 2-3 sets of 30 second holds, increasing the time or repetitions as you progress.
Level 2:
Beginning again from the bridge position, extend one leg while focusing on keeping the hips level and not shifting side to side. You should maintain some tension in the band to keep the outer hip muscles firing, but do not need to try to add additional tension to the band.
Again, try 2-3 sets of 30 second holds, increasing the time or reps to add challenge.
Yeaton reminds, “Really focusing on keeping your hips level. Don’t let the hip of the leg you are lifting off the ground drop — that’s the most important part.”
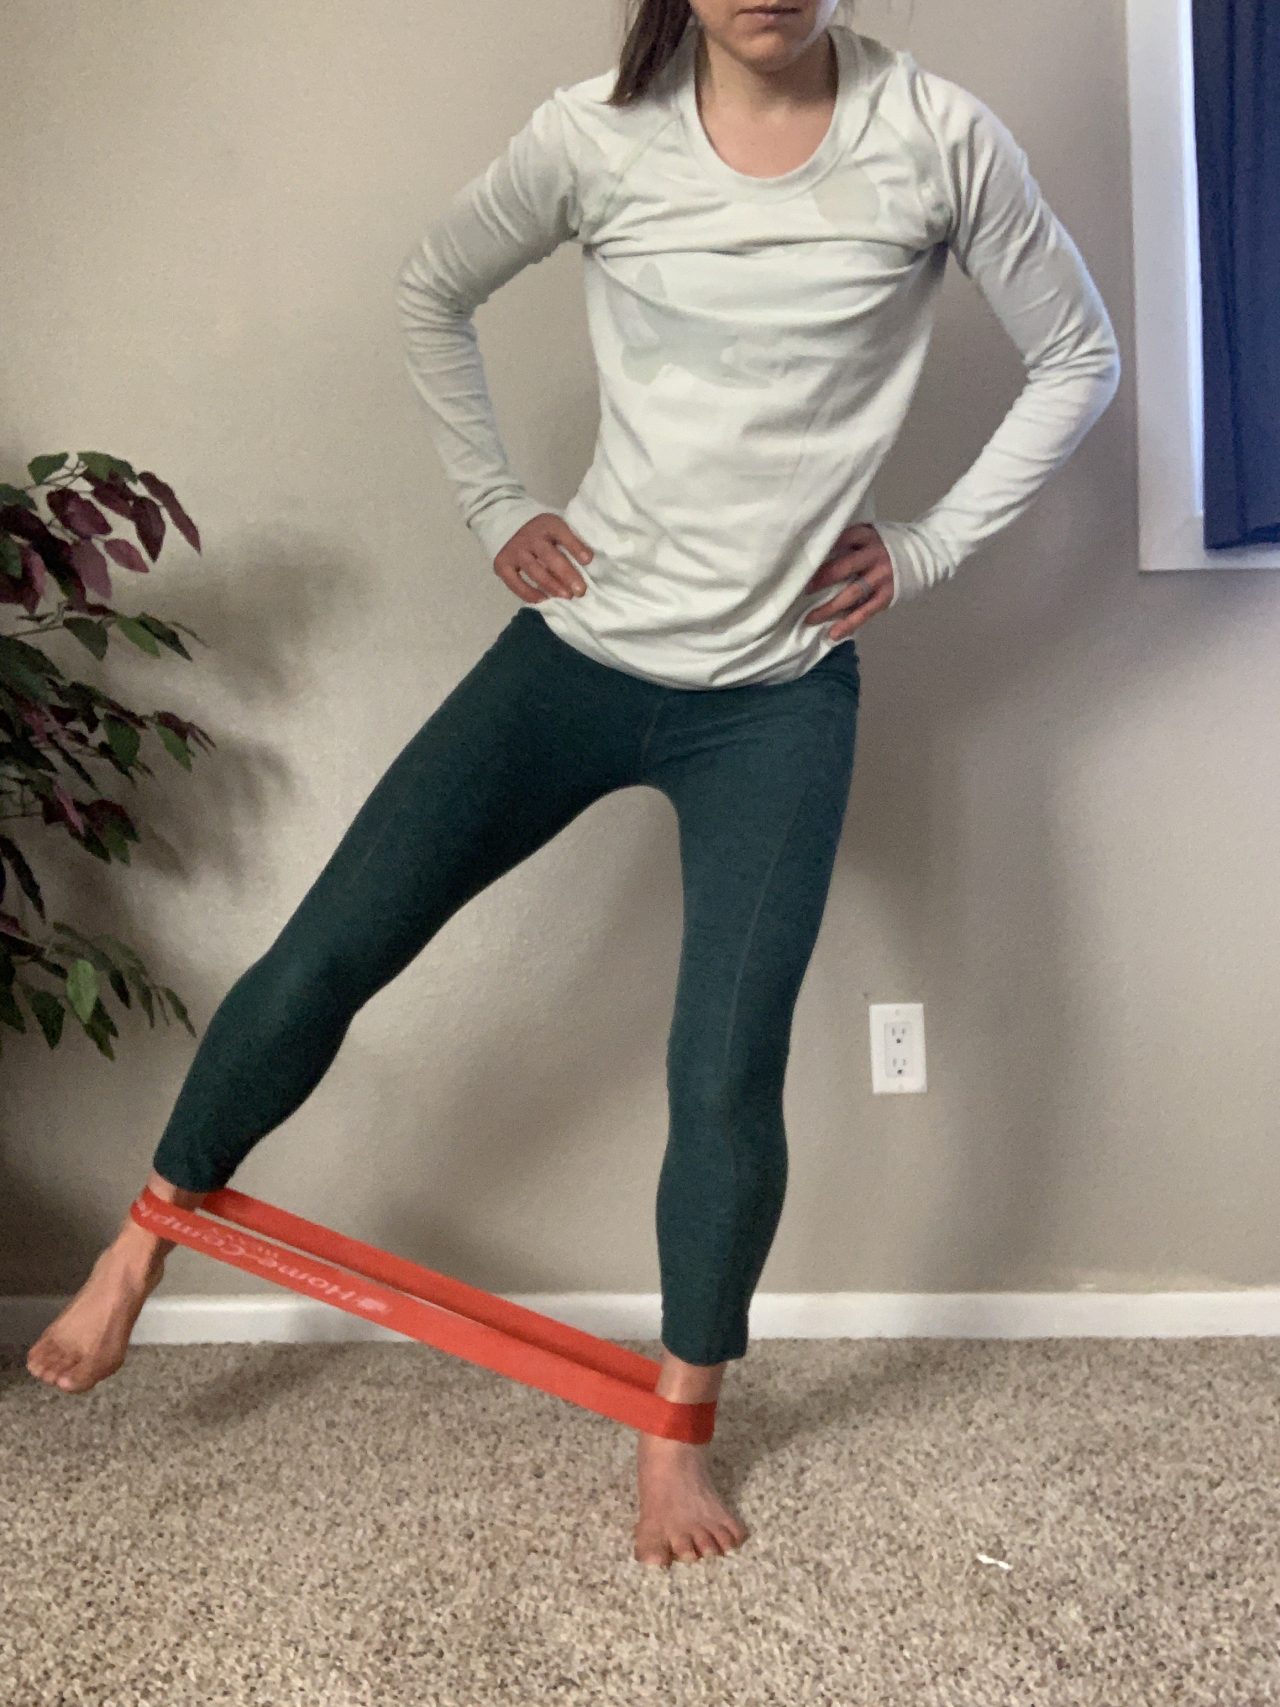
Skate Pushes
With the band just above the ankles, stand on one leg with a skate ski body position. There should be a bend at the ankle, the angle of the shin and back should be parallel, and hips should be stacked over the heel. Slowly extend the free leg outward as if you were pushing off perpendicular to the trail. Hold at the top for two seconds and release slowly to the start position.
It’s important to keep the motions slow and controlled. Just like in skate skiing, you do not want to compensate by tipping your torso to the side or letting the standing hip pop outward. A mirror can be helpful to help you maintain good form. If you’re finding it hard to maintain balance and form, try decreasing the resistance level of the band, or simply try it without the band until it becomes easier.
Try 2-3 sets of 10 to start, adding a longer hold or additional repetitions as you build strength.
Banded Skate Pushes
Banded skate push side view
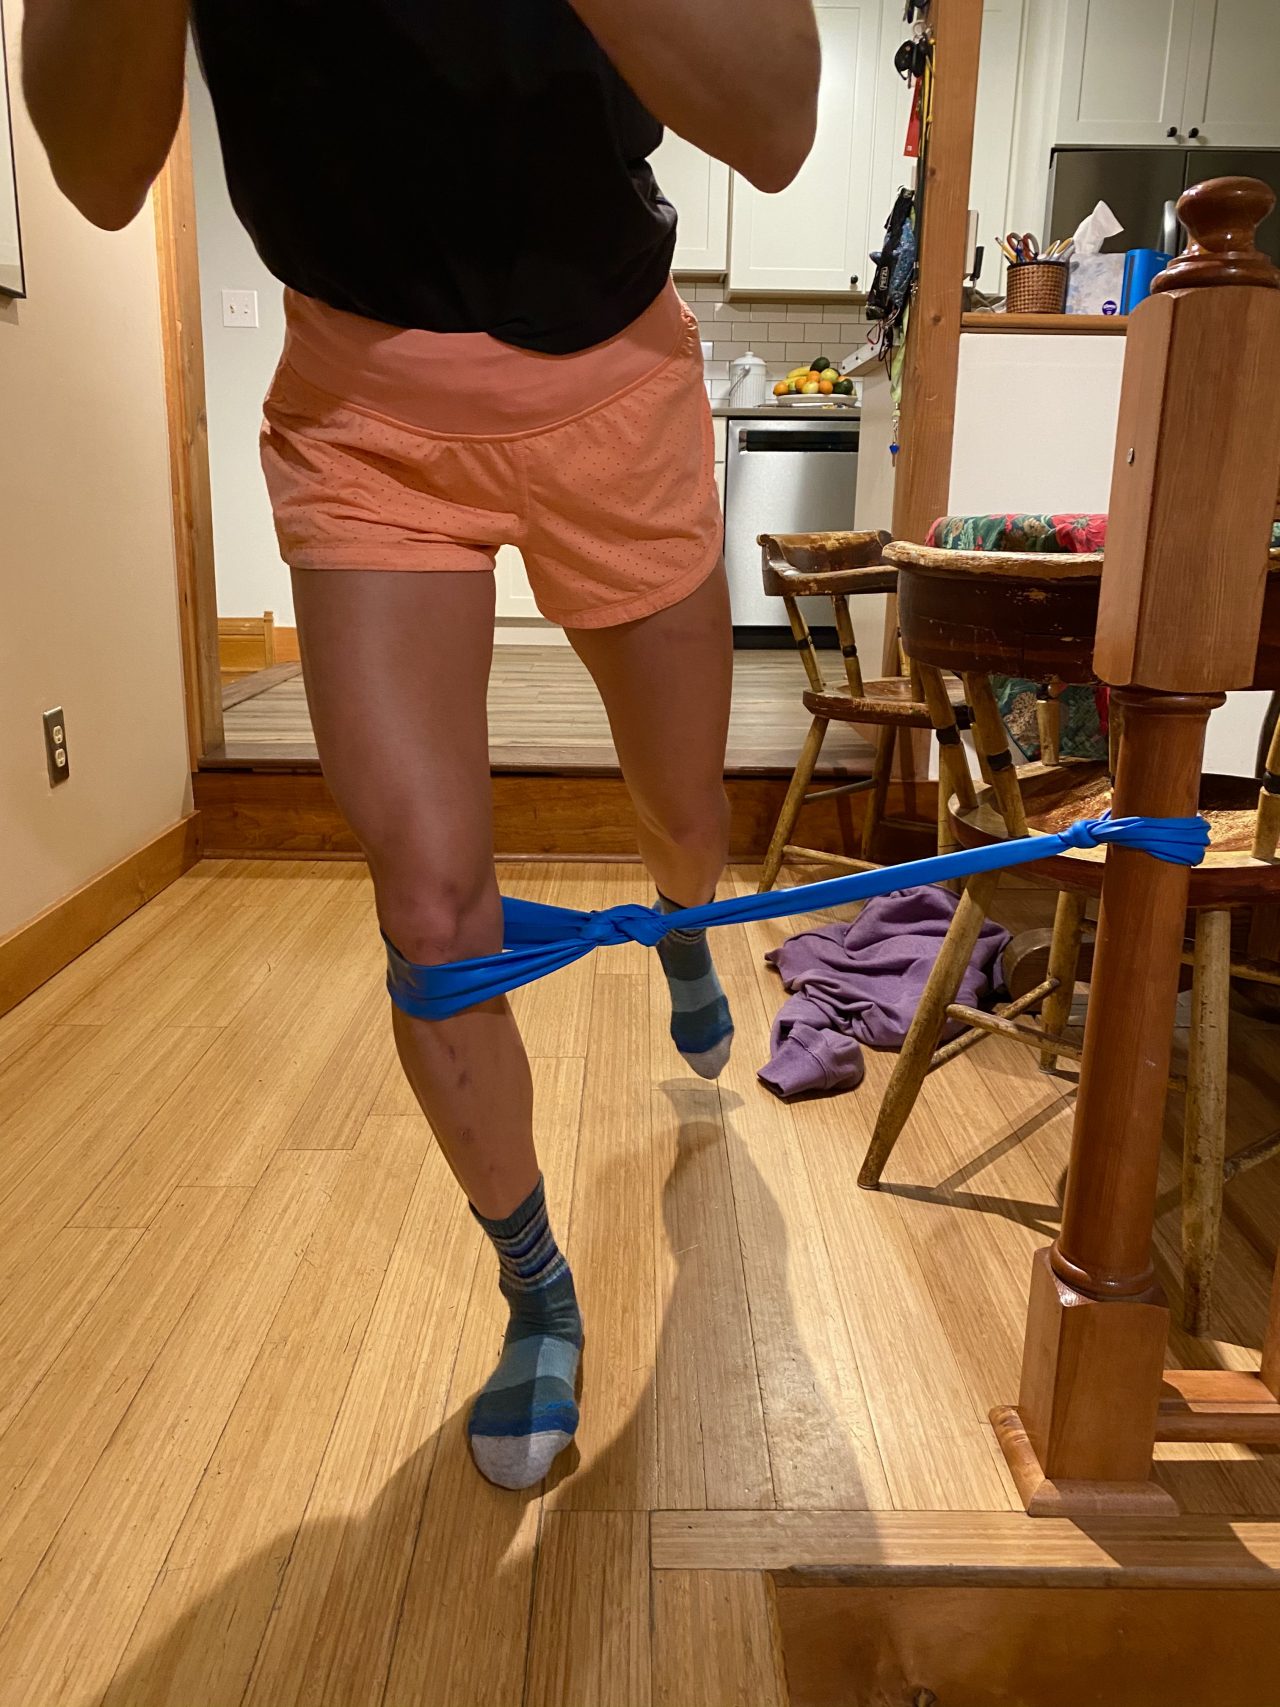
Single-Leg Squat With Band
If you found yourself wobbling and struggling to maintain good form with the skate pushes, it might be best to focus on the first three exercises for the time being. For those looking for a more advanced challenge, here is what Yeaton called her “favorite” exercise for single-leg stability.
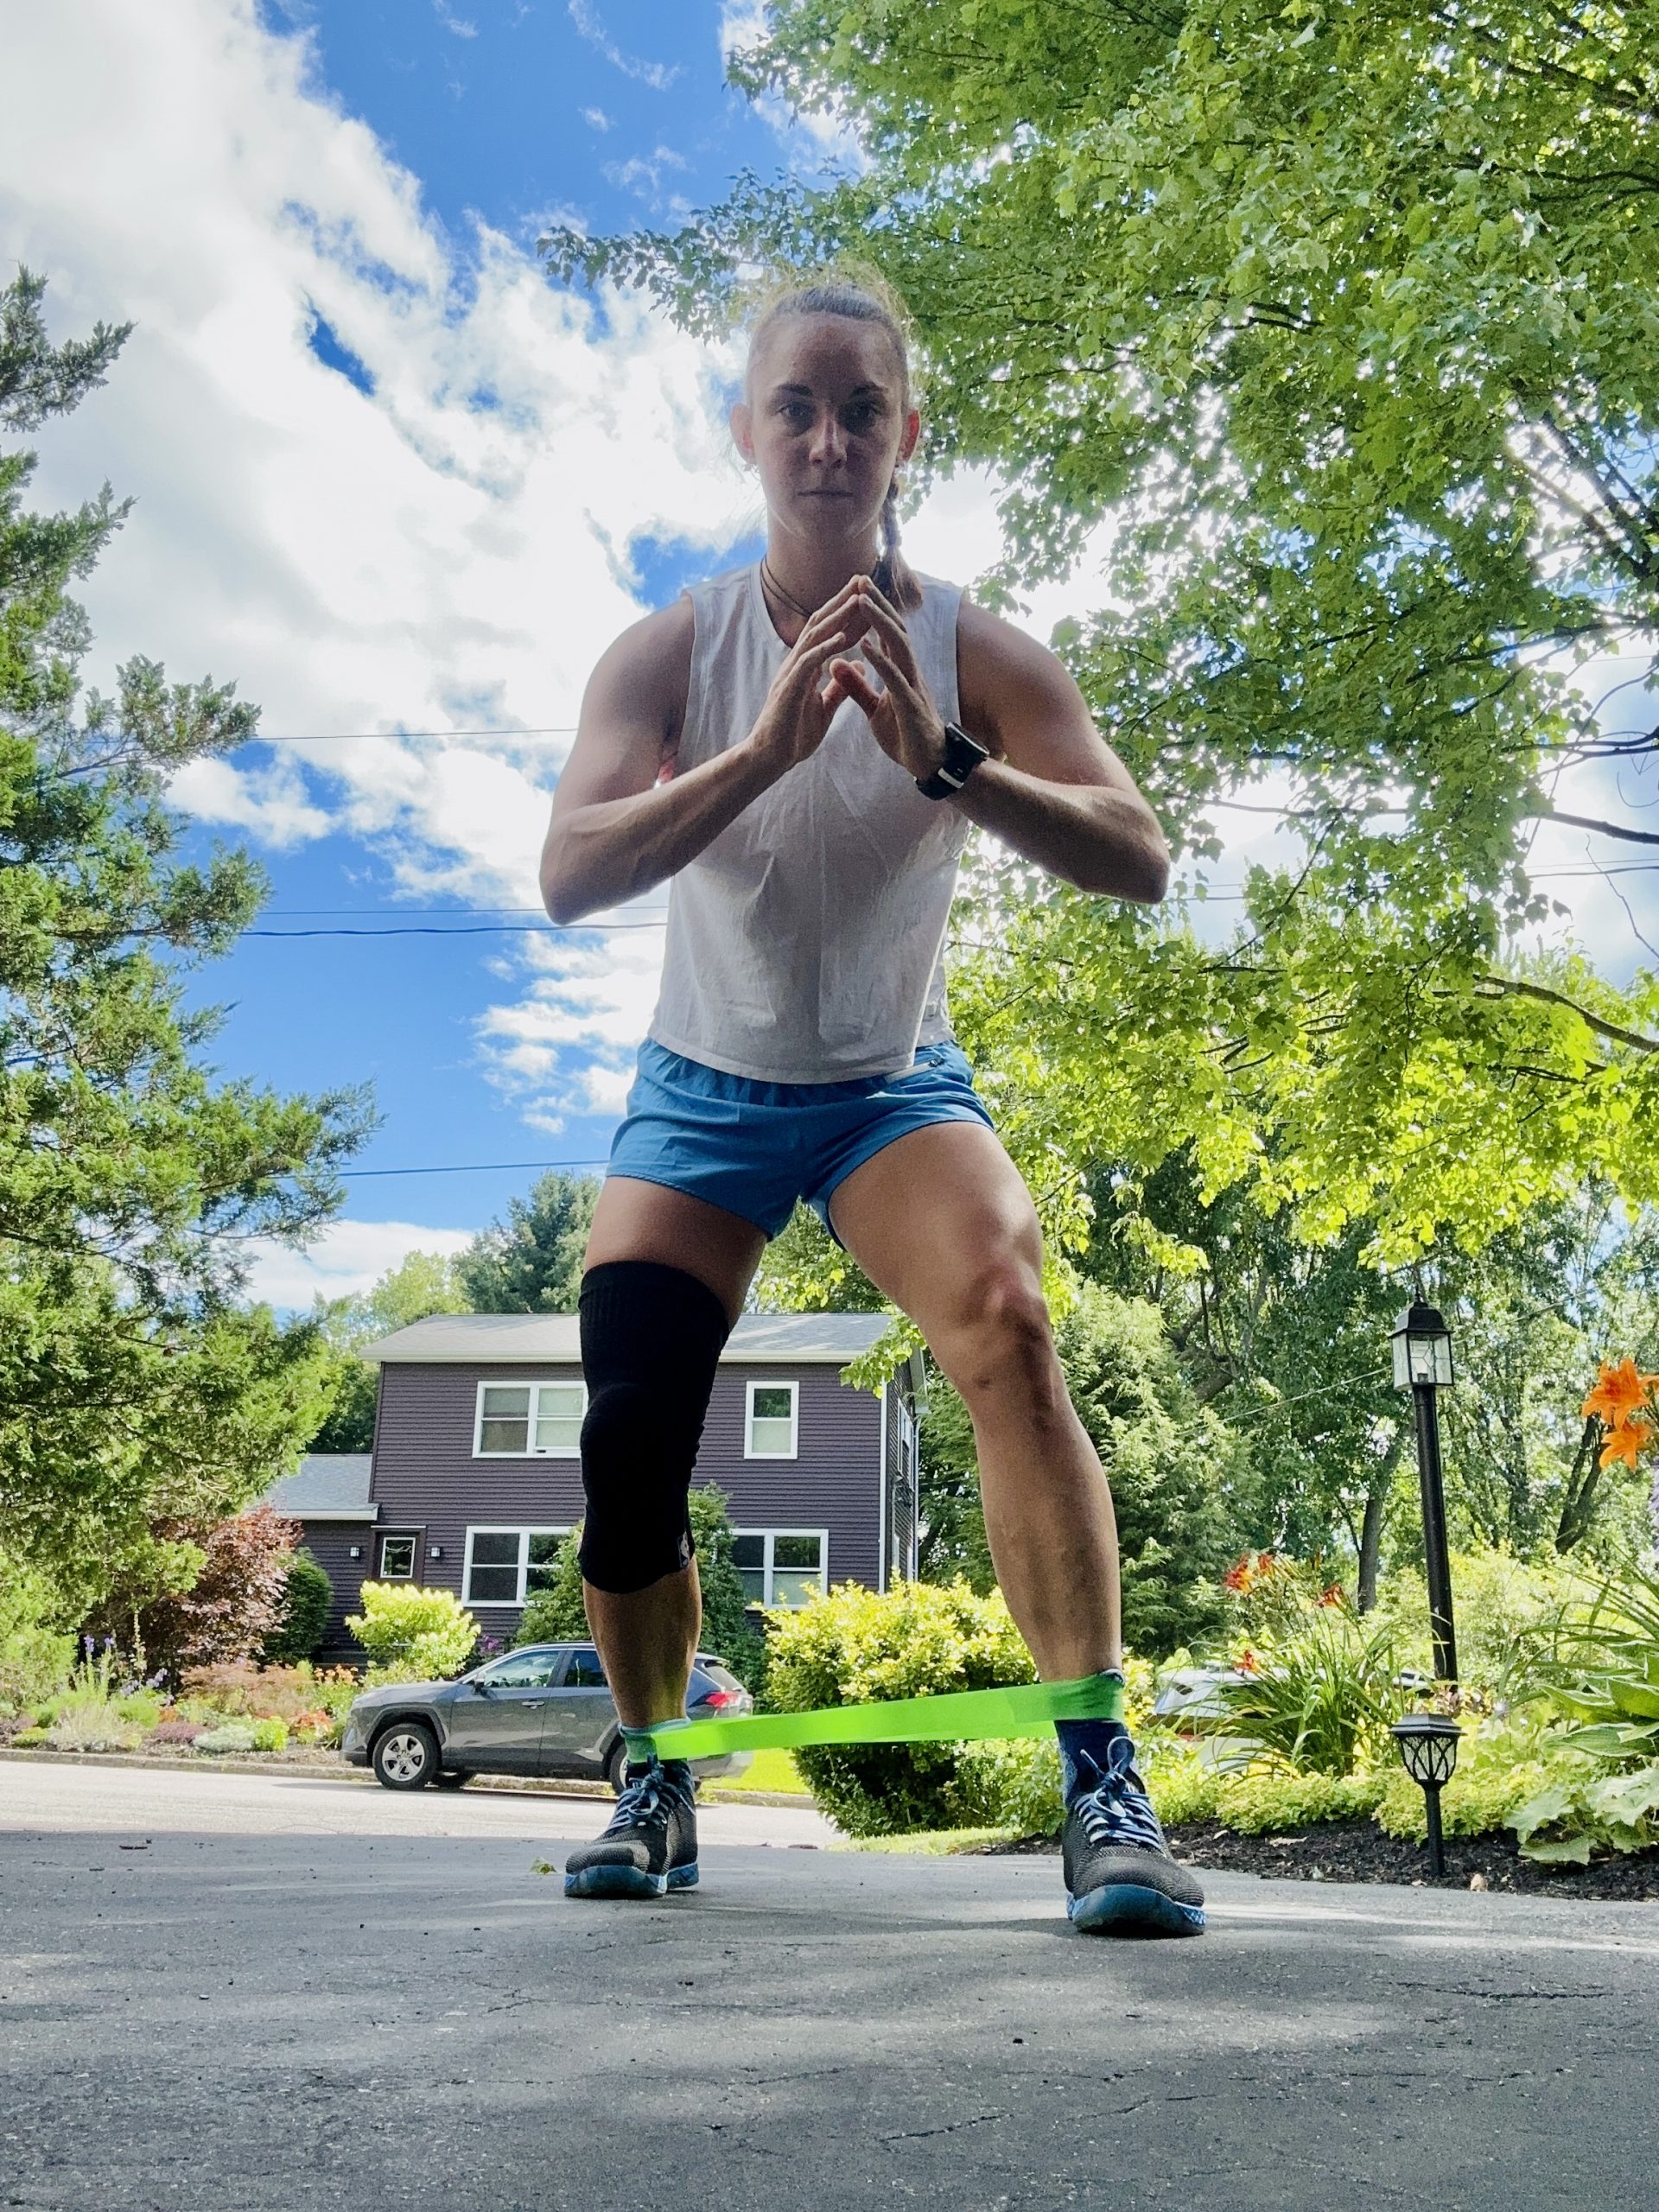
This exercise uses a full sized resistance band wrapped just below the knee of the standing leg. Fix the other end to something stable, like a table or the vertical rung of a railing. The band should be providing resistance that tries to rotate your knee inward, and you’ll be focusing on keeping the knee in line with the toe to resist the band.
Courtesy photo: Jessica Yeaton
Courtesy photo: Jessica Yeaton
With the free leg extended behind, focus on maintaining pressure through the outside of the foot and keeping the hips squared forward as you drop into a single-leg half squat. You should have flexion at your ankle, knee, and hip, so the hip is stacked over the knee, just like when you’re out for a ski.
“Don’t let your hips rotate towards the resistance, or again, you aren’t working the right muscles!” Yeaton warns.
Yeaton adds, “Another option is to tie the band around the opposite leg (leg in the air), which can actually make it even harder to stabilize and keep your hips in line and not rotating.”
Note: These exercises can all be made more challenging by incorporating a Bosu half ball or inflated disk to decrease the ground stability.
Wishing you improved balance and glide, and snowy trails to practice on! Give these exercises a try and you’ll be gliding like Sophie Caldwell in no time!
Picture perfect. Sophie Caldwell on her way to qualifying in first in the 2019 Davos, Switzerland skate sprint. (Photo: NordicFocus)
The SMST2 squad led by Jessie Diggins pushes the pace in a double pole interval workout during a fall 2019 training camp in Lake Placid, NY. (Photo: Matt Whitcomb / smseliteteam.wordpress.com)
It’s May. Yes, really.
For most skiers, the new page on the calendar also marks the beginning of a new training year. Dust off your rollerskis, locate your heart rate strap and drink belt, and make sure your running shoes have plenty of life in them.
With the country still predominantly on public health orders to stay close to home, avoid groups, and keep at least six feet of distance from those outside your home, kicking off a new cycle is happening without hugging our training partners, post-workout high fives, or otherwise gathering to ring in the new season. There also remains abundant uncertainty regarding the feasibility of racing during the upcoming season from the World Cup level to the junior and collegiate circuits to popular skiing. Nonetheless, we open our training logs and carry on.
Last season ended abruptly and the off season may have looked different than anticipated. We may have put our energy into homeschooling children, sourdough baking, binge-watching Tiger King, connecting virtually with our family and friends, or otherwise remaining largely homebound and less active than we’re accustomed. On the flip side, maybe the change in schedule has freed up additional time for long adventures and you’ve logged more hours in April than ever before.
Either way, at the onset of a season, you may be interested in checking in on your fitness and strength, looking for metrics to track improvement over time and to guide your pacing or heart rate zones during future workouts. FasterSkier reached out to Pepa Miloucheva, head coach of the Craftsbury Green Racing Project, to discuss fitness testing that could be done without the support of a facility or coach, making it accessible to any level skier as they begin the new year.
Miloucheva provided the disclaimer that she relies on advanced metabolic testing with her athletes to determine VO2 Max and lactate threshold levels to assess fitness and heart rate zones, and then prescribes training based on this information. With that caveat, Miloucheva holds a masters degree in Sport Science with a focus on physiology and biomechanics and has been coaching for over 20 years, over a dozen of which have been spent with the CGRP elite program.
Before jumping into assessing fitness and blowing up trying to hit a new PR on the SkiErg, Miloucheva emphasized that the most important thing an athlete can do at the beginning of a new cycle is to have a training plan and to understand how the periodization targets different areas of athletic development. This might be a plan from a coach or one found online.
“If someone really wants to establish a baseline and monitor, then they have to have a training plan,” said Miloucheva in a call. “I think everything else is kind of pointless, because all of these tests won’t give you anything if you don’t know what you’re looking for. In general, everything starts with first having a good training plan.”
Once a clear plan is established and you have taken time to understand it, then decide which part of the training process you would like to test.
“If you have 2-3 months of high volume, you want to test your basic aerobic improvement. You do the test, you see if you’ve actually improved. When you start doing a little bit more speed, you want to see if you’ve improved your speed. So you really have to schedule these tests based on your training plan.”
As the typical periodization of the year for skiers focuses on aerobic development during the spring and summer, a good starting place could be an uphill run test, possibly combined with a rollerski or SkiErg time trial, if those are available to you.
Traditionally, a 3000 meter run on the track was commonly used as an aerobic benchmark, but the results can be skewed based on individual running economy. Athletes with more running experience and better form often fare better than those with comparable or potentially better fitness. As such, most ski programs have transitioned toward an uphill run test, as it tends to level the playing field in terms of the impact of running efficiency on results.
In addition to being a good indicator of aerobic capacity, Miloucheva explained that the test has the added benefit of being easily repeatable with relatively few outside variables that might impact performance.
“The uphill running test is probably the most standard around the world. Simply, it’s easier to repeat. It’s a little bit less affected by the weather, but there are still a lot of elements and it is hard to keep it consistent.”
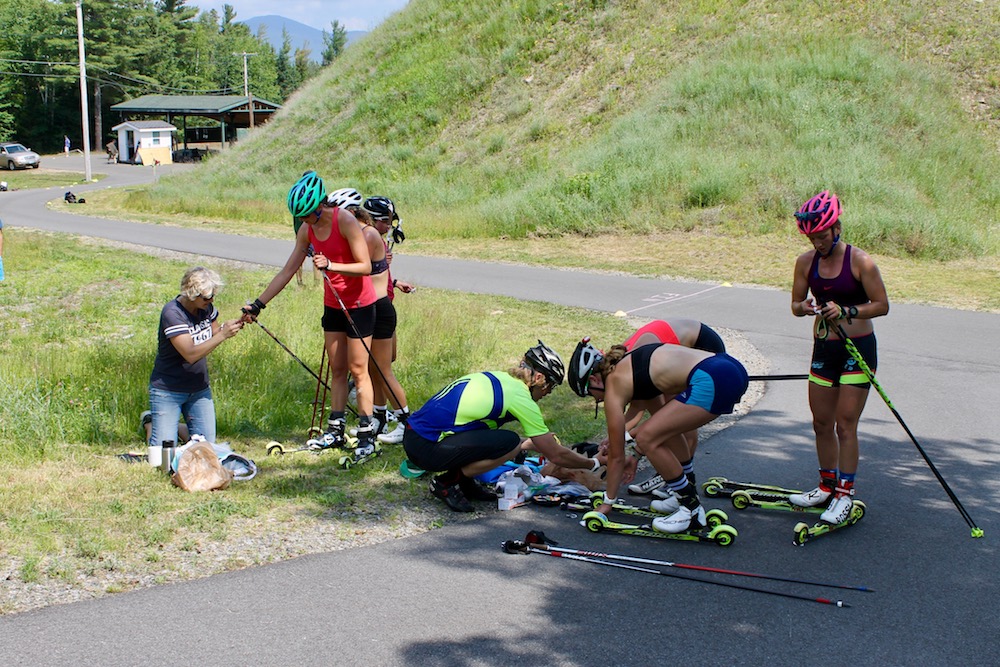
Craftsbury Green Racing Project Head Coach Pepa Miloucheva (l) and Stratton Mountain School T2 Team Head Coach Pat O’Brien (center) assist athletes with lactate testing after the U.S. Ski Team’s rollerski team sprint on July 15, 2018 in Lake Placid, N.Y.
If you’re looking to track your own progress on an uphill course, Miloucheva recommends finding a stretch of road or trail with little traffic that takes roughly 10-12 minutes. The effort should be steady throughout the test and you should finish feeling completely spent.
Be careful not to start out too fast as you want your heart rate to increase throughout the test, rapidly at first then gradually continuing to rise toward your lactate threshold heart rate, which can be estimated as the average heart rate sustained over the last five minutes of the test assuming it was well-paced. (TrainingPeaks has a deep dive on blood lactate and lactate threshold here, or you can read this description of lactate threshold training by Len Kravitz Ph.D., Exercise Science professor at the University of New Mexico.)
As for the course, you’re looking for terrain that is runnable, meaning you won’t need to resort to walking or hiking, and a relatively consistent grade.
Miloucheva later added that many veteran athletes have their own aerobic fitness test piece, which is also perfectly sufficient.
“I’m an old lady and I have this loop around the lake I do every year and I measure my time just for fun. So in general, everybody who has been training for years, they have a place where they can run the test.”
Miloucheva has also used a 1-kilometer uphill double pole test on rollerskis with some of her athletes. Her course starts relatively flat, climbs gradually, then levels off at the finish.
“The biggest thing is that [athletes] need to keep moving, so it cannot be very steep because strength and the resistance become the issue [rather than fitness].”
She has found this test harder to standardize than the run test, meaning results must be taken with a grain of salt.
“The problem using it year to year is that [the athletes] don’t always use the same rollerskis, they change wheels, cold weather and cold pavement changes a lot. So you have to consider all these details with the results.”
Sophie Caldwell and Annie Hart square off for a SkiErg time trial during a week of testing with the SMST2 team in 2017. (Photo: Instagram @sophiecaldwell(
Because of the ease of standardization, Miloucheva prefers using SkiErg time trials, as athletes can repeat the test indoors with a fixed resistance. Her junior athletes complete 1 and 2 k time trials, and her senior athletes additionally complete a 5 k test. The CGRP athletes complete the tests while hooked up to a VO2 Max testing equipment. If these are available to you, these tests could also serve as a benchmark for aerobic fitness with some ski specific strength indicators.
As for strength, Miloucheva is working on developing a test she feels is informative and can be standardized, as she is not satisfied with other tests used previously. She has historically used a version of the Canadian Strength Test (outlined here by Jackson Hole Ski & Snowboard Club), which counts the number of pull-ups, sit-ups, push-ups, box jumps, and dips an athlete can do in one minute with one minute rest between each exercise. Some differences in Miloucheva’s version include the use of single leg squats within a 30 second time period and measures pull-ups to exhaustion.
If you’re completing this test from home, ask a member of your household to help time, count, and keep your form honest so the data reflects your current strength accurately.
Okay, you’ve done an initial test of your aerobic fitness and/or strength. Now what? How soon should you repeat the test to check for improvement?
Miloucheva reiterated that it is essential to plan testing between training blocks to assess whether the block had the intended impact on fitness. She explained that her testing weeks are written into her general yearly plan for athletes at the beginning of the season.
When considering your own plan, space the tests out roughly 6-10 weeks to give the body time to absorb and respond to training. In addition to striving for a faster time, you can also consider trends in heart rate, as more time during the test spent closer to the lactate threshold heart rate is also an indicator of improved aerobic capacity.
To get the most information from a testing period, it is essential that each round is approached the same way, including how the training looks in the days prior and the warm-up performed before beginning the tests.
“You want to have a standard approach into the test, because you don’t want to do the first test after a very exhausting week and the second after an easy week, because it will affect the results.”
For CGRP athletes, this typically looks like one or two days of rest or easy training prior to a test.
There you have it. If you’re looking to assess and monitor progress in your fitness, first select and understand a training plan. Then, determine what factors of your fitness you’d like to assess and decide when a set of tests might fit best between different blocks within the training plan. Finally, do what you can to ensure that when the tests are repeated, the environment is as controlled as possible and your approach is the same so improvement (or lack thereof) between tests provides accurate insight into how your body is responding to training.
The small mountain town of Carbondale, CO is home to the Ripple Effect Training Center.
Like many mountain towns, Carbondale, Colorado is a magnet for athletes. The definition of that word is used broadly — though there are plenty, it is not just home to the uber endurance junkie. Within 30 miles, you can find world-class rivers for whitewater kayaking or fly fishing, five ski resorts, a variety of rock climbing and bouldering objectives, and miles of single track to be run, hiked, or ridden. With this unbelievable backyard, we are a town full of people who like to play outside.
Another common thread that links many of us is our belief in and gratitude for “the Injury Unicorn”, Carolyn Parker, who is the owner and lead trainer at the Ripple Effect Training Center. We flock to Carolyn to help us identify the source of our problems and to guide us to a solution through functional strength and mobility. In her words, it’s “outcome based training.”
Carolyn Parker, founder and lead trainer at the Ripple Effect Gym in Carbondale, CO, shares a workout to develop functional strength and mobility from home without any equipment. Parker has been training athletes since obtaining her certification through Gym Jones in 2010. (Photo: rippleeffecttraining.com)
Carolyn and her team have helped athletes correct muscle imbalances, increase power and strength, and recover from surgeries or pregnancy. She has helped athletes chase a Grand Canyon speed record in a raft, keep their body healthy for 100 mile running races, and even relearn to walk after spinal cord injuries. Her training supports the longevity and progress of athletes of all levels so we can stay healthy and continue to adventure in the mountains for years to come.
The Ripple Effect dogma is this:
“Our goals are to train the mind of the individual alongside the body, for the mind compels the body to endure and to achieve. To injury proof the body all the while encouraging the athlete to excel. We have created an environment of support, where honesty, character and integrity are paramount; and where motivation, instruction, and guidance are given to those with the desire to change.
“These practices do not apply to just the ‘elite’ of the athletic world. They apply to each and every one of us. We are all athletes! We all desire health, strength, happiness, and the capacity to excel in whatever we choose to do, at any level.”
When the gym was forced to close due to public health orders in mid March, the Ripple Effect crew hopped to and created a set of workouts athletes could complete from home without any equipment. The workout below is from that list and shared with permission.
The team at Ripple Effect is also leading small group and private instruction via Zoom. Parker also offers virtual or in person coaching to develop a periodized training program using the equipment available to you to help you reach your goals in the mountains. You can find out more by contacting Ripple Effect through their website or by following along on Instagram.
———————————————————————————————————–
Warm up with 10 minutes of walking, light jogging, heavy house work like vacuuming, wrestling with kids, or a Zumba video. You get the idea — get your heart rate up a bit and get your body warm.
Activation/Mobility:
2 x 8 shoulder opener with belt, ski pole, or towel
2 x 5 push-up, knees or toes.
3 x 5 air squats
Then:
4 x 30 sec push-ups/30 sec plank – 4 min total
1:00 rest
4 x 30 sec air squat/30 sec hold in the bottom of the squat – 4 min total
1:00 rest
4 x 30 sec sit up/30 sec with straight leg elevate 6” off the floor – 4 min total
1:00 rest
4 x 30 sec windshield wiper/30 sec flutter kick – 4 min total
1:00 rest
4 x 30 sec lunges in place/30 sec “rest” jog in place – 4 min total
1:00 rest
4 x 30 sec bicycles on back/ 30 sec mountain climbers – 4 min total
Cool down with some light mobility exercises.
Celebrating her 50th birthday with a dream trip ski mountaineering in Antarctica. (Photo: Instagram @blitzkriegbarbie)
Carolyn Parker is the founder and lead instructor at the Ripple Effect Gym in Carbondale, Colorado. She has been training athletes since obtaining her certification through Mark Twight / Gym Jones in 2010. Outside the gym, Parker is a life-long climber and AMGA certified mountain guide who has made the successful transition into full time coaching work. She has lead 5.12 rock, A3+, M8 mixed, and skis 50 degree couloirs. Parker has ski guided Mont Blanc, the famous Chamonix-Zermatt Haute Route, and the Italian Ortler Traverse multiple times. In 2001 she attempted to climb Makalu by a new route on the South Face with a small 4-person team. Most recently she has been competitive in mountain races and adventures, such as the Imogene Pass run, R2R2R in the Grand Canyon, the Sandia Crossing, the Four Pass Loop Elk Mountains, and the Power of Four Skimo Race. In 2019, she celebrated her 50th birthday by guiding a group of friends on a ski mountaineering trip to Antarctica, among other burly and spectacular mountain adventures.
Disclosure: The author is a paying member of the Ripple Effect Gym. Her goal is to be as badass, strong, and kind of a human being as Parker at 50.
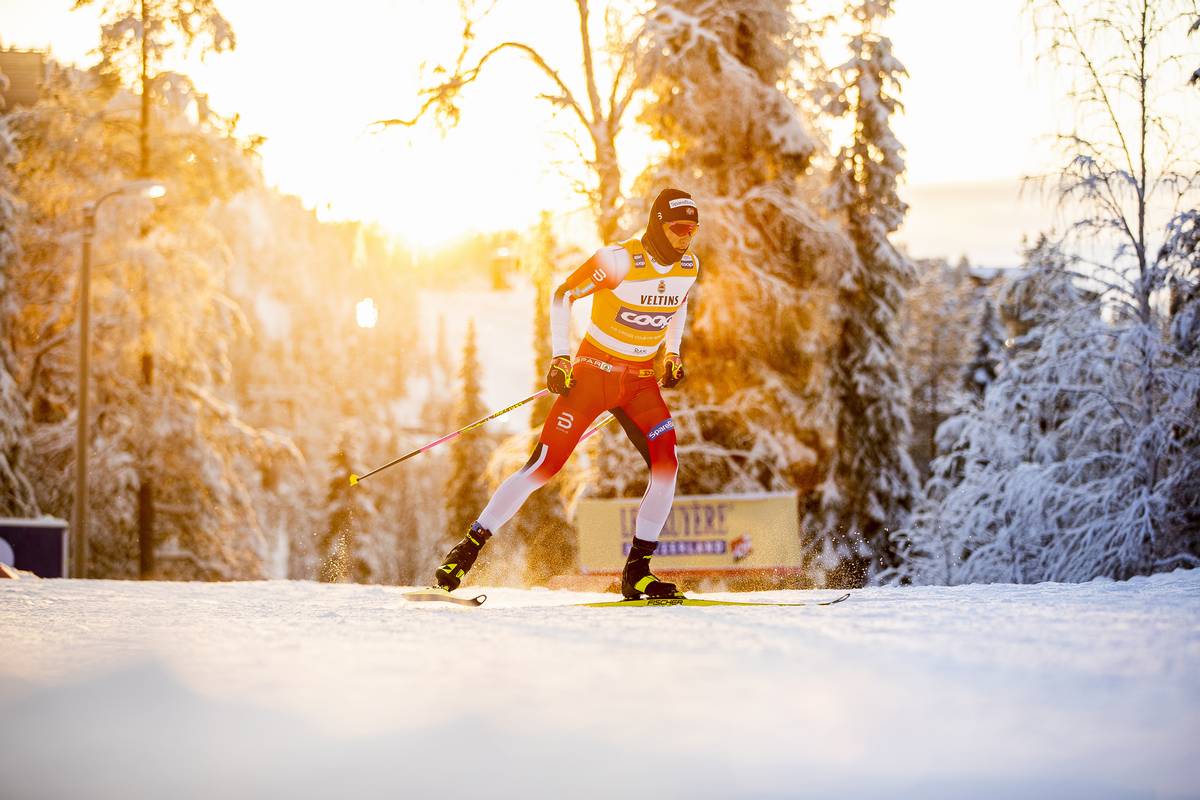
Johannes Høsflot Klæbo on course with fading December light in Ruka, Finland. (Photo: NordicFocus)
A new reality is setting in. As a nation, we are isolating ourselves at home, minimizing our contact with others to flatten the curve. Depending on your geographical location, you may still have access to scarcely populated nearby ski trails, routes to run, or bike paths to ride while still socially distancing. However, with schools closed, gyms shut down, and the challenges of working remotely, you may be finding that maintaining your usual exercise routine is challenging.
To help those looking for a quick strength routine that can be completed from home, Johannes Høsflot Klæbo went live on his YouTube channel this morning to lead a workout that can be completed without any special equipment. Klæbo addresses the audience in Norwegian, but he models each exercise, making it easy to follow. The full body workout includes familiar moves like sit ups, burpees, push ups, toe touches, mountain climbers, and planks, among others.
Katie Miller making the best with what nature has on offer. (Photo: Katie Miller)
At some point in the past seven months you signed up for the American Birkebeiner. Maybe you’ve done it before, maybe you haven’t. Either way, you’re now committed to skiing the American Birkebeiner, excited to experience “Birkie Fever,” whether for the first time or the 20th time. No matter your level of skiing or your goals for the Birkie, tackling a 50-kilometer ski race is no small feat. Realistically, for many people who participate, training full time is not an option. Working full time, dealing with normal day to day life — family, kids, pets — takes up most of our time and fitting training in when possible is a reality. This amplifies the challenge of preparing for a 50 k race.
Logging training hours was easier and more convenient in the summer months with warm weather and extra daylight. Now with three months to go until Birkie weekend, daylight is limited, work is busy and there are limitations to getting training in. The key questions is how do you continue to train into the late fall and early winter? What can you do now, with three months to go, to prepare for 50+ k of skiing?
These are great questions and important ones since you are now signed up to ski 50 k. That’s 31 miles sliding over snow. If you chose the classic race, it’s 55 k — that’s 34 miles. For those of you who do the classic race kudos to you. My back hurts just thinking about it! But don’t worry you could have signed up for a 50 k running race. I mean at least on skis you get to glide, right?
But in all seriousness, the Birkie is a one of a kind experience that every skier should try to participate in. Three months is plenty of time to make a few improvements to your training, work around the limitations our day to day life present, and hopefully, make those 50k a little easier! Below I’ll discuss some of the limitations faced and possible ways to address them.
When I started writing this it was a Thursday in late November. I was inside, riding my bike trainer trying as my long easy workout. My body was telling me I should be skiing but the rain, green grass, and pitch-black outside at 5:00 pm told me otherwise. Juggling work, life, and training can be especially challenging this time of year. Depending on where you live there are different limitations to late fall and winter training. Those can be:
Time constraints: make all of your time training quality “on-time” if you are over obligated with life commitments.
Lack of daylight is an added challenge once daylight savings hits in late fall. If you can get outside in the dark before or after work safely that is great but not always an option. If you can, secure yourself a reliable headlamp and get after it. Some alternatives to outdoor training are strength programs, accessing a spin bike, or other indoor workout facilities. They aren’t the most fun options, but you just have to get it done sometimes!
Lack of snow: depending on where you live and what kind of winter it is you may not even have the option to get on snow much before the Birkie. Lack of snow leads to the fourth limitation, a culmination of the first three- lack of time training on snow.
Once there is snow- lack of time training on snow. Getting on snow to train for a ski race is obviously one of the best ways to train but getting on snow often may not be an option for you. The days you can get on snow are valuable and important to your training.
Snow definitely works. (Photo: Katie Miller)
These limitations are hard to workaround. Here are some ways you can focus your limited time to tap into your best effort over 50 k.
What to focus on and how to address these four limitations:
Build up a base and be consistent. No matter your level of skiing, the more base you can build up and the more consistent you can be with your training the better.That base will be there to tap into when you’ve been skiing for several hours. So take time to determine what you can schedule during the busiest parts of your week. Can you get in a few short or medium distance training sessions during the week? Try for 30-90 minutes if you can. Use those days to get in high-qualitytraining sessions. These could be skiing, roller skiing, running outside or on the treadmill, hiking, biking outside or inside, swimming, anything aerobic that builds up your endurance. If a strength workout is what you can get in, then do that! A couple of short workouts during the week may seem a long way from skiing 50 k but every little bit adds up. When you are 40 k into the race and your body is able to harness just a little bit more from that base you’ve built up, you will thank yourself!
Two specific training sessions to fit into your training are a long slow distance (LSD) day and a threshold day. These are your endurance builders. Is there one day a week you can get in a long distance workout (a 2+hour workout)? If you can get out for an easy 2+ hour training session one day a week every week until the Birkie that adds up to some serious base building. And remember, that’s only a one day per week commitment. Can’t get quite that much time to work out in one day? Get in as much as you can: every little bit adds up.
The second specific training session is a threshold workout. A threshold workout is time efficient — it is a great way to get in a high-value training session in limited time. Getting in an entire threshold workout can be an hour to an hour and a half depending on the length of your intervals. For a threshold workout, a “threshold pace” (also known as L3) means a pace faster than a long-distance ski but not a hard race pace. I like to think of it as a consistent pace where you can speak but only in brief responses, holding a regular conversation is not easy. You should be working hard at an increased pace that you can hold for an extended period of time. If you are just beginning to experiment with threshold workouts for your Birkie training, try 2 x 10 minutes, then build up in time or the number of intervals with some of the breakdowns listed below. Rest for 3-5 minutes between intervals.
Sample workout:
15-minute easy warmup
Threshold intervals: choose your breakdown- 3 x 10 min, 2 x 15 min, 3 x 15 min, 2 x 20 min, 1 x 30 min, 2 x 25 min Rest 3-5 minutes between intervals.
Optional added challenge: add some pickups into the thresholds, 10-30 seconds, then bring it back down to threshold level
15-minute easy cooldown
Getting your LSD and threshold workouts done on snow is ideal, but they can be effectively done running, roller skiing, biking, whichever activity you are able to do at that time.
Turn a weakness into a strength
Choose a “weakness” to work on for the next three months and you will turn this “weakness” into a strength — adding another tool to your arsenal to use on race day. This is my favorite way to make an improvement to your skiing that does not have to take a lot of time. It gives you a path to improvement and will help you ski better over 50 k.
Strengthen your core
Core strength is an easy improvement to make. Our core strength is fundamental to skiing in general and particularly to skiing with consistent power. A strong core helps stabilize ourselves and hold proper technique when skiing.
Working on core strength requires little if any equipment, you don’t need daylight, snow, or prolonged amounts of time. Ten minutes of core three or four days a week is cumulative. It can be done anywhere at any time. And looking at three months until race day, those core exercises will add up.
10-Minute Core Workout
Complete each exercise for 30 seconds, rest 15 seconds in between, repeat twice with one minute between sets
Plank
Bicycles
Toe touches
V-Sit
Leg Raises
Leg hold
Search google if you need to see demonstrations of the exercises
Spend time on technique
Once you get on snow (or roller skiing), practicing certain aspects of your technique and transitions can pay off in a long race. Are you stronger with V1 technique on one side than the other? Then whenever you are on snow practice V1-ing on your offside. Being comfortable with V1 on both sides pays dividends in a long race, especially on the rolling and hilly parts of the Birkie and maneuvering around other skiers.
Work on transitioning from V2 to V1, pacing yourself over 50K, transitioning from double-poling to striding, and cornering.
These may seem like small things, but smooth transitions, and things like steady pacing compound over 50 k. If you are able to get on snow 1-2 times a week, choose the workout you are able to get in that day (long distance ski, threshold workout, easy hour-long ski- whatever fits your schedule) and also choose a technique goal during that ski.
The following was written by Katie Miller, a former University of New Hampshire (UNH) ski racer. She currently lives in southern N.H. where she does her best to “juggle a full-time job as a criminal defense investigator with the desire to get outside and ski all day everyday!”
“We want to see the sport thrive, we want to see more people on skis. The collection of youth game videos, those are like a gift to the cross country ski community.” — Kim McKenney, XC Ski Nation
(If the video doesn’t play in your browser, click here)
XC Ski Nation and Nordiq Canada recently created a series of ski game videos for kids. While these games teach many skills, the primary goal is to have fun on snow, which keeps the kids coming back. These games are freely available on the internet in both English and French.
“Stephen Novosad, [Nordiq Canada’s] Technical Coordinator, Coach Development, was my partner on the project. He’s the brains behind the games. As you can see in the videos, he has a wonderful sense of fun and is exceptionally creative when it comes to inventing games. He’s very much a kid at heart!” — Kim McKenney, XC Ski Nation
XC Ski Nation’s core business is providing online video coaching and support to their subscribers. For $33US/year, skiers get access to a large collection of technique video featuring national team skiers and elite coaches. Many of the subscribers posting on the forum are coaches looking for new ways to teach.
In 2017, Nordic Canada partnered with XCSN to create a series of technique and coaching videos which are available exclusively to NCCP-certified coaches in Canada.
“The partnership was facilitated by the fact that one of the founders/owners of XC Ski Nation is Chris Jeffries, long time head coach of the Alberta World Cup Academy and coach of several NST members. It allows us to work collaboratively on producing videos for which NC controls the content but getting a professional editing service while complementing these joint productions with many more from XCSN’s own library.” — Stéphane Barrette, NC’s Directeur du développement des athlètes et entraîneurs
We commonly hear that games are for kids, fun is for kids, games are just a way to teach kids without them complaining. We should also admit that masters can learn a lot from games: mobility and balance are useful to any skier, even if the goal is just to reduce skiing time lost to injury.
One of the coaches who has influenced me most used to say to adult skiers “You are not going to the Olympics. You need to enjoy your training.” The phrasing changed, the number of short anglo-saxon words used for emphasis changed to suit the audience, but the message was always the same: you need to have fun.
Games like these may take your masters group way out of their comfort zone, but rapid improvement in your skiing while laughing at your peer group is never a bad thing.
“What do we live for, but to make sport for our neighbours and laugh at them in our turn?” — Mr Bennet
Before we begin, if you have not heard of the Mount Marathon Race, which takes place annually on the Fourth of July in Seward, AK, watch this video. If you’re short on time, fast forward to the six minute mark to witness racers scale the direct route up the mountain which towers over the town, about 3,000 vertical feet in less than two miles. They then cascade down a harrowing descent, a semi-controlled fall down loose rock, snow, and rocky ledges before a final pavement sprint to the finish.
Mount Marathon is not the only race of its kind. Runners compete around the globe in technical mountain races of varying distances in the Sky Runner Series, and in the US, hundreds of racers “push peaks” up and down Western ski resorts in the Cirque Series. This is only a small subset of the hundreds of events that send runners through grueling terrain up and down peaks and along ridges.
In the list of past Mount Marathon champions, there are several familiar faces, including Kikkan Randall, Holly Brooks, David Norris, Scott Patterson, and Jessica Yeaton. This begs the question, why do some of the best skiers in the country put their bodies at risk racing through potentially high consequence terrain? Is it worth the potential setback from a bad fall that sidelines you from training?
David Norris stood atop the podium of the 2019 Cirque Series Alyeska race. Norris also won the race in 2017 and took third in 2018. (Photo: Instagram @cirqueseries / Keith Fearnow)
To answer these questions and get a deeper look into mountain running, specifically the Mount Marathon Race and the Cirque Series Alyeska race, FasterSkier spoke with Jessica Yeaton (APU/Australia XC Ski Team) and David Norris (APU) who have racked up a slew of wins in these races.
Norris is a two time Mount Marathon winner and course record holder. In 2016 he bested the time of world renowned mountain athlete Killian Jornet. Norris chose to sit out this year’s event due to the smoke-induced poor air quality. Norris also won the Cirque Series Alyeska race in 2017 and 2019 and took third in between.
In 2018, Yeaton won the Cirque Series race and both members of the duo won Mount Marathon — this is a perfect record for Yeaton as she has only entered each race once. (Fellow APU athlete Rosie Frankowski was the female Cirque Series Alyeska winner in 2019.) A nagging hamstring injury has kept Yeaton from incorporating doing much running into her training over the last year, keeping her out of competition.
At the time of the conversation, the couple was wrapping up a road trip from their home base in Anchorage through Western Canada and south through Montana, Wyoming, and Colorado before reaching their final destination of Albuquerque, NM where Yeaton begins Physical Therapy school this fall. She will continue to train and compete in skiing but acknowledges that her race schedule will look different this season as she will be navigating around the academic calendar.
Jessica Yeaton leads the women’s field up a ridge during the 2018 Cirque Series Alyeska race. (Photo: Instagram @jjyeaton)
Apart from dealing with a lingering cold through June, Norris is feeling fit and putting together a solid summer of training. He shared that he is “looking forward to November.”
As both Norris and Yeaton are primarily focused on ski racing, they take a slightly different approach to these races than athletes targeting mountain running. Rather than training specifically for Mount Marathon or Cirque Series, they use the efforts to compliment their high volume of training.
“The race itself is really good training for ski racing and the downhills are the only risky part,” said Norris in a call. “The uphill and cross country side of mountain racing is super good for our training. Usually, we don’t taper for the races, we just add it into the week’s schedule, so instead of hammering out intervals on Friday, we’ll adjust the workout to a speed session then do the race Saturday as our intensity for the second half of the week.”
While this strategy might not be attainable for the average racer, Norris and Yeaton explained that they capitalize on their fitness and power to excel on the uphill, cushioning their lead so they can ease up and stay in control on the downhill, which they believe minimizes the risk of sustaining an injury. This allows them to reap the benefits of a race effort without the danger of halting their otherwise steady progress in skiing.
“I think we’ve been kind of fortunate that in a lot of these uphill races that include technical downhills, if you have enough of a lead [on the uphill], you can stay within your comfort zone [on the downhill], and I don’t think the risk is absurdly high,” explained Norris. “What’s always made me nervous about Mount Marathon is if I were to get to the top in second or neck-in-neck with someone, then I don’t know if I would hold back. With my competitive nature, I think I would hammer the downhill and try to win, and that’s when I think it becomes more risky and that’s when you’d have to decide if that was the right thing for cross country skiing and the training.”
Look closely to see athletes ascend a steep ridge on the shoulder of the Alyeska Ski Resort during the Cirque Series race. (Photo: Instagram @cirqueseries)
As they would with any summer race, both athletes discuss their race strategy and their decision to enter with their coach, Erik Flora. Both agreed that he is on board with them racing but might not advise all of his athletes to do so.
“In my position, being injured, definitely I could enter races and do them and just continue to go down that path, and [Flora] would definitely advise against that,” Yeaton stated. “But if you’re in a place where you’re not battling injuries and you’ve been running and practicing downhills a lot, which is where I was two years ago leading into Mount Marathon, then he was totally supportive of that. A lot of it is knowing your boundaries and knowing what you’re capable of.
“It’s something that is on a case by case basis,” she continued. “Because some athletes are constantly battling injuries and are less skilled at technical running, he’d maybe advise against entering these races, but I think a lot of us can handle that.”
For the skier interested in trying a mountain race, Norris explains that not much alteration to typical summer training is necessary as the fitness will already be there. However, as with mastering any skill, practice and time moving through the type of terrain encountered during the race is valuable.
“For the uphill, all the rollerskiing and the hill bounding and plyometrics are awesome training for running uphill, so I think most skiers have good leg strength and aerobic capacity to climb hills fast,” Norris explained. “Then, it seems like for the descending, my downhilling has improved a bunch just since moving to Anchorage, because growing up in Fairbanks it’s more trail running and just dodging roots. In the afternoons, I do a lot of two hour runs that are just roaming around in the mountains. Once you get above treeline, you don’t really need trails, so you’re just scrambling around on ridges. I think my footwork and my agility has improved by just training out there a bunch. Not necessarily doing drills out there, but just the time and running trails in that terrain.”
Descending is not the only aspect of mountain running that requires practice. As the ascent often requires using hands and arms to scramble and navigate around steep rooty and rocky ledges, this too requires technique and practice to develop efficiency.
“For me, it was just practicing the uphill enough and being in good enough shape and knowing that I could be in front on the uphill,” Yeaton shared. “Then knowing that I could get down the downhill fast enough without putting myself in a risky place. So trying to make up all my time on the uphill, because that’s such good training for skiing — and that’s our strength is fitness. If you can get in a place where you’re already putting time on people on the uphill, then you don’t have to necessarily put yourself at risk, which I think is a really good tactic when you’re ski training.”
For the novice athlete interested in trying one of these races, Norris recommends developing enough stamina to feel strong throughout the event and also moderating effort to prevent the mental haze that can result from overextending one’s physical capacity.
“At any level, if you’re a first-timer going into it, just being fit enough that when you get to the top, your legs aren’t wobbly or shaking under you, because I think that’s where the risk would really increase is if you’re totally fried and you’re just trying to make it back to the bottom. I think with skiers, you start running down the hill for five or ten seconds and you’re already starting to recover. Your legs are strong and you’re able to maneuver downhill safely. But if you’re totally new to the sport and you got to the top of the hill and you’re cramping and crumbling, then your risk of just getting down is so much higher because your legs are so tired.
“Good advice for first-timers is to stay within yourself so that you have the energy and strength to maintain coordination for the downhill,” he said simply.
David Norris (APU) takes on the steep and technical descent during the Mount Marathon Race. (Photo: Screenshot norrisnordic.com)
Even though gravity is in the athlete’s favor during the descent, the difficulty should not be underestimated. Running downhill forces the legs, particularly the quadriceps, to work eccentrically, meaning the muscles are lengthening while under stress from the force of each footfall. Essentially, the tension in the muscles is preventing the legs from collapsing, versus the pulling forces from the glutes and hamstrings which power a runner forward or upward.
Ever had to walk down the stairs backward after a hard downhill run or hike? This type of work causes muscles to fatigue quickly or potentially to fail if they are not properly trained and is correlated with increased muscle soreness after the activity.
For any athlete looking to try a mountain race, it is important to spend some time running downhill beforehand to condition the legs to sustain this toll.
“Just in training, we jog around really easy then you start going down the hill and you realize your legs are getting super fatigued and tired on the descent. It’s deceptively hard to just run downhill,” Norris emphasized.
While no races are on their calendars at this point, both are eager to jump into more mountain races in the years to come. The couple agreed that they would like to find ways to race outside of Alaska; this has been tricky for Norris as his travel budget is focused on the winter race season, but as Yeaton will be based out of Albuquerque for the next two years — “closer” to the other Cirque Series races — both hope it might be possible in the near future.
To be depleted can take on many forms. In endurance sport, depletion often refers to an athlete’s fueling state. Are they stocked up on muscle glycogen, have they properly fueled with a balanced diet of proteins, carbohydrates, and “good” fats or are they trending towards empty?
Carbohydrates are the body’s primary fuel source, particularly during exercise, however, fat molecules are a caloric gold mine when it comes to available energy. The caveat is that fat is not as readily available, as it is more difficult for the body to break down into a usable form. Some athletes use depletion workouts to train their bodies to better adapt to fat burning when training and racing. When glucose/glycogen stores run low, the ability to burn fat for energy might ward off the feared bonk.
The general rule of thumb goes like this: as exercise intensity increases, the body’s ability to burn fat (fat oxidation) decreases. Sprinters burn almost exclusively glucose/glycogen for those big bursts of speed. Those running marathons or skiing 30 and 50 k cross-country events also use glucose/glycogen stored in their muscles, but this fuel source will become depleted as the body is not able to produce glycogen at a fast enough rate to replace what is being consumed. If the long-distance athlete’s body is able to adapt to this depleted state and break down its fat stores for energy, they may be able to maintain their level of exertion longer with less dependence on fueling.
Ben Lustgarten during the 2018 Sovereign Lake NorAm/Supertour 15 k classic.(Photo: Peggy Hung)
Some Craftsbury Green Racing Project (CGRP) athletes have been experimenting with their version of a depletion workout. Before we contrast this with what is done the realm of long distance running, CGRP skier Ben Lustgarten briefed us on their rollerski workout that adds elements of “depletion”.
We eat and drink normally until the workout starts, then we are just supposed to drink water.
We do about a standard 30 min easy skiing warm up.
We then do depletion L3 with minor short 15 second pick ups every 10 minutes or so just to mix it up.
We pick an out and back over a large hill that is about 14 minutes out, 14 minutes back, and we usually do 3-4 full “loops”. I think it is a good hard workout. It is weird to do continuous L3 without fueling properly, but good practice to feel some cramping and keep pushing.
“Refueling, naturally, is incredibly important for this workout,” Lustgarten said of the need to replenish stores following the effort. “It resembles most the feeling of a 50k so immediately after the interval, I try to eat carbs and protein, and I use Hammer Recoverite but just a good ratio of carbs, protein, and proper electrolytes is important. It actually feels kind of like my mountain bike races in the summer because they go from about 1h 30m to 2h long. Naturally, I fuel properly for those, but that duration and need for power in the legs feels kind of similar.”
Lustgarten emphasized that the CGRP depletion efforts are similar but not the same as what runners would call a depletion run or workout. He eats a normal breakfast of oatmeal before executing the workout. “I think for us it was more a basic depletion like L3 until you cramp and bonk,” said Lustgarten. “With the volume we are training, on the hard weeks, a full depletion would really destroy the quality after the workout for the next few days when we needed to keep training.”
Akeo Maifeld-Carucci in green, winner of the 2019 American Birkebeiner, along with Brian Gregg in 2nd (left), and Matt Liebsch (right) in 3rd, racing down main Street in Hayward, WI. (Photo:James Netz)
Akeo Maifeld-Carucci, one of Lustgarten’s teammates, explained they try to keep their effort during the workout solidly in L3, noting that is approximately 4mmol of lactate. They are not puttering along in L1+ at 1-2mmol of lactate. In their first depletion rollerski, Maifeld-Carucci and Lustgarten skated 44 k in under two hours.
“That is no normal distance ski,” wrote Maifeld-Carucci. The team only plans on a few of these workouts over the duration of the May-November dryland season.
FasterSkier reached out to Elliott Heath, a former pro-runner and the product line manager for track and field and racing at Nike to learn more about depletion running workouts. As part of his job, Heath spends time in endurance running hotbeds like Kenya, receiving feedback from athletes to optimize the racing shoe line. He also coaches for the Bowerman Track Club (BTC) based in Portland, Ore. and directs their summer running camp in Bend. Ore. One of his runners, Carrie Dimoff, will be representing the U.S. at the 2019 IAAF World Championships in Doha, Qatar. Dimoff races the marathon.
“Depletion workout or depletion run, there are probably different forms of it generally,” said Heath. “The idea is this: going for a long time and not fueling. A more common version of a depletion effort would be to set yourself up to be in a depleted state by doing a long effort in the morning before eating breakfast. You head out and go for your long run right away after waking up so that your body has less free and readily available energy stores in the muscles.”
For those with a ritual of big breakfast fuelings prior to a long effort, the mere thought of food-restriction can be a stressor. According to Heath, the whole premise is to train yourself in a depleted state.
“It puts you into a state where you have used all the readily available energy and your body has to figure out how to deal with that depleted state either by getting fatigued or switching over fuel consumption into things like fat and more long chain fuel stores,” said Heath.
In his experience, Heath, who ran competitively in Minnesota as a high schooler, with Stanford in college, and with Nike/BTC as a pro, depletion workouts are the realm of marathoners.
“It is pretty much exclusively marathoners, but it could be arguably applicable to a half-marathoner or even a 10k athlete in a less direct way,” clarified Heath. “But considering a direct benefit area, it is really only marathoners that are going to be experiencing that state in their race.”
The traditional methods for runners using depletion workouts are as follows:
At least ten hours after your last meal, complete a long run at moderate intensity with no refueling before or during the run. (Hydrating with water is fine.)
Complete two workouts during the day, with each workout incorporating moderately hard distance efforts. Do not refuel between workouts with carbs.
This is an oversimplification of depletion runs. There are many ideas about how best to incorporate them into training and the type of preferred diet that should be maintained to optimize the efficacy.
Which brings us to an important point raised by Heath. He explained that coaches and athletes need to think of both stress and adaptation, but also stress and recovery.
Elliott Heath in Bend, Ore. as the director of the Bowerman Track Club Running Camp. (Photo: Cortney White)
“You are trying to balance the benefit of that adaptation process with the cost of possibly needing four more days of recovery to actually dig yourself out of that hole from the depletion session,” added Heath. “From a training perspective I would say yes, it is all about stress and adaptation but when it comes to something like depletion runs, there is always a trade off between stress and adaptation and stress and recovery. What I would think about in terms of incorporating depletion runs or depletion efforts into your training is what are the trade off costs?”
As a student of running, Heath has thought about the origins of depletion workouts and why they may have been adopted more widely. “I am sure there were origins of this being researched in the lab long before this, but what perked a lot of interest in depletion running was asking how Africans train for marathons?”
That question has been explored ad-nauseam. The answer as to why East Africans have come to dominate the world’s top marathons are complex. But something as basic as observing daily training routines and habits, as Heath does as part of his work with Nike in Kenya, reveals depletion happens less by design.
“A lot of African runners, they are not thinking about ‘OK I need to do depletion training’,” said Heath. “Their life routine is that they wake up at sunrise, and they go out and do their long run. They don’t have food until they are back from it usually. So I believe some people have looked at that and think all these African runners are the best in the world at marathons, and this is what they do. They are so good at the end of the race it must be because they are practicing this depleted state over and over and over.”
Causation and correlation then enter the conversation. And Heath can play devil’s advocate.
“You could make the flip side argument,” claimed Heath. “If fueling is actually really important, I would say in many races some of them still under fuel and do not take enough to replenish the system over the course of a two hour plus marathon. You could say they are the best now, but how good could they be if they fueled ideally? Is it the practicing of depleted state running that is making them great or could they just be better? There are a lot of other things that are making them great.”
In cross-country skiing, depletion training is no staple in the stress, adaptation, and recovery training matrix. And it is wise to remember that consulting an expert on your personal capacities, nutrition, and goals are important before engaging in a depletion workout. There are lots of right ways to do things, but only a long wait to dig yourself out of a training hole.
“Even along the lines of depletion runs, you can talk to five different coaches and get a handful of different opinions on whether that was important or not,” Heath said. “Some might say it is the gold standard and there is no way you should run a marathon without doing it. And another coach might say that you are crazy for doing that because all you are doing is sending your body through too much stress that you are not recovering well from.”
That said, Heath does not incorporate depletion running into the training for the athlete’s he mentors.
“It depends on the athlete, but in most cases, we usually prioritize practicing fueling and teaching the body to process that nutrition while running rather than seeking out a depleted state,” added Heath. “Naturally, there is likely to be some depletion over the course of a really long effort, but we generally try to avoid more excessive depletion. This prioritizes optimal recovery from the long hard sessions so that it’s easier to turn around a couple of days later for another hard session.”
Doing our due diligence, we contacted Stephanie Howe Violett PhD — a former skier and cross-country runner at NMU and accomplished ultramarathoner. Along with running professionally, she is a coach and sports nutritionist. She said what remains critical is that athletes maintain a long term outlook and steadily fuel their system. Howe Violett has never incorporated depletion running into her training.
“I think maximizing training and fueling properly lead to better physiological adaptations than trying to manipulate depletion runs,” Howe Violett emailed. “There is no scientific evidence that this is helpful in the long term, or even the short term for performance. Of course, we want to stress the body to lead to the greatest adaptations, but training in a fasted state doesn’t do this. If anything it reduces the intensity at which one can train and creates a longer recovery time, both of which are negative for performance.”
Athletes commonly seek out a new stressor to stimulate adaptations for improved race day performance. When introducing new concepts, Howe Violett said to proceed with caution.
“I’d really work closely with an exercise physiologist and sports nutritionist because low glucose can lead to many negative performance and health issues,” said Howe Violett. “Overtraining, injury, illness, disturbed mood state, negative impact on performance are the short term consequences. But these can take weeks to years to correct.”
If you are reading this, we assume you are interested in skiing. To be clear on how the CGRP athletes are “depleting” themselves, they are not adhering to the strict concept put forth by depletion running. They are fueling with a solid breakfast before their roughly two hour depletion rollerski. They are also montitored closely by their coach and have access to high quality food at the Craftsbury Nordic Center. Further, the athletes using this workout are doing so sparingly, two to three times over nearly a seven month dryland training period.
We are trying to stay slightly ahead of the overuse injury and poor air quality curves. You may be midway through your summer training schedule and dealing with a bum ankle. Or you live in a place like much of the Western U.S. that has been or will be affected by poor air quality due to wildfires.
Whatever the causation, skiers can find themselves in make-do mode. If the air quality index (AQI) is high where you live, or a bum ankle precludes running or roller skiing, you have training options. And to remain optimistic, what you might think of as a compromise, can, in fact, benefit you in the short and long term.
Talk to most elite athletes who have trained abroad, and they will tell you that double pole specific workouts are the norm. Double pole capacity remains one mandatory piece of results success. This is where a Ski-Erg and upper body specific strength programs come in handy.
Many athletes are lucky to have access to a ski-erg. If you don’t, please don’t stress. According to a study published in 2017 that compared the effects of strength training and specific ski-erg training on junior cross-country athletes, both groups made double poling gains.
The researchers examined double-poling gross efficiency, maximal speed (V max), and peak oxygen uptake (VO2 max).
No ah-hah moments in terms of an either-or. “No between-group differences were found for any of the investigated variables,” was a key conclusion.
Sadie Bjornsen of the U.S. during the second leg of the 2019 World Championship 4 x 5 k relay in Seefeld, Austria. (Photo: John Lazenby/lazenbyphoto.com)
For those with access to a ski-erg, here’s a 2017 Wednesday Workout from a newly married Sadie Bjornsen. (Congrats!) If your local air quality is sub-par, we’re hoping the ski-erg is located indoors. (If you have a bum ankle, grab a chair, sit down in front of the ski-erg, and begin pulling.
The Start: “I start my workout with a fifteen-minute warm up. During this time, I often shut my eyes, and visualize skiing. This helps bring in true ski form, and feel my movements, rather than just fall into a ‘SkiErg-specific technique.’”
Getting Speedy: “During this time, I will do some little ten-second increases in power to warm up my back and arms, and get ready to go hard.”
The Workout: “After fifteen minutes, I begin the workout known as 30-30’s. This means 30 seconds of intervals followed by 30 seconds of recovery, then repeat for 30 minutes. What may feel easy at first, quickly catches up after 10 minutes, so I always start this workout more conservative than feels appropriate.”
Keeping It Going: “After about five minutes of 30 seconds on, 30 seconds off, I start to see a common number of watts I am exerting during the 30 seconds. This is where I set a goal. Maybe it’s 190 watts I am hitting, I want to continue to reach that level or more for the next 25 minutes of this workout. This becomes increasingly hard around 20 minutes, and requires a certain amount of mental power. The 30 seconds of rest begins to pass too quickly, and I find myself becoming really focused in my own little world… forgetting where I am (maybe a garage, maybe a gym).”
Finishing Up: “By the end of 30 minutes of 30-30’s, I am pretty worked, and feel like I have just done a race out on the snow. This is when I bring myself back to my surroundings, and finish with a fifteen minute easy warm down to help flush my arms out.”
Final Thoughts: “Not only does this one hour pass really fast, but it is a really focused workout that feels like it truly helps build specific power. I always make sure I finish this workout with a little five minute walk. This helps flush all my muscles, but also helps make sure my back goes back to moving naturally after a pretty intense workout.”
The Workout: Solo, high-focus, double-pole distance session
Erik Bjornsen of the U.S. skiing to 17th overall during the 15 k classic at the 2019 World Championships in Seefeld, Austria. (Photo: John Lazenby/lazenbyphoto.com)
Find suitable terrain and timing: “I choose the terrain based on how hard I want the workout to be. I try to fit this workout in mid-week between intervals sessions,” he wrote in an email. “The point is to get the biggest benefit without fatiguing the body too much.
“Most often I head up Campbell airstrip road. It’s a five-mile-long road, with a majority of the terrain measuring out at a gentle 5% incline,” Bjornsen continued. “There’s one steeper climb in the middle that’s about 500 meters long. For this workout, I go out and back twice.”
Warmup: 15-minute easy Level 1 (roller)ski to the start.
Go-time: Typically takes him 1 hour and 20 minutes to rollerski the 5-mile section twice.
“The steep 500-meter section is VERY hard to double pole — that portion of the road is something you would for sure stride in a race. During this workout, I try to spend an hour at L2 [Level 2] and end up bumping up to L3 [Level 3] only when double poling up that steep segment (2 X 5min in L3). I like having the two short but demanding double pole sections in this workout.
“The important part of this training session is not the 2 x 5-minute L3 sections, it’s the time before and after that L3 effort. You have to figure out how to get the muscles to recover from the hill while still double poling and determine what gear/tempo to use while still applying power efficiently — and recover at the same time.”
Cool down: 15-minute easy ski home.
Notes:
“The idea is to work specifically on double pole and upper body strength. You get an opportunity to work on all gears, from long double pole to very quick choppy double pole up the steep section.
“You can gain a lot from just focusing on two intensity sessions a week throughout the summer. This is a way I find I’m able to gain quite a bit from specific double pole training. But ideally, you don’t fatigue the body so much that it takes energy away from the true intensity sessions.”
Lastly, here’s the strength protocol from the 2017 study we mentioned up top. After a specified warm-up, here is what the researchers prescribed for the non-ski-erg test group.
(1) for different training days, the participant was allowed to alternate between five repetitions maximum (RM) of snatches, squats or deadlifts at 60–85% of body mass,
(2) 8 RM sit-ups or vertical sit-ups,
(3) 6 RM pull-downs, chin-ups or seal row
(4) 6 RM of pushdowns, bar-dips or narrow bench press
(5) 6 RM of belly-backs with or without dumbbells.
“All five exercises were conducted with two sets per exercise and 1-min rest between sets. Thereafter, the participants completed 5–10 min with different core-stability exercises, which were followed by 90 s of cable crunches, 60 s of pulldowns with a rope, and 30 s of triceps pushdowns with a rope without rest between exercises. After 1-min rest, these three exercises were repeated once. Finally, 3 sets of 45 s of medicine-ball slams (3–5 kg) with 15-s rest between sets were conducted. After the group-specific training session, the [strength] group performed 20 min of roller skiing using the double-poling technique in the heart-rate intensity zone MIT”
Lizzie Larkins and Phoebe Meyerson skiing at MidSweden 365. (Photo: Gus Johnson)
In September, I got an email from my high school club coach, Gus Johnson, about an opportunity to go to Östersund, Sweden to start the summer. The camp entailed participating in some research being conducted at the Swedish Winter Sports Research Center of the Mid Sweden University and training with college age skiers in a part of the world that I had never been to. I decided to Öster-send it, and a little more than half a year later, we are here getting after it! In the mix we have Alasdair Tutt (NSCF-FXC Head Coach), Gus Johnson (ASC Nordic Program Director), Quinn Lehmkuhl (University of Colorado, Boulder, ASC alum), Ursula Volz (Harvard Ski Team, ASC alum), Clara Cousins (Harvard Ski Team, CSU alum), Phoebe Meyerson (Harvard Ski Team, CSU alum), and myself, Lizzie Larkins (University of Vermont, ASC alum).
Rollerskiing on the track at the Ostersund Ski Stadium From left to right, Lizzie Larkins, Ursula Volz, Quinn Lehmkuhl. (Photo: Gus Johnson)
Östersund is high enough in latitude that it stays light 22 hours a day this time of year, but it is also a skiing hotspot for notable names like Stina Nilsson, Hanna Öberg, and many other Swedish national team members who train here regularly. We’ve been bumping into them- starstruck- on the trails over the past couple weeks. Mostly, we have capitalized on the rollerski track, the nearby mountain running in Åre, the training with local clubs, and all while absorbing as much local culture as possible. We have made some early season deposits in the fitness bank that we’re excited to bring home. In our down time, there has been plenty of sightseeing, bulk candy consumption, discovering of Swedish delicacies (most of which come in tubes), and discussing of the Lake Monster in Storsjön (the lake Östersund borders). Click Pin-Up casino giriş to authorize on the Turkish gaming platform.
Running the Salomon Fjällmaraton 27km course. (Photo: Gus Johnson)
One of my personal highlights of the trip has been exploring MidSweden 365, which is a ski tunnel in Gällö. It recently opened in 2017 and is a fabulous training facility. It was an old military base with converted train tunnels (now ski tunnels) and barracks that can be rented out to ski teams. We have had it to ourselves both times we’ve skied there because their busy season is August through November as clubs are getting hungry to get on snow. It is a short drive or train ride from our hostel in Östersund, so we’ve made the trek twice and have loved the fast conditions on the 1.5 km loop!
Warm up: commute to ski tunnel, (walk 3 km from the train station), rent gear, layer up, and start skirting around the underground loop!
Do a hot lap to get even more warmed up (considering it is -10 C in the tunnel) then assemble pairs for the team sprint. Our sprint simulation required 3 laps per partner and we adjusted start times and tagging to keep things close and duke it out as a group!
Cool down by cruising through the tunnel for as long as you desire and toss in some no pole if you’re feeling spicy! Our group highly recommends the apple pie made by Veronica (the ski tunnel director) as a recovery snack!
This Wednesday Workout comes to us from Matt Boobar who has been coaching the Stratton Mountain School (SMS) nordic team since 2007. In the fall, he also works with the cross country running and mountain bike programs, and leads cycling in the spring. Boobar has a B.S. in exercise science and has earned a USSA Level 200 certification. He has been the head coach of the New England Junior National Team eight times and was recognized as the NENSA coach of the year in 2009. The SMS Nordic and the elite SMST2 teams were selected by USSA as 2019 Cross Country Club of the Year; it is the clubs fourth time earning this recognition in the last six years.
Matt Boobar holds up the trophies earned at the 2017 Northern New England High School Mountain Biking Team Championships. SMS won the team title in both 2017 and 2018. (Courtesy photo)
If you have been so lucky as to grow up and go to school in a place where nordic skiing is possible, the scenario of fall cross country running followed by nordic skiing in the winter is likely one that you are familiar with. Looking at a Venn diagram of the teams, the union might not be significantly different than the intersection. With the growth of youth mountain bike and cycling programs creating a different opportunity for adolescents to become endurance junkies, the running-skiing symbiosis might be less prominent than it once was, nevertheless, it remains the approach of many U18 athletes nationwide.
In cross country running, there is a saying, “autumn holds no secrets of how summer was spent.” Similarly, in the ski world, you may hear, “skiers are built in the summer,” which leads to the challenge many athletes face when they head into summer with goals in both sports.
Depending on the long term goals of the athlete, at some point, it is wise to decide which sport holds the priority. This way, an athlete can fall into one of two camps: the runner who also wants to see improvement in their ski racing or the skier who wants to improve their running (and remain injury free through the fall). In Boobar’s mind, the time when this decision is made is unique to the individual making it.
“It has to be personally goal dependent on the athlete,” he said in a call. “I think helping to create awareness that, ‘I just can’t run and do my eight-week cycle [for cross country running] which gets me peaked on November 1st, and then jump in November 15th with my nordic team and build up for an eight or ten-week cycle for that’. I think they have to think, whether their goal is running or skiing, they need to definitely think year-round training.”
Members of the SMS cross country team charge up a hill during a fall race. (Courtesy photo)
First, let’s look at the skier who also wants to perform well in fall cross country races. This scenario is one Boobar is most familiar with, as the athletes that attend Stratton Mountain School are already committed to making ski sports their priority. Though his athletes compete in the local Vermont high school races and state championships, they do not train full time for running the way one might on a more traditional team. Athletes that train year-round with a club program, but also participate in their school’s cross country team may relate to and benefit from this approach.
“We use markers like some of the championship races in the fall as goal setting tools,” Boobar explained. “So for the state meet for cross country running, we’ll attempt a version of a taper and peak format and just see how their energy is for that event… We try to use that going forward in how they react to a certain type of taper and peak.”
While the hard efforts are beneficial, the races are not prioritized the way nordic races would be.
“The issue we run into with trying to run fast or even bike really fast is that we don’t really want to be at a peak level at the end of October,” said Boobar. “We want to be in the middle or more of a base building, pretty high volume, just pretty solid heavy training load.”
The challenge he faces in recommending summer plans for his athletes and training with them throughout the fall is prescribing them enough running specific work that they are able to hold their own in races without sustaining any injuries, while the primary focus of training remains more ski specific.
“What we run into nowadays with the running is a lot of soft tissue injuries: shin splints, Achilles tendinitis, sore knees,” Boobar noted. “Some kind of result of how kids are growing up possibly, they’re not doing as much crazy free play in the woods – but it’s definitely something that we’ve noticed, so we have to train our kids to build up some of that running durability. And I don’t think it’s enough to just be like, ‘Oh, we’re going to go trail running on the Appalachian Trail,’ I think they need to do some actual running repeats on a fairly hard surface and incrementally increase that so they can build up that durability and leg speed turnover.”
He added that for most skiers, running is used as a training modality on long endurance days possibly with poles in the mountains, so the body gets used to a much slower cadence than what is needed for a cross country race. While this cadence isn’t necessary to ski fast in the winter, it can certainly inhibit performance in a 5k run. By including some higher speed running, perhaps 400 meter or 1-kilometer repeats, Boobar expects to see a decrease in the frequency of running related injuries and an improvement in performance in his athletes at the championship benchmark races. They also include drills regularly to help promote proper running form.
SMS science teacher David Sinclair works with cross country athletes on their running form. (Courtesy photo)
What about the other camp? For athletes whose primary focus is on cross country running but are also interested in seeing improvements in their skiing, Boobar offered a few simple recommendations.
“If you’re a cross country runner that had skiing goals, you could add three things: you could add a longer double pole rollerski once a week, you could add skate agility once a week, and add as much core stability work as you can handle. You can’t really overdo that.”
Because of the high-impact nature of running, he also noted the difference in training hours (though most runners measure in miles).
SMS coach Matt Boobar demonstrates double pole technique during a training session. (Courtesy photo)
“Our kids [at SMS] are training 8-15 hours a week in the fall, and I would guess most public high school running teams or even a prep school, they’re training under ten hours a week and that might be a huge week for them running. So I would look at them and say they need to add a longer day.”
For the double pole rollerski, he recommends 1.5 hours easy, potentially following a run. This provides the athlete with the aerobic benefit of a long session without adding any load to their already fatigued legs. A 45-minute skate with agility focus helps with balance and coordination and works the musculature involved with lateral movement, which is not as recruited as much in cross country running.
“Luckily, I’ve worked here with him for ten years,” said Boobar. “So following along with his coaching style and philosophy will be pretty easy. We both have a similar philosophy with how we like to coach anyway, which is to try to provide an environment for kids to take ownership of their own training and goals. So not so much tell them what to do, but having all the pieces there for them to figure out what they need to do.”
This Wednesday Workout comes to us from Harrison Harb; Portland, Oregon denizen.
HH grew up racing bicycles and xc skis in Hopkinton, NH. He graduated from Stratton Mountain School in 07, and UNH in 2011. H has lived in Portland, Ore. since 2014 where he coaches cyclists and skiers while racing for XC Oregon on skis and River City Bicycles/Bike Law on the bike.
***
Portland, Oregon: home of craft beer, mycological diversity, and drizzly, snowless winters. Notice that “a thriving cross-country ski racing scene” is absent from the list. Since moving here from New Hampshire five years ago, and returning to ski racing with XC Oregon after a brief hiatus, I’ve settled into a training groove I find satisfactory in quality despite less than ideal external conditions, and one that I think many city-dweller-ski-racers can likely relate to.
I don’t want to sound like I’m complaining. Although the drive (90 minutes each way) to snow tends to wear one down over an entire season, the snow here–or rather–there, on Mt. Hood, is surprisingly consistent. We usually have our first days skiing at or just before Thanksgiving week, and our last days often as late as May. We also spend much of December kicking on Rode Super Extra Blue, so, it’s good.
I train on average around nine hours per week during the winter months. Most elite skiers would probably say that that’s weekend warrior status, and most true weekend warriors would probably call me a full-time athlete. Nevertheless, as time goes on I find myself more focused on races between 80 and 150 minutes, i.e. marathons of varying lengths. More bang for the buck, perhaps. The thing is, I’m only on snow twice a week. The rest of my hours are split between a rushed combination of short intervals on roller skis, ski-erg (rarely), or bicycle (indoors, on rollers). Not exactly ideal marathon training. What I want to share are a few ideas for making the most of those one or two days on snow per week, and hopefully, ways to keep training fresh, varied, and fun (if training isn’t [our sick version of] fun, the quality probably isn’t super high). I should add: hard! I like to think of the mid-week sessions (rushed intervals priorly mentioned) as my “A” workouts, and these–the hard, on-snow days, as my “A+” workouts. Race simulation is another way of thinking about it. Ideally, I want to come away from sessions like these pretty knackered. So here you go:
Warm up 30-45 minutes easy, building into a steady pace. Then ski for 45 minutes at marathon pace on rolling terrain (as similar to the course you’ll be racing as possible). Take a 5 minute break for water and maybe a little food. Find a long, steady section of trail if possible, and do 2 x 7 minutes of hard climbing. Cool down 45 minutes. (total workout time 2.5+ hrs)
Warm up 30 minutes. Lay out a difficult 10-15 k course and do a time trial on it. Try to make it as similar to a race effort as possible. Take a 10-15 minute break. Warm up for a few minutes then find a steep climb. Do 6 x 1 min full-freaking-gas efforts up it with equal recovery time between them. Cool down for 30 minutes. (total workout time ~2 hrs)
Warm up for 90 minutes building into a steady tempo pace for the last 30 minutes. Try and get right into 2 x 10 minutes full-gas (4 min recovery between efforts), followed by a 6 x 1 minute set (equal recovery), preferably on a climb. Cool down 30 minutes. (total workout time 2.5 hrs)
Warm up/ski steady 60 minutes, continue into another 60 minutes of tempo, continue into another 60 minutes of as hard as you can manage to keep it rolling: in other words, ski it like it’s the last 20 k of a marathon. Cool down 15 minutes. (total workout time ~3 hrs)