From the FasterSkier archive — posts syndicated from athletes’ and coaches’ own blogs between 2004 and 2012, kept online as published. Current coverage is at fasterskier.com.

Tag: injury prevention

  • Treating Compartment Syndrome Without Surgery: One Skier’s Season

    Treating Compartment Syndrome Without Surgery: One Skier’s Season

    Author’s note: From the PT: a Look at Chronic Exertional Compartment Syndrome is a good introduction to the current article and includes a more detailed description of the anatomy, pathophysiology, and associated research. Since it was published on FasterSkier in 2022, that article has served as a resource for the Nordic skiing community, and I have fielded multiple requests for guidance from skiers around the world with CECS. In that article, I suggested that conservative treatment has potential; however, I was still more optimistic about surgical intervention based on the available research. The published research hasn’t changed, but my experience has, and now I’d like to make the case for non-surgical treatment of CECS. As with any medical information found on the internet, this article should be taken as the opinion of the author and not a replacement for direct consultation with a medical provider.
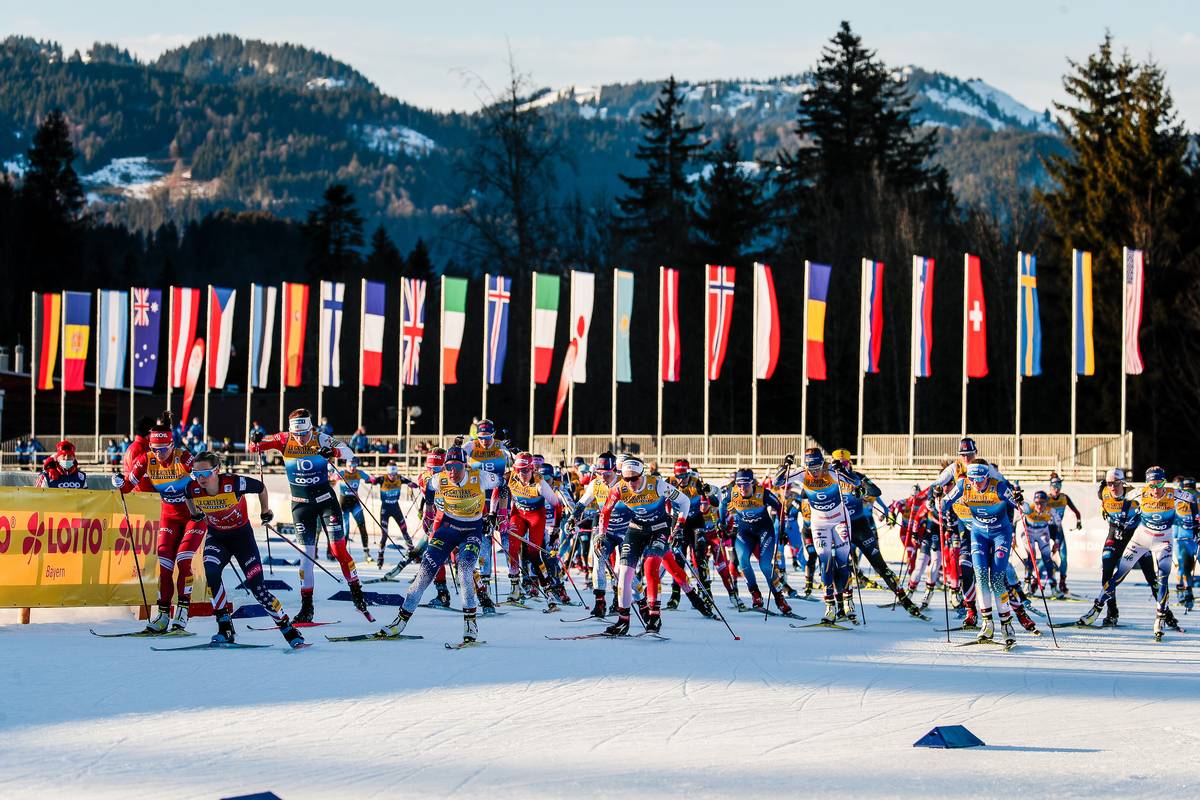
    The start of the women’s 10-kilometer mass start free during Stage 3 of the 2021/22 Tour de Ski in Oberstdorf, Germany. (Photo: NordicFocus)

    The primary symptoms of Chronic Exertional Compartment Syndrome (CECS) include pain, weakness, and/or numbness that only occurs with exertion. These characteristics are fairly distinct, although there can be enough overlap with other soft tissue disorders, namely tendinopathies, that CECS remains a diagnosis of exclusion when everything else has been ruled out. In Nordic skiers, symptoms affect the anterior, lateral, and/or posterior compartments of the lower legs and are most common with (often exclusive to) skating. Typically, or at least initially, these skiers will be symptomatic with high-intensity skating, but will be asymptomatic with classic skiing and running even at the same intensity.

    The physiology is relatively straightforward: our muscles are wrapped in a thin layer of connective tissue called fascia. As muscles repeatedly contract, especially at high intensities, they become enlarged; however, fascia is not elastic and does not stretch. If the muscle size exceeds the volume of the fascial compartment, blood flow is constricted, oxygen delivery is decreased, and the muscle gets strangled. This hypoxia in the muscle triggers a pain response, which is usually a good defense mechanism to make us stop doing something that the body perceives as harmful.

    The why is far more complex: some theorize that the fascia is just wrapped too tightly. Others suspect that the muscles are too big for the fascia. In either case, the common solution is a surgical fasciotomy where an incision is made in the fascia to increase the size of the compartment and decrease its stranglehold on the muscle.

    The why with skiing is even more complex. With CECS occurring with skate vs. classic, the initial theories centered around the ski retrieval phase. This makes sense with the work being done by the tibialis anterior muscle, which dorsiflexes the ankle while the ski is brought back to its glide phase position. Except that CECS can affect other lower leg muscles/fascial compartments which would not be active during the retrieval phase. Arguably the biggest difference between skate and classic techniques, at least as far as the muscles of the lower leg are concerned, is the stability demand of balancing on the gliding ski: the muscles must work much harder with skating.

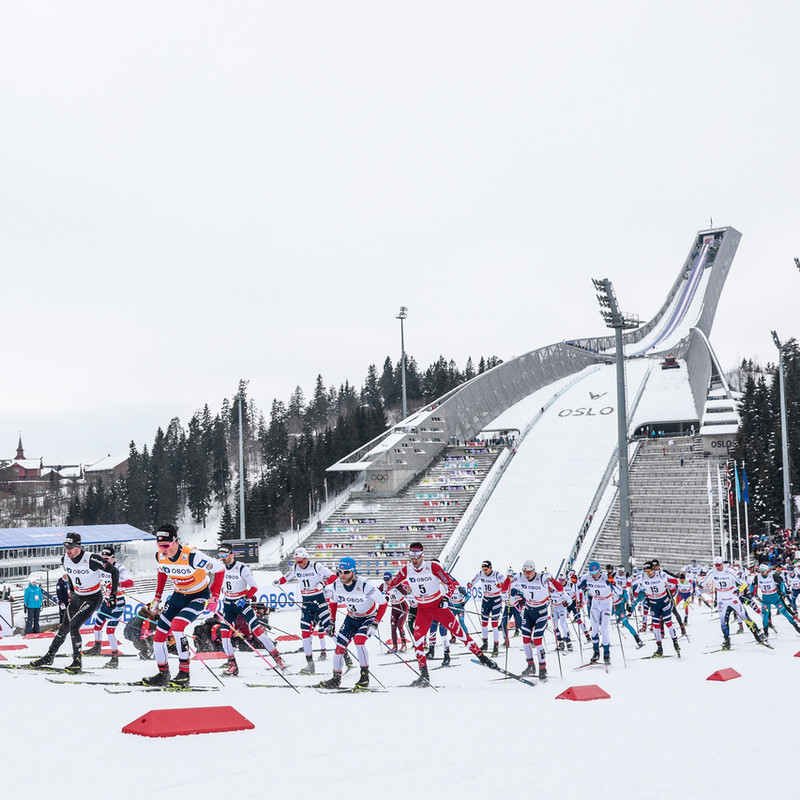
    A dense field of men’s skiers during Saturday’s 15 k mass start classic in Falun, Sweden. (Photo: NordicFocus)

    A case study

    The patient in our story is an 18-year-old male skier. He is a very competitive skier regionally and would have qualified for Junior Nationals had his skate races not been disrupted by leg pain. We had our initial physical therapy visit in mid-January, mid-race season. He reported pain, progressing to numbness, in both shins, which only occurred during high-intensity skate skiing. Symptoms were first noticed the previous winter during a skate race in icy conditions, but he didn’t have any additional episodes for the remainder of that season or during the summer. In October, however, symptoms returned during a skate interval session, persisted with any high-intensity skating, and got progressively worse through the race season. He was unable to finish his last skate race due to severe pain.

    In physical therapy exams and diagnostics, we are keen on reproducing patients’ symptoms. If we can do this in specific ways, we can begin to rule in or rule out anatomical structures which may be involved. For better or worse, I was unable to reproduce the patient’s symptoms in the clinic. This would likely rule out a muscle strain or tendinopathy, both of which tend to be painful with resisted tests (assuming we can make the tests both hard enough and specific enough). Differential diagnosis still included lumbar radiculopathy (nerve irritation at the spine leading to symptoms in the leg) or a bone stress injury (a.k.a. stress fracture), but neither of these fit the picture of symptoms being exclusive to high-intensity skating and absent at rest or especially with other modes of exercise. The symptoms really fit the pattern of CECS. To confirm, the gold-standard diagnostic would be compartment pressure testing; however, this testing is quite painful, fairly inconvenient (unless you have a rollerski treadmill in the clinic), and primarily aimed at determining if the patient is a candidate for surgery. Since this patient was looking to salvage his race season and avoid, or at least delay, surgery, we opted to skip the pressure testing but assumed that he was dealing with CECS.

    The remainder of the physical exam focused on ski technique, or at least the static components we could observe in the clinic: hip strength (fair), balance (compensated with lateral trunk lean), ankle dorsiflexion range of motion (appropriate), and foot stability (notable flexibility and forefoot varus). These findings were significant enough to suspect that the patient’s lower leg muscles were working very hard to maintain balance on his glide ski. The hip weakness and compensated single-leg balance made me suspect that if he was lacking stability from the top down, then he was having to work much harder from the bottom up, thus overloading the muscles at the ankle and leading to CECS.

    The root cause of any musculoskeletal symptoms can be described as an imbalance between load being placed on the body and the body’s ability to tolerate that load. In physical therapy, we are looking to balance that equation. Sure, we can decrease load by telling patients not to do things that are painful, and some of that may be required in the short term, but we’re not in the business of telling people to stop doing fun things. Thus, much of the work we do is aimed at improving the patient’s ability to tolerate load. The trick becomes sorting out where there is room for improvement and how to get there.

    His first round of exercises focused on balance without compensation (single-leg stance with a Pallof press and lateral hops to balance on one leg) and hip strength (side plank variants and fire hydrants). On the load mitigation side, we discussed using more supportive insoles, which he had only recently acquired, and training modifications with skating limited to short bouts of low-intensity skating and all high-intensity work done in the classic tracks.

    At his second PT appointment, we were very fortunate to have the involvement of his ski coach who attended the visit with the patient. We continued exercise progressions for balance and hip strength; but we also got much more technique specific, identifying areas for improvement and providing corresponding cues: “heel down” (when asked to stand as if he was balancing on the glide ski, he was over-exaggerating the very common “hips forward” cue and shifting his weight so far forward that his heel was no longer on the floor. Arguably this is okay on steep terrain but not in this context), “tripod foot” (equal pressure on the inside, outside, and heel of the foot), and “weight shift with the hips” (get the center of mass over the glide ski via the pelvis vs. leaning to the side). He and his coach then took these cues to technique sessions and eventually higher intensity intervals.

    At our next appointment a few weeks later, the patient reported zero symptoms with hard L4 skate intervals. Unfortunately, the rapid melt-off of snow in the West ended the race season before he could fully test the effectiveness of the intervention. However, as of the time of this writing, he has been skiing and training for five months without symptoms.

    The critical reader (and all readers should be critical) might point out that we have a false sense of accomplishment because he hasn’t raced. I would argue that he has had plenty of pain-free training sessions that would have previously been symptomatic. The reader might say that this is simply a case study and an N=1 is pretty weak research. That is certainly true. A randomized, double-blind, placebo-controlled study with a very large population would be ideal. But a case study is not nothing. Not all skiers with CECS are going to respond to the same intervention. But if we have seen that it is possible to effectively treat CECS without surgery, then we might want to consider exhausting our non-invasive options first. The reader might further pick holes by saying that without compartment testing, we don’t even know for sure if this skier had CECS. That is also very true and should be acknowledged. In the name of science, I should have subjected the patient to the very unpleasant testing before and after our intervention to both establish a baseline and to prove that he was cured. But in the name of practicality and the patient’s well-being (along with the patient’s and family’s input), I declined.

    Again, the story of one skier’s ability to overcome CECS without surgery does not mean that all skiers with CECS will have the same success. But it’s very much worth a try. If you are reading this article because you are a skier with CECS, I would encourage you to take a very detailed look at your skating technique and be very specific about your approach to changing it. This likely means working on the component parts in a low-complexity setting (not on skis) and progressing to technique sessions on skis with a heavy emphasis on the cues that you and your support team (coach, PT, trainer, etc.) have identified. Hopefully this can be a path back to fun, fast, and pain-free skiing.

    Help Support Our Coverage!

    FasterSkier is independent, reader-supported, and free to read. If health and training coverage like this is worth something to you, a voluntary subscription keeps it coming.

    Join the FasterSkier community!


  • Introducing a New Series: Ask the PT

    Introducing a New Series: Ask the PT

    When I began skiing halfway through high school, I remember my coach telling our team that cross-country skiing was a “lifelong sport”. Now, more than a decade and a half later, I don’t have to look far to see the truth in that statement. While out for a ski on local trails, I might see a 65 year old retiree who is training for the Korteloppet, a 50 year old former bike racer who has taken up skate skiing in the winter, a 75 year old skiing in jeans on fish scales, and a 17-year-old Junior Nationals hopeful. I might also see (or be) a parent towing their child(ren) in a chariot, a beginner working up the courage to “pizza” down a hill, or a former NCAA racer kicking and gliding effortlessly up the track. Each of us with unique starting points, individual differences in technique, and physiological strengths and weaknesses, the ski community encompasses a wide spectrum of athletes. 

    One of the authors favorite spots on her local trails at Spring Gulch near Carbondale, CO.

    The beauty of a low-impact sport is that it can be forgiving on the body, despite the cardiovascular toll it might require. At the same time – yes, it’s a low-impact sport, but “low-impact” does not mean cross-country skiing does not put a large strain on the body. It requires strength, balance, repetitive movement, and at times might involve an uncomfortable crash or two onto unforgiving hard packed snow. 

    Whether you have performance or fitness goals, are simply looking to improve technique and efficiency, or are looking for a path to return to a pain free ski experience following an injury, it’s likely that a question has run through your mind while out for a ski that you wish you had a physical therapist by your side to field.

    We’ve got your back. 

    FasterSkier is excited to introduce a new reader-driven series: “Ask the PT”. You ask, we answer.

    So who is the PT? 

    Already a familiar face on this site, Ned Dowling is a physical therapist based in Salt Lake City, UT. Most recently, Ned authored the “Building a Better Skier” series, focused on biomechanics, as well as articles on heart rate variability and an upcoming piece on SkiErg technique. 

    Though he had spent time on skis previously, Ned became hooked on cross-country skiing after moving to Salt Lake City a decade ago. With an extensive background in cycling, Ned worked as a physical therapist for a pro cycling team for several years, which gave him insights into the professional endurance sport world that have now transferred into his work with skiers. 

    After attending a U.S. Ski & Snowboard conference on ACL repair several years ago, Ned connected with some of the strength and conditioning coaches working at the Center for Excellence in Park City, and began learning more about the teams who trained there. These connections eventually led to a call in January 2020 asking him to travel to work with the U.S. Cross Country Team. 

    Ned Dowling out for a ski in Sjusjøen, Norway with Jessie Diggins and Matt Whitcomb. (Courtesy photo)

    In March 2020, as the pandemic loomed, Ned traveled to meet the team in Lillehammer, Norway, following Ski Tour 2020. (If, like us, you feel the last two years have been a blur, Ski Tour 2020 was a six-stage tour that began in mid-February in Östersund, Sweden and ended in Trondheim, Norway. The women’s Tour was won by Therese Johaug, with Pål Golberg taking the overall win for the men.)

    Ned has since continued his relationship with the U.S. Ski Team, and more recently assisted with athlete care during the team’s fall training camp in Park City, UT. Ned is also slated to join the team for the final two weekends of World Cup racing which are scheduled to take place in Falun, Sweden and Tyumen, Russia. 

    So how will this work? Shoot us your biomechanics and physical therapy-related questions to AskThePT@fasterskier.com. We’re aiming for a monthly article where Ned tackles a reader’s question, which hopefully benefits the broader nordic community as well. For other content related questions or comments, feel free to email info@fasterskier.com. 

    Stay tuned and happy trails! 

  • Building a Better Skier Part 4: The Shoulder

    Building a Better Skier Part 4: The Shoulder

    Rosie Brennan powers through the final meters for a commanding second place finish in Stage 4 of the 2021 Tour de Ski. (Photo: NordicFocus)

    This is Part 4 of a series delving into how biomechanics and movement patterns affect skiing technique. If you haven’t already, start with the introduction, Part 1 which introduces the concept of a neutral spine posture, Part 2 which describes spine stability and mobility, and Part 3 on single limb stability.

    ——————————————–

    Upper body power is a major contributor and perhaps even a determinant of cross country skiing performance. Poling accounts for up to 60% of propulsion in skate and classic diagonal and, obviously, 100% with double pole. For those who train for skiing year round, upper body work is an essential part of the routine. However, for those whose summers are focused on running, cycling, or hiking, arm strength is often forgotten once the snow melts.

    Let’s take a closer look at the structures and muscles involved in the upper body during the various poling motions of skiing. 

    The muscles that comprise the shoulder girdle can be roughly divided into two groups: the stabilizers and the movers. Coordinated motion requires “dynamic stability”, i.e., for the two groups to together such that the stabilizer muscles control extraneous joint motion while the movers perform the primary action. 

    The shoulder has a tremendous amount of motion available and relies heavily on the coordinated effort of multiple muscles to maintain proper alignment and movement of the joint. At the same time, it is capable of generating large amounts of power, whether that’s throwing a 90mph fastball, hammering a nail, or repeatedly pushing on a ski pole.

    The shoulder stabilizers can be further divided into those acting on the glenohumeral joint (the primary ball-and-socket shoulder joint) and those supporting the scapulothoracic joint (shoulder blade on the ribcage). 

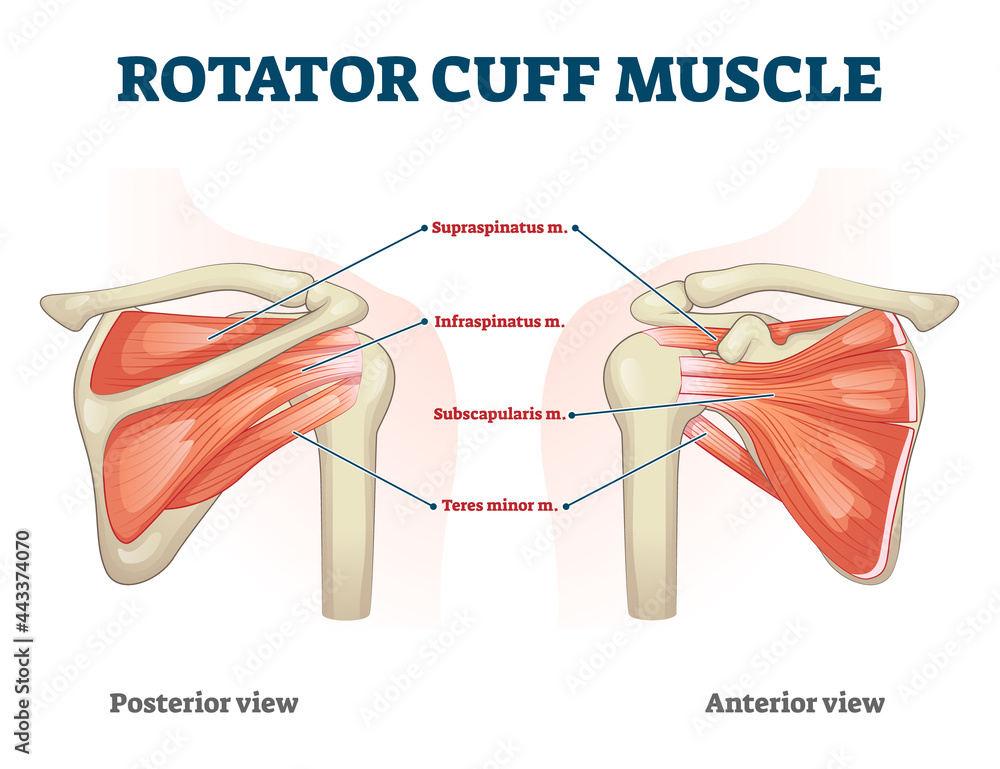
    The rotator cuff is a group of four muscles — supraspinatus, infraspinatus, teres minor, and subscapularis — that attach to both the scapula and humerus in close proximity to the joint. They are not particularly strong muscles, but they play a vital role in coordinating the movement of the glenohumeral joint. 

    A diagram of the muscle group involved in the shoulder’s rotator cuff. (Photo: www.freepik.com)

    The only rigid or bony attachment of the arm to the body is via the collarbone. This small bone is not enough to support the load of push ups, pull ups, or double poling. The base of support truly lies in the muscular attachment of the shoulder blade to the ribcage. For the sake of the simplicity of this article, we’ll limit the discussion to four muscles, one of which doesn’t count. (Side note: a classic physical therapy trivia question is to name all 17 muscles that attach to the scapula–clearly I’m skipping a few here.) 

    The primary stabilizers of the scapular are lower trapezius, middle trapezius, and serratus anterior. I’ll contend that the upper trapezius is a stabilizer but doesn’t count because it tends to exert force in the wrong direction (and is frequently overactive so needs little in the way of direct strengthening).

    The trapezius muscles stabilize and move the scapula along the ribcage. (Photo: www.freepik.com)

    As with any dynamic stability in the body — abdominal muscles for the lumbar spine, glutes for the hip, or the aforementioned muscles in the shoulder girdle — strength is important but intermuscular coordination is key. This is especially true at the shoulder due to its wide range of available motion and corresponding muscular complexity. 

    The following are exercises targeting the stabilizers, both at the shoulder joint and scapula.

    Exercises for the Stabilizers:

    (The intent of these exercises should be thought of more as activation drills and less about the heaviest weight you can find. Yes, we are looking to induce some fatigue but the emphasis is not on power.)

    Side Lying External Rotation: Lie on your side. Keep the top elbow bent at 90° and against your side. Rotate about the shoulder until your forearm is at about 45° to the horizontal. Try not to pull with your shoulder blade. A little bit of weight goes a long way.

    External Rotation + Uppercut: With a resistance band anchored on the opposite side, elbow fixed at 90°, and forearm against your belly. Rotate the forearm away from the belly to a neutral position (knuckles pointed forward). Then raise the arm by spinning through the shoulder. Again, the elbow should stay at 90° throughout. Only raise the arm to shoulder height. Motion should be isolated at the shoulder joint — don’t let the shoulder blade move. Finish by lowering the arm down and rotating the forearm back to the belly.

    Scaption: Raise both arms up your sides at 45° (not in front, not to the side, but halfway in between). Stop at shoulder height. Keep the shoulder blades fixed down and back. Start with light weights.

    Wall Slides: Loop a very light resistance band around both hands and stand facing a wall. Place both hands on the wall at about shoulder heights with elbows bent and palms facing inward. Stretch the band by squeezing your shoulder blades down and back, not just pulling from the arms. Keep the shoulder blades pinned down and back, band tensioned, and slide your hands up the wall until your elbows are at about shoulder height. Slide back down to the starting position. Ideally, the shoulder blades stay retracted throughout the set of repetitions, but you can stop and reset them between reps or as needed.

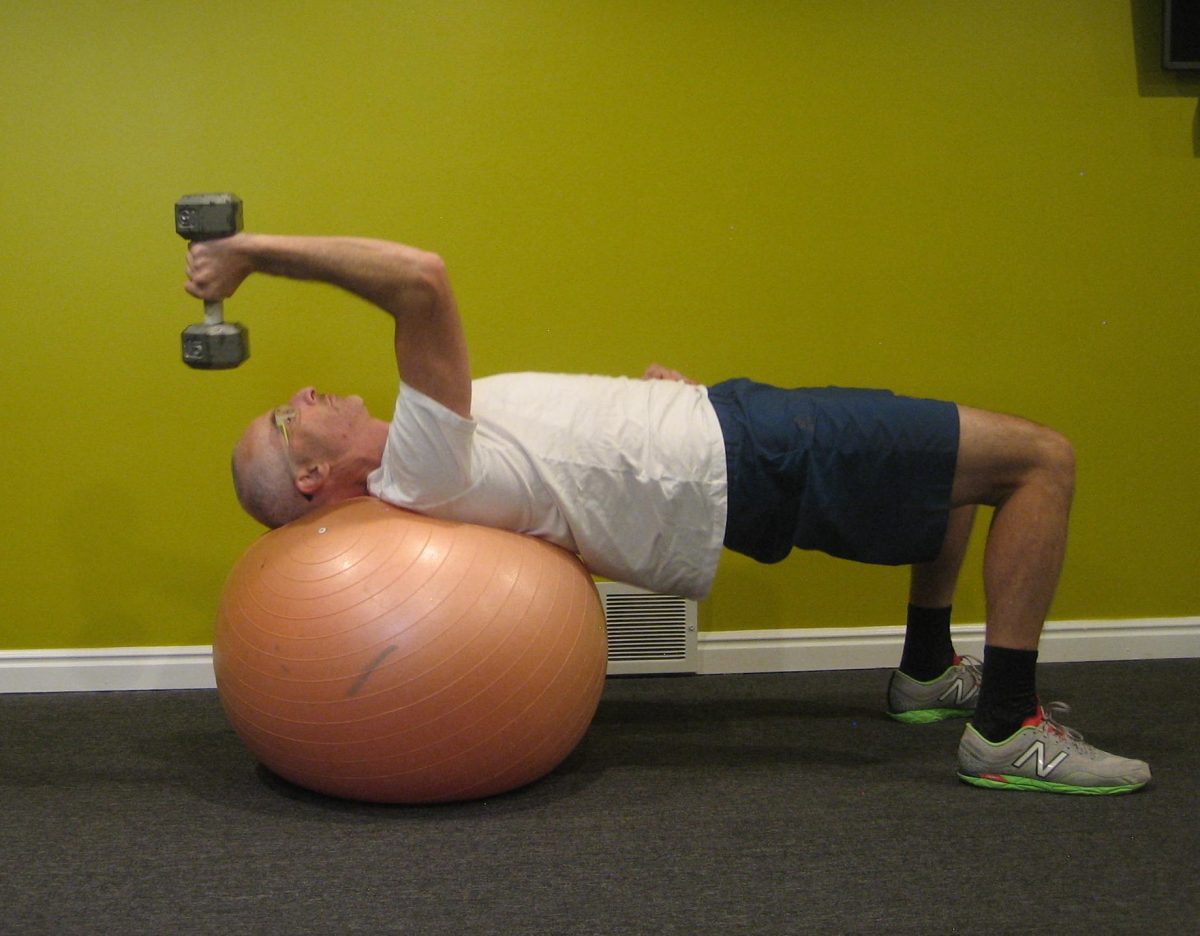
    Serratus Punch: The serratus anterior muscle attaches to the ribcage, inserts on the scapula, and, acting alone, protracts the scapula, or pulls it forward. As a stand alone movement, this scapular protraction is not especially functional unless you are a boxer hitting with a jab. However, the serratus anterior is a team player and becomes very functional when co-contracting with the posterior scapular muscles (especially middle and lower trapezius) to stabilize and coordinate movement of the scapula. The exercise will work the serratus anterior independently. 

    Lie on your back holding a dumbbell in each hand. Knees are bent and elbows are straight. Push the dumbbells towards the ceiling by moving the shoulder blades forward on the ribcage. This is the opposite of the motion described in Wall Slides. The neck and thoracic spine stay relaxed. This can also be done with a resistance band.

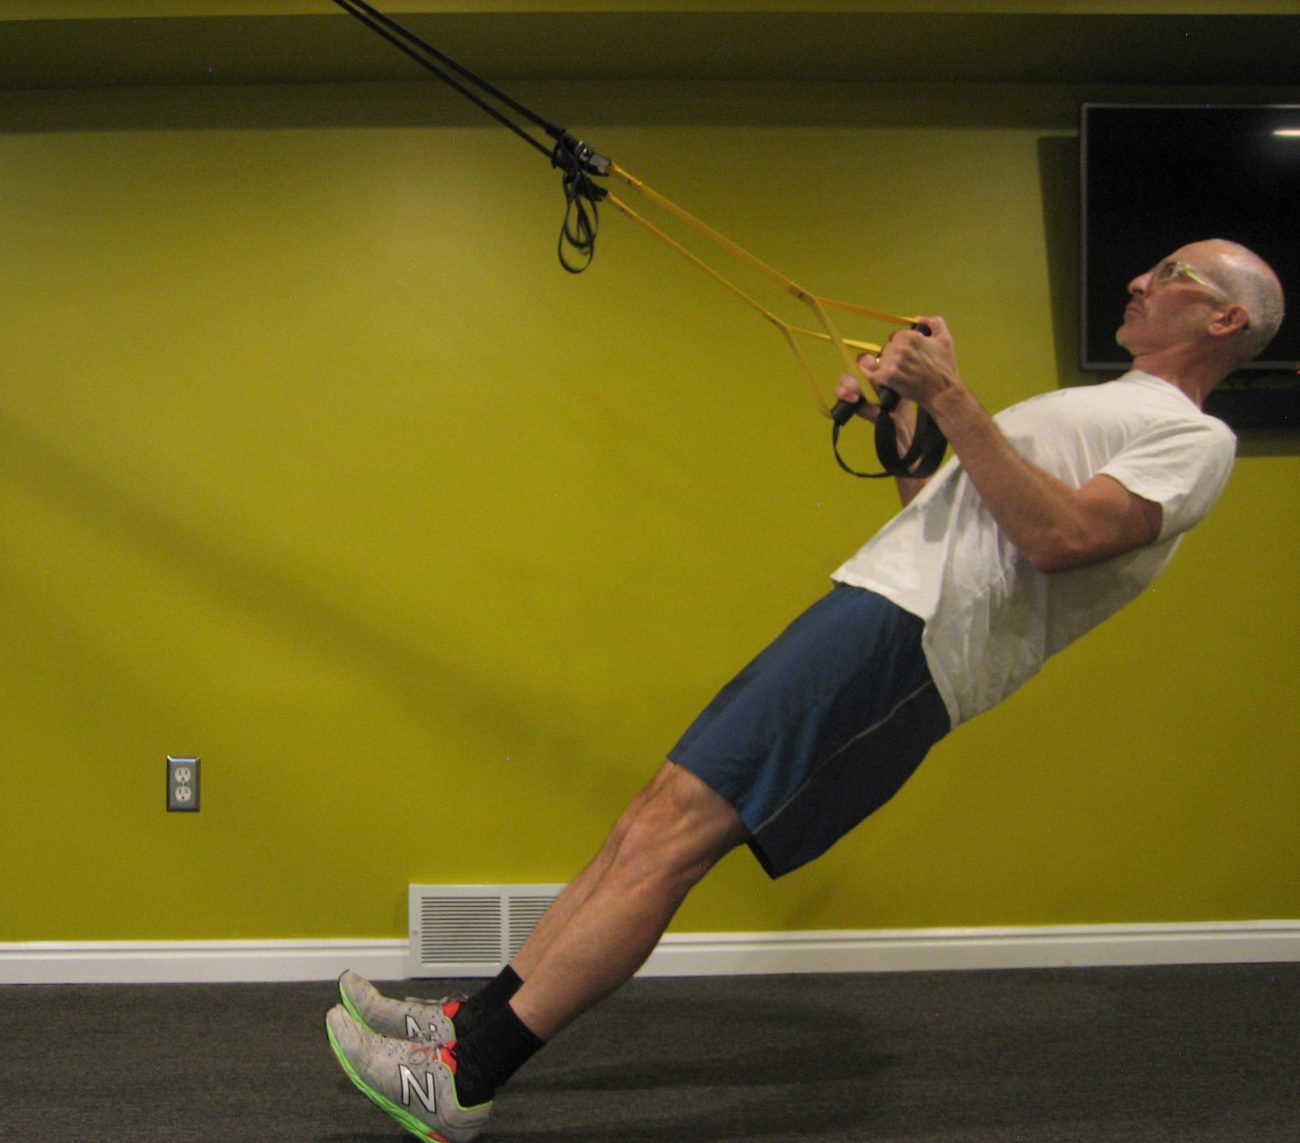
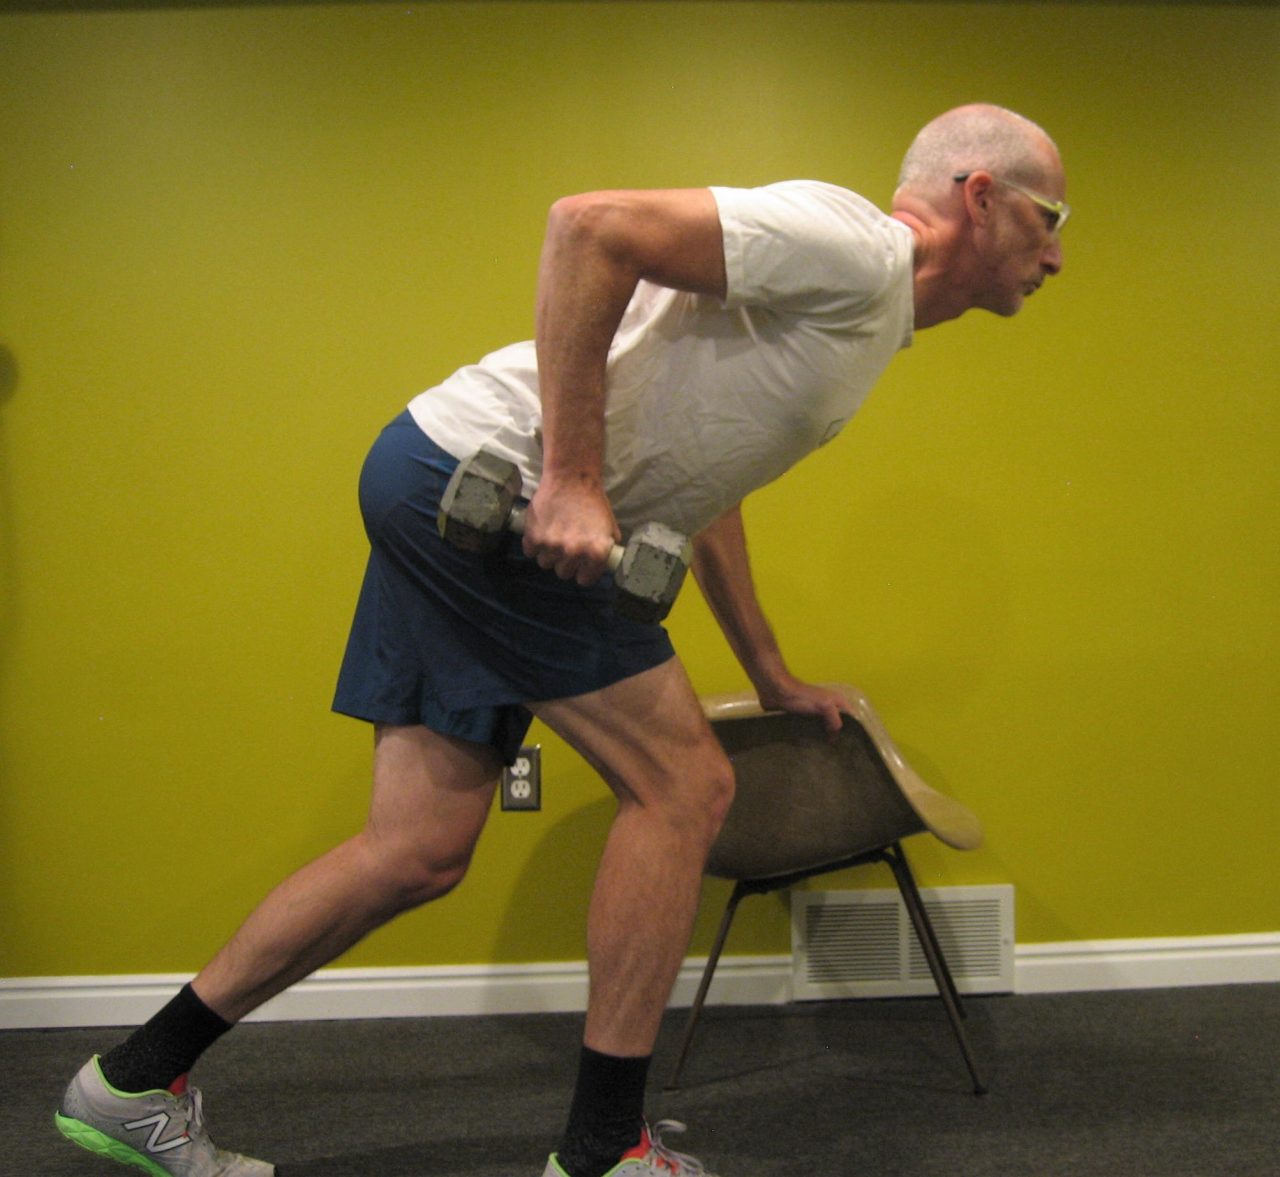
    Rows: The emphasis of the rowing motion is on squeezing the shoulder blades down and back as you pull the resistance towards you. This is the same motion described in Wall Slides and the opposite of the Serratus Punch. There are multiple means of adding resistance to the movement: resistance band, cable machine, single dumbbell/kettlebell, TRX, etc. 


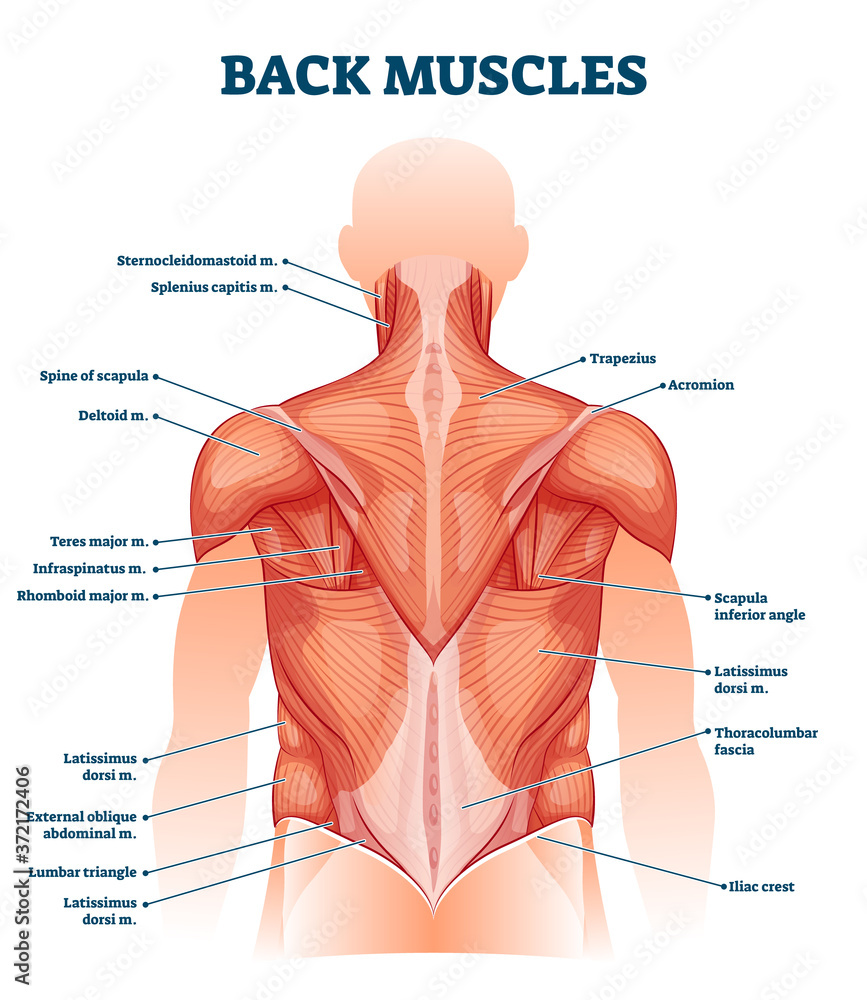
    In the propulsive phase of poling, the prime mover at the shoulder joint is the latissimus dorsi — often referred to as the “lats”. This big, broad muscle extends the shoulder, pulling an outwardly extended arm to the side as in freestyle swim strokes and pull ups. The lats are aided by the posterior portion of the deltoid muscle and teres major. 

    A diagram of the back muscles, including the latissimus dorsi. (Photo: www.freepik.com)

    The elbow joint is also involved with the triceps playing a rather complex role. This muscle, or more technically speaking, this group of muscles has a common insertion on the ulna and acts to straighten the elbow. However, the long head of the triceps, attaching to the scapular vs the humerus, is also able to play a role in shoulder extension. I say the triceps play a complex role because motion about the elbow varies with technique and terrain. In Skate V1 and V2 alternate and in Classic striding, there is a fair amount of elbow extension. However, in V2 and uphill double poling, there is very little motion at the elbow. 

    Notice how little motion takes place at the elbow during V2.


    A clinical case study: (Disclaimer: the subject of this case is the author, a potential duplicity that is frowned upon in academia.) In the lead up to ski season, I began doing “budget SkiErg” workouts double poling with resistance bands. After several weeks of twice a week workouts, I began to develop left posterior elbow pain. It didn’t take much to figure out I had irritated the insertional tendon of the triceps. So I stopped the workouts and focused on eccentric strengthening of the triceps, which has become the standard of care in the treatment of tendinopathies. 

    Come ski season, I could skate without any problems, but I continued to have elbow pain with more than about 45 minutes of classic. One night at dinner I was venting to my wife about my now chronic elbow pain. Ever the voice of reason, she asked what I would do if I was seeing myself in the clinic. What would I, the PT, do differently for a patient who is not responding? I replied that I would examine, biomechanically, how the patient is poling. So I started to think about how I was doing what I was doing. 

    My hypothesis was that I was using my triceps too much to generate shoulder extension. I started doing shoulder extension exercises with my elbow fixed at 90°. I focused on leading the motion with the back of my elbow, not my hand. Within a couple of weeks, the elbow pain was gone. The lesson from my mistake is that functional movement patterns often require a high degree of coordination. Because of our bodies’ anatomical redundancy, it is easy to fall into a suboptimal pattern that is inefficient in the best case and in the worst has potential for injury.

    Interestingly, the biceps appear to be very active during double poling, which seems counterintuitive since the action of the biceps is in the opposite direction of the propulsive phase of poling. The biceps do contribute to shoulder flexion so they are likely involved during the return phase. But, more likely, the majority of their action is co-contraction with the triceps to stabilize the elbow and hold it in the desired position. Perhaps this is rationale to include some biceps strengthening for more than just filling out the sleeves of your cycling jersey.

    David Norris models single-stick poling technique during a skiathlon in Lillehammer, Norway in December, 2019. (Photo: NordicFocu)
    Exercises for the Movers:

    Shoulder Extension: This is most easily done with a dumbbell, but a resistance band will work as well. As described in the case study, keep the elbow locked at 90° and focus on spinning at the shoulder joint by leading with the back of the elbow.

    Strengthening the Triceps: Like with Rows, there are numerous ways to work the triceps with no single exercise being the best. Resistance band, cable machine, dumbbell, push ups, and dips are all appropriate.


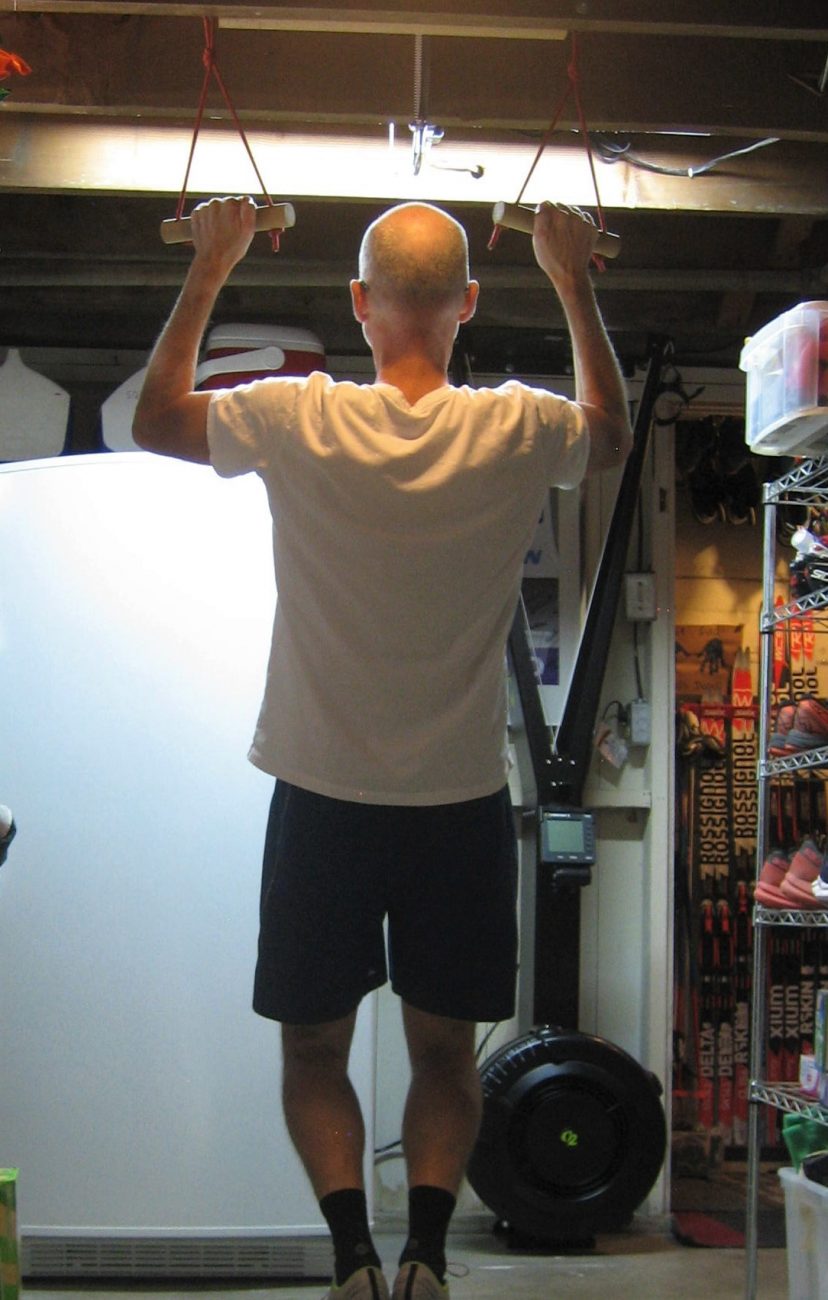
    Strengthening the Lats: The basic lat workout is pull ups. If these are too difficult to do at least 3 reps, then put your feet on a chair or on a long resistance band loop attached to the pull up bar (just make sure the band stays on your feet and not in between them!). Lat machines in the gym are a great alternative as you can select resistance that is lighter than body weight (or more than body weight if you can whip out 10+ regular pull ups)


    Epilogue: The goal of the Building a Better Skier series has been to identify some key biomechanical and kinematic components of cross country skiing and to provide exercises with the specific intent of facilitating these movement patterns and strength requirements. By no means has the depth of these articles been exhaustive. Nor have the lists of exercises covered all possibilities. Hopefully, these articles have been easy to follow and the exercises have been included in your twice weekly strength/dryland/pay-to-play routine. Even better, I hope the work done now will pay dividends when the snow falls this winter. Best of luck with the remainder of summer (the heat, the smoke, the pandemic), the glorious autumn, the struggles of shoulder season, and the winter we’ve all been waiting for.


  • Making a Healthy Transition to Running as the Seasons Change with Jessica Yeaton

    Making a Healthy Transition to Running as the Seasons Change with Jessica Yeaton

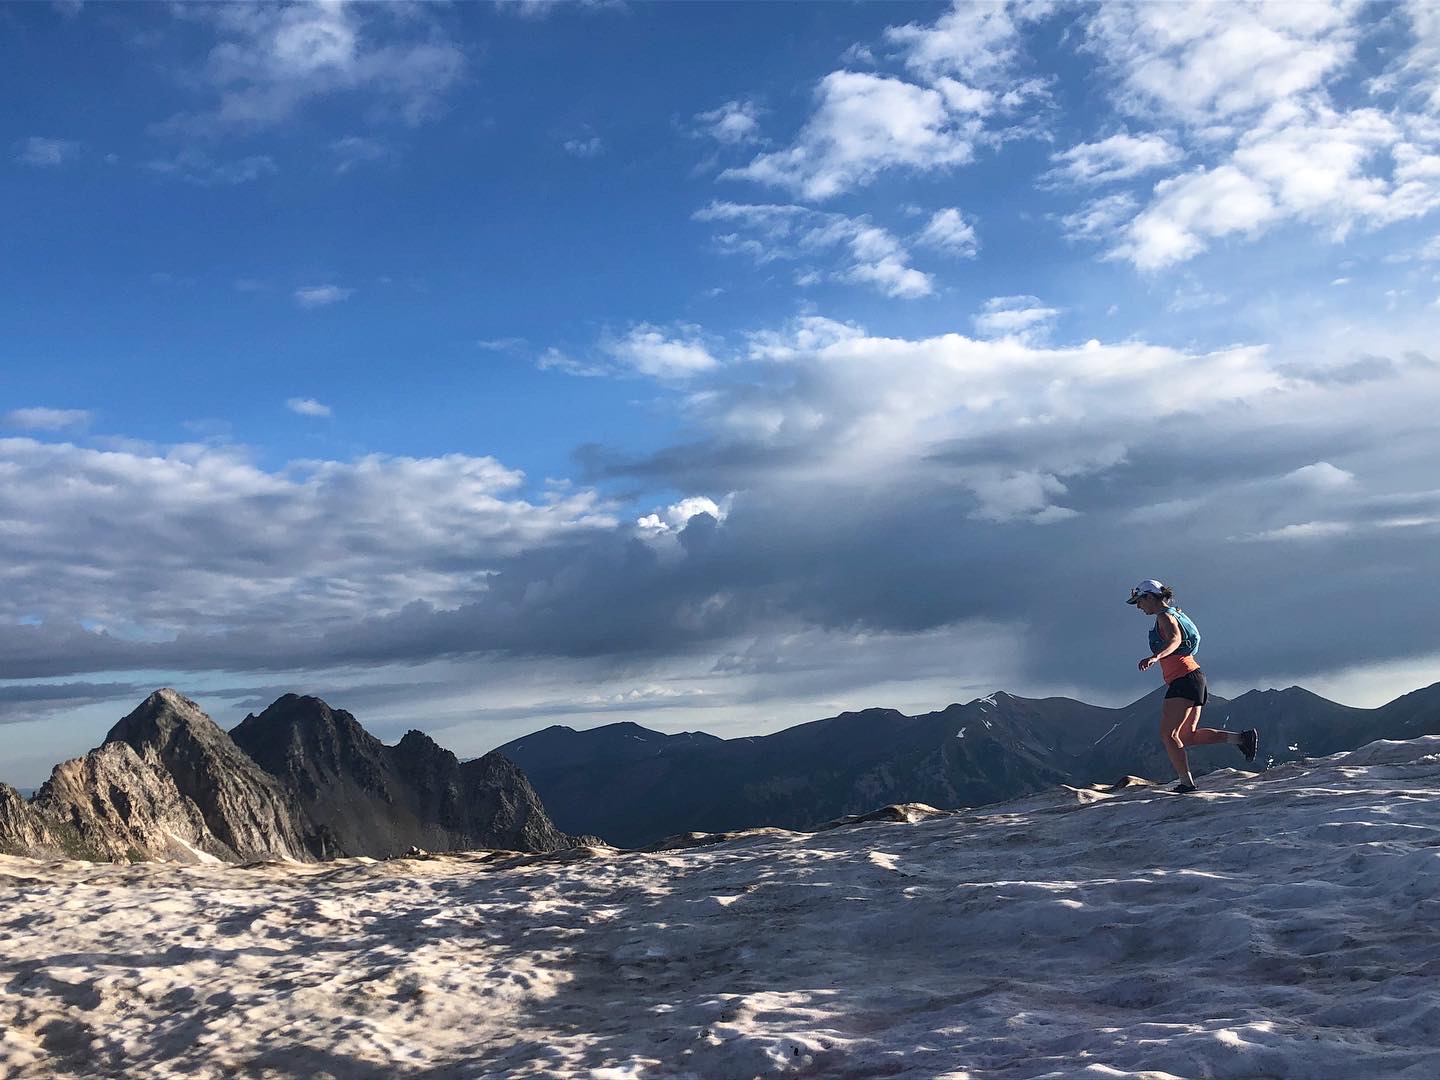
    The author crosses a snow field on a long run near her home in Colorado last summer.

    Last year at this time, I was primarily gym-ridden. After roughly five months on snow, my fitness was high but my tolerance for the impact and specific demands of running were low. Throwing better judgement to the wind, I gave in to the allure of warm days, rapidly drying trails, and beloved road loops around town, and paid the price.  

    Despite running between zero and ten miles total between December and the end of February, I took off for my first run of the season: 4.5 miles. That first week totalled 20 miles in four runs. Much lower than summer totals, but far greater than the sum of the months prior.

    Two weeks later, I did a 90 minute trail run with roughly 1,200 feet of climbing and descending. What started as the sensation that a tendon on the lateral side of my right knee was snagging with each leg swing quickly turned into a sharp stabbing pain. I hobbled my way home and by that afternoon, I couldn’t walk downstairs without sidestepping or even make it down the gentle slope of my front yard. Sound familiar?

    This experience is not uncommon. When snow conditions deteriorate in the spring but weather is perhaps not yet conducive to cycling or rollerskiing, our options for aerobic exercise that provides the same satisfaction as the kilometers we logged all winter are limited. The best available early season option is often running, so we lace up our cobwebbed sneakers, and fight the temptation to jump back in too quickly. 

    While some may tolerate a rapid transition, there are a myriad of running related injuries that could easily crop up. Last year at this time, FasterSkier featured recommendations from Dr. Ross McKinnon, DPT, to address the topic of a healthy transition to running. His advice included a slow increase in running volume, working on running mechanics, beginning with soft surfaces, and making sure your shoes are up to the task. 

    To add on, we reached out to DPT candidate, Olympian, and former APU Teammate Jess Yeaton for additional information to support a healthy return to running. 

    Jess Yeaton heads for home to win the 2018 Mt Marathon race in Seward, AK. (Photo: Anchorage Daily News/Lauren Holmes)

    Seconding Dr. McKinnon’s first recommendation, Yeaton began with the importance of committing to a gradual return.

    “I think the absolute biggest thing is taking a slow progression back and not increasing your weekly mileage too much, as well as adding in exercises that target strengthening glute med.”

    The gluteus medius muscle, or glute med, is a fan shaped muscle on the outside of the hip which connects the iliac crest to the top of the femur. The glute med plays a vital role in single leg stability, in particular, in maintaining level positioning of the hips and proper alignment of the leg during each stride. After all, running is essentially a repetitive high-impact single leg motion, so stability at the hips and through the core are key.

    By strengthening the glute med, runners can reduce “hip drop” and prevent the knee from caving inward with each stride. These phenomena reduce the body’s natural mechanisms for absorbing the impacts of running. They put abnormal strain on various ligaments, tendons, and joints down the chain, leading to IT Band Syndrome, knee and low back pain, and more. 

    The gluteus medius, or glute med, provides stability at the hip, a source of injury risk for runners. (Photo: Human Anatomy and Physiology Lab, LumenLearning.com)

    “Examples of [exercises to strengthen the glute med] would be things like donkey kicks, fire hydrants, bridging up with both legs and then holding with one leg,” Yeaton explained. “I actually had to do a community project working with a running group here in Albuquerque for school and made a video with some of these exercises, which is available on YouTube.”

    In the video, Yeaton demonstrates forward and lateral walks with an exercise band looped above the knees. Maintaining tension in the band activates and strengthens the glute med, promoting better stability in single leg movements, such as running — or skiing!

    Yeaton also contributed to an article on single-leg stability geared toward better balance on skis this fall, which can be found here. 

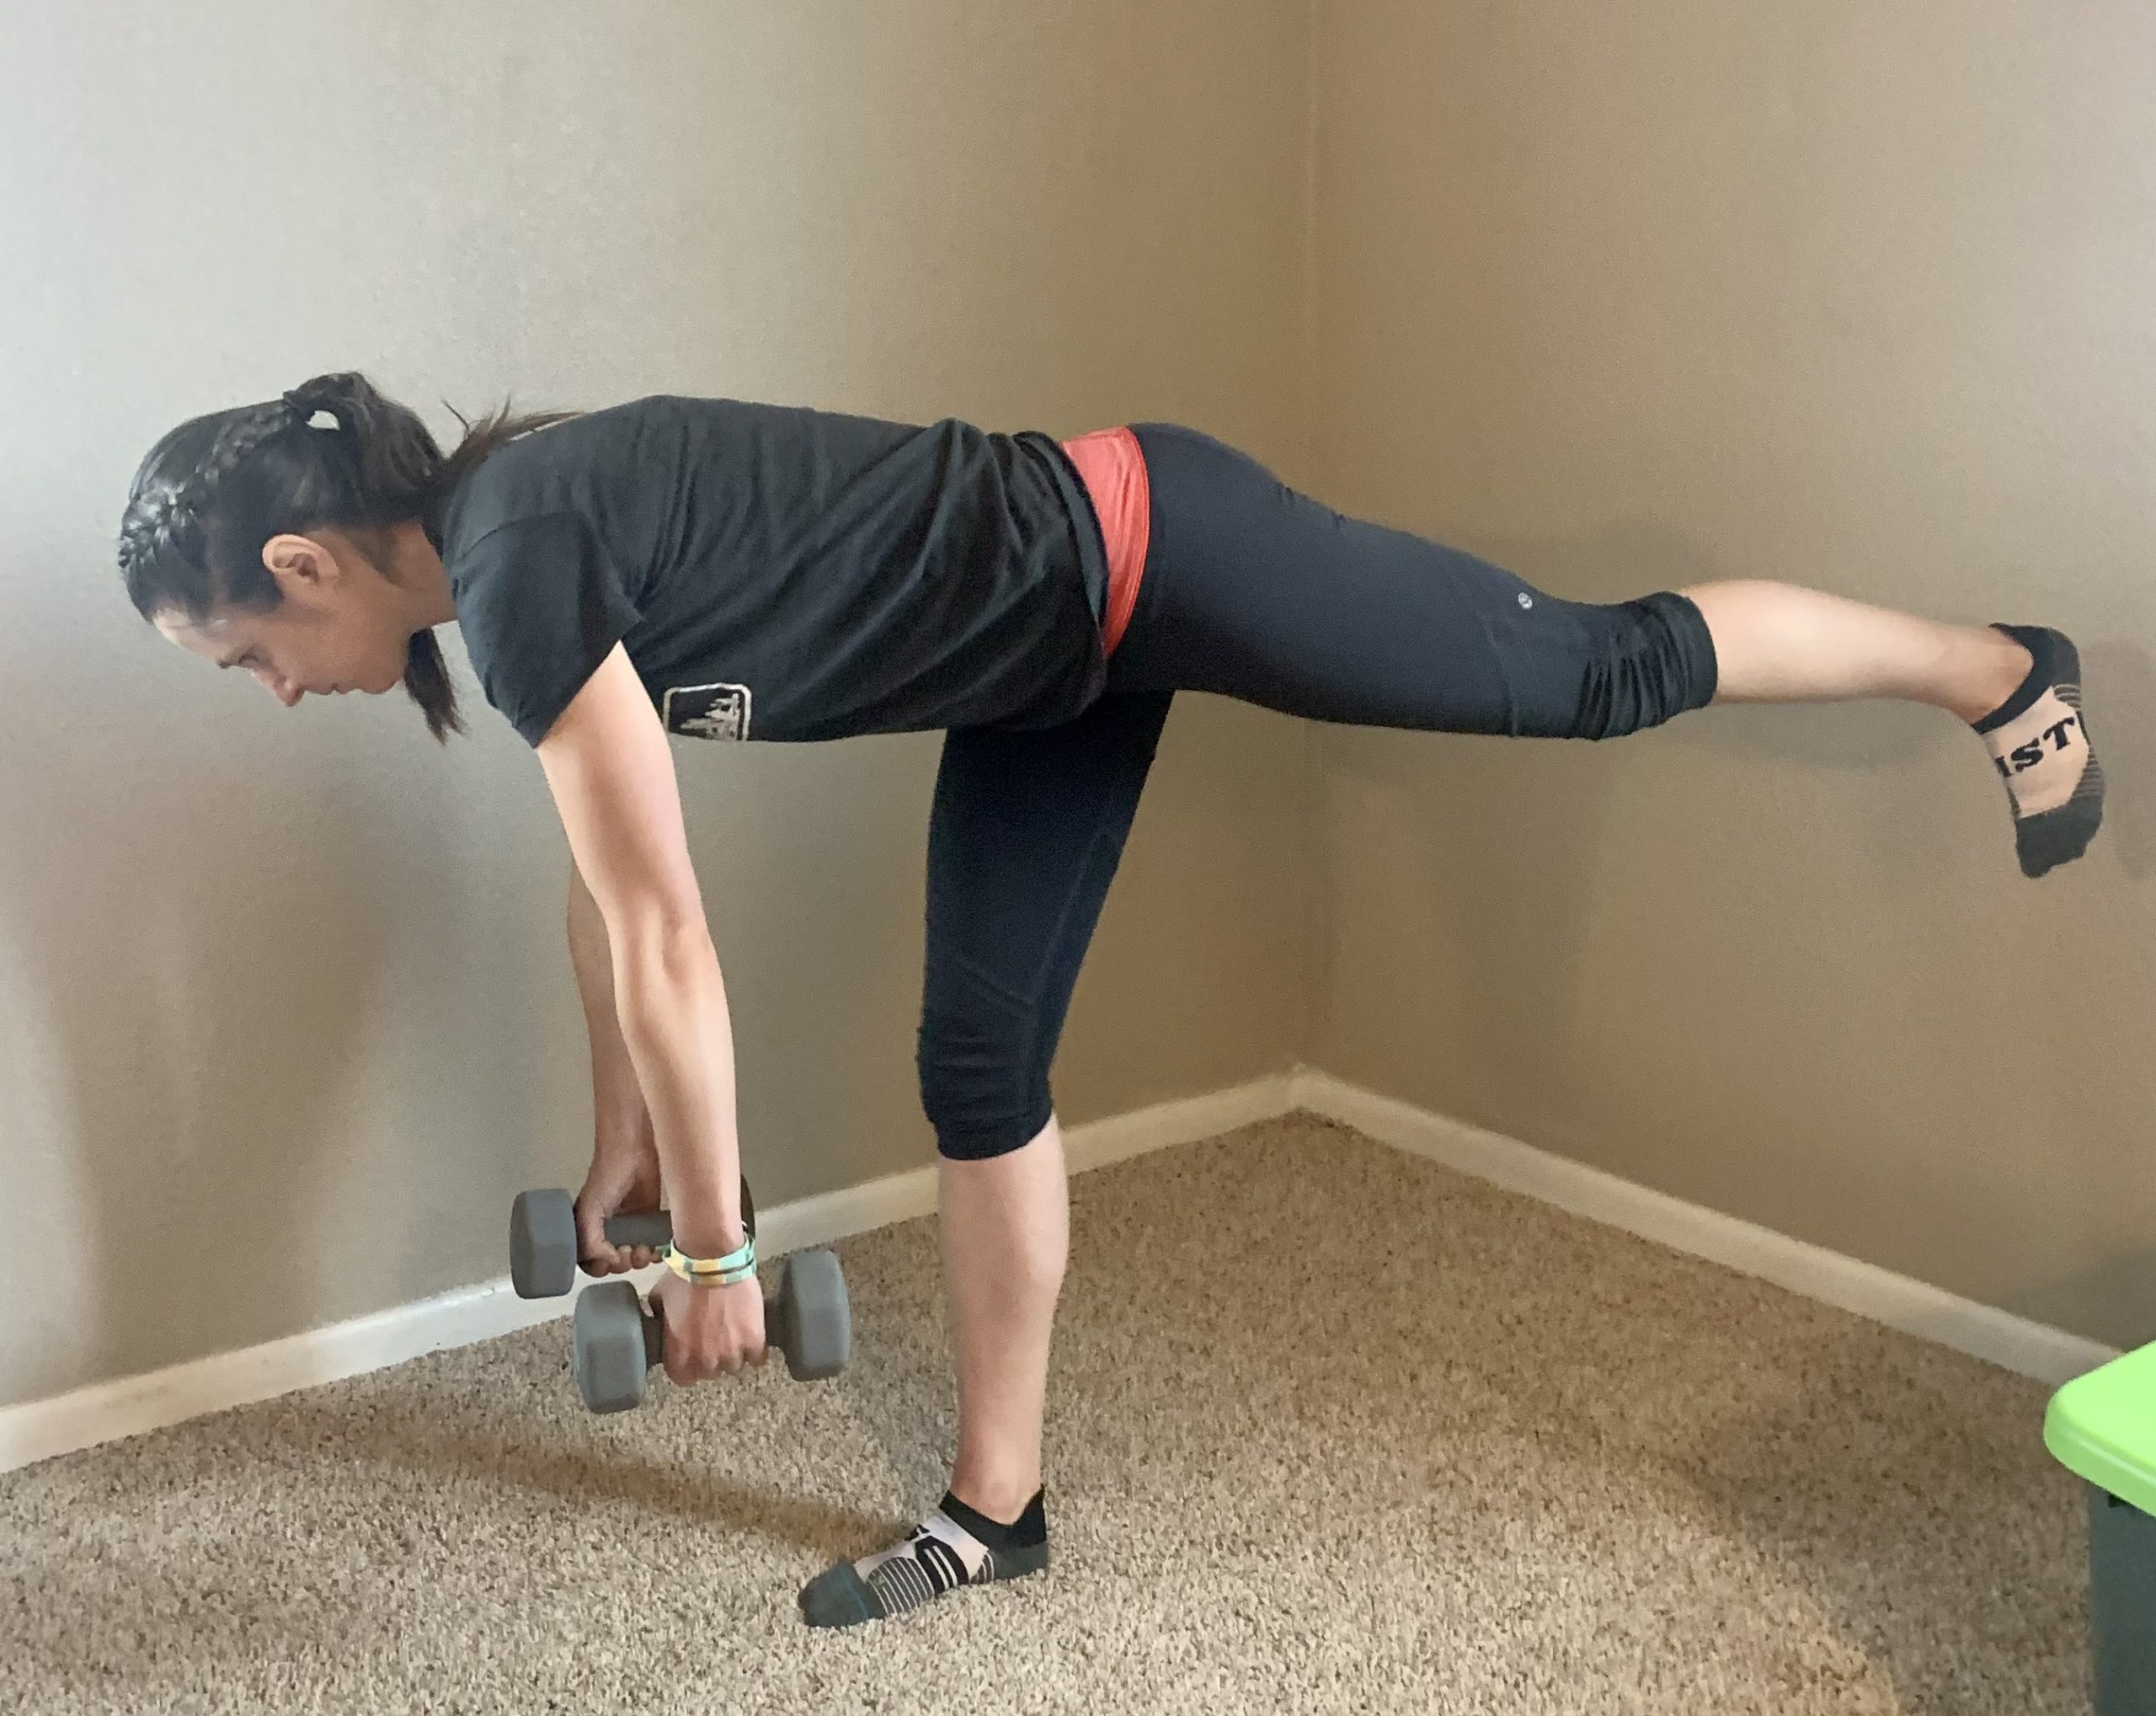
    In the gym, you could try single leg deadlifts with a kettlebell or free weight to build stability. To execute this move correctly, it is important to keep the hips level to the floor and avoid the tendency to rotate away from the standing leg. While keeping a flat back, focus on hinging  from the hip and staying within the range of motion that your hamstring flexibility allows rather than reaching the weight toward the floor, which often leads to rounding at the low back. In addition to challenging your single leg balance, you should feel this in the glute and hamstring of the standing leg. 

    Aim for a flat back with hips squared forward, and keep the toes of the lifted leg pointed toward the ground.

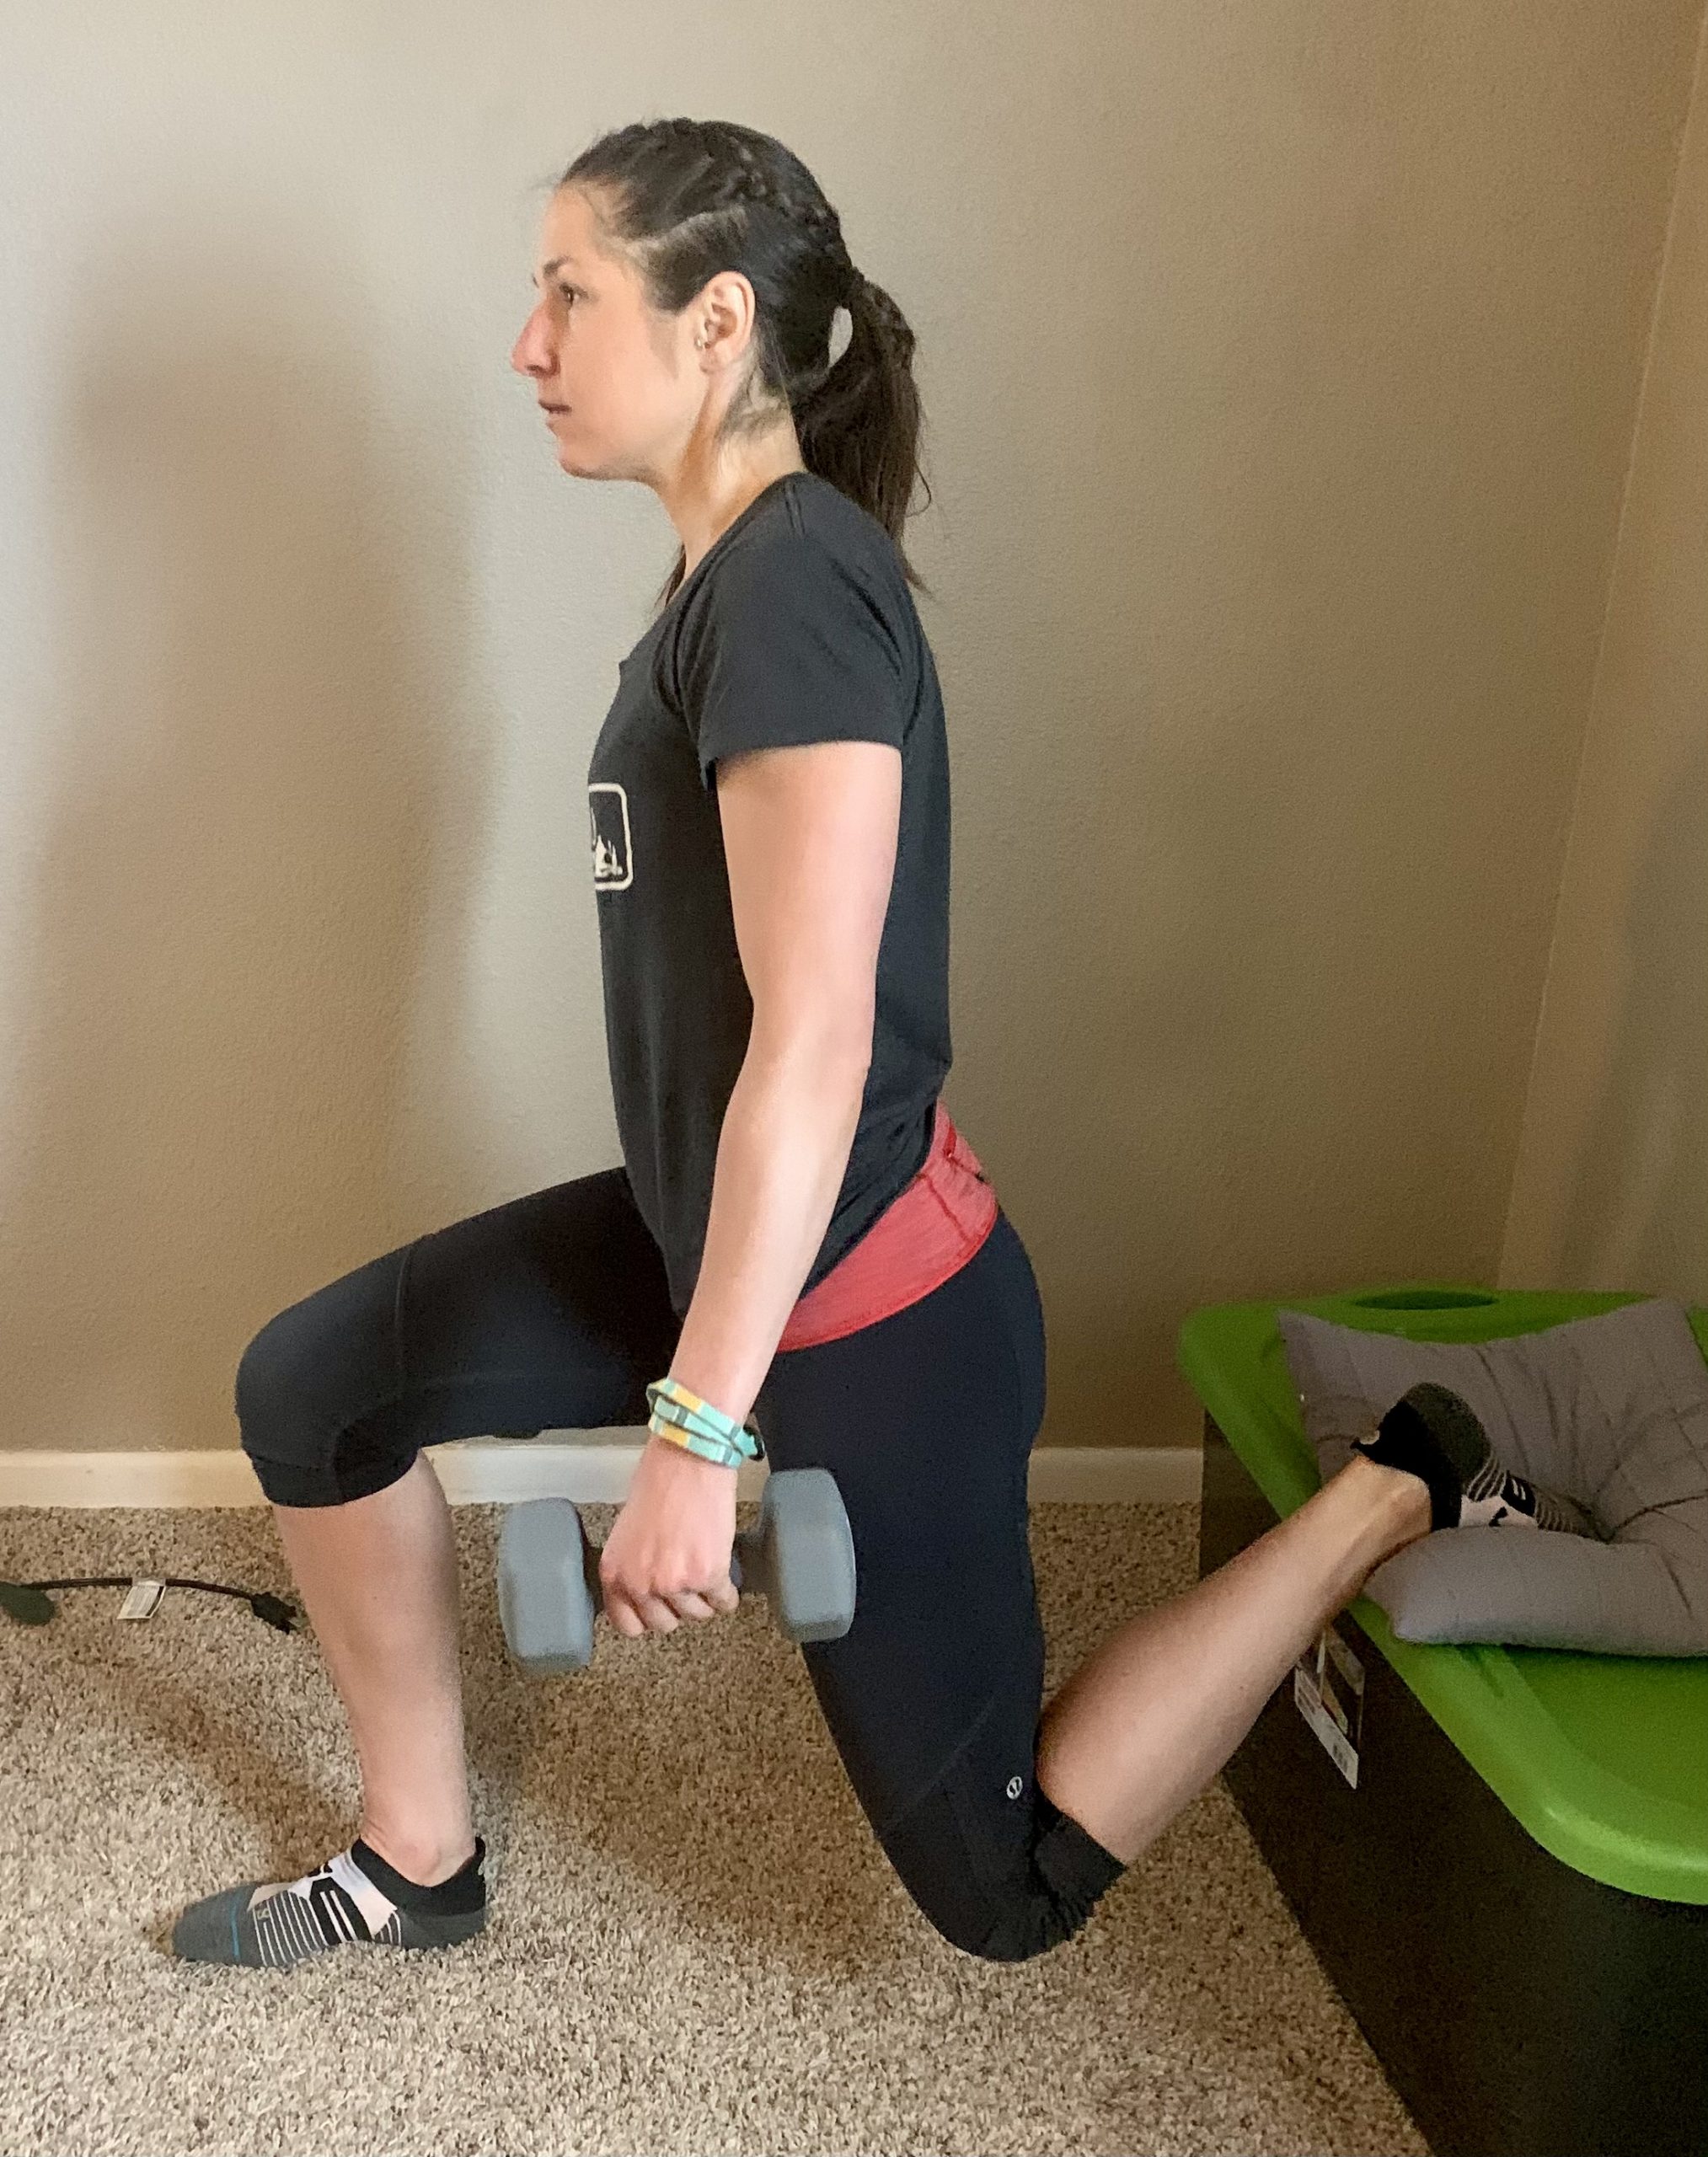
    Another option for enhanced glute med strength is to try a split squat with the rear leg elevated, also known as a Bulgarian split squat. With one foot resting on a box, stair, or bench, complete a single leg squat, creating a 90-degree bend in the knee of the standing leg. The knee of the elevated leg should drop straight down toward the ground, while the other knee stays stacked over the ankle and in line with the foot. 

    Be sure to keep your chest up and core tight to reduce wobbling and work the correct muscles.

    By pushing your heel into the ground as you come out of the squat, you can keep the action in your glute muscle, rather than letting the quadriceps muscles on the front of the upper leg take over. Again, the positioning of the hips is important; here they should stay squared forward throughout the movement. 

    Yeaton also noted that she commonly sees skiers develop calf and achilles related injuries from jumping back into running too quickly and recommended variations of calf raises and heel drops to combat these issues. 

    “Another one you could add is doing calf raises with a ball between your ankles, which puts you in a supinated position (meaning the foot is rotated slightly inward), which helps target tibialis posterior. I’ve noticed this muscle is a BIG problem for a lot of skiers.”

    Keeping pressure on the ball as you rise onto your toes and slowly lower cues and strengthens the tibialis posterior.

    The tibialis posterior lies underneath the gastrocnemius, more commonly known as the calf muscle. Running the full length of the lower leg, the tibialis posterior begins behind the knee and connects to the arch of the foot. It helps to flex the foot and reduce pronation, where the arch collapses and the ankle tracks inward. This is commonly seen in runners.

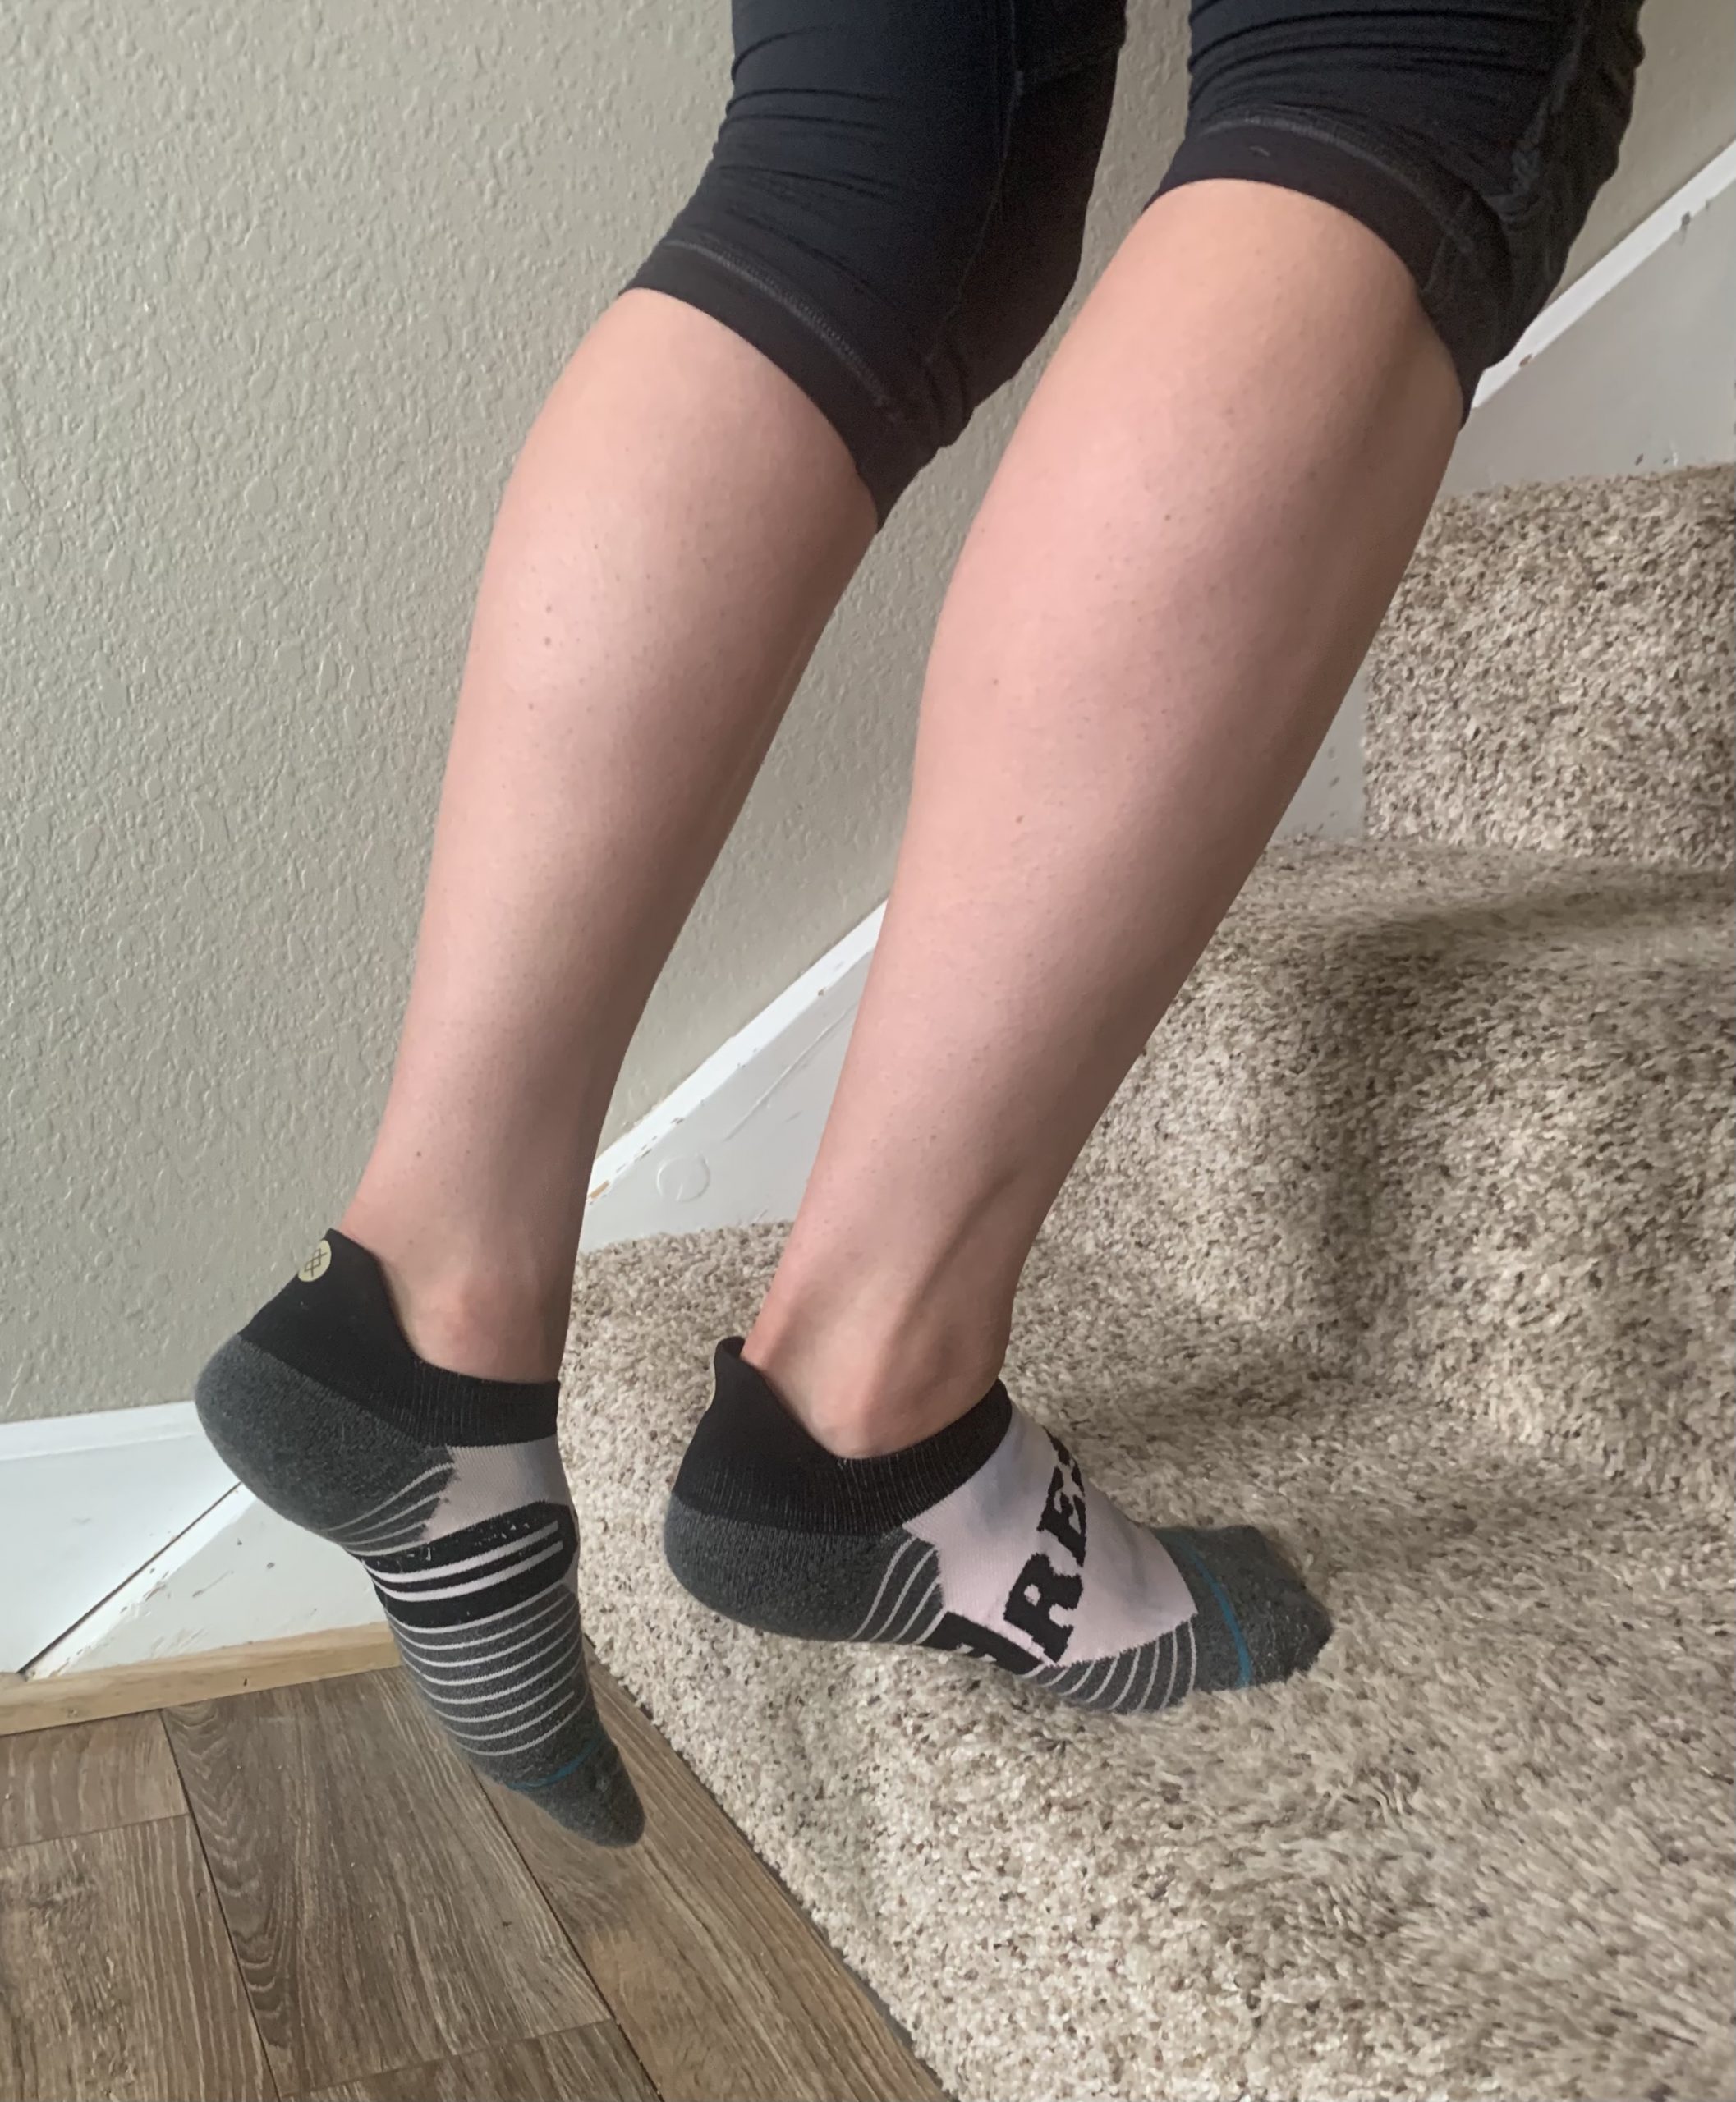
    To perform the exercise, hold a soft ball, such as a tennis ball, between the heels of your feet. Slowly rise onto your toes while maintaining the positioning of the ball, hold briefly at the top, then return slowly to standing. 

    “For achilles strength, you can do heel drop exercises on the stairs. Push up into a calf raise on both feet, then lower down slowly on one foot. The eccentric, or the slow, controlled lowering part is what’s important.”

    Use both feet to rise onto your toes, then slowly lower with just one foot to target the achilles.

    Returning to the concept of a gradual increase in running volume, Yeaton recommends actually calculating how quickly you are ramping up. Yeaton recommends the 10% rule — meaning volume should increase by no more than 10% per week. She referenced a 2014 study titled “Excessive progression in weekly running distance and risk of running-related injuries: an association which varies according to type of injury”, which followed roughly 900 runners for one year, tracking mileage increase and injuries. The research showed that athletes who increase by 30% or more were at a higher risk for injury, whereas those who increased by 10% or less were the least likely to incur a running-related injury. 

    “I think this is crazy when skiers put a number to it, because that really isn’t much of an increase… from what I’ve seen, what most athletes consider taking it slow and easing back in is really a pretty significant progression.”

    Obviously, there are caveats — if you start with one three mile run, you’ll probably be okay running more than 3.3 miles total the next week. If you ran 12 miles over four runs last week, you probably shouldn’t run 13 in one go the following week. However, paying attention to frequency, distance, and intensity of your runs as you progress can play a vital role in keeping your body happy.

    Anecdotally, running 5-7 miles once per week through this winter has made a big difference in my ability to progress this spring. 

    So there you have it. Work on hip stability and core strength (bonus: this will help your skiing too!), incorporate calf raises and heel drops, and keep an objective eye on your progression. Have fun and stay healthy!
  • Subscription Review: Athletes for Yoga — Designed to Fit Into and Support and Athletic Lifestyle

    Subscription Review: Athletes for Yoga — Designed to Fit Into and Support and Athletic Lifestyle

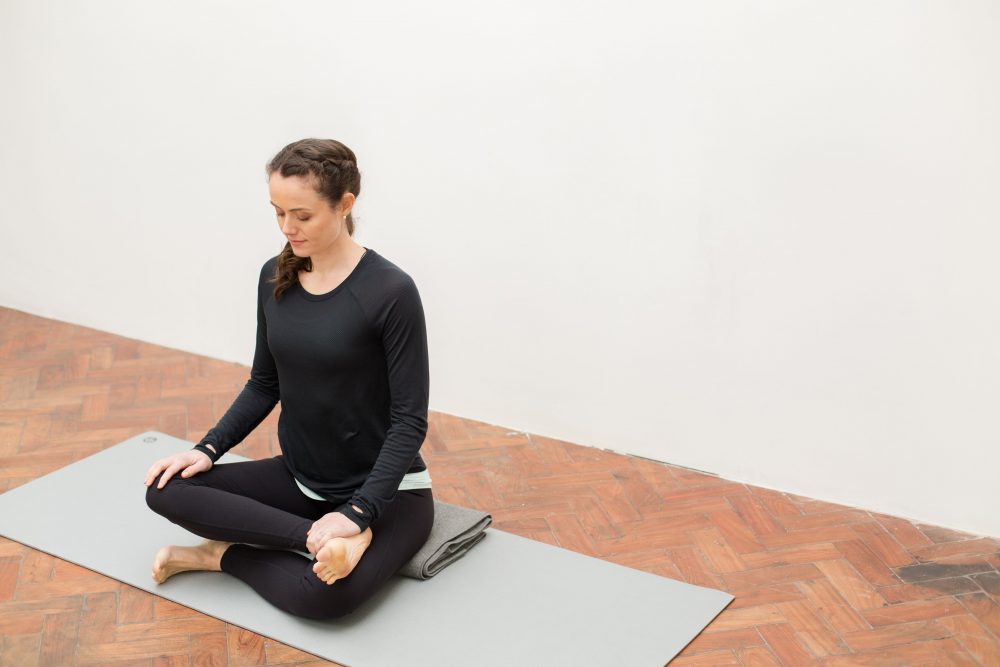
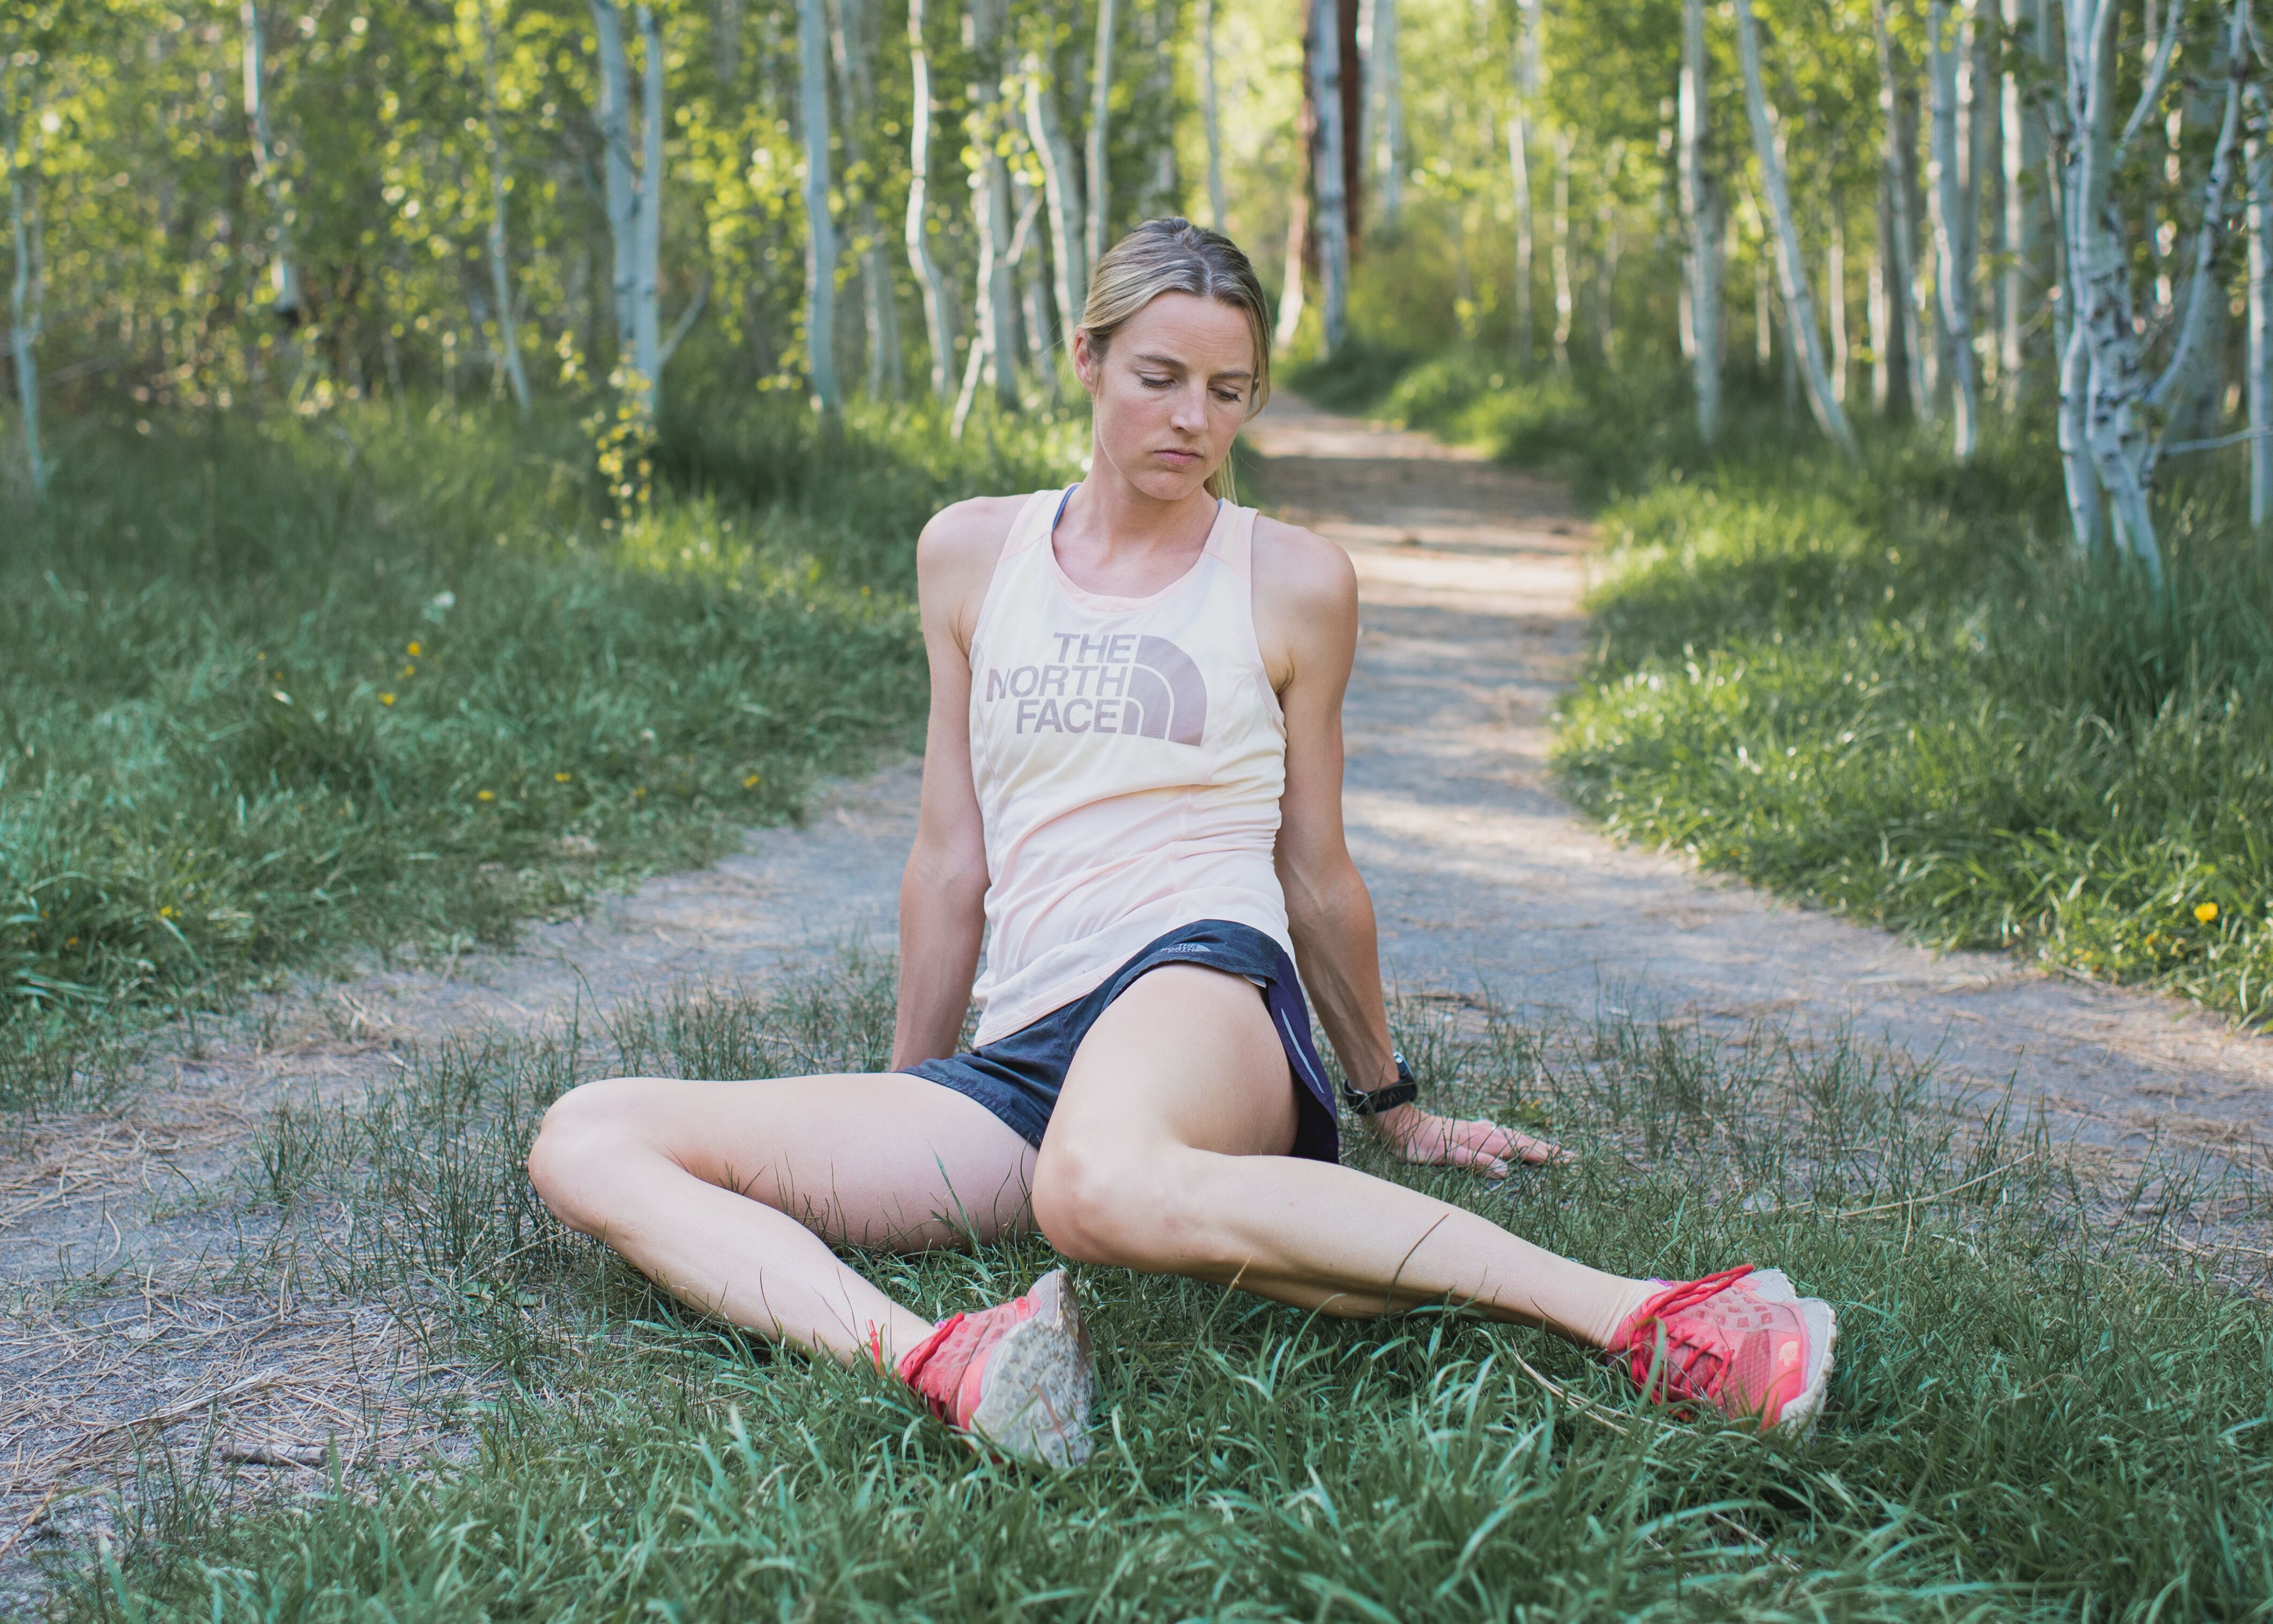
    Erin Taylor, founder of Athletes for Yoga (A4Y), demonstrates a hip-opening pose. (Courtesy photo)

    My relationship with yoga is very one-sided. Though I do not consider it in any way lesser, I ignore it most of the year when considering my options for exercise, choosing primarily running or skiing instead. 

    Then something crops up. A switch from skiing back to running in the spring makes my hips and IT bands cranky, causing pain in my knee. A couple ankle rolls on a trail run fire up my peroneal tendon. My elbow isn’t pleased about double pole intervals on pavement. 

    As if I hadn’t cast it aside, yoga welcomes me back with open arms, helping me improve body awareness and stability, and increase overall mobility and structural resilience. 

    Though local studios offer a variety of excellent classes, I consistently turn to an online resource: Athletes for Yoga. Started in 2010 by Erin Taylor, former collegiate basketball player turned runner, Athletes for Yoga (A4Y) is a unique resource designed to complement and support an active lifestyle or serious training. 

    Her message is this: “Don’t do yoga. Use yoga — right now, where you are, to get where you want to be.”

    Stephanie Howe uses Athletes for Yoga to compliment her training as a professional mountain running athlete. (Courtesy photo) 

    Taylor has a true talent for teaching how to unlock tight muscle groups, access and recruit the correct muscle groups, and develop a better understanding of the relationship between muscle groups in the body. For me, A4Y has been an essential tool to feel, identify, and understand muscle imbalances and sources of injury,

    The robust A4Y video series, which can be viewed on a cell phone, tablet, or computer, includes routines designed for pre and post workout, strength and balance training, and collections specific to triathlon, running, cycling, pregnancy, and more. There are also resources to quickly relieve tightness in the hip flexors, neck, and shoulders from too much computer time during the COVID-induced work from home grind. Your body will thank you on your aprés workout.

    “Athletes for Yoga is home to the only athlete-led, on-demand yoga video platform and app, coach training, and global community of athletes using yoga to achieve their goals. We are here to help you use yoga, for real. That means putting yoga into the context of your sport and goals with functional strength, strategic injury prevention, and optimized recovery to make you a more balanced, resilient, and powerful athlete.”

    While longer videos are also available, most of the resources fall between 10-20 minutes, allowing them to fit comfortably into your day. 

    The A4Y resources I use most frequently include the “5-minute resets”. These videos target specific areas such as hips, hamstrings, or shoulders, quickly yet effectively increasing circulation and range of motion to improve recovery and mobility. Given their length, it doesn’t feel daunting to tack one on at the end of a run, ski, or gym session. There is also a pre-run warmup routine of equal length to activate the glutes and hamstrings, promoting healthy running mechanics. 

    Stephanie Howe works through Athletes for Yoga’s “Booty Lock Mitigation” routine, designed to reduce tightness and promote mobility in the hips. (Courtesy photo)

    When I have a bit more time, “Power Your Pushoff” (16 mins) is one of my go-to’s, which activates and strengthens the rear chain while mimicking the forward motion of running or skiing, adding power and stability to those movements. I also utilize “Booty Lock Mitigation” (19 mins) to loosen my hips after a workout, and “Standing Balance Flow” (10 mins) to improve body awareness for better glide on my skis. 

    “Full Body Core” and “Functional Core” are great strength training sessions that teach you to engage and develop inner core muscles, translating to improved strength and coordination in other activities. 

    If you’re looking to slow down, try the guided meditation series which includes specific practices to improve sleep, refocus, or visualize race performance. 

    For those averse to yoga, you may find A4Y challenges your presumptions. It is not “Yoga for Yogis”. You don’t need to wear Lululemon, drink golden milk lattes, or listen to Enya. The style is to the point and down to earth.

    A4Y serves all active people, male or female, regardless of sport. 

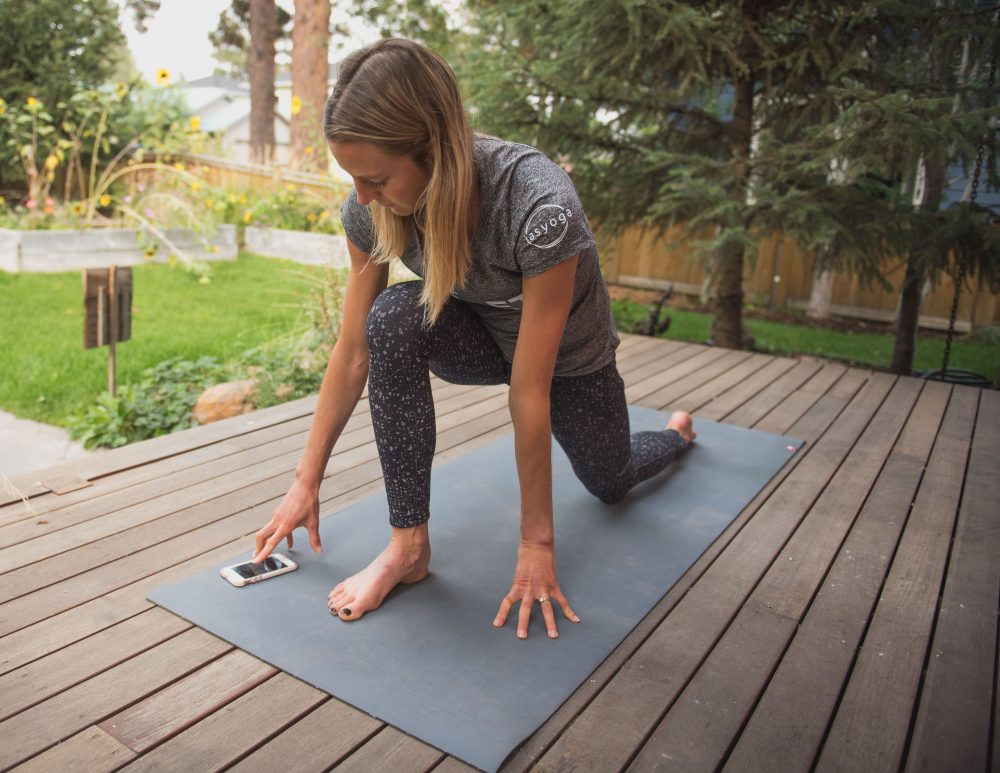
    No studio needed. Stephanie Howe, member of the Athletes for Yoga team, demonstrates the versatility of the A4Y resources. (Courtesy photo)

    To exemplify that athletes of all caliber have something to learn form Taylor’s approach, take a look at the list of athletes and alumni of the A4Y team, which includes Ironman Champion Ted Treise, professional track athlete Alysia Montaño, professional basketball player Desmond Simmons, and 4x national rowing champion Michaela Copenhaver. 

    In acknowledgement of the number of people currently looking for opportunities to exercise from home, A4Y is offering 50% off the first month with the code “HOMESTUDIO”, after which a subscription costs $9.99/month or $99.99/year. Subscriptions can be cancelled at any time. 

  • Freedom of Movement: Insights Into Improved Mobility, Motor Efficiency and Faster Skiing

    Freedom of Movement: Insights Into Improved Mobility, Motor Efficiency and Faster Skiing

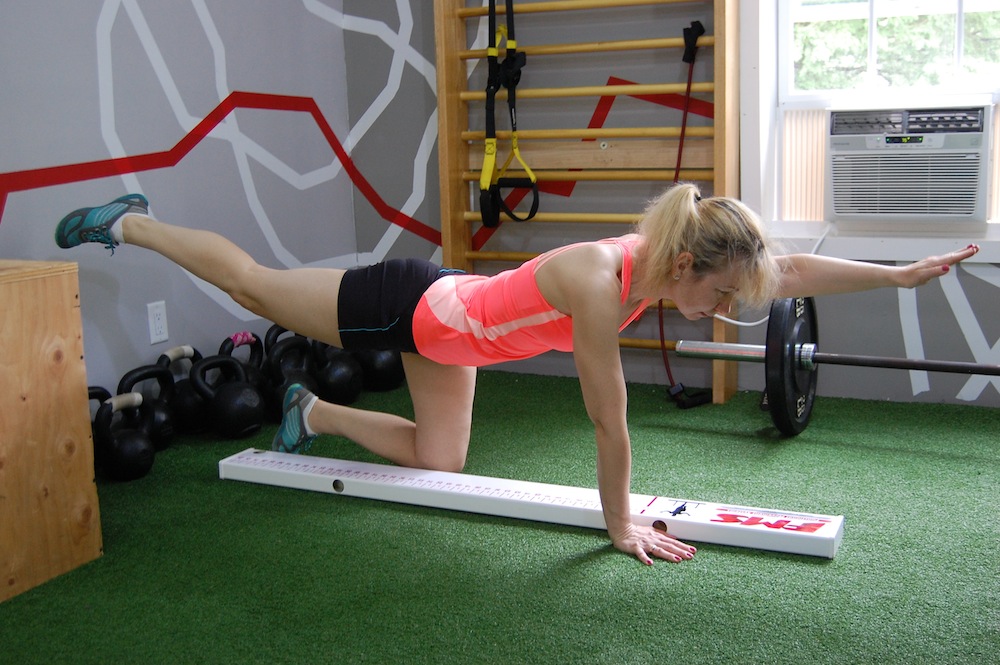
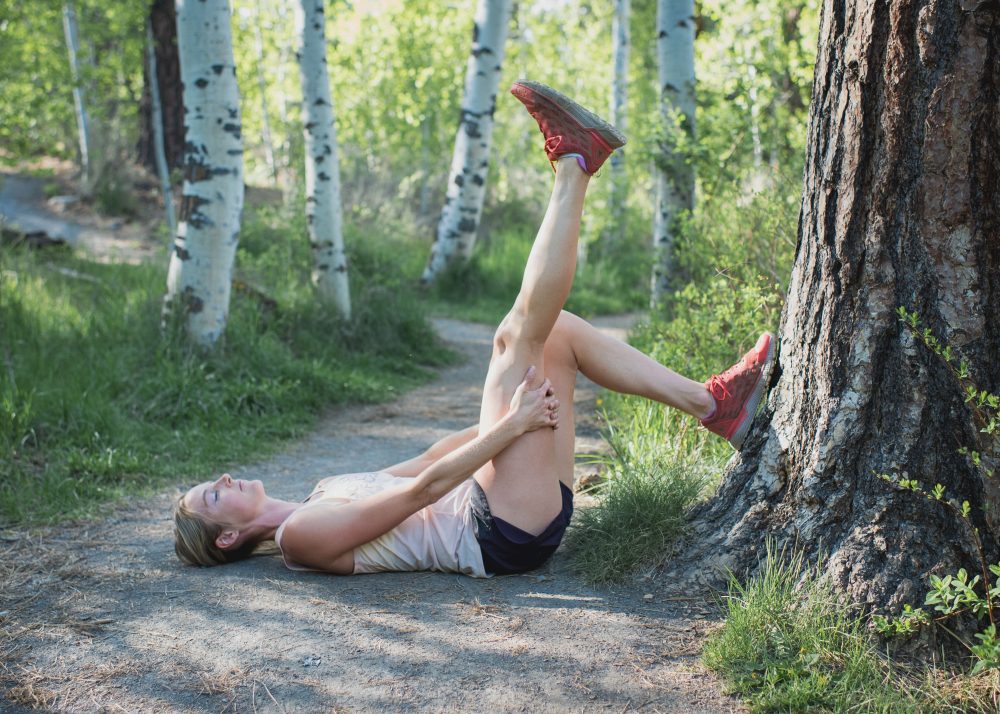
    Functional Movement Screens, an example of which is shown, can help skiers evaluate mobility, stability and optimal muscle function. Above, rotary stability examines core stabilization.
    Functional Movement Screens, an example of which is shown, can help evaluate an athlete’s mobility, stability and optimal muscle function. Above, rotary stability shows one’s ability to stabilize their core.

    This is the time of year nordic skiers are excited to really ramp up the hours and build that summer base. It’s also the time that in our excitement to do so, we get some kind of injury or aches and pains that slow this process down.

    Years ago for me, it was an IT band, then shoulder, then Achilles. Many look at this as part of the process of being an athlete, each of the injuries due to too much too soon, just random pains and strains, right? Wrong!
    In the seemingly randomness there is a pattern, it is just not apparent unless one understands the body’s movement patterns and what drives injury risk through muscle and mobility imbalances. Just because one is not injured does not mean an imbalance will not catch up to them at some point, be it with increased training volume, intensity or a different movement pattern, such as a change in technique or activity (switching form biking to running).

    For many of us addressing imbalances will lead to improved movement efficiency, which will directly impact race times. Once the dysfunction is determined the imbalance can be fixed with an individualized strength, and mobility program. Hence these injuries are very preventable.

    The muscles and joints getting injured are the ones that are usually working the hardest and pulling the weight of neighbors not doing their job. It’s kind of like that group science project where one or two members do the majority of the work and the others coast along. After a while, the one working hard either gets irritated or burnt out.

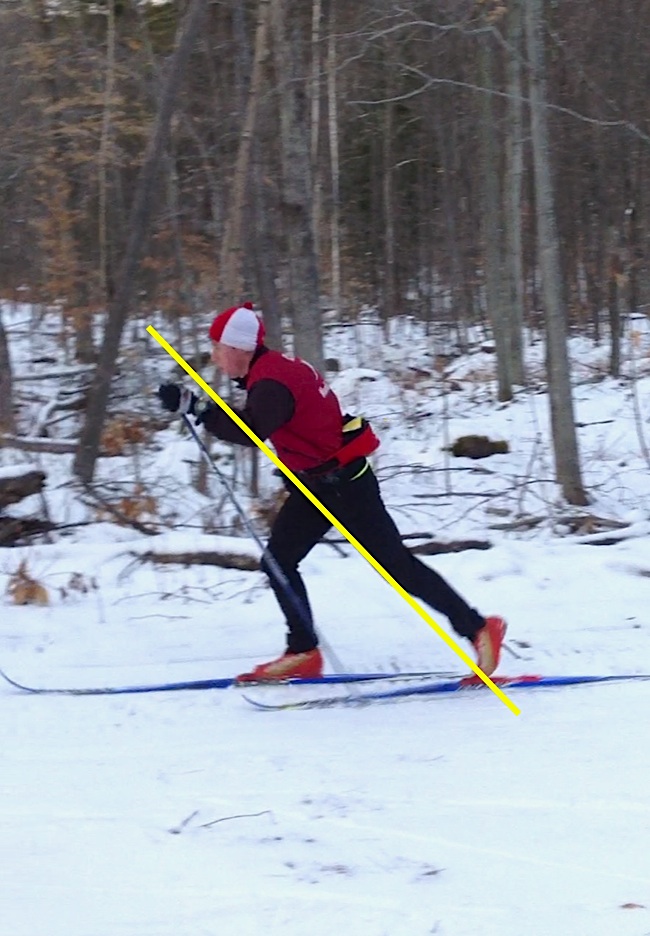
    Body lean is a combination of leaning from the ankle (ideally with the hips forward) so gravity is helping propel your body forward.  For runners and skiers if they maintain a 3- to 5-degree body lean, it allows them to apply more power (whether with kick or pushing off for running or skating) for each stride.  For example among elite female runners body lean is one of the most important factors in their running stride efficiency. Only 5-10% of  female runners have it.
    Body lean is a combination of leaning from the ankle (ideally with the hips forward) so gravity is helping propel your body forward. For runners and skiers, if they maintain a 3- to 5-degree body lean, it allows them to apply more power with each stride (whether kicking or pushing off while running or skating). For example, body lean is one of the most important factors in the running stride efficiency of elite female runners. Only 5 to 10 percent of female runners have it, according to Kremzner.

    Now imagine this happening for the full semester. That is what happens to your body. A good example is low-back pain when you do your first long classic ski. Those muscles are working extra hard to keep your pelvis balanced and in position; that is also your abdominals’ job. If they are just along for the ride, guess what happens? Add tight hamstrings or hip flexors and it just accelerates the process.

    For years we did stretches, back extensions and sit-ups and usually it didn’t fix much. Why? It never really addressed the root problem of mobility and stability imbalances.

    The body’s musculoskeletal system (kinetic chain) mobility and stability are an interdependent foundation of all other aspects of fitness; one balances the other like a seesaw. When not fully developed (and this is the case in many elite athletes), we see injuries, technique deficits and minimal gains from higher-level fitness elements like strength, power, and speed. Physical therapist and author Gray Cook talks of mobility as the freedom of movement of multiple muscles and joints, then stability as “the ability to control force.”

    As a coach, I’d be frustrated when given skier couldn’t grasp a certain aspect of technique, be it body lean angle (see accompanying photo) in skiing or lifting the knees when sprinting. But the athlete’s body won’t let them move that way due to mobility, stability or asymmetrical deficits.

    For example, a restriction in ankle mobility will limit the amount of lean angle in running and skiing. Tight hip flexors/hamstrings or a weak core will limit the amount of pelvic rotation one can have or maintain (i.e. the butt pushing back).

    Many of us have also coached athletes who are strong, but after many hours of work they did not develop to expectation. This, too, is a symptom of a mobility/stability deficit, as any higher-level development will not be optimized with an unstable foundation.

    A simple system exists to evaluate and address this: the Functional Movement Screen. Many of us have heard of Cook’s book Athletic Body in Balance, a hidden gem in its implications for developing athletes by addressing these kinetic-chain imbalances. Once we diagnose and fix kinetic-chain deficits, like core instability, where an athlete has difficulty balancing on one leg, or stabilizing upper and lower body, we can progress athletes much faster.

    From the time we are born, our body’s musculoskeletal and nervous systems start compensating and adapting to environmental stresses, such as repetitive movement, bad posture from sitting at a computer for hours a day, or injuring an ankle so we lose ankle mobility. The body mostly adapts in a positive manner, however as we mature our bodies are exposed to a host of repetitive stresses (and sometimes traumas) that can cumulatively cause restrictions/imbalances in our body’s movement, stability, and strength. This will cause inefficiencies in movement and power application.

    With movement restrictions, no matter how hard we try, we cannot achieve an efficient body position. This compensated body position will not allow us to ski efficiently. This can be very frustrating to beginning and advanced skiers alike, and very perplexing to a coach. Why can’t this skier push his or her hips forward to get in a good body position? Why are they hunched or struggling with balance?

    Coaches have skiers stretch, strengthen and do planks for minutes on end, yet problems persist. In order to more effectively address this, we need to think about, evaluate and train the musculoskeletal system as an interrelated system.

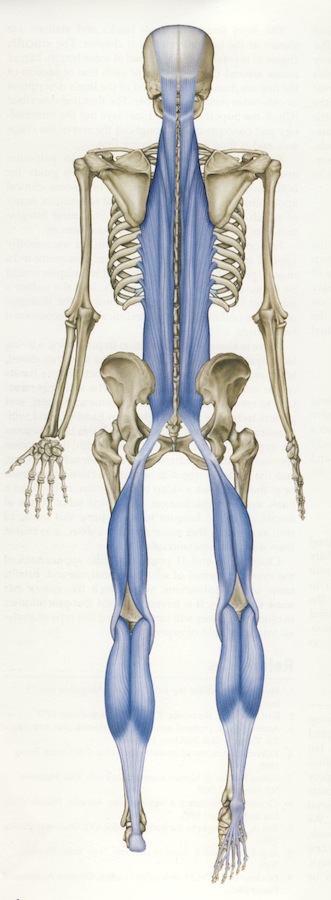
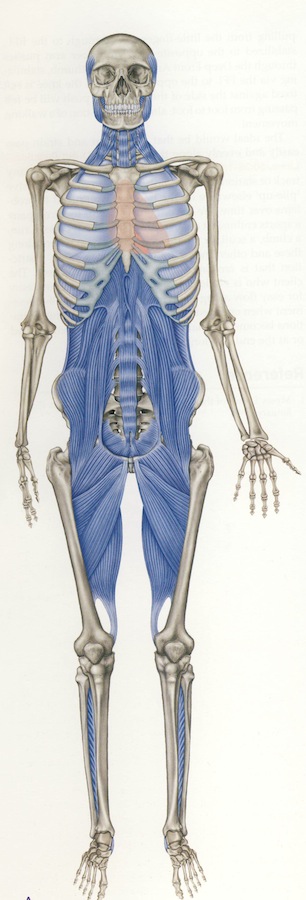
    In the following model, refined by Cook and Thomas Myers, the muscles are thought of as a series of myofascial slings (a network of muscles) that extend the full length of the body. Hence what aches you have in your back can be driven by tightness in your foot or shoulder, as they are connected through the same muscular networks, or myofascial slings.

    Superficial back line (Credit: Thomas W. Meyers/Anatomy Trains)
    Superficial back line (Credit: Thomas W. Myers/Anatomy Trains)
    Deep front line (Credit: Thomas W. Meyers/Anatomy Trains)
    Deep front line (Credit: Thomas W. Myers/Anatomy Trains)

    Your skeletal system works in tandem with this system. Its stacked joints alternate their roles between stability and mobility.

    Michael Boyle explains this in depth in his article “The Joint-by-Joint Approach to Training.” The ankle is a mobile joint, knee a stable joint, hip is mobile, lumbar (lower) spine is stable, and Thoracic (middle) spine is mobile.

    What usually happens if you lose ankle mobility due to multiple injuries or tight muscles? Movement has to happen somewhere so it gets transferred to an adjacent joint, usually the knee, which is meant to be a stable joint. The knee isn’t designed to be mobile so it gets sore or even much worse, injured (such as tearing an ACL, IT band, etc.).

    Trying to fix a single problem, for example hip tightness or knee pain, will not be as effective as addressing the whole system. One muscle group does not work in isolation, nor should we train it in such a manner. In order to achieve proper body position when skiing, we first need to address movement restrictions to allow it to move freely and efficiently. Cook has taken this concept to a user-friendly level and developed a system of evaluation and corrective exercises.

    For example, think about how many hours per day students and adults are seated. This seemingly benign activity will cause a variety of mobility and altered muscle firing pattern dysfunctions, such as tightened hip flexors and altered glute/hamstring functioning (glute amnesia).

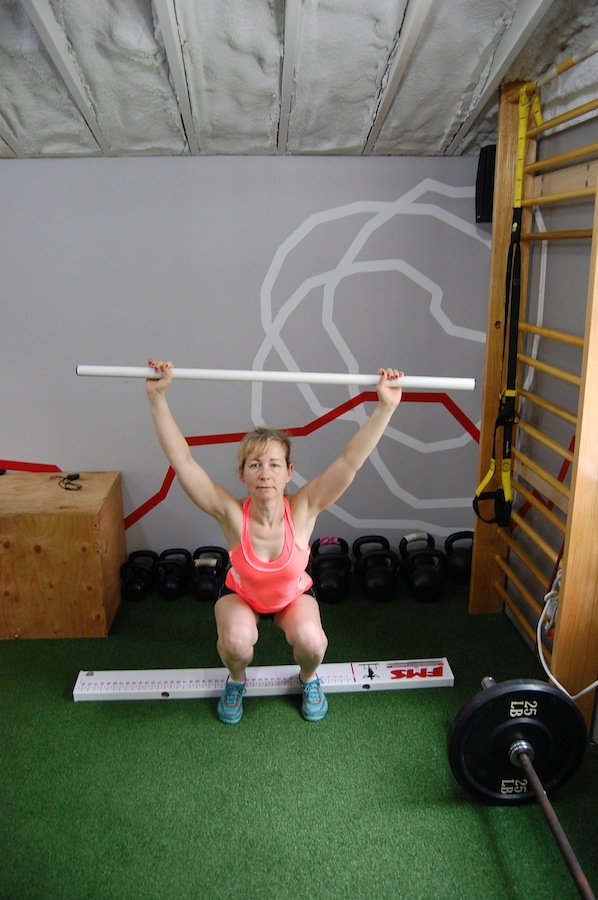
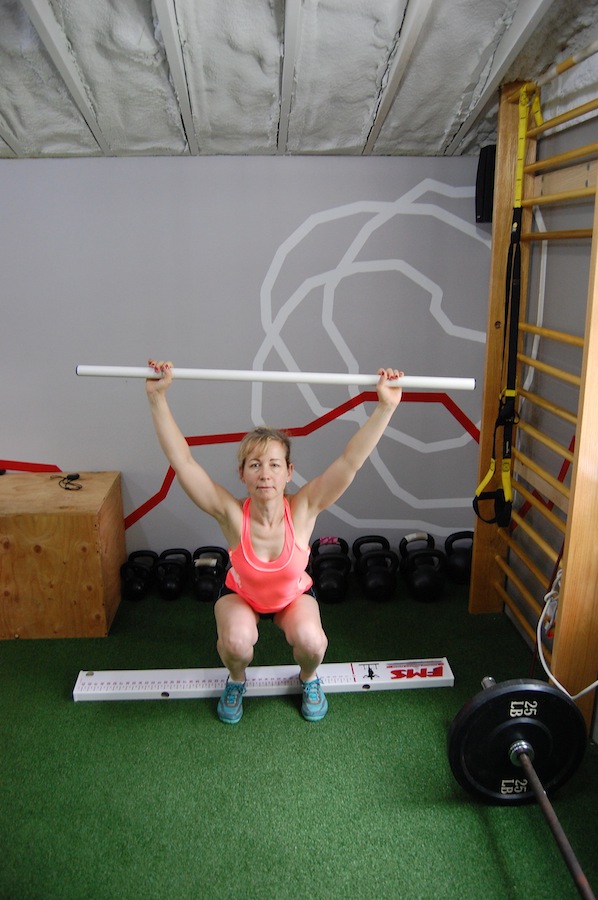
    One of the seven FMS screens, the overhead squat evaluates total body mobility and stability patterns.
    One of the seven FMS screens, the overhead squat evaluates total body mobility and stability patterns.

    How does this affect a skier? From running studies we know that for each degree of anterior hip rotation we gain 2 ½ centimeters of stride length. It is common with tight hip flexors to have a 5- to 10-degree deficit; think about the impact an improvement of this could have on one’s overall race pace.

    In addition, if the glutes are turned off, the hamstrings are putting energy doing their neighbor’s job (and producing less power for locomotion), plus the knee is less stable and someone is going to be unhappy (i.e. knee or back pain, hamstring pulls).

    As skiers, we strive for movement efficiency and optimal power production. To achieve this we need to evaluate skier’s mobility, stability and optimal muscle function. This is best achieved through an advanced Functional Movement Screen (FMS) or a very well done kinetic-chain physical therapy evaluation.

    The basic FMS is excellent for picking up on major deficiencies, but well trained athletes have learned how to “cheat” very well. They need additional sub-tests to determine deficiencies, but this process has gained much-needed recognition and is used with many elite sports teams. The best option is to find a sports trainer or physical therapist who has a FMSII certification.

    The athlete’s early season is an ideal time to have an evaluation done, this way corrective exercises can be applied in the preparatory phase of training and full movement restored prior to big summer volume phases.

    So get all those muscles working together for better performance. Your body will thank you for it in the first races in the fall and winter!