From the FasterSkier archive — posts syndicated from athletes’ and coaches’ own blogs between 2004 and 2012, kept online as published. Current coverage is at fasterskier.com.

Tag: masters training

  • How to Go Easy (and Why): An Introduction to the Polarized Training Model

    How to Go Easy (and Why): An Introduction to the Polarized Training Model

    French skiers Delphine Claudel and Lena Quintin stop to refuel during a training camp on the Glacier de la Grande Motte near Tignes, FRA. (Photo: NordicFocus)

    I grew up playing soccer. Every practice was hard. “No pain, no gain,” and all of that. By tenth grade, I was burned out and quit. 

    I started rock climbing. Every day at the crag was about pushing your limits. This was before indoor gyms or any concept of training other than doing as many pull ups as possible. I plateaued, got frustrated, and quit. 

    Then I had a go at running. I read some books, but skipped the training methodology parts and cherry picked the workouts. Every run was hard. Every interval was done to exhaustion. I plateaued, got frustrated, and quit. 

    Then I got into cycling. I began to hear of “easy” rides. I knew pros who rode around for four or five hours at such a pedestrian pace that they were talking the whole time. ‘How insanely boring!’ I thought. ‘Where’s the fun in that?’ So I went hard every time because it’s more fun. And guess what? I plateaued, got frustrated, and quit.

    Fortunately, I didn’t learn my lessons the really hard way – through injury – but I still learned them the really stupid way –  by throwing away any potential I might have had. 

    You can’t go hard all of the time. It’s as simple as that (at least on paper).
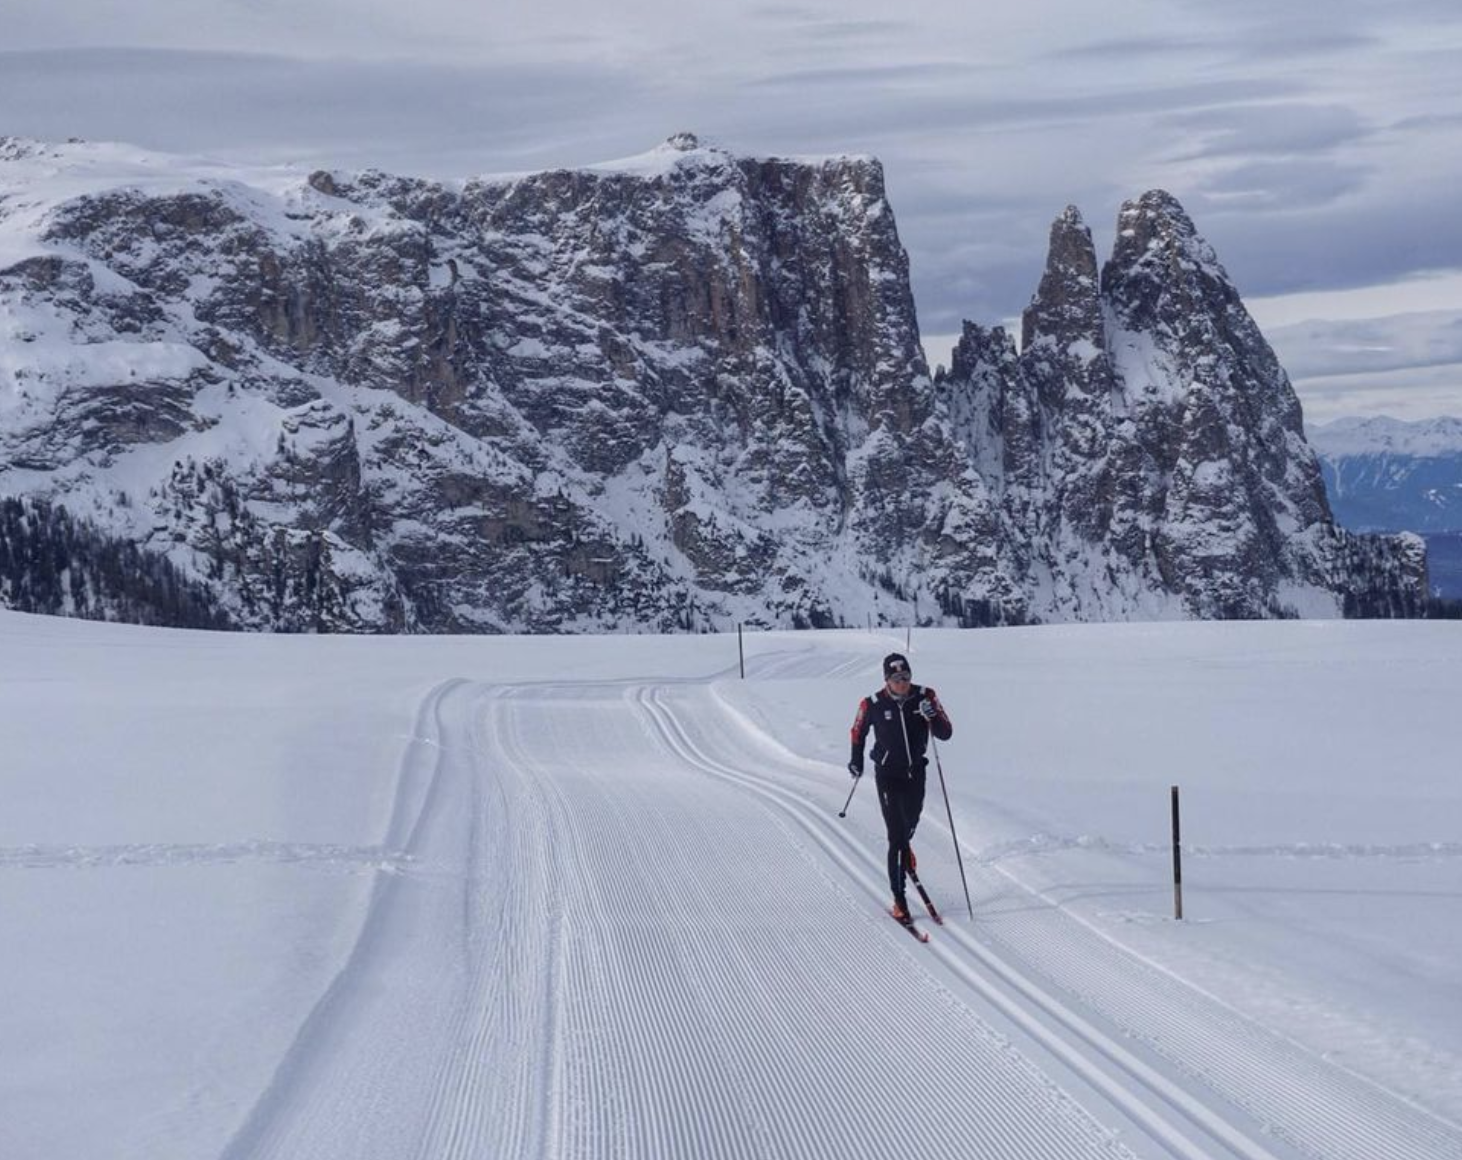
    Scott Patterson enjoying a training day in Seiser Alm, ITA in January 2021. (Photo: Caitlin Patterson / Instagram @scottgpatterson)

    The Basics of Polarized Training

    Make your easy days easy and your hard days hard. 


    That is the backbone of a Polarized Training model. I had no problem making my hard days hard–they were all hard days after all. Full gas. Gun to tape. But in hindsight, I realize how depleted and chronically fatigued I was. I thought that was the desired effect, but it meant my training became less and less productive. 

    It’s the easy days that are actually the hard part.

    First: I hear your inner dialogue. “Who wants to go easy? It’s unproductive. It’s a waste of precious time. It looks lame on Strava.” But the science says everyone should want to go easy. Metabolic efficiency is the name of the game.

    If hard workouts train the engine to create more horsepower, then the easy sessions improve the gas mileage. 

    Secondly: let’s define easy. Training intensity is commonly split into five zones. (Some systems use three and others use seven, but I’ll be referring to a five zone system.) Zones 1, and especially 2, define the ranges of easy. Heart rate is the typical metric, especially for cross country skiers and runners, while cyclists typically use power. 
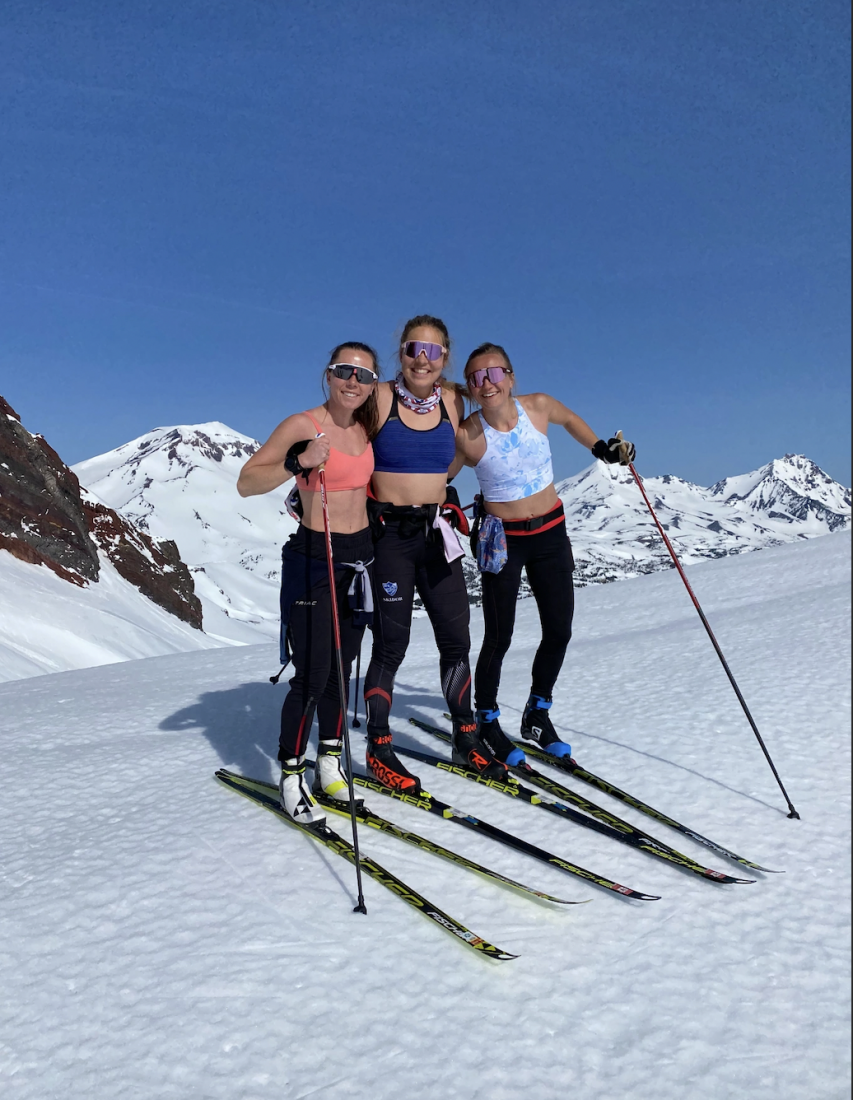
    SMS T2 athletes Lauren Jortberg, Lina Sutro, and Alayna Sonnesyn find bluebird conditions for a crust ski up Broken Top near Bend, OR in May. (Photo: SMS T2 Blog)

    Identifying Your Easy Zones

    The theoretically simple method for establishing heart rate zones is to work backwards from your maximum heart rate where each zone represents a percentage of the max. The challenge is that there’s very little agreement on how to best calculate one’s max heart rate without actually experiencing it. 

    A more accurate method is to undergo a lactate threshold test, where heart rate zones are calculated based on the amount of lactate measured in the bloodstream. More accurate, but more difficult to conduct, and not universally accessible.

    So how can we determine what is easy and what is too hard? 

    In an effort to keep easy easy, I’m going to define it as conversational pace. You should be able to talk in complete sentences without having to… pause… to take in… more air… to finish your sentence. This is mediocre science and not especially objective, but with some practice, it’s not difficult to find that upper limit of talkability. 

    If you’re a numbers person, you can likely conduct your own ramp test where – after a warm up period – you progressively increase speed/effort while reciting poetry or singing along to what’s in your AirPods. Mark the heart rate where you lose the rhythm, and that’s a decent estimate of your upper limit for Zone 2.

    Your new goal on easy days will be to keep your heart rate below this threshold, not necessarily at this level. For those accustomed to pushing the pace on every session, slowing down enough to keep your heart rate in the appropriate zones might feel like a big adjustment. There’s no real way around it – you’ll need to buy in, and trust the process/science. Maybe use it as an excuse to get out with a training buddy who is generally slower than you and give the whole “pedestrian pace, talking the whole time” thing a go.

    Worst comes to worst, you give it an honest try and decide you prefer to just go hammer, then go back to your old ways. That’s the beauty of being a recreational athlete – at the end of the day, we’re just pursuing hobbies we find rewarding and enjoyable. 

    * A note for Strava users: don’t rely too much on the Relative Effort number. As a metric of intensity over time, it seems optimized to capture long, hard efforts like an hour-long tempo run where your heart rate stays high for the entire hour. It doesn’t handle intervals very well since the rest periods sort of cancel out the high intensity efforts. 

    For example, Strava gave 60 points to a 55 minute tempo run with an average heart rate of 158; however, an 57 minute interval session (9x600m on the track) with an average heart rate of 147 only got 35 points. To me, both sessions were equally hard, but the tempo run scored 25 points higher. 

    Strava does allow you to use your perceived exertion in place of heart rate for calculating Relative Effort. When I enabled this override, the tempo run scored an 87 while the track workout got a 147. (My easy efforts aren’t affected much.) Personally, I’ve found the Relative Effort score, along with the weekly log and Fitness and Freshness, far more useful (and accurate?) with this tweak. Here’s a deeper dive into that black hole.
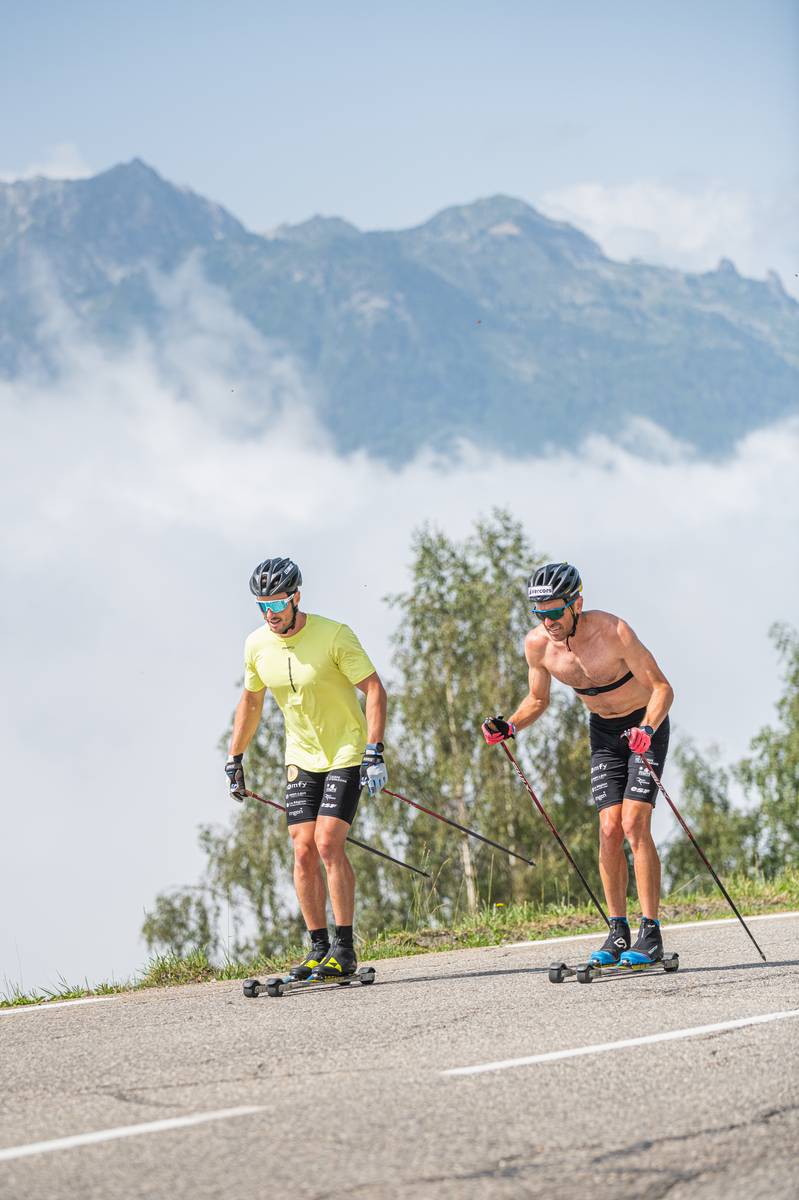
    French athletes Lucas Chanavat (left) and Maurice Magnificat (right) out for a rollerski during a training camp in Tignes. (Photo: NordicFocus)

    The Purpose of Polarized Training

    Now we can talk about why the easy is important. 

    Stress + rest = growth/adaptation/strength/speed. That is the basic formula. Our bodies are designed to adapt to load, but we have to give ourselves the opportunity to make those adaptations. Too much volume or intensity and the body will stop absorbing. Not enough recovery and the body will stop adapting. Best case, your performance plateaus. Worst case, you get injured. 

    The Krebs Cycle. The stuff of High School nightmares. But the essence of the endurance athlete. The Krebs Cycle is the pathway by which our bodies put gas in the tank. It is the process by which our mitochondria – magical little intracellular thingies – convert carbohydrates, fats, and proteins into the specific energy required by muscles to contract. In oversimplified terms, the more efficient the mitochondria are, the faster and longer we can go. And it appears that the best way to train mitochondrial efficiency is with training in Zone 2. (If you want to seriously nerd out, this podcast with Dr Iñigo San Millán, perhaps the Father of Zone 2,  is a deep dive in a submarine to depths of the ocean.)

    The easy/Zone 2 is considered so important that it typically makes up 70-80% of elite athletes’ training volume. The other 20-30% is hard (high Zone 3, Zone 4, and rarely into Zone 5). For the athlete who doesn’t have all day, every day to train, that means you only get a couple of hard sessions per week. Keep the rest easy.

    Some that’s hard, lots that’s easy – that’s the essence of putting Polarized Training into practice.


    Example Training Plan Template

    Monday Easy short or Rest if needed
    Tuesday Hard long
    Wednesday Strength/core maintenance
    Thursday Hard short (intervals) 
    Friday Easy short or Rest if needed
    Saturday Easy long OR Hard long AND Sunday is Easy
    Sunday AM: Hard short (intervals) + PM strength/core maintenance


    My training template is based on my work schedule and typical life obligations. I’ve given myself a max of three hard sessions a week with one of them longer (2-3 hrs ride or mountain run–the fun stuff!) and the others around an hour of intervals. My strength/core maintenance sessions typically fall into the easy category and don’t require much recovery (no delayed onset muscle soreness). But my schedule is also very flexible. If I’m tired, I can move a hard session to another day or skip it that week. If I get too busy or stressed, then I can modify the program without too much frustration.

    I’m fortunate that I can train/play seven days a week, as long as I’m recovering adequately. However if your schedule only allows for training three days a week, you can still apply the basic formula and have one hard day and two easy days.

    Richard Jouve doublepoles up an incline during a team training camp in Tignes, FRA. (Photo: NordicFocus)

    For some of you, this may be common sense and describe how you’ve been training for years. For others, this is quite a departure from your norm and will take a concerted effort to implement. But whether your goal is optimal performance or staying healthy for years to come, investing in a polarized plan, and especially leaning into the Zone 2 work, will pay dividends.

    Lastly, I think any discussion about training principles/plans needs to have the overriding theme of ‘push yourself, but be kind to yourself’.

    Be flexible. Training plans aren’t written in stone. Don’t beat yourself up if work, family, weather, fatigue, or lack of motivation keeps you from your intended workout. Take a walk, play with the kids, lie down on the sofa—whatever it takes to reset and be ready for another day. One workout will not make or break, but constant self-criticism will sink the ship.

  • Personal Essay: An Uphill Battle by Tim Donahue

    Personal Essay: An Uphill Battle by Tim Donahue

    If you look at the lines that graph long-term athletic performance – VO2 max, anaerobic threshold, maximum heart rate, 10k running speed – it can be pretty demoralizing. Even before age 30, there’s a slow and steady cant downward, and then by the mid-40s, a descent into a valley that plunges toward the abyss’s void of emptiness.  

     Some of us choose to oppose these trendlines, wrestling with them like tentacles in a roiling sea of errands and bills and fraying cartilage and arthritis. During well more than one rollerski session each year, I think of the “strange resistance” Robert Frost describes in his poem “West Running Brook”:

    “It has this throwing backward on itself / So that the fall of most of it is always/ Raising a little, sending up a little.”

    This man, whose Vermont cabin touches the Rikert Nordic trail system, continues:

    “It is this backwards motion toward the source/ Against the stream, that most we see ourselves in,/ The tribute of the current to the source./ It is from this in nature we are from./ It is most us.”

    The tribute of the current to the source. It’s as though Frost (who, I’m guessing would be Birkie wave 8 – at best) was tasked to make an inspirational T-shirt that captures the mind of a masters skier. I am proud to be a member of this infinitesimal subset of American society, and if you still think skis with holes in the tips look new, I imagine you are too.  

    Tim Donahue mid-race during the 2020 Winter World Masters Games in Seefeld, AUT. (Photo: Garrott Kuzzy / Lumi Experiences)

     After too much running for my large frame and my knees, I began uphill skiing in earnest in my mid-30s, just as I knew these charts were generally tipping downwards. As I was effectively starting from scratch, though, I felt I had an advantage. I did not have to chase the ghost of my 22 year-old self, vaunted by a college program and a systematic knowledge of voluntary suffering. Skiing gave me a second athletic life, and as I opened its invitations to technique, training blocks, intensity sessions, and World Cup fandom, I delighted in every aspect of its complexity.  

     Nearly twenty years into it, the fires still burn, though sometimes it’s hard to tell whether I’ll coax any new flames or just ride along the glimmer of dying embers. Now into the swing of summer as we are, I find myself between an acronym – SAMITS (skiers are made in the summer) – and, a hammock. Can I throw another log onto this fire? Should I? It’s a question of little worldly consequence, and yet it’s the central question of this other world I’ve built for myself. 

     More than anything, the lure of skiing these days is that reliable doorway it opens into another place. I have sat through all-morning “self-care” sessions in hot rooms in masks, and then I have clicked into the Marwes and breathed. I have endured a full Guy Fieri cooking show in the doctor’s waiting room, then I’ve gently climbed through the woods with four points of contact. I just learned the world emitted more C02 than ever last year, and I needed to get out and roll among the innocent trees.   

    This otherworldliness has especially come as I’ve lived in, and now just north of, Manhattan all these years. I have approximately one teammate (the great Sproule Love) and I get on snow maybe a dozen days a season. But new wheels roll well on fresh pavement even here, and it’s easy to let the mind return to the familiar grooves. On the rail trail that runs mercifully just out my door and now nearly connects through the entire state of New York, I can lather into a third hour under a canopy of early spring leaves and let the Wendell Berry in: “The health of nature is the primary ground of hope – if we can find the humility and wisdom to accept nature as our teacher.” Yes, skiing can soften the hard edges of the world and give way to the dance of balance and strength. And yet, sometimes I need more than this.  

     Sometimes, I can rouse the fires within to see a completely different world beyond, with its own muses and images. Here’s where I hear the siren song of Devon Kershaw and his allusions of carnage: the “rip their legs off” and “gun to tape annihilate” and the “going down to the basement.” Racing is just instinctual for me. I ran my first 10k back in 1979, when I was nine, and whether up stairs, across bogs and sand dunes, on bikes, on skis or snowshoes, I’ve raced every year since. To this career high school English teacher, it’s the opposite of grading essays.  

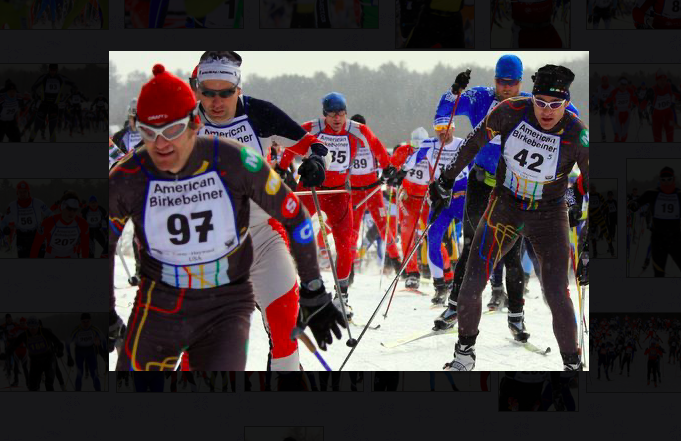
    The author, Tim Donahue, races the 2012 American Birkie with teammate Sproule Love (bib 97). (Photo: livestream screenshot)

     When I’m trying to connect with my limited stores power and speed, I’ll sometimes watch World Cup clips on YouTube. I see Petter Northug gritting his way through the field to take the 50k classic at the 2015 Falun World Championships; I see those last few k’s in the Beijing Olympic 30k when Jessie Diggins finishes on fumes for silver. (Yes, a proud moment in our household when my daughters encouraged me to name our puppy Diggins.) The one I’m thinking of now is the 2019 World Champs 30k skiathlon in Seefeld. It’s Sundy-Bolshunov-Røthe trying to destroy each other up the last few climbs, finding a hop skate after seventy-five minutes of redline racing, then spilling across the line with perfectly emptied tanks. Perhaps you have your own favorite clips.  

    As I try to summon a summer interval in the suburbs, after dropping my daughter a sleepover, I can get to thinking about my own highlight tape, which Chad Salmela is definitely not narrating. I think of the 2006 Pepsi Challenge, when at 48k, I gave a nod to my one teammate and we made a decisive surge, dusting the last young buck riding in our train. I think about Bitch Hill, a steep little climb 40k into the Birkie, when several years later, I found the spring to fracture our large, lollygagging pack. I find these memories within, gently flogging me with their flagella. In part because it’s so hard to explain them in my faculty lounge in the Bronx, in part because they are the payouts of so much stoic suffering, and mostly because I just love it, I want to make more.  

    This winter was different though. Mysteriously, I started feeling a constriction in my chest. I was often unable to get a full breath, even when reading in bed at night. When I tried to get out of zone three, I just couldn’t find the air. I saw my pulmonologist, my cardiologist, a gastroenterologist. I drew blood, I got tests. I got sucked down the Internet vortex: was it long Covid? Had I even had Covid? It took time and was expensive, and I didn’t learn much.  

    With each race I had penciled into the schedule and had to decline, I felt the nip of disappointment. I didn’t want to say good-bye yet. Could I salvage, at least, something?  

    One day in February after a good night’s sleep, I decided to enter a low-stakes challenge – the benchmark 10k rollerski time trial in Central Park. It wasn’t awful. In fact, it was an improvement from a few months prior. So, I succumbed to the beast and tried a few late-season races.  

    It’s not a great feeling to stand on the starting line with a doubting mindset – “What am I doing here?” “Don’t blow up.” But that’s how things went – I felt like I was wearing someone else’s clothes. It was hard, humbling, and really not that much fun. But my last race of the “season” (four races total) offered a glimmer of hope. It was just a 5k relay leg, in perfect conditions on a rather flat course. Still, I felt relatively strong. I was actually able to pass people up a hill. So that’s the memory I’m choosing to take away. 

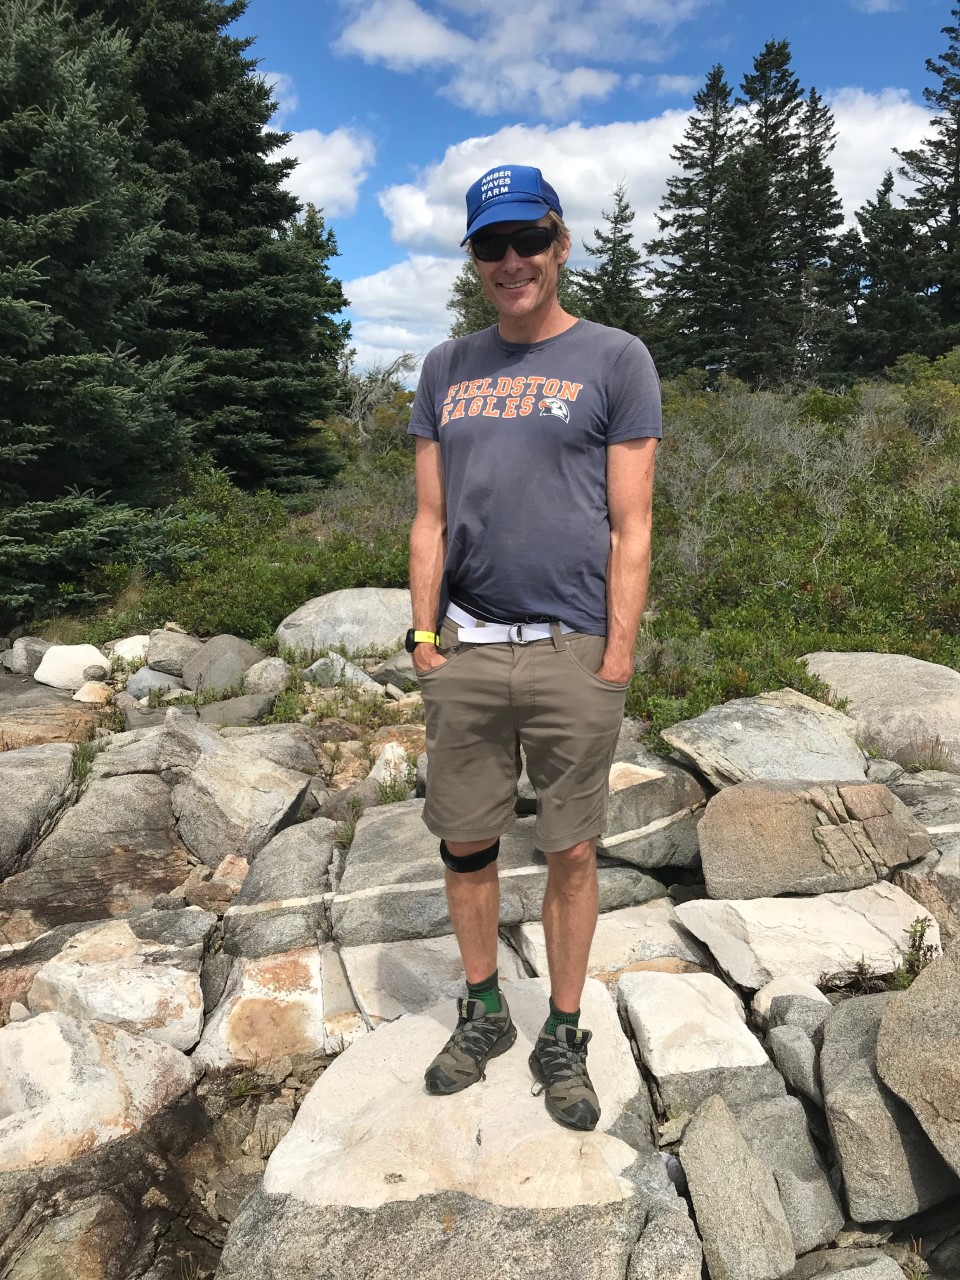
    Tim Donahue in Maine during the summer of 2020. (Photo: Sproule Love)

    But is it enough to justify all the rigamarole? That sixth hill interval when the pain just feels pointless? Those beautifully aimless workouts – where you go a little faster than you should – interrupted by the voice of prudence? The occasional margarita you eschew for some pious purpose? And then, when winter comes, all that fretting over Wunderground and waxes and websites, where you read about volunteers shoveling snow onto corners in dwindling hopes of staving off the coming thaw, toward which your travel no doubt contributes?  

     Ugh – yeah, it’s worth it! We skiers worship a rather demonic god, it seems. And its worth only grows because it’s so fleeting, like surfing through a barrel wave – exhilarating and bound to crash. Like trying to ski uphill forever. If you, reader, have not grappled with this same question, you probably will!  

    Here’s the best revelation I’ve come to: I just want to be able to work hard enough so that going out on a long ski feels easy. For a recent New York Times piece about the pleasure of running slowly, one of the most popular comments was, “Running for joy beats running to win anytime.” I’m not quite there yet, but I see the light of this too. For now, I want my strength to be more than my pain. I know my imagination can supply the rest.  

    Author Bio:

    Tim Donahue teaches high school English at the Ethical Culture Fieldston School in The Bronx. He lives in Hastings-on-Hudson, NY and rollerskis year round. You can find his writing on climate change and education in The New York Times, USA Today, and Newsweek.

  • Introducing a New Series: Ask the PT

    Introducing a New Series: Ask the PT

    When I began skiing halfway through high school, I remember my coach telling our team that cross-country skiing was a “lifelong sport”. Now, more than a decade and a half later, I don’t have to look far to see the truth in that statement. While out for a ski on local trails, I might see a 65 year old retiree who is training for the Korteloppet, a 50 year old former bike racer who has taken up skate skiing in the winter, a 75 year old skiing in jeans on fish scales, and a 17-year-old Junior Nationals hopeful. I might also see (or be) a parent towing their child(ren) in a chariot, a beginner working up the courage to “pizza” down a hill, or a former NCAA racer kicking and gliding effortlessly up the track. Each of us with unique starting points, individual differences in technique, and physiological strengths and weaknesses, the ski community encompasses a wide spectrum of athletes. 

    One of the authors favorite spots on her local trails at Spring Gulch near Carbondale, CO.

    The beauty of a low-impact sport is that it can be forgiving on the body, despite the cardiovascular toll it might require. At the same time – yes, it’s a low-impact sport, but “low-impact” does not mean cross-country skiing does not put a large strain on the body. It requires strength, balance, repetitive movement, and at times might involve an uncomfortable crash or two onto unforgiving hard packed snow. 

    Whether you have performance or fitness goals, are simply looking to improve technique and efficiency, or are looking for a path to return to a pain free ski experience following an injury, it’s likely that a question has run through your mind while out for a ski that you wish you had a physical therapist by your side to field.

    We’ve got your back. 

    FasterSkier is excited to introduce a new reader-driven series: “Ask the PT”. You ask, we answer.

    So who is the PT? 

    Already a familiar face on this site, Ned Dowling is a physical therapist based in Salt Lake City, UT. Most recently, Ned authored the “Building a Better Skier” series, focused on biomechanics, as well as articles on heart rate variability and an upcoming piece on SkiErg technique. 

    Though he had spent time on skis previously, Ned became hooked on cross-country skiing after moving to Salt Lake City a decade ago. With an extensive background in cycling, Ned worked as a physical therapist for a pro cycling team for several years, which gave him insights into the professional endurance sport world that have now transferred into his work with skiers. 

    After attending a U.S. Ski & Snowboard conference on ACL repair several years ago, Ned connected with some of the strength and conditioning coaches working at the Center for Excellence in Park City, and began learning more about the teams who trained there. These connections eventually led to a call in January 2020 asking him to travel to work with the U.S. Cross Country Team. 

    Ned Dowling out for a ski in Sjusjøen, Norway with Jessie Diggins and Matt Whitcomb. (Courtesy photo)

    In March 2020, as the pandemic loomed, Ned traveled to meet the team in Lillehammer, Norway, following Ski Tour 2020. (If, like us, you feel the last two years have been a blur, Ski Tour 2020 was a six-stage tour that began in mid-February in Östersund, Sweden and ended in Trondheim, Norway. The women’s Tour was won by Therese Johaug, with Pål Golberg taking the overall win for the men.)

    Ned has since continued his relationship with the U.S. Ski Team, and more recently assisted with athlete care during the team’s fall training camp in Park City, UT. Ned is also slated to join the team for the final two weekends of World Cup racing which are scheduled to take place in Falun, Sweden and Tyumen, Russia. 

    So how will this work? Shoot us your biomechanics and physical therapy-related questions to AskThePT@fasterskier.com. We’re aiming for a monthly article where Ned tackles a reader’s question, which hopefully benefits the broader nordic community as well. For other content related questions or comments, feel free to email info@fasterskier.com. 

    Stay tuned and happy trails! 

  • Quantifying Recovery: An Intro to Heart Rate Variability by Ned Dowling, PT

    Quantifying Recovery: An Intro to Heart Rate Variability by Ned Dowling, PT

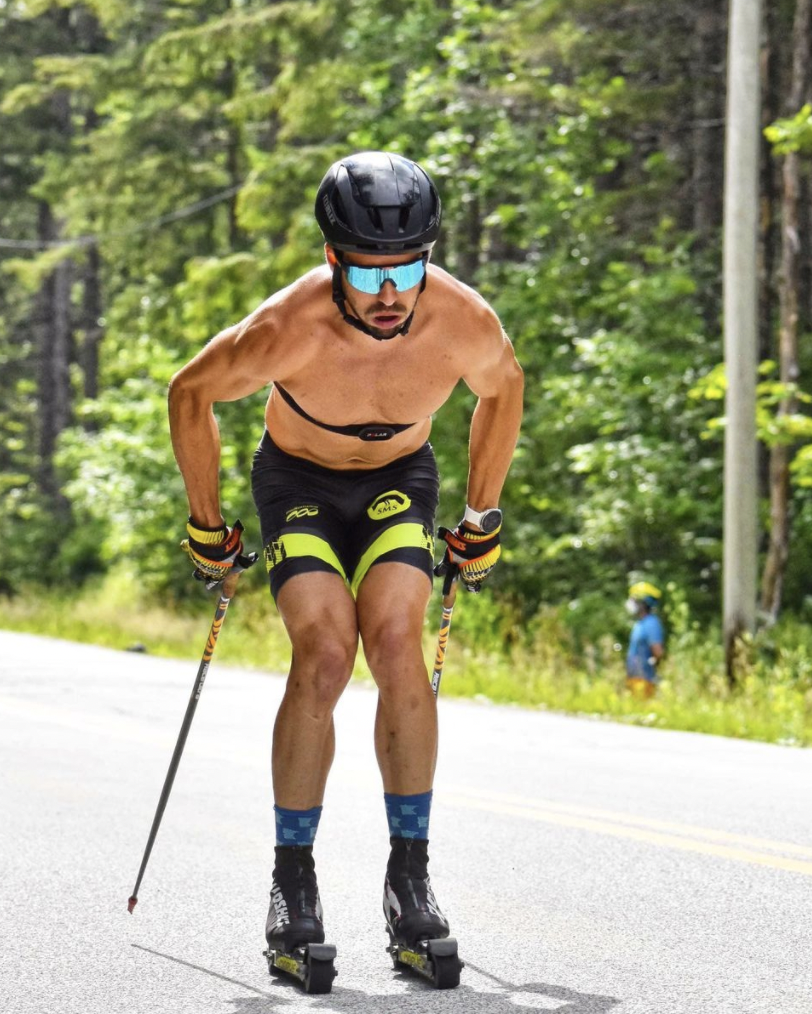
    Ian Torchia (SMS T2) pushes through a set of double pole intervals. (Photo: Tom Horrocks / Instagram @fullytorched)

    As endurance athletes, and especially as cross country skiers, we like to suffer. We enjoy a sport that takes place in the coldest months of the year and requires both strength and endurance to climb big hills and descend on skinny skis with no edges. We like to breathe hard. Most of us are in it for the suffering and the healthy dose of chemicals that our bodies release when the heart rate goes up and the muscles begin to burn. The runner’s high, an endorphin rush, pick your preferred phrasing. 

    Hopefully, we’re smart enough by now to know that we can’t go hard all of the time, at least not without consequences. The really smart among us are able to listen to their bodies and know intuitively when they can step on the gas and when they need to back off. But the rest of us could probably benefit from some type of external governor besides the voices in our heads egging us on, or constantly available Strava competition taunting from inside our pocket.

    If life was just eat, sleep, and train, the calculus of easy/hard or short/long might be pretty easy. But work, school, kids, relationships, global pandemics, and social media bring no shortage of life stressors. And, physiologically, these life stressors can load the body just the same as an interval session. Stress is stress, and stress takes a toll on the body. 

    So, your training plan might call for a hard session, but what if work was crazy, the kid kept you up all night, and you made the mistake of reading the news headlines this morning? Is your body in the right place to make the workout productive? (Or at least not detrimental?) How do you know?

    I think the honest answer is that we don’t always have an answer, but there are some metrics that can help us shape a well-informed guess. 

    Since Polar introduced the first functionally useful heart rate monitor in 1984 and Garmin gave us the GPS watch in 2006, wearable training technology has evolved considerably. Current wearables can track — and thus quantify — everything from steps to sleep to intensity. I don’t dare dive into that vast sea except to highlight and discuss what metrics might be the best at answering our question, “How hard should I push myself today?”

    But before we even get there, it’s worth having a quick refresher on some principles of training, exercise, and activity. Depending on your goals, Nordic skiing can be an activity that simply gets you out in nature, a tool to maintain fitness for other sports like cycling or running in the winter, or it can be a year-round focus with time on snow dichotomized into either training or racing. In any of these scenarios, the cumulative load on the body is a very important variable to manage. 

    Too much load and we stop having fun, plateau or lose fitness, and begin to risk injury. Too little load and we don’t progress, but I doubt that’s an issue with the majority of us. We must also remember that the basic recipe for improving strength and fitness is load + recovery = adaptation. Or as Brad Stulberg and Steve Magness phase it, stress + rest = growth.

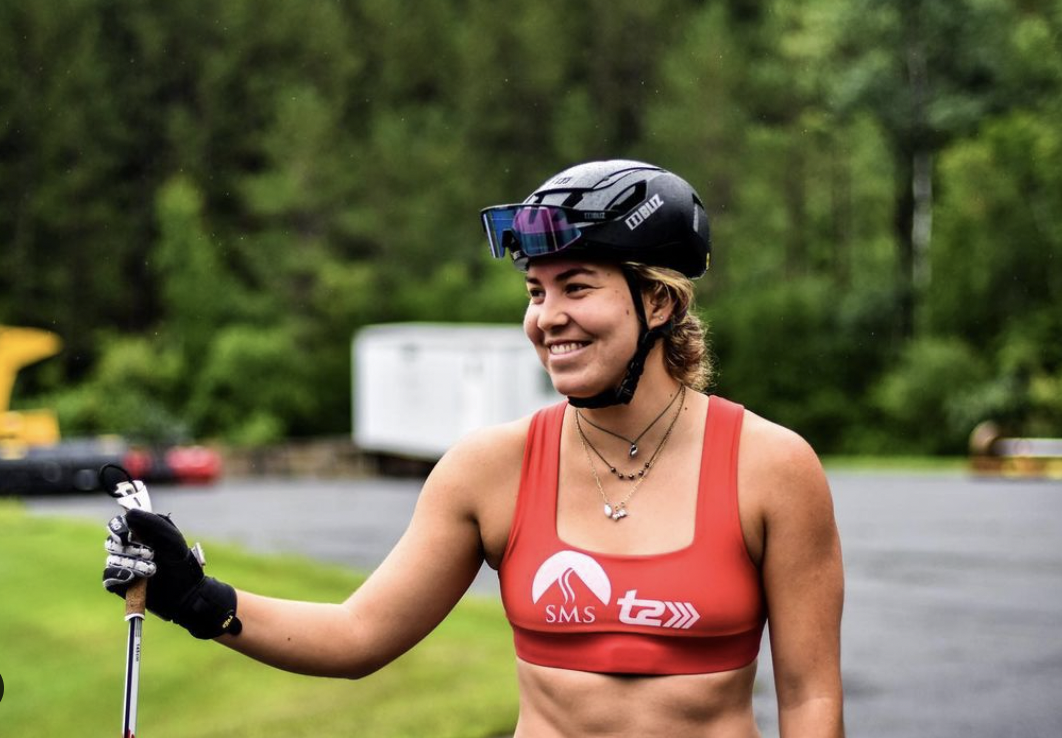
    Lina Sutro (SMS T2) models the female skier’s signature “heart rate monitor tucked under sports bra band” look while training in Vermont. (Photo: Julia Kern)

    Our bodies respond to load by making adaptations, but if we go too hard too often, and/or take too little rest and recovery, the equation becomes out of balance. We lose out on adaptation, and thus our capacity for improvement stalls out. 

    Strategies like polarization and periodization aim to apply the load/recovery equation to maximize the training adaptations and improvements. Briefly, polarized training is the division of activities into either “hard” or “easy” intensity in roughly a 20:80 ratio. There is no “moderate.” The premise being that moderate efforts are neither hard enough to stimulate adaptations nor easy enough to allow to develop aerobic pathways or for active recovery — putting in “junk miles”, as it’s often described. 

    In a periodized training program, polarization is taken a step further with hard and easy sessions layered together over longer cycles (think weeks and months). A periodized training plan builds progressively toward a goal race, followed by a period of time following the event that is focused on rest and unstructured training.

    During that macrocycle, the split of your weekly training might stay roughly at the 80/20 ratio, but every third or fourth week might be recovery-focused, with a lower volume than the previous weeks. This three to four week block might be called a microcycle. On average, the easy-to-hard ratio is the same, but the overall load of the week is lower, allowing the body to adapt and repair. (And you can catch up on your laundry.)

    These fundamental concepts should be incorporated in any good training strategy, whether it’s a week-by-week homemade plan or a comprehensive annual program from a coach. But, just because the plan is intended to provide a roadmap for loading and resting doesn’t mean we will always get the implementation right. 

    This is not the coach’s fault. It’s life’s fault. A training program is written to balance training load and frequently doesn’t account for the additional stressors of work, school, or family. Stress is stress, regardless of the source. We can’t achieve the intended balance in training if we are over-tired from traveling for work, have been chasing our kids around all day, or burned the midnight oil trying to get our work done when our kids’ school is shut down. Similarly, pushing too hard when we should be going easy leaves us over-cooked before an interval session, deeming it unproductive. But how do we gage the load our body’s have been under?

    (If you read the previous paragraphs and said, “This is stupid, I just want to ski” I don’t blame you. I don’t think everyone needs a rigid or even dichotomized workout schedule. However, if all of your exercise is at a hard intensity your risk of injury is increased so you might consider rethinking your strategy. If all of your exercise is at moderate intensity, then you’re just unlikely to get faster. For a lot of people, that’s not a priority, which is perfectly fine and you shouldn’t be judged or dissuaded. Go have fun!)

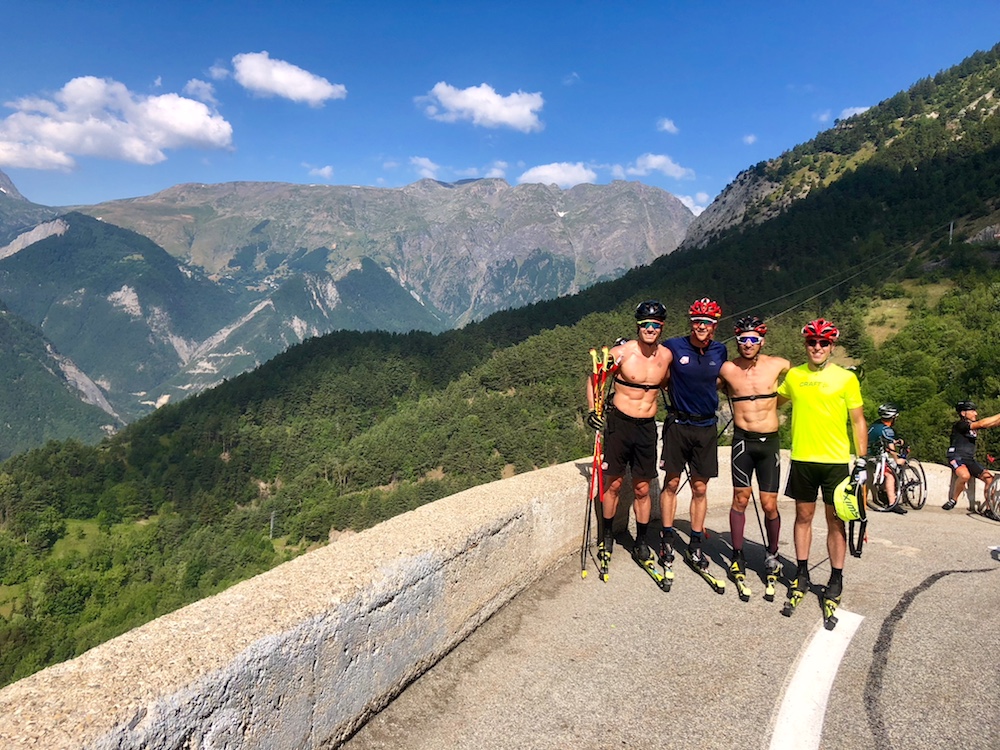
    From l to r: Simi Hamilton, Erik Bjornsen, Ian Torchia, and Paddy Caldwell of the U.S. men’s team during a 2018 rollerski up l’Alpe d’Huez in France. (Photo: Chris Grover)

    There’s an old proverb in bike racing about burning matches. Everyone on the starting line starts with the same number of matches. During the race, matches are burned quickly by riding at the front, attacking, covering attacks, and just riding above one’s threshold. At the end of the race it’s often not the strongest rider who wins but the one who burns the least matches (the 2021 men’s Paris-Roubaix is a perfect example). 

    We, too, start the day with a set number of matches that we’ll burn up with road rage, frustrations at work, frustrations at home, social media FOMO, and of course training. The number of matches we get each day is directly related to how rested and recovered we are heading into the day, both mentally and physically. Exactly how many matches are in the box goes back to recovery, and, once again, to our original question: “How hard should I push myself today?”

    If your matches are burnt up before you head out to train, the answer might be “Not very,” regardless of what the training plan says.

    One of the earlier attempts to answer this analogue question with a binary “hard or easy”, was resting heart rate. It’s a simple concept: Take your heart rate every morning for a few weeks and calculate an average. If your heart rate has increased by more than 5 beats per minute from the average, then your inventory of matches is not fully replenished. While this article won’t go deeply into the details, there is some research to indicate that resting heart rate doesn’t correlate that well with fatigue levels. This article from Marco Altini goes into significant detail on the topic. (If you follow that link, you’ll find that you’ve arrived on the last of a five part series on Heart Rate Variability. Dr Altini is one of the leading experts and innovators in the field, you may find his articles to be more robust than one you’re currently reading.)

    Relative Effort, TSS, EPOC, PTE, CTL, ATL, are all metrics generated by modern wearables to quantify training load and, therefore, stress on the body. These numbers are based largely on heart rate and duration: the higher your heart rate and the longer you keep it there, the more points you score. This is certainly useful information, especially with regards to periodization and keeping track of hard vs easy training sessions; however, it only gives you one number in the load + recovery = adaptation equation. 

    Gus Schumacher and Kevin Bolger, heart rate straps on and up, bump fists after a training session in Soldier Hollow. (Photo: Simi Hamilton / Instagram @gus.schumacher)

    We still haven’t answered the question, “How hard should I push myself today?”The same device or app that gave you a training load score will likely give a number for recovery status or a time needed to recover; this evaluation is typically still based on average heart rate during training and the overall duration of the previous session(s). It does not take into account the other life stressors. Enter Heart Rate Variability (HRV).

    In a nutshell, HRV is a measurement of the time between heart beats rather than the number of beats itself. More specifically, HRV looks at the inconsistency of timing between heart muscle contractions. 

    Heart rate is governed by the autonomic nervous system, or the division of the nervous system that is responsible for body functions that happen automatically. This is the same part of the nervous system that controls things like temperature regulation (sweating and shivering) and digestion — bodily functions that we don’t have to consciously think about to make happen. 

    The autonomic nervous system is influenced by the sympathetic nervous system — the “fight or flight” mode that upregulates the body to prepare for battle (heart rate increases, armpits get sweaty, digestion gets turned off, etc.), and by the parasympathetic nervous system, which calms the body down. Our bodies are programmed to seek homeostasis — that happy place where everything can function optimally. The sympathetic and parasympathetic systems work to maintain that balance. 

    HRV attempts to quantify that balance between the parasympathetic and sympathetic systems, and thus the measurement is a gauge of how the body is down-regulating versus up-regulating — homeostasis. 

    Somewhat counterintuitively, a higher HRV, which indicates more variability and less consistency in the time between heartbeats, is indicative of greater parasympathetic versus sympathetic influence on the autonomic nervous system. Looked at another way, the greater the stress on the body, the greater the influence of the sympathetic system, which decreases the variability in time between heartbeats and therefore equals lower HRV. 

    This infographic from Firstbeat Technologies, an industry leader in heart rate training science, modeling heart rate variability. (Photo: Firstbeat.com)

    These days, there are many options for recording and tracking HRV: Whoop is a 24/7 wristband with an LED sensor that measures a gazillion things, but specific to HRV, the measurement is taken every night during sleep. The Oura Ring, which is used by some members of the U.S. Cross Country Ski Team, also contains an LED sensor and records automatically during sleep. HRV4Training has an app that turns the camera and flash of your smartphone into a recording device much like a pulse oximeter. EliteHRV uses a device that goes on your finger very much like a pulse oximeter. Firstbeat, who use a proprietary ECG style sensor, were one of the first commercially available HRV trackers on the market (as mentioned in a Nordic Nation podcast with Jim Galanes and in this old article from Zach Caldwell, which also discusses HRV in all the detail you’d expect from Zach).
    With all platforms, consistency in recording is key so you can recognize patterns over time. The devices that record automatically during sleep (Whoop, Oura, and Firstbeat) have the advantage in being the no-brainers as long as you’re wearing the gizmo, but they have the disadvantage of being the most expensive. Both HRV4Training and EliteHRV require you to take the recording daily at a consistent time and in a consistent way. Ideally this is first thing in the morning (I go to the bathroom first then immediately sit down and record). I’m a creature of habit and since building this into my morning routine, I’ve not had much trouble incorporating the one minute it takes to record a daily HRV measurement. If consistency is going to be a challenge, invest in one of the automated devices.

    This brings us to the utility of HRV: tracking the body’s response to stress over time. The emphasis here is over time. HRV can help answer our question, “How hard should I push myself today?”, but it’s not exactly a stoplight. Waking up to a low score doesn’t necessarily mean you should go easy if you still feel good, but waking up to a seven day average with a negative trend means you should probably skip the hard workouts until your HRV stabilizes. For example, both this paper and this paper found benefits to using HRV to modify training vs strictly following a periodized schedule.

    From what we know about the metric so far, the primary goal is to keep HRV stable. If your training plan is appropriately balanced, you’re keeping life stressors in check, and your body is responding favorably, then HRV will remain fairly uniform, even after a hard workout. (A low HRV score after a hard session is definitely not a goal or badge of honor.) But if your HRV becomes unstable, especially a downward trend over at least a few days, that is when it really has the potential to catch an issue while it’s small, whether that’s due to training load, illness, or life stressors. Anecdotally, I’ve heard of notable dips in HRV with people just prior to illness (especially COVID) and after the vaccine. These are situations where maybe you’ve not yet become symptomatic — your body hasn’t started yelling at you — but it is already enduring stress, and the additional load from hard training is not going to be welcomed.

    Ultimately, HRV is just another tool in the box. It’s not necessarily there to change what you do on any given day, at least not without subjective input on sleep quality, soreness, emotional state, and how much you drank last night. It’s best viewed as a safety device like anti-lock brakes on your car: if you’re always looking down the road and anticipating what’s to come, you might never need them. But sometimes, when we’re training hard and emotionally invested in our goals, it’s like driving through a snowstorm to make it home for Christmas. It can be easy to focus on the objective outcome and wanting to get there as quickly as possible, rather than slowing down and proactively adapting to the road conditions. Chances are, you’ll make it to your destination unscathed, but in the event that a deer runs across the road or you hit a patch of black ice coming into an intersection, the antilock brakes might help you stop and reset rather than crash.

    As Jason Cork, World Cup Coach for the US XC Ski Team, put it, “I think it has some utility as long as you’re honestly also taking into account how you feel, how long you slept, energy, etc. I guess an analogy is if your HR at L3 is usually 180, and you’re super tired, it might be incredibly easy to hit 180 at an L1 velocity or incredibly difficult [to hit all-out velocity because HR is suppressed]. But the question really should be, ‘If you’re tired, why are you doing intensity?’”

    Author’s disclaimer: I have no affiliation with any company that tracks HRV. I personally use the HRV4Training app, a Suunto watch, a Wahoo chest strap, and Strava, all of which I have paid for without discount.


  • Adding Power to the Push Off: Understanding the Rate of Force Development

    Adding Power to the Push Off: Understanding the Rate of Force Development

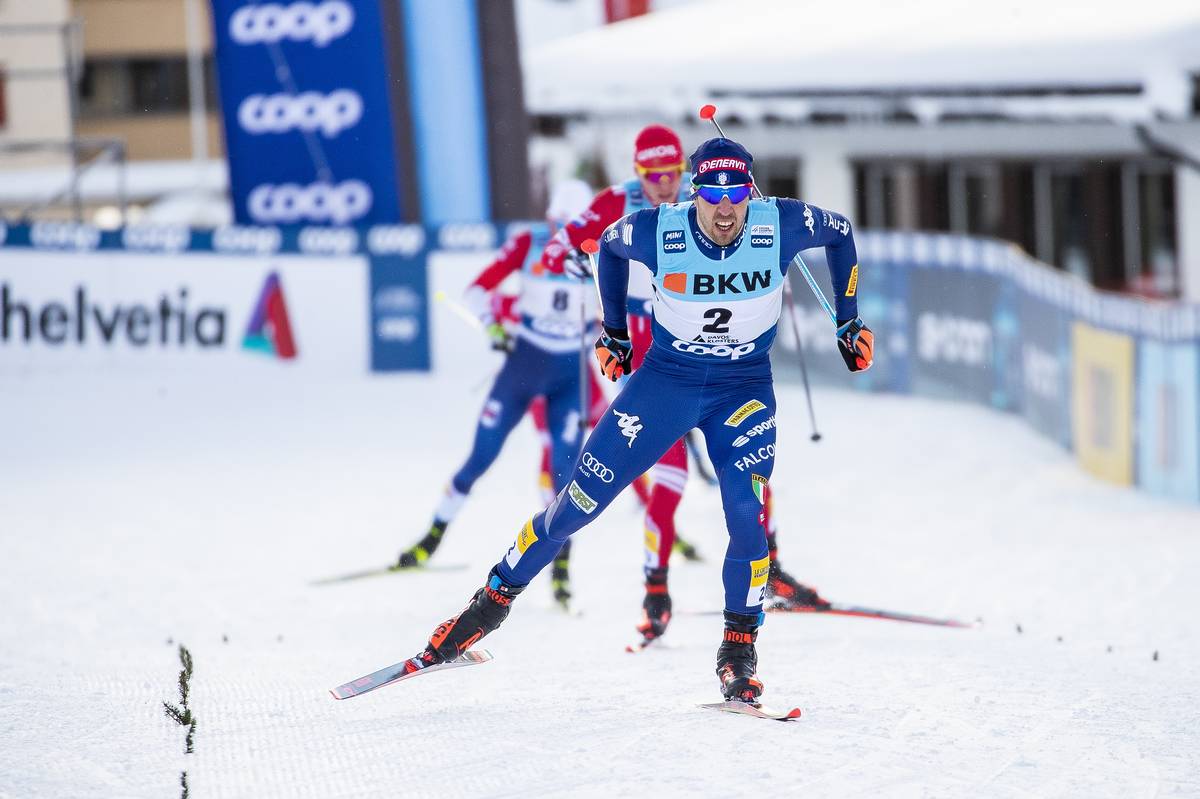
    Italy’s Federico Pellegrino closing out the win at the 2020 Davos freestyle sprint. (Photo: NordicFocus)

    This article builds upon the four-part “Building a Better Skier” series, which explores how biomechanics and movement patterns affect skiing technique, and more importantly how you can apply these concepts to improve your skiing. Please feel free to email the author with any questions: ned.dowling@hsc.utah.edu.

    Recently, I overheard one of my Physical Therapy colleagues tell a patient, “We’ve got to get you jumping. If you want to get back to running, you’ll need to do some jumping first. Running is nothing but jumping from one leg to the other.” Running is a bit more complex than that, but she made a good point. 

    I’d think it obvious to most that jumping is a faster, more explosive movement than simply taking a step. The same goes for running versus walking. Time spent with one foot on the ground in running is about 0.215 seconds while walking is closer to 0.6 seconds. In the context of cross country skiing, the propulsive phase during skate V2 is around 0.310 seconds and 0.230 seconds with diagonal stride. While these numbers are variable based on velocity, it should be easy to appreciate that the actions involved in running and Nordic skiing happen at a much faster rate than with walking. 

    But what does ‘happen at a faster rate’ mean? To answer this, I’m going to take a dive into some physics and biomechanics. First, we need a name for what exactly is happening faster. For the sake of this article, we’re going to go with force. This is perhaps more appropriate than power and maybe less accurate than impulse, but it certainly does the trick of conveying the message that an action has been initiated with the intent of creating motion, be it skiing, running, walking, jumping, etc. (If you want a deeper dive, I highly recommend Force: the Biomechanics of Training by Dan Cleather.)

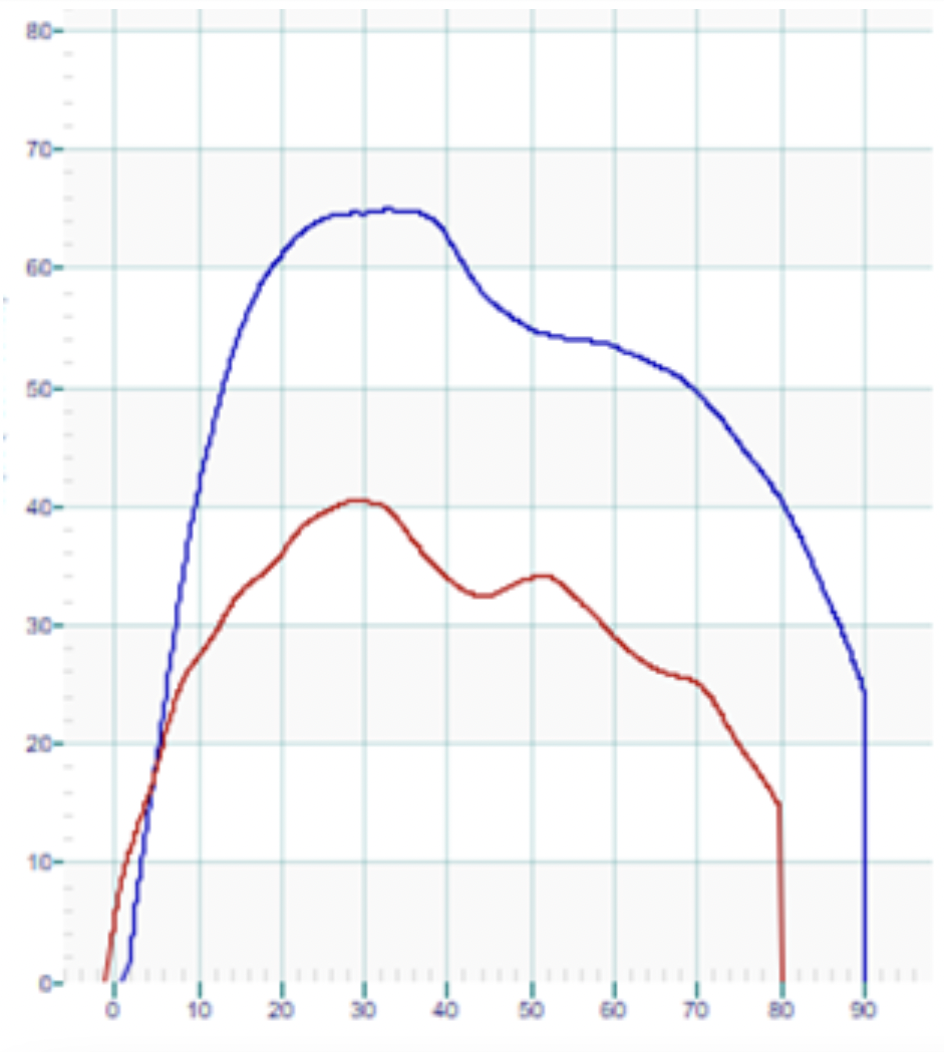
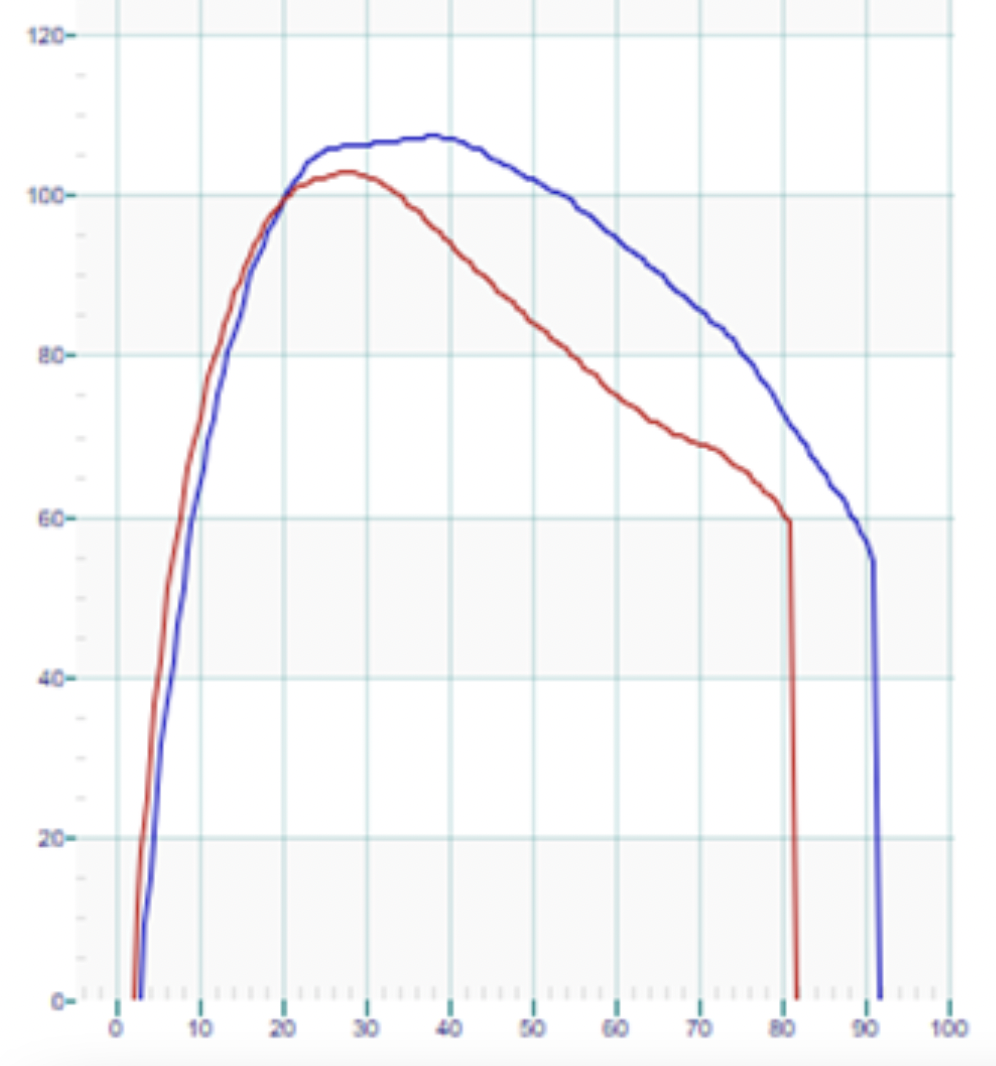
    To overcome gravity and the friction (or suction) of snow, force is required. Our velocity or speed is largely dependent on the magnitude of the force we generate. However, force is not simply an instantaneous measurement. We can talk about peak force or average force, but these miss the big picture. With skiing, whether we are talking about legs propelling skis or arms pushing on poles, force can be plotted on a graph where the Y-axis is the magnitude of force, the X-axis is the amount of time that force is applied, and the area under the resulting curve is the total quantity force applied to the ski or pole during one cycle.

    In this graph, the peak force (y-axis) is much greater for the blue line. The greater magnitude of force is also held for a longer period of time (x-axis). Thus, the area underneath the blue line is considerably greater than the area under the red line. All else being equal, the skier producing the blue line will be faster.

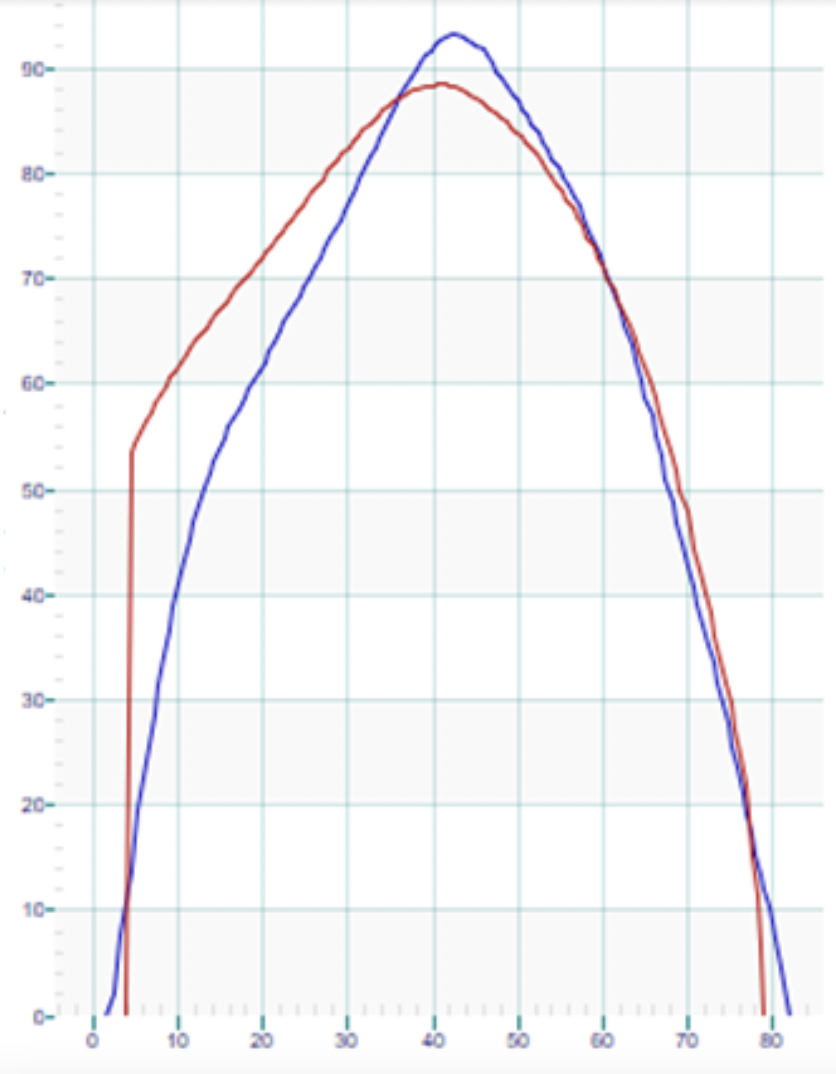
    Here we see similar peak forces (y-axis), but the red line doesn’t maintain its force and drops off more rapidly (x-axis). The area under the blue line is larger as a result.

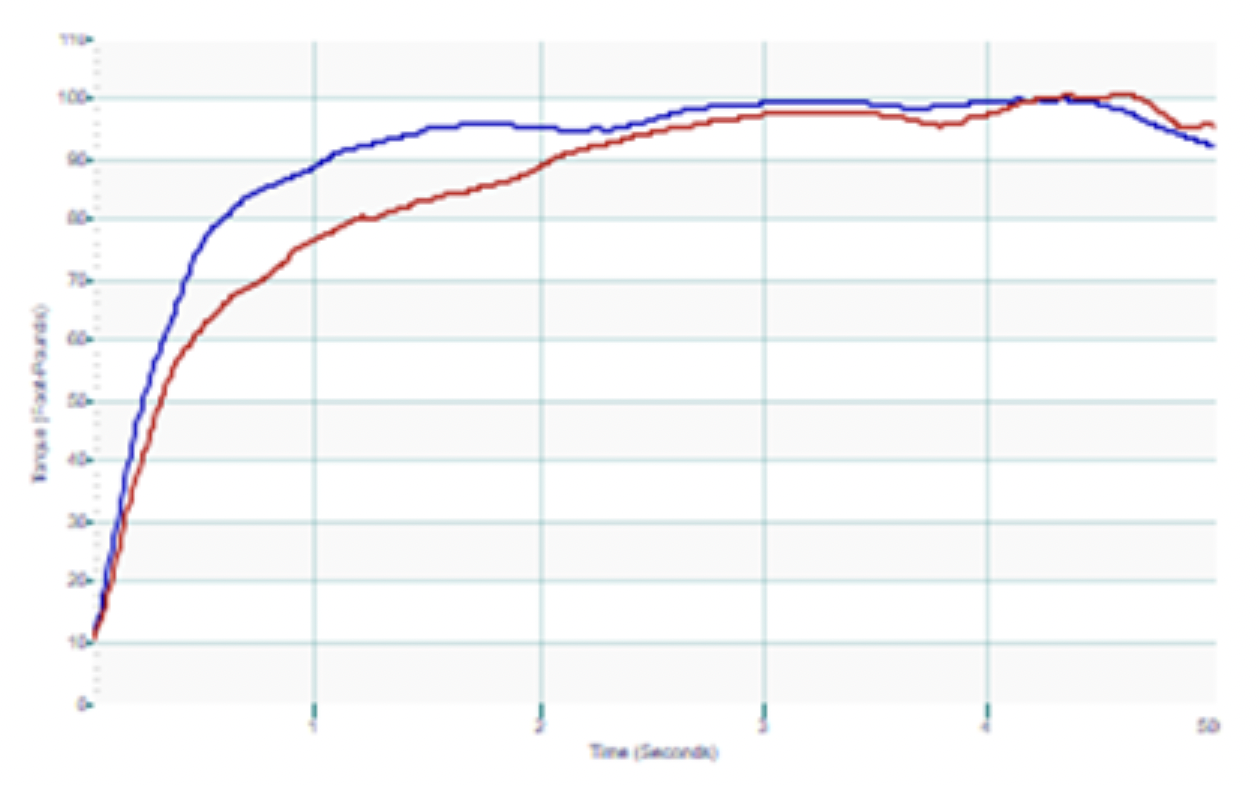
    In this graph, the red and blue lines have very similar peak forces (y-axis) and duration (x-axis). However, there is a major difference in how they get there. The red line reaches its peak force faster. As a result, the area under the red line is larger than the blue. This is because, even though peak force and duration are the same, the red athlete’s peak force happened faster.

    Here’s another example of similar peak force, but the blue line has a much steeper curve and is reaching peak force more quickly.

    The slope of the line, “rise over run” if you remember way back to middle school, represents how quickly force is generated. This is called the rate of force development (RFD), and since it is the name of the article and we’ve spent so much time just getting to this point, it must be important.  

    I already pointed out that force development in powerful skiing happens quickly. In their article, General strength and kinetics: fundamental to sprinting faster in cross country skiing (also cited above), the authors set out to draw correlations between biomechanics, kinematics, and strength in elite skiers. Among their primary findings were: 1. “Analysis of kinetics and kinematics revealed that it was not exclusively the magnitude of applied forces during skiing, but the timing and proper instant of force application were major factors discriminating between faster and slower skiers.” And 2. “General strength and power per se seem not to be major determinants of performance in elite skiers, whereas coordination of these capacities within the different and complex skiing movements seems to be the discriminating factor.” 

    A primary takeaway is that RFD is related to maximum velocity. This sounds intuitive enough: a sprinter on the track is generating more force per stride over 100 meters than a distance runner racing the 5k. But they go on to conclude that as the skiers increased their speed, they decreased their stride time/duration of force (X-axis). How can speed be increasing if the duration of force is decreasing? Won’t the area of the graph get smaller? 

    Some of the speed increase is the result of higher peak forces, but it was also attributed to increased RFD. If we manipulate the graph such that peak force is achieved more quickly — meaning a steep spike at the onset of the force — we can afford to decrease the force more rapidly while still generating a larger area under the curve. 

    With regards to physical attributes, the authors discovered that maximum strength was not correlated with maximum skiing speed; however, jump height (aka RFD) was closely correlated. In the study, maximum strength was considered isometrically, meaning that the muscles were resiting a static load (think planks) versus a push or pull against a load. 

    It also should be noted that a quicker, but shorter, stride must be accompanied by a faster stride cycle or cadence in order to be effective. This will be well understood by anyone who rides a bike with a power meter: if you are trying to maintain 300w on a climb and shift into an easier gear, your cadence has to increase or the power will drop off. The change in gearing creates less max force through the pedals but is compensated by increasing the speed at which the crank is turned.

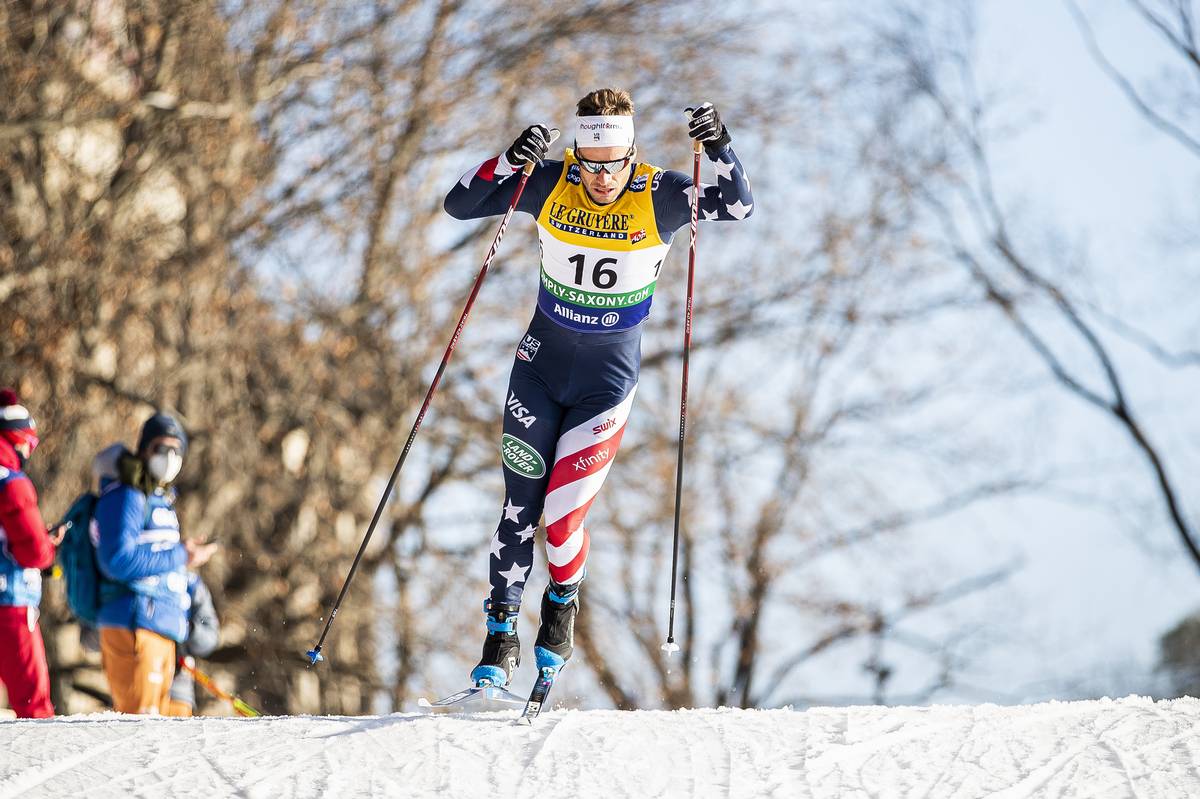
    Simi Hamilton pushes over the roller during a 2020 skate sprint in Dresden, Germany. (Photo: Nordic Focus)

    RFD sounds awesome. How do I get some?

    Simply put, you train it. In order to increase the speed at which muscles contract and generate force, we must increase the speed of muscle contractions in training. On the low-load end of the spectrum, this can mean simply speeding up standard strength exercises like squats, leg press, and lat pulls. 

    At the higher end of the spectrum are jumping and plyometric training. Plyometric training significantly improves vertical jump height, which was already noted to be correlated with increased skiing speed. 

    Plyometric exercises incorporate a pre-load or “stretch” phase prior to a rapid contraction. For example, if we consider a vertical jump, starting the jump from a squat position is a simple contraction of the muscles responsible for hip, knee, and ankle extension. But if the jumping motion begins in standing before dropping into a squat and quickly rebounding for the vertical jump, the same muscles that generate the jumping force are lengthened before contracting. This harnesses the energy produced by the elastic recoil of muscles and tendons. 

    Think about putting a fairly tight rubber band around your wrist. The rubber band is actively contracting against your wrist and the pressure, or force, is evident. Now pull back on the rubber band and let it snap against your wrist. This amount of force is significantly and noticeably (sorry!) greater. Our muscles and tendons do not harness that much elastic energy, but you get the idea.

    A pause for words of advice/caution: If the previous paragraph made your knees tremble or your back start to tighten, keep in mind that all exercises exist on a spectrum. With any exercise program, the load or difficulty must start with what is doable. There is a fine line between doing enough to stimulate adaptations in the body and doing too much, increasing the potential for injury. If you are managing a chronic musculoskeletal issue or returning from injury, it is highly recommended that you consult with a Physical Therapist or Athletic Trainer for a more personalized RFD program. Plyometric exercises can be done in a pool with a significant decrease in resistance. The overall load in the water is decreased, but the RFD benefit is retained.

    Plyometric Exercises to Increase RFD:

    Hopping: Whether on two feet or one, hopping drills will help strengthen the feet and ankles while developing RFD in the calf muscles. These have the lowest loads and can be valuable exercises themselves or as part of your warm up. Jumping rope falls in this category and has been shown to improve running speed.

    This video demonstrates a handful of “pogo” style hopping drills. Notice how the knee and hip stay fixed with force being generated by the ankle.

    Jumping: Vertical jumps, broad jumps, box jumps, drop jumps, bilateral, unilateral, backwards, sideways–the variety is only limited by your imagination. However, to get the most out of the plyometric stretch cycle, it is arguably best to make these countermovement jumps where the body drops down before exploding upwards (or sideways, forward, etc.).

    In this video, Dave Quammen of Park City Sports Medicine demonstrates a series of two-legged jumping drills. Challenge can be increased with added repetitions or with reversing direction with the forward jumps. Try these on one leg for a significant increase in load/difficulty. 

    Bounding: With or without poles, bounding follows the basic premise of adding “pop” to a normal stride for increased RFD and exaggerated height, distance, or speed. While boulding can be done on flat ground, there are added benefits to going uphill: because height and flight time are reduced so are the impact forces when landing. It also takes more effort to go uphill, so the workout is more efficient (more bang for the buck), and it just feels more natural.

    Demonstration of more running-oriented hill bounding, from Lydiard Training.

    Ski bounding with poles is a traditional dryland exercise that not only improves RFD but works the core and arms at the same time — valuable training even if you only skate ski. It can be done on a long gradual hill for endurance work, but short, steep hills will emphasize RFD.

    The U.S. Ski Team completes a set of longer duration L4 ski bounding intervals way back in 2012. Camera quality has since improved, but the background song is still a classic. Note how the technique is very different from running even though the speed might be similar. 

    Again, with the basic concept of creating quick, explosive movements, there are far more ways to develop RFD than this summary can hope to cover. The remaining topic, then, is dosage. 

    Plyometric exercises are demanding and stressful to the musculoskeletal system. Delayed onset muscle soreness is to be expected, and at least one recovery day is mandatory. Aside from muscle soreness, any pain that is beyond mild or takes more than a couple of hours to subside should be considered a contraindication and deserving of a consultation with a sports medicine provider. 

    For most readers, doing the exercises once or twice a week is an adequate stimulus for both improvement of RFD and appropriate recovery. As for duration or repetitions: when in doubt, start small. In the jumping video above, Dave demonstrates two repetitions of each jump. If we consider the full video to be one set, then starting with 2-3 sets is likely reasonable. Then, increase repetitions to progress the program. Keep in mind that quality is key — if you feel your technique or stability start to wean, it’s best to stop there. Total exhaustion is not the goal. 

    Precede plyometrics with a light cardio warm up. If coupling plyometrics with core or strength training in the same session, it is generally recommended to do the plyos first before you are too fatigued.

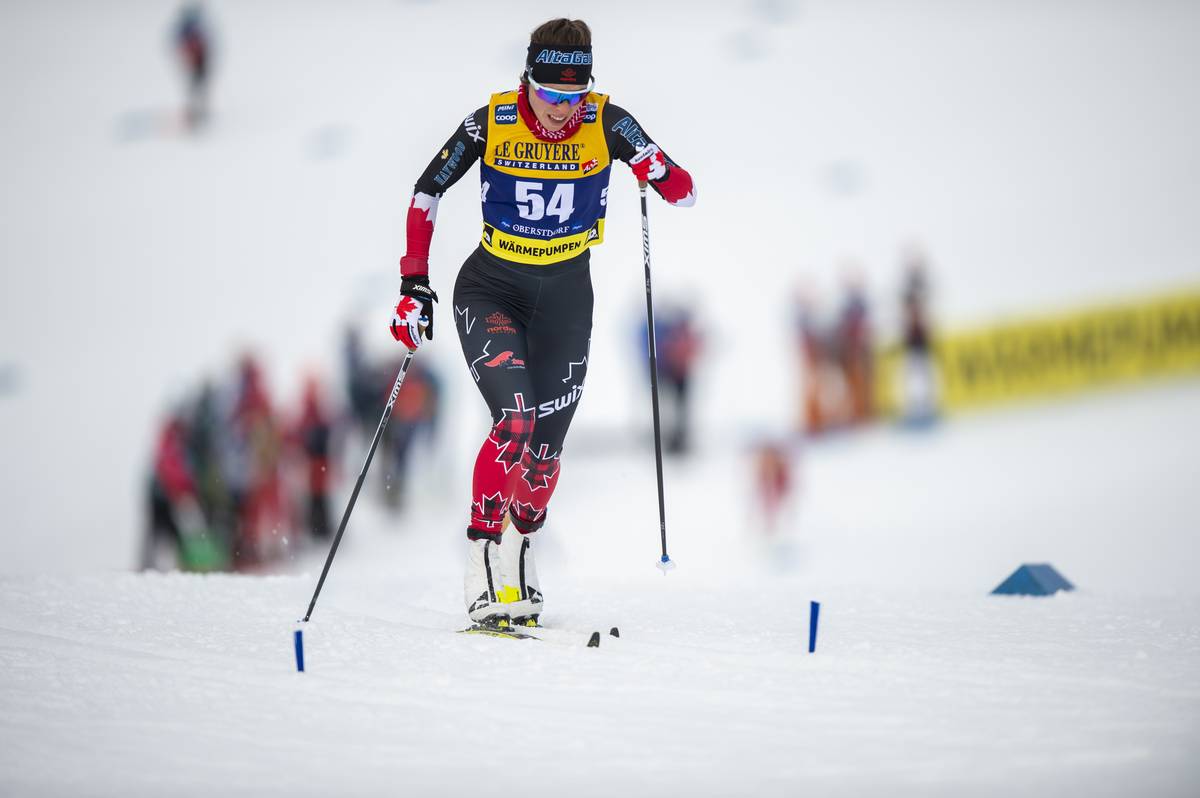
    Sophie Caldwell Hamilton powers through the heats during a classic sprint in Oberstdorf, Germany in March 2021. (Photo: Nordic Focus)
  • Building a Better Skier Part 4: The Shoulder

    Building a Better Skier Part 4: The Shoulder

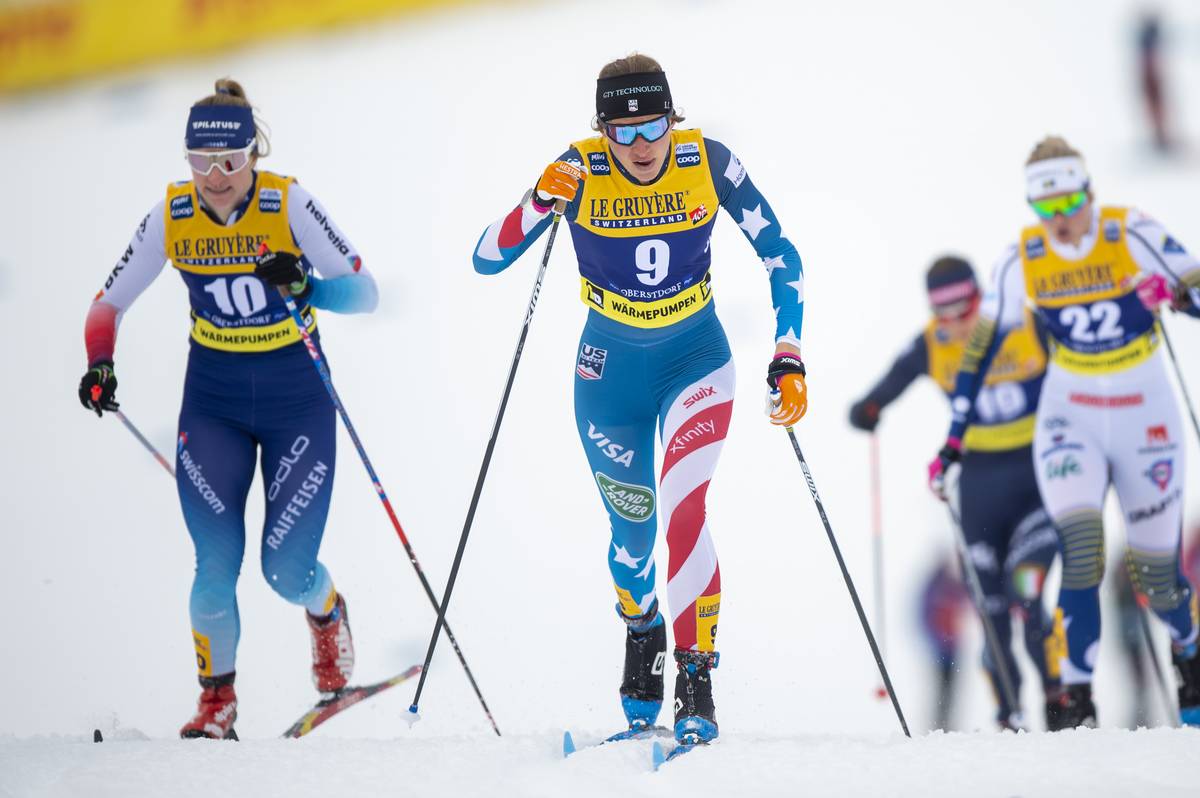
    Rosie Brennan powers through the final meters for a commanding second place finish in Stage 4 of the 2021 Tour de Ski. (Photo: NordicFocus)

    This is Part 4 of a series delving into how biomechanics and movement patterns affect skiing technique. If you haven’t already, start with the introduction, Part 1 which introduces the concept of a neutral spine posture, Part 2 which describes spine stability and mobility, and Part 3 on single limb stability.

    ——————————————–

    Upper body power is a major contributor and perhaps even a determinant of cross country skiing performance. Poling accounts for up to 60% of propulsion in skate and classic diagonal and, obviously, 100% with double pole. For those who train for skiing year round, upper body work is an essential part of the routine. However, for those whose summers are focused on running, cycling, or hiking, arm strength is often forgotten once the snow melts.

    Let’s take a closer look at the structures and muscles involved in the upper body during the various poling motions of skiing. 

    The muscles that comprise the shoulder girdle can be roughly divided into two groups: the stabilizers and the movers. Coordinated motion requires “dynamic stability”, i.e., for the two groups to together such that the stabilizer muscles control extraneous joint motion while the movers perform the primary action. 

    The shoulder has a tremendous amount of motion available and relies heavily on the coordinated effort of multiple muscles to maintain proper alignment and movement of the joint. At the same time, it is capable of generating large amounts of power, whether that’s throwing a 90mph fastball, hammering a nail, or repeatedly pushing on a ski pole.

    The shoulder stabilizers can be further divided into those acting on the glenohumeral joint (the primary ball-and-socket shoulder joint) and those supporting the scapulothoracic joint (shoulder blade on the ribcage). 

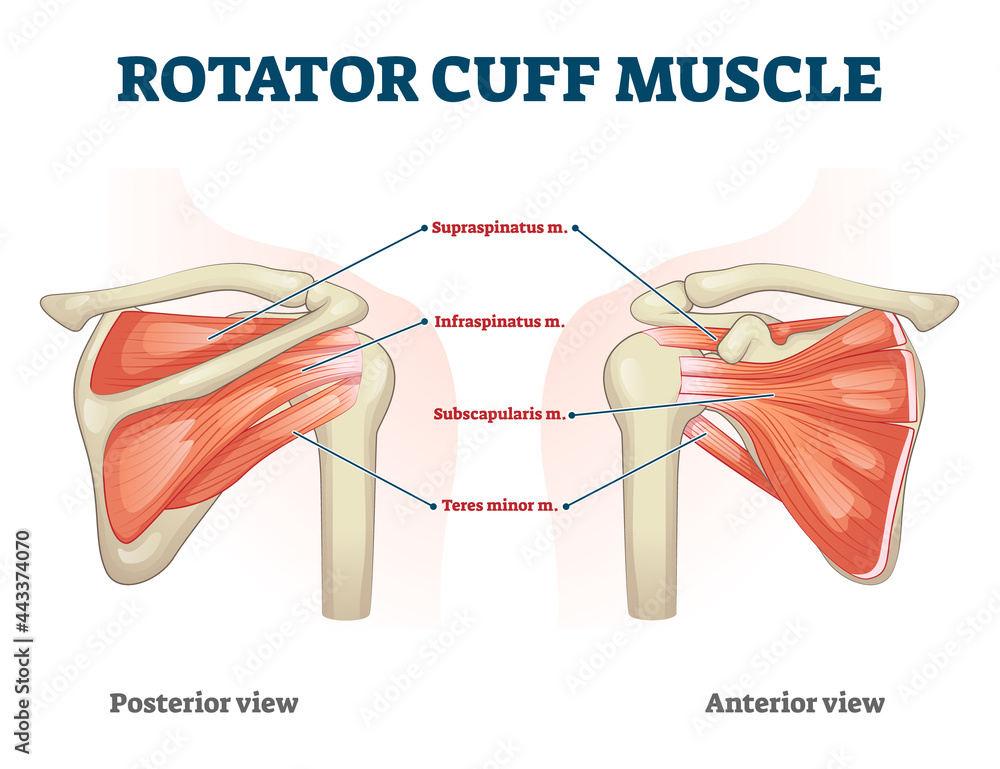
    The rotator cuff is a group of four muscles — supraspinatus, infraspinatus, teres minor, and subscapularis — that attach to both the scapula and humerus in close proximity to the joint. They are not particularly strong muscles, but they play a vital role in coordinating the movement of the glenohumeral joint. 

    A diagram of the muscle group involved in the shoulder’s rotator cuff. (Photo: www.freepik.com)

    The only rigid or bony attachment of the arm to the body is via the collarbone. This small bone is not enough to support the load of push ups, pull ups, or double poling. The base of support truly lies in the muscular attachment of the shoulder blade to the ribcage. For the sake of the simplicity of this article, we’ll limit the discussion to four muscles, one of which doesn’t count. (Side note: a classic physical therapy trivia question is to name all 17 muscles that attach to the scapula–clearly I’m skipping a few here.) 

    The primary stabilizers of the scapular are lower trapezius, middle trapezius, and serratus anterior. I’ll contend that the upper trapezius is a stabilizer but doesn’t count because it tends to exert force in the wrong direction (and is frequently overactive so needs little in the way of direct strengthening).

    The trapezius muscles stabilize and move the scapula along the ribcage. (Photo: www.freepik.com)

    As with any dynamic stability in the body — abdominal muscles for the lumbar spine, glutes for the hip, or the aforementioned muscles in the shoulder girdle — strength is important but intermuscular coordination is key. This is especially true at the shoulder due to its wide range of available motion and corresponding muscular complexity. 

    The following are exercises targeting the stabilizers, both at the shoulder joint and scapula.

    Exercises for the Stabilizers:

    (The intent of these exercises should be thought of more as activation drills and less about the heaviest weight you can find. Yes, we are looking to induce some fatigue but the emphasis is not on power.)

    Side Lying External Rotation: Lie on your side. Keep the top elbow bent at 90° and against your side. Rotate about the shoulder until your forearm is at about 45° to the horizontal. Try not to pull with your shoulder blade. A little bit of weight goes a long way.

    External Rotation + Uppercut: With a resistance band anchored on the opposite side, elbow fixed at 90°, and forearm against your belly. Rotate the forearm away from the belly to a neutral position (knuckles pointed forward). Then raise the arm by spinning through the shoulder. Again, the elbow should stay at 90° throughout. Only raise the arm to shoulder height. Motion should be isolated at the shoulder joint — don’t let the shoulder blade move. Finish by lowering the arm down and rotating the forearm back to the belly.

    Scaption: Raise both arms up your sides at 45° (not in front, not to the side, but halfway in between). Stop at shoulder height. Keep the shoulder blades fixed down and back. Start with light weights.

    Wall Slides: Loop a very light resistance band around both hands and stand facing a wall. Place both hands on the wall at about shoulder heights with elbows bent and palms facing inward. Stretch the band by squeezing your shoulder blades down and back, not just pulling from the arms. Keep the shoulder blades pinned down and back, band tensioned, and slide your hands up the wall until your elbows are at about shoulder height. Slide back down to the starting position. Ideally, the shoulder blades stay retracted throughout the set of repetitions, but you can stop and reset them between reps or as needed.

    Serratus Punch: The serratus anterior muscle attaches to the ribcage, inserts on the scapula, and, acting alone, protracts the scapula, or pulls it forward. As a stand alone movement, this scapular protraction is not especially functional unless you are a boxer hitting with a jab. However, the serratus anterior is a team player and becomes very functional when co-contracting with the posterior scapular muscles (especially middle and lower trapezius) to stabilize and coordinate movement of the scapula. The exercise will work the serratus anterior independently. 

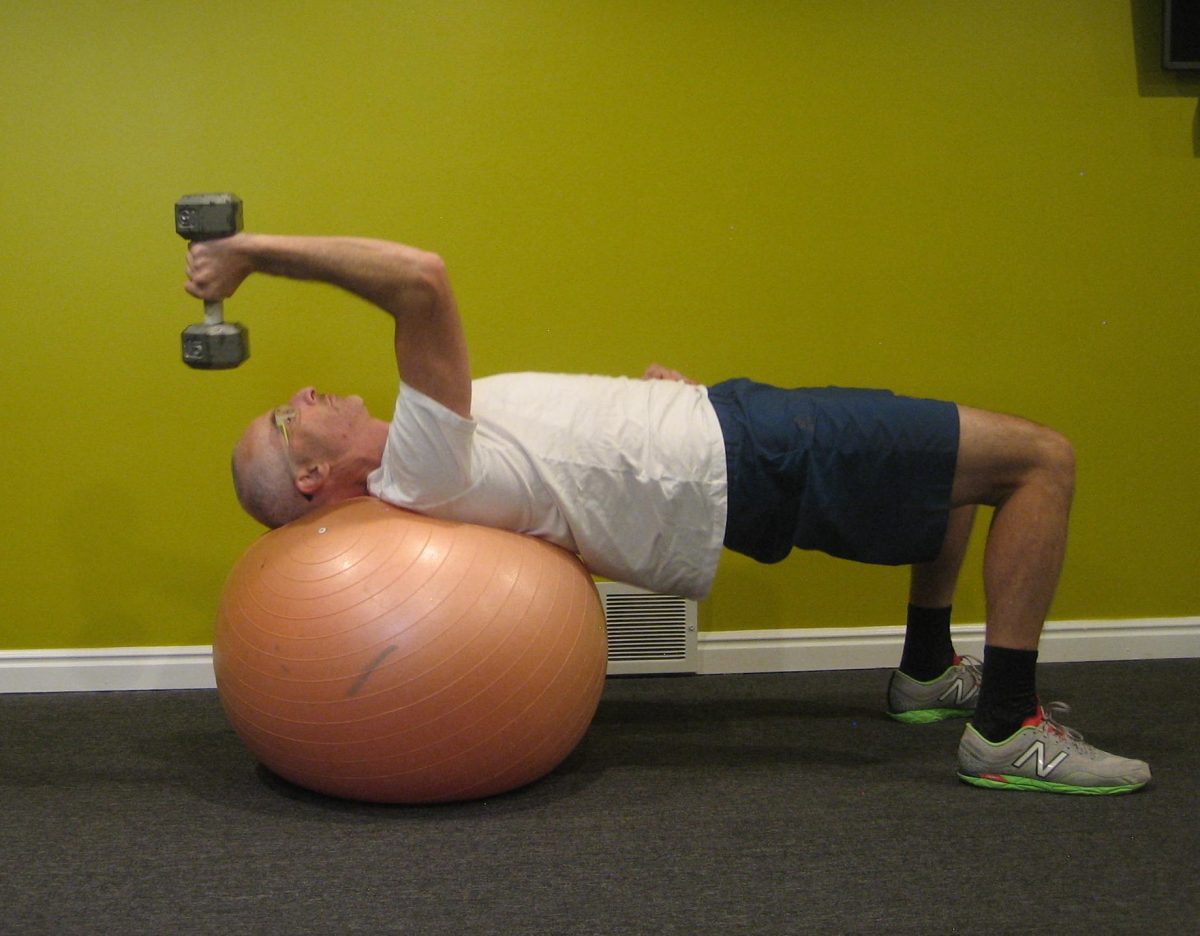
    Lie on your back holding a dumbbell in each hand. Knees are bent and elbows are straight. Push the dumbbells towards the ceiling by moving the shoulder blades forward on the ribcage. This is the opposite of the motion described in Wall Slides. The neck and thoracic spine stay relaxed. This can also be done with a resistance band.

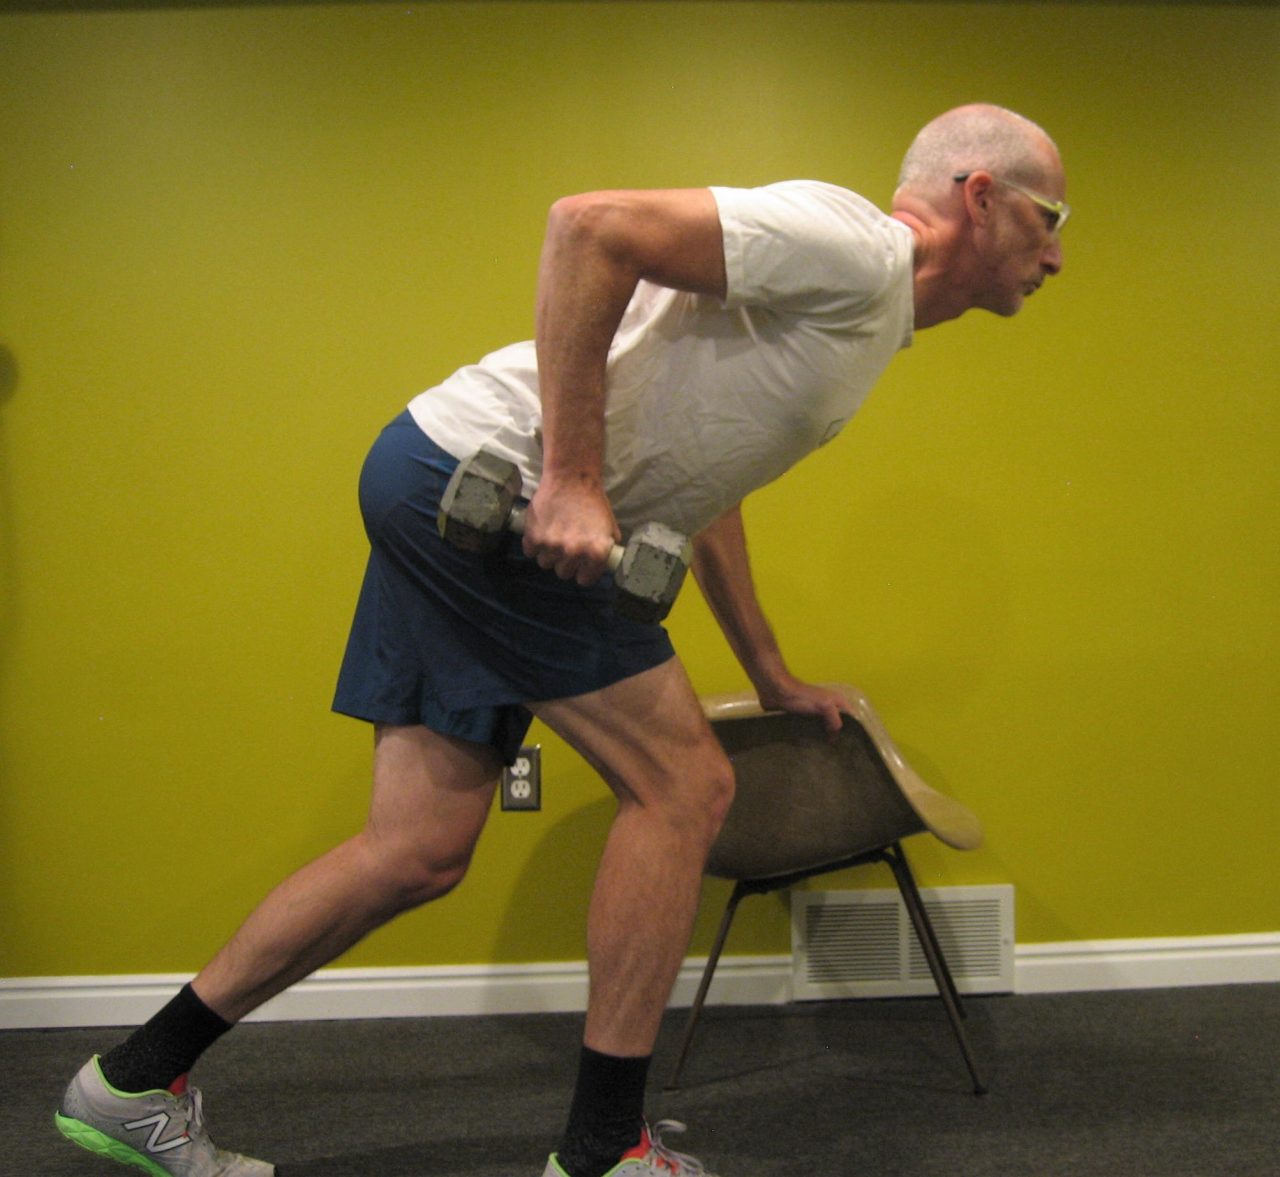
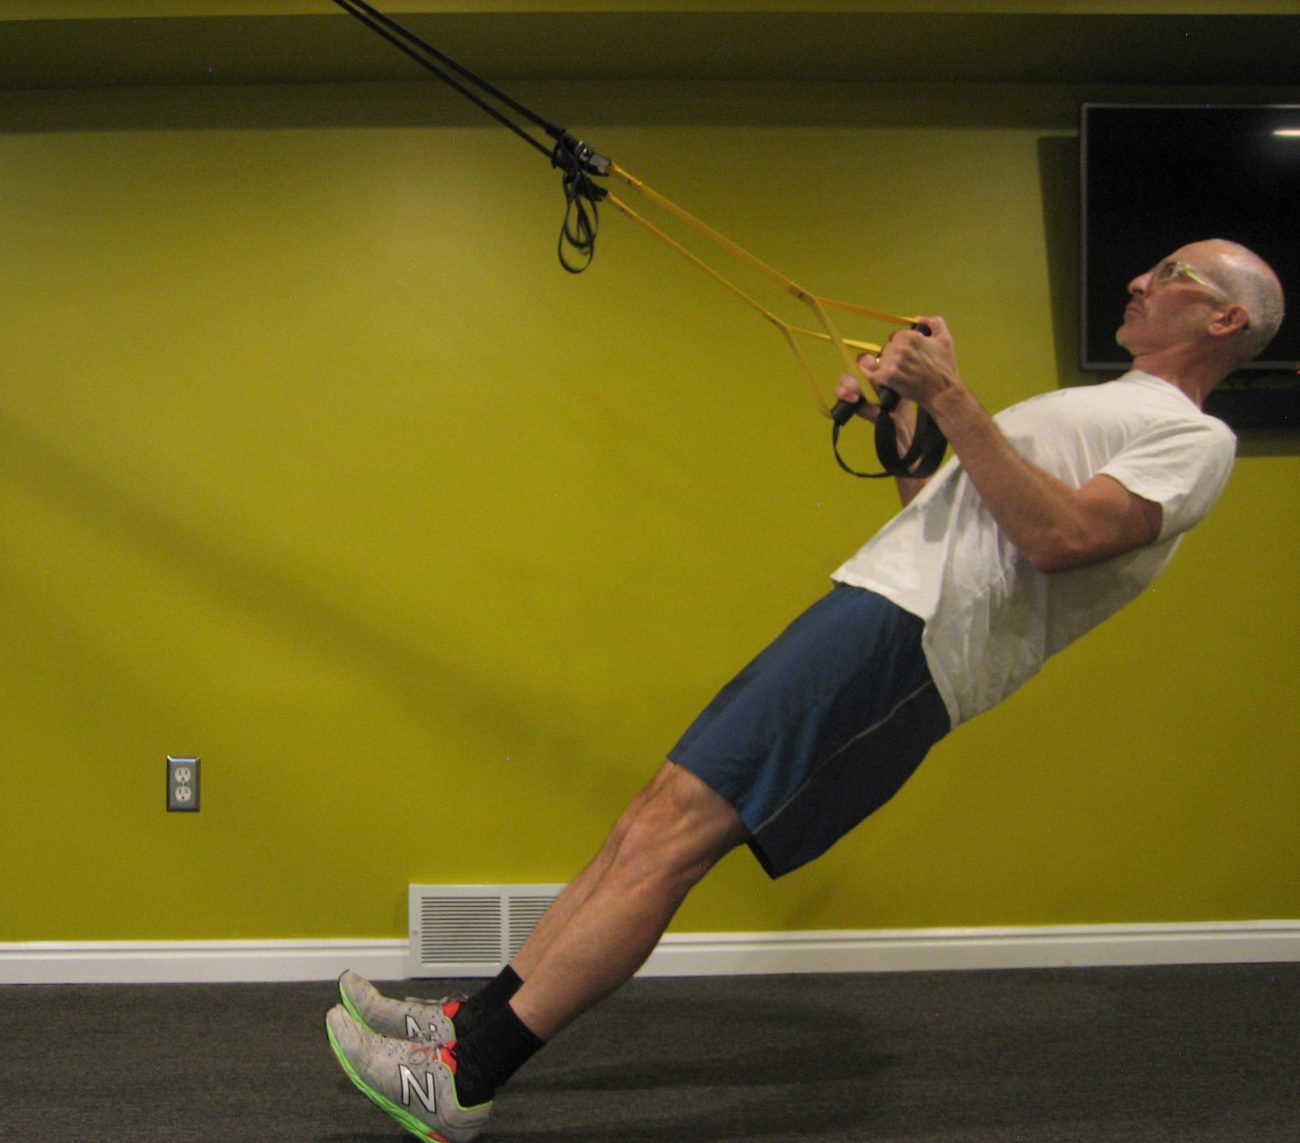
    Rows: The emphasis of the rowing motion is on squeezing the shoulder blades down and back as you pull the resistance towards you. This is the same motion described in Wall Slides and the opposite of the Serratus Punch. There are multiple means of adding resistance to the movement: resistance band, cable machine, single dumbbell/kettlebell, TRX, etc. 


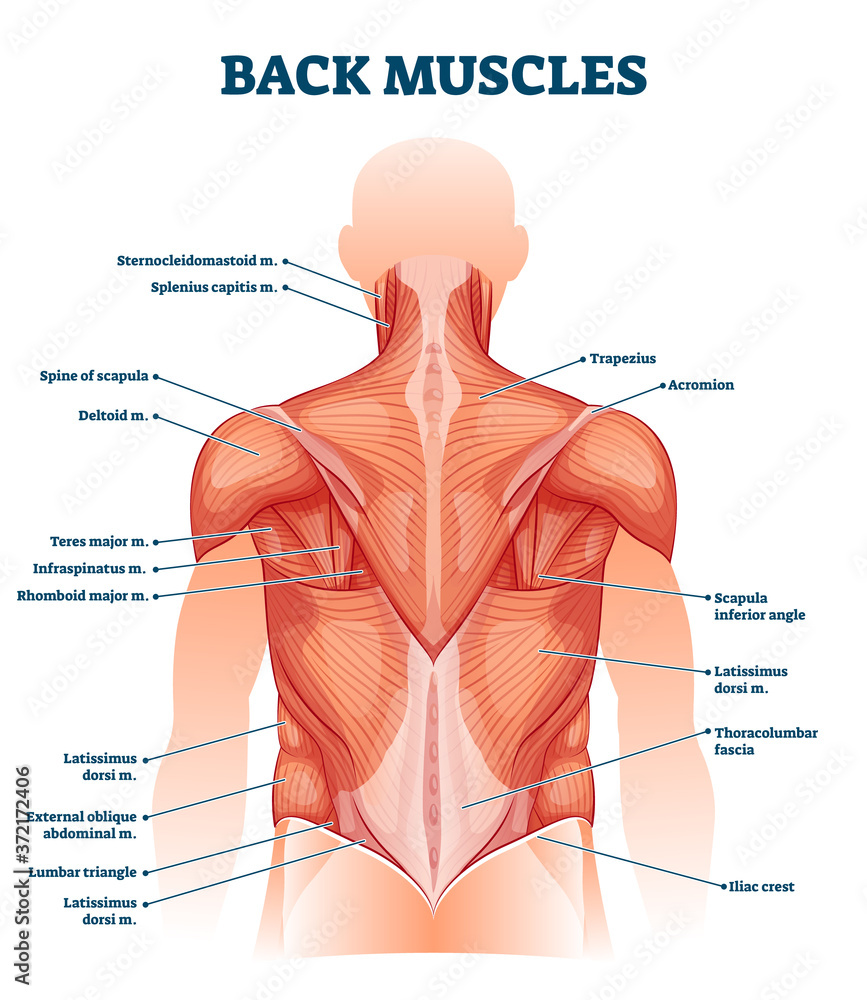
    In the propulsive phase of poling, the prime mover at the shoulder joint is the latissimus dorsi — often referred to as the “lats”. This big, broad muscle extends the shoulder, pulling an outwardly extended arm to the side as in freestyle swim strokes and pull ups. The lats are aided by the posterior portion of the deltoid muscle and teres major. 

    A diagram of the back muscles, including the latissimus dorsi. (Photo: www.freepik.com)

    The elbow joint is also involved with the triceps playing a rather complex role. This muscle, or more technically speaking, this group of muscles has a common insertion on the ulna and acts to straighten the elbow. However, the long head of the triceps, attaching to the scapular vs the humerus, is also able to play a role in shoulder extension. I say the triceps play a complex role because motion about the elbow varies with technique and terrain. In Skate V1 and V2 alternate and in Classic striding, there is a fair amount of elbow extension. However, in V2 and uphill double poling, there is very little motion at the elbow. 

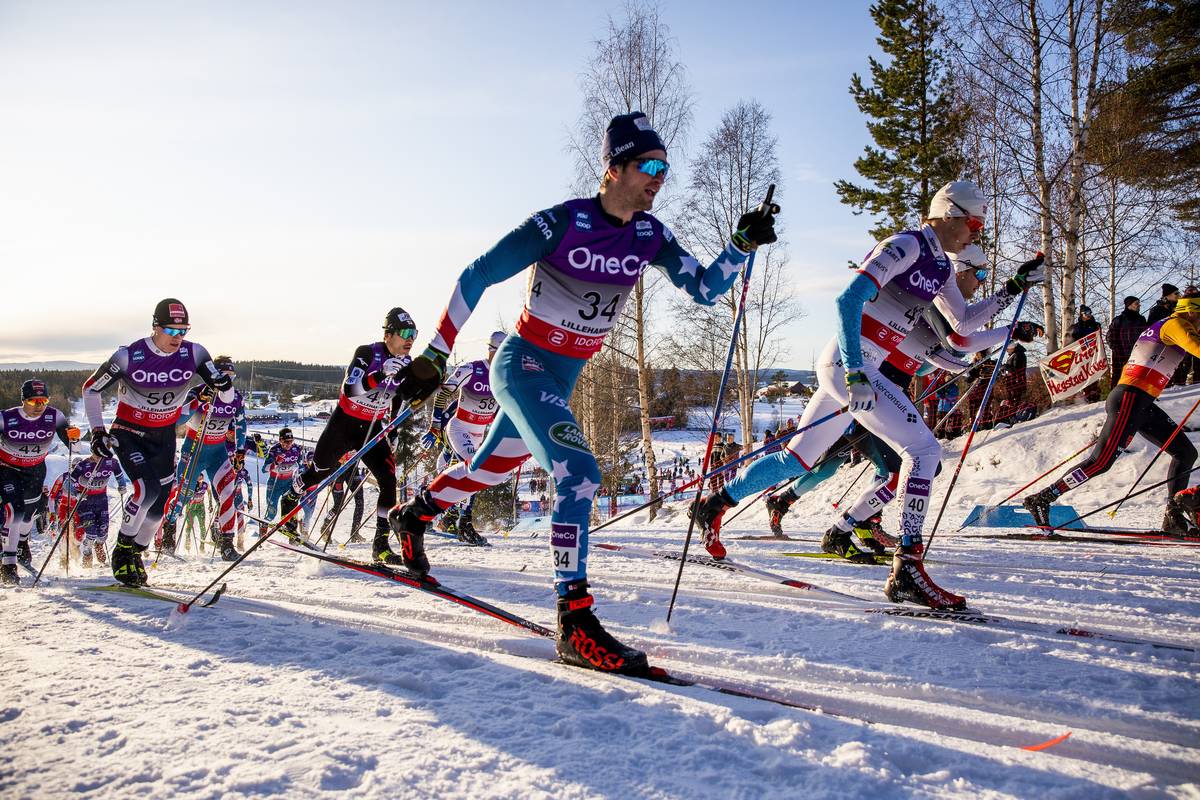
    Notice how little motion takes place at the elbow during V2.


    A clinical case study: (Disclaimer: the subject of this case is the author, a potential duplicity that is frowned upon in academia.) In the lead up to ski season, I began doing “budget SkiErg” workouts double poling with resistance bands. After several weeks of twice a week workouts, I began to develop left posterior elbow pain. It didn’t take much to figure out I had irritated the insertional tendon of the triceps. So I stopped the workouts and focused on eccentric strengthening of the triceps, which has become the standard of care in the treatment of tendinopathies. 

    Come ski season, I could skate without any problems, but I continued to have elbow pain with more than about 45 minutes of classic. One night at dinner I was venting to my wife about my now chronic elbow pain. Ever the voice of reason, she asked what I would do if I was seeing myself in the clinic. What would I, the PT, do differently for a patient who is not responding? I replied that I would examine, biomechanically, how the patient is poling. So I started to think about how I was doing what I was doing. 

    My hypothesis was that I was using my triceps too much to generate shoulder extension. I started doing shoulder extension exercises with my elbow fixed at 90°. I focused on leading the motion with the back of my elbow, not my hand. Within a couple of weeks, the elbow pain was gone. The lesson from my mistake is that functional movement patterns often require a high degree of coordination. Because of our bodies’ anatomical redundancy, it is easy to fall into a suboptimal pattern that is inefficient in the best case and in the worst has potential for injury.

    Interestingly, the biceps appear to be very active during double poling, which seems counterintuitive since the action of the biceps is in the opposite direction of the propulsive phase of poling. The biceps do contribute to shoulder flexion so they are likely involved during the return phase. But, more likely, the majority of their action is co-contraction with the triceps to stabilize the elbow and hold it in the desired position. Perhaps this is rationale to include some biceps strengthening for more than just filling out the sleeves of your cycling jersey.

    David Norris models single-stick poling technique during a skiathlon in Lillehammer, Norway in December, 2019. (Photo: NordicFocu)
    Exercises for the Movers:

    Shoulder Extension: This is most easily done with a dumbbell, but a resistance band will work as well. As described in the case study, keep the elbow locked at 90° and focus on spinning at the shoulder joint by leading with the back of the elbow.

    Strengthening the Triceps: Like with Rows, there are numerous ways to work the triceps with no single exercise being the best. Resistance band, cable machine, dumbbell, push ups, and dips are all appropriate.


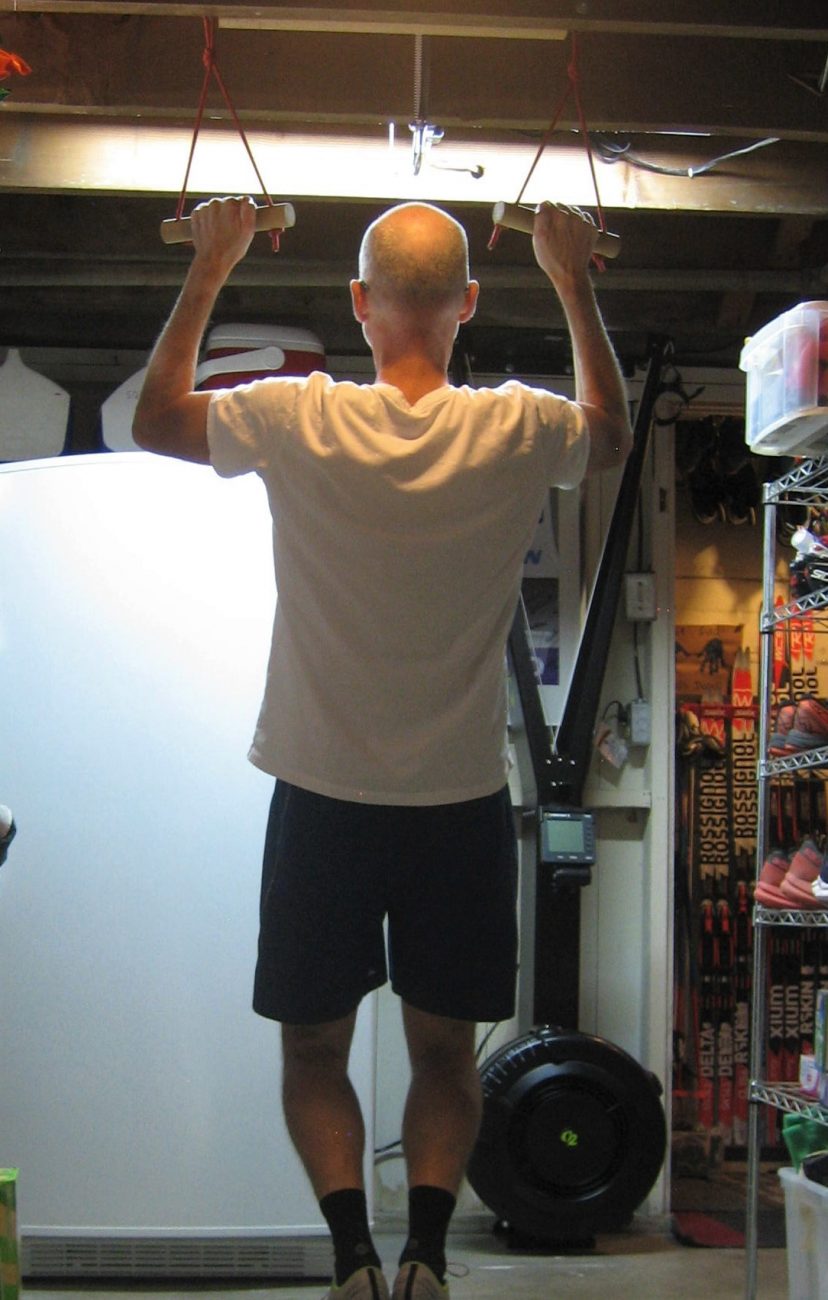
    Strengthening the Lats: The basic lat workout is pull ups. If these are too difficult to do at least 3 reps, then put your feet on a chair or on a long resistance band loop attached to the pull up bar (just make sure the band stays on your feet and not in between them!). Lat machines in the gym are a great alternative as you can select resistance that is lighter than body weight (or more than body weight if you can whip out 10+ regular pull ups)


    Epilogue: The goal of the Building a Better Skier series has been to identify some key biomechanical and kinematic components of cross country skiing and to provide exercises with the specific intent of facilitating these movement patterns and strength requirements. By no means has the depth of these articles been exhaustive. Nor have the lists of exercises covered all possibilities. Hopefully, these articles have been easy to follow and the exercises have been included in your twice weekly strength/dryland/pay-to-play routine. Even better, I hope the work done now will pay dividends when the snow falls this winter. Best of luck with the remainder of summer (the heat, the smoke, the pandemic), the glorious autumn, the struggles of shoulder season, and the winter we’ve all been waiting for.


  • An Intro to Building a Better Skier

    An Intro to Building a Better Skier

    Building a Better Skier is a multi-part series born from the inquisitive mind of a physical therapist and late-blooming Nordic skier. The objective is to explore how biomechanics and movement patterns affect skiing technique, and more importantly how you can apply these concepts to improve your skiing. To cover this topic thoroughly would likely require a hefty book, so apologies in advance if these articles lack depth or specificity. Please feel free to email the author with any questions: ned.dowling@hsc.utah.edu

    Many in the sport look to Swedish speedster Linn Svahn (Bib 14, here racing in Davos back in 2019), as a model of solid form and efficient skiing. (Photo: NordicFocus)

    Cross country skiing is hard. Very hard. Not only does it require a well-tuned cardiovascular engine, but technique can make the difference between a Ferrari and a Ford. Whether you’re a podium contender, looking to get some off-season training, or simply schussing about, we are all looking to propel ourselves efficiently. 

    Technique in any sport exists on a bandwidth. Everyone skis a little differently, just like everyone runs or swings a tennis racquet in their own personal style. If the technique falls within the bandwidth, where it is accurate, powerful, and efficient, then all is good. But when it falls outside of the acceptable range, the cost becomes prohibitive. From a performance perspective, this means bleeding power. From an injury prevention side, this equates to increased load on the system

    So what do we do when that efficient technique evades us? When balancing on the glide ski seems like a tightrope over the Grand Canyon? When that elbow angle never seems to satisfy your significant other? If you worked on it all winter and it still didn’t click, then it might be time to look at this technique thing a little differently. 

    A while back, FasterSkier interviewed Canadian World Cup skier Katherine Stewart-Jones and her coach at the time, Erik Bråten, to discuss the apparent improvement in Katherine’s technique, which led to some of the best results of her career. Sadly, they did not disclose any magic bullets or secrets to speed. However, there was a very large pearl of wisdom:

    Katherine Stewart-Jones racing on the World Cup in 2020. (Photo: Nordic Focus)

    “I took her off the skis as she could not really handle the movements I was asking her to do. And so until she was able to do that without skis, I think, it is unfair to put her on skinny skis at 30 K an hour and ask her to do it.”

    When an athlete has the physical capacity to perform the technique or movement pattern but lacks the understanding or knowledge, this is called a technical deficit. This deficit often will respond to instruction, cues, and coaching. But what if one understands what is being asked but the body won’t cooperate? This is considered a mechanical issue: when a physiological deficit like balance, stability, mobility, or coordination is preventing the appropriate execution. All the cues in the world won’t help if the athlete is physically incapable of moving as desired. 

    In Katherine’s case, it sounds like she had issues with both the mobility and proprioception (awareness of your body’s position and movement) of her spine. The posture she held, without the ability to correct it on her own, put her in a compromised position which led to a loss of power through her skis and poles. With the help of a physical therapist, she was able to improve these impairments in dryland training before progressing back onto the snow. With her mechanical deficits improved, she had the best race results of her professional career.

    I am not a coach or ski instructor and as a significant other I try to keep my mouth shut. I am not here to offer yet another “Hips High!” cue to overcome a technical deficit. As a physical therapist who loses sleep at night analyzing Nordic skiing biomechanics, I strive to help the readers (and my patients) overcome mechanical deficits. In what will be a series of conversions on the topic, Part 1 will be a deeper discussion about posture. Part 2 will go into more detail about the spine, when to move it, and when to keep it still. Part 3 will delve into single-limb stability for both glide and kick. Part 4 will offer advice on shoulder mechanics for powerful yet healthy poling.


  • Interval Session to Kick Start The Season

    Interval Session to Kick Start The Season

    We’ve reached mid-December. With any luck, your local trail system is beginning to fill in, you’ve scraped off your storage wax, and you’ve put in at least a handful of easy days getting reacquainted with your boards. Whether or not you rollerski during the summer, skiing on snow has its own jive and it’s normal to feel a little like Bambi your first few sessions. 

    In my experience as a coach and masters athlete, I find it best to lean into the Bambi phenomenon. Don’t expect to pick up where you left off last season. Accept that you’ll feel a little loose and wobbly and go back to the basics. Spend plenty of time skiing without poles and keep things very easy, continually emphasizing form over speed or power.

    (Find more on this from the FasterSkier archives here.)

    Early season intervals build the strength, fitness, and stamina to help you thrive as winter provides the goods.

    Okay. Now that that’s done and you’re no longer rusty, are you feeling dialed in and ready to get your heart rate up a bit? Great. That’s what this interval session is designed for. 

    Objective #1: Pick up the pace and effort without losing your form.

    Regardless of ability, we can all recognize that skiing harder does not always equate to skiing faster. Particularly when we’re learning or regaining technique, skiing harder might mean skiing less efficiently and wasting energy with extraneous movement. During this session, your focus should be on keeping the intervals in control so your technique isn’t compromised as fatigue and intensity increase. 

    Objective #2: Ease in. Don’t be too hot out of the gate. 

    The variations below both involve relatively short periods of rest, meaning your heart rate will stay elevated, even during the rest periods. The fitness boost is similar to doing long threshold intervals, just broken into smaller and more manageable chunks. 

    Going out too fast on your first few sets will quickly dig a hole, compromising either the consistency of the effort during the subsequent intervals or your technique on tired legs or both! The season is young. Easy on the gas. 

    The Workouts:

    Now that we’re on the same page in terms of when to introduce an interval session and what to keep in mind, here are two bread and butter workouts to help boost your fitness and enhance your skiing this season. These can be incorporated throughout the season, but they make great candidates for early season training as the duration of the intervals is short enough to wrap your head around.

    8-10 x 1 minute on / 1 minute easy ski (2-3 sets)

    Though simple, this workout will leave you feeling tired, satisfied, and accomplished, remembering just how many muscles you use when you’re skiing. Try it on varying terrain to work through each of your gears and practice transitioning smoothly between them. 

    Reinforcing the importance of easing in, after the first few intervals of the set, you should feel like the minute of rest is plenty of time to catch your breath as you continue on easily. It’s more about stamina than speed here. Don’t worry – by the last few, you’ll be thinking, “Wow, that minute of rest went by fast!”

    Take 5-6 minutes to ski very easy between sets so your heart rate has the chance to come back down. Aim for two sets of eight intervals on your first go, then introduce a third set or bump up to ten intervals the following round. 

    Totaling 16-30 minutes worth of “work”, the load is equivalent to skiing hard for 5-10 kilometers, broken into bite-sized pieces. When using this for the first time, keep the effort equivalent to a 40-60 minute race to ensure you can maintain form and effort throughout. Dial-up the effort to a 5k pace as your fitness and ski form improve throughout the season. 

    The author during an early-season interval session in Crested Butte, CO.

    8 – 10 x 2 minutes on / 2 minutes easy ski (1-2 sets)

    This variation challenges you to hold onto your technique for a longer effort, with increased rest between to account for the extra load. These sessions help improve both your mental and physical stamina, as you focus on your technique under the duress of the challenge. 

    Since one set equates to 16-20 minutes of work, it’s important to scale back the intensity compared to the 1 on/off, perhaps starting the first few at an effort you might be able to sustain for 60 minutes in a race, then hitting the last few a bit harder if you’re feeling up for it. 

    This time, give yourself 6-8 minutes of easy skiing between sets. You’ll feel the accumulation of fatigue as you work your way into the second set!

    What are the pros doing?

    FasterSkier reached out to three-time World Junior Champion Gus Schumacher via email to see how he tests the intensity waters once he is back on snow, which given his residence in Anchorage, Alaska tends to arrive earlier than it might for those of us at lower latitudes. Turns out, it’s pretty similar — just without the breaks!

    Taking it. Gus Schumacher of the U.S. wins the World Junior’s 10 k classic. (Photo: Doug Stephen)

    “The workout I like to do early in the season to get some ski legs under myself again is a longer level 3 (medium intensity) interval session. Normally I’d do 12-15 minute intervals for a total of 45-60 minutes of on time. This workout is nice because it gives you time to settle into the intensity and adjust to new movements on snow. During this time, big strides in technique can be made, because you ski with more similar power and motions to racing. It’s also a workout that doesn’t have to be overly taxing, giving it a good return on technique work without being overly physical. 

    “It also has the benefit of building or maintaining base fitness that can be added to as skiing starts to feel more normal. It can easily be adjusted to your level, the goal is basically to just give you some time on skis at a faster pace!”

  • Wednesday Workout: Masters Training Trips with Pioneer Midwest’s Brad Johnson

    Wednesday Workout: Masters Training Trips with Pioneer Midwest’s Brad Johnson

    Brad Johnson, of Pioneer Midwest, skied his first Birkie at age 57 and made the race’s prestigious 25% Club (top 25 percent of age group) at age 60.

    This Saturday, Jan. 20, the Masters World Cup will open in Minneapolis, Minnesota —the first time it has been in the U.S. in 10 years. Of course, the word “master” could be considered a euphemism for “old skier.” However, age doesn’t have to come with a decline in performance. Ask 65 year-old Brad Johnson, of Pioneer Midwest in Osseo, Minnesota. He raced his first American Birkebeiner when he was 57, and he’s done every one since.

    As an employee of the Anoka-Hennepin school district before his retirement in 2009, Johnson acknowledges it was hard to teach, coach (track and nordic) and race. He was able to stay fit, “but you don’t get training in. I’d get home at 7-7:30, I’m not going out for an hour and a half because I don’t have anything left in the tank. Some coaches successfully do that.” He admits he was not one of them.

    Johnson’s one of the “older-guy contingent” of Pioneer Midwest’s ski team, an “emeritus team of older guys that ski in Pioneer stuff.” Despite his late start to racing, he has made the Birkie’s 25% Club, with a top finish of 3:56 for the 54-kilometer classic, and he also completed the original Norwegian Birkebeiner. He credits his fitness to focusing on the basics: duration, frequency, and intensity of training.

    He feels the main mistake masters skiers make is a focus on duration, not emphasizing frequency and intensity enough. “Those two- and three-hour skis can cause more harm than good,” Johnson said, citing a breakdown of technique as one fatigues, opening them up to injury. And, if you get too tired, you become more susceptible to illness.

    “Illness and injury are the two things that shut us [masters] down more than anything,” he said.

    Johnson typically skis about four days a week, with one core and weight-training session per week.  He asserts the significant loss of muscle mass as one ages is central to maintaining some sort of strength regimen.

    “You hit your 60s and it can go downhill real fast … use it or lose it, basically,” he said.

    Johnson rests at least one day a week, but admits it can be as many as three, depending on weather.

    Each workout, he focuses on one aspect of technique in conjunction with intensity, maintaining three aspects of fitness are integral to any workout: aerobic capacity, lactate threshold, and economy — the last an advantage of the master skier.

    “We’ve done this [skiing] over and over again. We’ve become more efficient,” he said. “We’ve got a little bit more guile than some of these younger skiers.”

    He calls it “skiing lazy”: saving energy as much as possible, using good form and drafting, something he’s done to 30-something skiers that “save[s] a lot of energy!”

    Johnson incorporates Heart Rate Variability training into his workouts to help him get the best workout for any given day, but admits that is just one small piece of training. He feels one of the best things for the master skier is intervals — the number being based on how one feels; the use of a heart-rate monitor is imperative:

    “We think we know where our heart rate is — we don’t have a clue, unless you’re wearing a monitor,” he said.

    In Johnson’s opinion, a person should know their heart rate zones (1-5) in order to maximize the benefits of any workout.

    Additionally, acknowledging that age can come with physical changes, Johnson suggests getting the OK from your doctor. “Assuming they know what they’re talking about, which isn’t always the case, and having a doctor that understand sports medicine and aging athletes,” he said. “That’s not the most common physician to find, but at the very least [one needs to establish], ‘is my heart in decent enough shape to go do this?’ ”

    As Johnson is most definitely in “decent enough shape,” and showing no signs of slowing down, it would appear there is at least some truth in the old axiom: Old age and treachery will overcome youth and agility.

    The Workout: Basic intervals

    One of Johnson’s essential workouts is basic intervals, done on a variety of terrain, based on the technique he’s focusing on for the day. So, pick your “skill drill” (hills, double poling, etc.), and get ready for some intensity.

    Warmup: Base on how you’re feeling for the day. Minimum is 5 minutes, but up to 20-30 minutes. Get into Zone 2; if you’re there, but don’t feel “ready to hit it” take more time until you do.

    Interval Session: 8-12 intervals of 2-4 minutes in upper Zone 3 to Zone 4, in anaerobic threshold. Between intervals, ski easy until your heart rate is back into Zone 1. As soon as you are back in Zone 1, go into the next interval.

    Be sure to note how long recovery takes for the first three or four intervals. The number of intervals you do is based on how quickly you are recovering; once your recovery time significantly increases, you are done. Johnson notes a recovery time increase of 30-45 seconds as significant.

    For example: if it takes you 90-120 seconds to recover between the first few intervals, but by interval 9, it is taking you 150 seconds or longer, you are finished. By that point, Johnson says you have depleted yourself, technique can fall apart, and you can do more harm than good.

    Warm down: (a.k.a. cool down) An easy ski back to the chalet — about 15-20 minutes, keeping the heart rate no higher than Zone 2.