From the FasterSkier archive — posts syndicated from athletes’ and coaches’ own blogs between 2004 and 2012, kept online as published. Current coverage is at fasterskier.com.

Tag: Ned Dowling

  • Treating Compartment Syndrome Without Surgery: One Skier’s Season

    Treating Compartment Syndrome Without Surgery: One Skier’s Season

    Author’s note: From the PT: a Look at Chronic Exertional Compartment Syndrome is a good introduction to the current article and includes a more detailed description of the anatomy, pathophysiology, and associated research. Since it was published on FasterSkier in 2022, that article has served as a resource for the Nordic skiing community, and I have fielded multiple requests for guidance from skiers around the world with CECS. In that article, I suggested that conservative treatment has potential; however, I was still more optimistic about surgical intervention based on the available research. The published research hasn’t changed, but my experience has, and now I’d like to make the case for non-surgical treatment of CECS. As with any medical information found on the internet, this article should be taken as the opinion of the author and not a replacement for direct consultation with a medical provider.
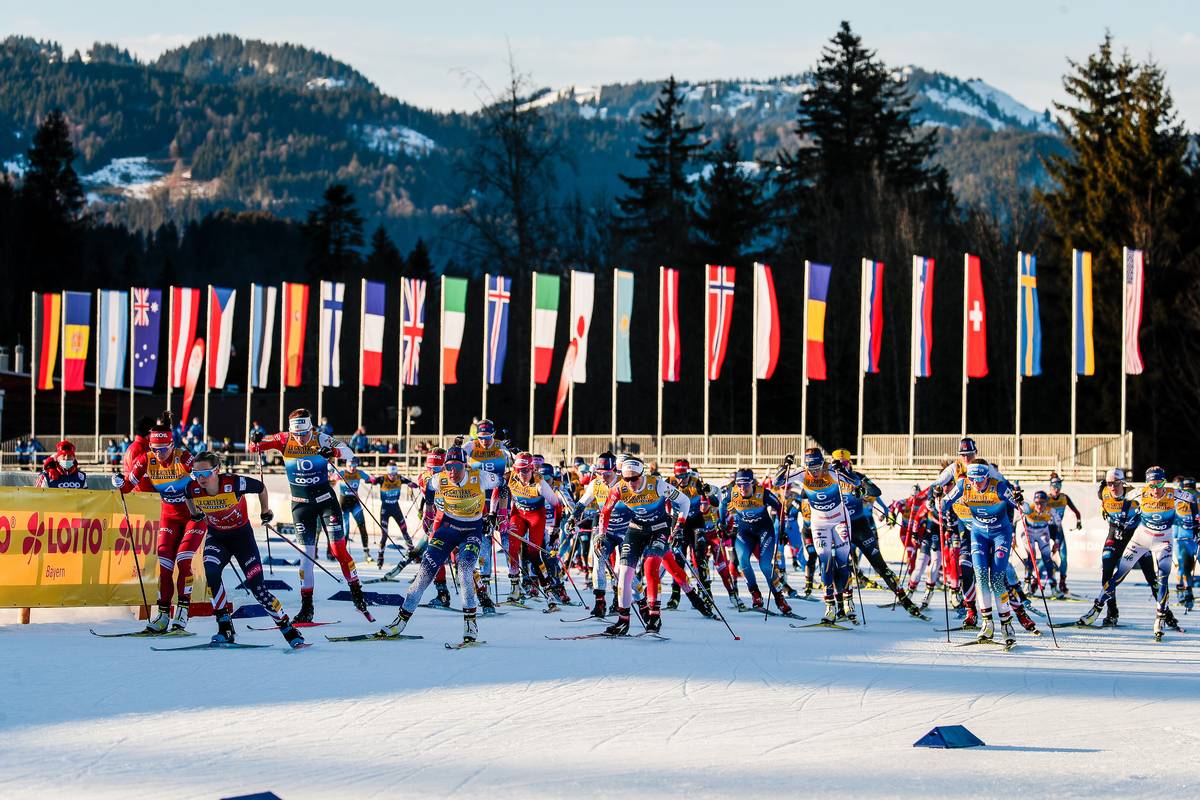
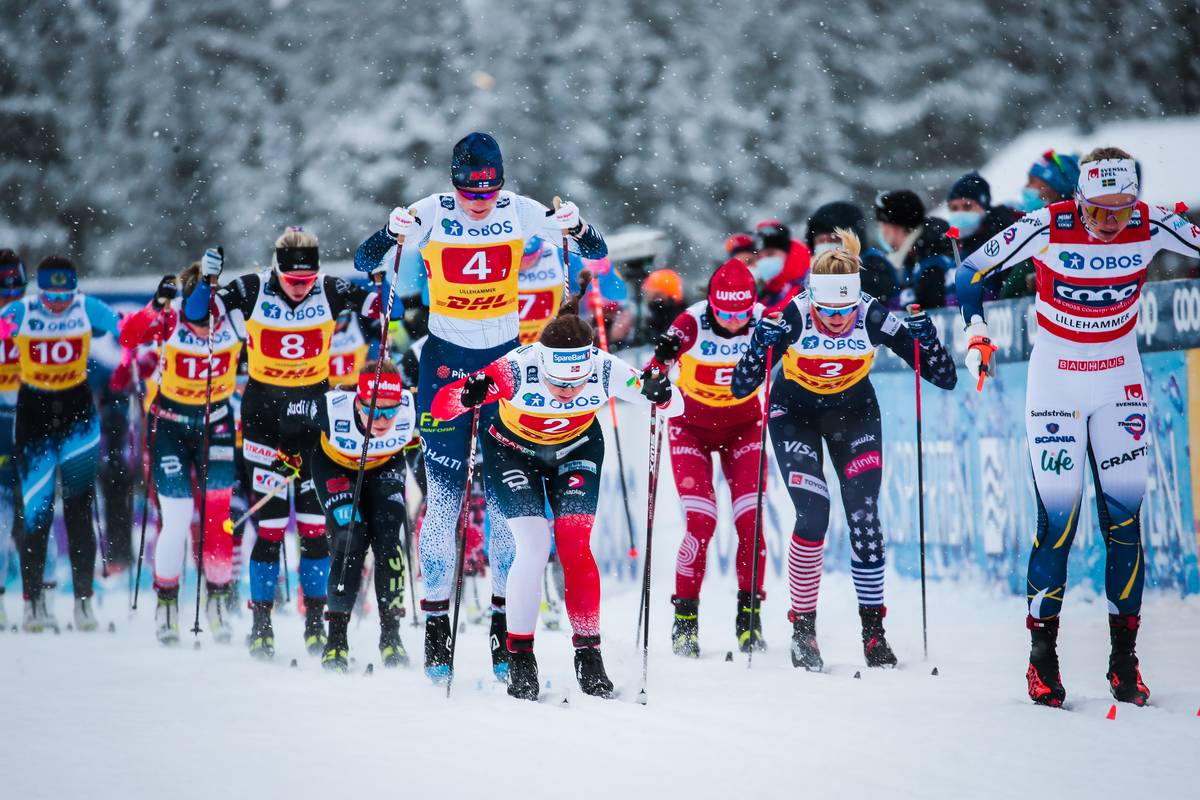
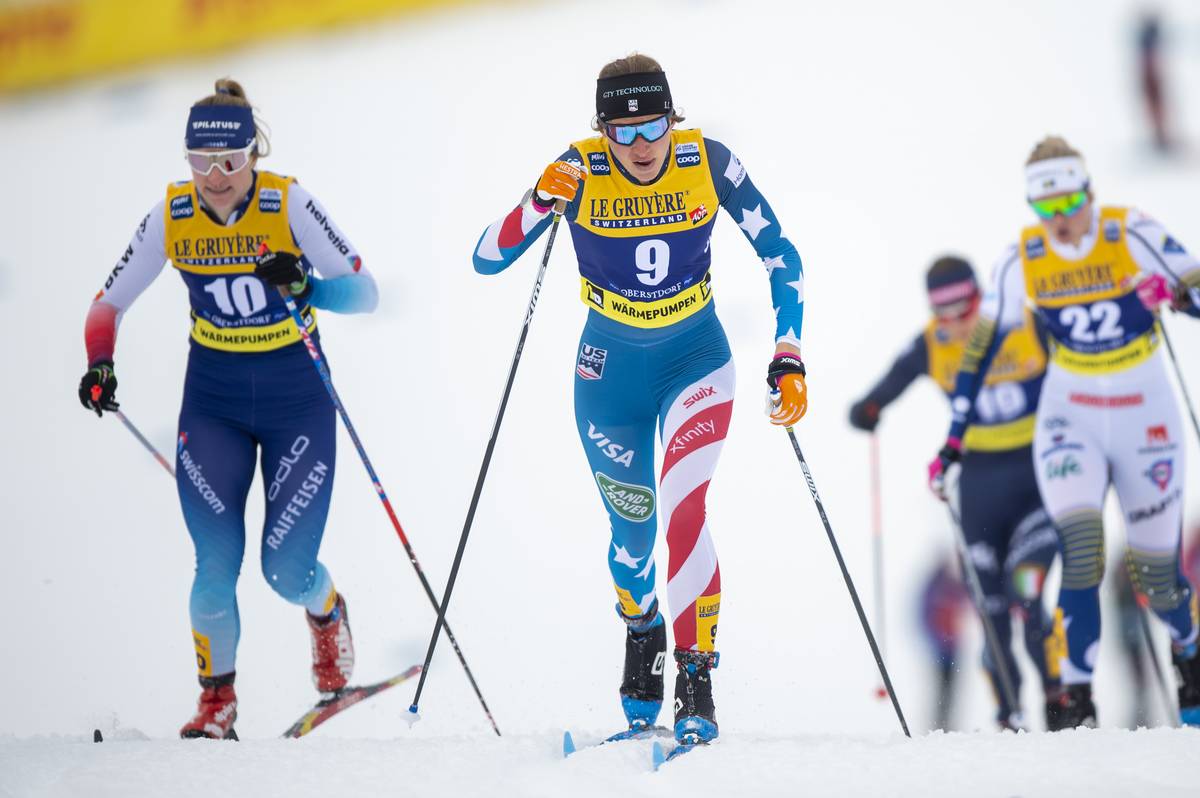
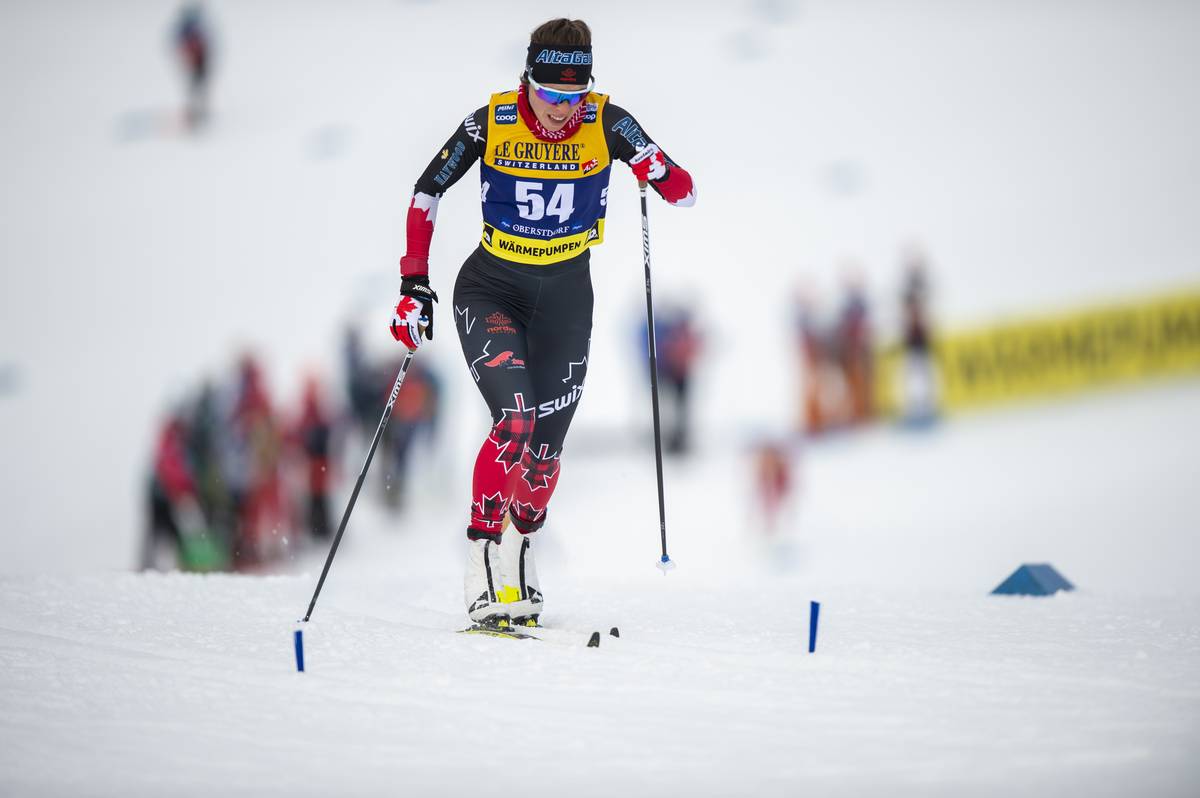
    The start of the women’s 10-kilometer mass start free during Stage 3 of the 2021/22 Tour de Ski in Oberstdorf, Germany. (Photo: NordicFocus)

    The primary symptoms of Chronic Exertional Compartment Syndrome (CECS) include pain, weakness, and/or numbness that only occurs with exertion. These characteristics are fairly distinct, although there can be enough overlap with other soft tissue disorders, namely tendinopathies, that CECS remains a diagnosis of exclusion when everything else has been ruled out. In Nordic skiers, symptoms affect the anterior, lateral, and/or posterior compartments of the lower legs and are most common with (often exclusive to) skating. Typically, or at least initially, these skiers will be symptomatic with high-intensity skating, but will be asymptomatic with classic skiing and running even at the same intensity.

    The physiology is relatively straightforward: our muscles are wrapped in a thin layer of connective tissue called fascia. As muscles repeatedly contract, especially at high intensities, they become enlarged; however, fascia is not elastic and does not stretch. If the muscle size exceeds the volume of the fascial compartment, blood flow is constricted, oxygen delivery is decreased, and the muscle gets strangled. This hypoxia in the muscle triggers a pain response, which is usually a good defense mechanism to make us stop doing something that the body perceives as harmful.

    The why is far more complex: some theorize that the fascia is just wrapped too tightly. Others suspect that the muscles are too big for the fascia. In either case, the common solution is a surgical fasciotomy where an incision is made in the fascia to increase the size of the compartment and decrease its stranglehold on the muscle.

    The why with skiing is even more complex. With CECS occurring with skate vs. classic, the initial theories centered around the ski retrieval phase. This makes sense with the work being done by the tibialis anterior muscle, which dorsiflexes the ankle while the ski is brought back to its glide phase position. Except that CECS can affect other lower leg muscles/fascial compartments which would not be active during the retrieval phase. Arguably the biggest difference between skate and classic techniques, at least as far as the muscles of the lower leg are concerned, is the stability demand of balancing on the gliding ski: the muscles must work much harder with skating.

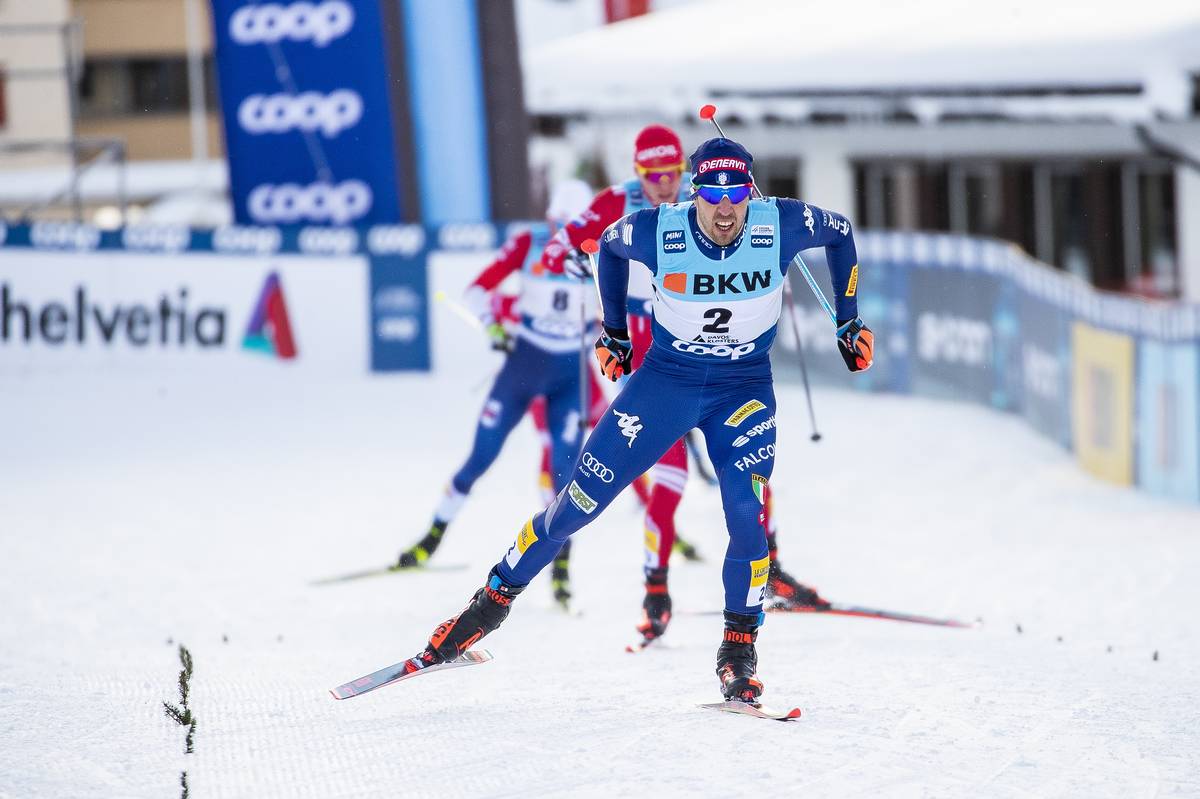
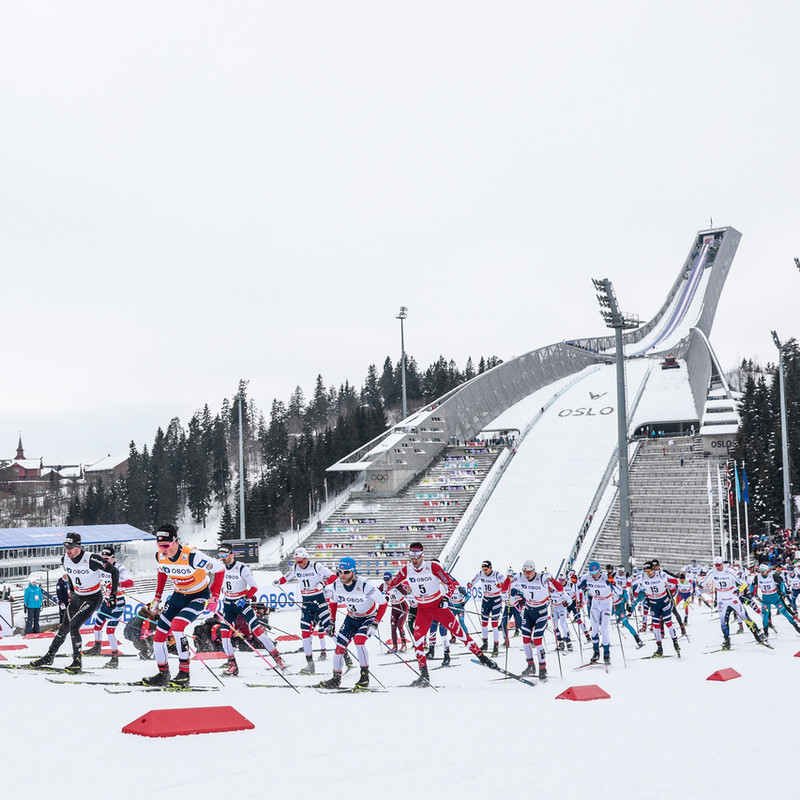
    A dense field of men’s skiers during Saturday’s 15 k mass start classic in Falun, Sweden. (Photo: NordicFocus)

    A case study

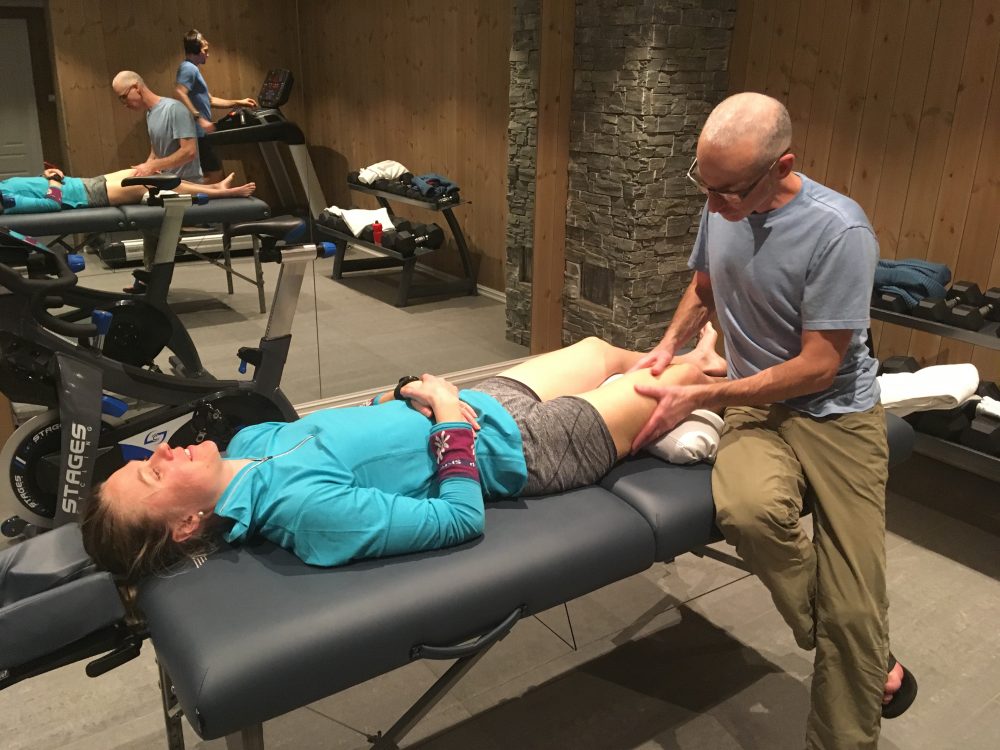
    The patient in our story is an 18-year-old male skier. He is a very competitive skier regionally and would have qualified for Junior Nationals had his skate races not been disrupted by leg pain. We had our initial physical therapy visit in mid-January, mid-race season. He reported pain, progressing to numbness, in both shins, which only occurred during high-intensity skate skiing. Symptoms were first noticed the previous winter during a skate race in icy conditions, but he didn’t have any additional episodes for the remainder of that season or during the summer. In October, however, symptoms returned during a skate interval session, persisted with any high-intensity skating, and got progressively worse through the race season. He was unable to finish his last skate race due to severe pain.

    In physical therapy exams and diagnostics, we are keen on reproducing patients’ symptoms. If we can do this in specific ways, we can begin to rule in or rule out anatomical structures which may be involved. For better or worse, I was unable to reproduce the patient’s symptoms in the clinic. This would likely rule out a muscle strain or tendinopathy, both of which tend to be painful with resisted tests (assuming we can make the tests both hard enough and specific enough). Differential diagnosis still included lumbar radiculopathy (nerve irritation at the spine leading to symptoms in the leg) or a bone stress injury (a.k.a. stress fracture), but neither of these fit the picture of symptoms being exclusive to high-intensity skating and absent at rest or especially with other modes of exercise. The symptoms really fit the pattern of CECS. To confirm, the gold-standard diagnostic would be compartment pressure testing; however, this testing is quite painful, fairly inconvenient (unless you have a rollerski treadmill in the clinic), and primarily aimed at determining if the patient is a candidate for surgery. Since this patient was looking to salvage his race season and avoid, or at least delay, surgery, we opted to skip the pressure testing but assumed that he was dealing with CECS.

    The remainder of the physical exam focused on ski technique, or at least the static components we could observe in the clinic: hip strength (fair), balance (compensated with lateral trunk lean), ankle dorsiflexion range of motion (appropriate), and foot stability (notable flexibility and forefoot varus). These findings were significant enough to suspect that the patient’s lower leg muscles were working very hard to maintain balance on his glide ski. The hip weakness and compensated single-leg balance made me suspect that if he was lacking stability from the top down, then he was having to work much harder from the bottom up, thus overloading the muscles at the ankle and leading to CECS.

    The root cause of any musculoskeletal symptoms can be described as an imbalance between load being placed on the body and the body’s ability to tolerate that load. In physical therapy, we are looking to balance that equation. Sure, we can decrease load by telling patients not to do things that are painful, and some of that may be required in the short term, but we’re not in the business of telling people to stop doing fun things. Thus, much of the work we do is aimed at improving the patient’s ability to tolerate load. The trick becomes sorting out where there is room for improvement and how to get there.

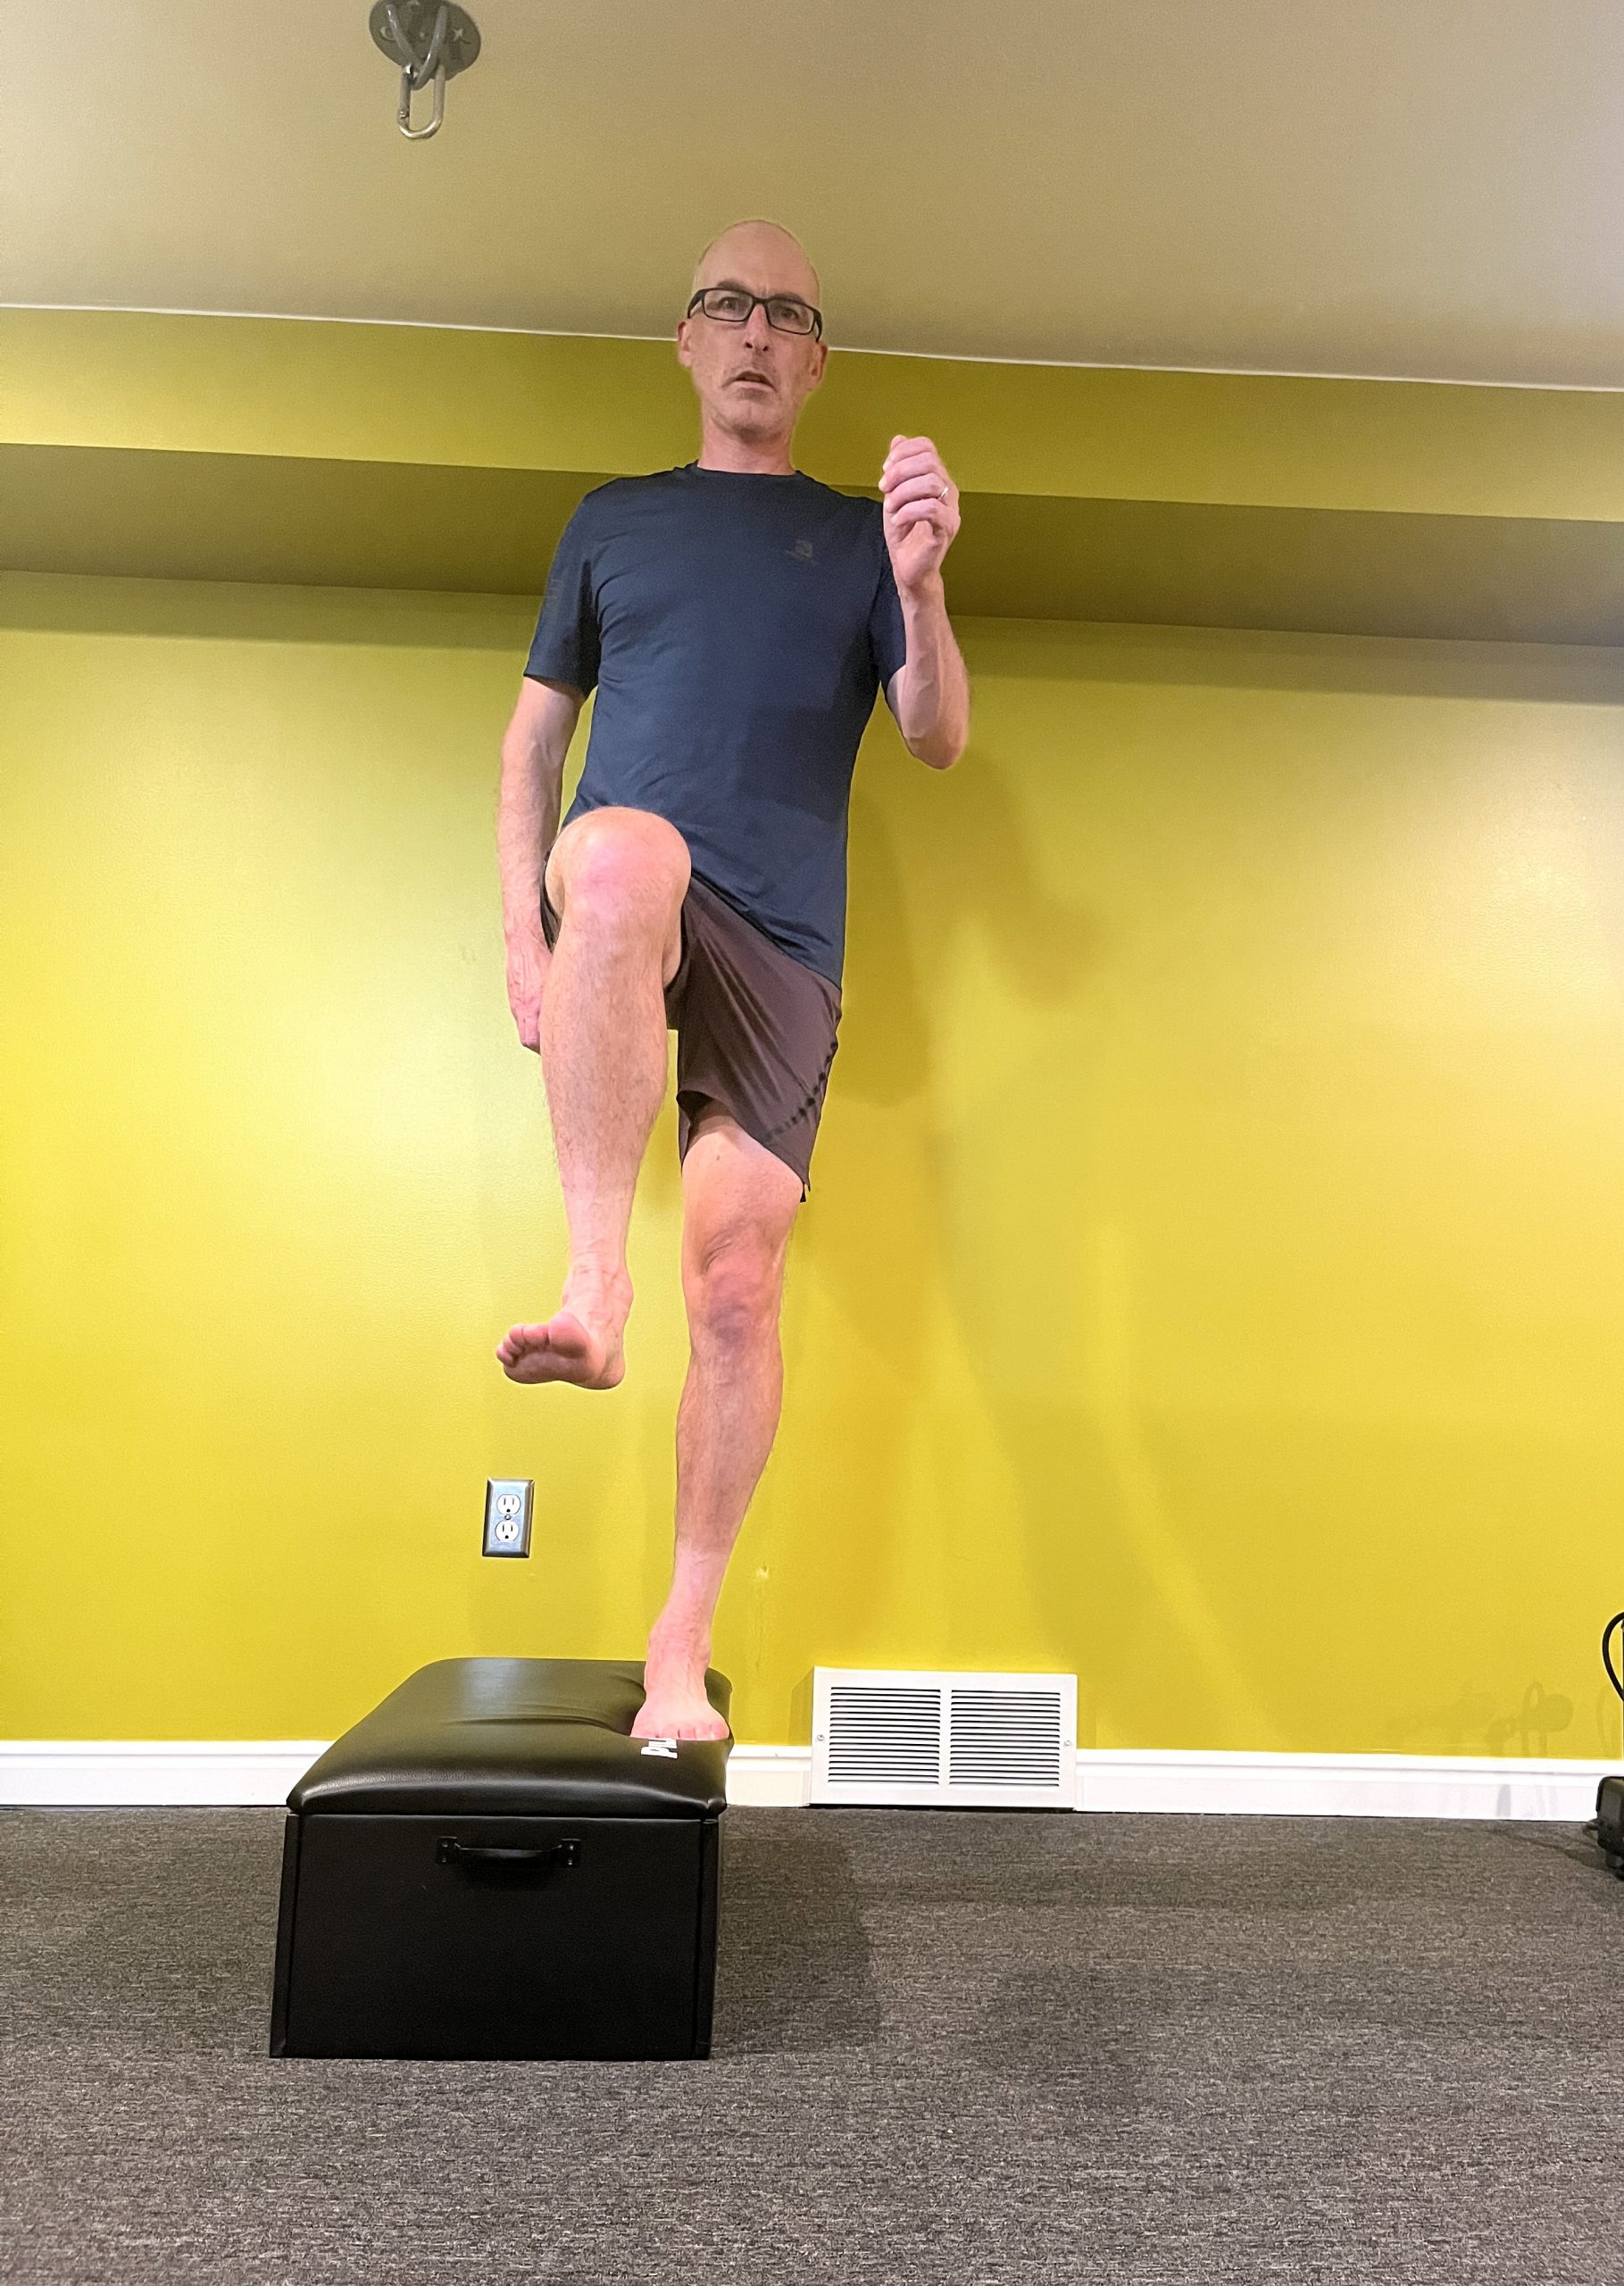
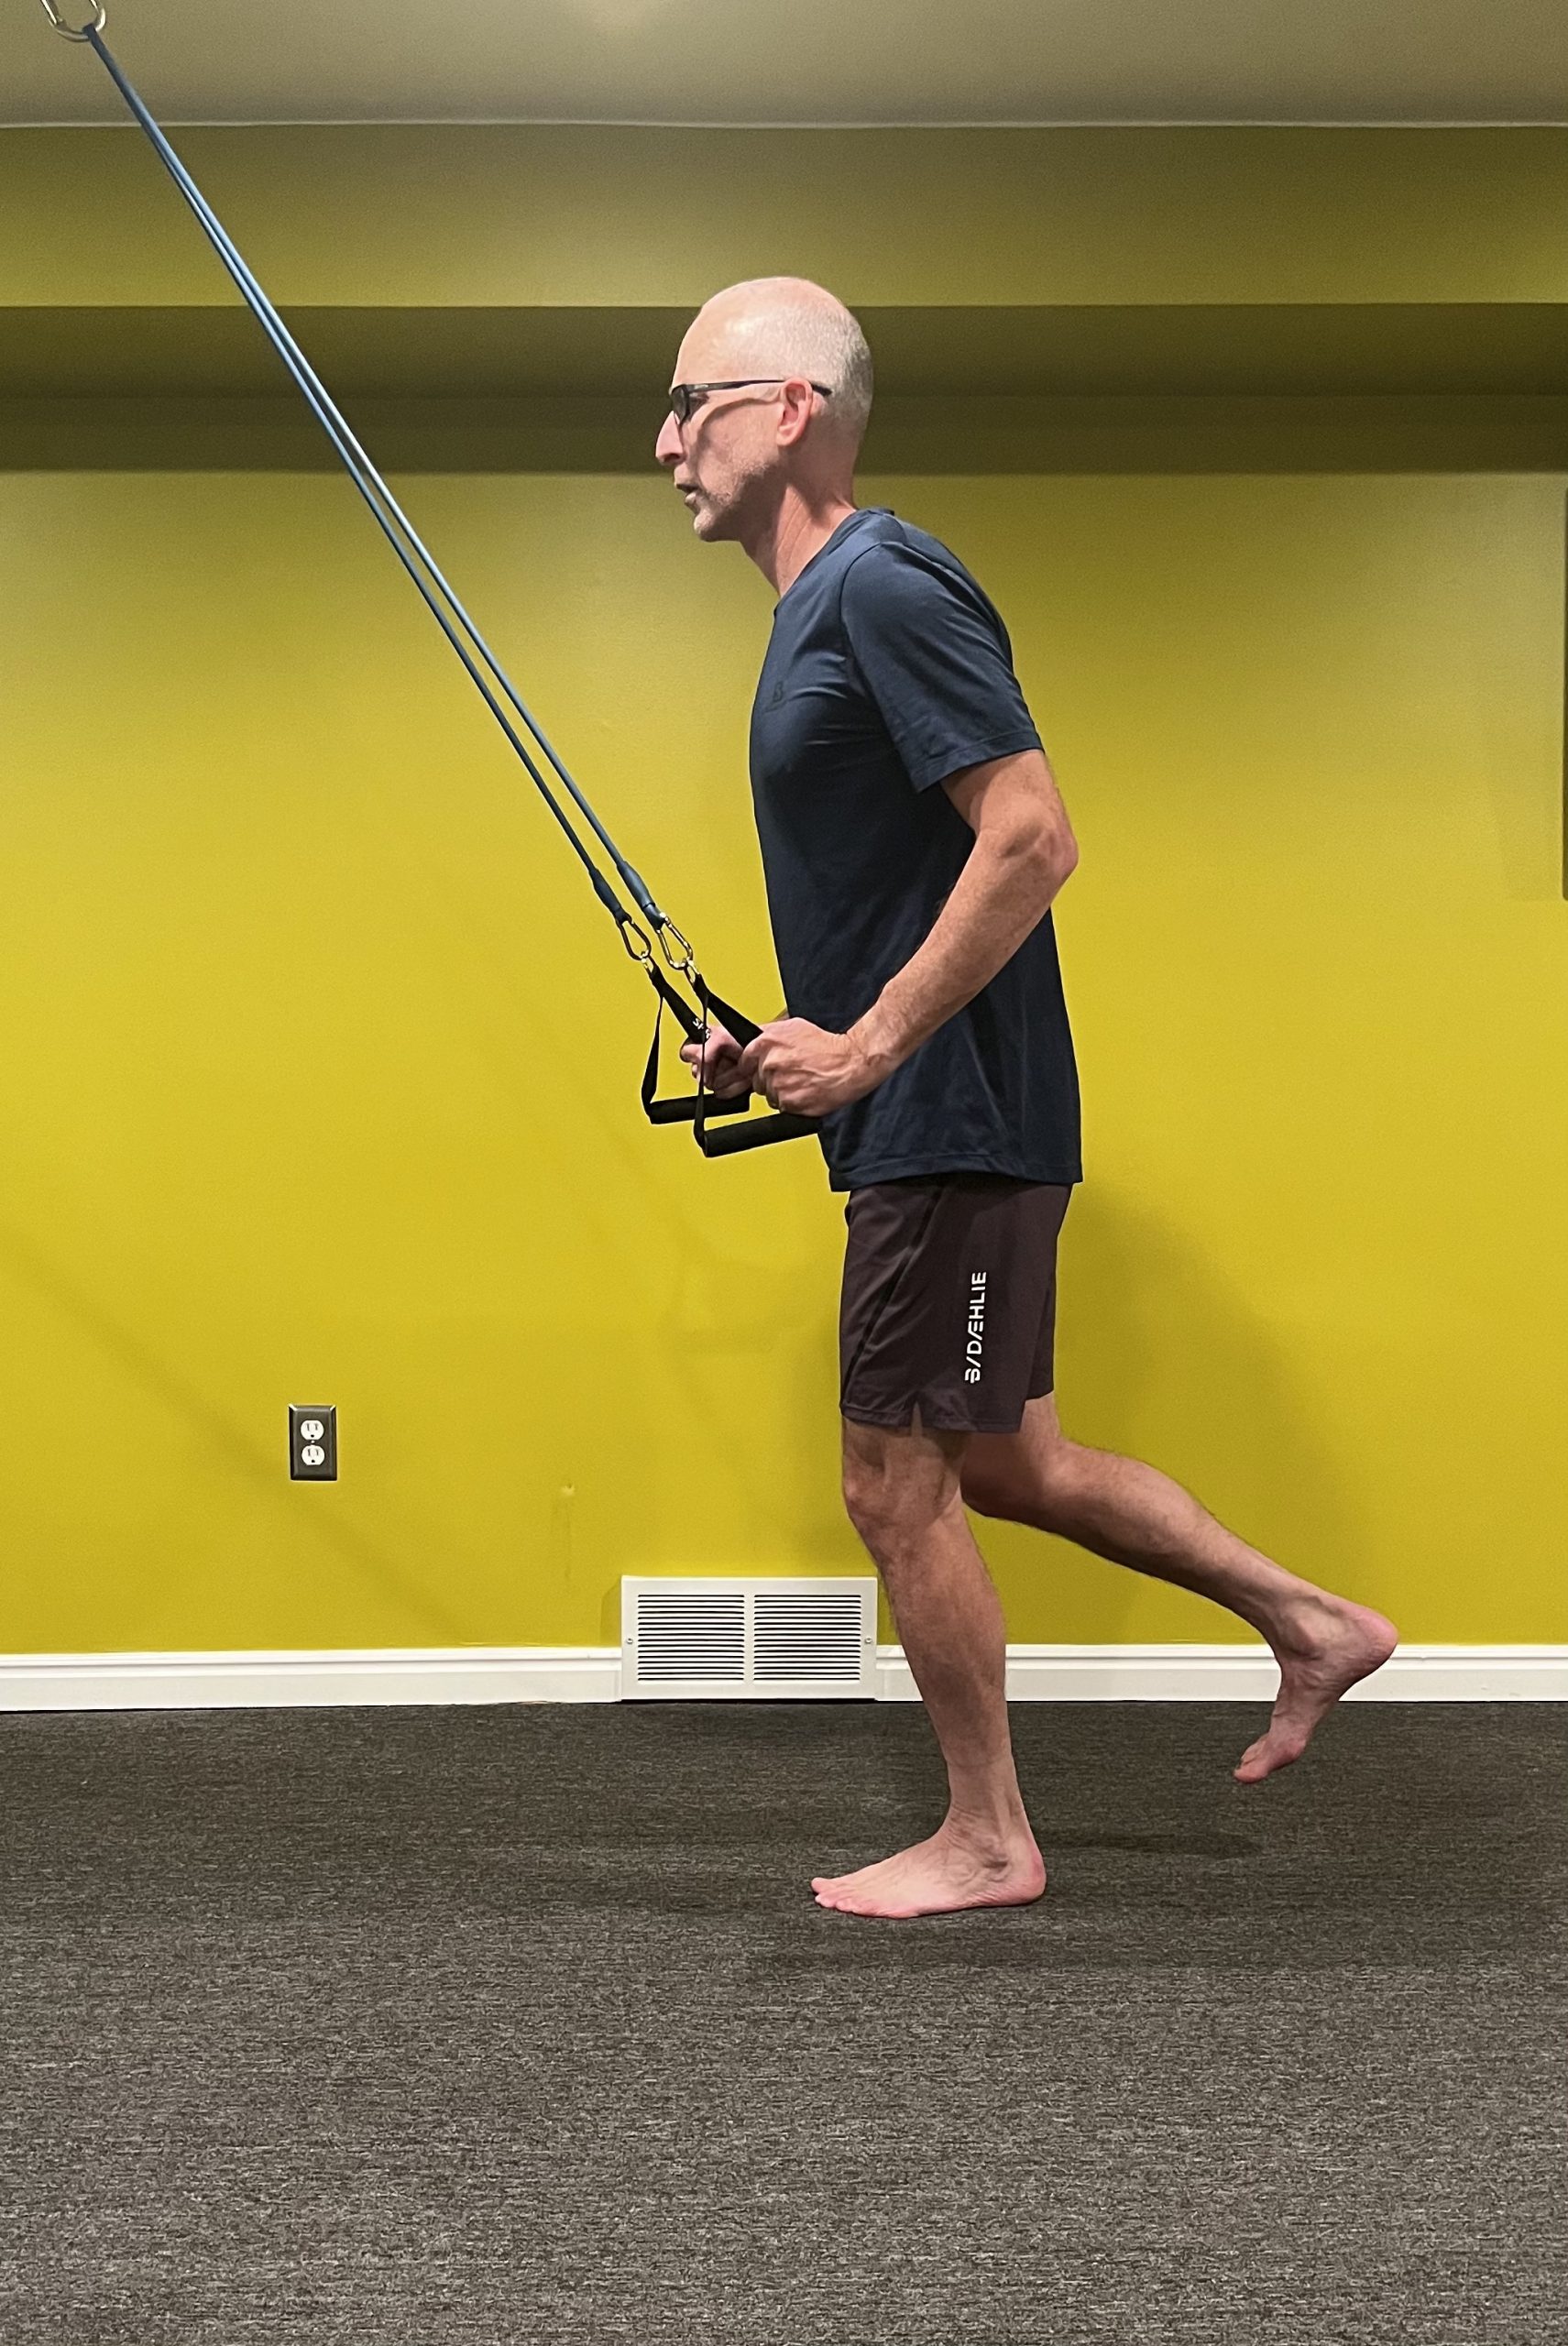
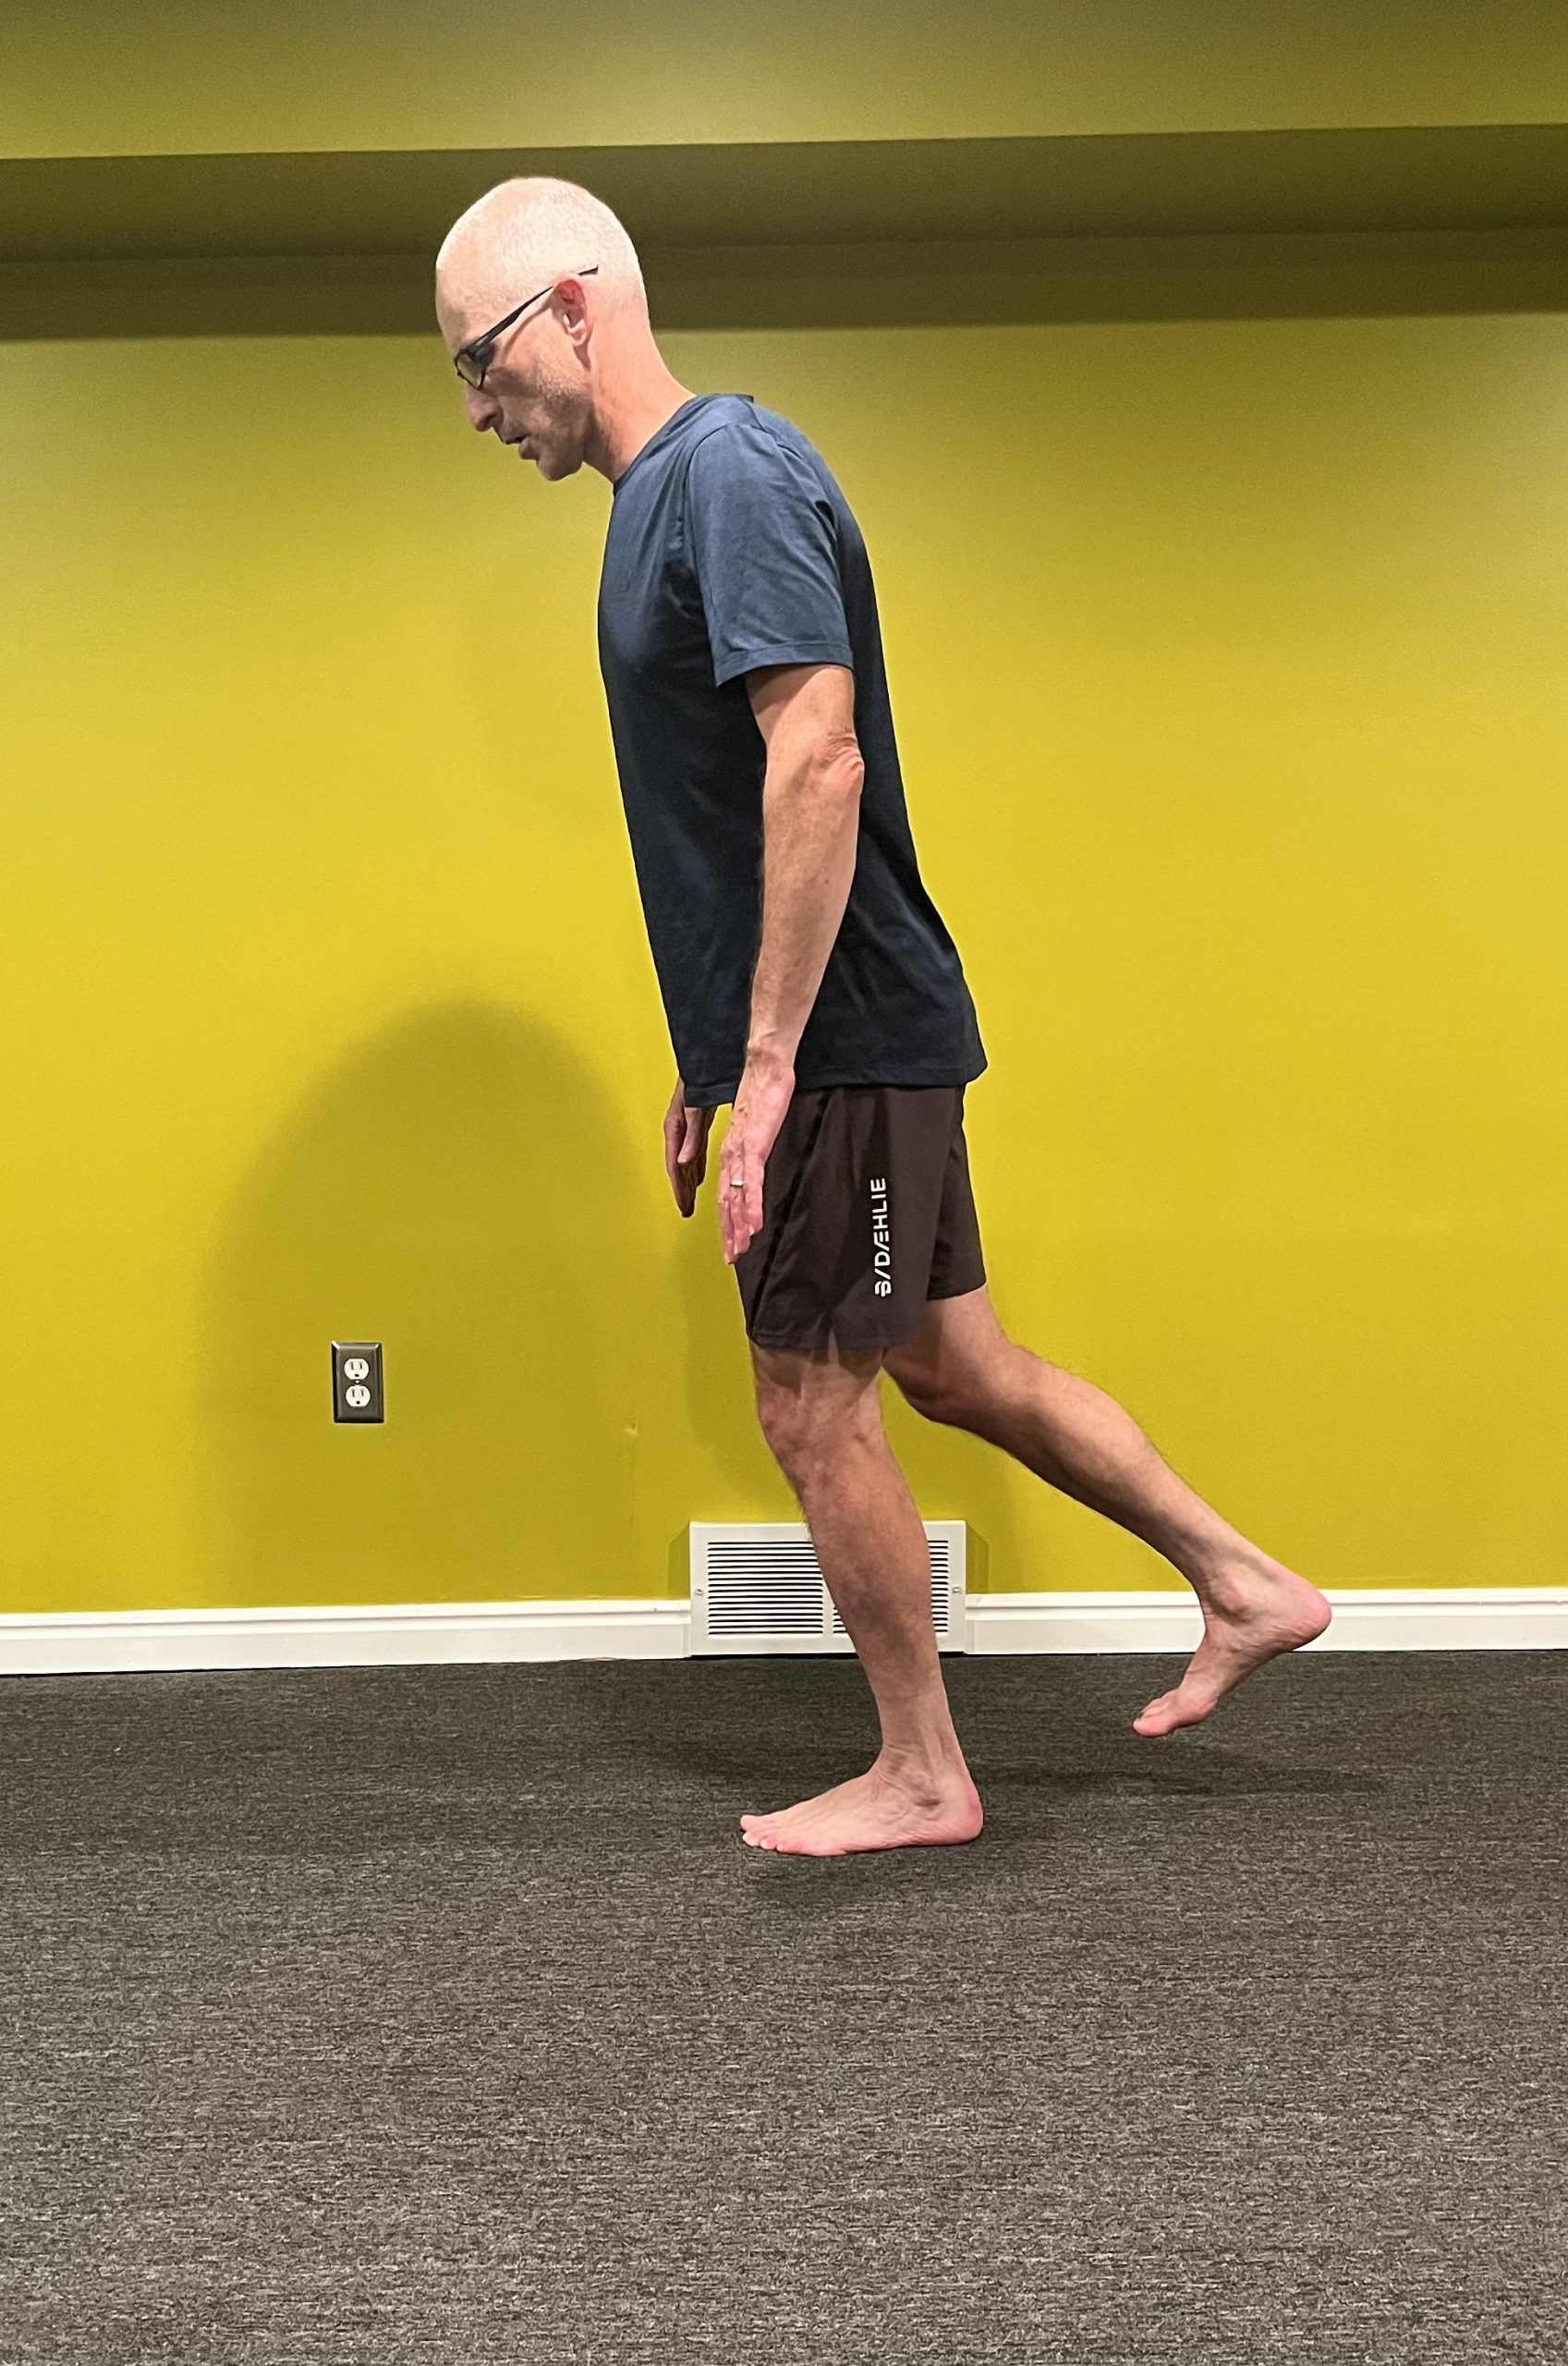
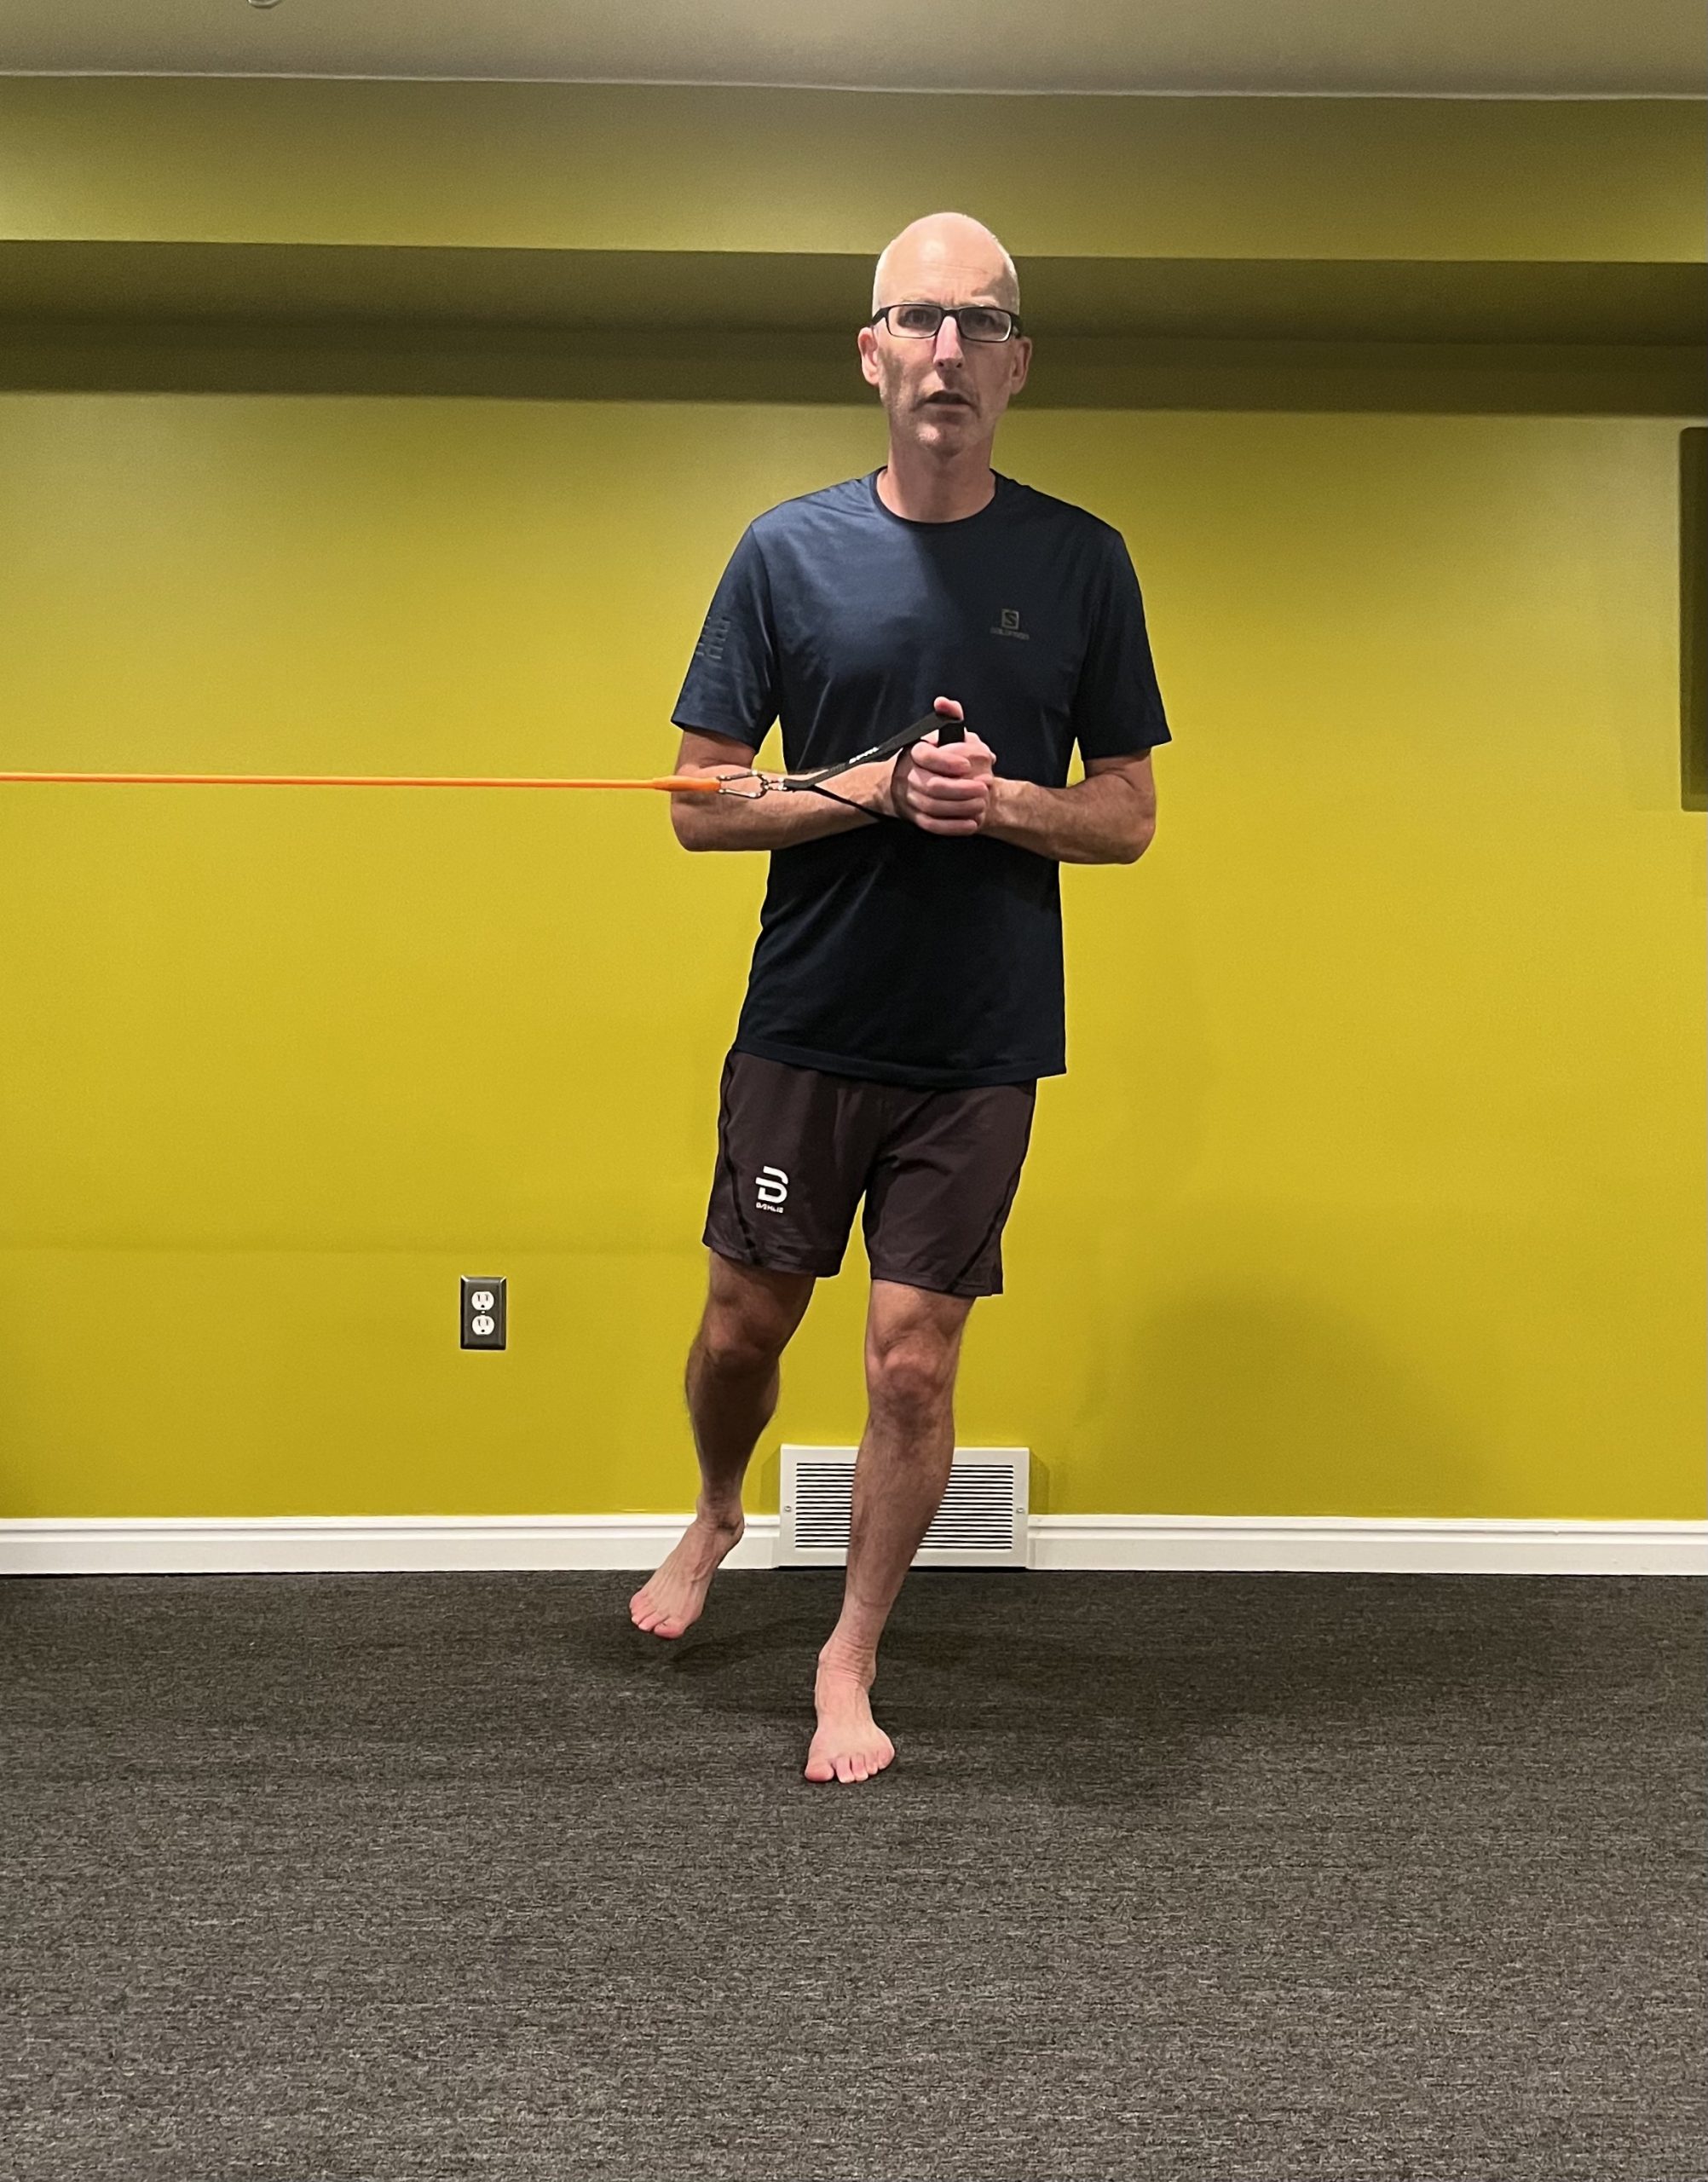
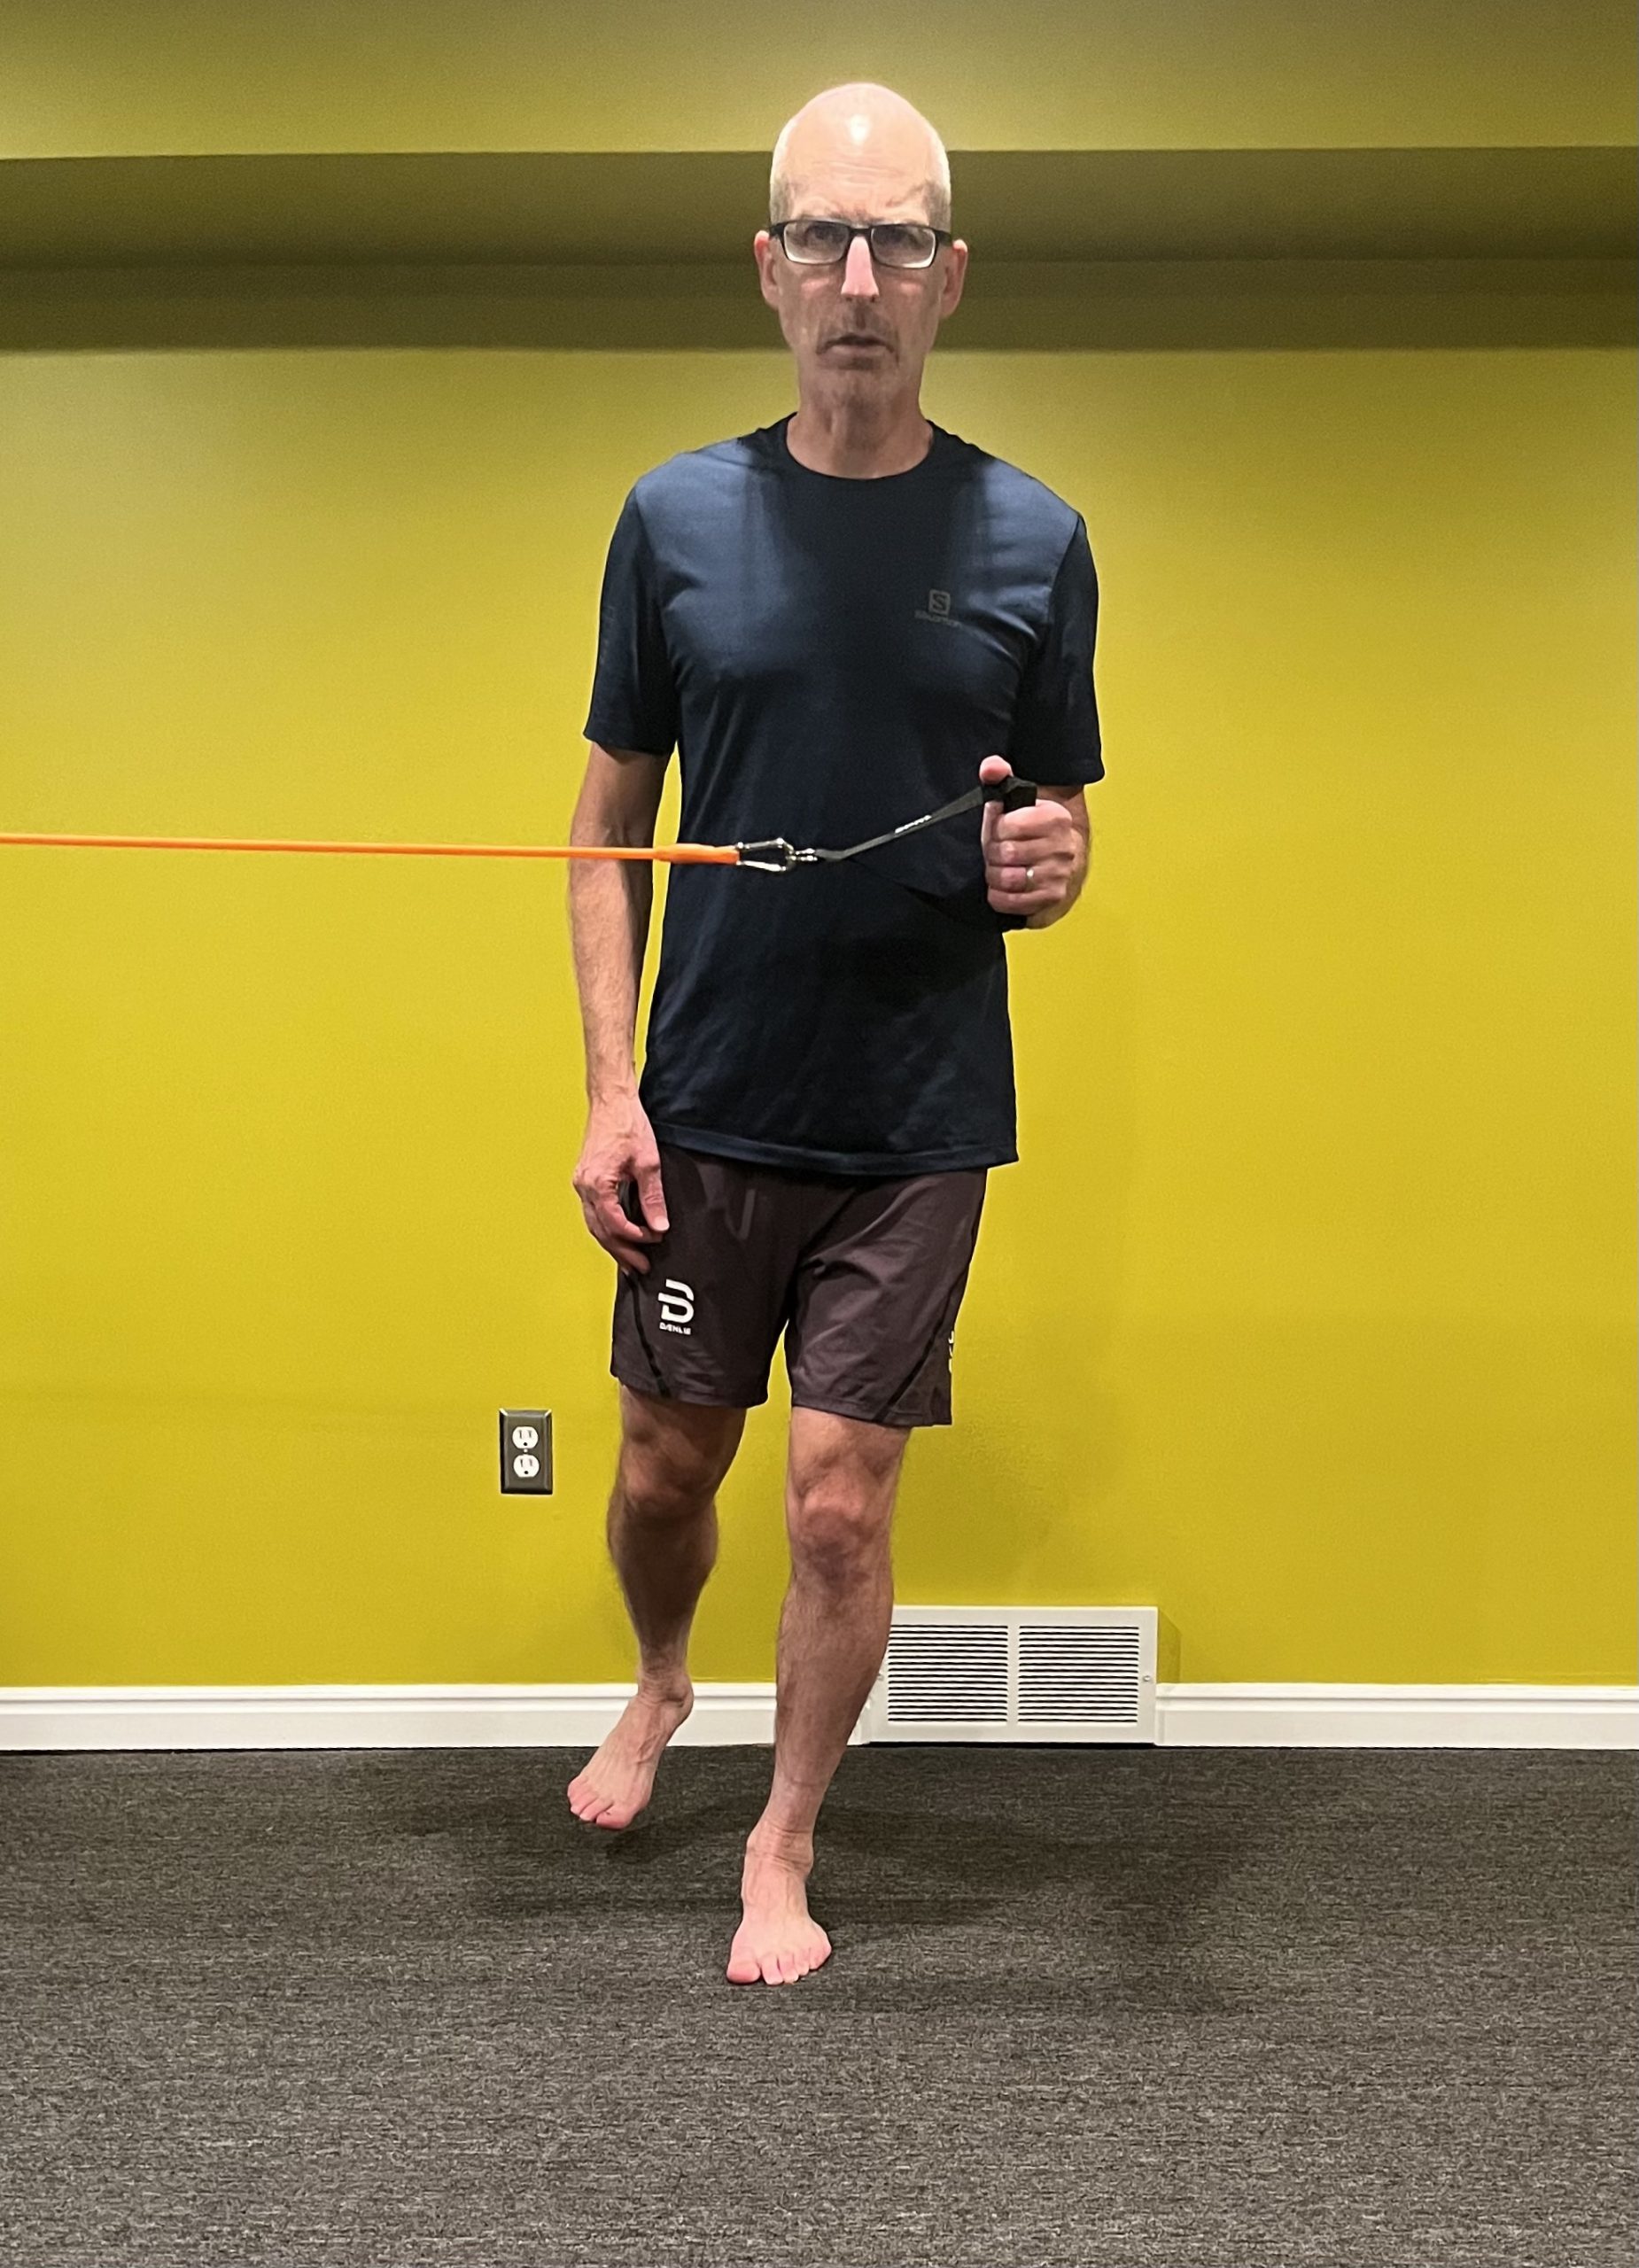
    His first round of exercises focused on balance without compensation (single-leg stance with a Pallof press and lateral hops to balance on one leg) and hip strength (side plank variants and fire hydrants). On the load mitigation side, we discussed using more supportive insoles, which he had only recently acquired, and training modifications with skating limited to short bouts of low-intensity skating and all high-intensity work done in the classic tracks.

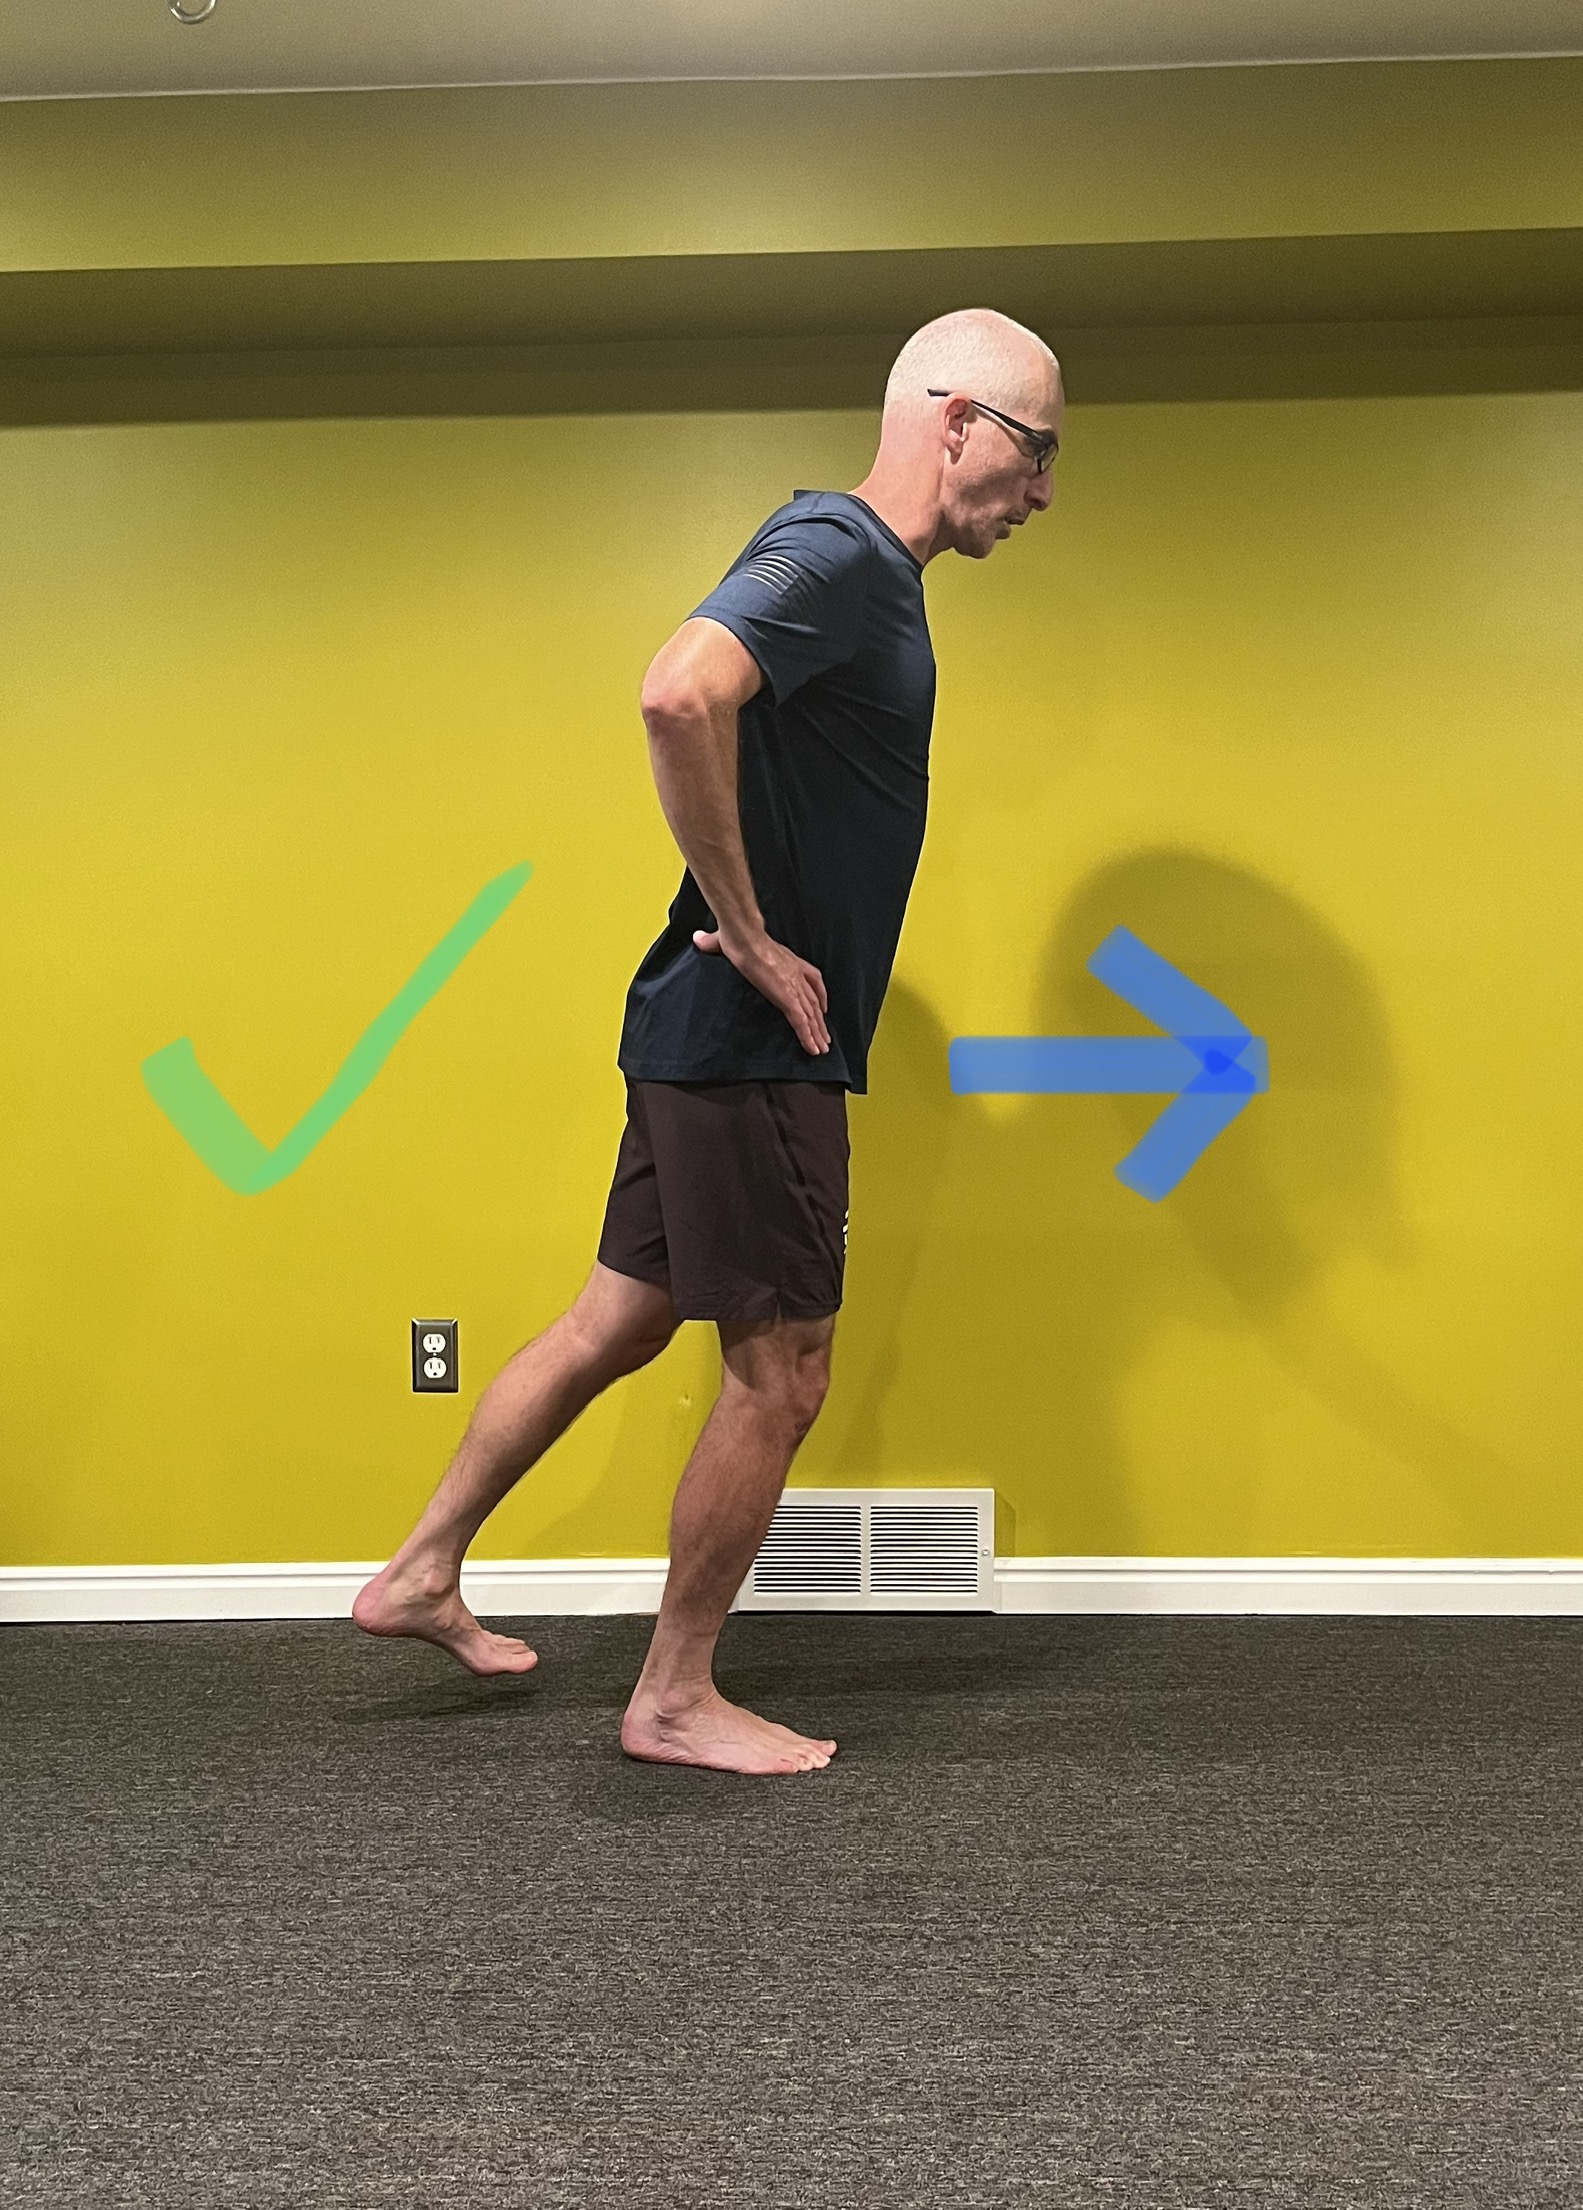
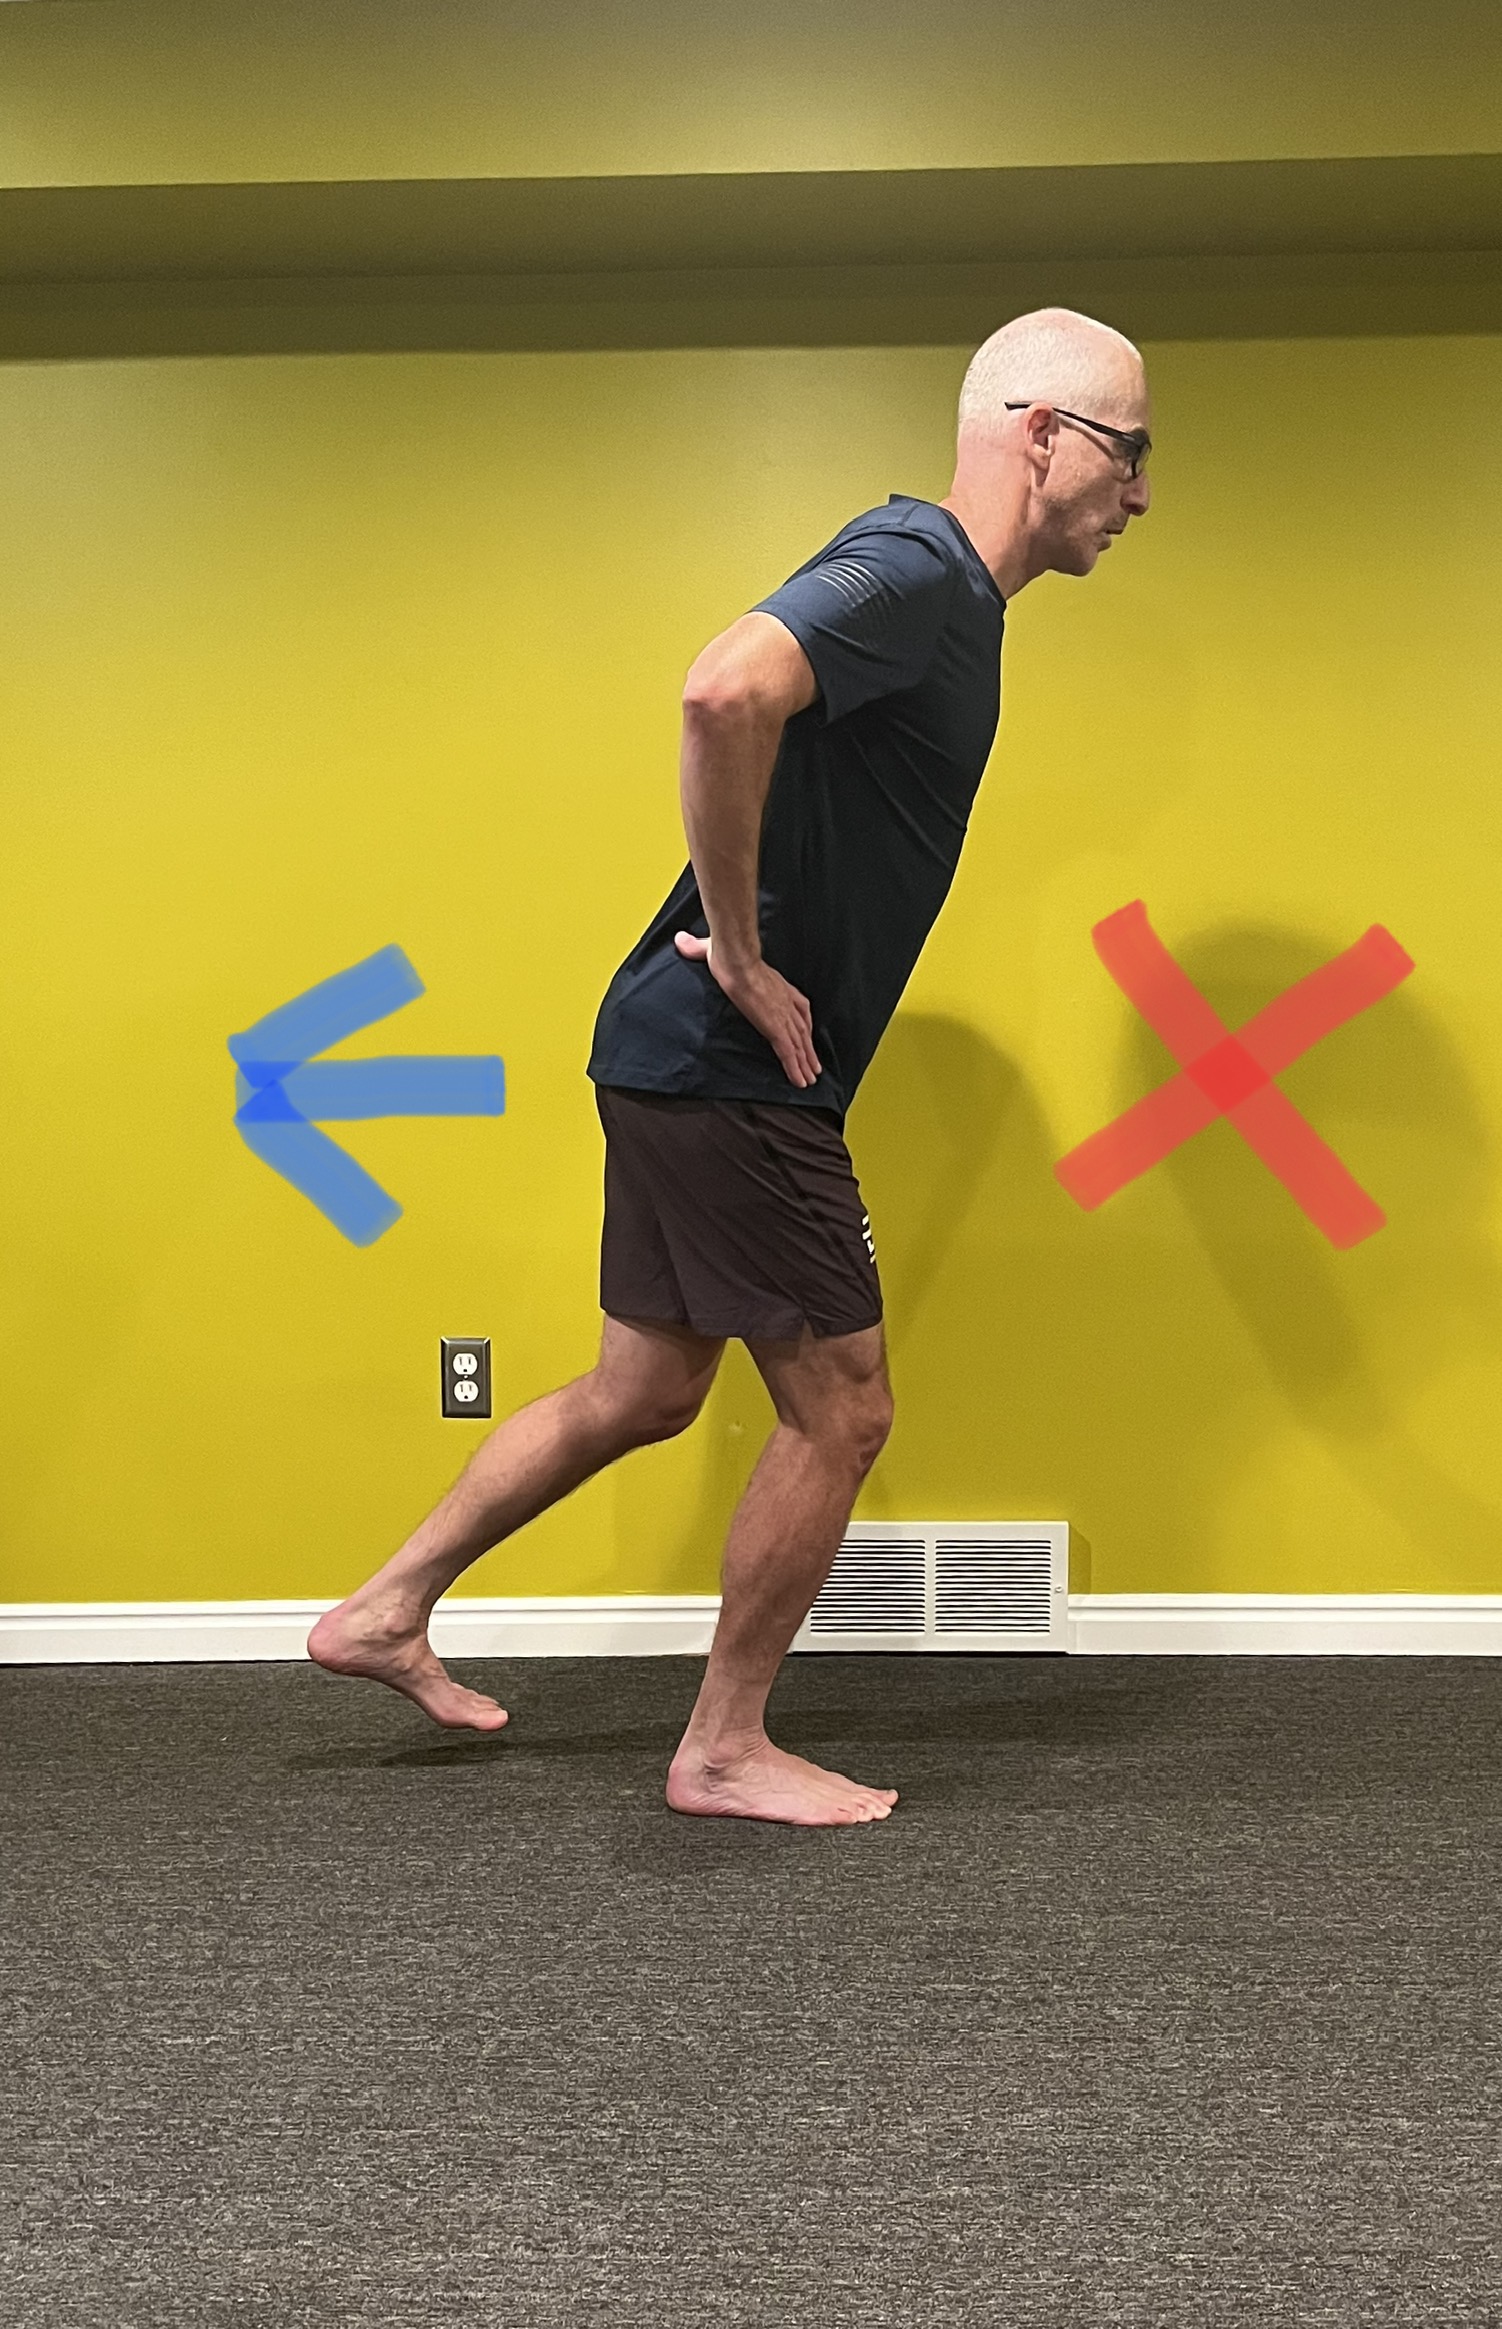
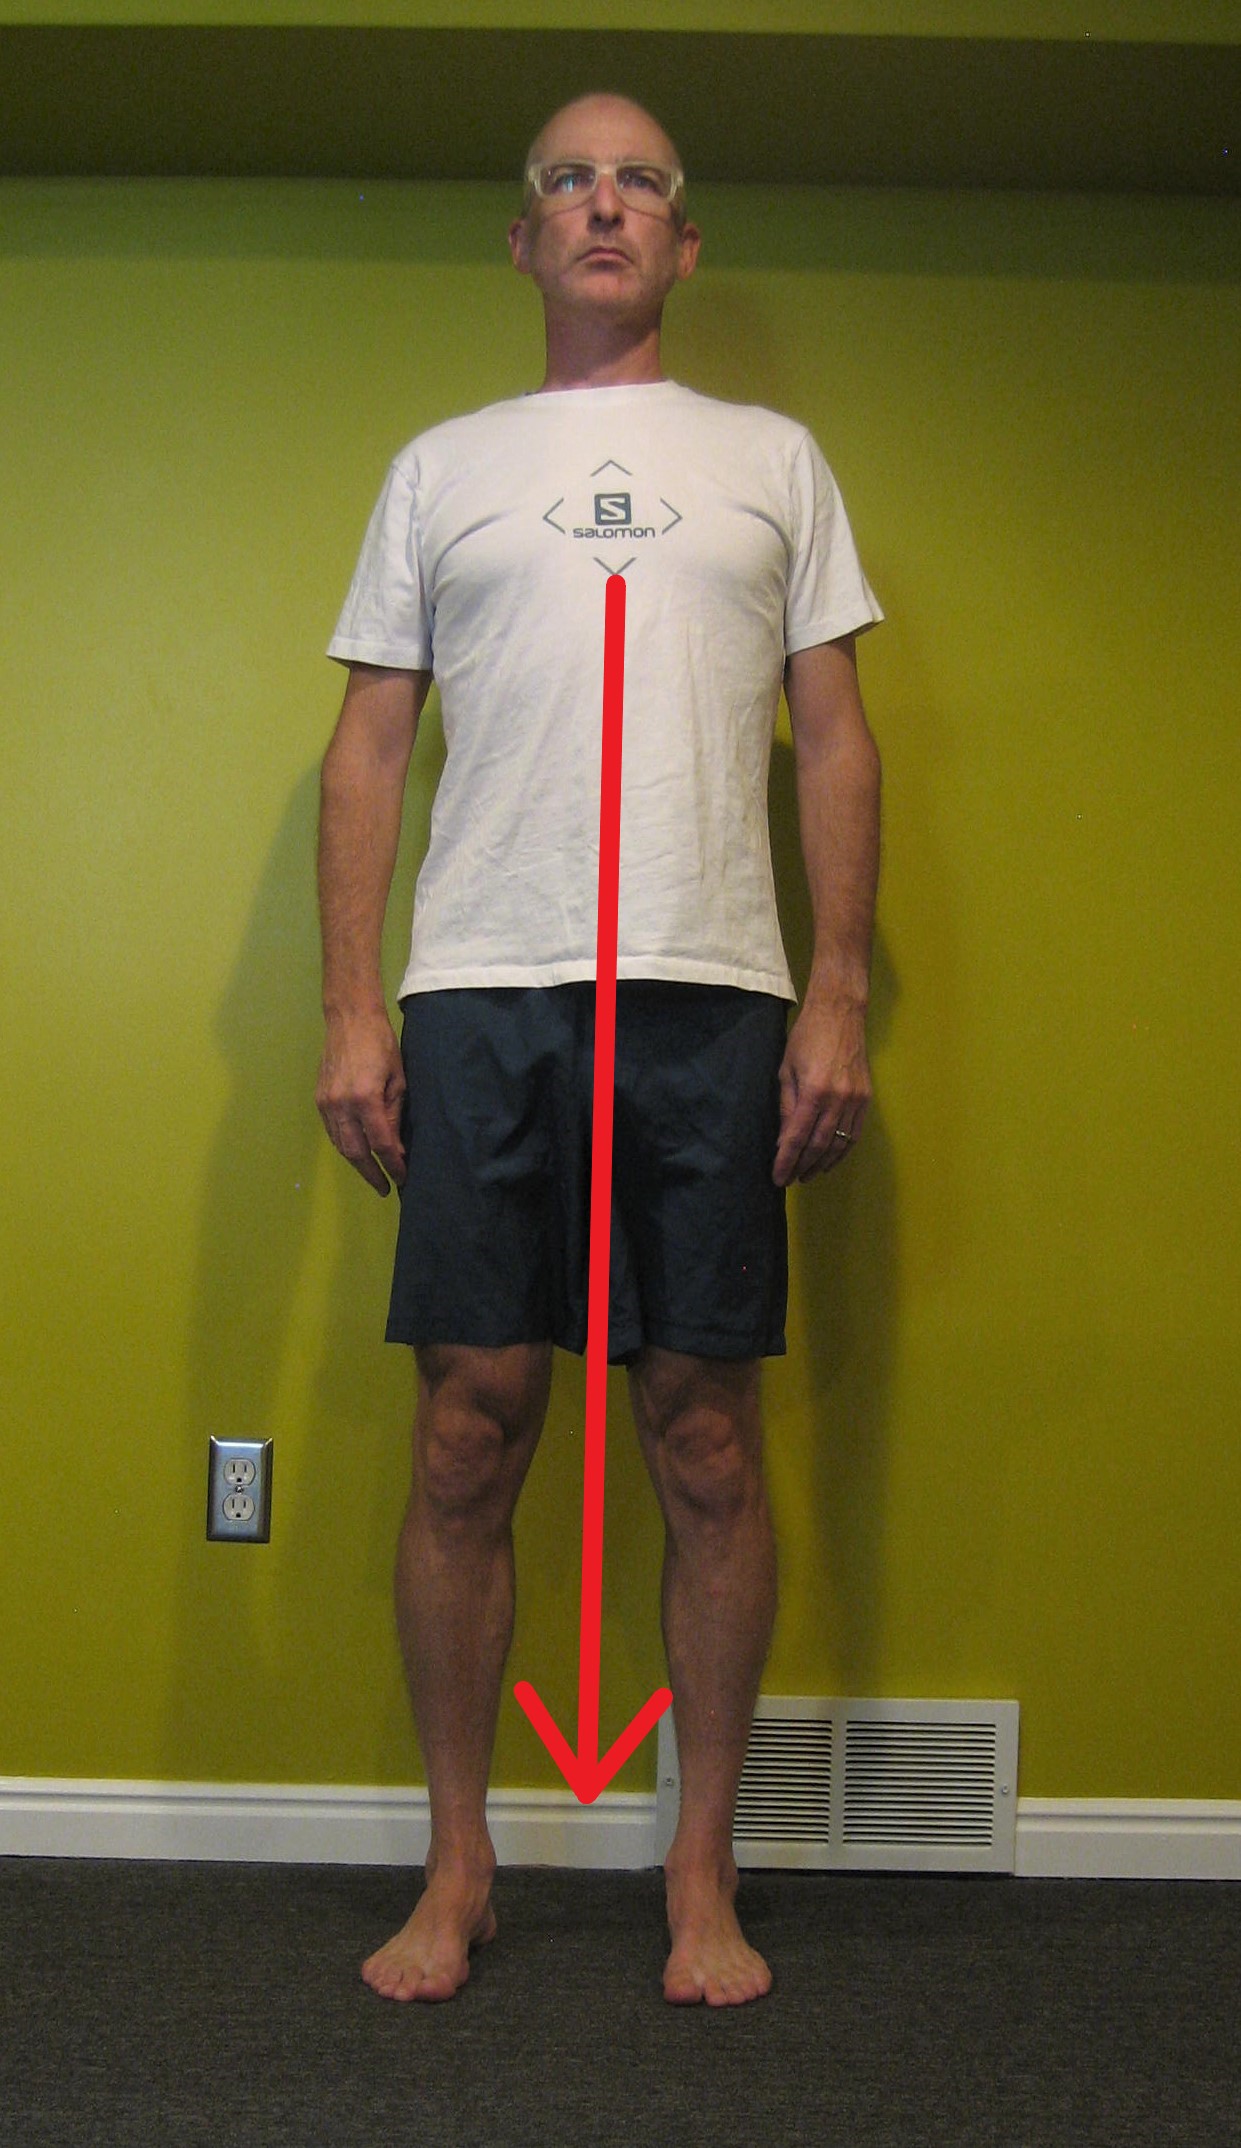
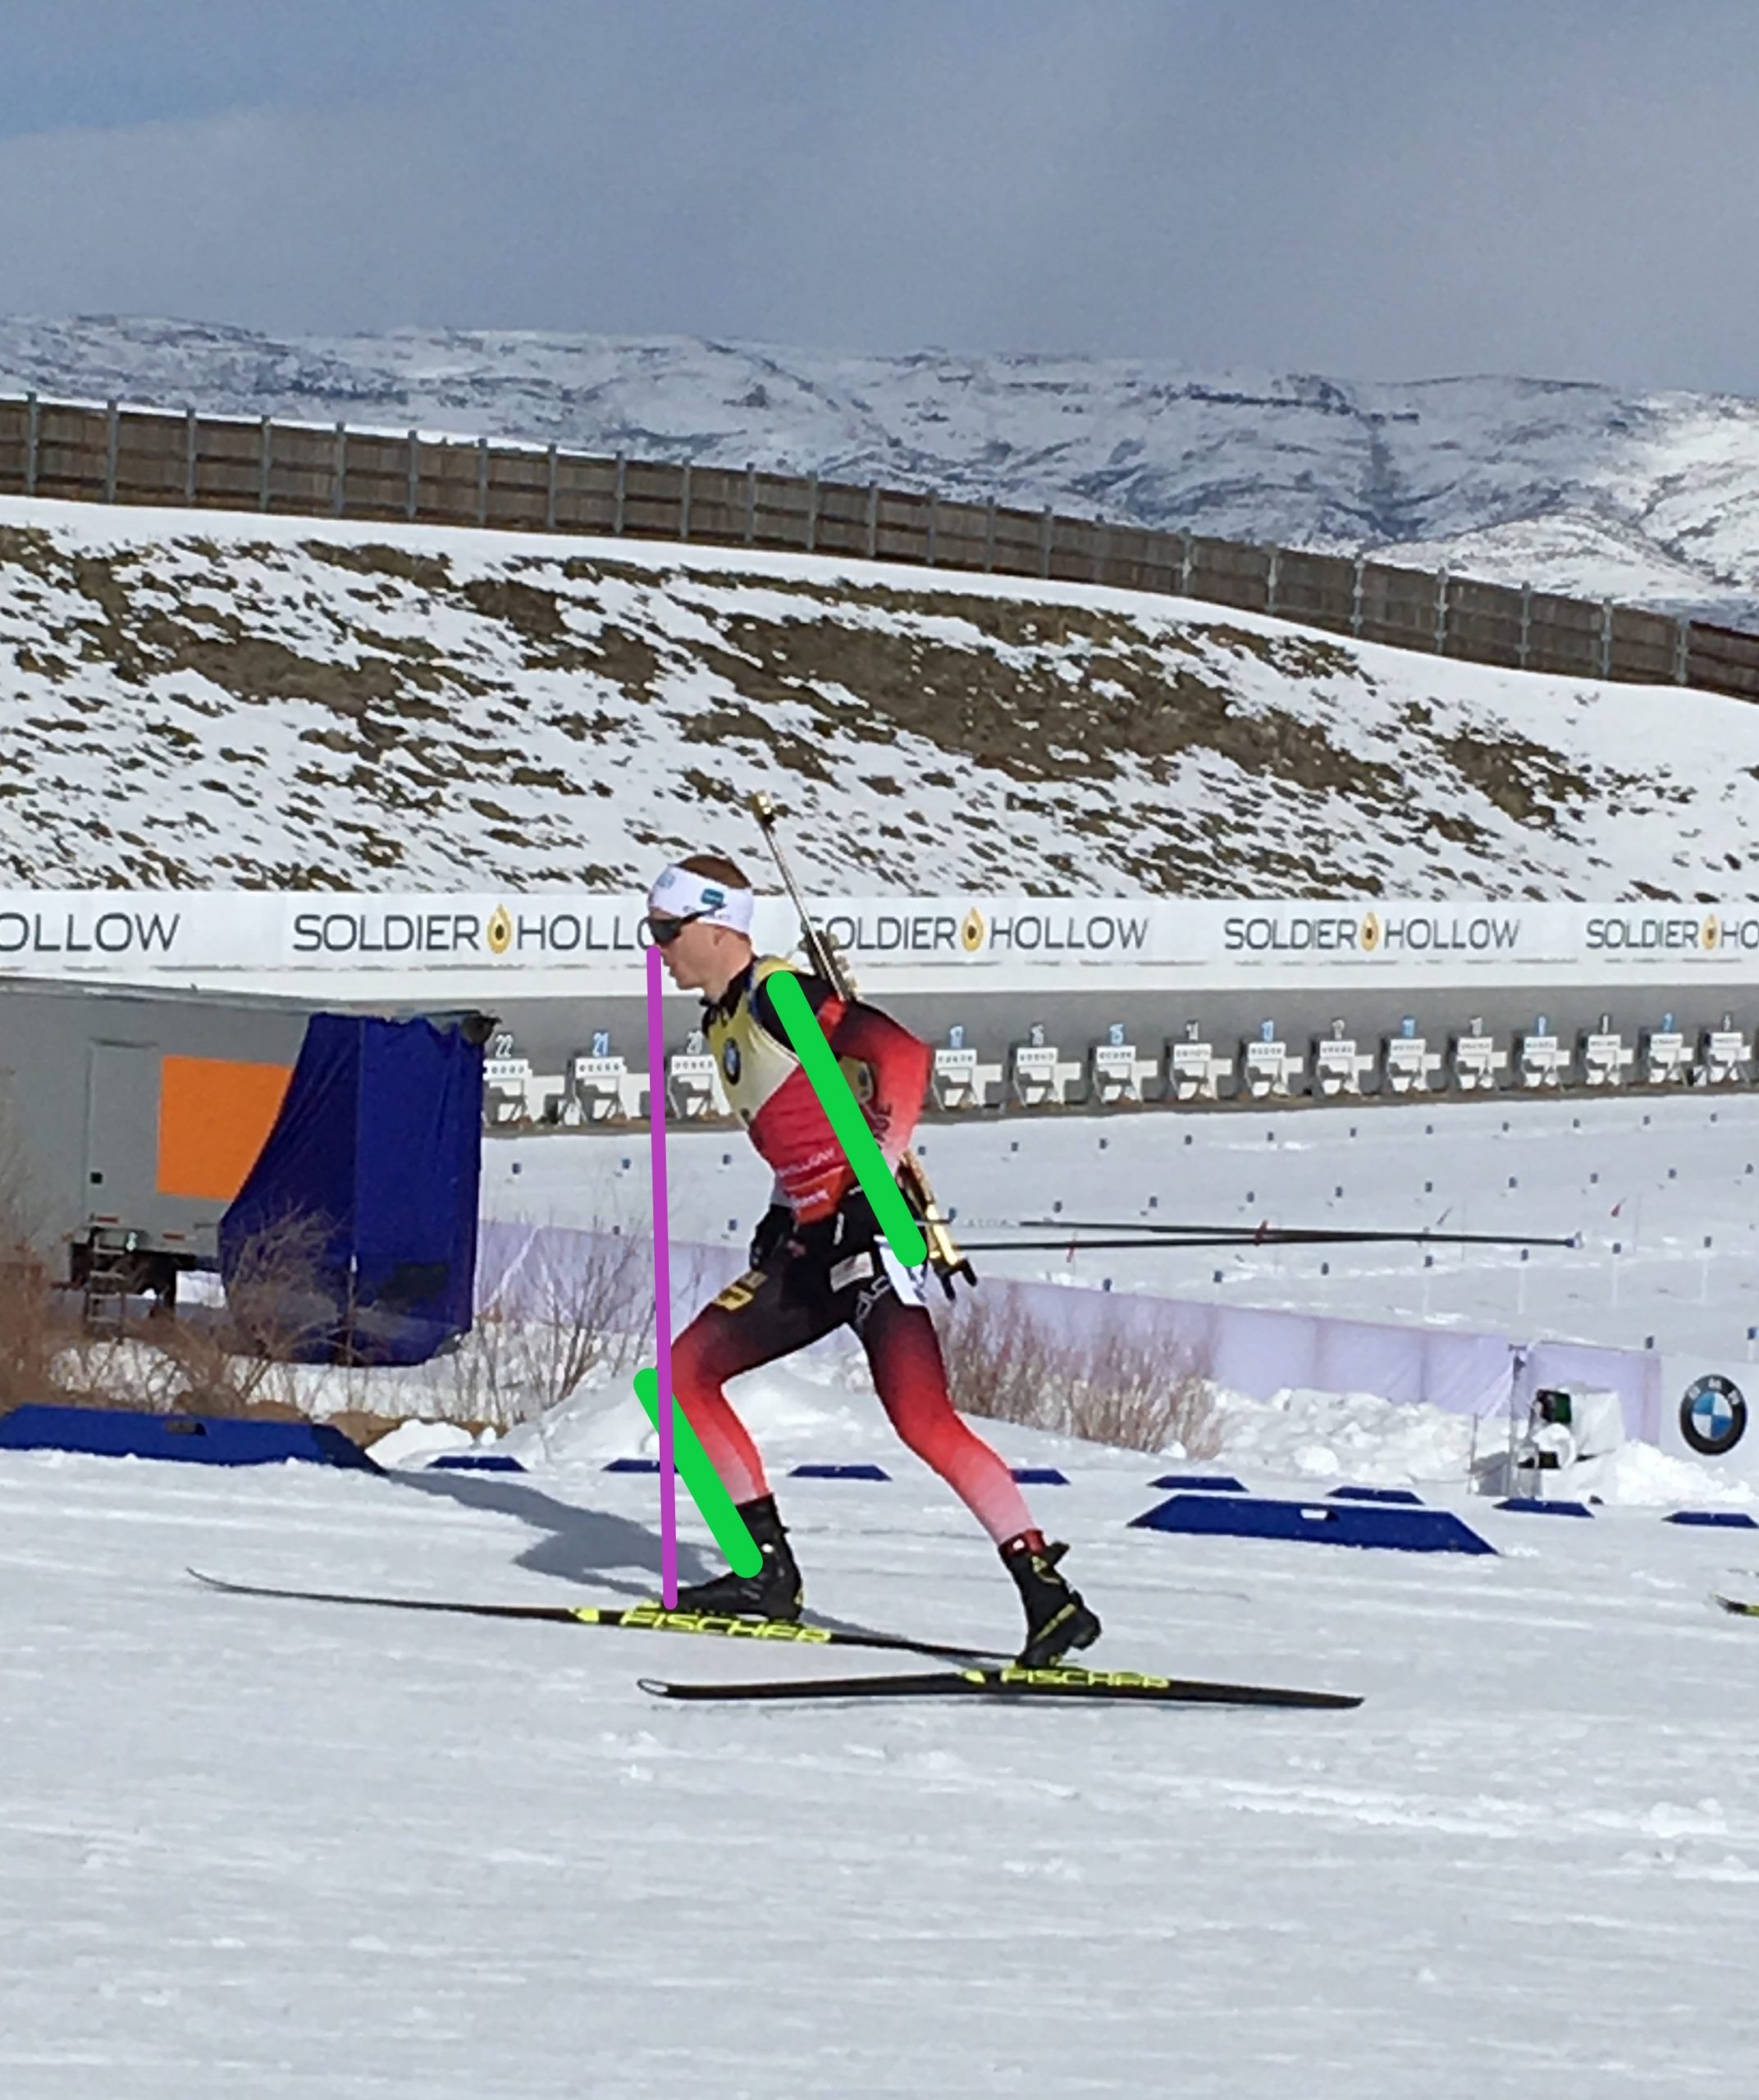
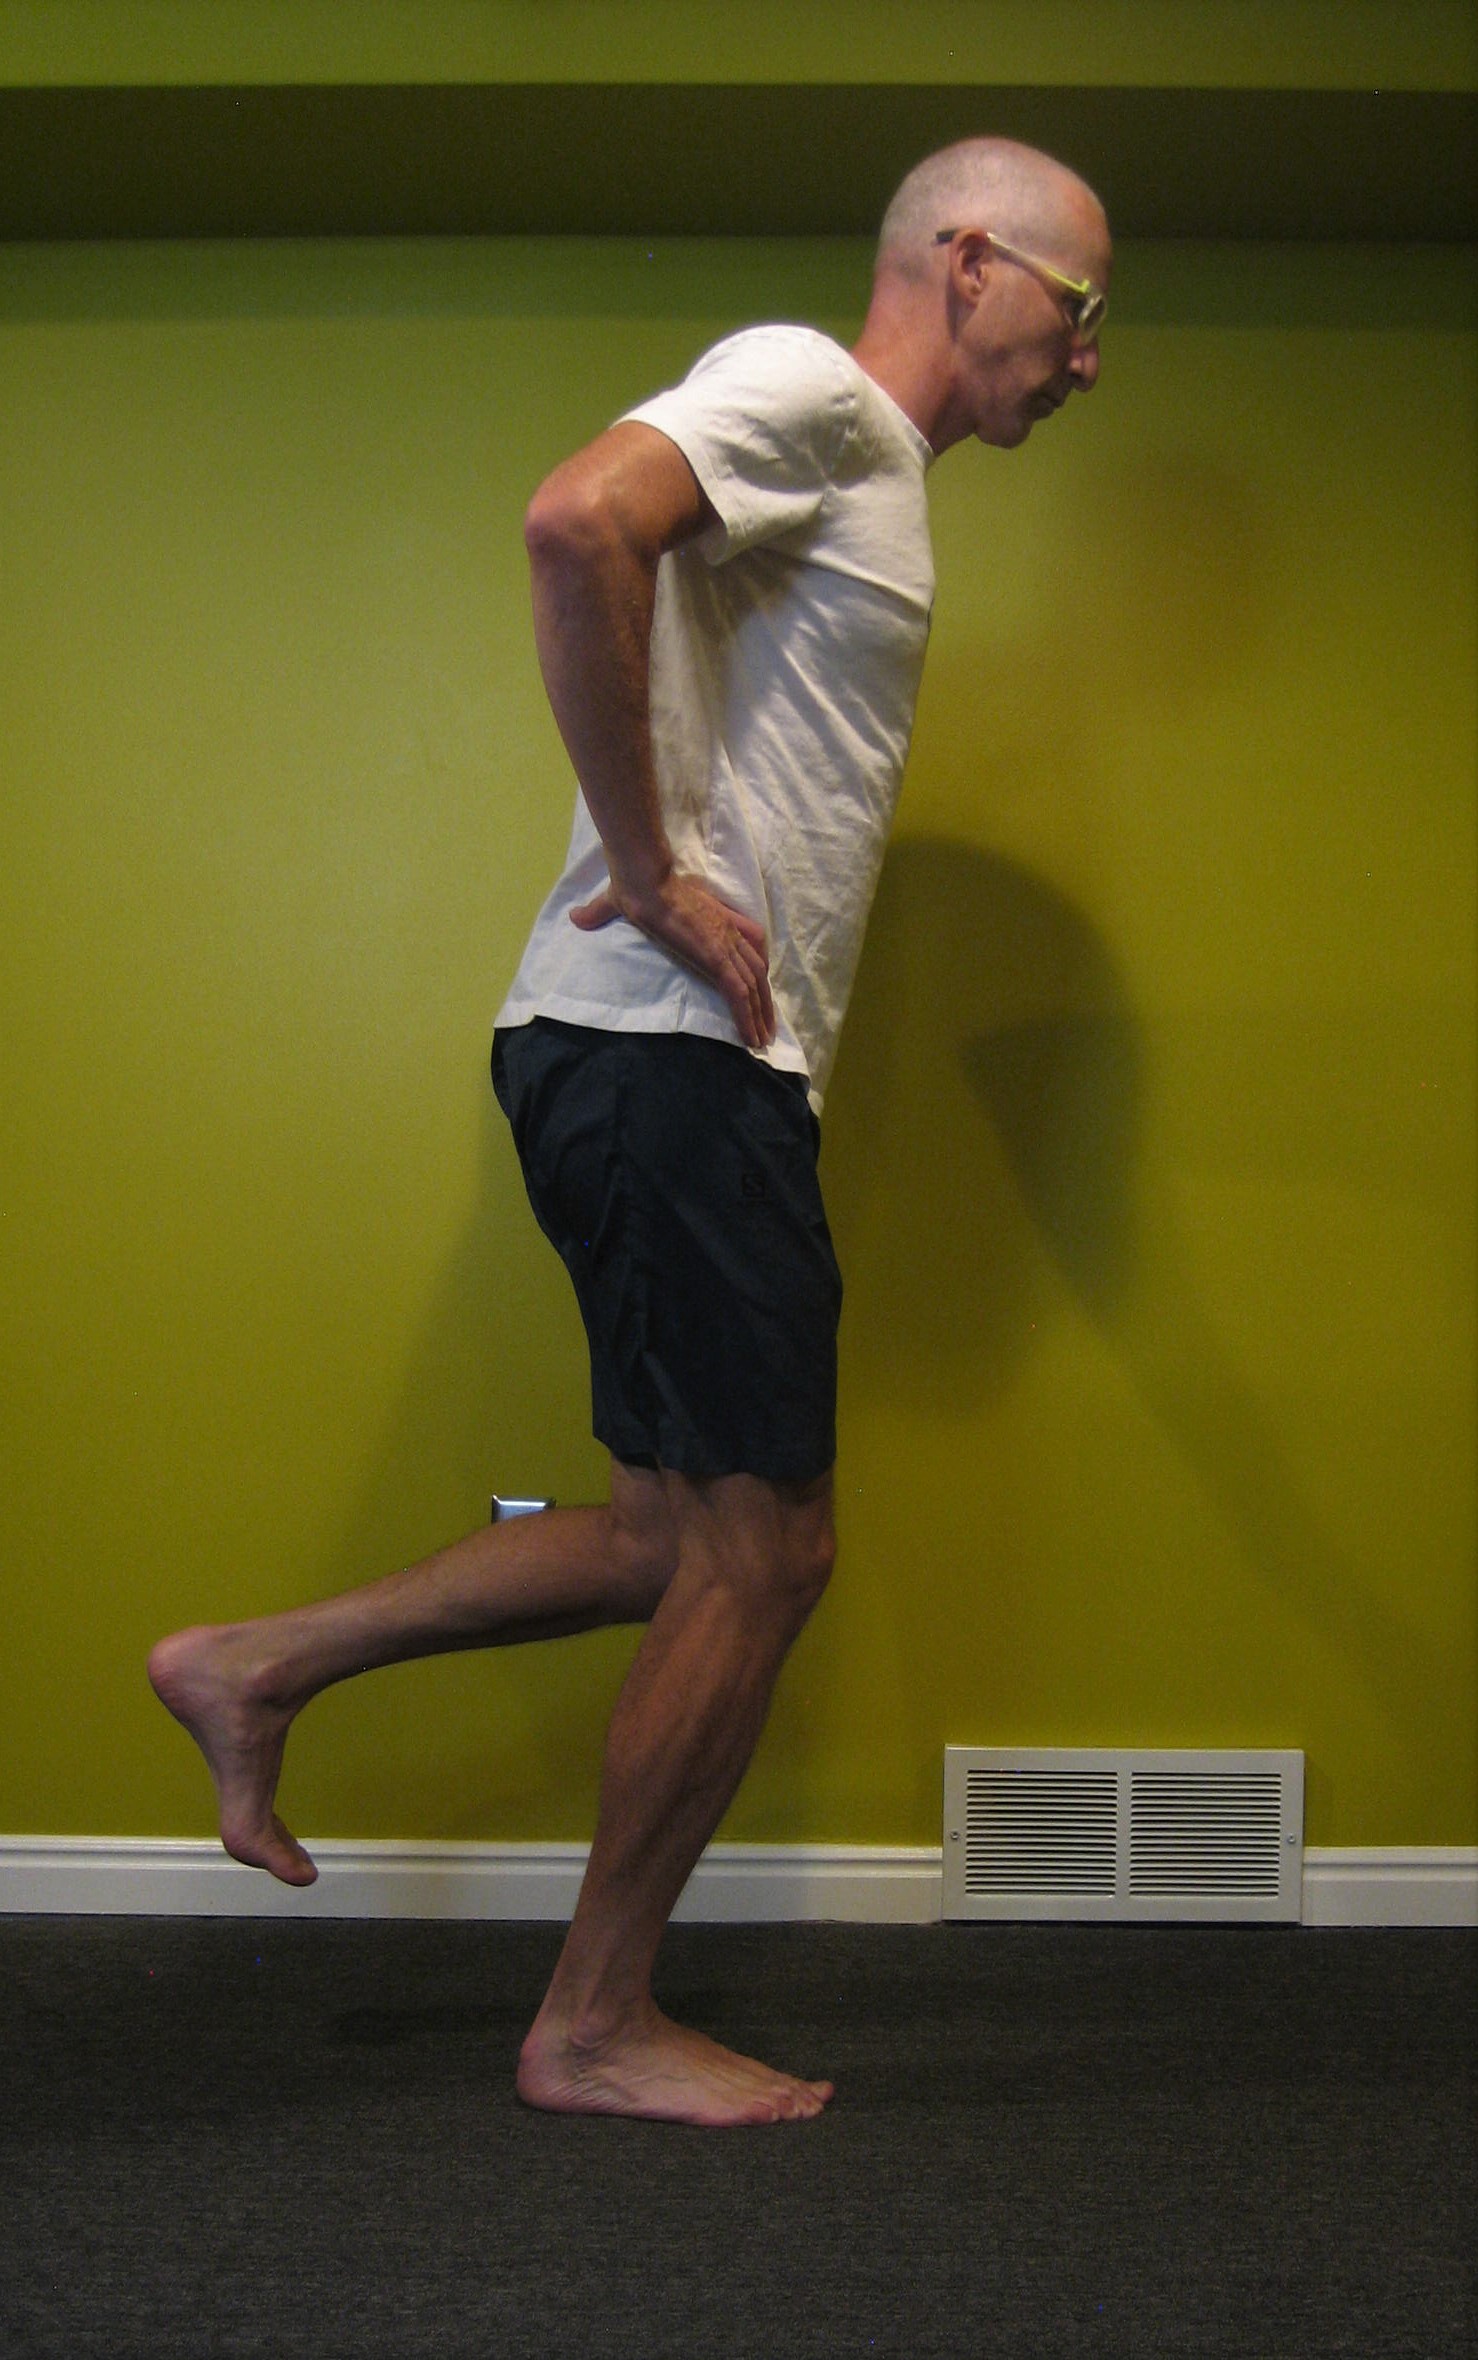
    At his second PT appointment, we were very fortunate to have the involvement of his ski coach who attended the visit with the patient. We continued exercise progressions for balance and hip strength; but we also got much more technique specific, identifying areas for improvement and providing corresponding cues: “heel down” (when asked to stand as if he was balancing on the glide ski, he was over-exaggerating the very common “hips forward” cue and shifting his weight so far forward that his heel was no longer on the floor. Arguably this is okay on steep terrain but not in this context), “tripod foot” (equal pressure on the inside, outside, and heel of the foot), and “weight shift with the hips” (get the center of mass over the glide ski via the pelvis vs. leaning to the side). He and his coach then took these cues to technique sessions and eventually higher intensity intervals.

    At our next appointment a few weeks later, the patient reported zero symptoms with hard L4 skate intervals. Unfortunately, the rapid melt-off of snow in the West ended the race season before he could fully test the effectiveness of the intervention. However, as of the time of this writing, he has been skiing and training for five months without symptoms.

    The critical reader (and all readers should be critical) might point out that we have a false sense of accomplishment because he hasn’t raced. I would argue that he has had plenty of pain-free training sessions that would have previously been symptomatic. The reader might say that this is simply a case study and an N=1 is pretty weak research. That is certainly true. A randomized, double-blind, placebo-controlled study with a very large population would be ideal. But a case study is not nothing. Not all skiers with CECS are going to respond to the same intervention. But if we have seen that it is possible to effectively treat CECS without surgery, then we might want to consider exhausting our non-invasive options first. The reader might further pick holes by saying that without compartment testing, we don’t even know for sure if this skier had CECS. That is also very true and should be acknowledged. In the name of science, I should have subjected the patient to the very unpleasant testing before and after our intervention to both establish a baseline and to prove that he was cured. But in the name of practicality and the patient’s well-being (along with the patient’s and family’s input), I declined.

    Again, the story of one skier’s ability to overcome CECS without surgery does not mean that all skiers with CECS will have the same success. But it’s very much worth a try. If you are reading this article because you are a skier with CECS, I would encourage you to take a very detailed look at your skating technique and be very specific about your approach to changing it. This likely means working on the component parts in a low-complexity setting (not on skis) and progressing to technique sessions on skis with a heavy emphasis on the cues that you and your support team (coach, PT, trainer, etc.) have identified. Hopefully this can be a path back to fun, fast, and pain-free skiing.

    Help Support Our Coverage!

    FasterSkier is independent, reader-supported, and free to read. If health and training coverage like this is worth something to you, a voluntary subscription keeps it coming.

    Join the FasterSkier community!


  • Go Sideways for Strong Skating Hips

    Go Sideways for Strong Skating Hips

    One of the beauties of skate skiing for the recreational athlete is that it gets us out of the straight line, sagittal plane motion that is so common with walking, running, and cycling. But this also poses a challenge for those of us who don’t rollerski in the summer: How do we stay conditioned for skate skiing’s lateral motion when there’s no snow on the ground? Fortunately, there’s a long list of exercises that will at least work on the strength and lateral movement at the hips. For this article, I’ve picked some of my favorites, especially ones that don’t require much in the way of special equipment. They are listed in order of lowest to highest intensity. Add these to your routine a couple of times a week—you’re already in the gym at least twice a week for maintenance, right?

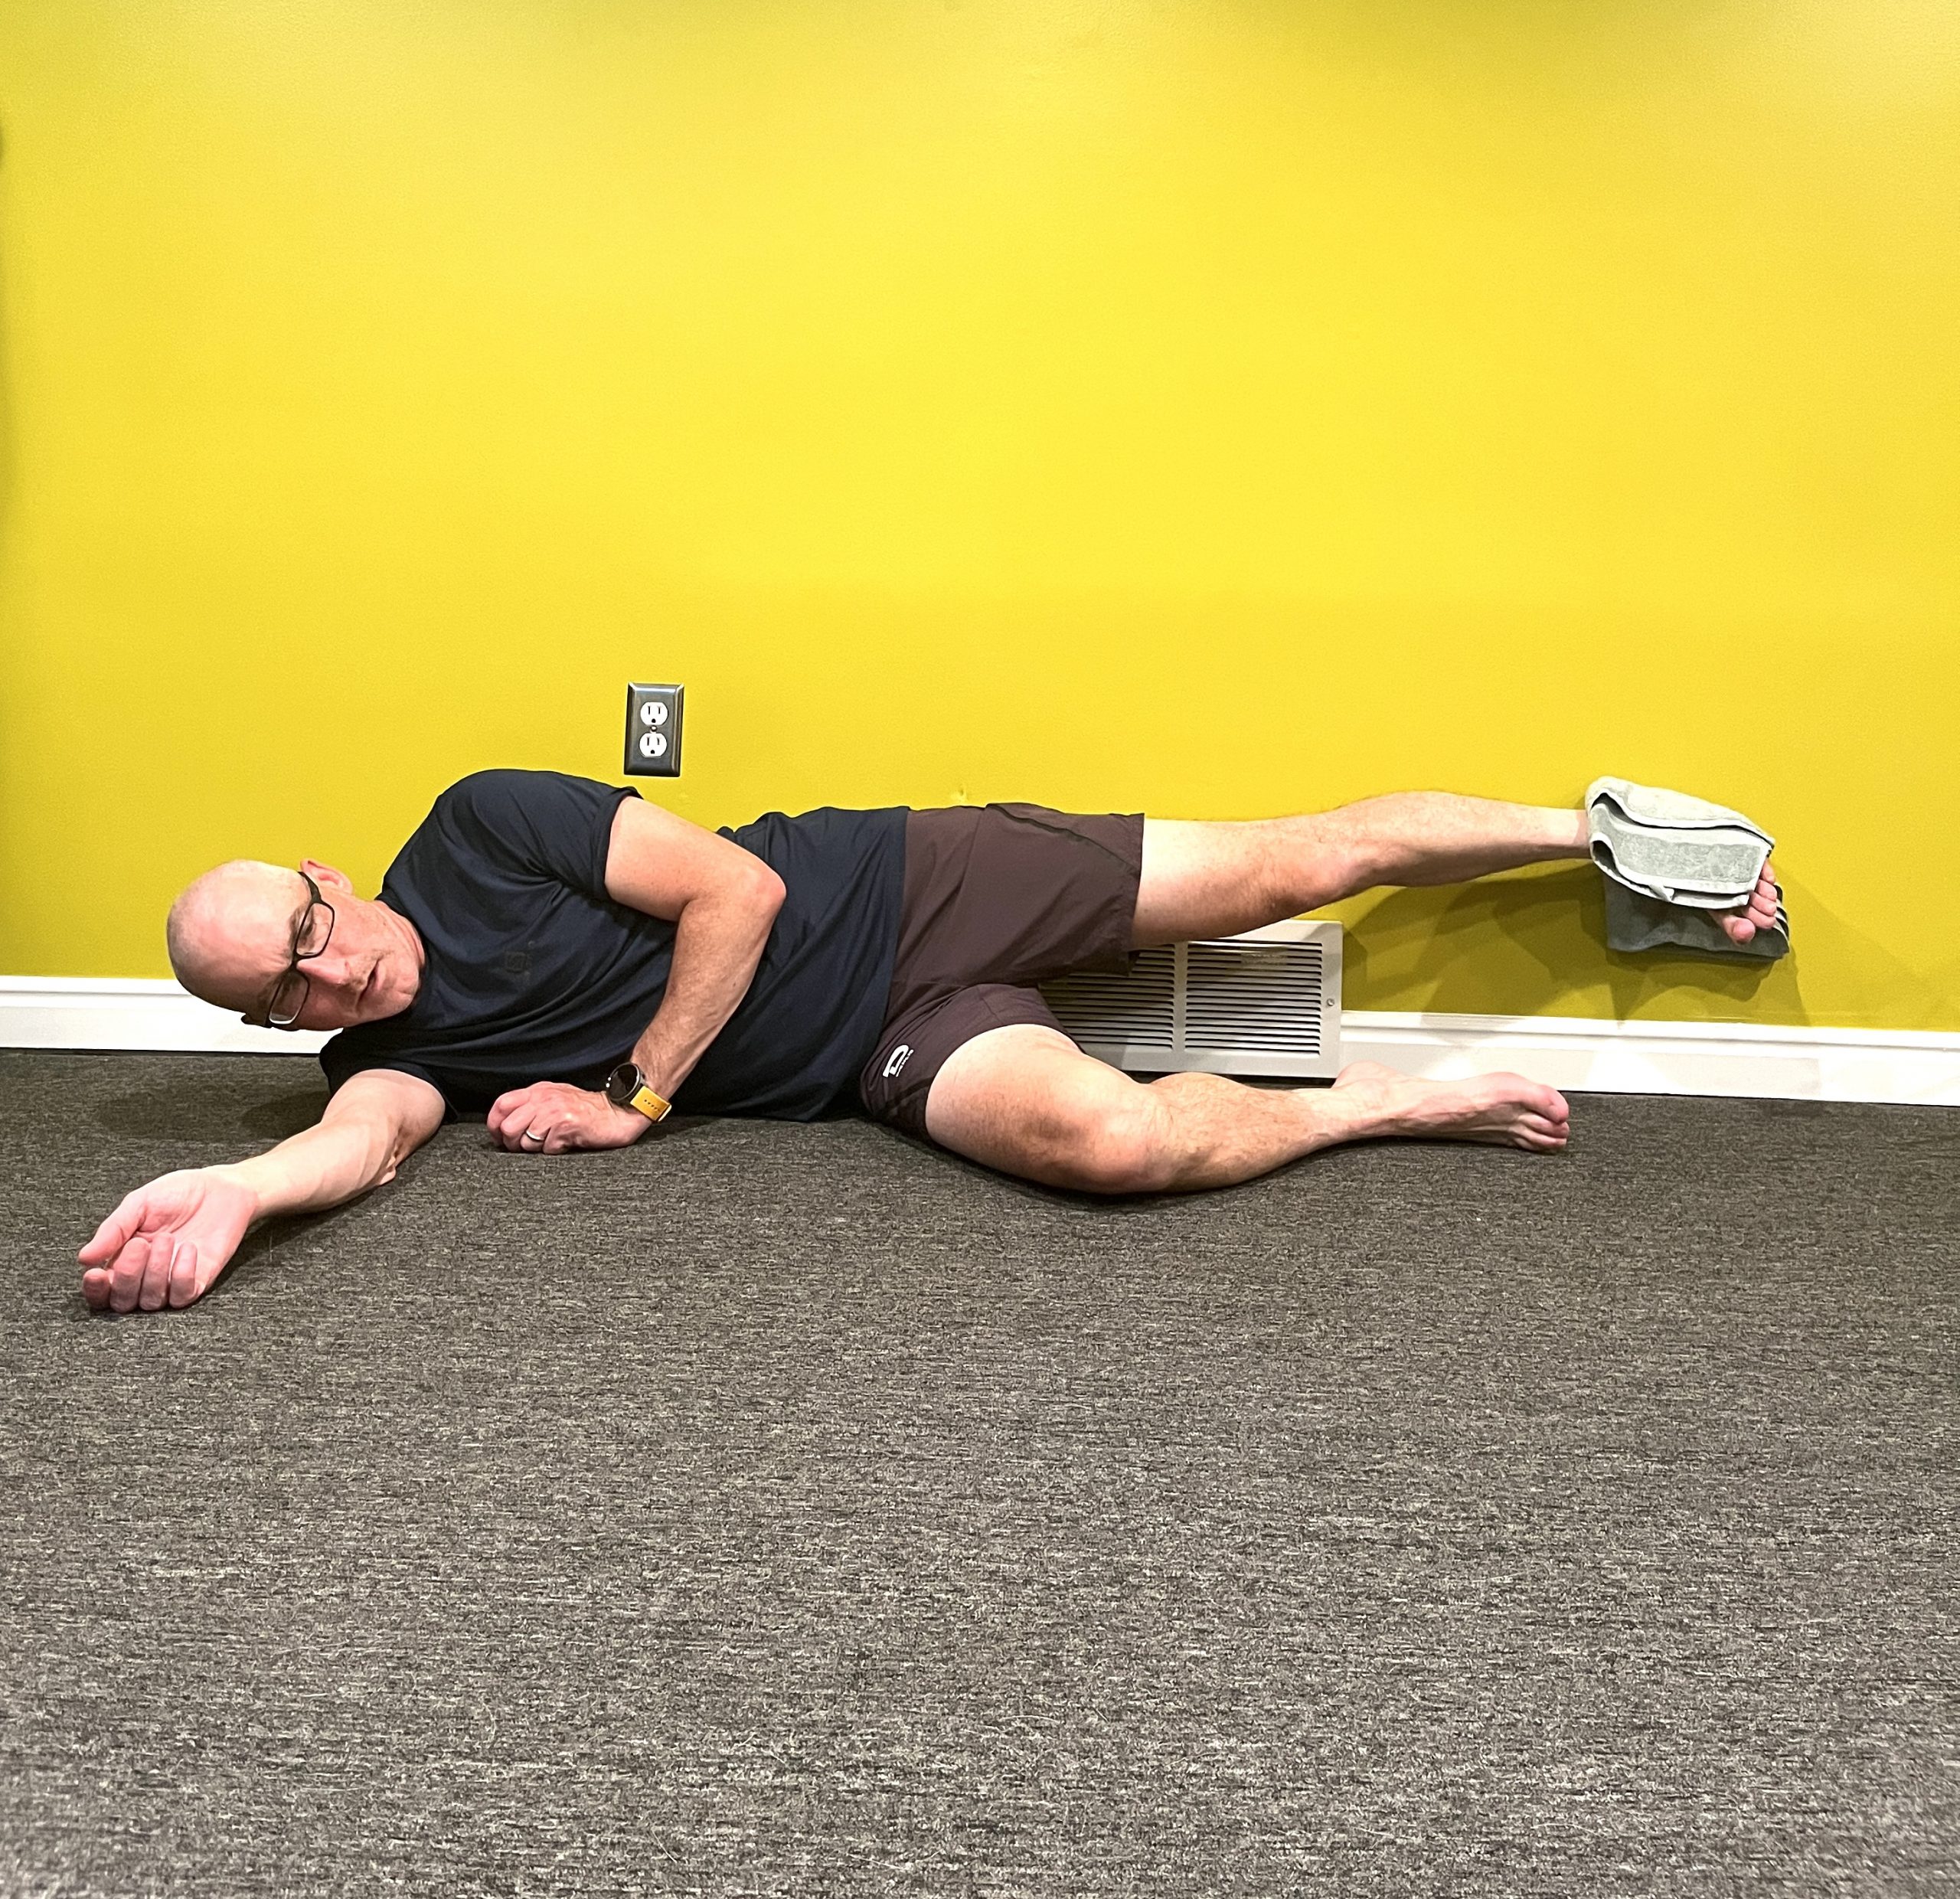
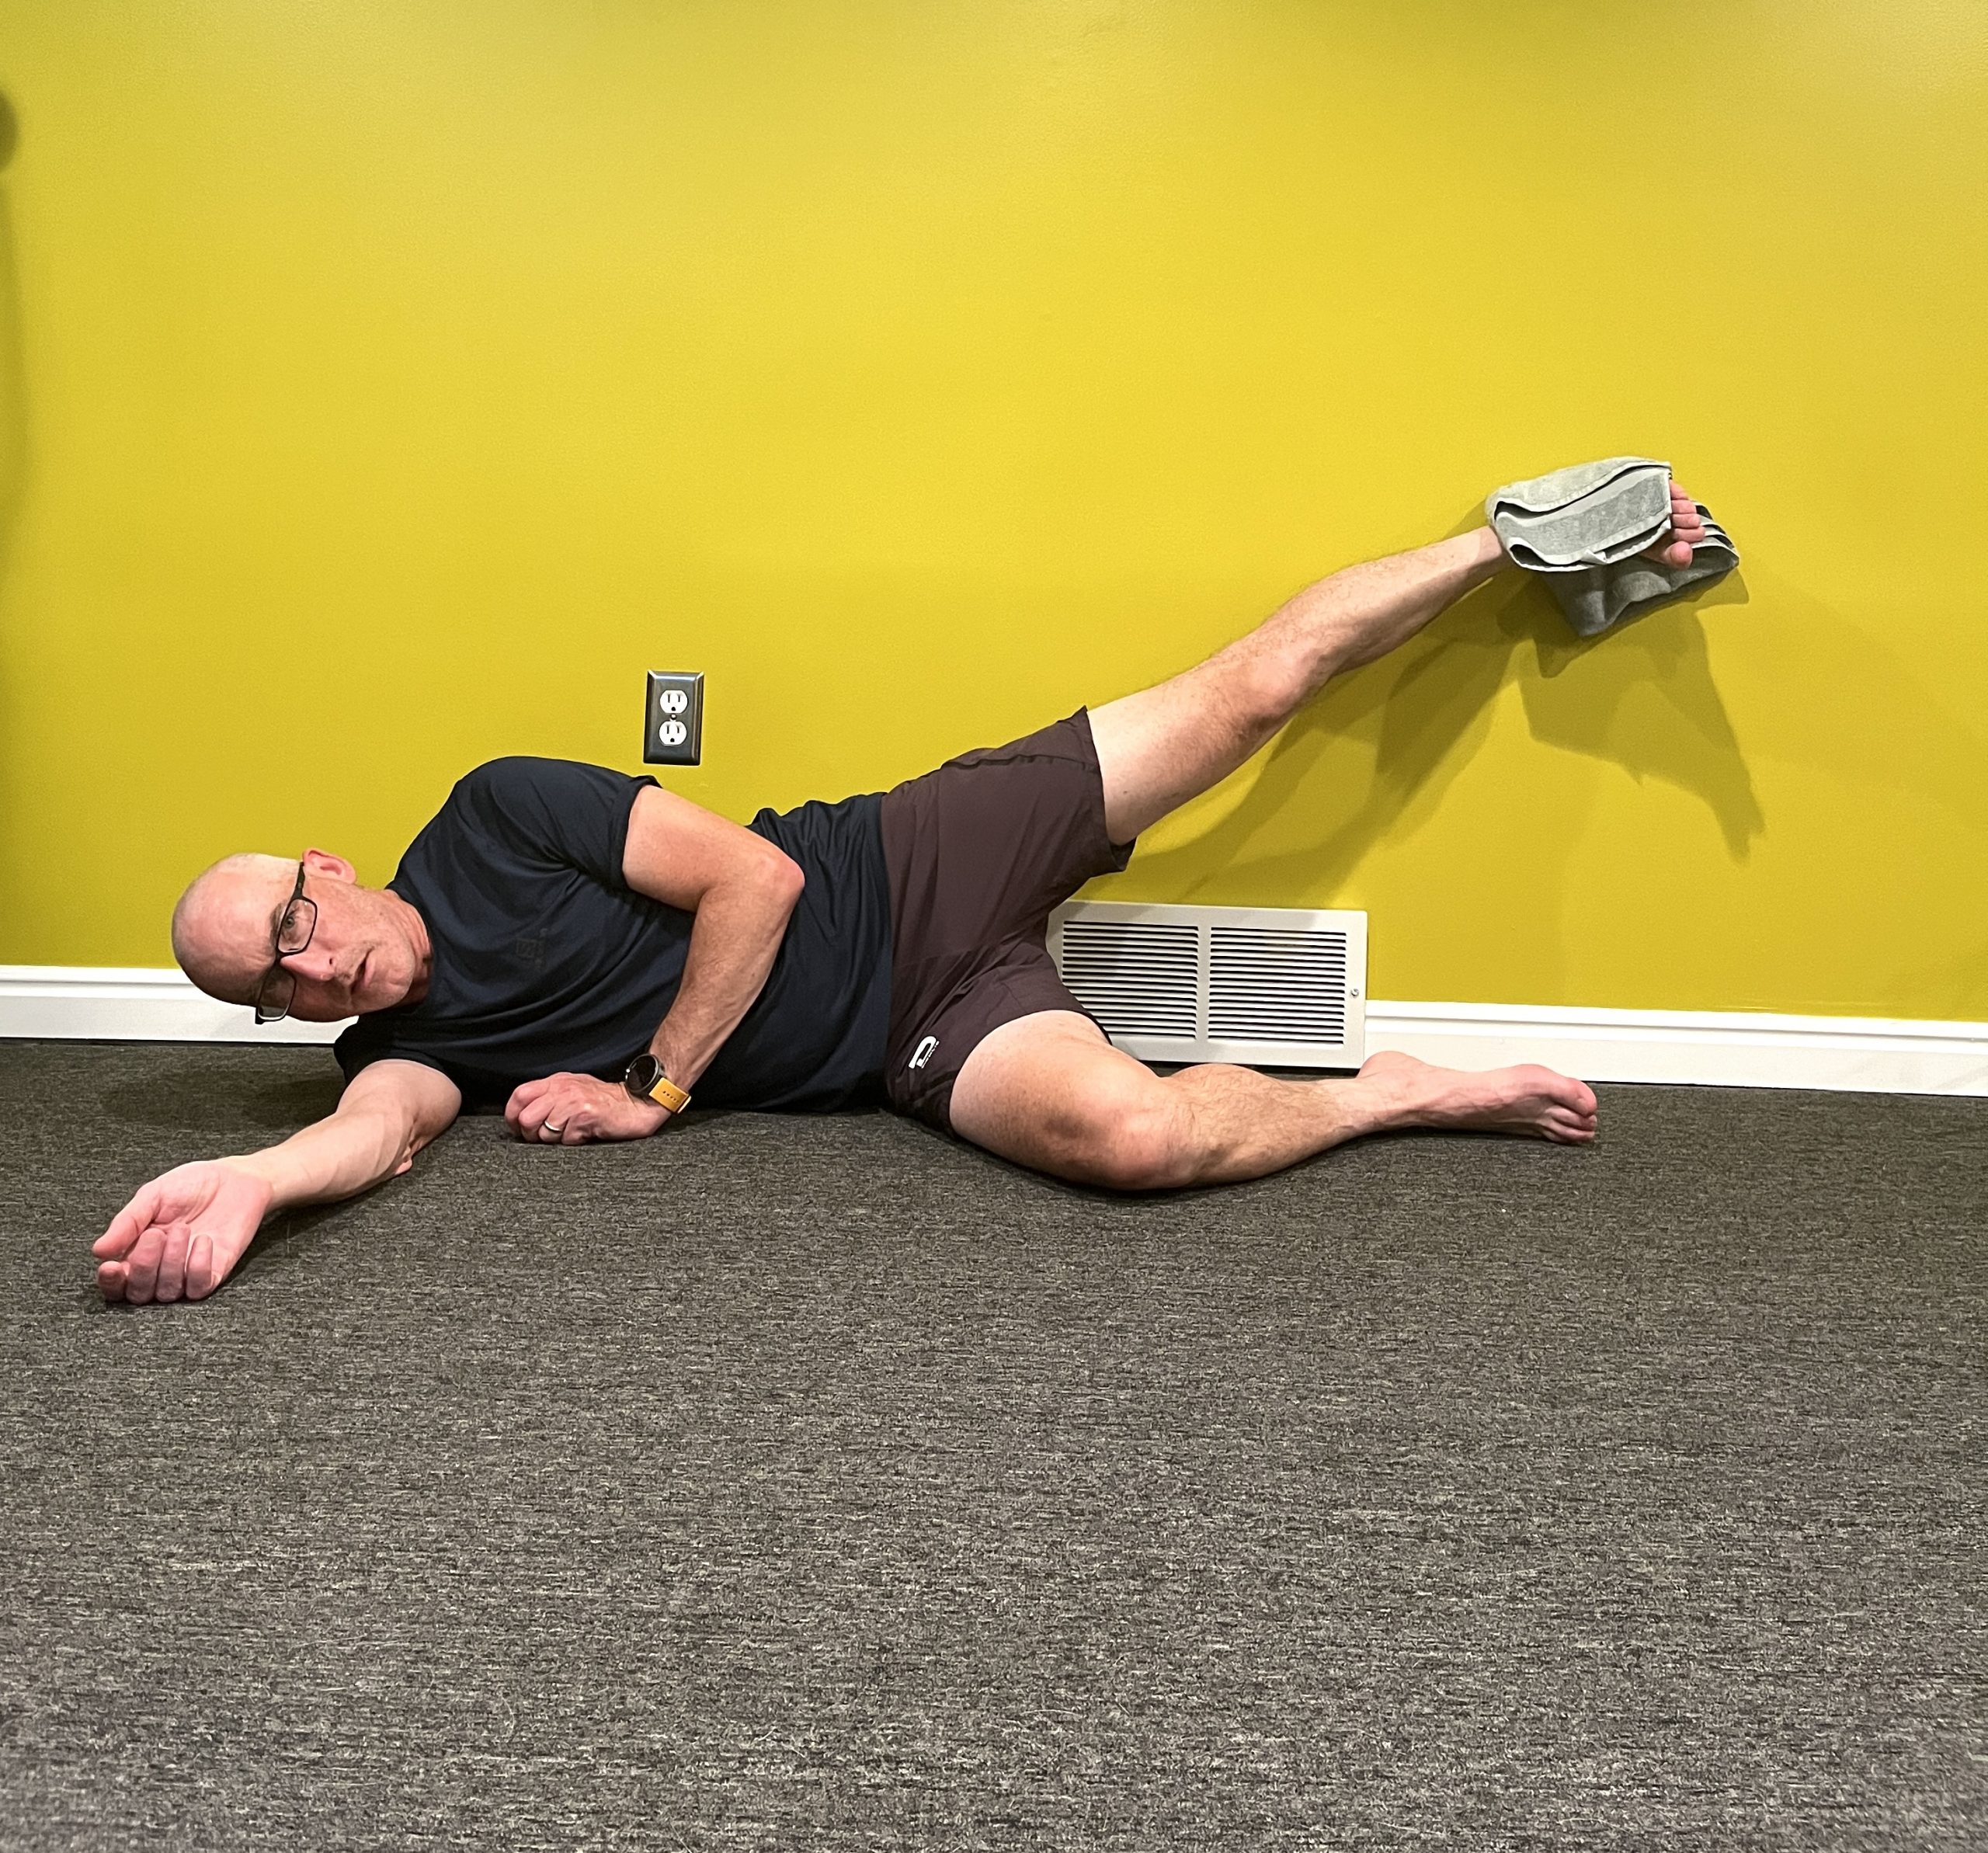
    Wall Scrubs
    • Lie on your side with your butt 4-6 inches from a wall
    • Bottom knee is bent and the top leg is straight
    • Push the heel of your top leg into the wall and move that leg up and down
    • You should be putting a lot of pressure into the wall—think about scrubbing the wall vs just painting it
    • Keep your toes pointed forward not up towards the ceiling
    • Pelvis stays vertical and quiet. The motion should be isolated at the hip, not from the pelvis tipping. You can put your hand on the side of your pelvis for feedback to monitor potential movement
    • You’ll need to be wearing just a sock or use a washcloth on your heel to reduce friction on the wall
    • 3 sets of 10-15 reps (if you’re not getting much fatigue with 15x, add a resistance band around your knees)
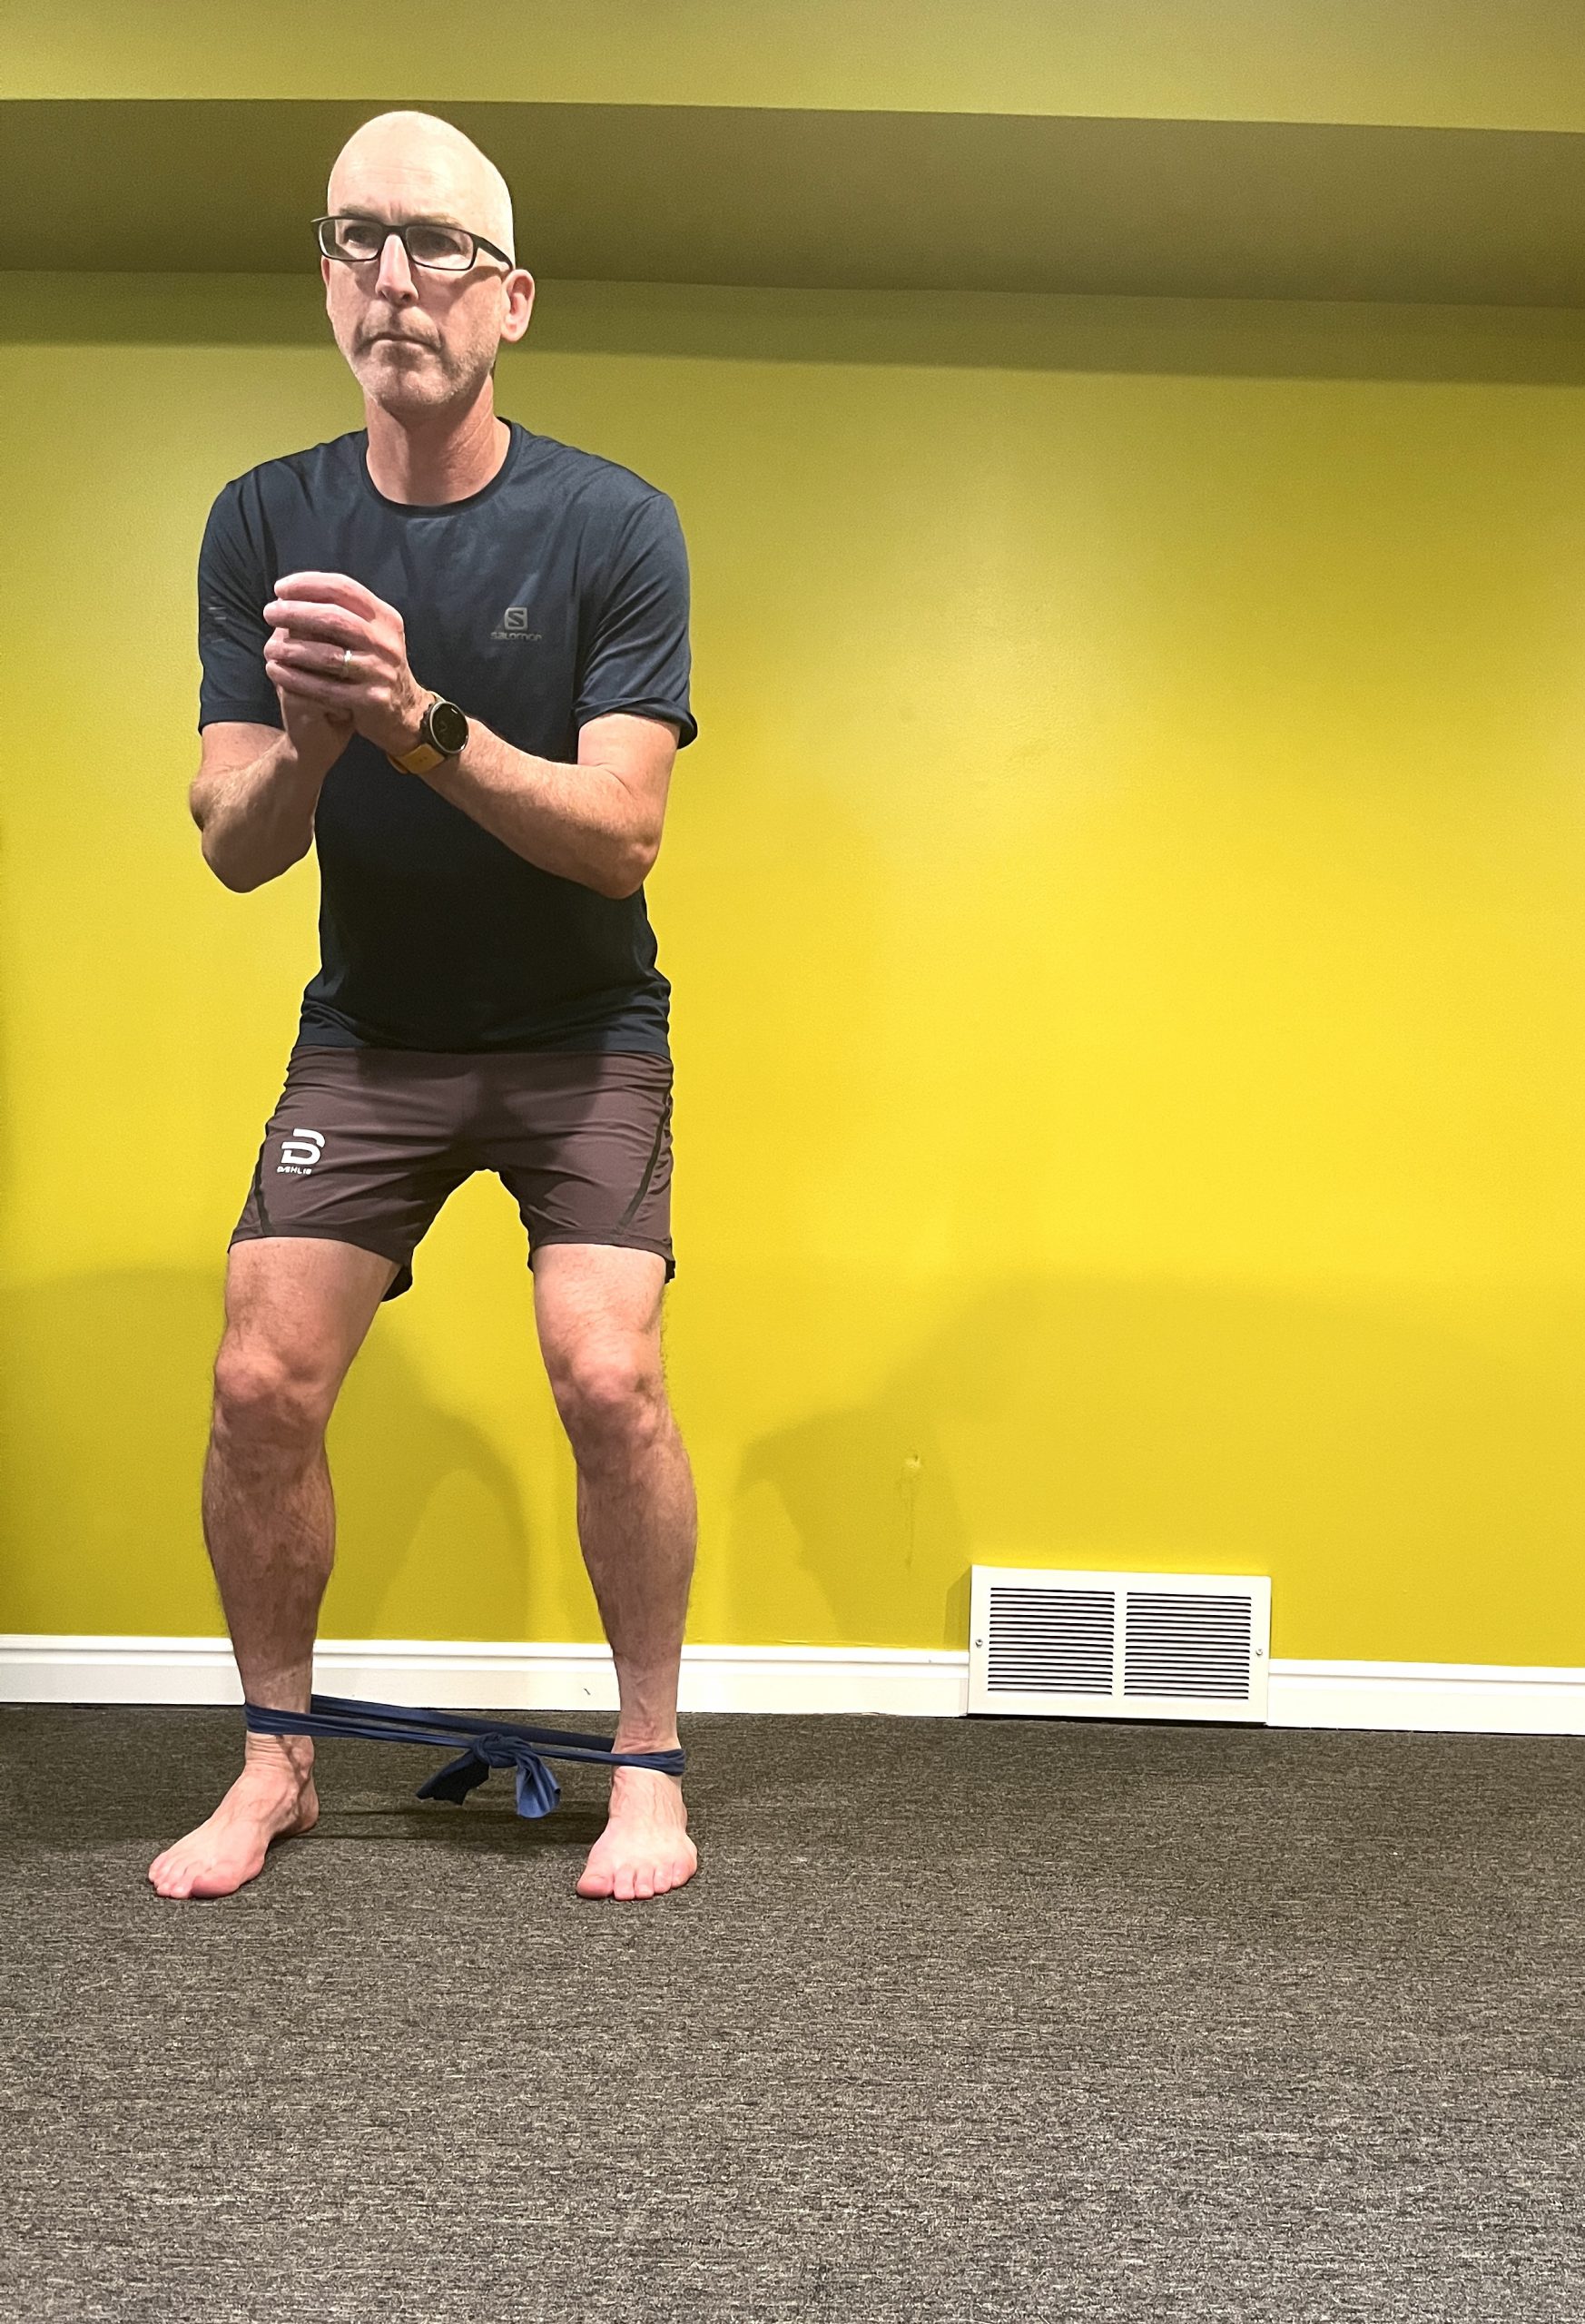
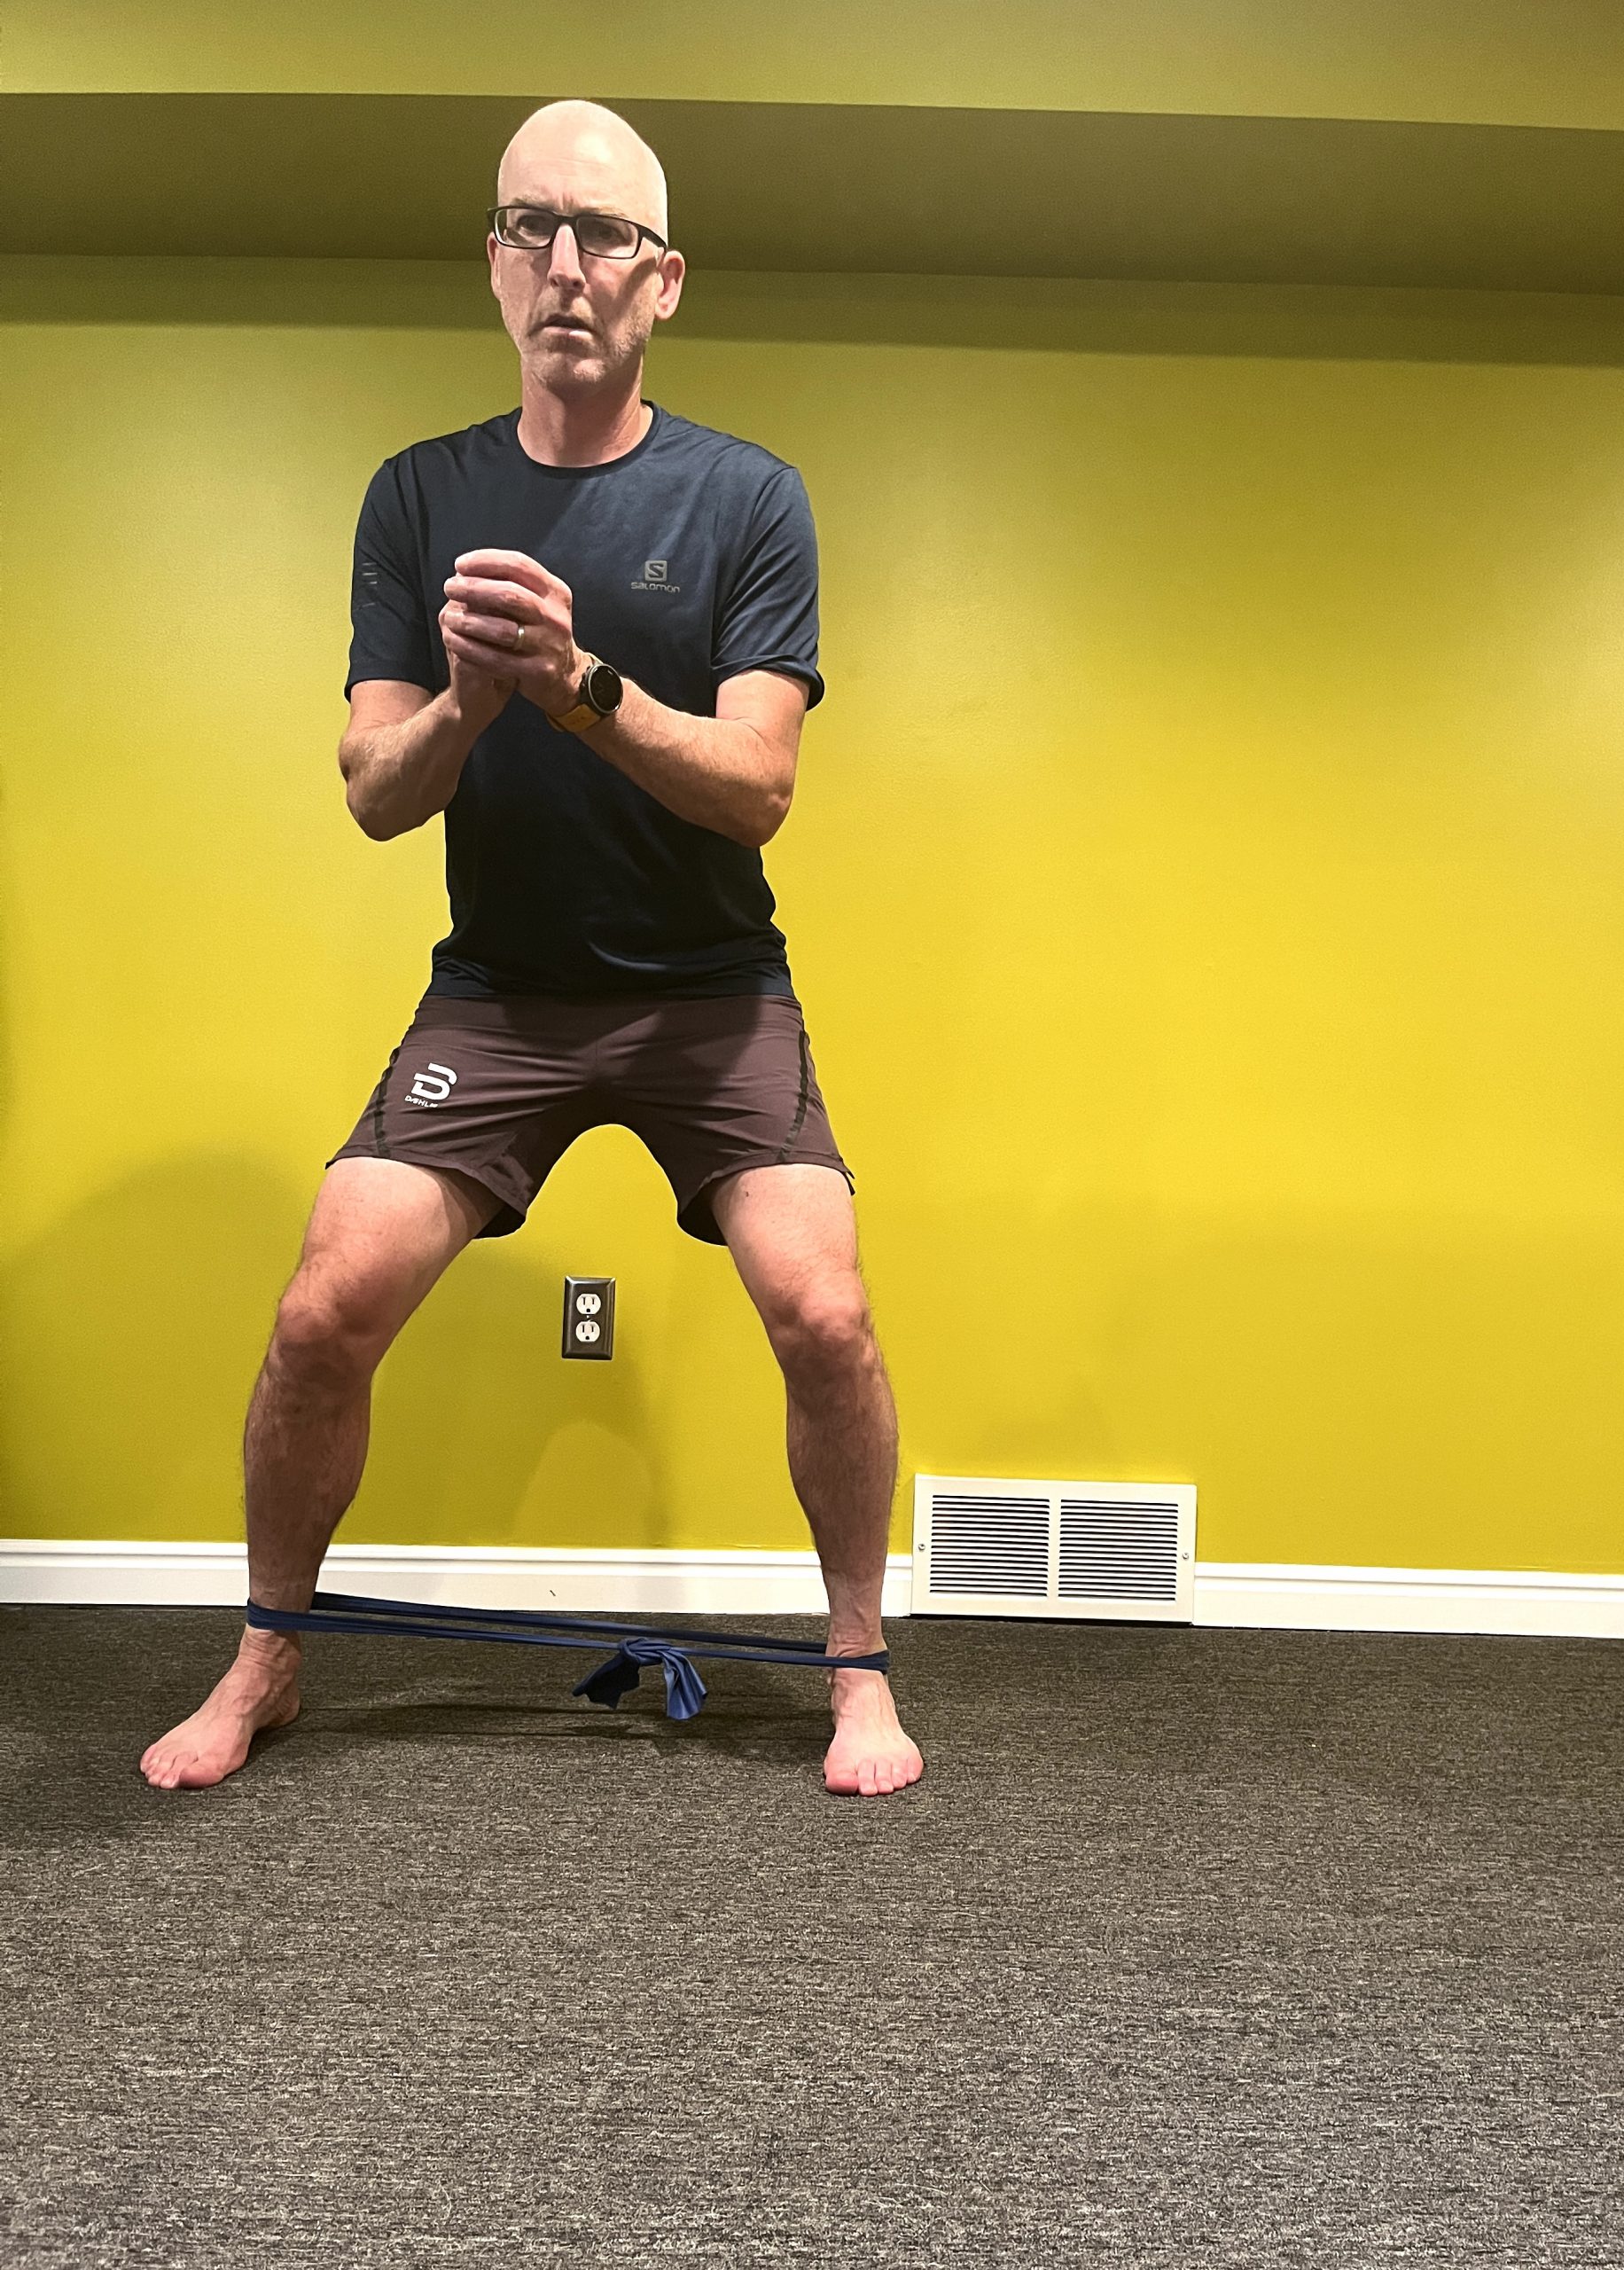
    Banded Side Steps
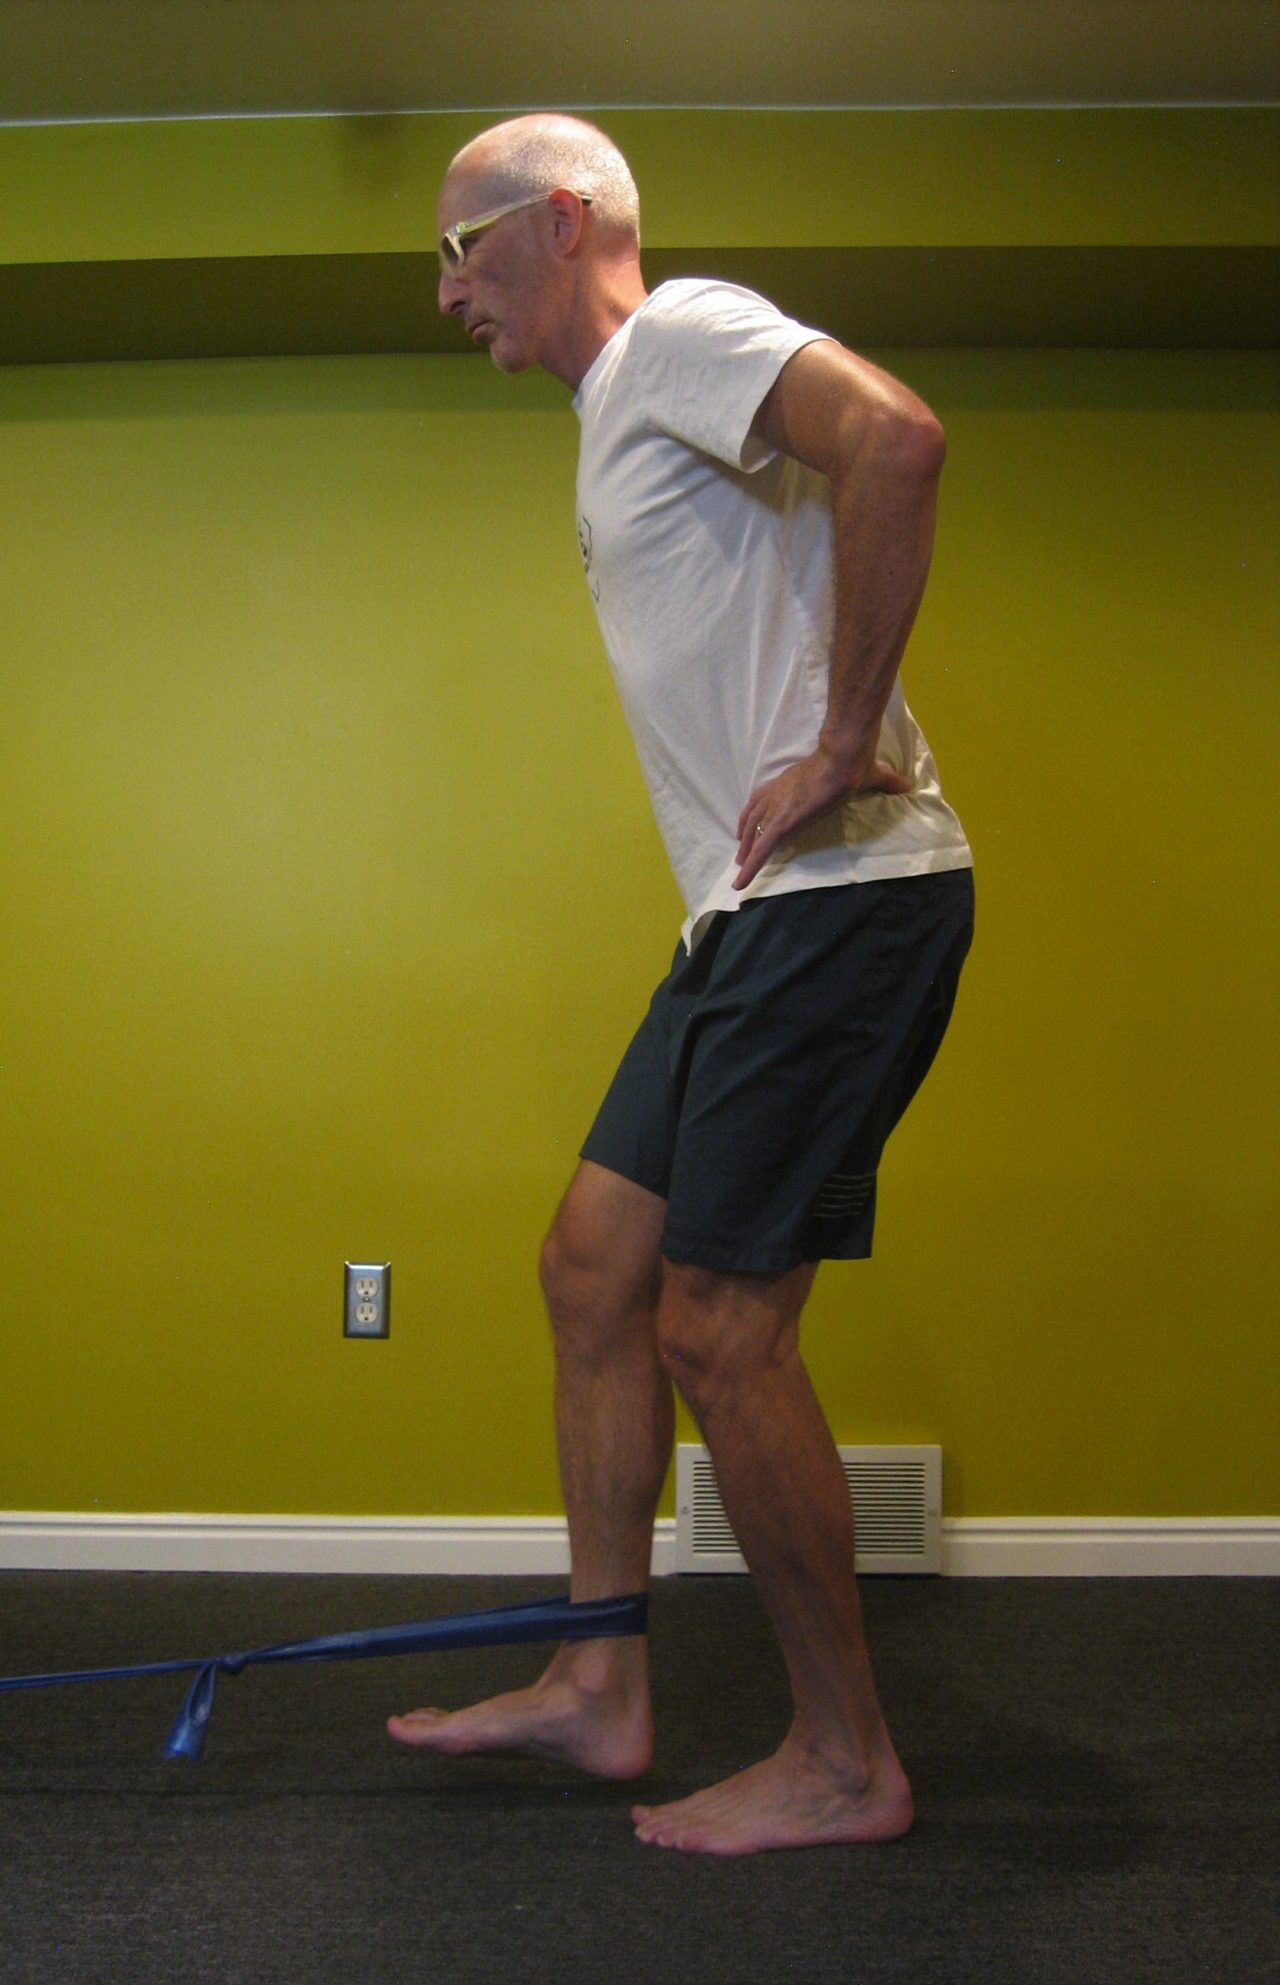
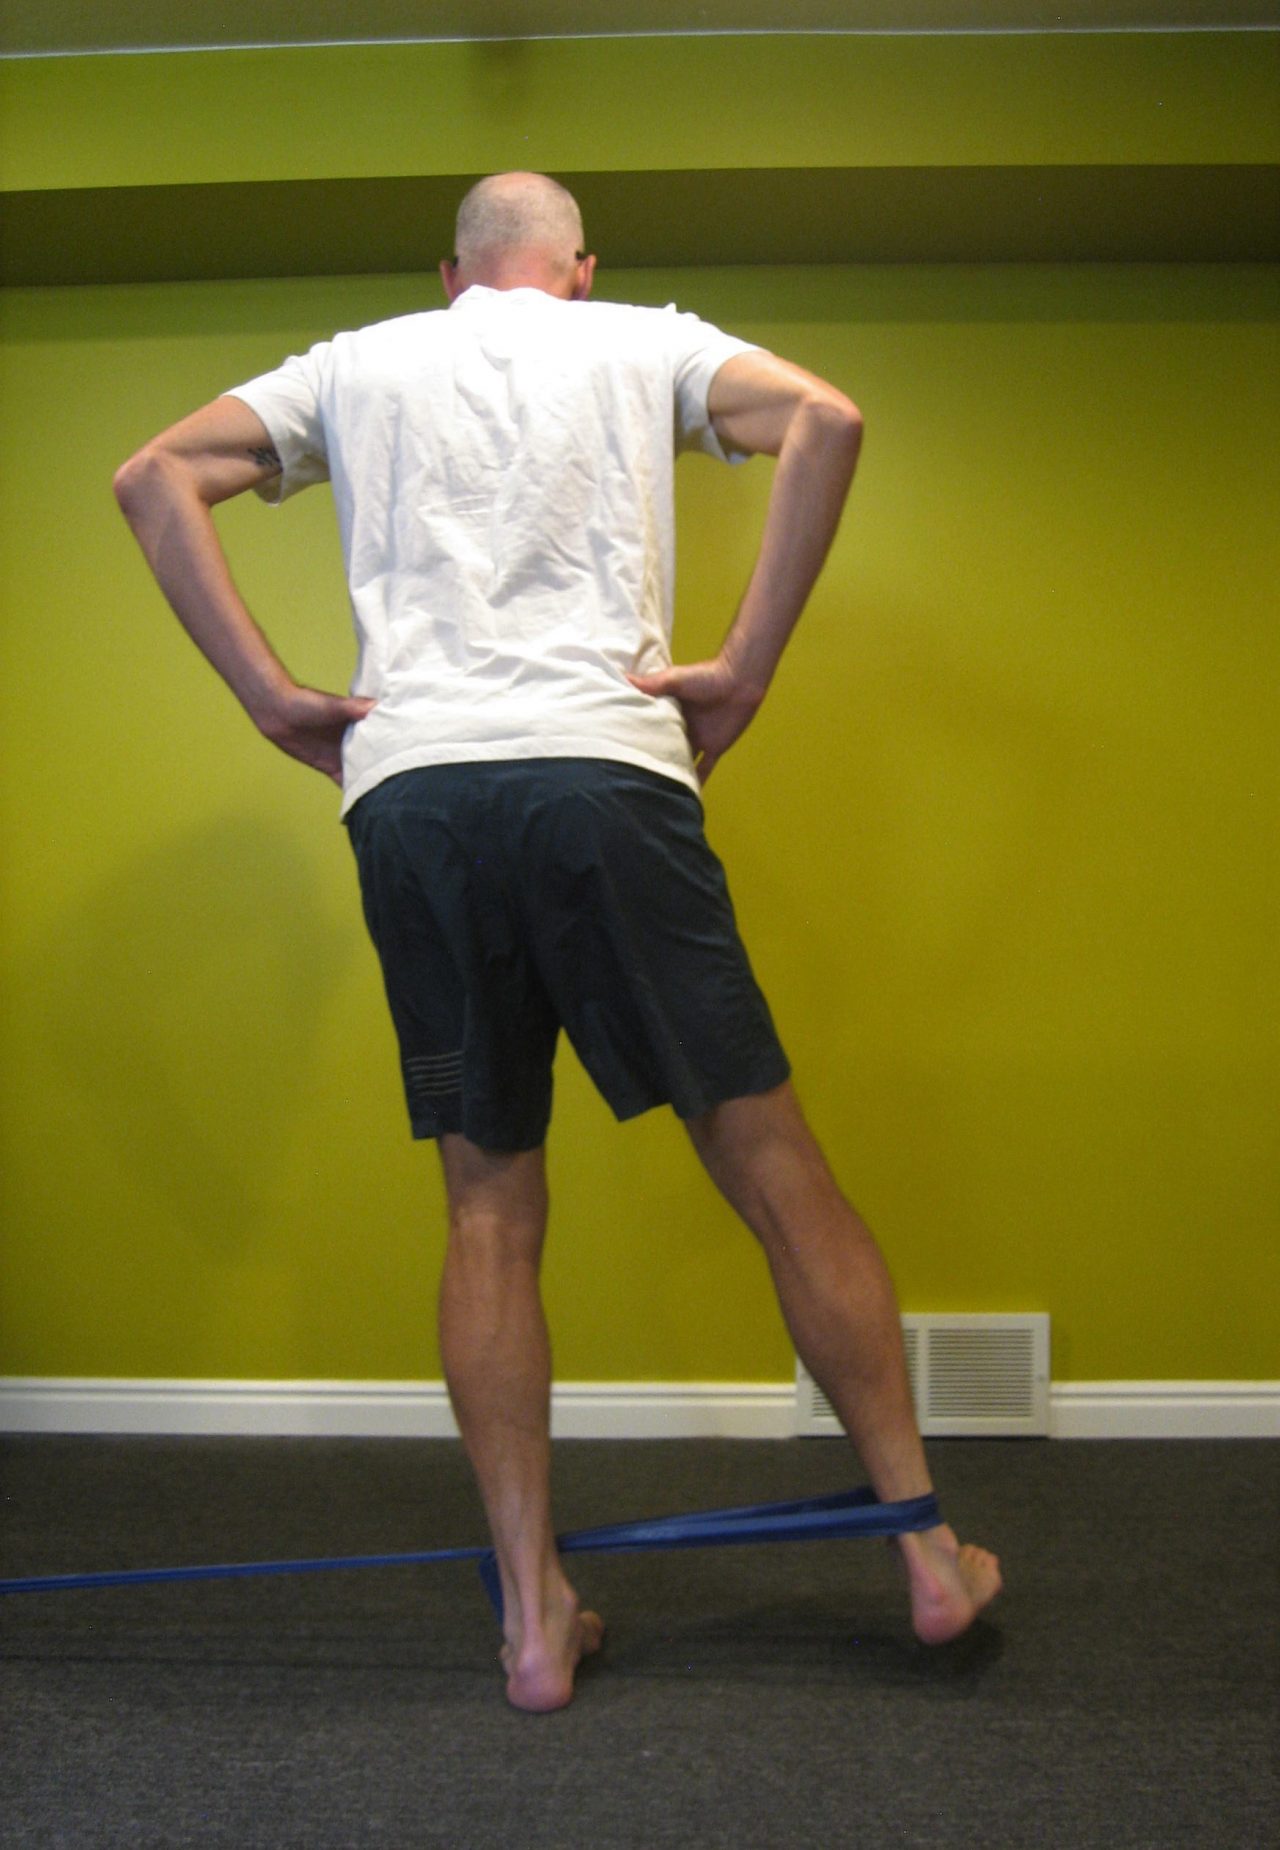
    • Put a resistance band around your ankles
    • Bend and the ankles, knees, and hips like the ski stance
    • Keeping tension on the band throughout, step sideways leading with the knee rather than reaching with the foot and shifting your weight
    • Band position variations: band around the knees is a regression offering less resistance and possibly more cuing to lead with the knee vs the foot; band around the feet is harder with more work at the ankles but requires a durable band not the cheap ones we give to patients in PT
    • 2×15-20 steps or whatever length of hallway you have 
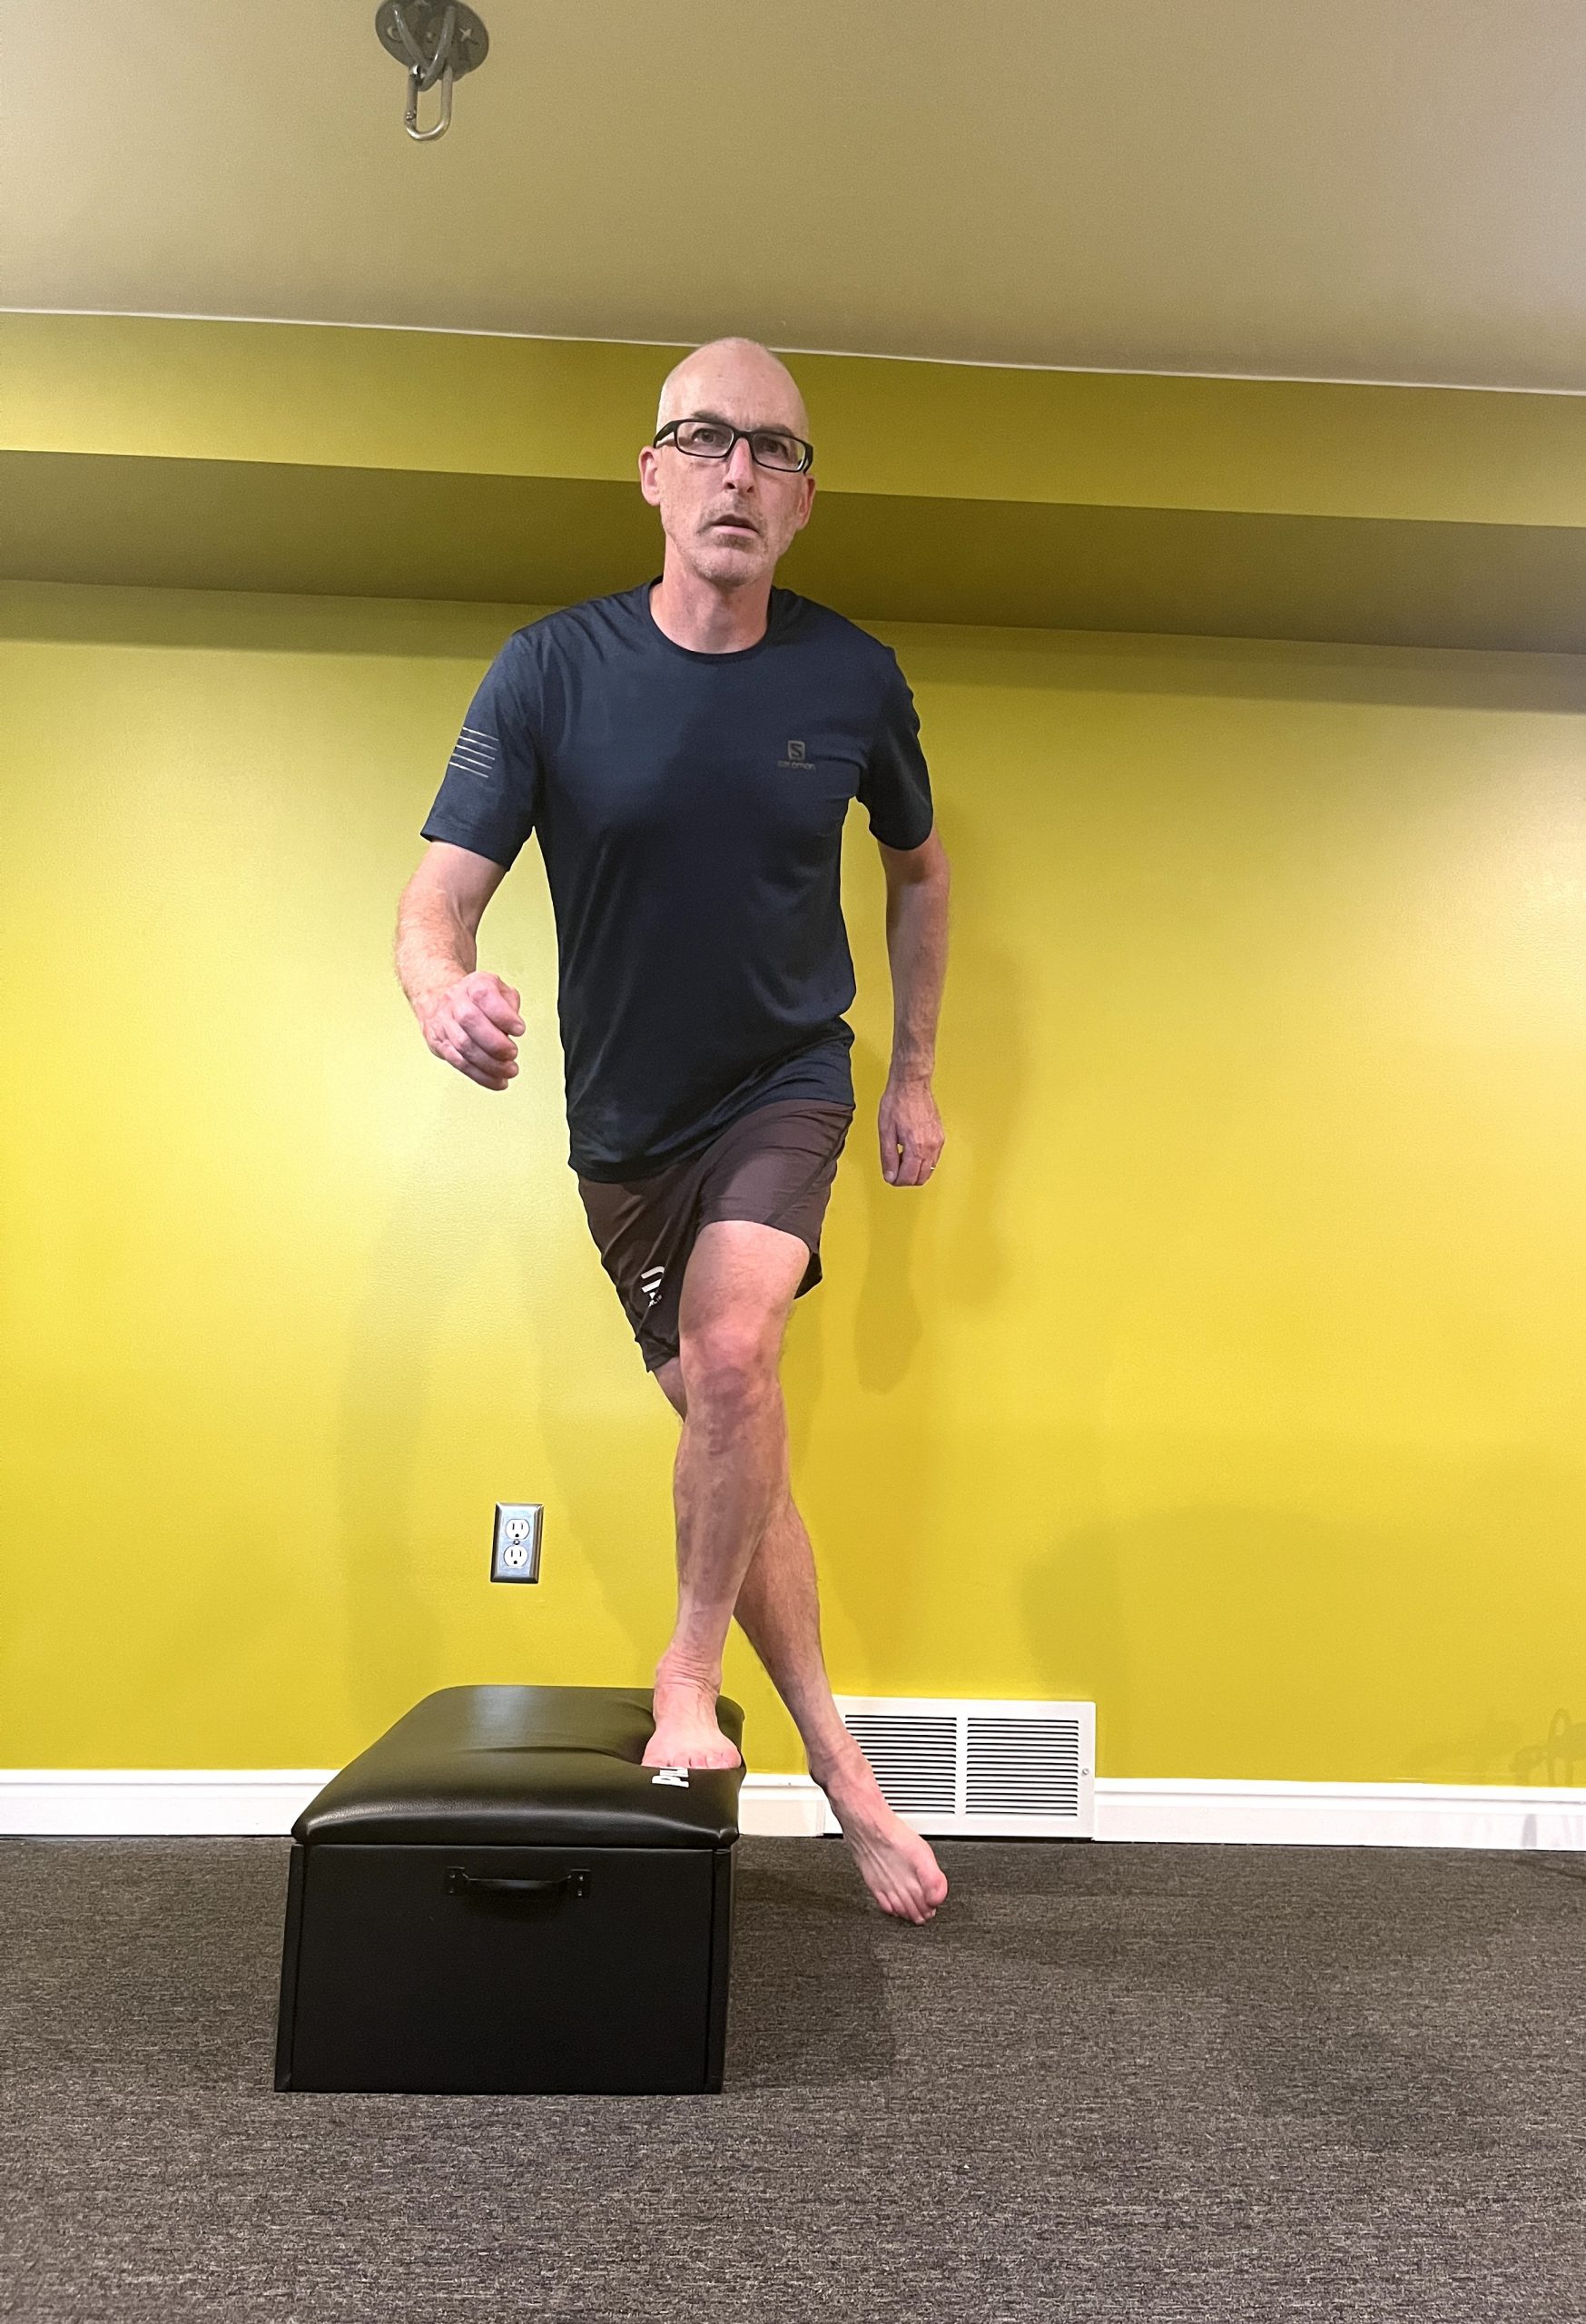
    Curtsy Step Downs
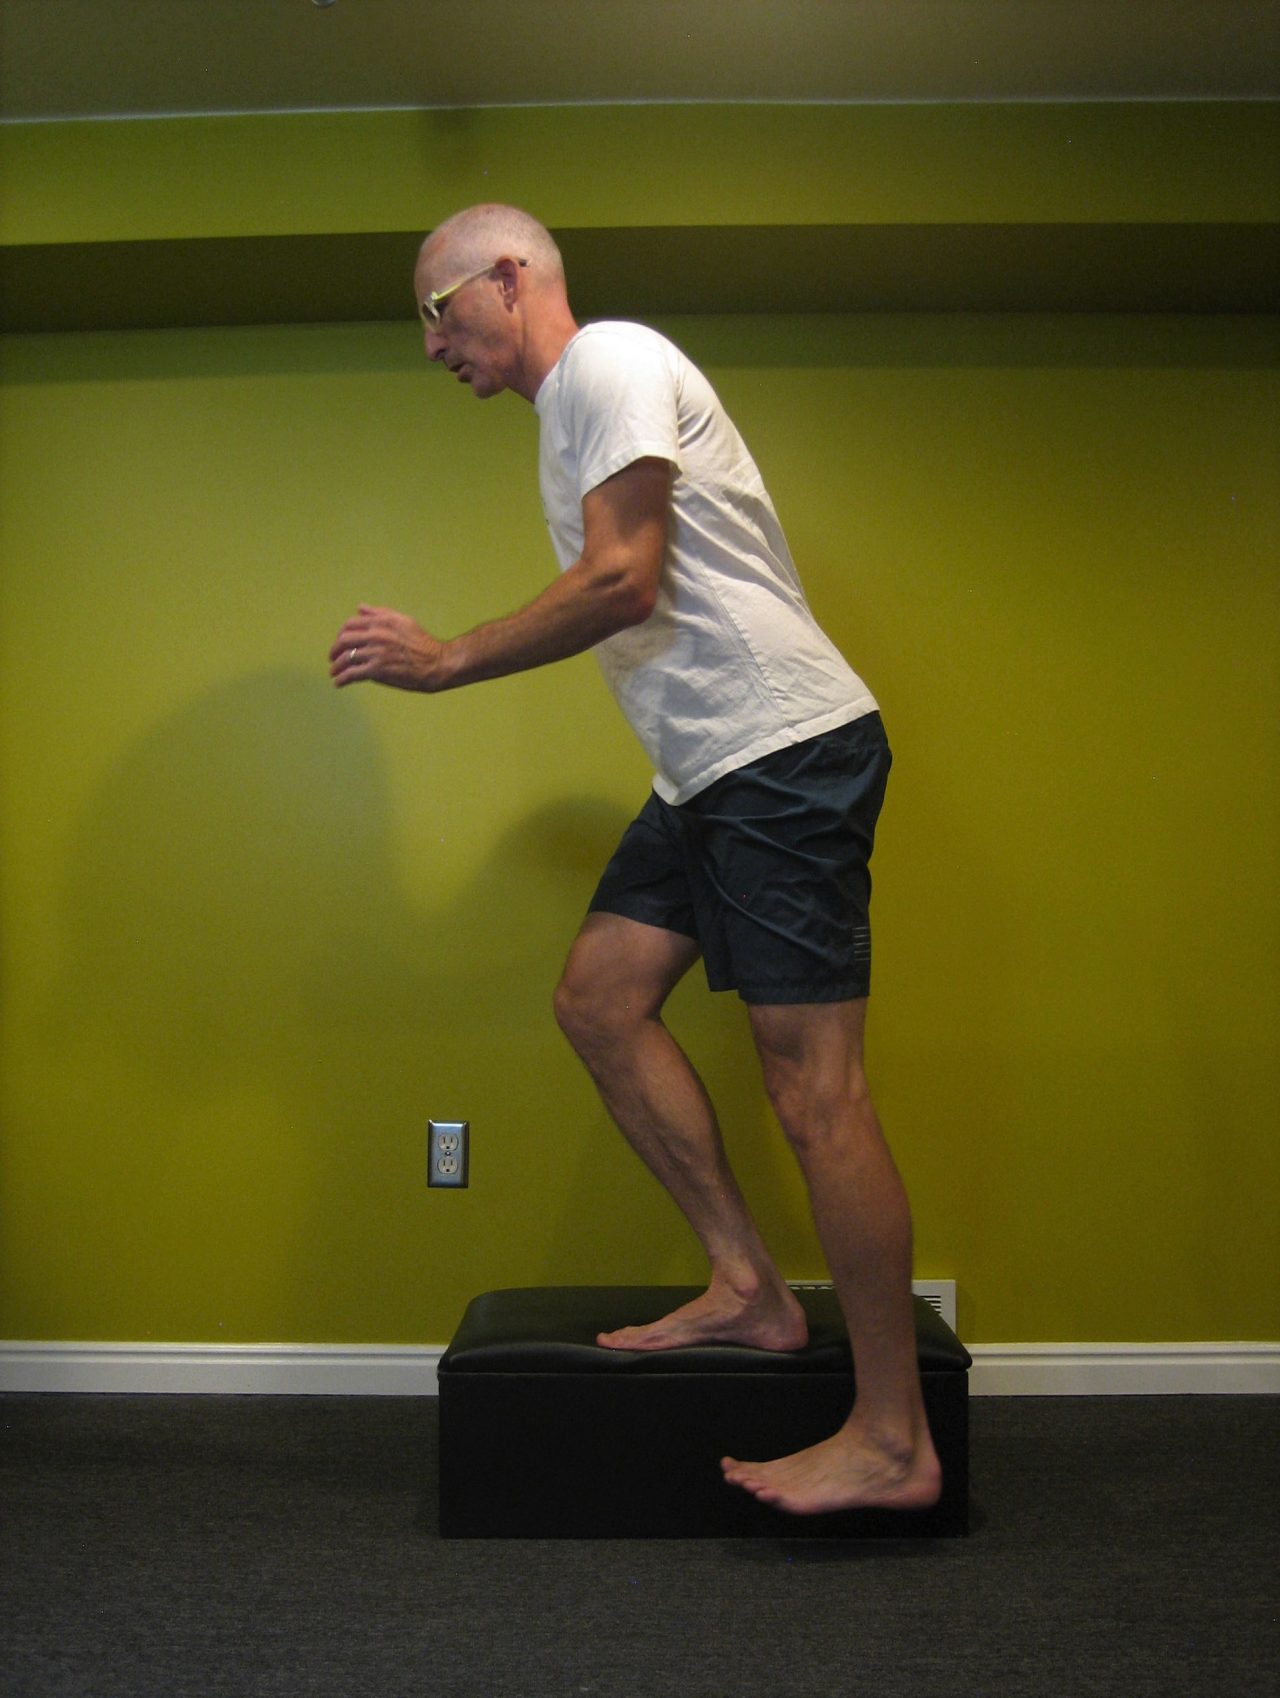
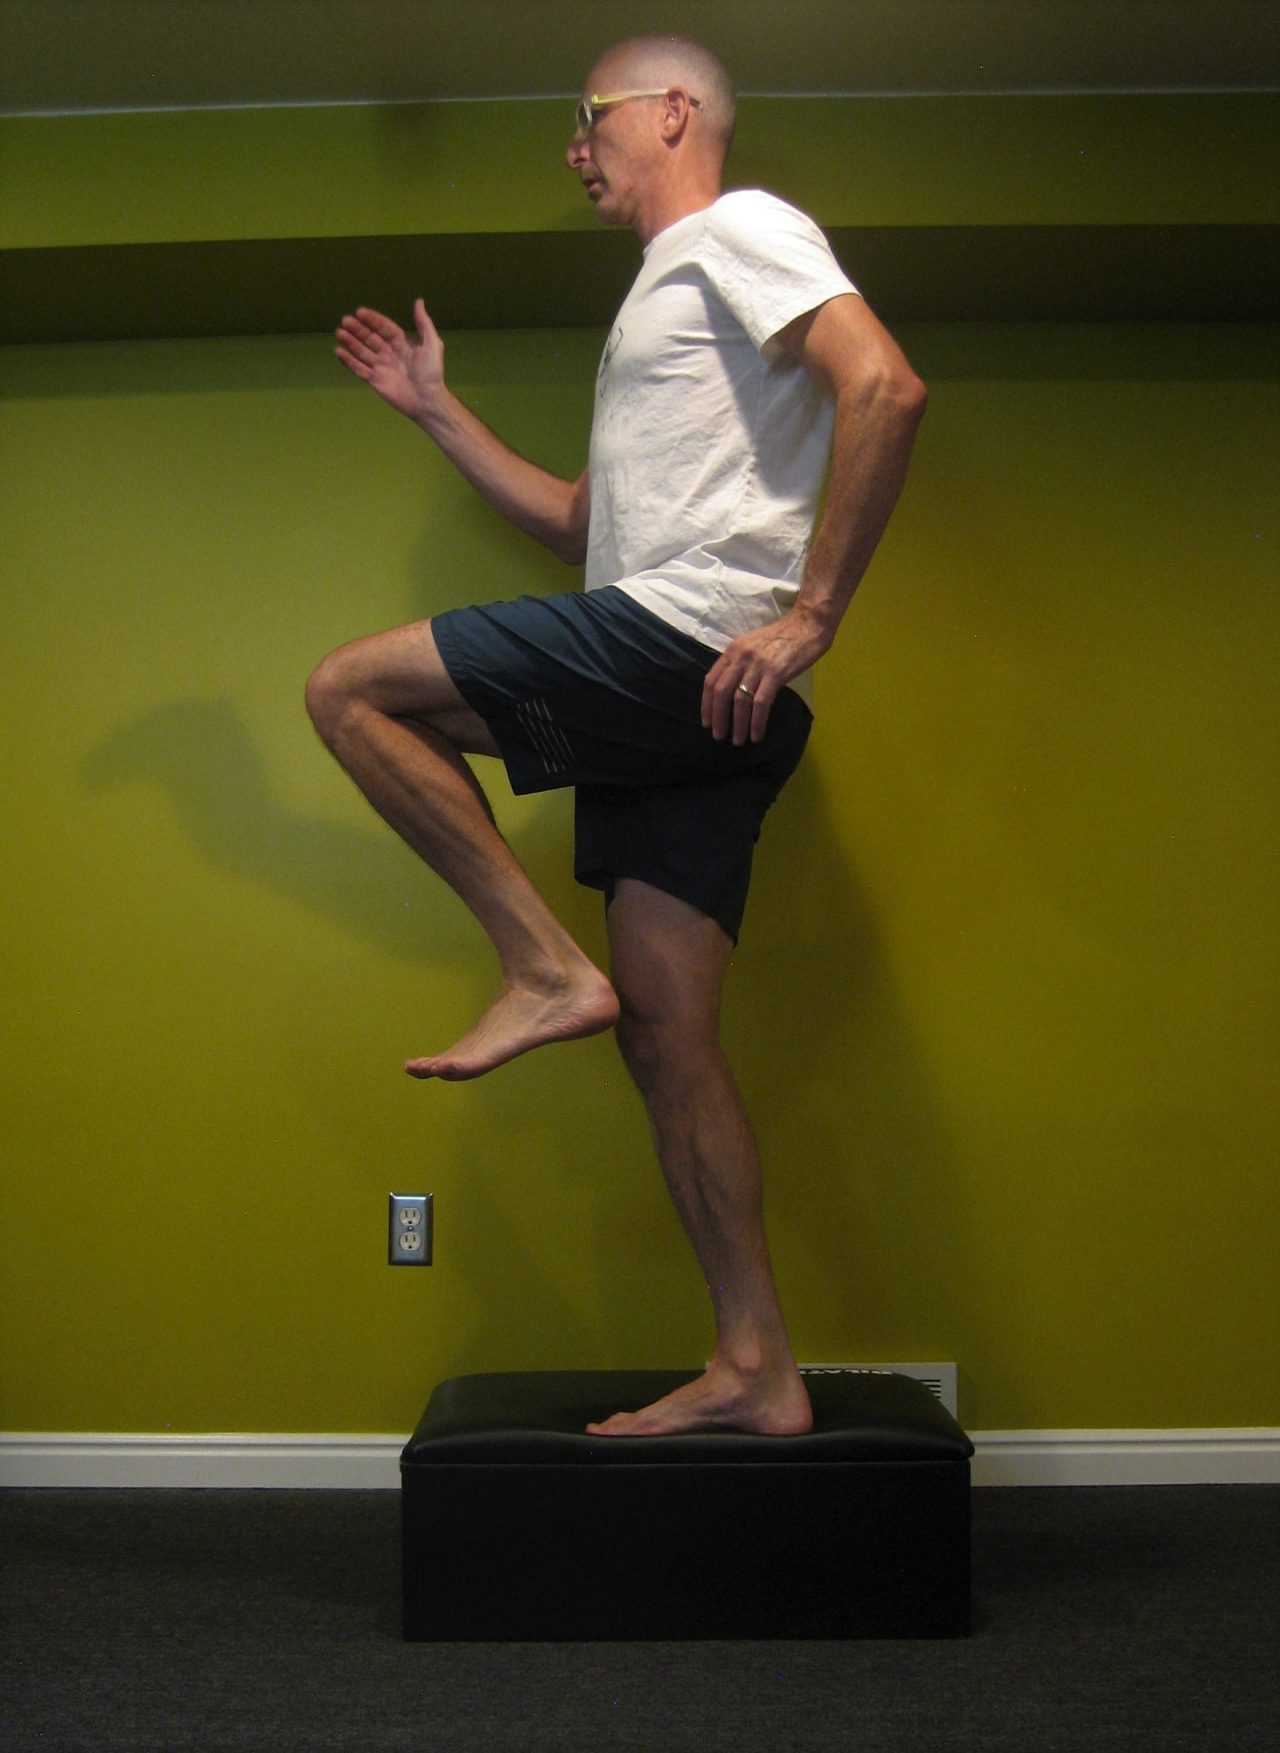
    • Stand sideways on the bottom stair or a plyo box
    • The foot at the edge of the stair will be the working leg
    • With the other leg, reach behind the stance leg and tap the floor then finish with knee high
    • The working leg will be doing a single leg squat so look to keep your spine neutral, hinge through the hips, lean forward with the the trunk and your butt goes back
    • Ideally, this is also a balance exercise with the non-stance leg never taking any weight. However, if this is a struggle, use a railing or wall for assistance
    • You can add weight for additional resistance 
    • 3 sets of 10x
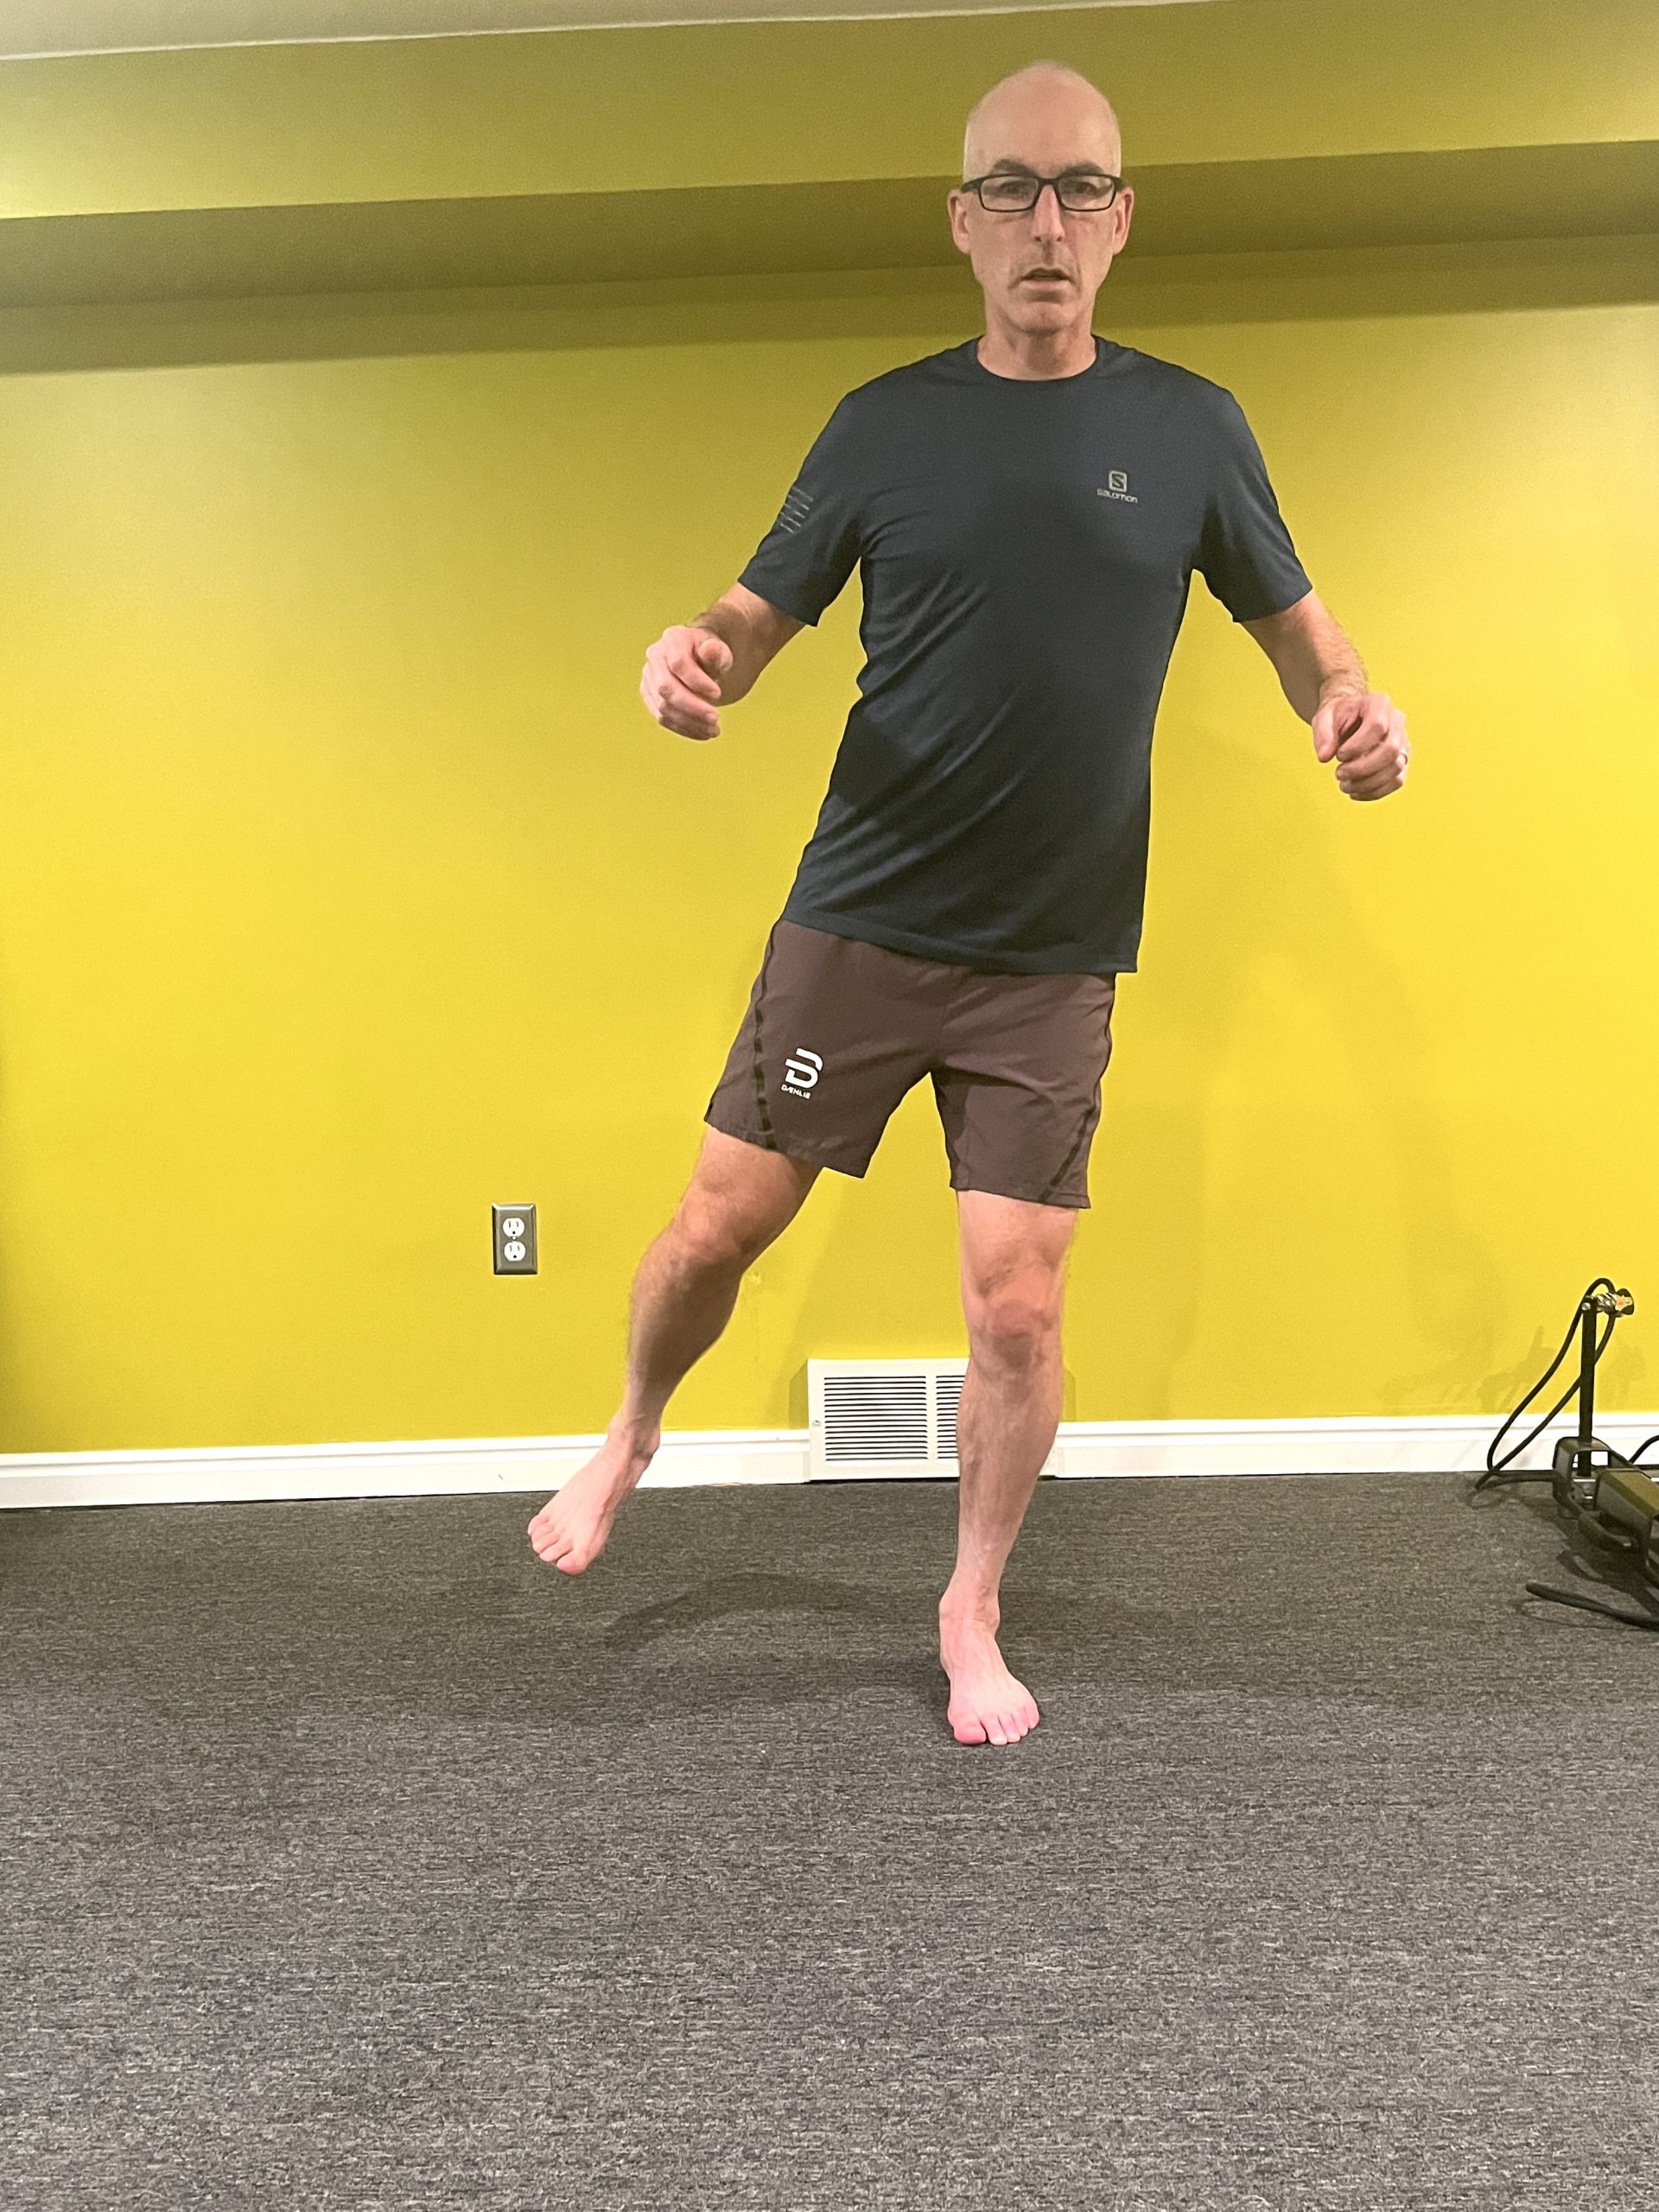
    Lateral Bounding
    • Think of these as hopping side steps
    • Start in the ski stance position
    • Push/hop sideways off the stance leg and land on the other leg in a balanced position
    • Switch back to the working leg and go again
    • As described, you’ll be moving sideways like down a hallway. If you’re tight on space, you can go back and forth from right leg to left leg but strive to be honest about the balance before the next hop
    • Look to do 30 contacts/reps on each side split into sets however your space allows (2×15, 3×10, 5×6, etc)
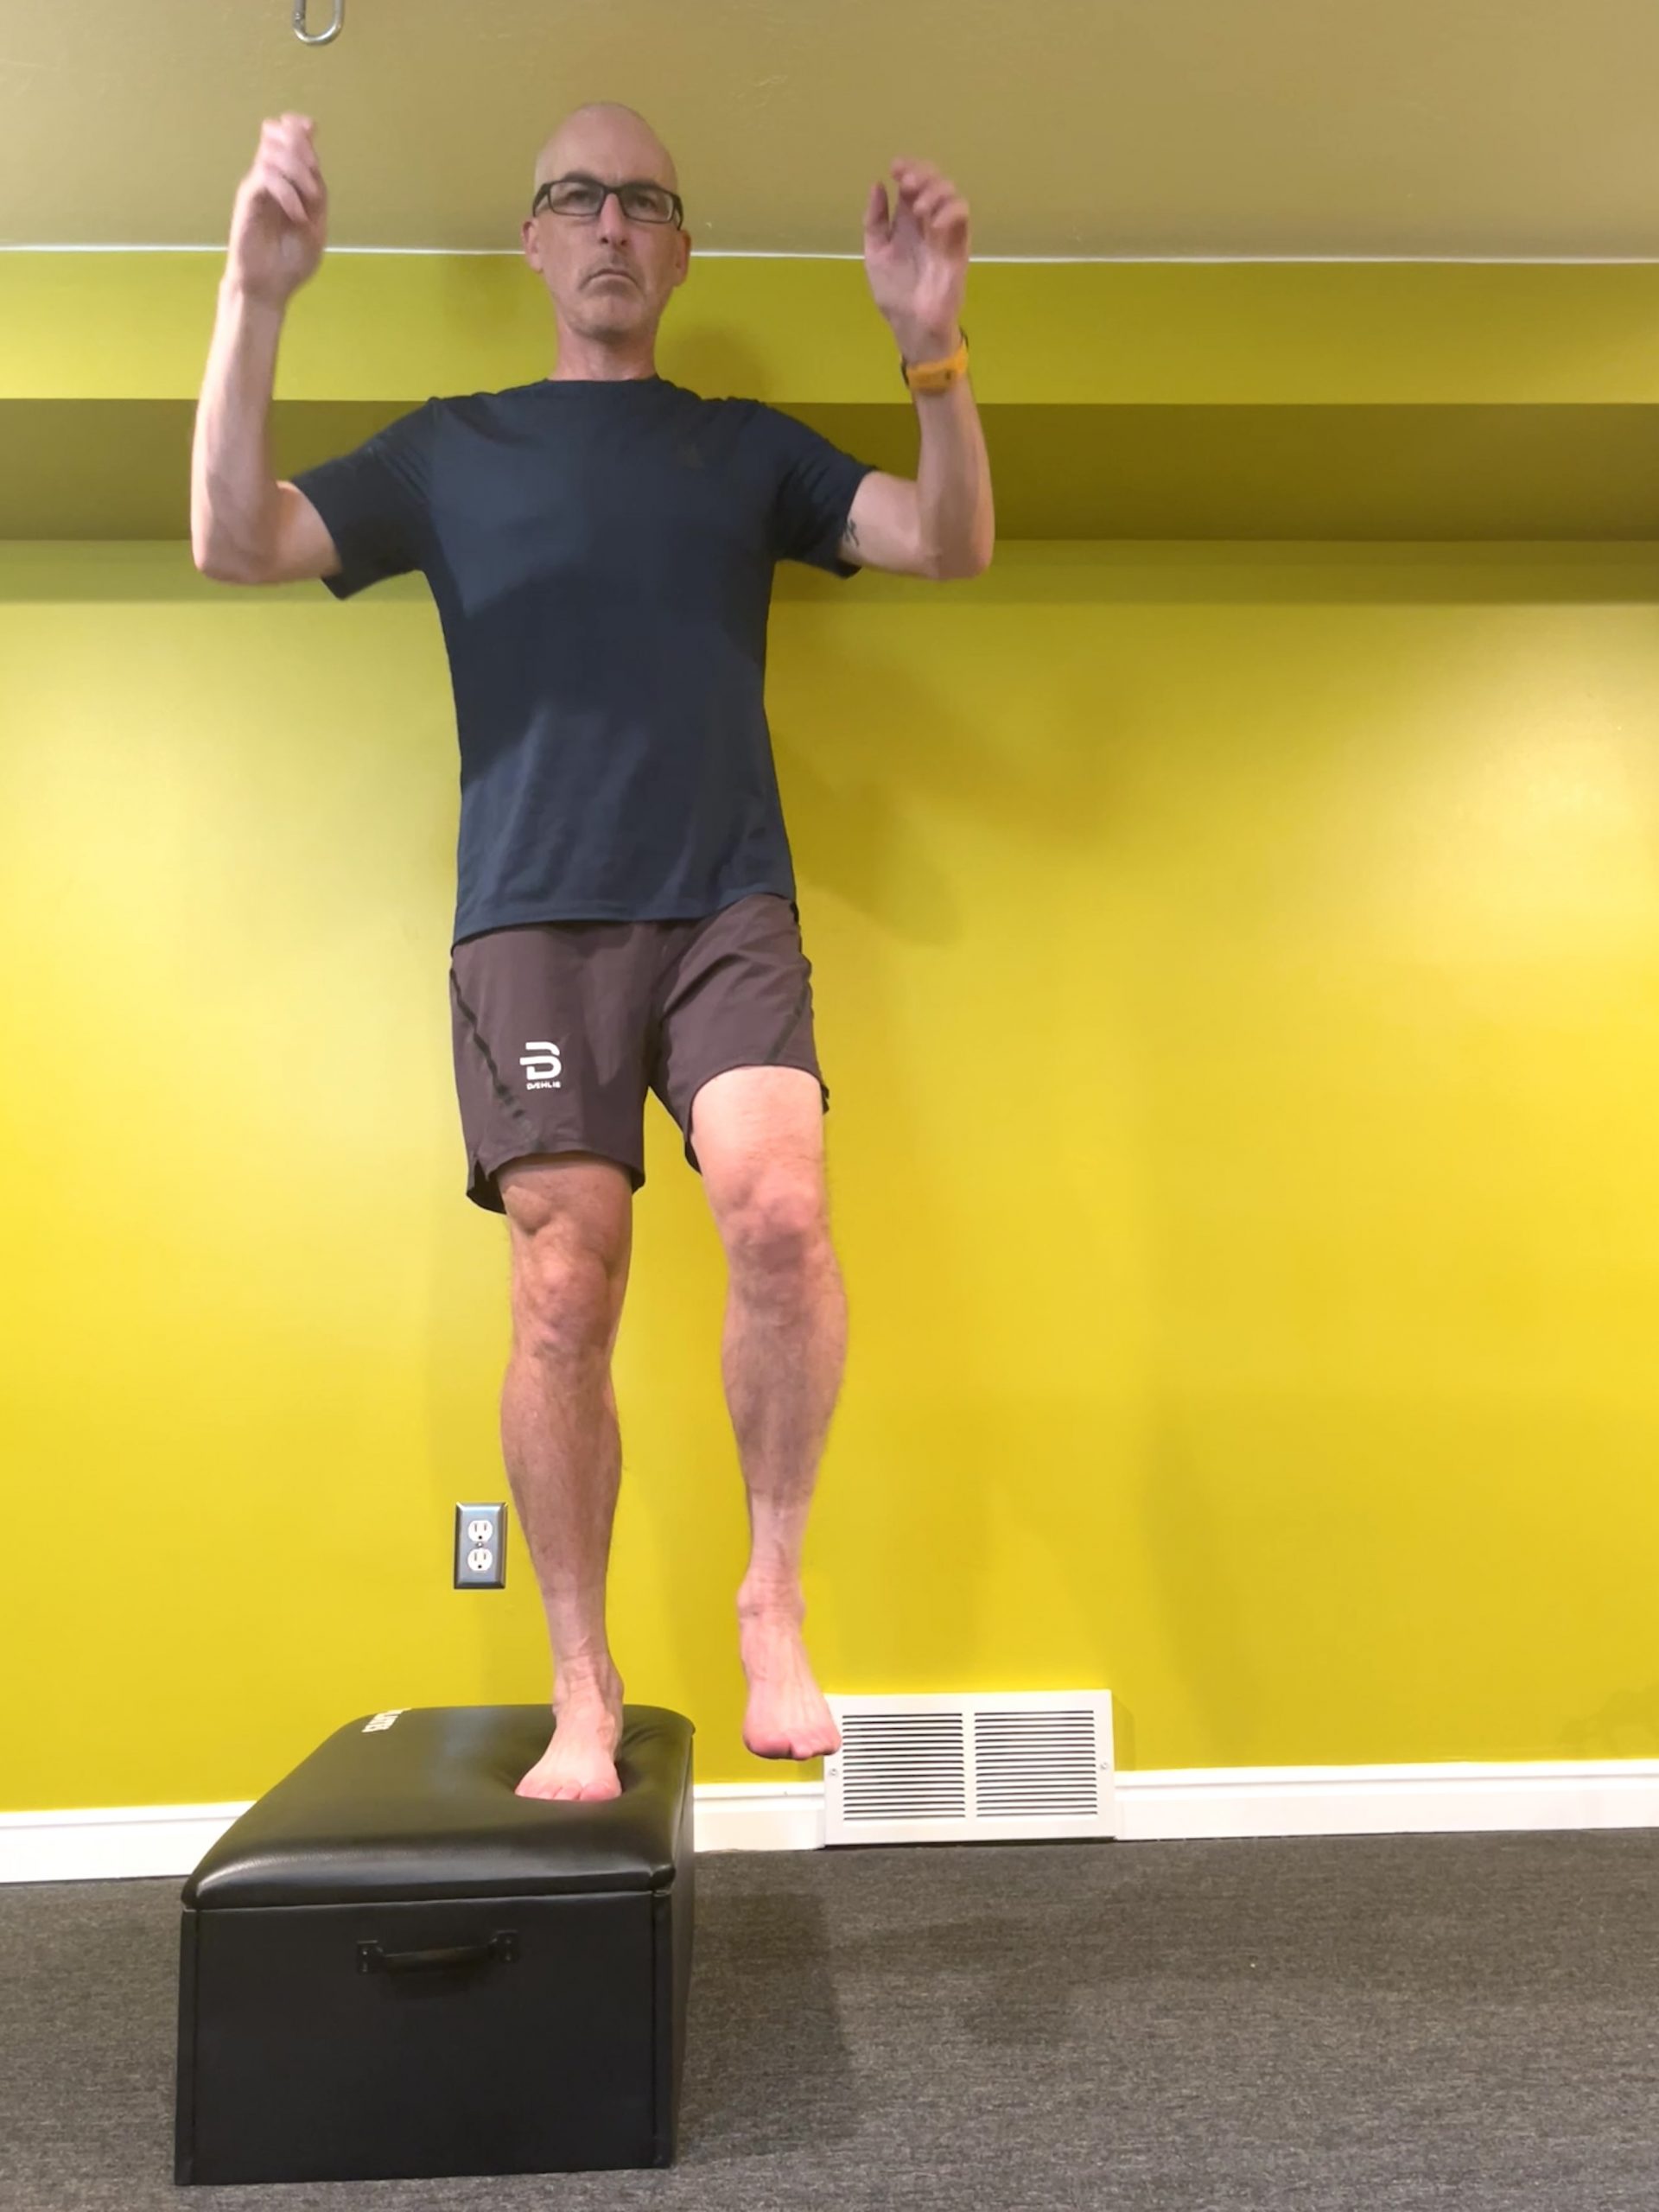
    Lateral Countermovement Jumps
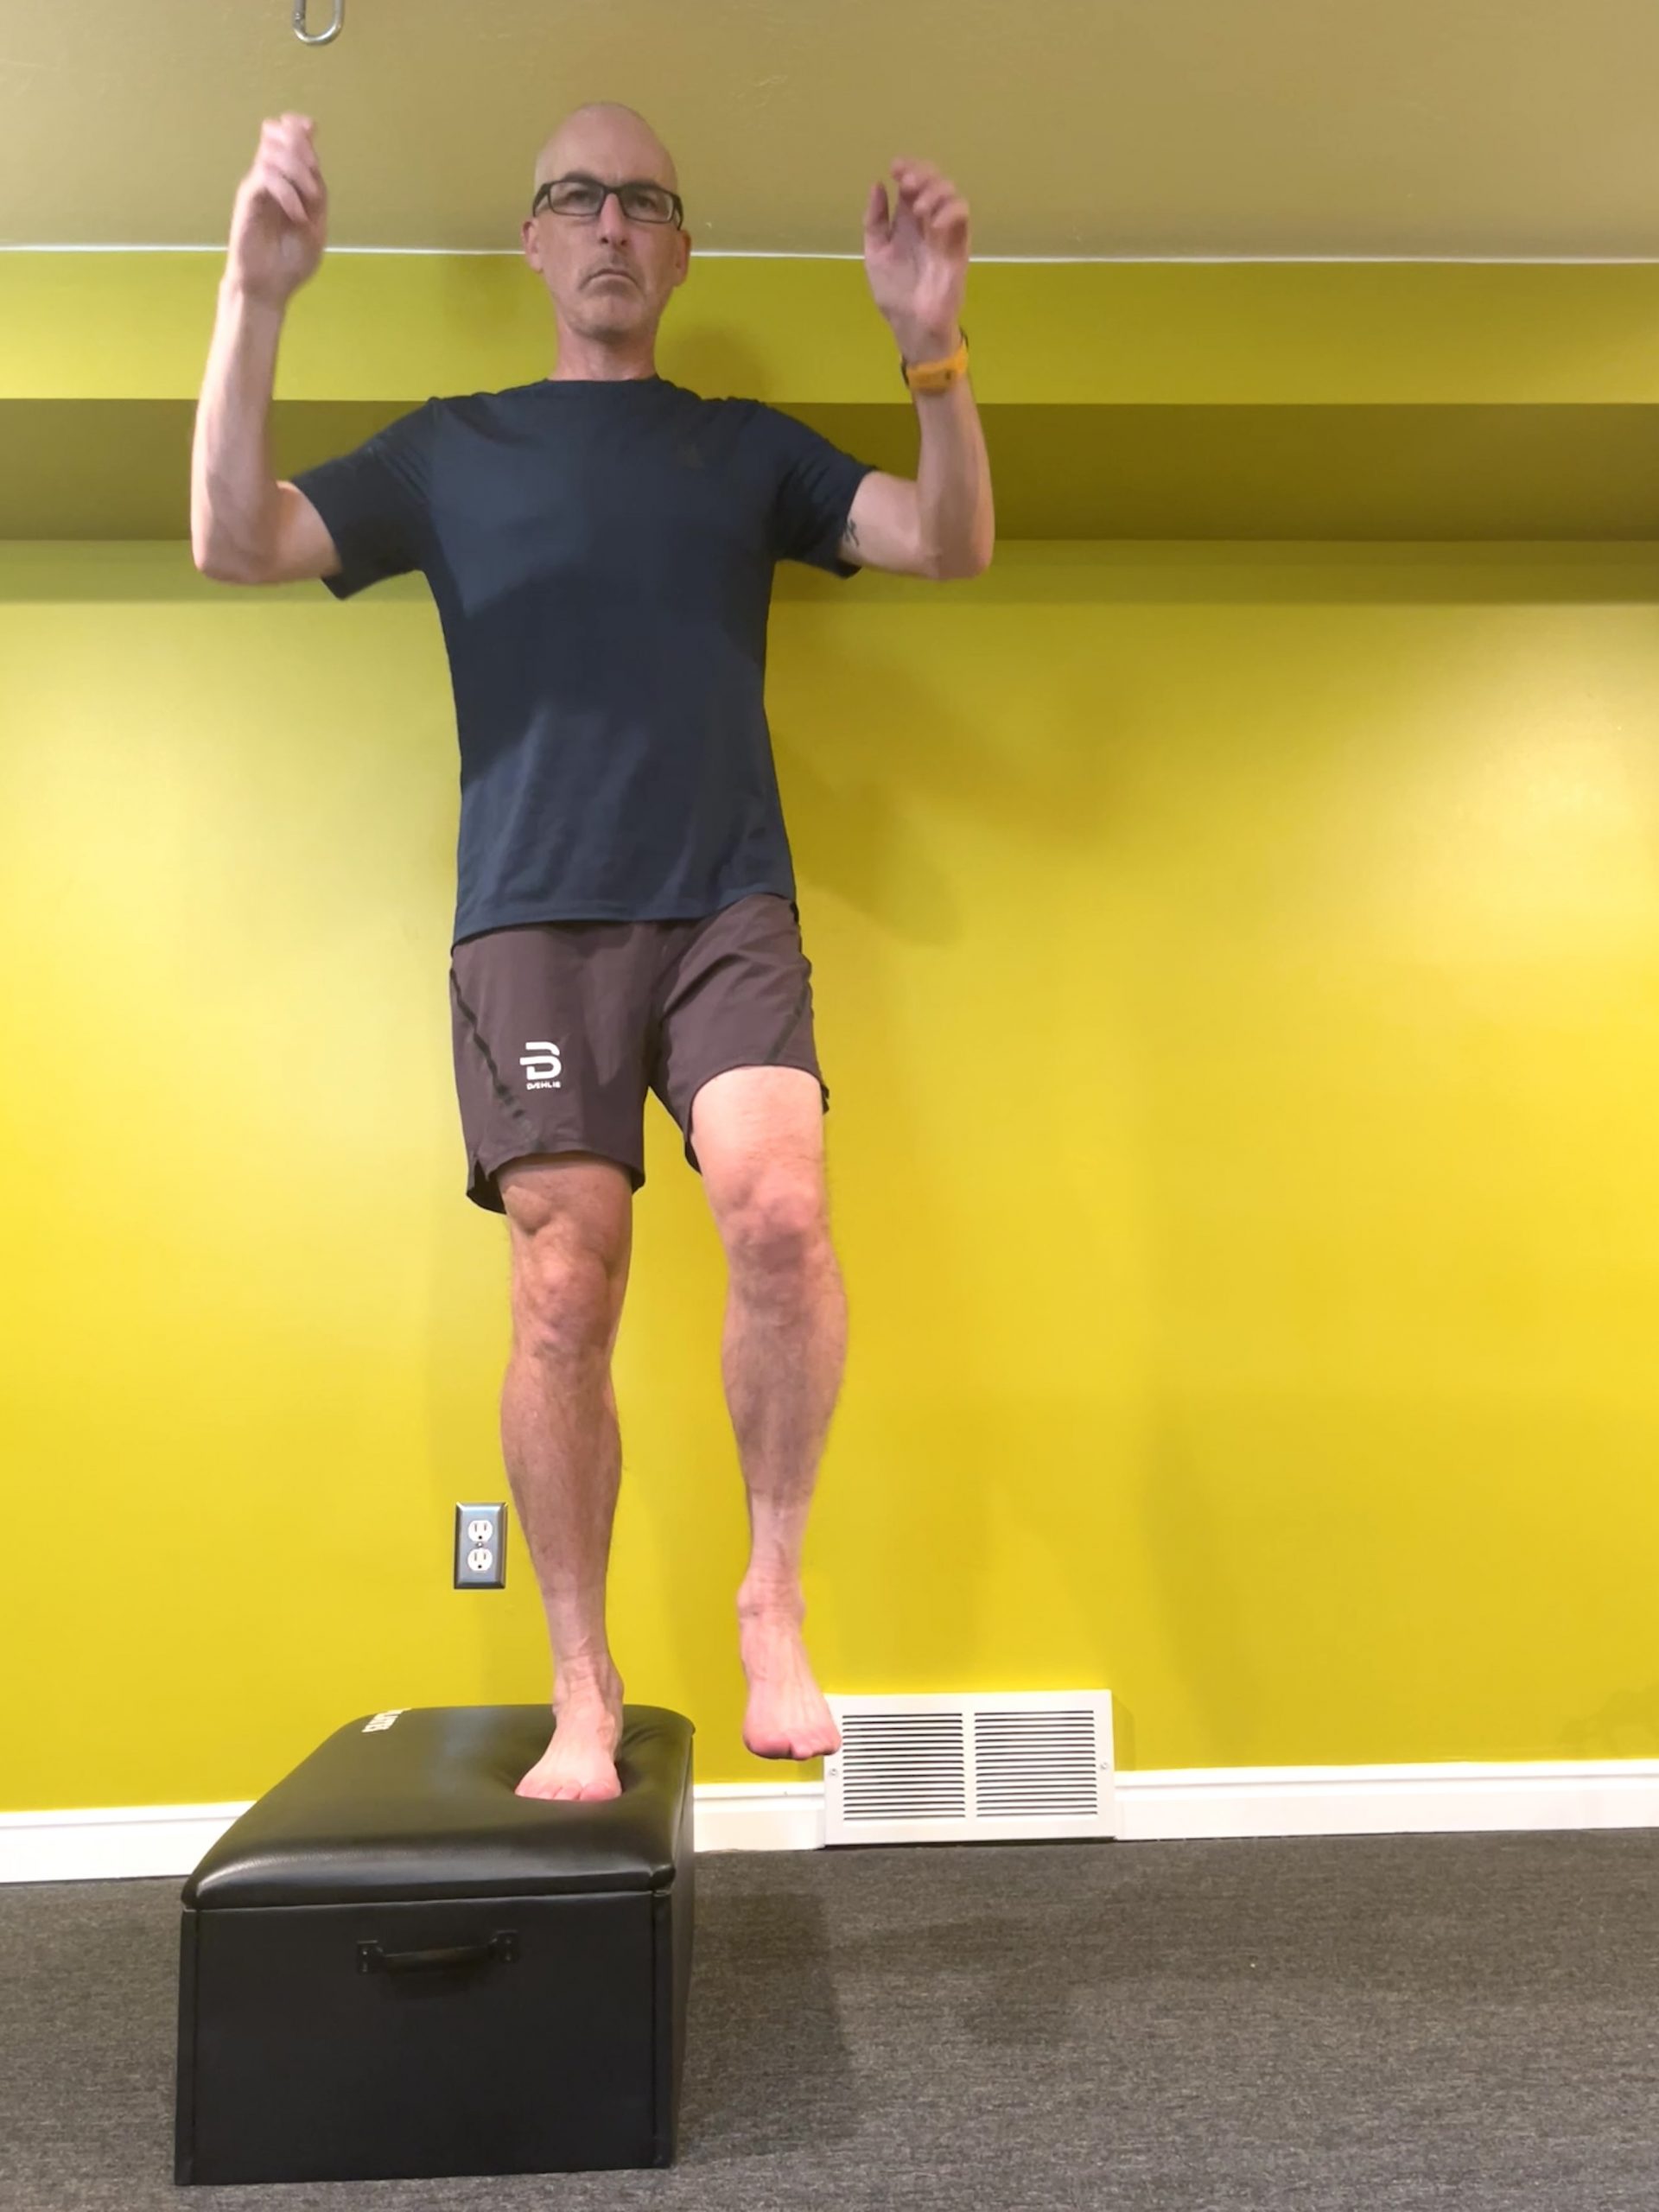
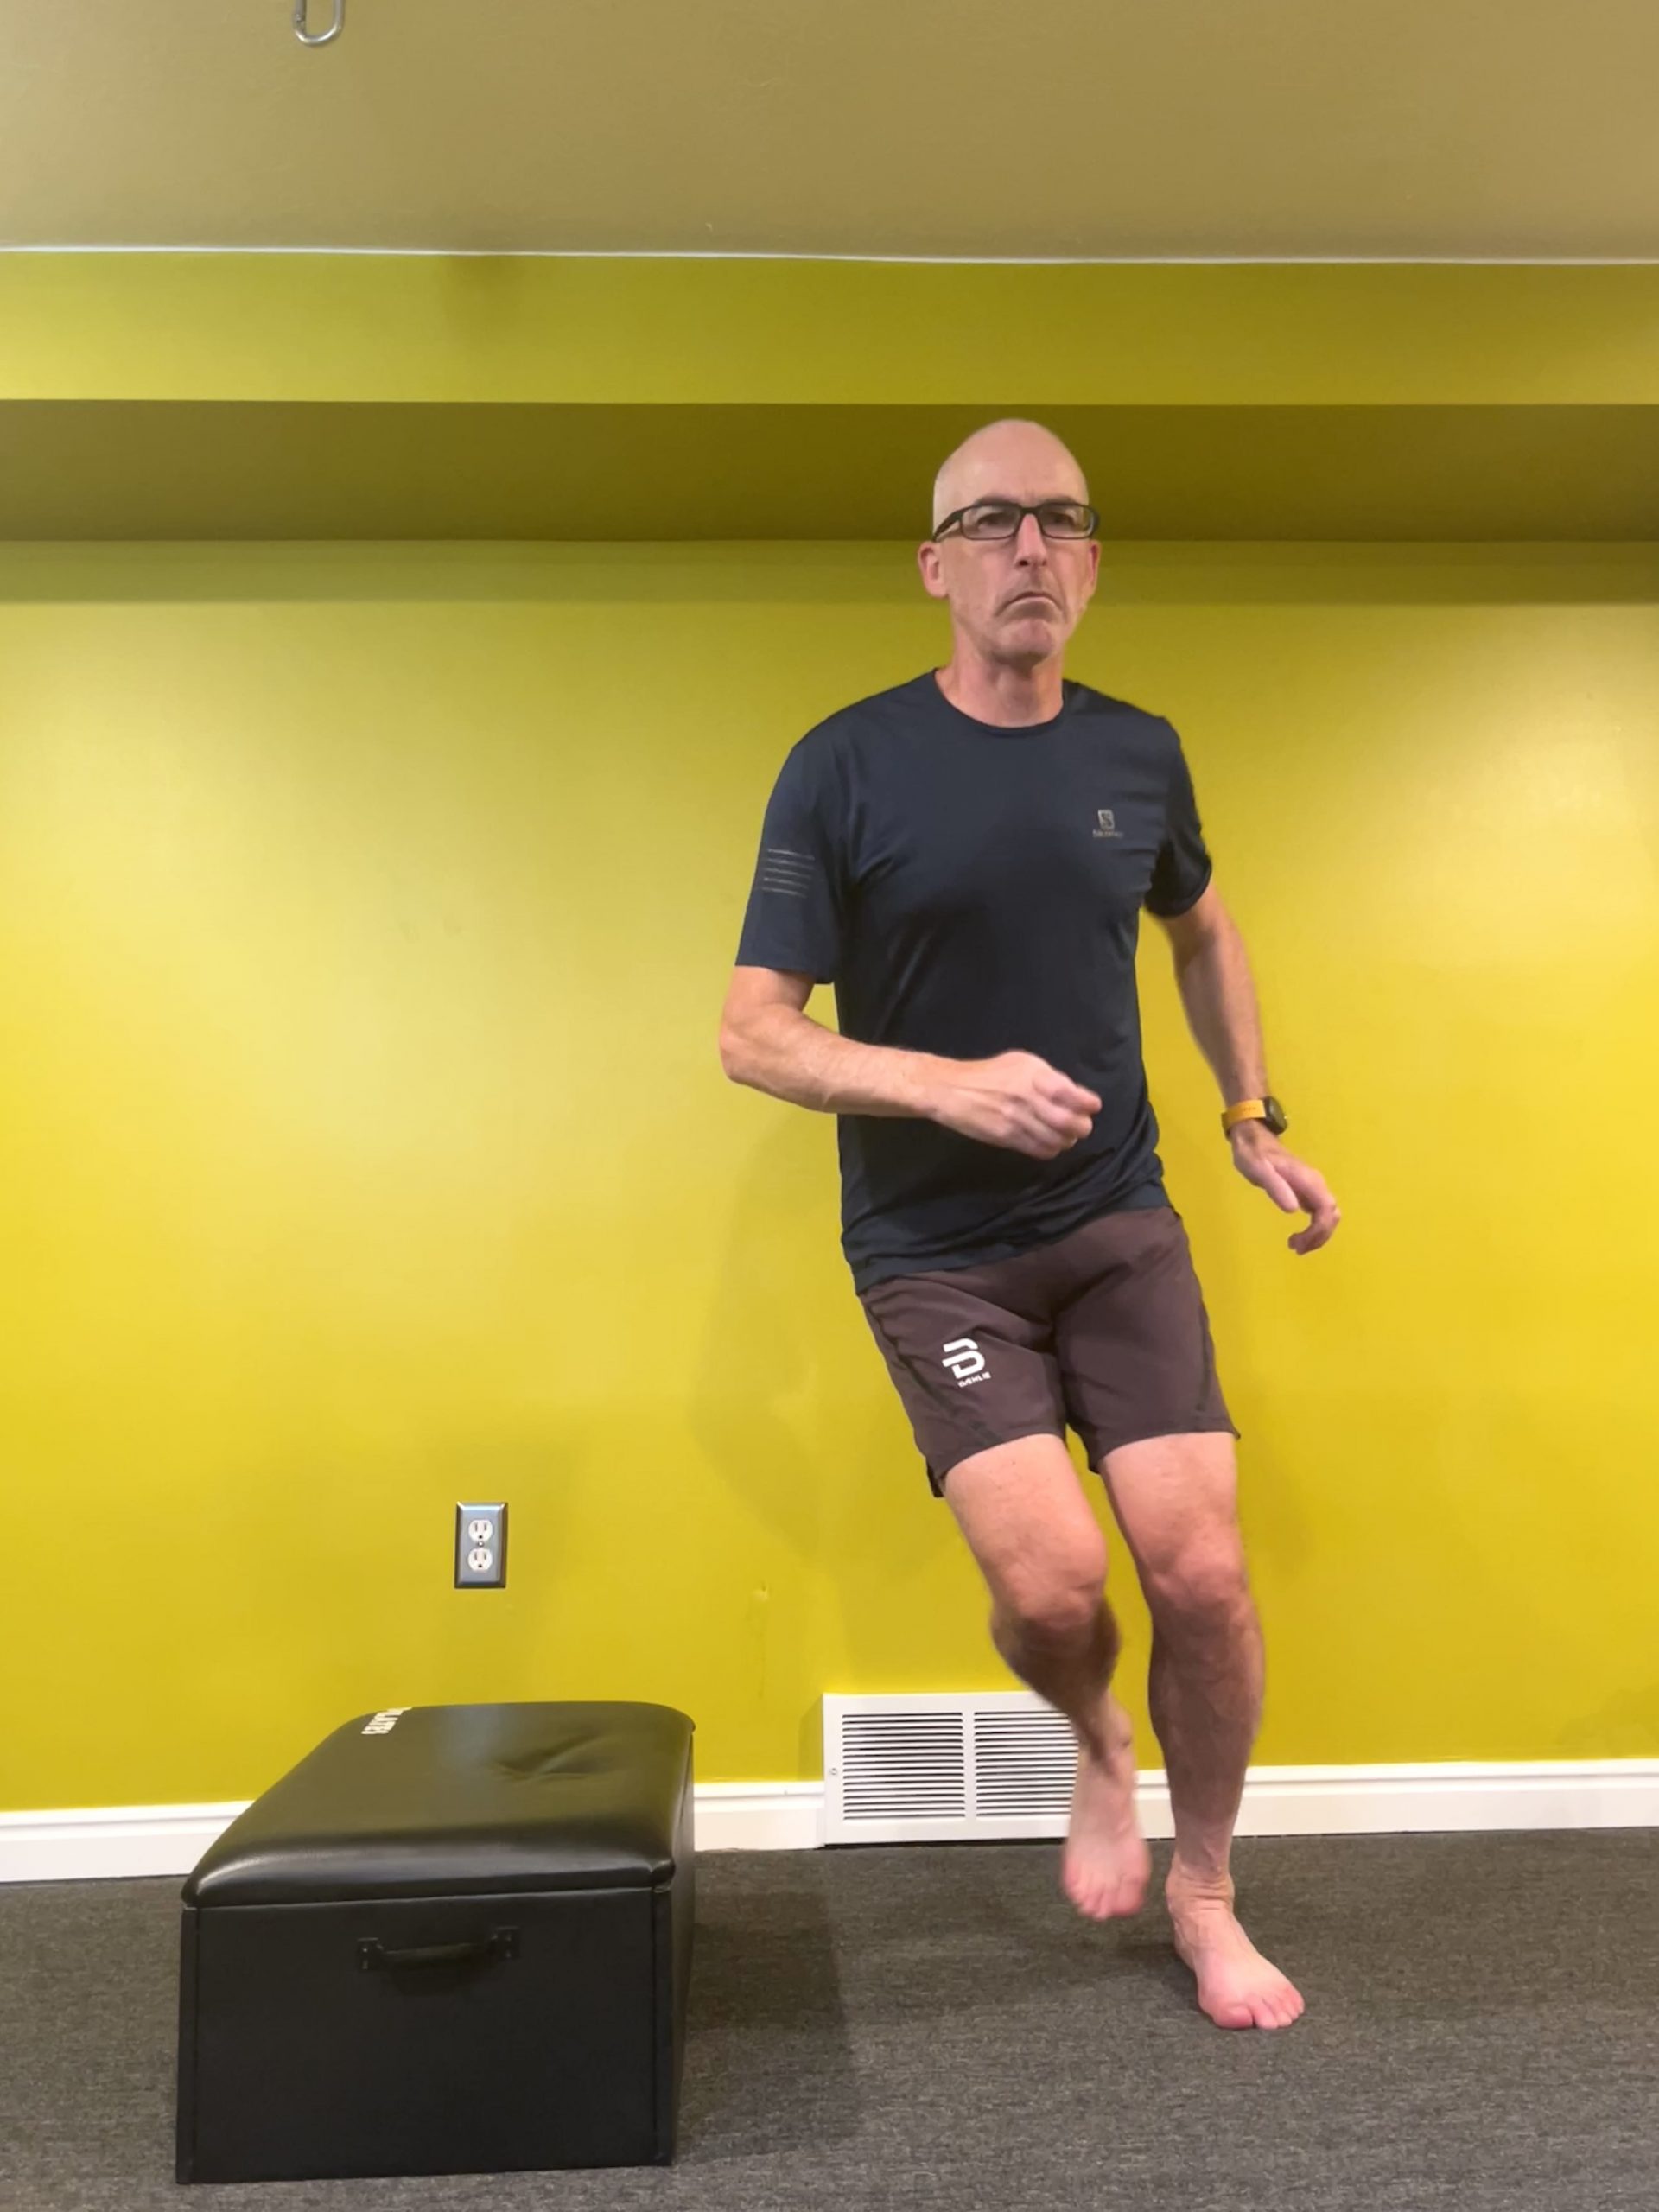
    • Stand sideways on the bottom stair or a 8+ inch plyo box
    • Step off, landing in the ski stance position on the opposite leg
    • Rather than pausing in a balanced position, immediately hop back up to the standing leg on the stair/box
    • Think of the landing leg as being a spring or pogo stick that will bounce back after being compressed—the compression will create the ankle, knee, and hip flexion inherent to ski stance, then we want to rebound off quickly and pop back up to the box
    • Make sure the work is being done by the landing leg vs just stepping back on the box
    • 2 sets of 5-10x. You can add weight or increase the box height for more difficulty (with a med ball or dumbbell held in both hands, move it from chest height while standing on the box to the hip of the landing leg on the floor)
  • An Ode to the Big Toe

    An Ode to the Big Toe


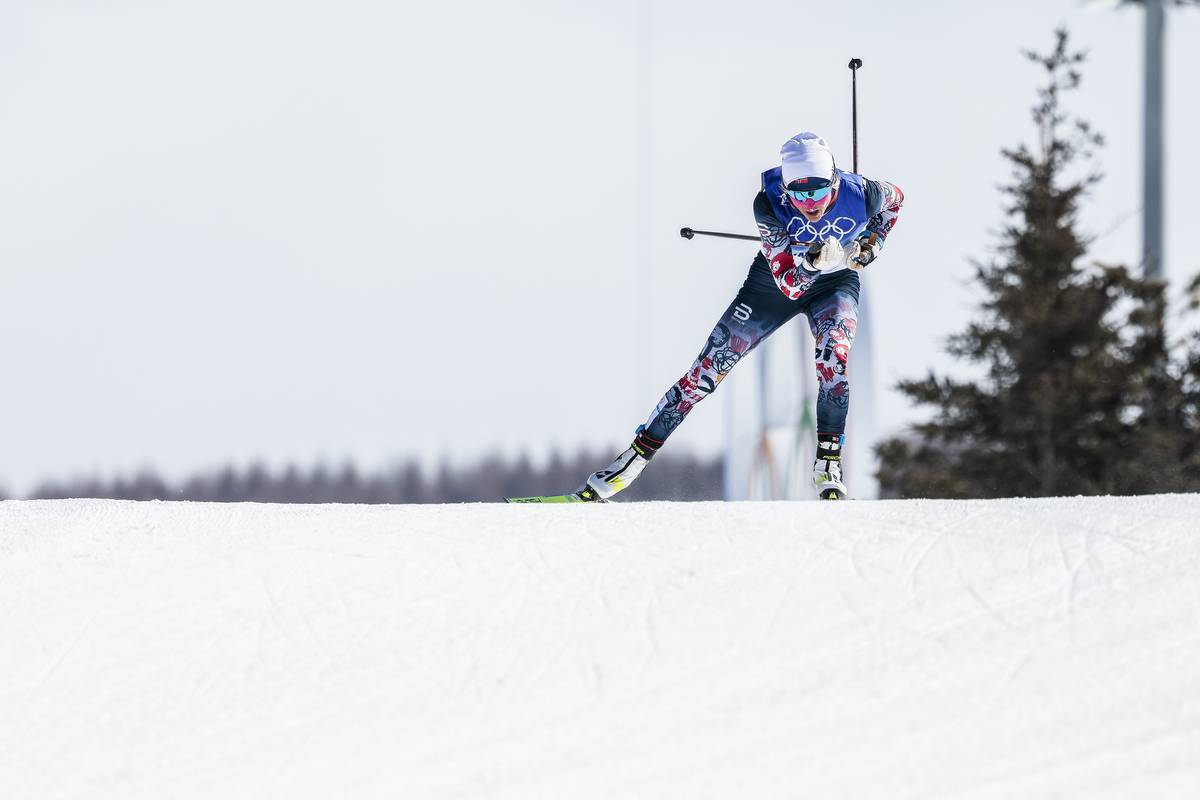
    Therese Johaug (NOR), at speed. Her low body position is not an aerodynamic tactic; she simply needs to get low in order to keep her heel down to elongate the pressure phase of the stroke (hip, knee, foot all in alignment). She’s creating pressure through her big toe, though that pressure will begin to release as soon as her heel is elevated. (Photo: NordicFocus)

    The big toe is called the big toe because it’s bigger than the other toes. It has bigger bone and muscle structure because it takes more load. When we walk and run, we are programmed to get the big toe on the ground. But how and when we get the big toe to the ground can cause problems. Too much, too soon, too late, or too fast and efficiency suffers. When efficiency decreases, loads increase, which does not make for happy feet. All these factors are part if skiing, just as they are part of walking. And the big toe is the key . . .
    From Supination to Pronation

    In normal walking gait, when the heel makes the first point of contact with the ground, the foot is in a supinated position—the inside of the foot is angled up and outside of the foot is angled down like when you check to see if you stepped in dog poo. In supination, the foot is fairly rigid due to joint mechanics. As we move over top of the foot in mid stance, the joints unlock and the foot moves into a pronated position—the inside of the foot is down and outside is up (literally the opposite of supination). This movement into pronation creates flexibility in the foot, which helps to dissipate impact forces and adapt to uneven surfaces. By the time we get to the last bit of contact with the ground and roll off of the toes, the foot stiffens up again to create a rigid lever. Running gait follows the same general pattern but changes somewhat based on whether the initial contact happens at the heel, mid foot, or forefoot. 

    Feet come in many different shapes and sizes, but when the quantity or timing of the transition from supination to pronation is outside of the normal range, the movement pattern becomes less efficient, likely compensated, and potentially pathological. Too much and too soon, both tend to cause an inward rotation of the leg, which is a common culprit in knee pain. Too little or too late can lead to lateral foot issues, greater risk of ankle sprains, and adverse effects from rapid internal rotation of the lower leg as the foot dives onto the big toe right before it leaves the ground. (I have just presented a gross oversimplification of foot and ankle kinematics. For a deeper dive, check this tutorial or get a PhD.)

    The control and coordination of this transition from supination to pronation to push off is dependent on joints with their associated ligaments and on muscles. The foot and ankle are comprised of 28 bones, 33 joints, 112 ligaments, 21 muscles in the foot, and 13 muscles in the lower leg. There’s a lot going on here, folks. To oversimplify once again (and to eventually bring this back to skiing), I’m going to focus on two of the star players: tibialis posterior (TP) and flexor hallucis longus (FHL). 

    Both TP and FHL are long, thin muscles located in the lower leg along the medial side of the tibia. By the time they get to the ankle, the muscles have turned into tendons that wrap around the inside of the ankle bone (medial malleolus) and head into the foot. 

    TP attaches to the navicular and cuneiform bones in the mid foot. Its primary role is to control the movement of the mid foot and support the medial longitudinal arch (i.e. it controls pronation). But it also stores energy and helps the foot rebound from flexible pronation into the rigid lever for toe off. Think about the suspension on your mountain bike: ideally we get a plush ride with the right amount of rebound to set us up smoothly for the next bump. Not enough air in the shock and ooff, we bottom out (too much pronation). Not enough rebound, the shock is too slow, and we feel every one of those roots (the foot stays too flexible for efficient toe off). 

    The tendon of FHL runs all the way out to the big toe. Not only does it pull the big toe down, or more functionally, keeps the big toe from collapsing under the load of toe off, but it also helps maintain the structure of the medial arch and mid foot. It works together with its neighbor TP on that transition from supination to pronation to rigid lever.

    Reading Break & Audience Participation: 

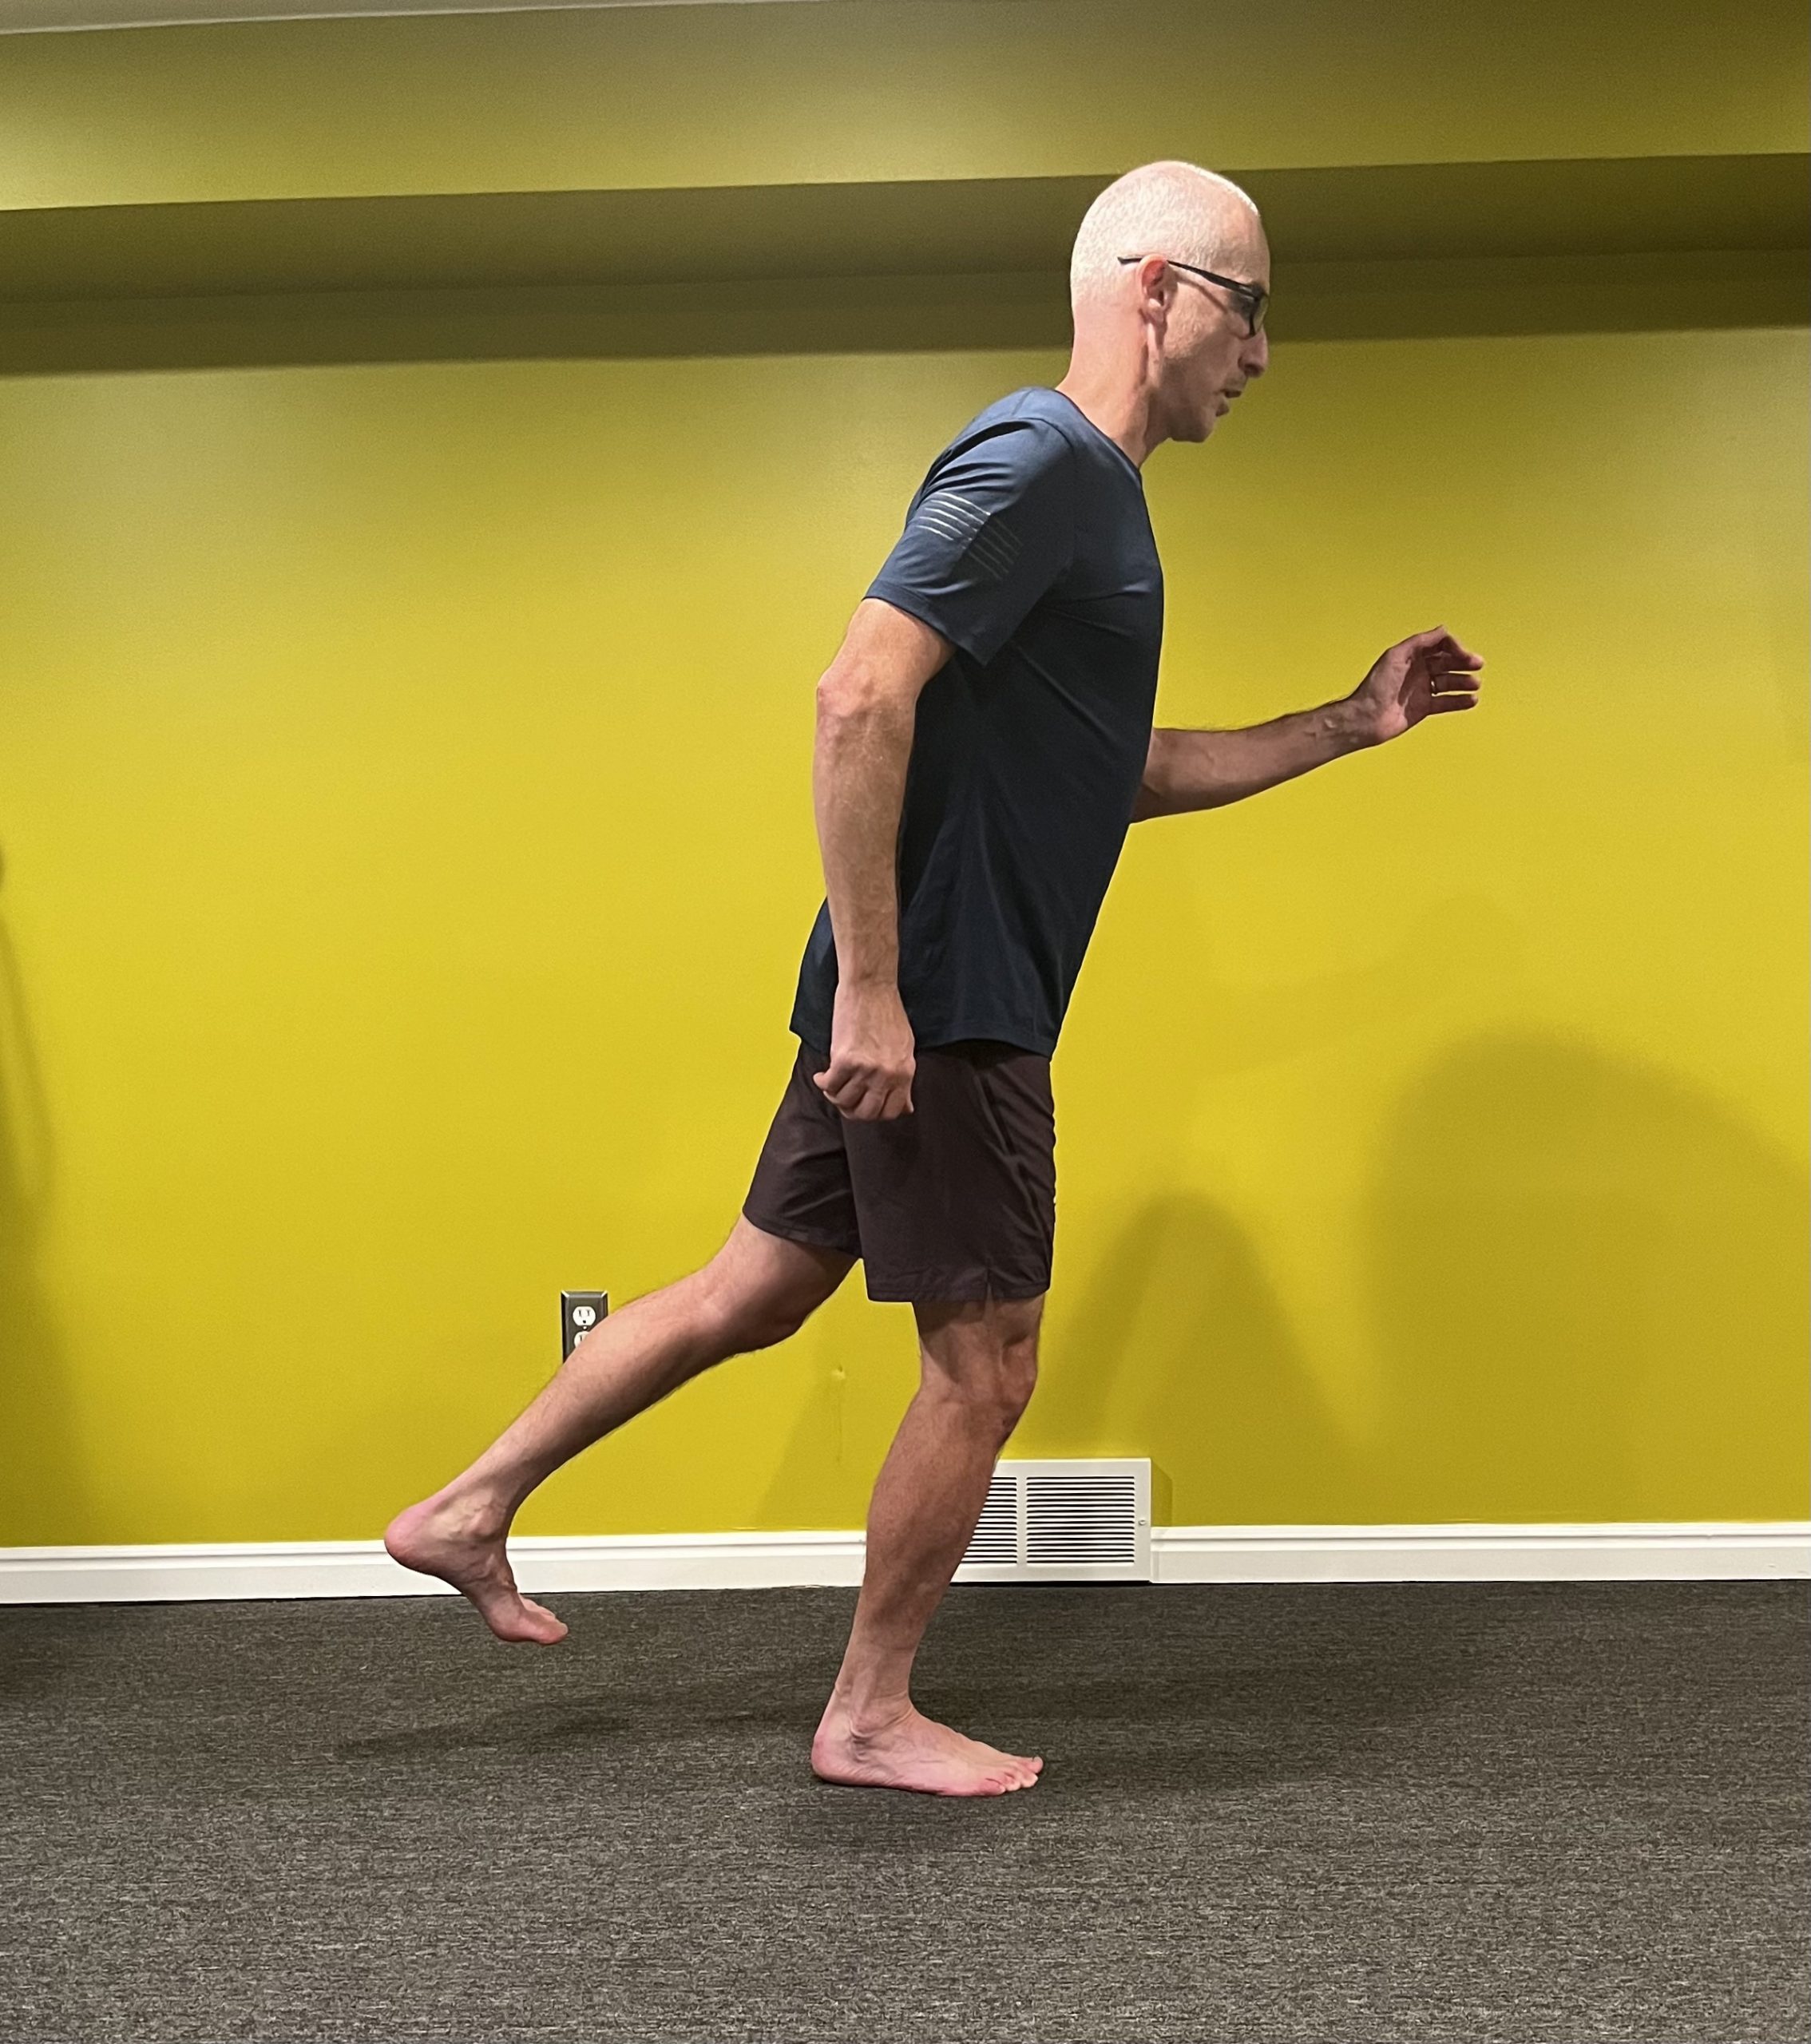
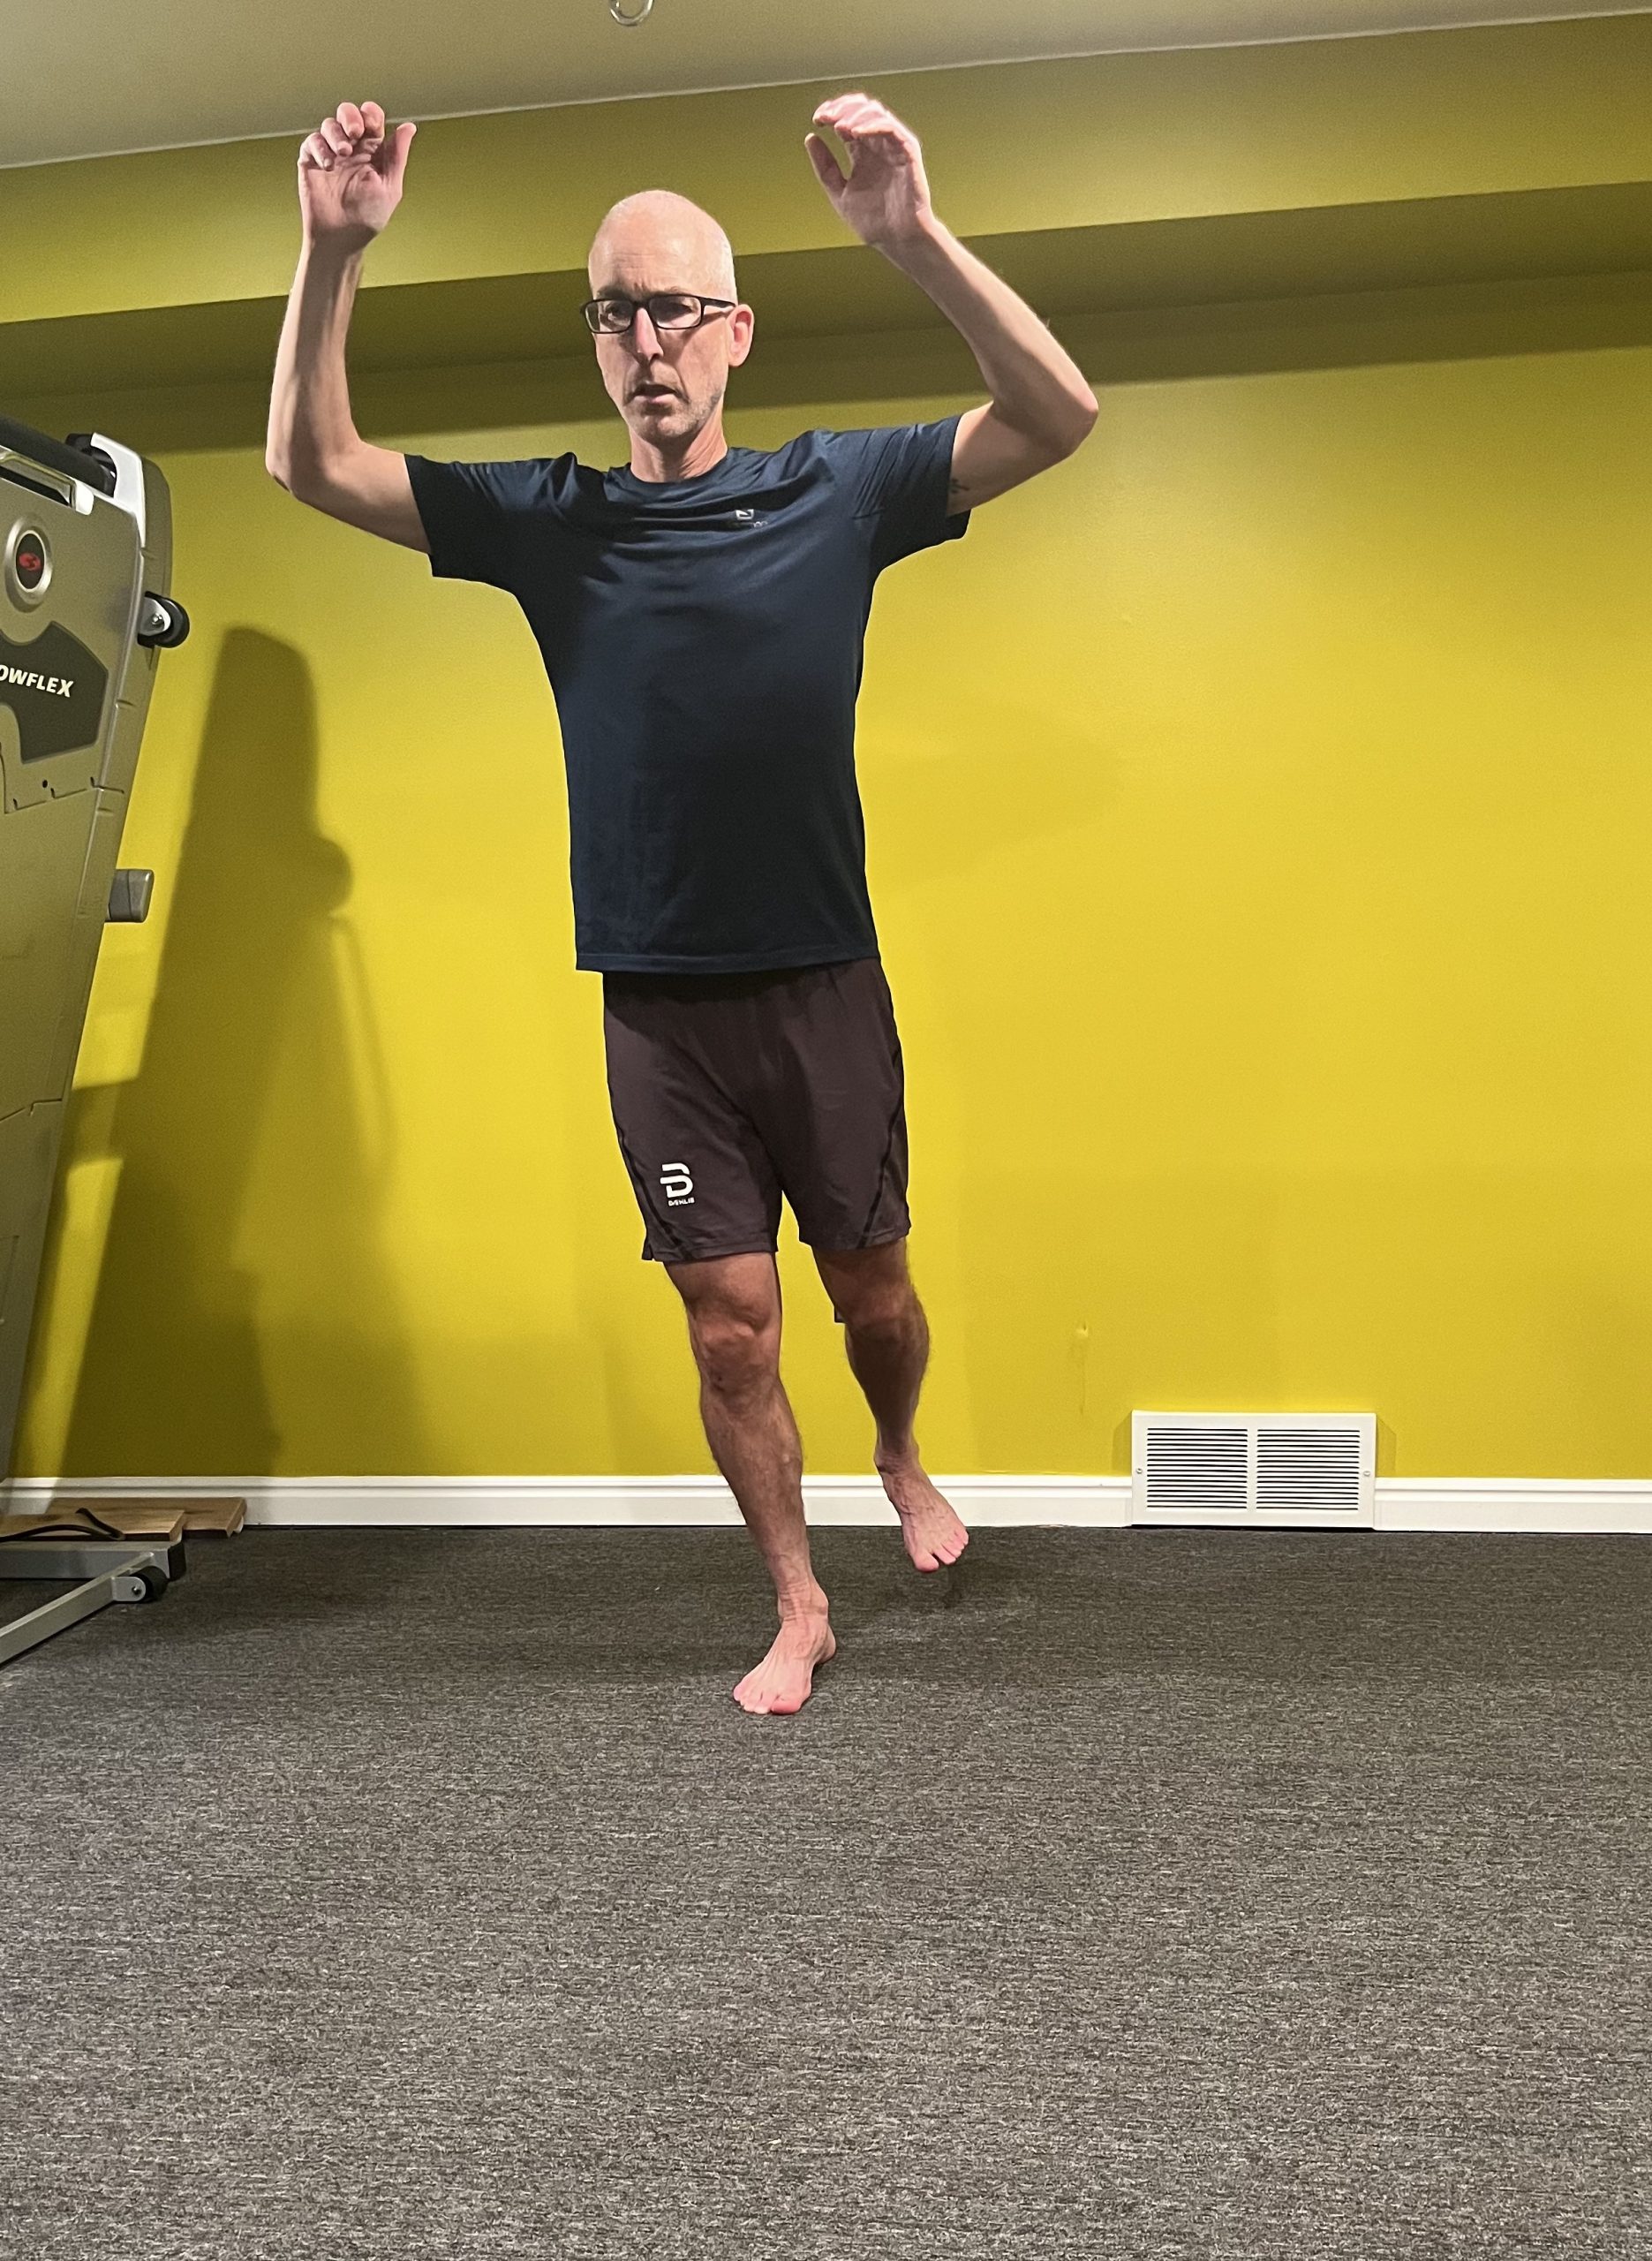
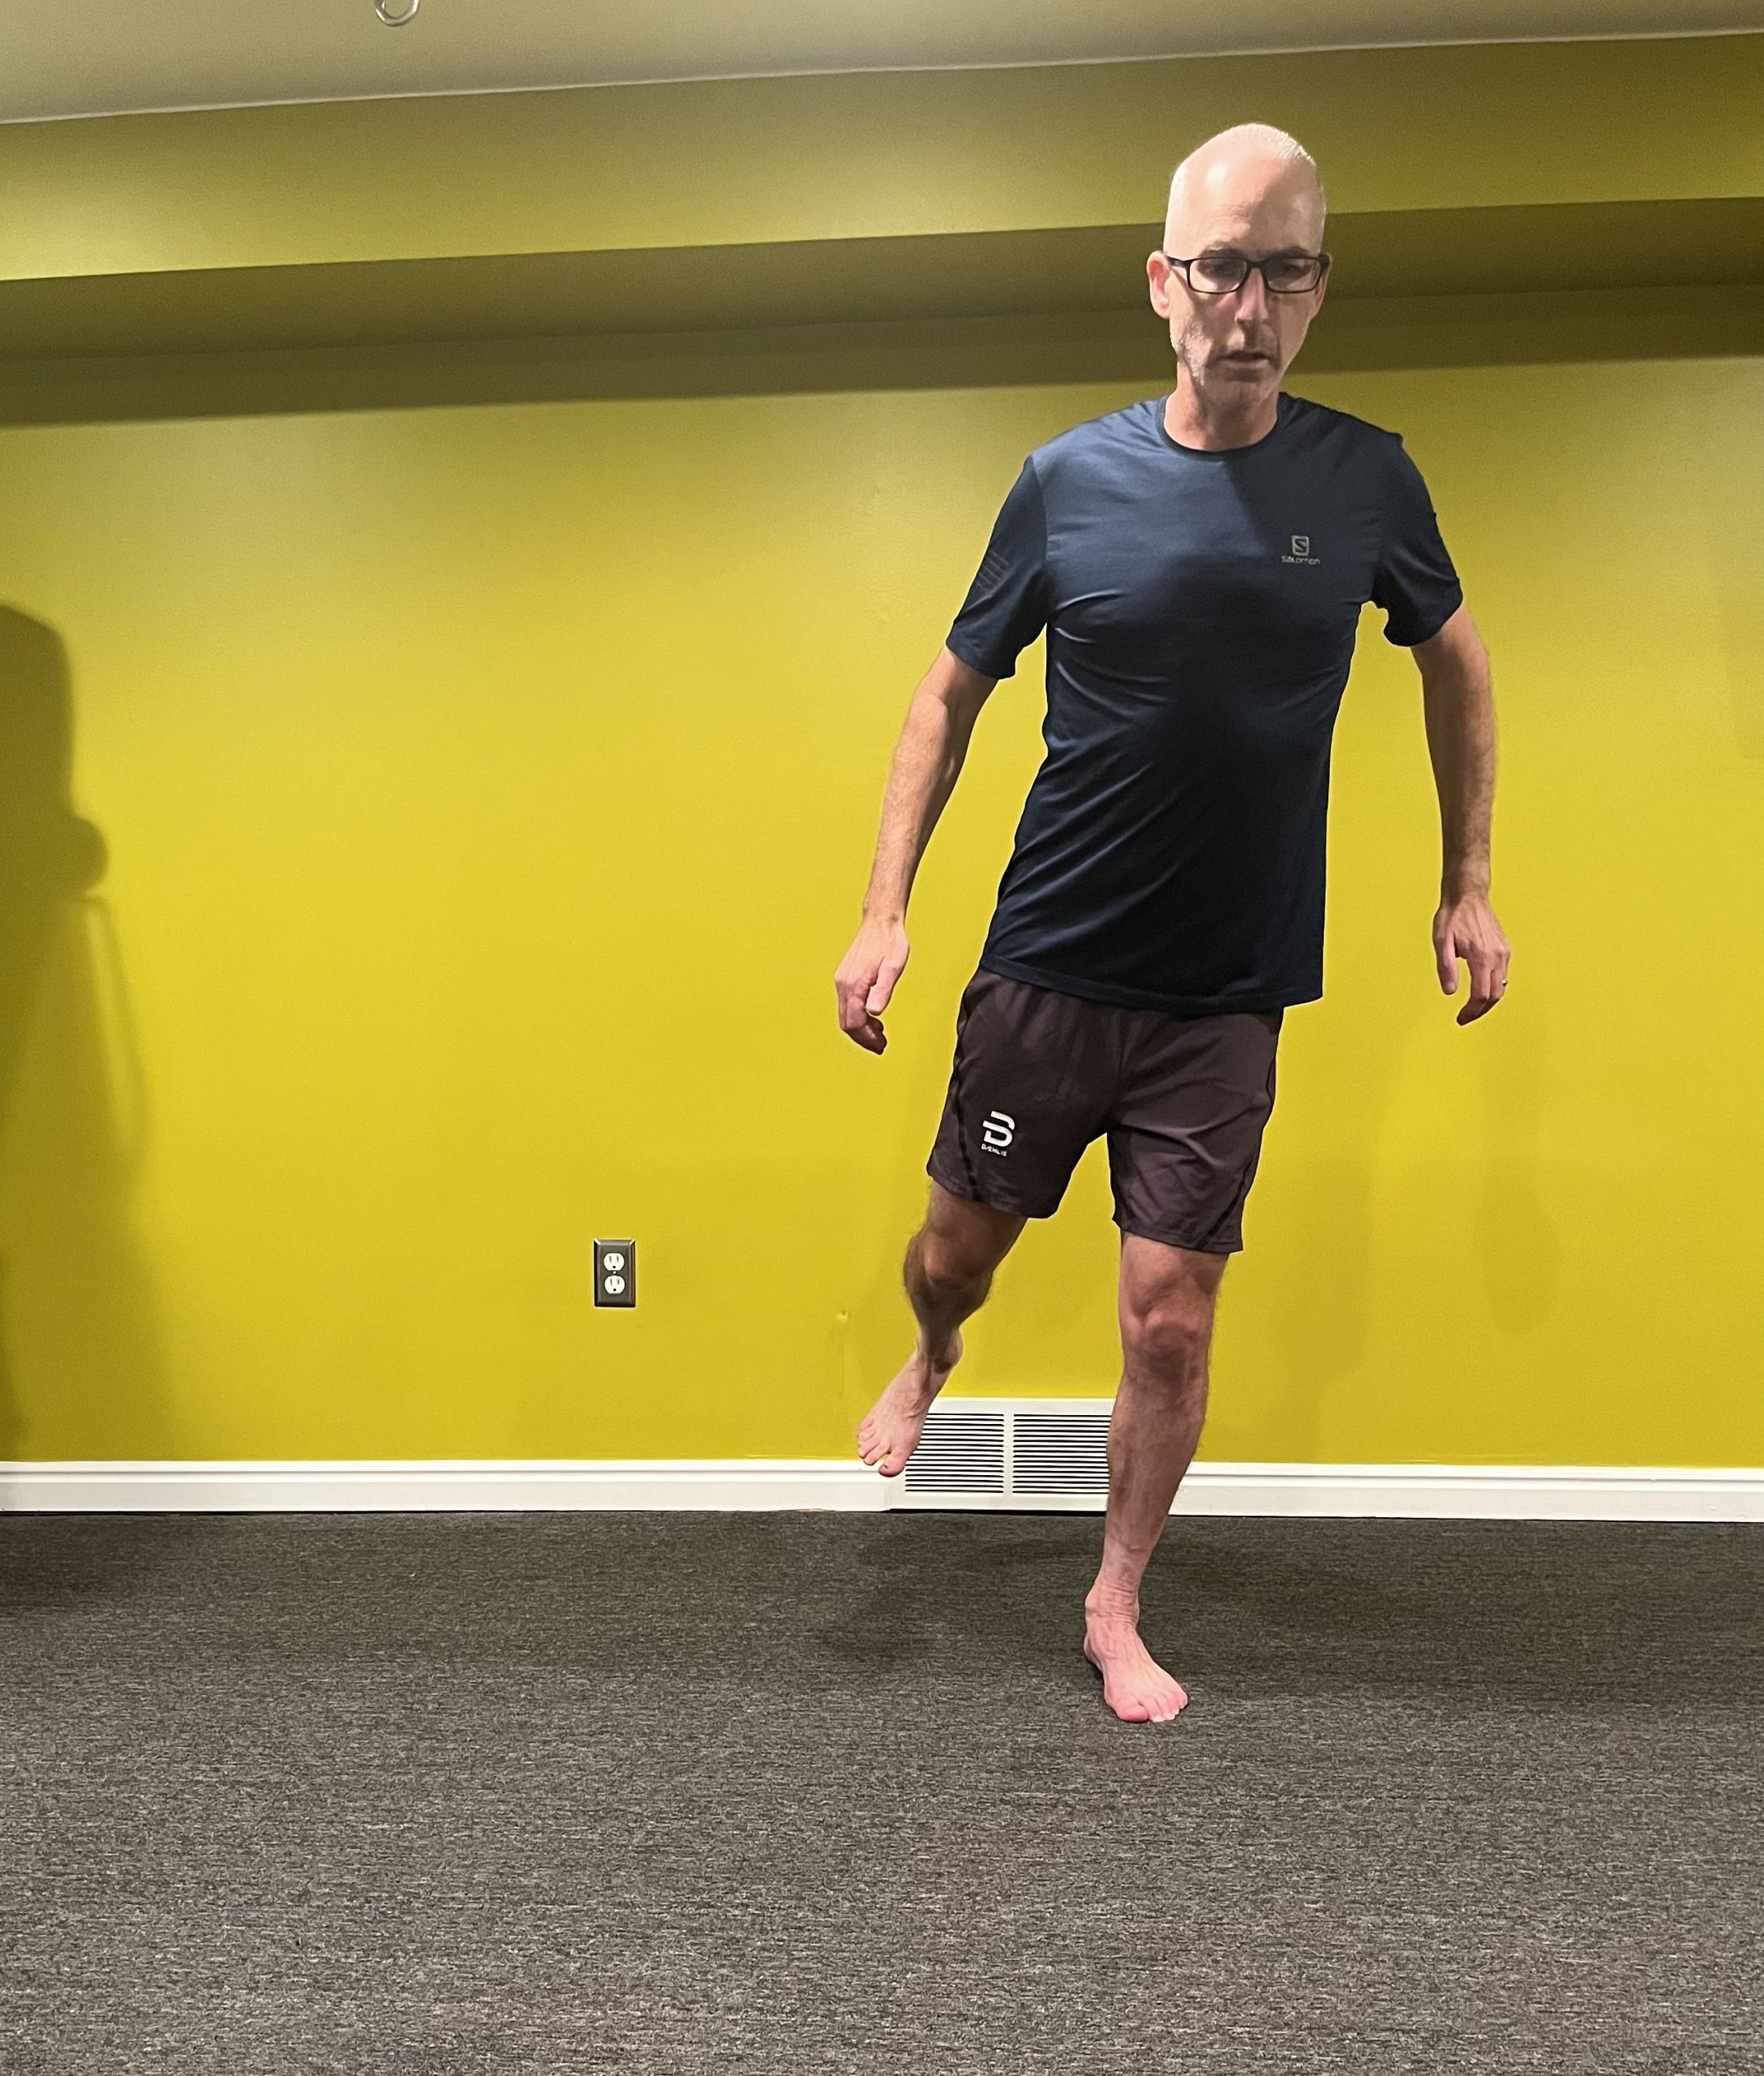
    Take off your shoes and stand up. Use a wall or counter top for balance and do a few single leg heel raises on each side. Have a look down at your foot. Does the movement or line of force go through the middle of the foot or do you end up more on the pinky toe side? Ideally, it should feel like the line of force goes between the first and second toes like it’s following the arrow made by the straps on a flip flop. If you’re way more on the pinky toe side, it’s likely that TP and/or FHL are asleep at the wheel.

    As Applied to Cross Country Skiing

    In cross country skiing, the biomechanics change, but the demands on TP and FHL remain very high. Biomechanically, we can describe the phases of cross country skiing in similar terms as with walking and running gait: initial contact, mid stance, and toe off. The position of the foot and ankle (and arguably the rest of the body) are very similar during initial contact (assuming V2, not steep V1) and mid stance for both skate and classic but different from walking/running. Rather than a transition from supination at initial contact to pronation at mid stance, we are striving for equal pressure across the width of the foot through both of these phases. “Finding the outside of your foot” is optimal for balance, stability, and glide. Through these two phases, TP and FHL are working primarily as stabilizers of the ankle and mid foot to facilitate balance on the gliding ski. At toe off, aka push, aka kick, skate and classic become quite different from each other. 

    Kristin Stoermer Steira’s (NOR) Classic striding technique. The camera captures the moment in which she creates the most significant power—and traction—in the stride. Her pushing foot has been flat to create pressure in the wax pocket, and her heel is only beginning to rise. That’s the moment in which the big toe plays such an important role in Classic technique. Technical point: hip, knee, toe all in alignment. (Photo: NordicFocus/FasterSkier)
    Classic Skiing

    Toe off in classic is not that dissimilar from walking and running. As I described above, we’re looking for the line of force to run between the first and second toes. Perhaps the biggest divergence is the flexion angle of the ankle as we transition from mid stance to toe off: there is far more ankle dorsiflexion during skiing. While this article is meant to focus on the big toe, it should be noted that a lack of ankle dorsiflexion mobility, both in quantity and quality, will adversely affect not only the mechanics at the foot but also the skier’s ability to get their center of mass over the kick zone. Speaking of range of motion, the first metatarsal phalangeal joint (MTP)—where the toe meets the foot, aka ball of the foot—must also have good dorsiflexion mobility (sources cite 60° for walking and likely more for running; I’ve not seen a study that examined the requisite for skiing). The demands on TP and FHL continue to be focused on foot and ankle stability through the toe off phase; however, if the skier is losing balance and falling towards the other ski (or pronating uncontrollably or internally rotating at the hip or dropping the pelvis or rotating the pelvis or twisting too much through the trunk), the loads on the inside of the foot and big toe will be much greater.

    Toe off with skate gets very interesting (assuming you’re finding any of this interesting). Skate boots, unlike classic boots, have minimal flex through the sole, thus the MTPs joints do not have much of a mobility requirement. Skate boots also have a stiff ankle cuff to minimize medial and lateral motion at the ankle. And theoretically they have a supportive insole. But the boots can only do so much.

    Skate Skiing

    In skate skiing, we have to put the ski on edge. This is a very different movement than with walking, running, classic skiing, or most any activity outside of actually skating. Theoretically, we can get the ski on edge by pronating the foot, internally rotating the tibia, and collapsing the knee–unfortunately, this is how many people ski. But this has the effect of decoupling the foot and lower leg from the power producing muscles (quads and glutes). Instead of sending the force into the ski for a strong push, the energy is lost to aberrant movement (and generally a controlled fall onto the glide ski rather than a coordinated transition). Best case scenario, you’re bleeding power. Worst case scenario, you’re setting yourself up for injury at the knee (most likely), foot/ankle, and/or hip. 

    Didrik Toenseth (NOR) captured by the camera in the moment after the skate push has concluded. Heel lift in the skate stroke is part of the follow-through, not part of the power-generating stroke. (Photo: Nordic Focus)

    Skate toe off should happen with the ankle, knee, and hip in line. During the transition from flat ski to edge, the line of force through the foot will move medially onto the first MTP. Pushing power is coming primarily from the quads extending the knee and the glutes extending and abducting the hip. But all of this big muscle power must be transferred to the ski. FHL and especially TP are working very hard to maintain joint stability to essentially lock the medial ankle and foot into a rigid conductor of force. While there is active ankle plantarflexion that occurs during this phase, the majority of work by FHL and TP is through isometric contraction rather than creating joint movement. A lack of adequate strength or coordination of TP and FHL will likely lead to a breakdown of this connection. Biomechanics suffer, power is bled, and pathology may surface.

    Admittedly, this movement pattern of primarily isometric ankle eversion and plantar flexion while pushing off an angled surface is very difficult to simulate with dryland exercises. However, there are multiple ways that we can still address the concept and strive to make TP and FHL more resilient and tolerant of load. 

    There are a number of Physical Therapy exercises that can assist skiers in creating proper foot/leg alignment over the big toe:

    Banded Big Toe

    This has to be the coolest Physical Therapy exercise ever! Hook a resistance band under your big toe and pull tension. Lift the toe off of the floor and push it back down. Keep the toe long (don’t let it curl up). Also, try not to let it push into the second toe (if you can’t control this, have bunions, or are not getting your toe very far off of the floor, it might be worth a visit to your friendly neighborhood PT).

    Toe Band B
    Toe Band A
    Heel Raises with Tennis Ball 

    Squeeze a tennis ball between your heels and do calf raises. Use a wall or counter top for balance. The ball will keep you symmetrical and help direct the line of force between the first and second toes. 

    Ball HR A
    Ball HR B
    Single Heel Raises with Incentive Band

    Place your first MTP and big toe on the edge of a resistance band. Use one hand against a wall for balance and use the other to pull tension on the band. Do single leg heel raises. Don’t let the band come loose from under your toe and pop you in the face.

    Incentive HR A
    Incentive HR B
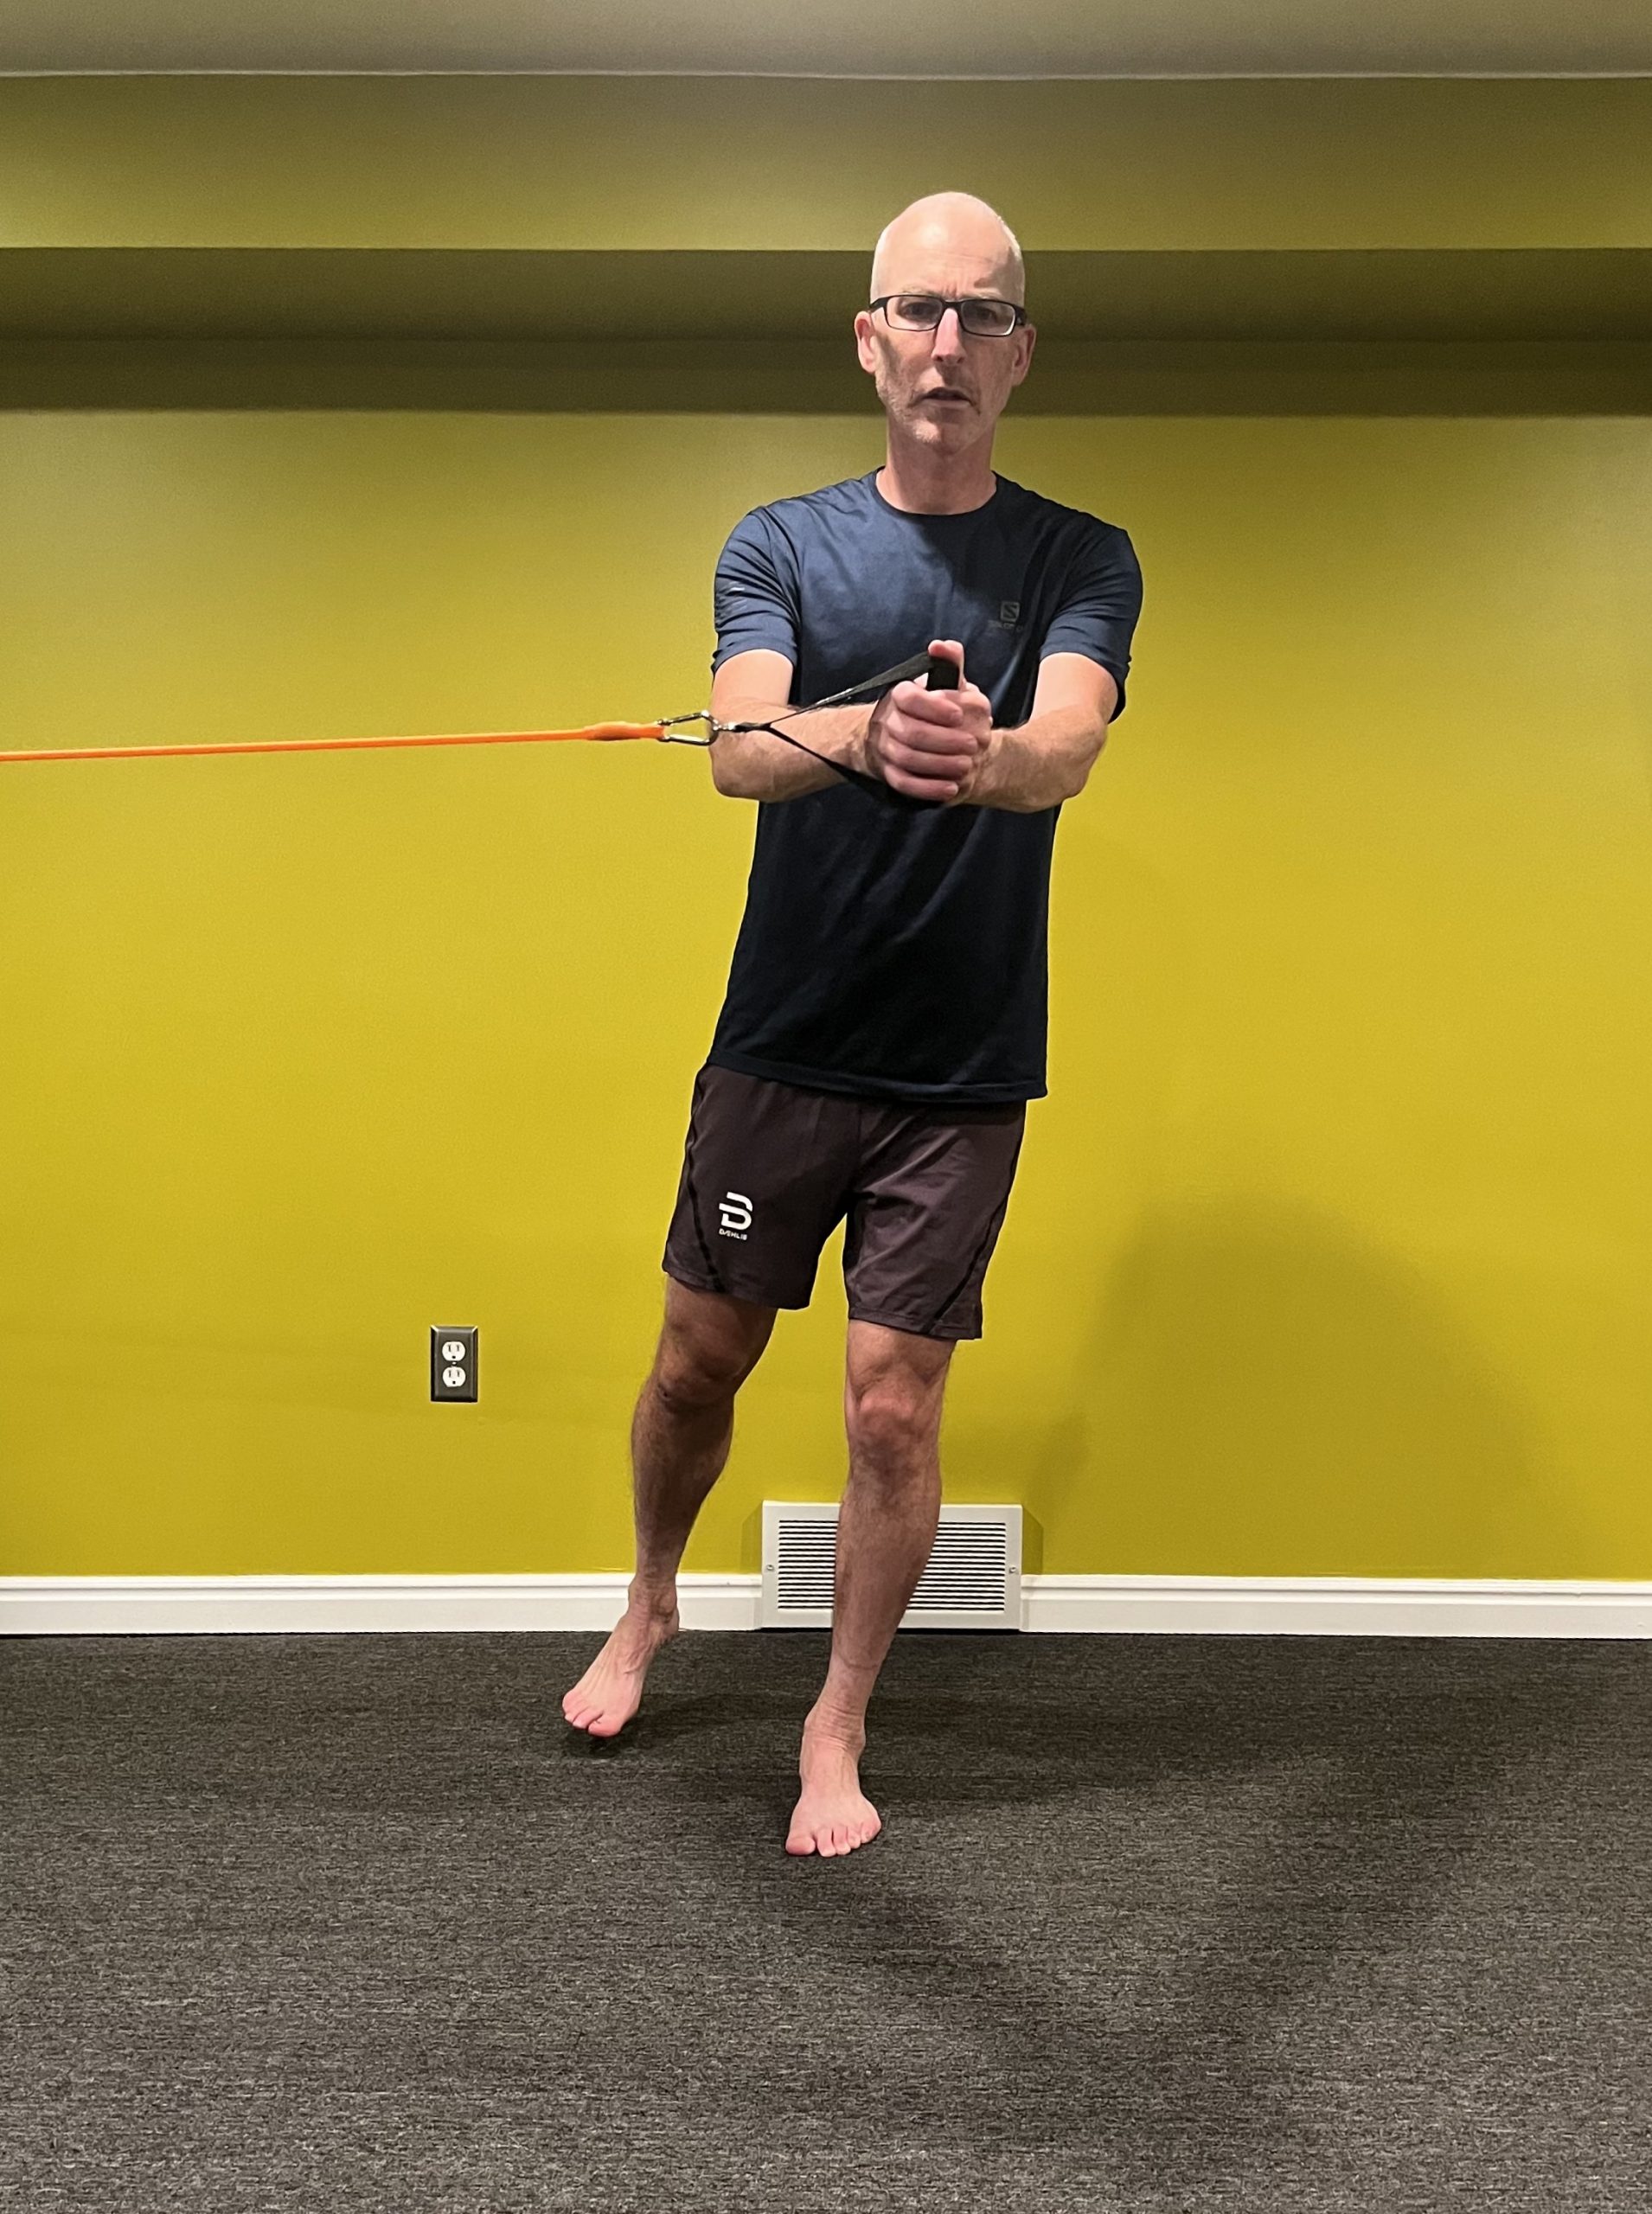
    SLS with IR Paloff

    Balancing on one leg in Ski Stance, hold a resistance band coming from the same side as your stance leg. Push your hands straight out and back. Keep the first MTP and big toe grounded. Don’t let the band twist you.

    TP Paloff A
    TP Paloff B

    There are always more exercise options out there, and anything that involves single leg stability is going to be beneficial, but these are a few of my favorites that are a good bang for the buck without fancy equipment. If you like fancy equipment, I would highly recommend the MOBO Board, which does a better job of training FHL, TP, and the rest of the foot/ankle team than any other gizmo I’ve come across.


  • In Good Standing—Fundamental Elements of Ski Stance

    In Good Standing—Fundamental Elements of Ski Stance

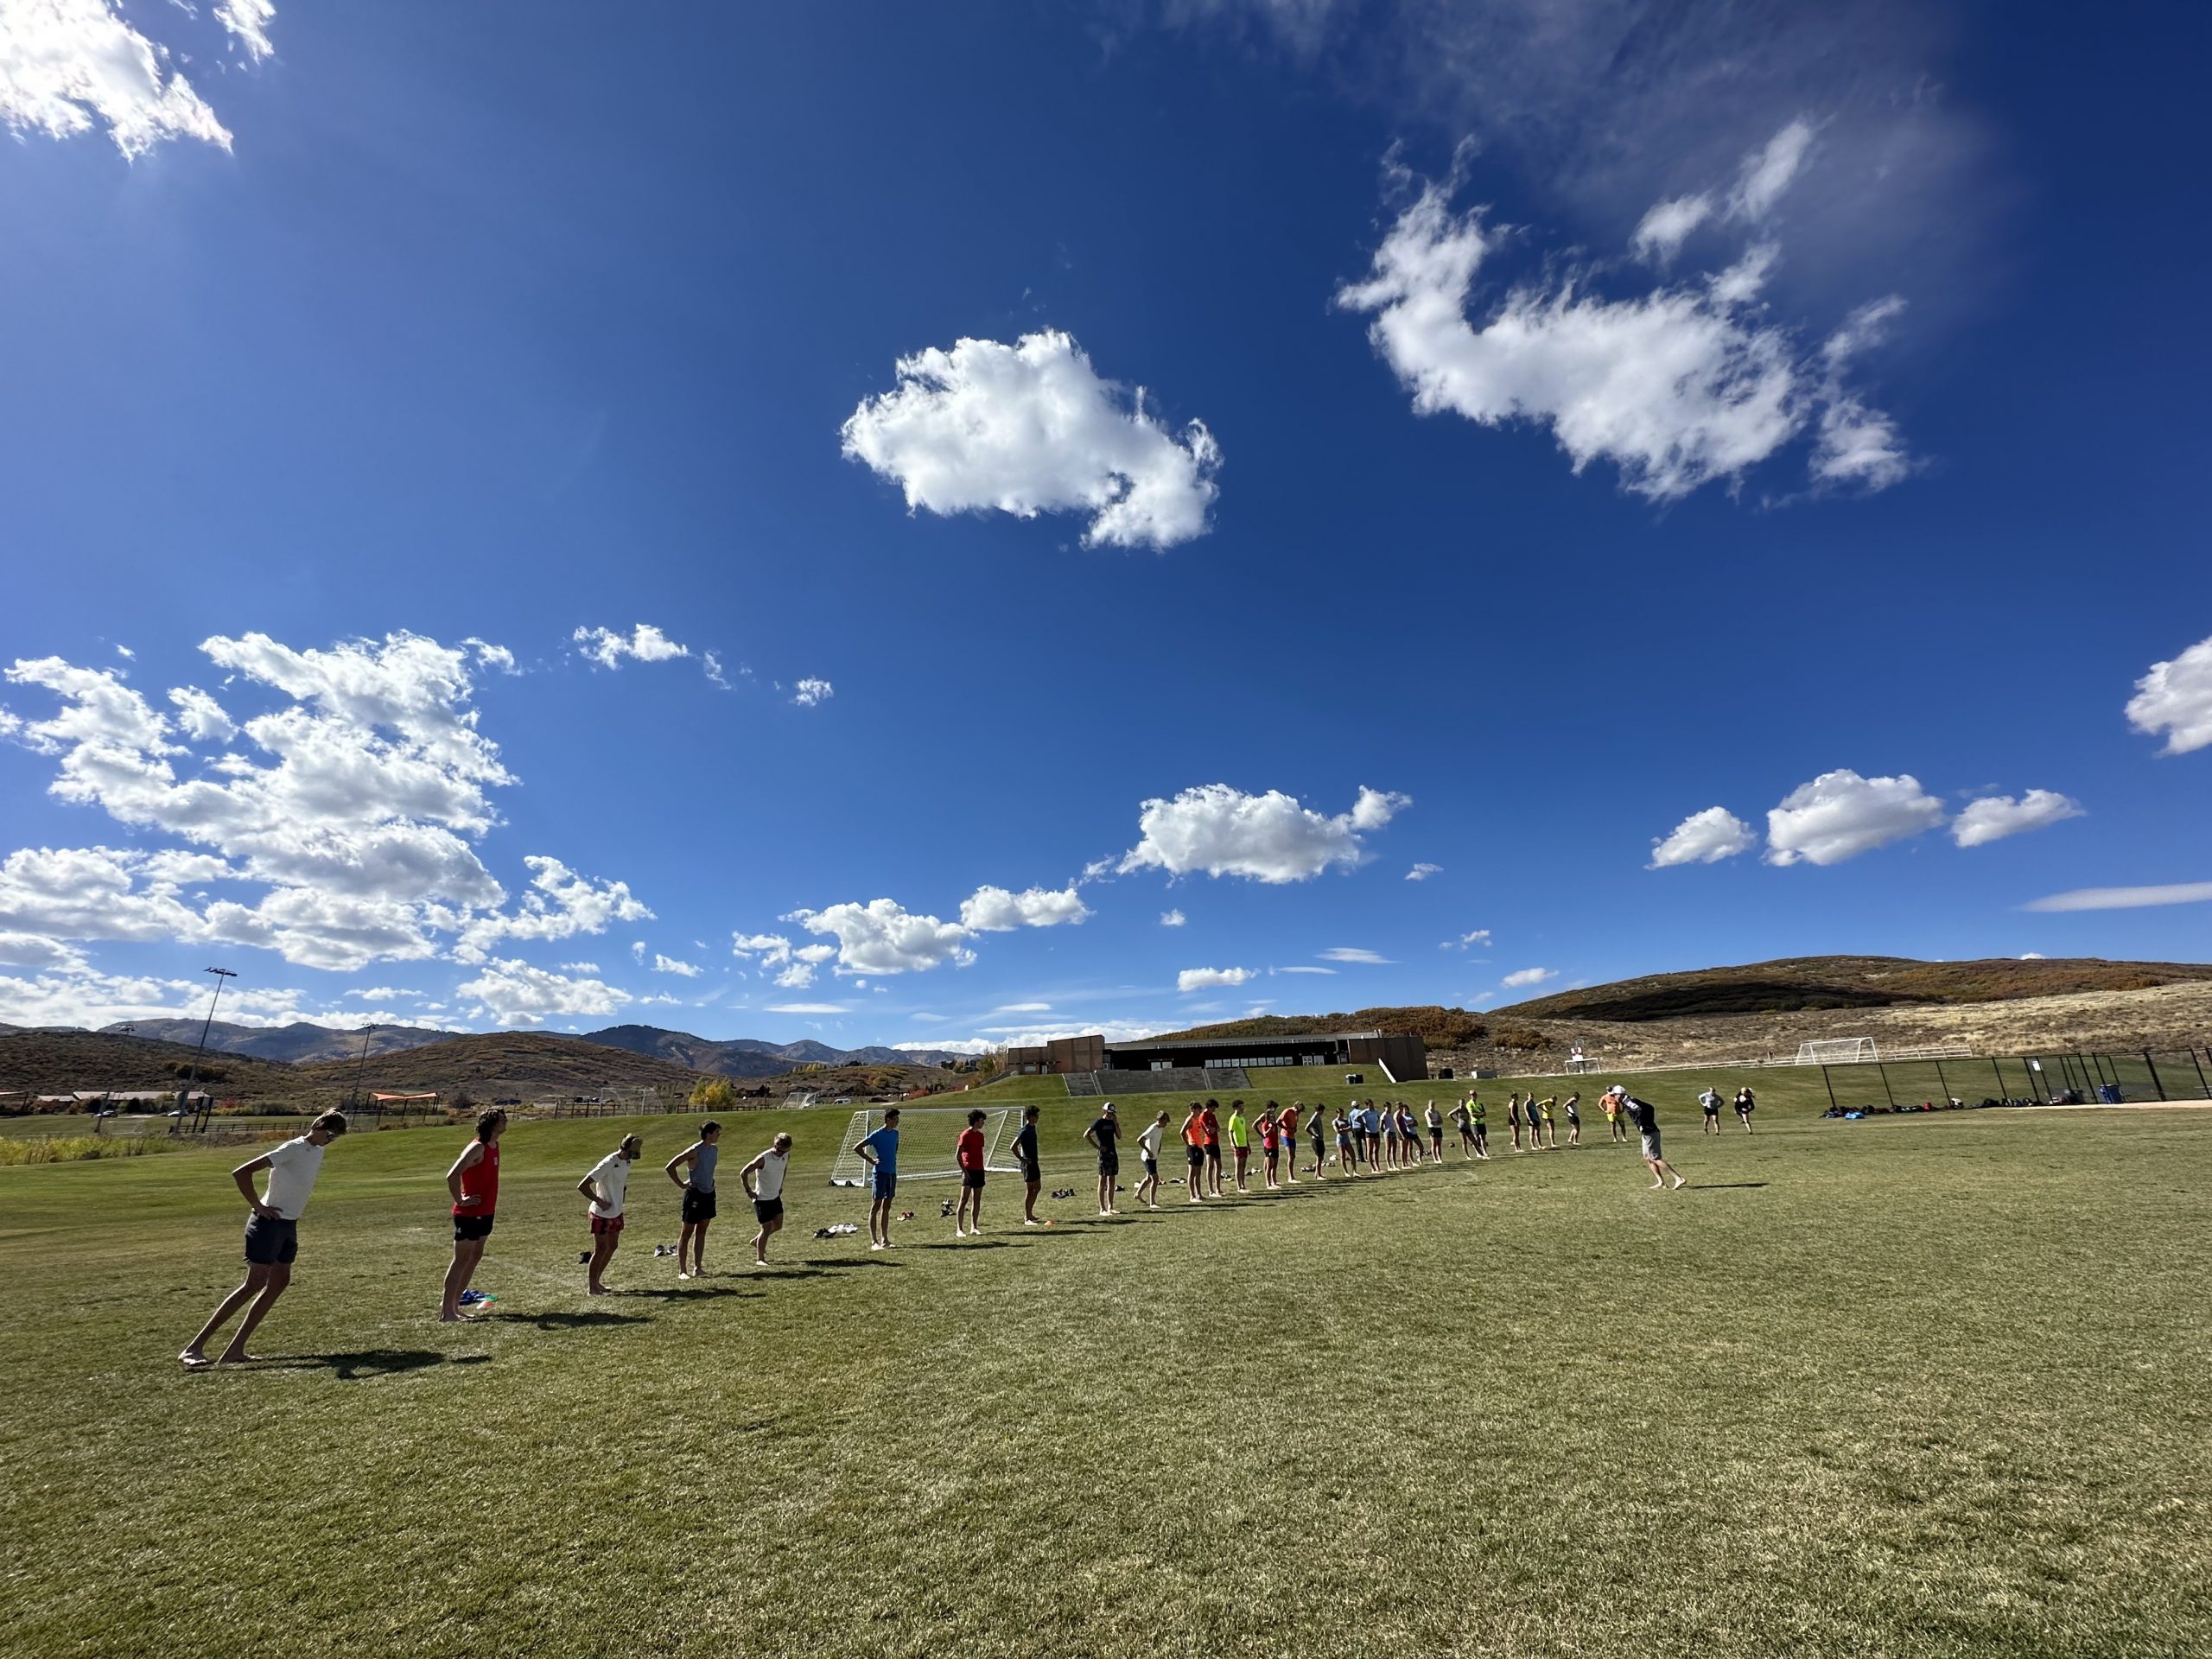
    Ned Dowling conducts a Ski Stance seminar for participants in the recent National Training Group (NTG) and National Elite Group (NEG) training camp in Park City, Utah. (Photo: Ned Dowling)

    “Big motor, lousy suspension.” That’s how I often describe the endurance athletes I see in physical therapy. They have the physiology to go fast but are lacking the stability and/or coordination for efficient movement. Decreased efficiency equals increased load. And excessive load has led to injury and a visit to their friendly, neighborhood PT. 

    I used the same description while Greta Anderson, the US Cross Country Development Coach, and I stood trackside last August watching rollerskiers during the 15k Classic race in Trollhatten, Sweden. At that high level of racing, everyone was fast, but not everyone looked to have good stability, movement coordination, and efficiency. Our peanut gallery coaches’ box banter turned into a lengthy conversation on the fundamentals of Nordic skiing. Next thing I knew, Greta had me leading a training session for the National Training Group (NTG) and National Elite Group (NEG) combined camp in Park City, UT. We called it Stability From the Ground Up with the goal of reinforcing the Ski Stance while balancing on one leg and doing tricks. The following is an excerpt of that training session. 

    .        

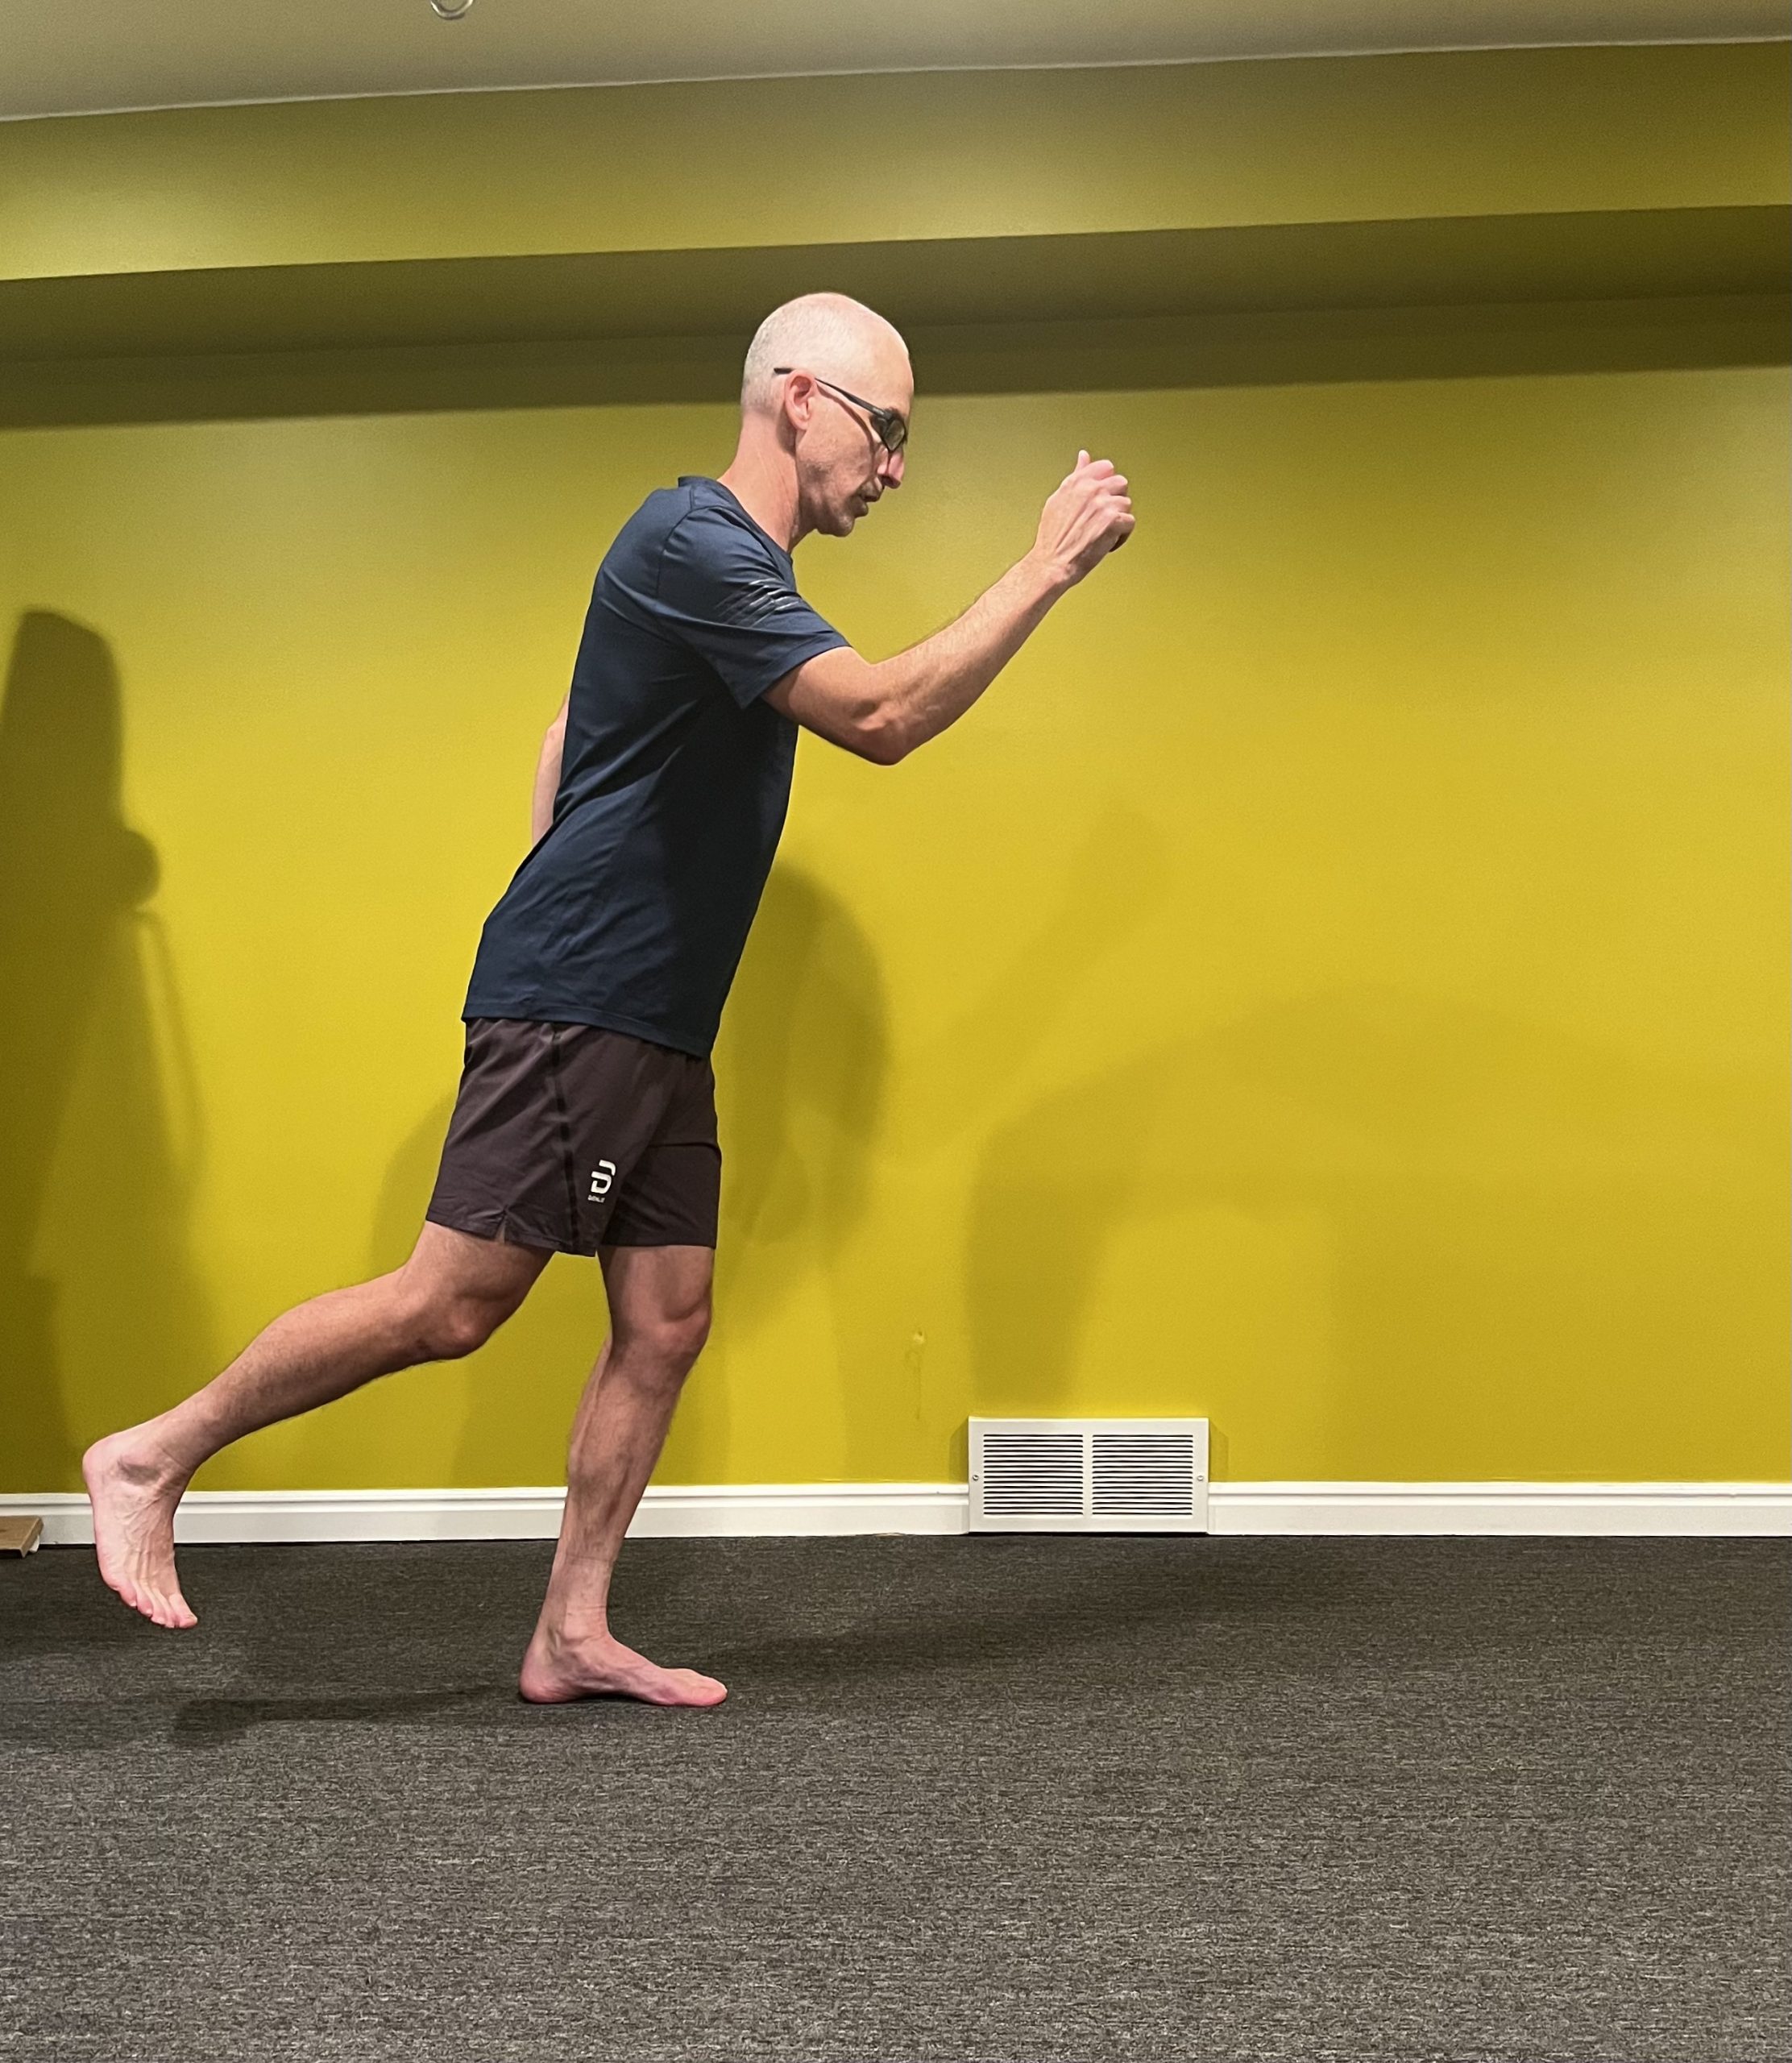
    What is Ski Stance?

    It is the foundation of Nordic skiing, both Skate and Classic. It is the stable, balanced position on the glide ski that facilitates both optimal glide and a stable platform as the glide ski becomes the kick ski. Stable glide begets more power, and more power begets more stable glide

    Ski Stance Checklist:
    • Balance on one leg.
    • Equal pressure between the inside and outside of the foot, especially across the metatarsal heads between the ball of the foot on the big toe side and the pinky toe equivalent. 
    • Weight is biased towards the front of the foot but the heel stays down. Distribution is in the neighborhood of 70:30, forefoot to rearfoot. 
    • Toes are relaxed. This doesn’t mean the toes are hovering off the ground, but it very much means the toes are not clawing at the floor. (Have a look at the insoles of your ski boots: if there is a lot of wear under the toes, you are likely using them too much. This is either a bad habit or a compensatory strategy, or both. Speaking of insoles…)
    • The ankle is flexed enough to put the kneecap in line vertically over the toes. 
    • Slight bend at the knee and hip.
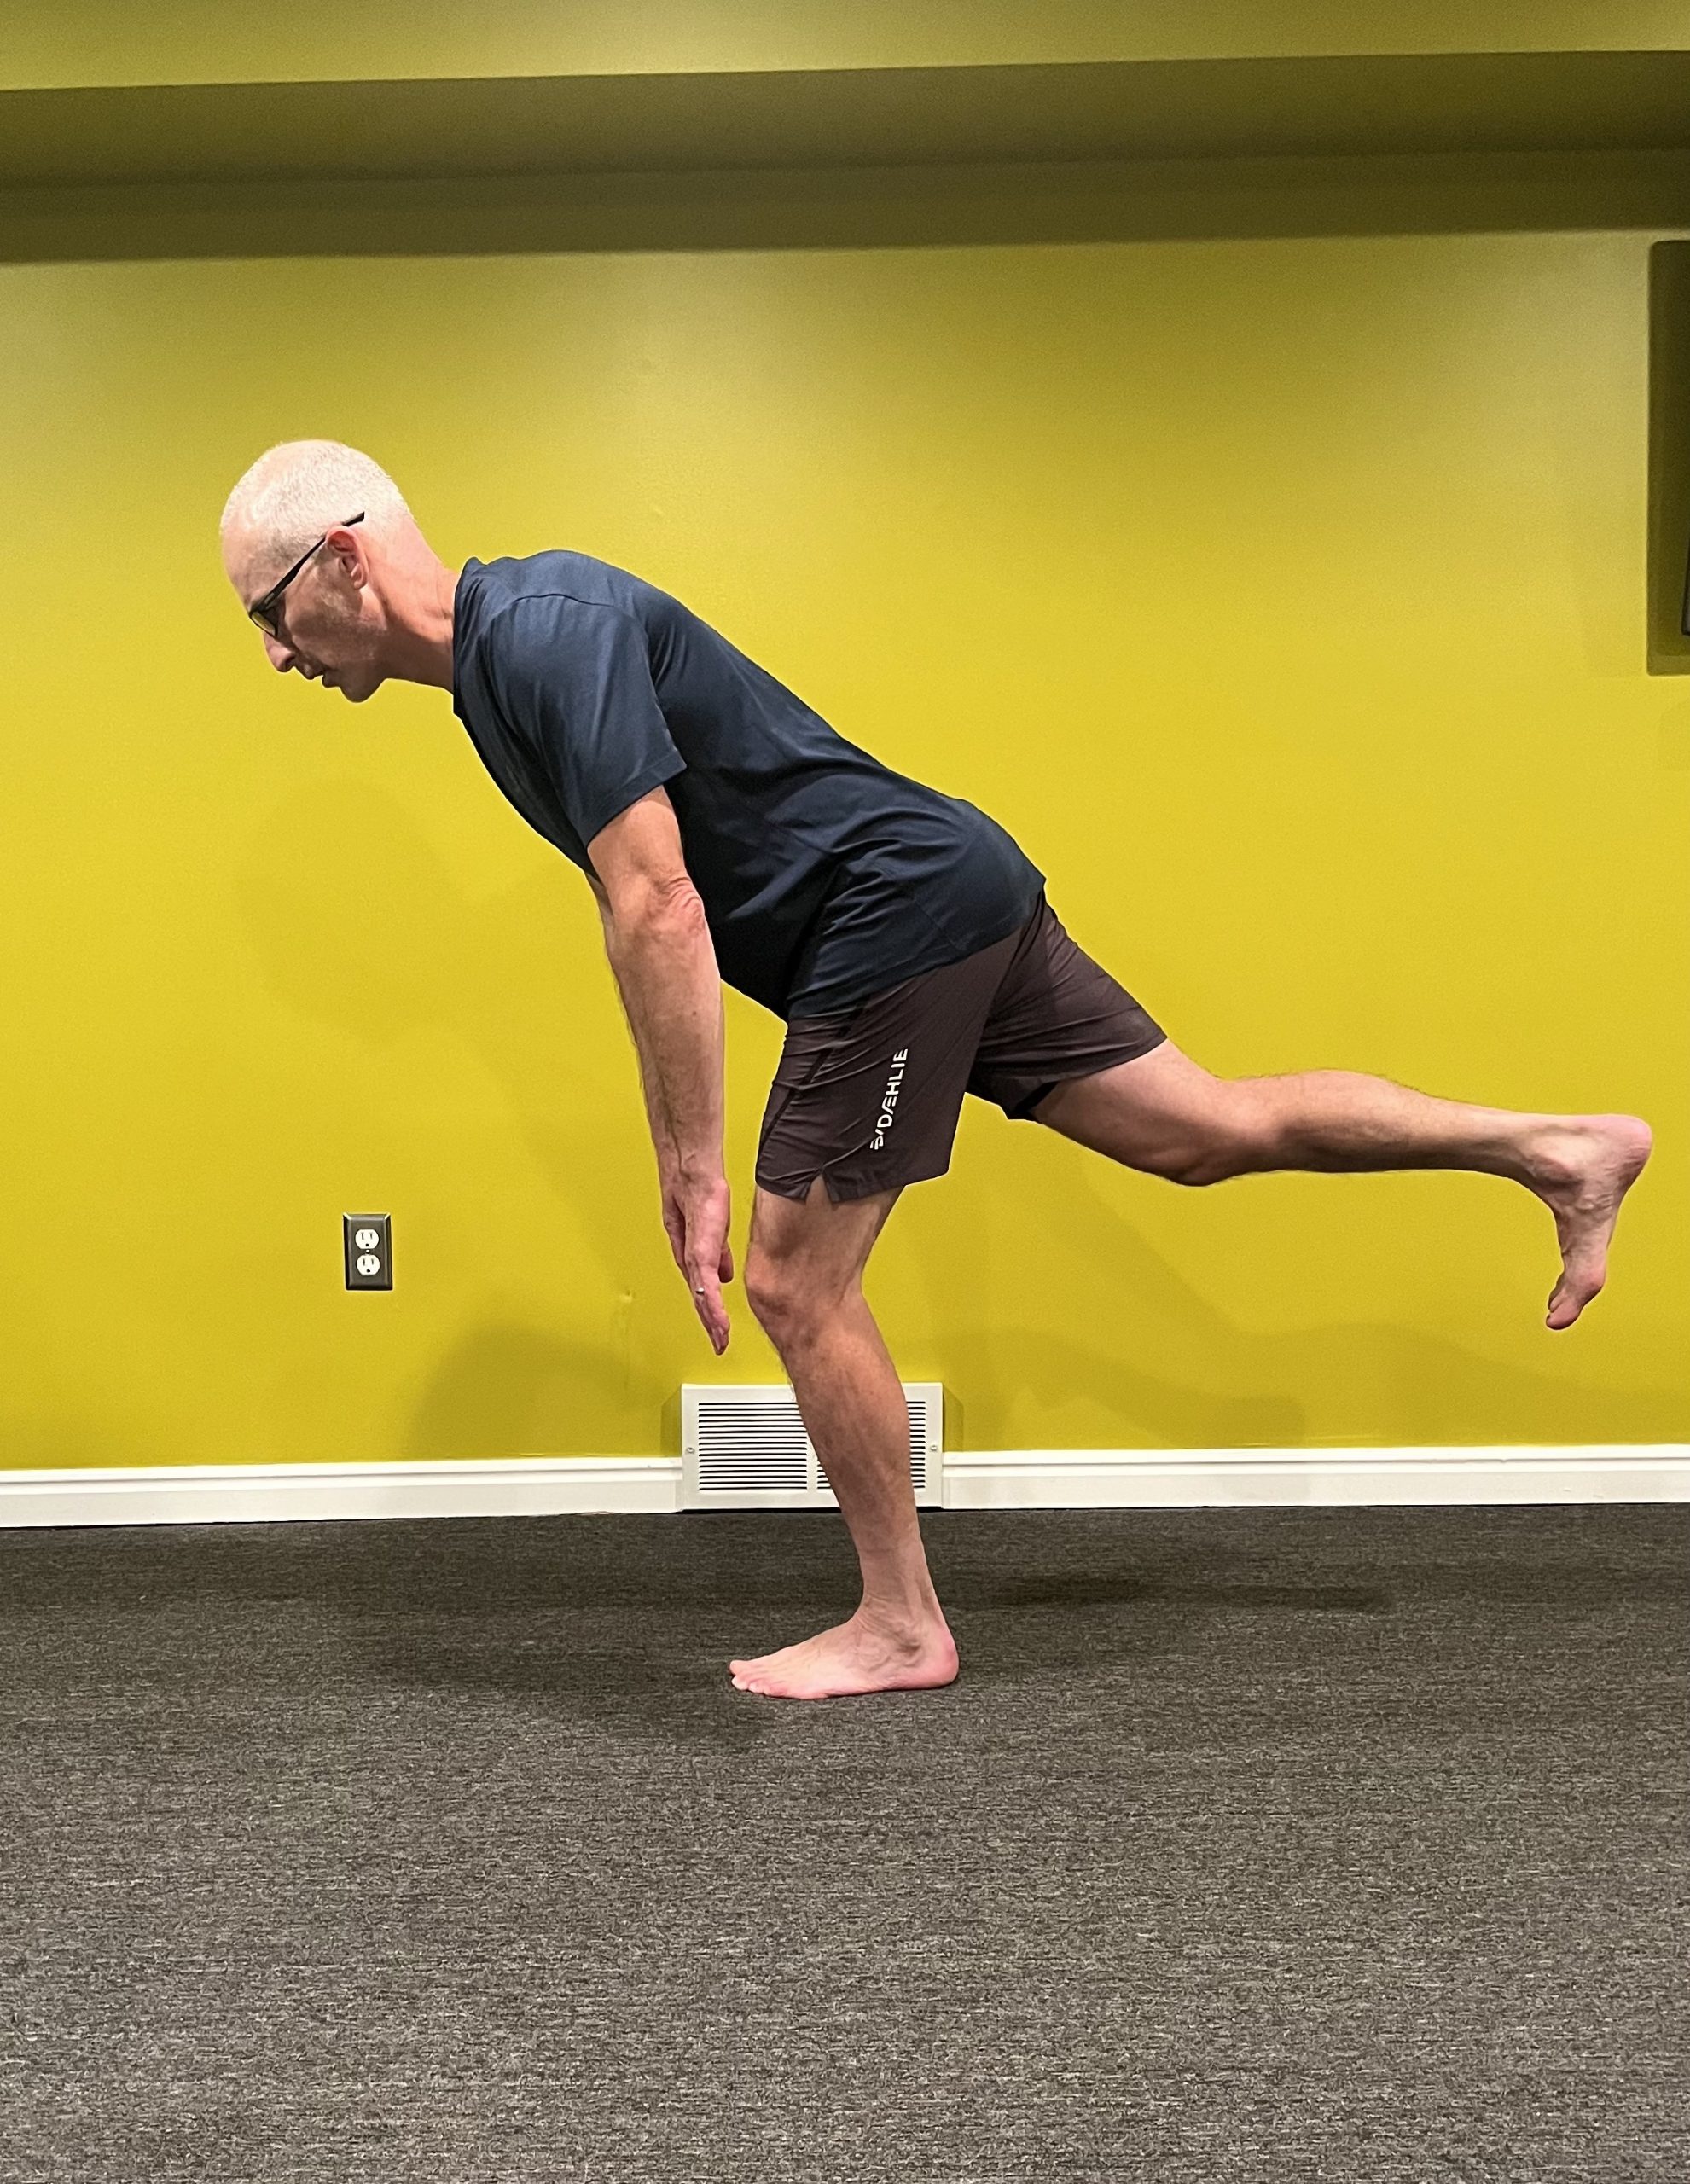
    • Forward lean at the trunk. This is accomplished with a hinge at the hips, not a flex through the spine. Nose-Knee-Toes is the old cue. If you’re dripping snot out of your nose, it should land on your foot not down the front of your shirt. 
    • High Hips. If I had a dollar for every time Devon Kershaw has endorsed a skier with “high hips” I could buy a ski quiver worthy of the World Cup. But what does this even mean? Our Checklist just listed flexion at the ankle, knee, and hip, so how can we keep the hips high but flexed at the same time? Forward Hips might be a little more intuitive. The pelvis is pushed forward without losing the bend at the hips. It will initially feel like you are falling forward, but that’s a good thing. We want the center of gravity shifted forward to push us down the trail. A different cue is Front seat, not Back Seat. The back seat is like starting to sit on the toilet: ankle, knee, and hip are flexed and the trunk is leaning forward; however, the butt is reaching backwards. Aim to shift the hips forward like someone is pulling at the front of your belt.
    • Stability from the hip, not leaning to the side. When we stand on two feet, the center of gravity is between the two feet. If we are to stand on one foot, we can’t just pick up the opposite foot—our center of gravity has to shift to the stance side. That can be accomplished by leaning the trunk to the side, but this is not an active position and doesn’t facilitate generation of power. The weight shift ideally comes via a lateral movement of the pelvis over top of the stance leg. Note: this shift is very applicable to diagonal stride as we move from the kick ski to the glide ski. The direct application to skate varies a bit with the sub-discipline—V1 has a more distinct weight shift from ski to ski while the transition during V2 is more of a “swapping” of skis underneath the body than a lateral movement from one to the other.
    Exercises 

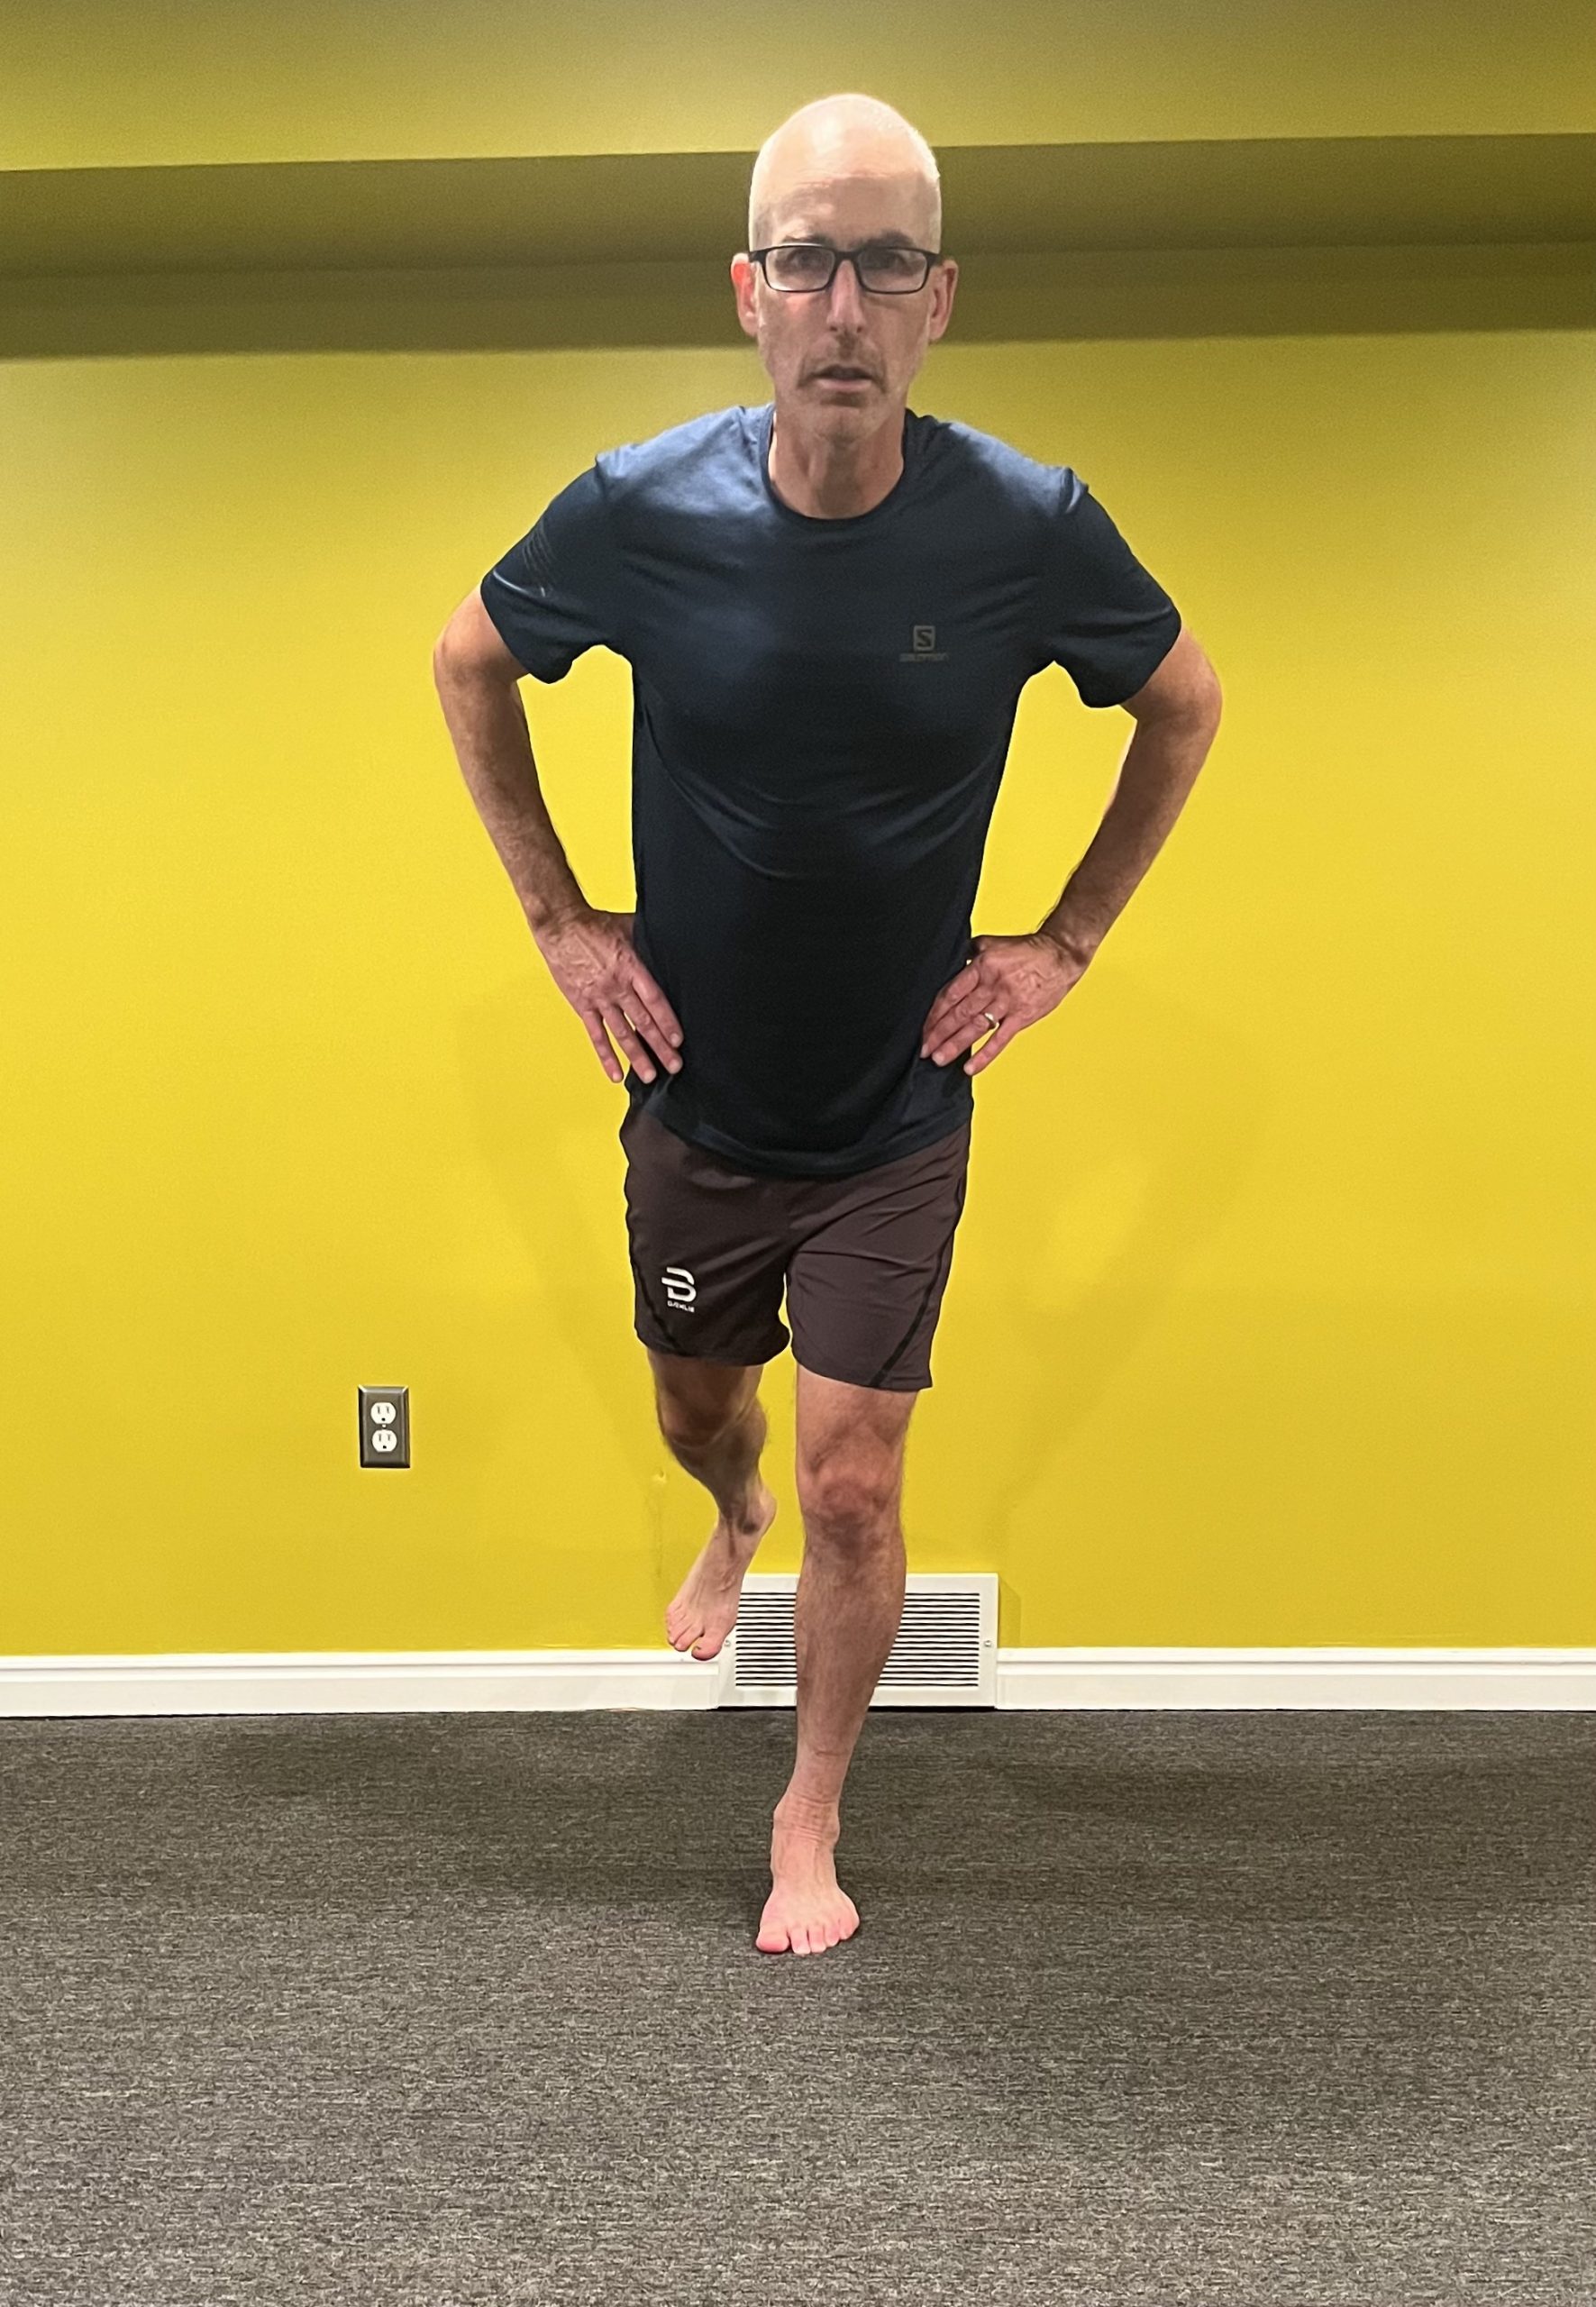
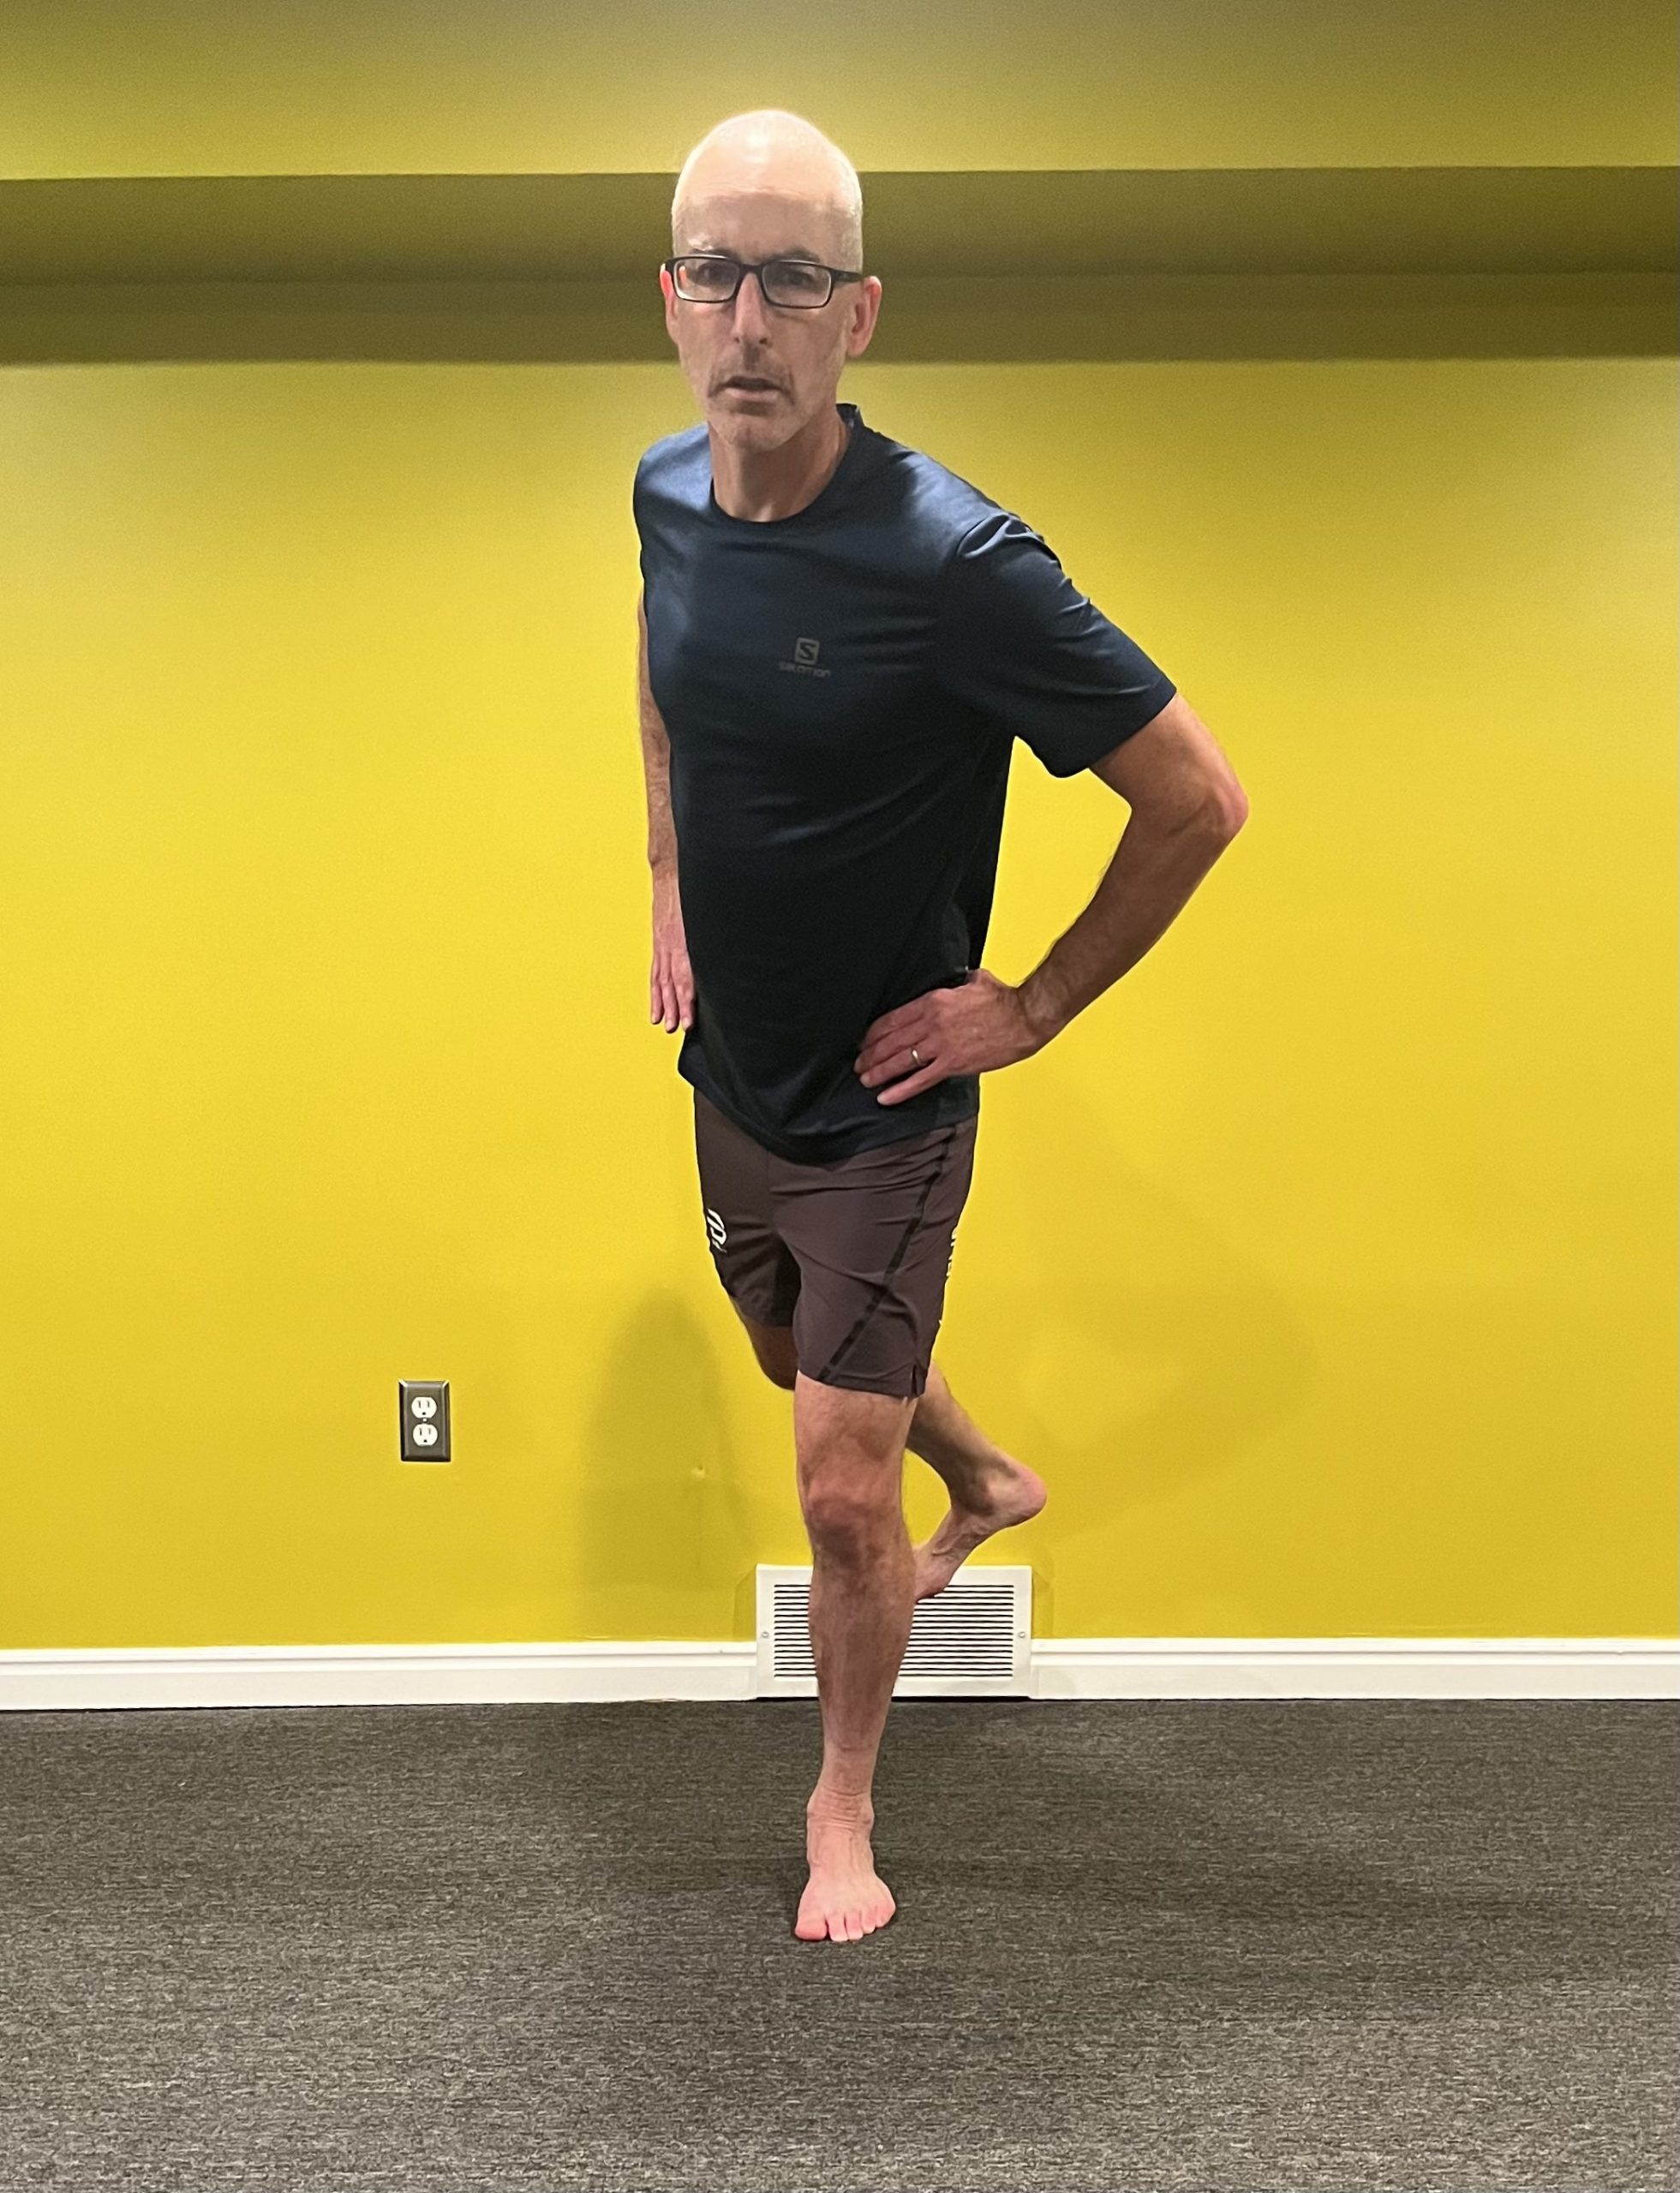
    The intent of these exercises is to reinforce the Ski Stance. Each one has a movement component to challenge both balance and maintenance of the Ski Stance position. (Here is a primer on single limb balance and stability.) The quality of movement and balance are paramount. In order to be beneficial, the exercise should be challenging but doable. If you are falling all over the place or cannot control the movement, the exercise is likely too difficult for your current level. The exercises are listed in ascending order of difficulty.

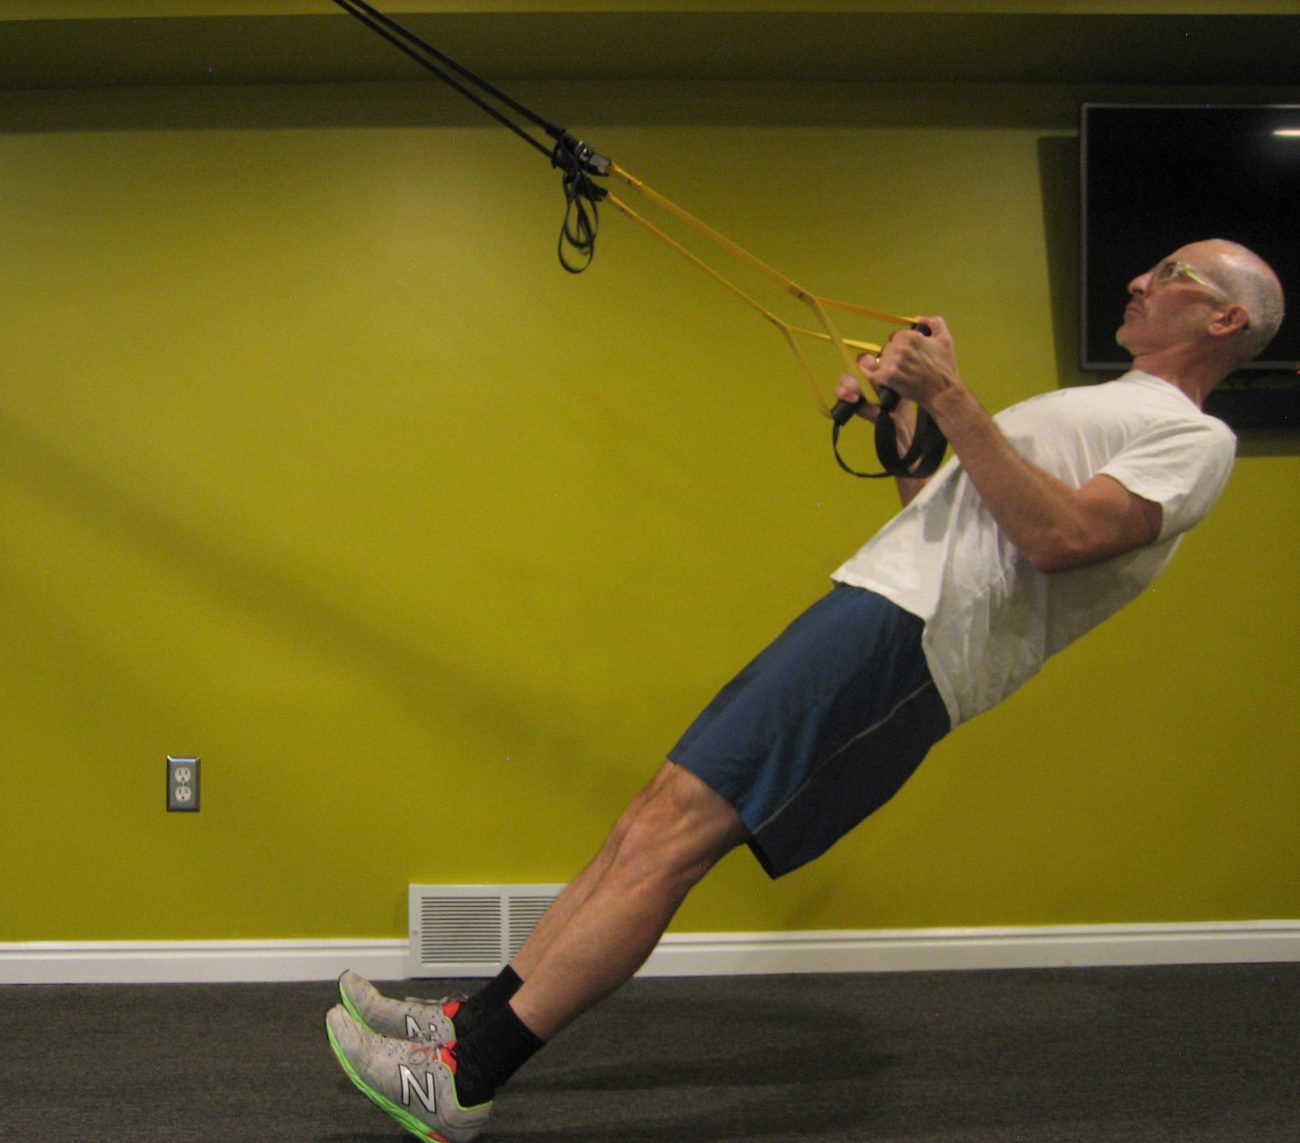
    Band Poling Exercise

    • Ski Stance.
    • Use a two-tailed band or two separate bands anchored at head height or higher.
    • Pull down on bands keeping some bend in the elbows. (This is not meant to be a double poling simulation as we are trying to stay tall in the Ski Stance not dropping down as we would with DP or V2.)


    Romanian Deadlift (RDL) Exercise

    • Ski Stance.
    • Bend forward aiming your fingers for the sides of your knee. The movement is a hinging motion at the hip. The joint angles at the ankle and knee should not change. The spine stays in neutral position without bending.
    • Pelvis stays level as you bend forward (no twisting).
    • Finish with a push forward of the hips/pelvis—front seat not back seat.
    • You can add weight (single dumbbell or kettlebell in the opposite hand or one in each hand) for glute and hamstring strengthening, it doesn’t necessarily make the balance/stability any more difficult. 


    Hip Twist Exercise

    • Ski Stance.
    • Twist your upper body in the opposite direction of the stance leg (standing on right leg = rotation to the left).
    • Shoulders, belly button, pelvis move together. 
    • Knee cap stays pointing straight ahead. 


    Paloff Press with Resistance Band Exercise

    • Ski Stance.
    • Band is anchored at chest height coming from the opposite side of the stance leg.
    • Holding the band in both hands, push your arms straight out and back.
    • Keep knuckles pointed straight ahead—don’t let the band twist you.


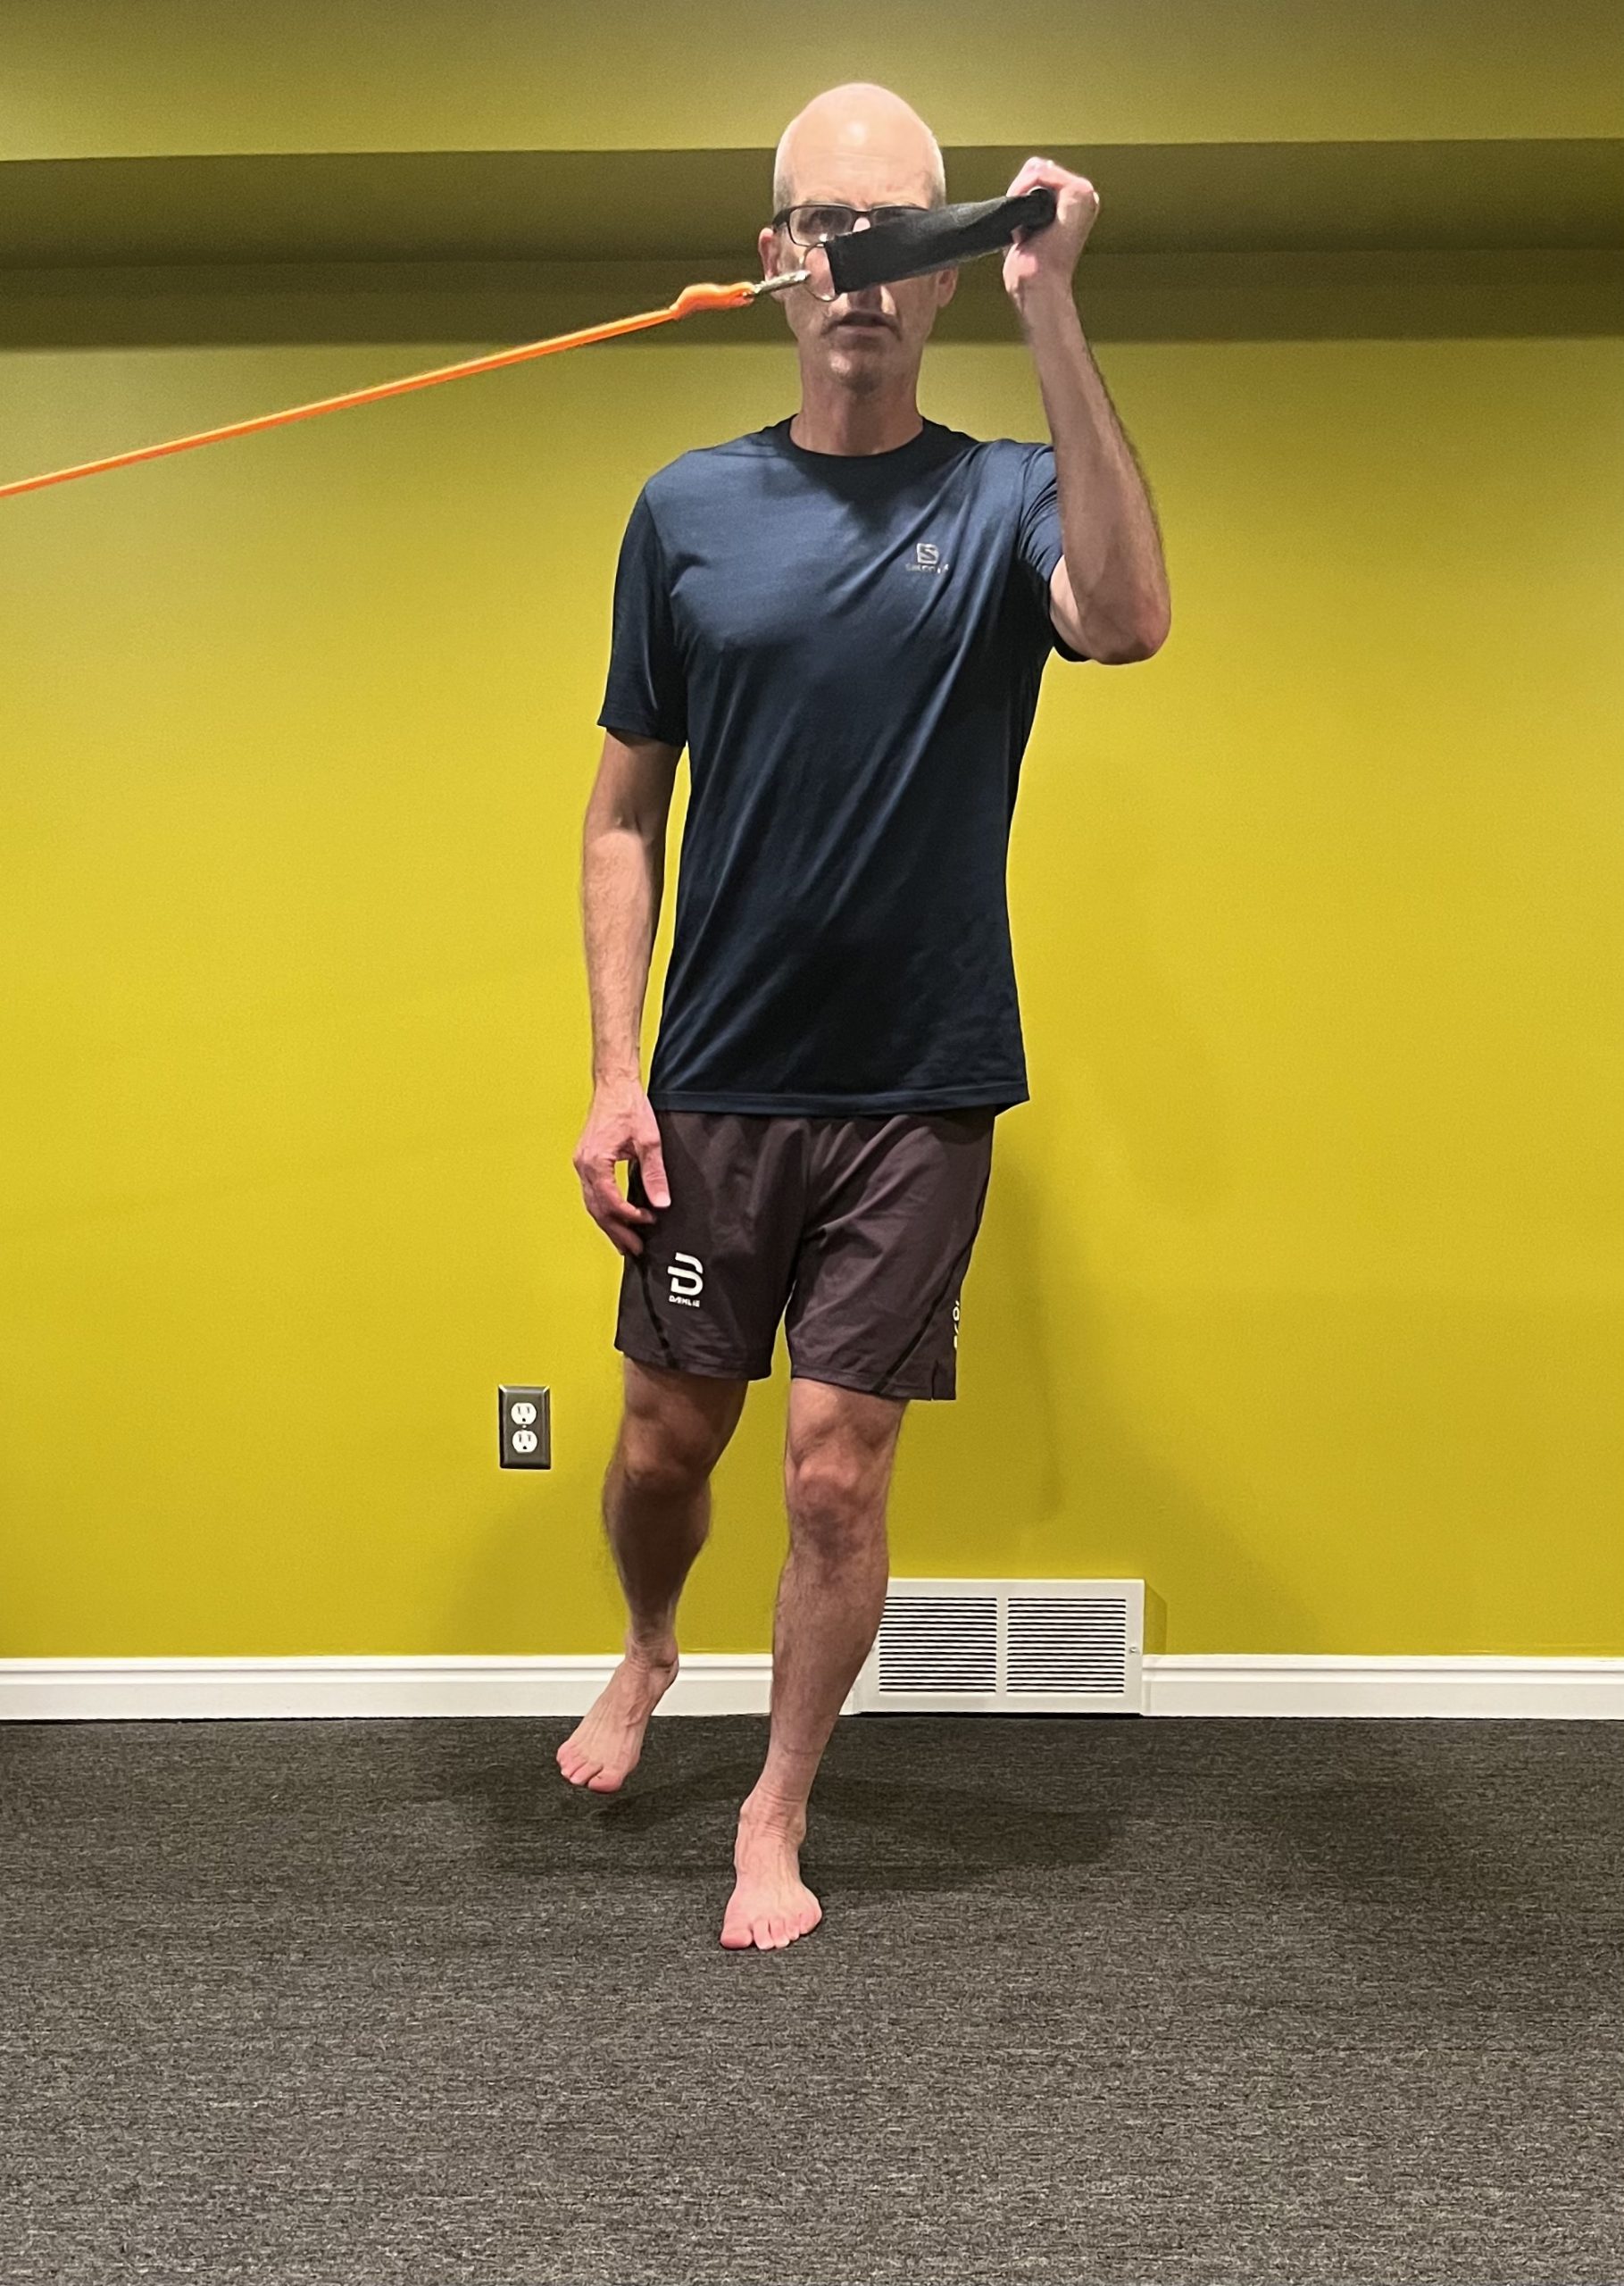
    Shoulder External Rotation + Uppercut with Resistance Band Exercise

    • Ski Stance.
    • Band is anchored at chest height coming from the opposite side of the stance leg.
    • Hold the band in the same hand as the stance leg with your elbow bent at 90 degrees and knuckles pointed straight ahead.
    • Keeping the elbow bent at 90 degrees, raise your arm up as if you were a waiter carrying a tray.
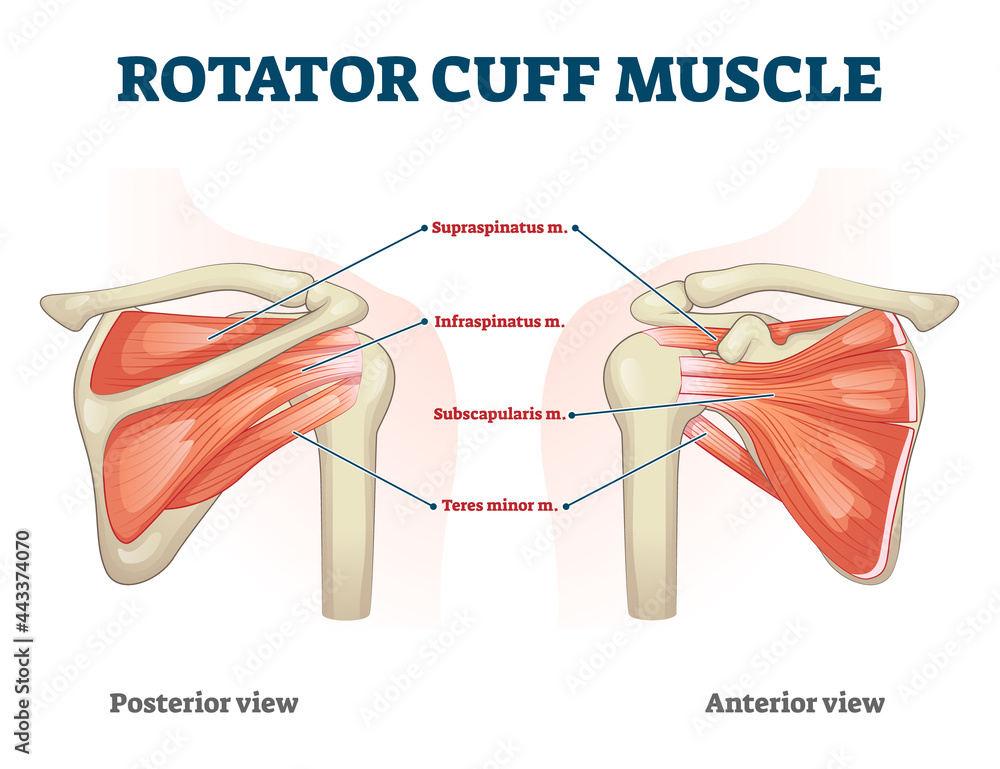
    • This is very good bonus work for your rotator cuff muscles.


    Classic Stride/Bound with Pause for Balance Exercise

    • Traditional diagonal stride bound except with a pause on the “glide” foot.
    • Be honest about balancing in Ski Stance before kicking onto the other leg.
    • Continue to focus on arm swing mechanics and a strong kick.


    Skate Stride/Bound with Pause for Balance Exercise

    • Traditional lateral bounding except with pause on the “glide” foot.
    • Be honest about balancing in Ski Stance before kicking onto the other leg.
    • Continue to focus on both the pre-load and strong push through the leg.


  • Injuries are Inevitable

    Injuries are Inevitable

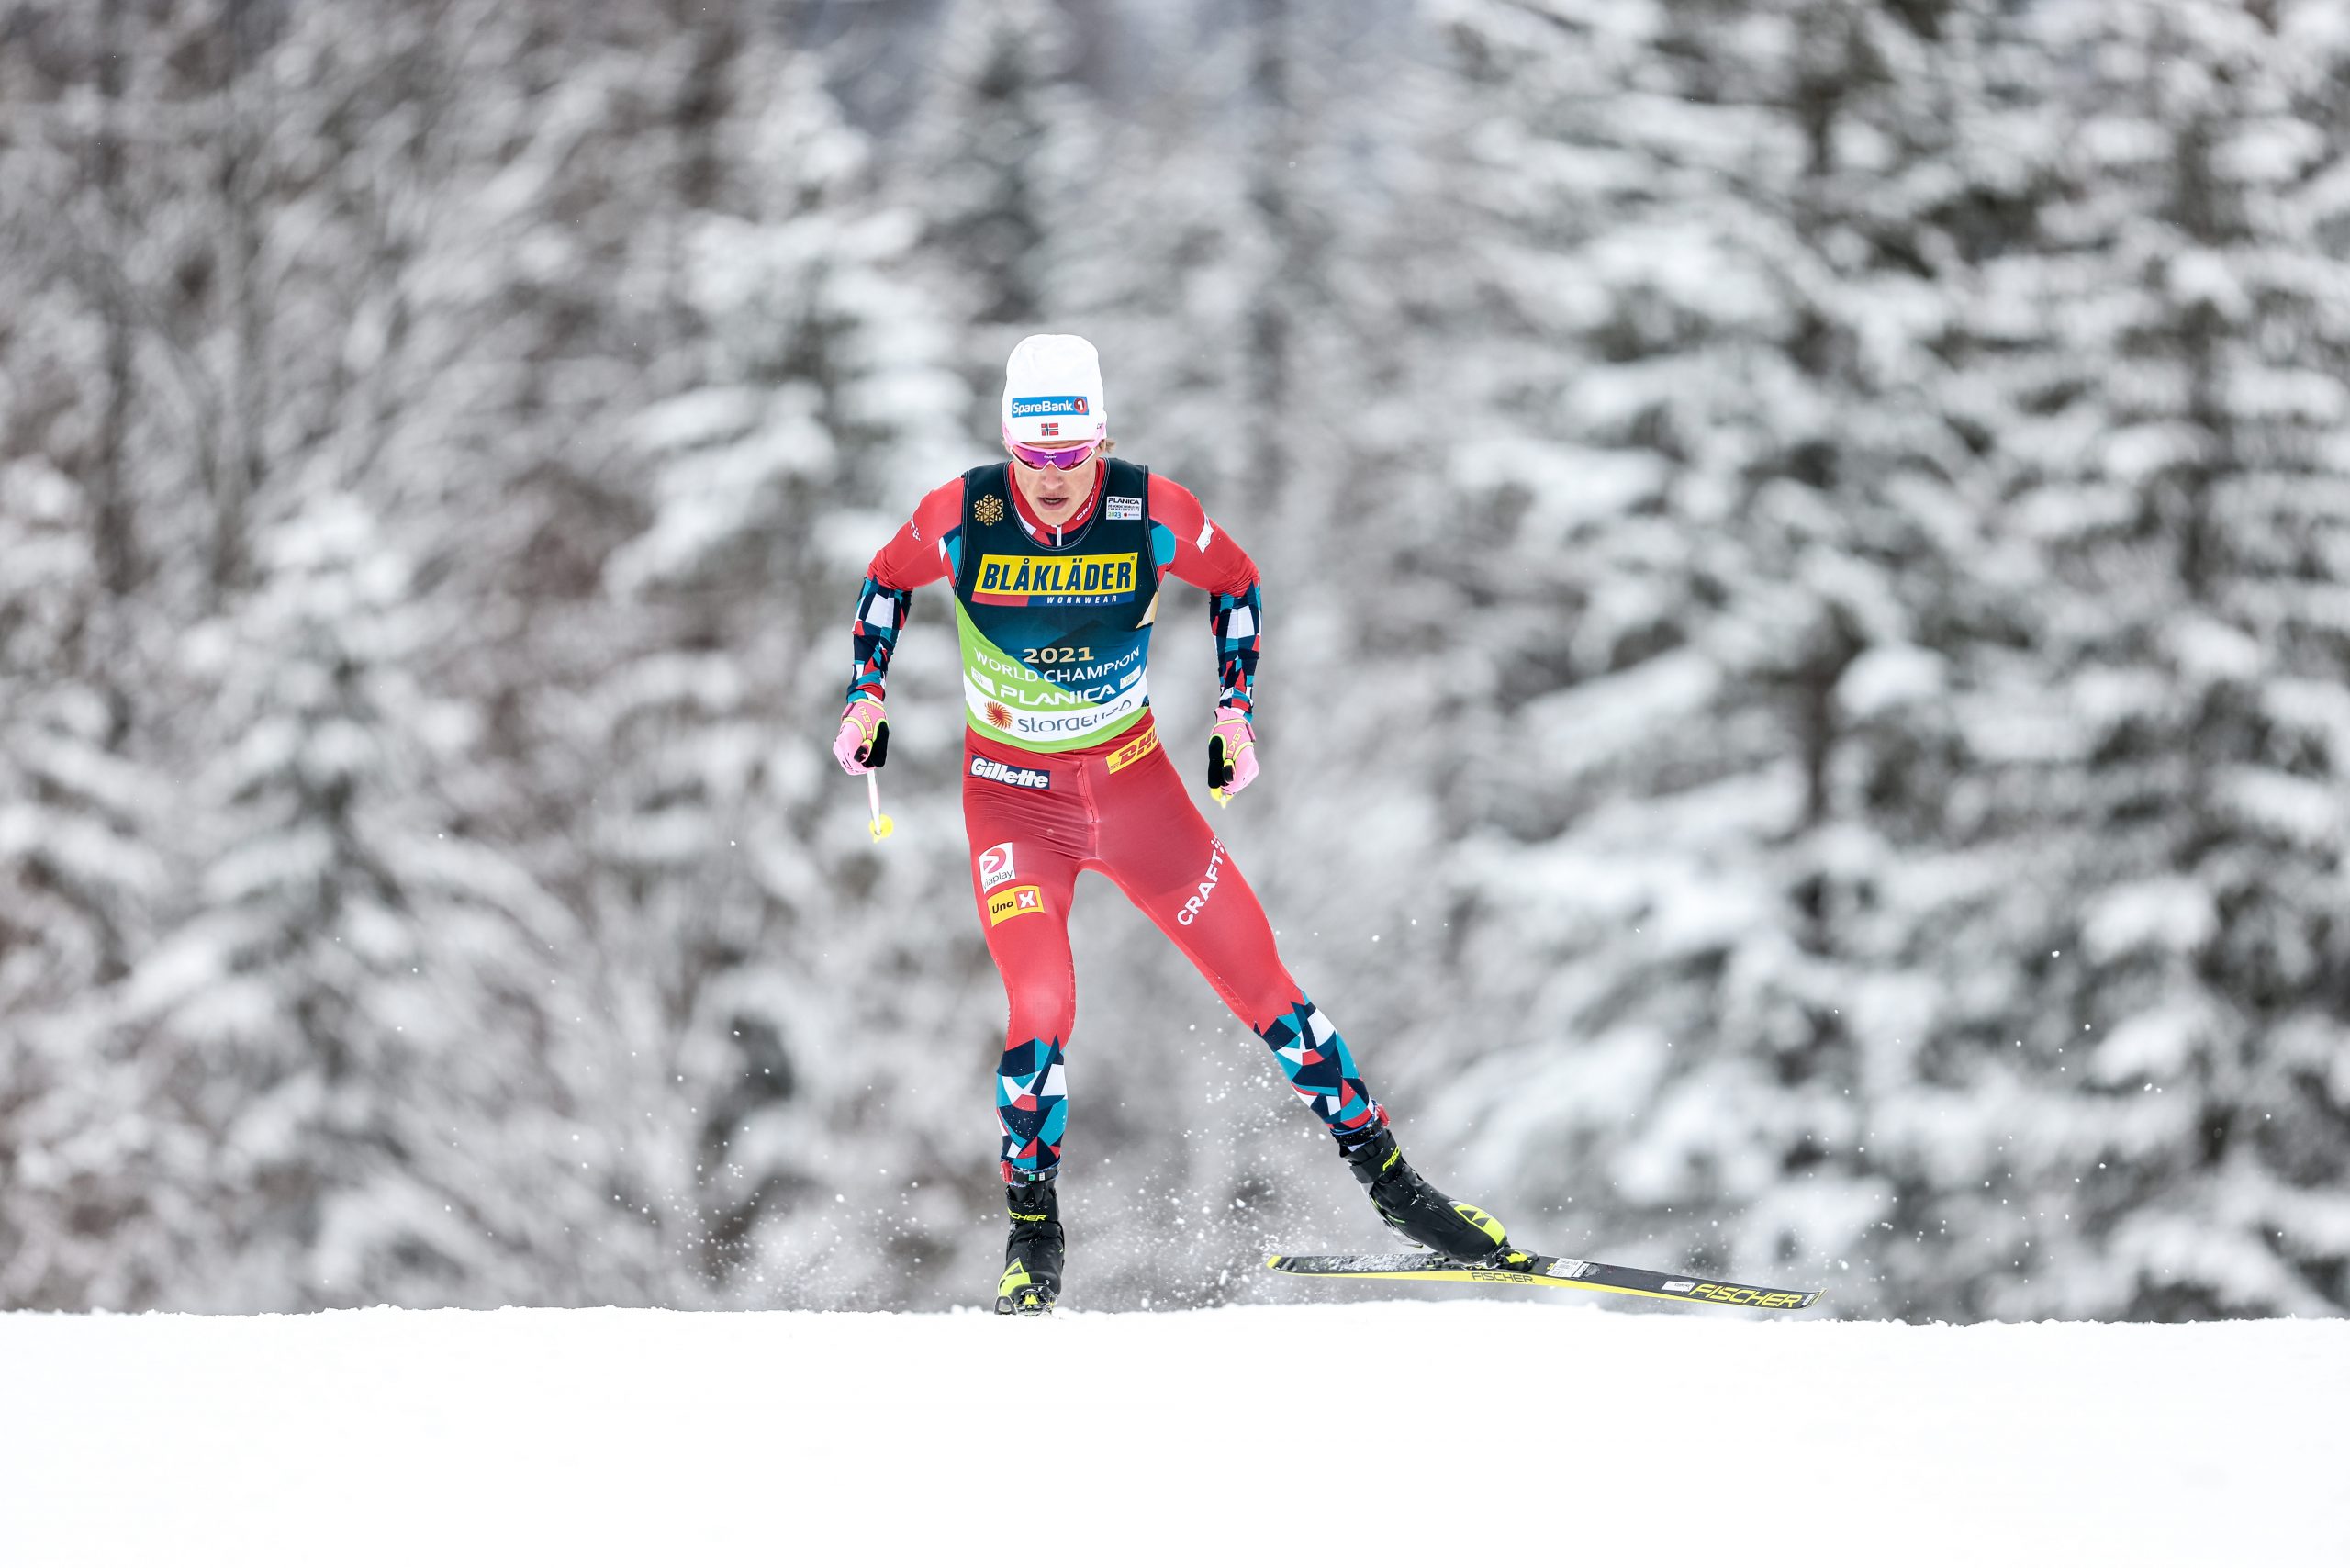
    Johannes Hoesflot Klaebo (NOR) began his 2022-2023 World Cup season after having spent his summer training in the pool, rehabilitating an injured hamstring. He adhered strictly to a program of rest, healing, and recovery rather than rushing back to his usual training regimen . . . it worked. (Photo: NordicFocus)
    Injuries are inevitable . . .
    As a physical therapist, I am often preaching prevention through maintenance exercises and training strategies; however, despite very well intended plans, injuries can still happen. Some of these will be short term, quite manageable, and maybe just a product of bad luck. Other injuries are longer lasting, will likely require some medical management, and are certain to impact training, whether from an acute trauma or from symptoms that have become progressively worse due to overuse/training error. The cool thing is, given the right conditions, the body will heal.

    But what are the right conditions for healing? How do I heal faster? When do I know when to resume training? These are questions I get every day in the clinic. I certainly don’t have all the answers, but I’ve compiled a list of what I generally advise patients.

    What is pain?

    First off, I think it’s helpful to be reminded of what, exactly, is pain? Simply put, pain is a defense mechanism to keep us from harming ourselves. If you put your hand on a hot burner, the body’s response is pain so you take your hand away before it burns. Remember that like all animals, our body’s primary objective is survival (arguably procreation as well, but I’m not going there). Our bodies have a multitude of regulatory systems meant to aid us in homeostasis and survival. When there is an injury, and especially the subsequent inflammatory response, the nerve receptors in the area send a warning signal to the brain which we interpret as pain and thus respond in a way that protects the injured area. But the severity of pain is not always commensurate with the degree of injury. A paper cut hurts like hell, but it’s not going to kill you. Also, the paper cut will stop hurting before the skin has fully healed. The hypothesis is that the body is familiar with the paper cut, no longer sees it as a threat or concern, and stops interpreting the nerve signal as pain (unless it meets lemon juice and the body feels threatened all over again). All of this would seem to indicate that some pain, especially when chronic in nature, does not actually represent a fragility or active threat. This doesn’t mean that we disregard it, but it doesn’t mean that we bow down to it, either.

    Pain can be a guide to training and activity; it doesn’t need to be a  contraindication. Typical guidelines will say that pain less than 4/10 (0 is no pain, 10 is going to the emergency room screaming for mercy) that goes away or returns to baseline within two hours of exercise or activity is totally reasonable. It’s a green light, keep on going. Pain in the 4-5/10 range, or lower grade pain that is taking longer to calm down, is a yellow light: you really shouldn’t go through that intersection, so back it off a bit. Pain 6/10 or worse is a red light.

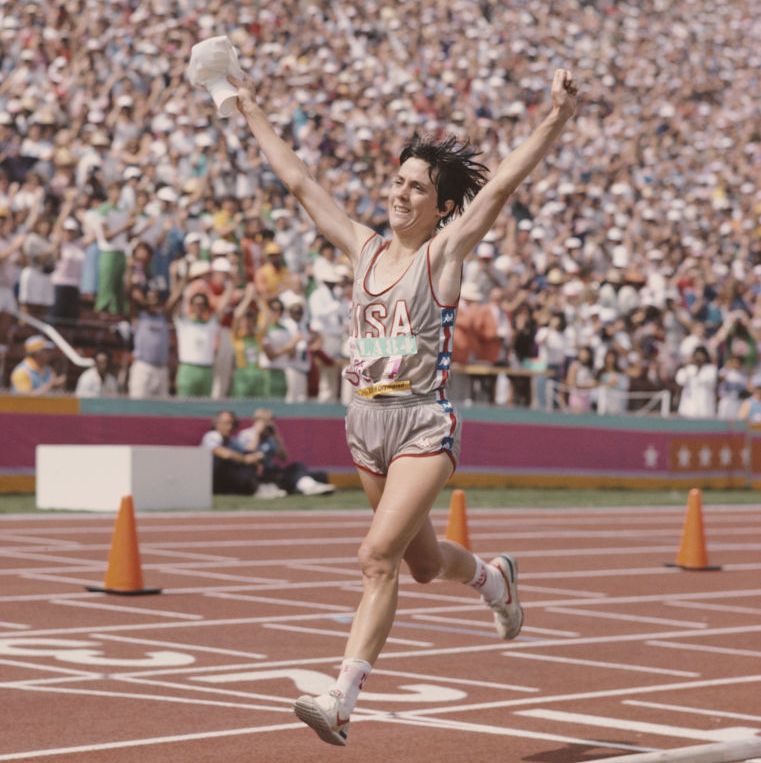
    Joan Benoit Samuelson (USA) won the 1984 Los Angeles Olympic Marathon only a few weeks after recovering from arthroscopic knee surgery. She maintained her cardiovascular fitness by training on a hand-cycle apparatus mounted above her hospital bed. (News Photo, 1984)
    Inflammation gets a bad rap 

    We often blame inflammation and the associated swelling and pain as the cause of our problems; however, the inflammatory process is the way our body deals with injuries (and pathogens). The long-held treatment strategy for acute injuries is RICE: Rest, Ice, Compression, and Elevation. This is often paired with anti-inflammatory medications like ibuprofen. This treatment may provide some short-term pain relief—rest means you’re not using it so it’s less likely to be painful, icing numbs the injured area, compression and elevation may decrease swelling and some associated pain, and NSAIDs suppress the pain signal in the nervous system; however, there is mounting evidence that it can hamper appropriate healing in the long term. While we still want to manage pain, the treatment approach is shifting towards early movement with progression back to activity as symptoms dictate. There are certainly caveats to this: I am not endorsing walking on a broken leg or running on a newly sprained ankle—follow your medical provider’s advice.

    For long-duration chronic issues, the thought process is a little different: at the anatomical level, we often think of chronic injuries, especially tendinopathies, as a failure of the inflammatory process to fully address the issue. My local streets are full of potholes. In the summer, the street crews patch them with asphalt. In the winter, the snowplows blow out these repairs. Every spring, the potholes are back. This is my analogy for chronic tendon issues: when we sleep the body does a quick, half-assed repair job (patching the pothole) then when we load the tendon the next day, we blow out the repair (the snowplow). What we really need is for the street to be repaved and for the body to appropriately heal the tendon. The street gets repaved when the mayor’s office is tired of the nosey neighbor complaining to City Hall every day. The tendon gets healed when we get the body’s attention through specific exercises. While there may be a role in the use of anti-inflammatories and injectables, the research in favor of exercise treatment is pretty compelling. Again, talk to your medical provider, especially one of my friendly colleagues in physical therapy. 

    Focus on what you can do, not what you can’t 

    It may be that your symptoms with activity/training are duration- or intensity-dependent; by modifying these variables, you are able to continue at least at some level. Depending on the severity and acuity of the injury, your body may not be in a place to absorb the stimulus of high intensity training. If it is too concerned with survival and homeostasis, it will behave much the same as if you are sick or overtrained: do all the intervals you want, but you’re unlikely to see progress and more likely to see your fitness decline. It may be that an activity (running is likely the first thing that comes to everyone’s mind) is simply not doable and you need to look for alternatives. Cycling, swimming (love it or hate it, but there’s very good carry over to XC skiing), SkiErg, paddle boarding, hike up/chairlift down are all potential alternatives that can still get your heart rate up, get you outside, and keep pain levels in the green light range. Specificity of training is certainly a good thing, but it’s not the only thing. There are lots of ways to get stronger and more cardiovascularly fit. Look at your injury as a way to try new things, master a different skill, and have fun.

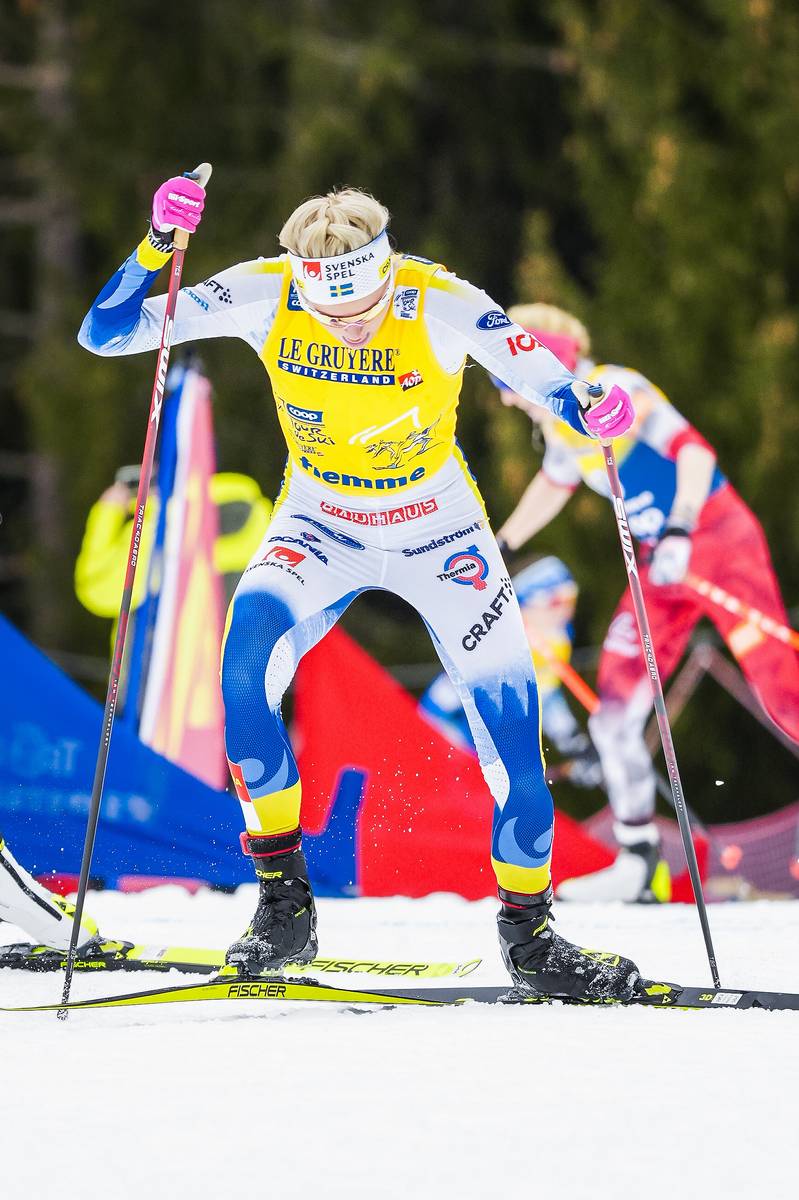
    Frida Karlsson (SWE) injured her tailbone in a freak training accident during the 2023 Tour de Ski. She adjusted her expectations during the Tour, changed her training and recovery plans, and still managed to produce a successful end to her 2023 season.  (Photo: nordicfocus.com. © Barbieri/NordicFocus)
    Be nice to yourself 

    It may feel like your body has betrayed you, but it really is trying to do its best. Treat it with kindness. You don’t have a good knee and bad knee, you have a right and a left. Working through an injury is like powering up that last hill or getting the bell lap when you really just want to puke: they all take self-motivation, self-encouragement, and self-respect (notice the self- theme here). Sleep is a powerful drug. Don’t overdose, but maybe take more than normal (at least 8 hours/night). Eat well and eat wisely. A muscle injury will appreciate more protein. A healing bone will enjoy more calcium. There is a strong tendency to cut back on calories when an injury is preventing normal training volume; however, your body still needs fuel to heal. I am a big fan of acupuncture (disclosure: my wife is an acupuncturist). While the supporting research is inconsistent, the practice does have 6000 years of history behind it. Without delving into Eastern medical philosophy, I will simply say that it has the potential to help the body heal. Having just made a medical recommendation while maybe sidestepping evidence-based practice, I would encourage you to thoroughly research any nontraditional treatments or recovery hacks. You can buy a lot of things with great promise, but the only given is how much lighter your wallet will be. Some may work, some may not: just try to be an informed consumer.

    Surround yourself with good people and good energy 

    You might need a hiatus from social media, most especially Strava. Interact with people who lift you up and try to avoid the ones who leave you feeling bad about yourself (whether they mean to or not). FOMO (“Fear Of Missing Out”) is a loaded gun—lock it up and throw away the key. Your sport may define you, but it’s not your only definition, and your injury does not need to be one either.

    Find medical providers who understand your body’s demands 

    I became a physical therapist to help people do what they want, not to tell them what they can’t. But not all medical providers share this sentiment. Telling a patient to stop running or lifting weights because it’s causing pain will likely improve symptoms, but that’s not going to be an acceptable treatment. It may be that the painful activity needs to be modified (and very likely moderated); however, your provider should share your goal of getting back to it. The way I see it, medical providers should be part of the patients’ team—we are working in collaboration to establish a plan of care that is based on both the patient’s goals and the provider’s hypotheses of diagnosis and appropriate treatment. Your provider will need to have a very good understanding of your sport—maybe not all the nuances of technique, but at least the physiological and biomechanical demands on the body. The path forward is often centered around progressive loading, and we as providers need to know what that looks like in order to prescribe the appropriate dosage of volume and intensity, hard days and easy days, stability and strength.

    Don’t make the same mistake twice 

    The typical medical model is to diagnose and treat. Let’s name it and fix it. This may get you back to training, but if we don’t identify the underlying cause of the injury, we are unlikely to have provided any protection against repeat offenses. I simplify all musculoskeletal injuries as an imbalance between load that is placed on the body and the body’s ability to tolerate load. Excessive load may be in the form of training error (too much, too soon) or through inefficiency of movement. Inability to tolerate the load is due to a deficiency in strength, mobility, stability, and/or coordination. In order to address the issue long term, we will need to balance the equation. That means both identifying and addressing all of the components of the equation. With training error, that means gaining a better understanding of training principles and especially greater awareness of your body’s response to both exercise stimulus and recovery. On the resilience side, it’s likely going to be boring exercises with stretchy bands. Addressing this side of the equation is not glamorous, but neither is pouring the concrete foundation of a house. But both are essential if you want to build something worth living in.  


  • Training When There’s Nothing to Train For

    Training When There’s Nothing to Train For

    Bounding intervals in the group—both social and athletic, both intense and relaxed—is a good workout to include in your summer season training. (Photo: Pat O’Brien)

    Most conversations regarding training for endurance sports center on competition: the training schedule is built around the races. But what if you don’t compete? What if you’re out there on the ski trails, bike trails, and hiking trails without a race number? What if your objective is not to podium but to simply enjoy the opportunity to push your body? Is there still a reason to “train” when there isn’t a competition to train for?

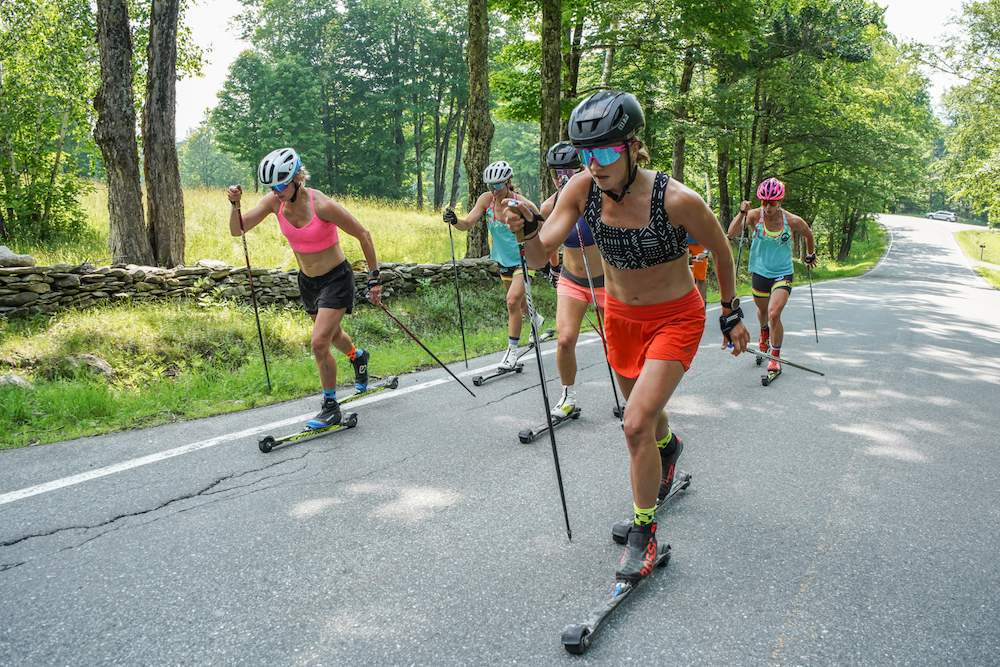
    Alayna Sonnesyn, far right, and Jessie Diggins, far left, along with the rest of the SMS women, rollerskiing in Vermont in summer 2021. (photo: courtesy SMS)
    Goals

    Why do you do what you do? Cross country skiing is not easy. The technique is impossible to master, the fitness requirement is harder than doing all three triathlon disciplines at the same time, and the equipment, despite all of its carbon fiber, provides all the stability of a wet noodle. Yet we’re out there flogging ourselves around the ski track all winter long. The why is very individual but everybody has one. To get your heart rate up, to feel the burn in your muscles (and lungs), to ski for 90 minutes without keeling over, to V1 up that nasty hill (and not crash going down the other side), to V2 gracefully like your World Cup hero, to soak up that euphoric sensation of gliding across the snow. Every time we step into our bindings we have goals, whether big or small. Given the nature of our sport, they will likely be facilitated by strength, balance, and aerobic fitness—all things that can be improved with intentional training. They will also be facilitated by how we frame our goals; are we more focused on the journey or the destination?

    Putting in the effort on Craftsbury’s Concept II Ski Ergs. (Photo: GreenRacingProject.com)
    Intentional Training

    Pay to play. As athletes, we get what we pay for (training-wise). As a physical therapist, I am a huge advocate for putting in some work off of the skis/bike/running shoes. I see a lot of patients whose injuries have come about due to having a big engine with lousy suspension. They’ve built a fancy house on a shoddy foundation. Our sport is great at building the big muscles—the primary movers of the body—but if we’re not training the smaller stability muscles, they often get left behind. Worse yet, we humans are built with anatomical redundancy, meaning that if one muscle, artery, or nerve is injured or not up to the task, we have others that can take over. The problem is that the compensatory Plan B is not as efficient, which leads to increased load on the body, predisposition to injury, and decreased performance. As we get older, our bodies are less concerned with maintaining muscle mass (sarcopenia, in the fancy vernacular). It would also be wise to pick up heavy things. Stability, balance, and coordination with a side of lifting and mobility for dessert. These are the staples of pay to play. I’ve covered some guidance in previous articles on FasterSkier including spine stability and mobility, balance and single leg stability, and the shoulder girdle.

    Former Craftsbury Green Racing Project skier, Caitlin Patterson, adding some variety to her summer training. (Courtesy photo)

    Intent. Every workout or exercise session should have a purpose. That can range widely from the post-work jog to get some fresh air and clear the head so you’re more patient and present at home to the Z4 rollerski intervals where you’re trying to focus more on technique than top speed. These two examples differ in mode and intensity, but they both have a purpose. If the post-work jog is run at high intensity (or has the unexpected stress of a dog chase or near miss from a distracted driver), you won’t have achieved the goal of a calmed state of mind. If the rollerski intervals become too competitive or if the intensity is pushed too hard to keep the focus on technique, you may still get some physiological benefits from the hard efforts but they failed to achieve the purpose of maintaining technique while deep in the pain cave. Even if you head out the door on a run, ride, or ski with no intent other than the pure joy of moving, you may still want to consider how you’re doing what you’re doing to avoid overtraining or pushing too hard without an adequate foundation. 

    Former Craftsbury Green Racing Project teammates Adam Martin (r) and Ben Lustgarten during a summer track workout. (Courtesy photo)

    Scheduling. This may well be the greatest challenge for the noncompetitive athlete. If every workout is hard, then you risk flying too close to the sun. I’ve just preached the gospel of pay to play. In a previous article, I tried to espouse the benefits of lower intensity work. How does all of this fit into the training week, especially when we still want to go out, have fun, and not overthink it? Most coaches and structured training programs will include strength sessions and lower intensity workouts, much as I have just championed, but the hard sessions will likely be rigidly defined intervals or tempo work. If you are a competitive skier with the goal of optimizing speed, these programs are exactly what the science would tell you to do. If you are not regularly pinning on a number, or not willing to be constrained by a formal training plan, you may be wondering where the group ride, social run, family hike, or KOM hunting fits in the mix. The general framework is no differen—a couple of gym sessions, a couple of hard sessions, and the rest at lower intensity. To repeat, The Big Day Out and The Epic Adventure only get to happen a couple of times a week (and ideally not on consecutive days) or you risk overcooking.

    Caitlin Patterson (a few seasons ago) warming up on the dirt roads near Craftsbury, Vt. (Courtesy photo)

    Process Goals. For competitive skiers, training is the journey and racing is the destination. For noncompetitive skiers, it’s almost all about the journey. In (very simplified) sports psychology terms, the destination is an outcome and the journey is a process. Framed as goals, or what you’re hoping to achieve, an outcome goal would be a specific result: finishing position, PR, Strava KOM, etc. In contrast, process goals are the pieces of the outcomes puzzle or what it takes to achieve the desired results: quality training (and recovery), appropriate nutrition, adequate sleep. In this study, the authors sought to determine which type of goal was more beneficial. Their conclusions: “Process goals generally enhanced self-efficacy, intrinsic interest, and satisfaction.” More specifically, “Process goals were more beneficial for increasing performance and self-efficacy than other goal types. The latter is a noteworthy finding, given self-efficacy has been shown to enhance decision-making, increase motivational intentions, and is positively correlated with sport performance.”

    While the concept of process goals is nothing new in the sport psychology circles, it was cemented for me while I was in Norway with the US Cross Country Team. During a physical therapy session a day or two before the historic women’s 50k at Holmenkollen, I asked Jessie Diggins about her goals for the race. “Well, to win would be really cool.” To which, I replied, “Duh! But what about your process goals?” (Yes, I was baiting her a little.) She proceeded to list three things she really wanted to nail: eat her favorite pre-race breakfast, be thorough and concise in conversations about ski selection, and be extra patient in the feed zones to make sure she was taking in enough calories. 

    As a physical therapist, I tend to judge the success of a treatment on whether the patient gets better. However, that is not something that I have full control over. There are many variables that make up a patient’s injury or pain–maybe even more that determine their response to PT–and I can only affect what I can control. Similarly, Jessie knew that once the gun went off, there were going to be a lot of things during the race that were out of her control, so she chose to focus on the things that she could control. That is the basis of why process goals are considered more effective than results goals. 

    For the noncompetitive skier, I’m emphasizing the role of process goals because the components of intentional training I pitched–pay to play, intent of the activity, and scheduling–are all process goals. Judging yourself on how you do what you do more so than the end result is likely to bring more joy in the experience. The journey may very well be more important than the destination.


  • From the PT: a look at Chronic Exertional Compartment Syndrome

    From the PT: a look at Chronic Exertional Compartment Syndrome

    Kris Freeman—seen here winning a NorAm 30 k freestyle at Sovereign Lake—is one of many elite skiers whose careers have been affected by CECS (Photo: Frances Weeks)

    US Ski & Snowboard recently hosted a course titled “Medical Emergencies in Skiing and Snowboarding”, which is required training for all physical therapists and athletic trainers working with the team during competitions. As the name would imply, we learned about emergency management of acute injuries: application of cervical collars, tourniquets, back boards, distraction splints, and plenty of other nasty scenarios we hope to never see. 

    Thankfully, cross country skiing tends to be lower risk when it comes to traumas and medical emergencies. Typical of an endurance sport, our injuries are more self-induced from the volume and intensity of training. Instead of blown out knees and broken bones, we contend with tendinopathies, muscle strains, and joint pains. For better or worse, these ailments are quite common, and we’re pretty good about diagnosing and treating them. That might not be the case with a condition called Chronic Exertional Compartment Syndrome (CECS), a painful condition most often affecting the lower leg. It’s common among Nordic skiers, it’s painful enough to seriously disrupt training, and it’s often difficult to diagnose and treat. This article attempts to investigate the condition, and to offer some advice to those suffering from it.

    C.E.C.S.

    Chronic. It occurs repeatedly and/or persists over time (not the result of a trauma).

    Exertional. It happens with effort. This is one of the hallmarks of the condition: symptoms are present with exercise, often only at higher intensities, but tend to subside fairly quickly with rest. 

    Compartment. Throughout our bodies we have connective tissue called fascia. I think of it as Saran Wrap. It’s thin, pliable, and has a small amount of elasticity. Our organs are packaged in fascia. Muscles are encased in fascia. The typical physiological explanation for fascia is that it creates “compartments” to reduce the spread of infections or pathogens. (From a musculoskeletal perspective, fascia may play a large role in how our muscles, tendons, and joints interact.)

    Syndrome. A group of symptoms that occur together. Generally, not a good thing. 

    CECS occurs when exercise causes the muscles within a fascial compartment to become swollen and enlarged to the point of exceeding the space within the compartment. This leads to decreased blood (therefore decreased oxygen supply to the muscles) and ultimately pain, numbness, and/or weakness. 

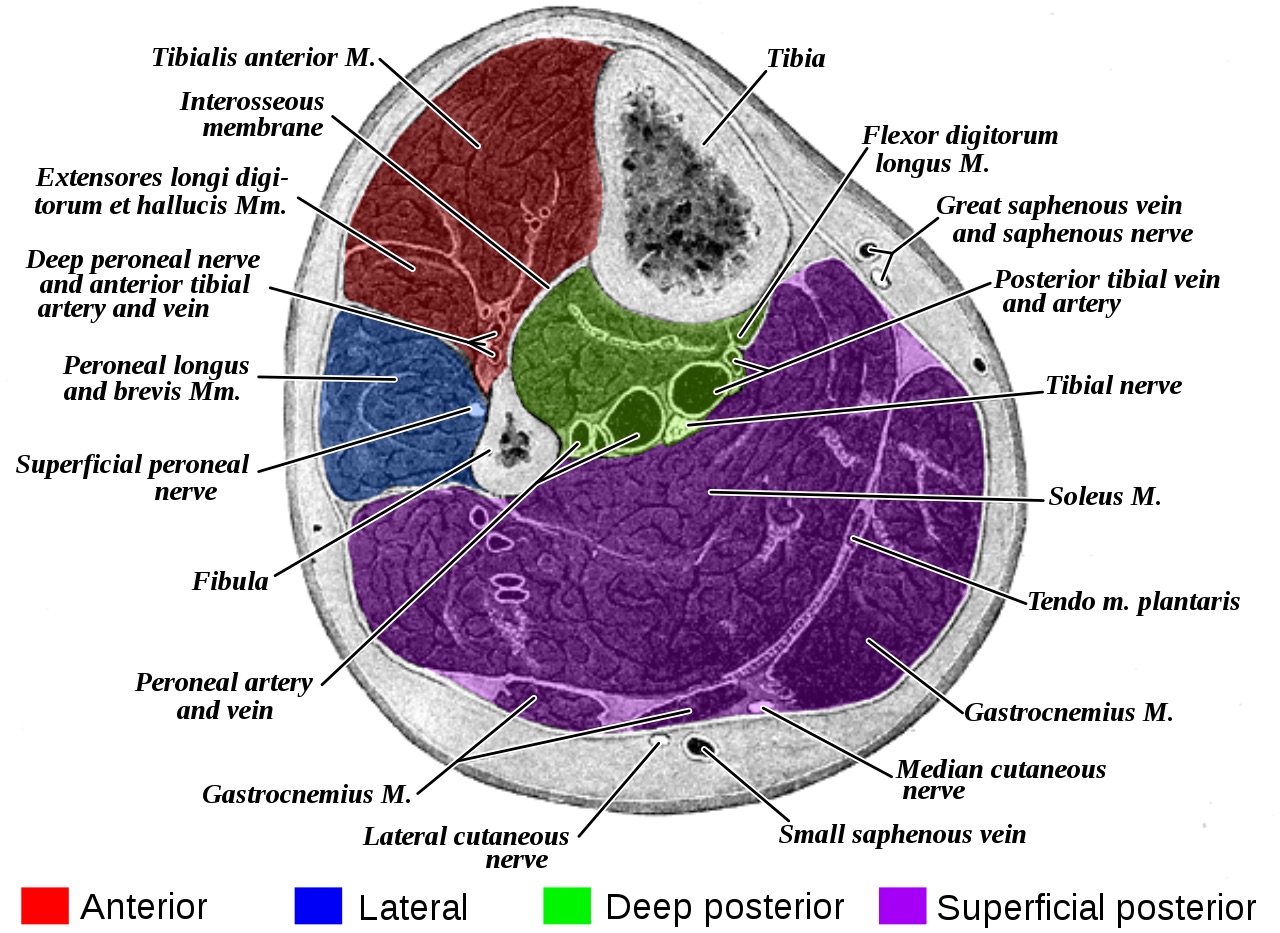
    CECS almost exclusively affects the lower leg, which has four compartments. 

    • The anterior compartment contains muscles of ankle dorsiflexion and stability, primarily the tibialis anterior. 
    • The muscles of the lateral compartment provide dynamic stability at the ankle. 
    • There are two posterior compartments: the superficial compartment with ankle plantar flexors and the deep compartment containing muscles that stabilize the ankle and foot. 
    Compartments of the lower leg are those likely to be affected by CECS.


    The mechanics of CECS is a simple matter of too much stuff in too little space. The more that muscles work, the more oxygen they need. The body obliges by increasing the heart rate, pumping more blood, and delivering more oxygen. This causes the muscles to swell and take up more space. While the fascia has some elasticity and ability to stretch, it does become quite confining and won’t let the muscles expand any further. This causes pressure to build within the compartment. 

    So far, this is all a normal physiological response. But, if the incoming blood flow continues at a higher rate than the outgoing flow, the pressure will continue to increase. When the compartment pressure exceeds that of the blood vessels, blood flow becomes restricted. The muscles become starved for oxygen and will get very pissed off. Pain is the body’s response, yelling at you so you’ll stop what you’re doing and leave the poor muscles alone.


    Traits of CECS

    Pain is the most common complaint with CECS. It is sometimes accompanied by numbness or sense of weakness. Along with pain, there is often a description of tightness or cramping. As previously mentioned, symptoms arise only with exertion and subside quickly – often within only a few minutes of rest. Symptoms arise only with exertion and subside quickly–often within a few minutes of rest. This is a key trait of CECS.

    Location of pain is commonly bilateral and often broad–it takes a whole hand instead of a finger to point to the pain. However, it is almost always within the anatomical borders of the compartment. (This does get more vague when multiple compartments are symptomatic, especially the combination of anterior and lateral.) 

    Symptoms of CECS are typically very hard to reproduce without the exertion of the offending sport. This is a clinician’s nightmare as we glean a considerable amount of information when our tests reproduce the patient’s pain.

    Taken together, these traits are what will most readily differentiate CECS from other chronic musculoskeletal issues like tendinopathies, muscle strains, or joint pathologies: symptoms subside quickly with rest, are diffuse, and are not reproduced during a physical exam.

    Diagnosis

    The gold standard is an exercise test using an intra-compartment pressure monitor. It’s basically a syringe needle attached to an air pressure gauge. The protocol is to take baseline measurements at rest and then again after exertion. The pressures are compared using the Pedowitz criteria: “1) a preexercise pressure greater than or equal to 15 mm Hg, 2) a 1 minute postexercise pressure of greater than or equal to 30 mm Hg, or 3) a 5 minute postexercise pressure greater than or equal to 20 mm Hg.” This essentially means 1) your resting pressure is really high, 2) your pressure under exertion is really, really high, or 3) your intra-compartment pressure is not decreasing normally with rest. 

    Treatment

    Conservative treatment is frequently not very effective but certainly worth exploring, especially if you are trying to make it through competition season. Massage and taping are the most common interventions that have potential for at least short term improvement (if a bit of tape lets you race without pain, that’s a win!). There may be more substance behind altering the movement pattern responsible for CECS in the first place: for example, this study found very positive results by making changes to the subjects’ running gait and foot-strike pattern.

    Unfortunately, we are not very good at treating CECS without a scalpel. Surgery is by fasciotomy. Oversimplified, this is a procedure where the fascia is cut to create more space within the compartment. For most surgeons, a positive on the Pedowitz criteria is a prerequisite; however, they will also consider the compartments affected and the severity and duration of symptoms. While not perfect, surgical outcomes tend to be pretty good. A study of elite French skiers with CECS observed that 94% became asymptomatic and almost 90% returned to competition after fasciotomy surgery.

    Skate techniques—and the dorsiflexion required by the recovery of the pushing ski—have been shown to exacerbate CECS even more than classic technique.
    Ski-Related CECS

    The article just referenced found the prevalence of CECS to be 6.1% among the elite, national team skiers they studied. It was slightly higher amongst biathletes and slightly lower for cross-country skiers. Symptoms were much more common with skate vs classic skiing techniques, and the anterior compartment was the most commonly affected.

    The anterior compartment and skating 

    Recall that the anterior compartment houses muscles that generate ankle dorsiflexion, in other words, the muscles that lift the foot and toes toward the shin. When we skate, we lift the kick ski off of the snow before swinging it back into position for gliding–a motion that activates the dorsiflexors. But these anterior compartment muscles, especially tibialis anterior, are also ankle stabilizers. When we balance on one leg, the tibialis anterior is co-contracting with the soleus and gastrocnemius to maintain stability. So, it is also very busy during the glide phase so it is getting very little rest. In contrast, with classic technique the kick ski stays mostly on the snow and is brought forward action at the hip vs ankle. Meanwhile, the glide phase balance demand is generally lower.

    Too much tibialis anterior? That was the finding of this study that looked at muscle activation during skate skiing. In comparing elite skiers with CECS to their asymptomatic teammates, they saw greater tibialis anterior muscle activation in the swing phase (active dorsiflexion) but even more so in the glide phase (dynamic balance). 

    The swing vs glide question was also inadvertently investigated in this novel study from way back in 1992 when skate technique was emerging. And, unfortunately, so too was CECS. The authors measured intra-compartment pressures after subjects skated with both skate and classic skis. While they found slightly higher pressures with classic skis, the results were not deemed statistically significant. This would seem to demonstrate that the increased load on the dorsiflexors from swinging a longer, heavier ski did not make much difference.

    The Takeaways

    CECS is common enough amongst at least competitive cross-country skiers that it should not be considered an outlier diagnosis when a skier complains of lower leg pain. 

    Diagnosis can be tricky, and often misleading, but relatively clear with intra-compartment pressure testing. (Clinical interjection: The testing must be done with the offending sport/activity to be accurate. Most physicians will be accustomed to patients who are symptomatic with running so the common test is running on treadmill. If a skier is only symptomatic with skate skiing, a running test is likely to return a false negative. They need to reproduce their symptoms; therefore, they need to skate ski/roller ski for the test.)

    Anterior > lateral > posterior compartments. Skate > classic. Maybe symptomatic with other exercise and training but maybe not.

    According to the current research, those who meet the compartment pressure criteria will likely be unsuccessful with conservative treatment and ultimately require surgery, though it should be expected that most surgeons will want to see a failed trial of PT before they operate. However, there are some tactics, from taping to training modifications, that might help to at least decrease symptoms and are very much worth exploring, especially in the short term if trying to salvage a competitive season.

    The glide phase is likely the most problematic. This would seem to indicate a technique and balance issue. This is also where those of us who do not wield scalpels might make a difference in both prevention and treatment (even if the skier has had surgery). I, for one, consider the ability to demonstrate appropriate balance in ski-specific postures a prerequisite for effective skiing and recommend single leg stability exercises to all skiers, independent of CECS treatment. To paraphrase a recent interview with Matt Whitcomb, head coach of the US Ski Team: “[A]ll great technique starts with the ability to use our feet well. And for anyone that has a hard time being stable on their feet, it’s going to be very difficult to ski well in the rest of the body.” If technique changes can improve symptoms in runners with CECS, as noted above, perhaps the potential exists for skiers as well.

    Ultimately, CECS is complex and often quite pernicious. Neither surgeon nor physical therapist has a magic sword to slay the dragon. However, if athletes, coaches, and medical providers work together as a team, they look to have a much better chance of taming it. 


  • SkiErg Training: Training Considerations and Technique

    SkiErg Training: Training Considerations and Technique

    I hate rollerskiing. As much as I try to be a good Nordie, I just can’t get over my fear of hitting the pavement. Between a history of bike racing and the rollerski learning curve, I’ve already lost enough skin. I know it’s good for me and might make me faster on snow, but I’m too old to put up with my heart rate being affected more by fear-induced adrenaline than by quality training.

    My legs and lungs get plenty of work all summer from running, cycling, and strength training, but my typical dryland routine does little for the arms. I’ve tried to swim, but I haven’t progressed past drinking half the pool. 

    A few years ago, I set up some resistance bands to train the arms for double poling. After developing triceps tendinopathy, taking a snapped band to the crotch, and generally finding the bands to be either too hard or too easy, I realized my workouts were far from ideal. 

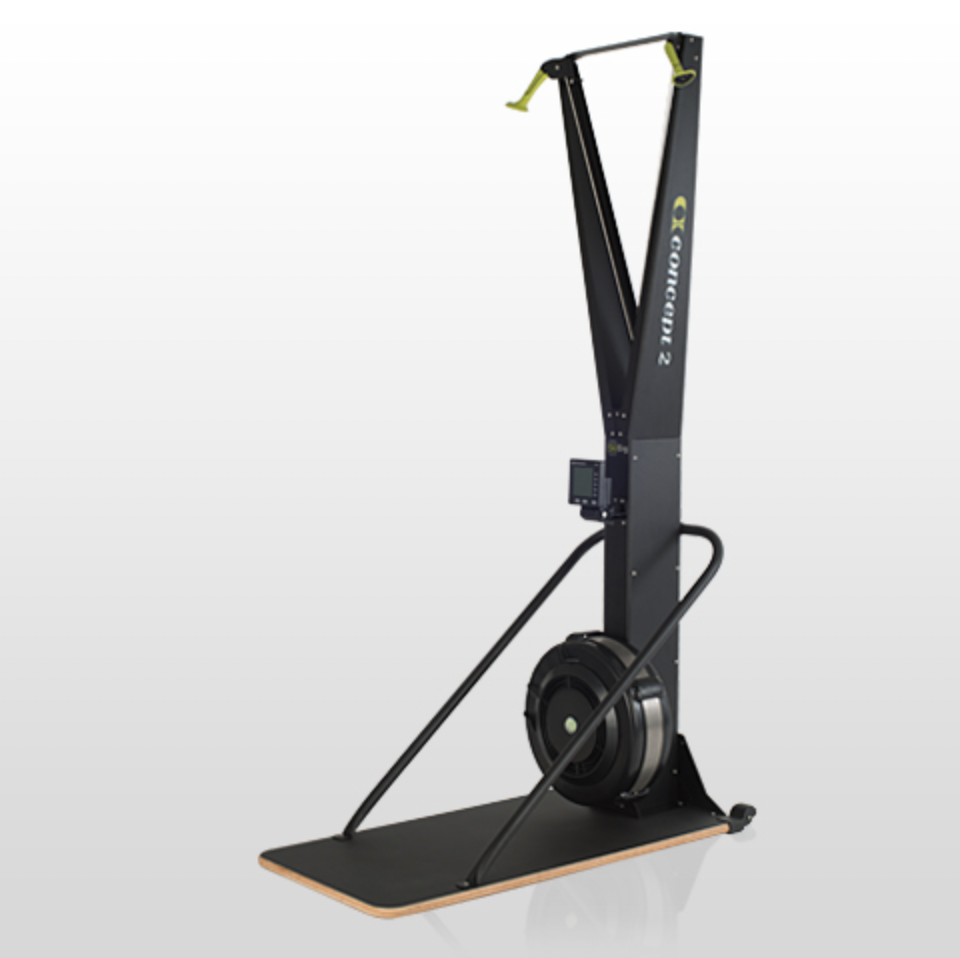
    (Photo: Concept2.com)

    What the bands gain from their price-point, they yield in utility. By their nature, the more you stretch a band, the more resistance it provides. This is the opposite of what happens with poling on snow, where the greatest resistance (or force requirement) takes place near the beginning of the pushing phase and decreases through the end of each cycle. 

    Staring in the face of another hot (and smoky) summer, I splurged on a Concept2 SkiErg last spring. Thus, I was immediately able to avoid rollerskiing (without feeling guilty) while simultaneously shielding myself from the heat and poor air quality. Solved were the resistance bands’ problems of poor adjustability and inverse force curve. This utility continued during the purgatory of shoulder season in the fall, and carried me through the local trails’ annual mid-season melt out here in Salt Lake City. 

    Cool tool. What do I do with it?

    For some expert information, I asked Miles Havlick, head Nordic coach for the reigning NCAA national champion University of Utah Ski Team, some questions about how they incorporate the SkiErg into their training. 

    What are your typical resistance settings? What’s the max you’ll use?

    We almost always use the max resistance setting of 10 during SkiErg workouts. The majority of the time we do sprint type workouts on the SkiErg machines with interval lengths of less than 5-minutes in duration. However, during longer sessions we will lower the resistance in order to keep the intensity lower.

    Author’s comment: 10 is hard! Keep in mind these are elite skiers. In a video blog from Jens Burman, he notes that his max resistance is 7. 

    Better for easy, Z1-2 endurance or higher intensity intervals?

    In my opinion, it is better for high intensity sessions targeting more anaerobic or strength training. Although the muscles are fairly similar to actually double poling, we prefer to perform longer L1 sessions on rollerskis which offers more variety in terrain and more closely resembles double poling on snow.

    Author’s comment: In my opinion, pavement hurts more than snow and I haven’t lost any skin to L1 sessions on the SkiErg.

    Head coach of the University of Utah nordic team, Miles Havlick (far right), was named RMISA coach of the year in 2021 following a record setting season for the Utes. (Photo: utahutes.com)

    Do you cue or work on technique during SkiErg sessions?

    We certainly do. It is easy to get higher power numbers when using techniques that are not as effective on snow, however, we are training to be better on snow. Therefore, we are always trying to emulate the most effective on-snow double pole technique on the SkiErg machines.

    Author’s comment: more on this below.

    Do you incorporate drills like balancing on one leg or BOSU?

    We have played around with it but we do not regularly utilize this. It is effective for making L1 workouts more interesting, however during higher intensity bouts, it seems to detract from the quality and focus of the on-snow movements that we are trying to emulate.

    Training sessions on the SkiErg can cover both ends of polarized training with the capacity for both longer duration, low intensity workouts with emphasis on metabolic efficiency and for shorter, high intensity intervals to work power. 

    SkiErg Technique

    While perhaps the best indoor replacement, pulling on the SkiErg is definitely not the same as poling on snow or rollerskis. The notable difference is the lack of balance with a forward trunk lean. Without bindings and the ski to counterbalance, there is much more tendency to fall forward on your face. Or, perhaps, more tendency to sit back so you don’t fall on your face. This is a likely reason why coaches can be critical of spending too much time on a SkiErg, with a nod toward the potential non-ski-specific movements Havlick alluded to when he commented that they are always attentive to form.  

    With that in mind, there are absolutely some technique fundamentals that can be reinforced on the SkiErg. 

    A pair of Craftsbury Green Racing Project athletes complete a 1k time trial on the SkiErg in November, 2014. (Photo: GreenRacingProject.com)
    The Arms

    The monotony repetition of the poling motion creates a great opportunity to reinforce some key components:

    • Hands high: don’t be lazy, get those hands up
    • Elbows fairly fixed with short swings under higher resistance (think uphill double pole or V1)
    • Elbows extend with long swings under lower resistance (think fast V2 or V2 alternate)
    • Smooth on the power: like starting a car from a dead stop but getting up to speed quickly – if you just stomp on it, the wheels will spin. With poling, we want to achieve peak force quickly but smoothly; setting the poles, then delivering power to them as the upper body drops powerfully onto the poles and the pole angle decreases to deliver the force behind the skier as a push off, versus just stabbing the poles as hard as we can into snow. The latter strategy does not propel forward motion as the peak force is directed into the ground, which incurs vibrational losses in the pole shaft, and robs the system of energy before the pole angle changes toward one more effective for force delivery. 


    The Hips

    “Hips high” might be one of the more overused and less understood cues in Nordic skiing. Without digging too deeply here, the basic premise while on the SkiErg is starting the poling motion from a tall position. As the body compresses with the arm pull, hinge at the hips and ankles. Then, focus on quickly getting back to the tall start position by extending the hips via contraction of the glutes (aka “squeeze your butt cheeks”). Your knees should be relaxed and bend slightly on each cycle, but you’ll want to avoid significant knee bending as it likely indicates that you are sitting back too much. I’ve personally found that one of the biggest gains I’ve found on snow is through focusing on quickly returning to the high hands and hips start position, over and over and over on the Erg.

    As much as high intensity double poling is a full body effort (not just the arms), in skiing it is more about movement across the hips and ankles vs the knees. In CrossFit gyms, this is not necessarily the case. They are after maximum generation of force, not skiing efficiently. Please don’t do this.

    Balance

    While Havlick mentioned that they rarely incorporate balance drills into SkiErg sessions, I think they can be very useful for reinforcing single leg stability, especially if there is a specific component to address like foot pressure distribution, ankle dorsiflexion, or lateral weight shifts from the hips. As with any balance exercise, it is generally more beneficial to work on consistently accomplishing appropriate balance on the floor before moving on to an unstable surface like a BOSU or Dynadisc.

    Visual learner? Here’s a helpful video on the CXC Facebook page with Eliska Albrigtsen, former CXC head coach who now leads the University of Alaska Fairbanks team. 

    Looking for more? Find a 2017 Wednesday Workout with Sadie Bjornsen here, featuring 30 minutes of 30/30’s on the SkiErg.

    Doublepole form on display at the start of the 4×5-kilometer relay in Lillehammer. Hailey Swirbul (bib 3) skis the scramble leg for the U.S. (Photo: NordicFocus)

    Author’s Disclosure: Concept 2, manufacturers of the SkiErg, is a sponsor of FasterSkier; however, I purchased mine at full price before I was affiliated with this fine website. In addition to the SkiErg, Abilica makes a very similar device. The Italian company Ercolina makes an upper body ergometer that has the advantage of being much more compact and portable, but it is also more expensive and very hard to find in the US.  

  • A PT in Sweden: Pandemic, War, or Plague of Locusts?

    A PT in Sweden: Pandemic, War, or Plague of Locusts?

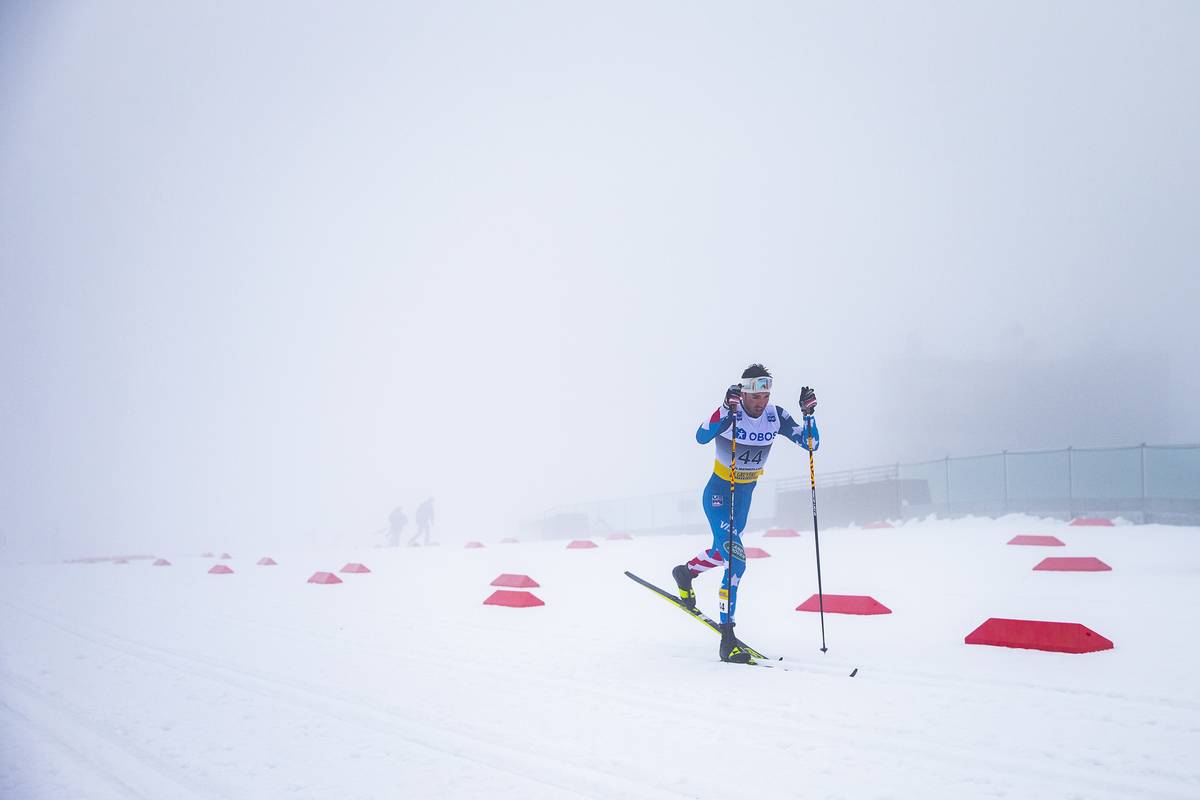
    Ian Torchia (SMS T2) races through dense fog at the 50 k classic at Holmenkollen in March, 2020. (Photo: NordicFocus)

    Click here to read an account of physical therapist Ned Dowling’s first stint overseas with the US Ski Team in March, 2020.

    Holmenkollen, Norway. March 8, 2020 – Men’s 50k Classic World Cup. 33 degrees and raining. The ski jump was engulfed in clouds. Spectators were forbidden from attending the Super Bowl of cross country skiing due to the impending COVID pandemic. My first stint as a physical therapist traveling with the US Ski Team was ending in an Oslo fog.

    Salt Lake City, Utah. Late March, 2020 – Buzz kill. In the week following my return from Norway, my son’s school was closed, my clinic was closed, people were fighting over toilet paper and hand sanitizer. It was the end of the world as we knew it. And we didn’t feel fine.

    July 6, 2021 – I received an email from Chris Grover asking if I could travel with the ski team again in 2022. We were amidst the calm before the storm. People were getting vaccinated. COVID cases were dropping. We went on vacation. Delta had not yet jumped out from behind the grim reaper. The light at the end of the tunnel was getting brighter and brighter.

    I had declined an offer to travel the previous winter. I knew I couldn’t get permission from either the boss at work or the boss at home. And I sure couldn’t tell my kid, who was still doing school remotely, “You keep up with those classes on Zoom while Daddy is off to Europe.”

    But now things were looking up. By the time I’d be overseas in March, the COVID thing would be a distant memory. Hell yes! Sign me up Chris.

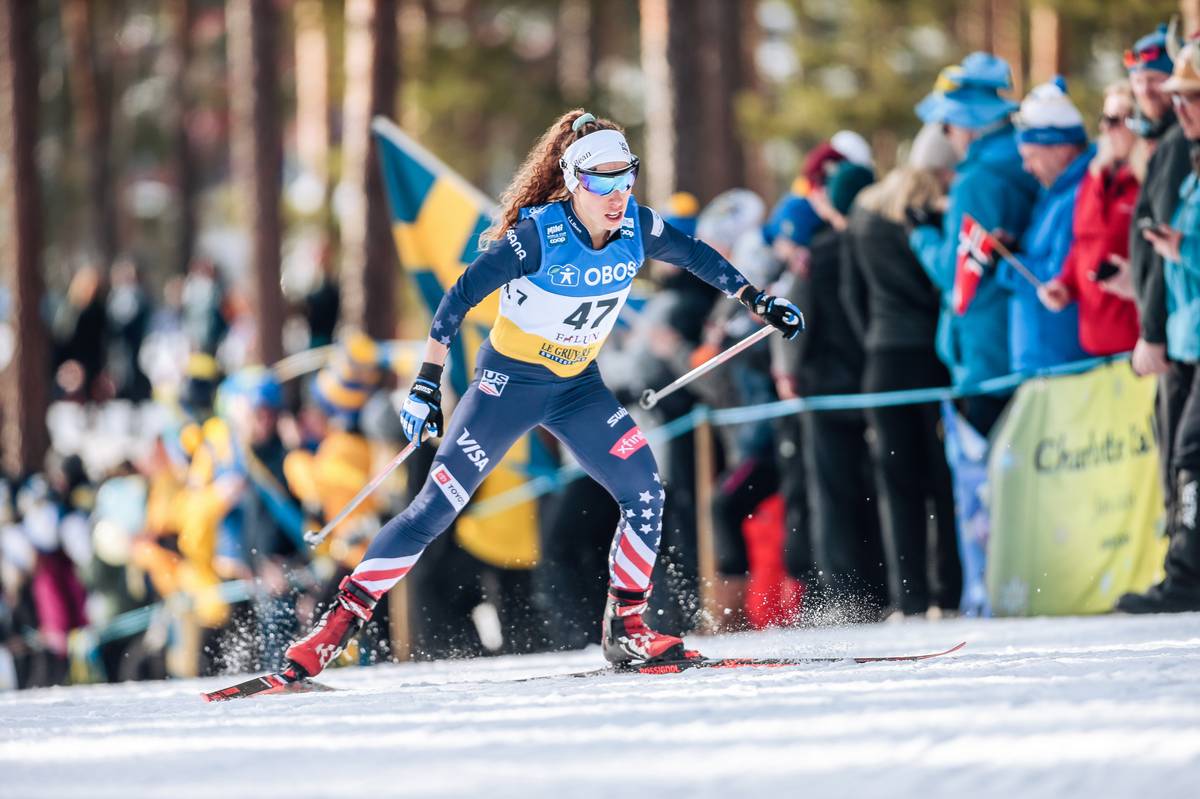
    Rosie Frankowski races the 10 k freestyle in Falun, Sweden in March 2022. (Photo: NordicFocus)

    Summer, Fall, Winter – We all know what happened next. The light at the end of the tunnel was an oncoming train and the shit hit the fan. Lots of shit hit lots of fans. First, the Delta variant, then Omicron. Through all of that, I did my best to stay optimistic about my opportunity to work the last two weekends of World Cup races in Falun, Sweden and Tyumen, Russia. 

    Falun was a bit of a known entity, or at least easily researched on the internet. The World Cup had been racing there for years. Trail maps showed a good network of tourist tracks (which is a good thing because the race course is no joke). Videos of old races on YouTube showed huge crowds, which were sorely missed at the pre-COVID Holmenkollen. 

    Tyumen, the Pearl of Siberia, was going to be much more of an adventure. Much to my relief, the plan was to have a chartered flight from Stockholm to Russia. I really, really didn’t want to fly (or crash) on a commercial Russian plane. With a lot of digging and Google Translate, I could glean some information about the race venue and its environs. 

    February 9, 2022 – Chris emailed me about getting a Russian visa. He told me to contact someone at the Russian Consulate in Washington: call this guy, do what he says, pay what he says, we’ll reimburse you. The next day I anxiously called Bogdan, to whom I would be entrusting my passport. “You send passport, extra photo, and $250. You complete visa application online and send password for application, so I fix your mistakes. You send postage to mail back.” I had him repeat that three or four times while I nervously scribbled notes to myself. I reminded him that I was flying to Sweden on March 6 and would very much need my passport back by then. “No problem. You get passport.”

    The visa application was nerve racking. Employment history. List of all countries traveled to in the last 5 years. “Have you been trained in firearms, artillery, or nuclear warfare?”

    With sweaty palms and my heart rate in L4, I mailed off my passport and hopefully everything else I was supposed to. Then I waited. 

    A different kind of Olympic suit: US wax techs take COVID precautions while testing and preparing skis in Falun, SWE. (Courtesy photo)

    Thursday, February 24, 2022 –  Russia invaded Ukraine. The world as we knew it ended once again. Chris texted me that the trip to Russia was canceled (the US team’s decision not to go to Russia preceded FIS’s decision to cancel the races). “Get your passport back right away.” I called Bogdan, my contact at the Russian Consulate. “We’ve had a change in plans, and I won’t be traveling to Russia. Can you please send my passport right away?” “No. I do not have your passport. Embassy has passport. I cannot get until finished with visa. But I mail it.” I could hear a toddler crying in the background. Bogdan apologized for the crying. I told him he shouldn’t have taken my call at home. He said, “Do not worry with passport. Visa will finish on Monday or Tuesday, then I mail. I call you when I mail.”

    Friday, Saturday, Sunday, Monday, Tuesday – Nope. Not going to happen. I’m never going to see my passport again. They’ve all left the embassy. My passport is too low of a priority. They’re just going to be jerks and not send it back. So much for going to Sweden. COVID, war, what’s next?

    9:21am, Tuesday, March 1, 2022 –  Bogdan called. “Naatan, I mail passport. You get tomorrow.”

     I thanked him profusely. And I said a little prayer. This man is living in America, raising a family in America. Yet he works for the Russian government. He is a Russian in a country that, overnight, hates Russians. I spent the last 5 days completely stressed because I didn’t have possession of a passport that would allow me to travel to Sweden for the sake of people skiing around in circles. This man, who must pay at least some attention to Western media, must have spent the last 5 days completely stressed over the safety and ultimate fate of his family and country. 

    (I do not mean to discredit ski racing or initiate some existential debate. As crazy as it seemed for the World Cup, and even Olympics, to carry on through this pandemic–and now war, I know I found great benefit from the distraction that racing provided. It was a slice of normalcy and vicarious living, which was invaluable to me as so much of what I took for granted was upended. But my little problems did seem very small compared to Bogdan’s.)

    Wednesday, March 2, 2022 – Scott, our friendly (seriously, he waves to everyone) neighborhood mail carrier delivered my passport. Huge sigh of relief.

    After a series of hurdles, Ned Dowling is wheels up on his way to Sweden. (Courtesy photo)

    SLC International Airport. Sunday, March 6, 2022 – I hugged my son, kissed my wife goodbye, and donned my N95 mask which I wore for 18hrs straight. SLC direct to Amsterdam. Enough layover to grab a bottle of Scotch at the duty-free. A packed flight to Stockholm and a 2.5 hr bus ride to Falun. Jet lagged and sleep deprived, I met up with the team as they’d just gotten off their bus from Oslo. We all stood around in LL Bean team gear and N95s awaiting instructions on where to schlep our massive duffles.

    Our accommodations for the week were not at the Scandic Hotel, the FIS-provided standard lodging for all of the teams. It was decided that the hotel and its buffet meals were too COVID risky. Instead we stayed two-each in a group of camping cabins equipped with bunk beds and a small kitchen. We were on our own for breakfast and lunch. Dinners were catered by restaurateur parents of Swedish sprint star Maja Dahlqvist (the World Cup circle is pretty close knit). 

    Cheers for negative COVID tests!

    Falun, Sweden. Tuesday, March 7, 2022 – COVID testing. The team was shedding skiers and staff with positive tests. A few soldiers were left behind to wait out quarantine in an Oslo airport hotel. A couple more made it to Sweden but wouldn’t see a race bib. Anxiety was high. A positive test meant no racing, no human interaction, no trip home until the negative. One car load at a time we went to a testing center in Falun for nasal – very, very nasal  – PCR tests. 

    “I think it touched my eyeball!” “I had 31 tests in China and that was the most aggressive one ever!” “Damn, that was legit!” 

    Physical therapist Ned Dowling snaps a masked selfie while supporting the US Ski Team in Falun, SWE. (Courtesy photo)

    Wednesday, March 8, 2022 – All tests were negative. Collective sigh of relief. With that reassurance, I finally had some customers on the physio treatment table. Thankfully, everyone’s bodies were holding up reasonably well for being that late in the season. I felt guilty for being over there without much to do, but I figure that my boredom means they don’t need me and if they don’t need me it’s because they’re healthy, which is the goal (or they don’t want me because they’re COVID paranoid – there was plenty of that too, understandably so). So, until the racing began, I didn’t have much to do besides ski every day. Poor me.

    March 11-13, 2022 – Let’s go racing! My experience with the team is that they are always a great group of people to be around, but they’re even more fun with podiums. Lots of good results all around with some “first World Cup points” to some near-misses to some 5.5 lb chunks of Gruyere podium cheese. 

    4:30pm, March 13, 2022 – The final race: antigen testing for entry back into the US. Again, all negative. We’re going home! That night in the bar at a Stockholm airport hotel, I finally saw some faces that’d been hidden behind N95s all week. The poor bartender had a tough time keeping up with the drink orders. Elation, exhaustion, and simple relief that they’d survived another crazy race season and were finally heading home after four months of living out of suitcases, always masked, always nervous. 

    Maybe next year we can race without a pandemic or war or plague of locusts.

    Jessie Diggins hugs teammate Julia Kern at the finish of the 10 k freestyle in Falun. (Photo: NordicFocus)
  • Introducing a New Series: Ask the PT

    Introducing a New Series: Ask the PT

    When I began skiing halfway through high school, I remember my coach telling our team that cross-country skiing was a “lifelong sport”. Now, more than a decade and a half later, I don’t have to look far to see the truth in that statement. While out for a ski on local trails, I might see a 65 year old retiree who is training for the Korteloppet, a 50 year old former bike racer who has taken up skate skiing in the winter, a 75 year old skiing in jeans on fish scales, and a 17-year-old Junior Nationals hopeful. I might also see (or be) a parent towing their child(ren) in a chariot, a beginner working up the courage to “pizza” down a hill, or a former NCAA racer kicking and gliding effortlessly up the track. Each of us with unique starting points, individual differences in technique, and physiological strengths and weaknesses, the ski community encompasses a wide spectrum of athletes. 

    One of the authors favorite spots on her local trails at Spring Gulch near Carbondale, CO.

    The beauty of a low-impact sport is that it can be forgiving on the body, despite the cardiovascular toll it might require. At the same time – yes, it’s a low-impact sport, but “low-impact” does not mean cross-country skiing does not put a large strain on the body. It requires strength, balance, repetitive movement, and at times might involve an uncomfortable crash or two onto unforgiving hard packed snow. 

    Whether you have performance or fitness goals, are simply looking to improve technique and efficiency, or are looking for a path to return to a pain free ski experience following an injury, it’s likely that a question has run through your mind while out for a ski that you wish you had a physical therapist by your side to field.

    We’ve got your back. 

    FasterSkier is excited to introduce a new reader-driven series: “Ask the PT”. You ask, we answer.

    So who is the PT? 

    Already a familiar face on this site, Ned Dowling is a physical therapist based in Salt Lake City, UT. Most recently, Ned authored the “Building a Better Skier” series, focused on biomechanics, as well as articles on heart rate variability and an upcoming piece on SkiErg technique. 

    Though he had spent time on skis previously, Ned became hooked on cross-country skiing after moving to Salt Lake City a decade ago. With an extensive background in cycling, Ned worked as a physical therapist for a pro cycling team for several years, which gave him insights into the professional endurance sport world that have now transferred into his work with skiers. 

    After attending a U.S. Ski & Snowboard conference on ACL repair several years ago, Ned connected with some of the strength and conditioning coaches working at the Center for Excellence in Park City, and began learning more about the teams who trained there. These connections eventually led to a call in January 2020 asking him to travel to work with the U.S. Cross Country Team. 

    Ned Dowling out for a ski in Sjusjøen, Norway with Jessie Diggins and Matt Whitcomb. (Courtesy photo)

    In March 2020, as the pandemic loomed, Ned traveled to meet the team in Lillehammer, Norway, following Ski Tour 2020. (If, like us, you feel the last two years have been a blur, Ski Tour 2020 was a six-stage tour that began in mid-February in Östersund, Sweden and ended in Trondheim, Norway. The women’s Tour was won by Therese Johaug, with Pål Golberg taking the overall win for the men.)

    Ned has since continued his relationship with the U.S. Ski Team, and more recently assisted with athlete care during the team’s fall training camp in Park City, UT. Ned is also slated to join the team for the final two weekends of World Cup racing which are scheduled to take place in Falun, Sweden and Tyumen, Russia. 

    So how will this work? Shoot us your biomechanics and physical therapy-related questions to AskThePT@fasterskier.com. We’re aiming for a monthly article where Ned tackles a reader’s question, which hopefully benefits the broader nordic community as well. For other content related questions or comments, feel free to email info@fasterskier.com. 

    Stay tuned and happy trails! 

  • Adding Power to the Push Off: Understanding the Rate of Force Development

    Adding Power to the Push Off: Understanding the Rate of Force Development

    Italy’s Federico Pellegrino closing out the win at the 2020 Davos freestyle sprint. (Photo: NordicFocus)

    This article builds upon the four-part “Building a Better Skier” series, which explores how biomechanics and movement patterns affect skiing technique, and more importantly how you can apply these concepts to improve your skiing. Please feel free to email the author with any questions: ned.dowling@hsc.utah.edu.

    Recently, I overheard one of my Physical Therapy colleagues tell a patient, “We’ve got to get you jumping. If you want to get back to running, you’ll need to do some jumping first. Running is nothing but jumping from one leg to the other.” Running is a bit more complex than that, but she made a good point. 

    I’d think it obvious to most that jumping is a faster, more explosive movement than simply taking a step. The same goes for running versus walking. Time spent with one foot on the ground in running is about 0.215 seconds while walking is closer to 0.6 seconds. In the context of cross country skiing, the propulsive phase during skate V2 is around 0.310 seconds and 0.230 seconds with diagonal stride. While these numbers are variable based on velocity, it should be easy to appreciate that the actions involved in running and Nordic skiing happen at a much faster rate than with walking. 

    But what does ‘happen at a faster rate’ mean? To answer this, I’m going to take a dive into some physics and biomechanics. First, we need a name for what exactly is happening faster. For the sake of this article, we’re going to go with force. This is perhaps more appropriate than power and maybe less accurate than impulse, but it certainly does the trick of conveying the message that an action has been initiated with the intent of creating motion, be it skiing, running, walking, jumping, etc. (If you want a deeper dive, I highly recommend Force: the Biomechanics of Training by Dan Cleather.)

    To overcome gravity and the friction (or suction) of snow, force is required. Our velocity or speed is largely dependent on the magnitude of the force we generate. However, force is not simply an instantaneous measurement. We can talk about peak force or average force, but these miss the big picture. With skiing, whether we are talking about legs propelling skis or arms pushing on poles, force can be plotted on a graph where the Y-axis is the magnitude of force, the X-axis is the amount of time that force is applied, and the area under the resulting curve is the total quantity force applied to the ski or pole during one cycle.

    In this graph, the peak force (y-axis) is much greater for the blue line. The greater magnitude of force is also held for a longer period of time (x-axis). Thus, the area underneath the blue line is considerably greater than the area under the red line. All else being equal, the skier producing the blue line will be faster.

    Here we see similar peak forces (y-axis), but the red line doesn’t maintain its force and drops off more rapidly (x-axis). The area under the blue line is larger as a result.

    In this graph, the red and blue lines have very similar peak forces (y-axis) and duration (x-axis). However, there is a major difference in how they get there. The red line reaches its peak force faster. As a result, the area under the red line is larger than the blue. This is because, even though peak force and duration are the same, the red athlete’s peak force happened faster.

    Here’s another example of similar peak force, but the blue line has a much steeper curve and is reaching peak force more quickly.

    The slope of the line, “rise over run” if you remember way back to middle school, represents how quickly force is generated. This is called the rate of force development (RFD), and since it is the name of the article and we’ve spent so much time just getting to this point, it must be important.  

    I already pointed out that force development in powerful skiing happens quickly. In their article, General strength and kinetics: fundamental to sprinting faster in cross country skiing (also cited above), the authors set out to draw correlations between biomechanics, kinematics, and strength in elite skiers. Among their primary findings were: 1. “Analysis of kinetics and kinematics revealed that it was not exclusively the magnitude of applied forces during skiing, but the timing and proper instant of force application were major factors discriminating between faster and slower skiers.” And 2. “General strength and power per se seem not to be major determinants of performance in elite skiers, whereas coordination of these capacities within the different and complex skiing movements seems to be the discriminating factor.” 

    A primary takeaway is that RFD is related to maximum velocity. This sounds intuitive enough: a sprinter on the track is generating more force per stride over 100 meters than a distance runner racing the 5k. But they go on to conclude that as the skiers increased their speed, they decreased their stride time/duration of force (X-axis). How can speed be increasing if the duration of force is decreasing? Won’t the area of the graph get smaller? 

    Some of the speed increase is the result of higher peak forces, but it was also attributed to increased RFD. If we manipulate the graph such that peak force is achieved more quickly — meaning a steep spike at the onset of the force — we can afford to decrease the force more rapidly while still generating a larger area under the curve. 

    With regards to physical attributes, the authors discovered that maximum strength was not correlated with maximum skiing speed; however, jump height (aka RFD) was closely correlated. In the study, maximum strength was considered isometrically, meaning that the muscles were resiting a static load (think planks) versus a push or pull against a load. 

    It also should be noted that a quicker, but shorter, stride must be accompanied by a faster stride cycle or cadence in order to be effective. This will be well understood by anyone who rides a bike with a power meter: if you are trying to maintain 300w on a climb and shift into an easier gear, your cadence has to increase or the power will drop off. The change in gearing creates less max force through the pedals but is compensated by increasing the speed at which the crank is turned.

    Simi Hamilton pushes over the roller during a 2020 skate sprint in Dresden, Germany. (Photo: Nordic Focus)

    RFD sounds awesome. How do I get some?

    Simply put, you train it. In order to increase the speed at which muscles contract and generate force, we must increase the speed of muscle contractions in training. On the low-load end of the spectrum, this can mean simply speeding up standard strength exercises like squats, leg press, and lat pulls. 

    At the higher end of the spectrum are jumping and plyometric training. Plyometric training significantly improves vertical jump height, which was already noted to be correlated with increased skiing speed. 

    Plyometric exercises incorporate a pre-load or “stretch” phase prior to a rapid contraction. For example, if we consider a vertical jump, starting the jump from a squat position is a simple contraction of the muscles responsible for hip, knee, and ankle extension. But if the jumping motion begins in standing before dropping into a squat and quickly rebounding for the vertical jump, the same muscles that generate the jumping force are lengthened before contracting. This harnesses the energy produced by the elastic recoil of muscles and tendons. 

    Think about putting a fairly tight rubber band around your wrist. The rubber band is actively contracting against your wrist and the pressure, or force, is evident. Now pull back on the rubber band and let it snap against your wrist. This amount of force is significantly and noticeably (sorry!) greater. Our muscles and tendons do not harness that much elastic energy, but you get the idea.

    A pause for words of advice/caution: If the previous paragraph made your knees tremble or your back start to tighten, keep in mind that all exercises exist on a spectrum. With any exercise program, the load or difficulty must start with what is doable. There is a fine line between doing enough to stimulate adaptations in the body and doing too much, increasing the potential for injury. If you are managing a chronic musculoskeletal issue or returning from injury, it is highly recommended that you consult with a Physical Therapist or Athletic Trainer for a more personalized RFD program. Plyometric exercises can be done in a pool with a significant decrease in resistance. The overall load in the water is decreased, but the RFD benefit is retained.

    Plyometric Exercises to Increase RFD:

    Hopping: Whether on two feet or one, hopping drills will help strengthen the feet and ankles while developing RFD in the calf muscles. These have the lowest loads and can be valuable exercises themselves or as part of your warm up. Jumping rope falls in this category and has been shown to improve running speed.

    This video demonstrates a handful of “pogo” style hopping drills. Notice how the knee and hip stay fixed with force being generated by the ankle.

    Jumping: Vertical jumps, broad jumps, box jumps, drop jumps, bilateral, unilateral, backwards, sideways–the variety is only limited by your imagination. However, to get the most out of the plyometric stretch cycle, it is arguably best to make these countermovement jumps where the body drops down before exploding upwards (or sideways, forward, etc.).

    In this video, Dave Quammen of Park City Sports Medicine demonstrates a series of two-legged jumping drills. Challenge can be increased with added repetitions or with reversing direction with the forward jumps. Try these on one leg for a significant increase in load/difficulty. 

    Bounding: With or without poles, bounding follows the basic premise of adding “pop” to a normal stride for increased RFD and exaggerated height, distance, or speed. While boulding can be done on flat ground, there are added benefits to going uphill: because height and flight time are reduced so are the impact forces when landing. It also takes more effort to go uphill, so the workout is more efficient (more bang for the buck), and it just feels more natural.

    Demonstration of more running-oriented hill bounding, from Lydiard Training.

    Ski bounding with poles is a traditional dryland exercise that not only improves RFD but works the core and arms at the same time — valuable training even if you only skate ski. It can be done on a long gradual hill for endurance work, but short, steep hills will emphasize RFD.

    The U.S. Ski Team completes a set of longer duration L4 ski bounding intervals way back in 2012. Camera quality has since improved, but the background song is still a classic. Note how the technique is very different from running even though the speed might be similar. 

    Again, with the basic concept of creating quick, explosive movements, there are far more ways to develop RFD than this summary can hope to cover. The remaining topic, then, is dosage. 

    Plyometric exercises are demanding and stressful to the musculoskeletal system. Delayed onset muscle soreness is to be expected, and at least one recovery day is mandatory. Aside from muscle soreness, any pain that is beyond mild or takes more than a couple of hours to subside should be considered a contraindication and deserving of a consultation with a sports medicine provider. 

    For most readers, doing the exercises once or twice a week is an adequate stimulus for both improvement of RFD and appropriate recovery. As for duration or repetitions: when in doubt, start small. In the jumping video above, Dave demonstrates two repetitions of each jump. If we consider the full video to be one set, then starting with 2-3 sets is likely reasonable. Then, increase repetitions to progress the program. Keep in mind that quality is key — if you feel your technique or stability start to wean, it’s best to stop there. Total exhaustion is not the goal. 

    Precede plyometrics with a light cardio warm up. If coupling plyometrics with core or strength training in the same session, it is generally recommended to do the plyos first before you are too fatigued.

    Sophie Caldwell Hamilton powers through the heats during a classic sprint in Oberstdorf, Germany in March 2021. (Photo: Nordic Focus)
  • Building a Better Skier Part 4: The Shoulder

    Building a Better Skier Part 4: The Shoulder

    Rosie Brennan powers through the final meters for a commanding second place finish in Stage 4 of the 2021 Tour de Ski. (Photo: NordicFocus)

    This is Part 4 of a series delving into how biomechanics and movement patterns affect skiing technique. If you haven’t already, start with the introduction, Part 1 which introduces the concept of a neutral spine posture, Part 2 which describes spine stability and mobility, and Part 3 on single limb stability.

    ——————————————–

    Upper body power is a major contributor and perhaps even a determinant of cross country skiing performance. Poling accounts for up to 60% of propulsion in skate and classic diagonal and, obviously, 100% with double pole. For those who train for skiing year round, upper body work is an essential part of the routine. However, for those whose summers are focused on running, cycling, or hiking, arm strength is often forgotten once the snow melts.

    Let’s take a closer look at the structures and muscles involved in the upper body during the various poling motions of skiing. 

    The muscles that comprise the shoulder girdle can be roughly divided into two groups: the stabilizers and the movers. Coordinated motion requires “dynamic stability”, i.e., for the two groups to together such that the stabilizer muscles control extraneous joint motion while the movers perform the primary action. 

    The shoulder has a tremendous amount of motion available and relies heavily on the coordinated effort of multiple muscles to maintain proper alignment and movement of the joint. At the same time, it is capable of generating large amounts of power, whether that’s throwing a 90mph fastball, hammering a nail, or repeatedly pushing on a ski pole.

    The shoulder stabilizers can be further divided into those acting on the glenohumeral joint (the primary ball-and-socket shoulder joint) and those supporting the scapulothoracic joint (shoulder blade on the ribcage). 

    The rotator cuff is a group of four muscles — supraspinatus, infraspinatus, teres minor, and subscapularis — that attach to both the scapula and humerus in close proximity to the joint. They are not particularly strong muscles, but they play a vital role in coordinating the movement of the glenohumeral joint. 

    A diagram of the muscle group involved in the shoulder’s rotator cuff. (Photo: www.freepik.com)

    The only rigid or bony attachment of the arm to the body is via the collarbone. This small bone is not enough to support the load of push ups, pull ups, or double poling. The base of support truly lies in the muscular attachment of the shoulder blade to the ribcage. For the sake of the simplicity of this article, we’ll limit the discussion to four muscles, one of which doesn’t count. (Side note: a classic physical therapy trivia question is to name all 17 muscles that attach to the scapula–clearly I’m skipping a few here.) 

    The primary stabilizers of the scapular are lower trapezius, middle trapezius, and serratus anterior. I’ll contend that the upper trapezius is a stabilizer but doesn’t count because it tends to exert force in the wrong direction (and is frequently overactive so needs little in the way of direct strengthening).

    The trapezius muscles stabilize and move the scapula along the ribcage. (Photo: www.freepik.com)

    As with any dynamic stability in the body — abdominal muscles for the lumbar spine, glutes for the hip, or the aforementioned muscles in the shoulder girdle — strength is important but intermuscular coordination is key. This is especially true at the shoulder due to its wide range of available motion and corresponding muscular complexity. 

    The following are exercises targeting the stabilizers, both at the shoulder joint and scapula.

    Exercises for the Stabilizers:

    (The intent of these exercises should be thought of more as activation drills and less about the heaviest weight you can find. Yes, we are looking to induce some fatigue but the emphasis is not on power.)

    Side Lying External Rotation: Lie on your side. Keep the top elbow bent at 90° and against your side. Rotate about the shoulder until your forearm is at about 45° to the horizontal. Try not to pull with your shoulder blade. A little bit of weight goes a long way.

    External Rotation + Uppercut: With a resistance band anchored on the opposite side, elbow fixed at 90°, and forearm against your belly. Rotate the forearm away from the belly to a neutral position (knuckles pointed forward). Then raise the arm by spinning through the shoulder. Again, the elbow should stay at 90° throughout. Only raise the arm to shoulder height. Motion should be isolated at the shoulder joint — don’t let the shoulder blade move. Finish by lowering the arm down and rotating the forearm back to the belly.

    Scaption: Raise both arms up your sides at 45° (not in front, not to the side, but halfway in between). Stop at shoulder height. Keep the shoulder blades fixed down and back. Start with light weights.

    Wall Slides: Loop a very light resistance band around both hands and stand facing a wall. Place both hands on the wall at about shoulder heights with elbows bent and palms facing inward. Stretch the band by squeezing your shoulder blades down and back, not just pulling from the arms. Keep the shoulder blades pinned down and back, band tensioned, and slide your hands up the wall until your elbows are at about shoulder height. Slide back down to the starting position. Ideally, the shoulder blades stay retracted throughout the set of repetitions, but you can stop and reset them between reps or as needed.

    Serratus Punch: The serratus anterior muscle attaches to the ribcage, inserts on the scapula, and, acting alone, protracts the scapula, or pulls it forward. As a stand alone movement, this scapular protraction is not especially functional unless you are a boxer hitting with a jab. However, the serratus anterior is a team player and becomes very functional when co-contracting with the posterior scapular muscles (especially middle and lower trapezius) to stabilize and coordinate movement of the scapula. The exercise will work the serratus anterior independently. 

    Lie on your back holding a dumbbell in each hand. Knees are bent and elbows are straight. Push the dumbbells towards the ceiling by moving the shoulder blades forward on the ribcage. This is the opposite of the motion described in Wall Slides. The neck and thoracic spine stay relaxed. This can also be done with a resistance band.

    Rows: The emphasis of the rowing motion is on squeezing the shoulder blades down and back as you pull the resistance towards you. This is the same motion described in Wall Slides and the opposite of the Serratus Punch. There are multiple means of adding resistance to the movement: resistance band, cable machine, single dumbbell/kettlebell, TRX, etc. 


    In the propulsive phase of poling, the prime mover at the shoulder joint is the latissimus dorsi — often referred to as the “lats”. This big, broad muscle extends the shoulder, pulling an outwardly extended arm to the side as in freestyle swim strokes and pull ups. The lats are aided by the posterior portion of the deltoid muscle and teres major. 

    A diagram of the back muscles, including the latissimus dorsi. (Photo: www.freepik.com)

    The elbow joint is also involved with the triceps playing a rather complex role. This muscle, or more technically speaking, this group of muscles has a common insertion on the ulna and acts to straighten the elbow. However, the long head of the triceps, attaching to the scapular vs the humerus, is also able to play a role in shoulder extension. I say the triceps play a complex role because motion about the elbow varies with technique and terrain. In Skate V1 and V2 alternate and in Classic striding, there is a fair amount of elbow extension. However, in V2 and uphill double poling, there is very little motion at the elbow. 

    Notice how little motion takes place at the elbow during V2.


    A clinical case study: (Disclaimer: the subject of this case is the author, a potential duplicity that is frowned upon in academia.) In the lead up to ski season, I began doing “budget SkiErg” workouts double poling with resistance bands. After several weeks of twice a week workouts, I began to develop left posterior elbow pain. It didn’t take much to figure out I had irritated the insertional tendon of the triceps. So I stopped the workouts and focused on eccentric strengthening of the triceps, which has become the standard of care in the treatment of tendinopathies. 

    Come ski season, I could skate without any problems, but I continued to have elbow pain with more than about 45 minutes of classic. One night at dinner I was venting to my wife about my now chronic elbow pain. Ever the voice of reason, she asked what I would do if I was seeing myself in the clinic. What would I, the PT, do differently for a patient who is not responding? I replied that I would examine, biomechanically, how the patient is poling. So I started to think about how I was doing what I was doing. 

    My hypothesis was that I was using my triceps too much to generate shoulder extension. I started doing shoulder extension exercises with my elbow fixed at 90°. I focused on leading the motion with the back of my elbow, not my hand. Within a couple of weeks, the elbow pain was gone. The lesson from my mistake is that functional movement patterns often require a high degree of coordination. Because of our bodies’ anatomical redundancy, it is easy to fall into a suboptimal pattern that is inefficient in the best case and in the worst has potential for injury.

    Interestingly, the biceps appear to be very active during double poling, which seems counterintuitive since the action of the biceps is in the opposite direction of the propulsive phase of poling. The biceps do contribute to shoulder flexion so they are likely involved during the return phase. But, more likely, the majority of their action is co-contraction with the triceps to stabilize the elbow and hold it in the desired position. Perhaps this is rationale to include some biceps strengthening for more than just filling out the sleeves of your cycling jersey.

    David Norris models single-stick poling technique during a skiathlon in Lillehammer, Norway in December, 2019. (Photo: NordicFocu)
    Exercises for the Movers:

    Shoulder Extension: This is most easily done with a dumbbell, but a resistance band will work as well. As described in the case study, keep the elbow locked at 90° and focus on spinning at the shoulder joint by leading with the back of the elbow.

    Strengthening the Triceps: Like with Rows, there are numerous ways to work the triceps with no single exercise being the best. Resistance band, cable machine, dumbbell, push ups, and dips are all appropriate.


    Strengthening the Lats: The basic lat workout is pull ups. If these are too difficult to do at least 3 reps, then put your feet on a chair or on a long resistance band loop attached to the pull up bar (just make sure the band stays on your feet and not in between them!). Lat machines in the gym are a great alternative as you can select resistance that is lighter than body weight (or more than body weight if you can whip out 10+ regular pull ups)


    Epilogue: The goal of the Building a Better Skier series has been to identify some key biomechanical and kinematic components of cross country skiing and to provide exercises with the specific intent of facilitating these movement patterns and strength requirements. By no means has the depth of these articles been exhaustive. Nor have the lists of exercises covered all possibilities. Hopefully, these articles have been easy to follow and the exercises have been included in your twice weekly strength/dryland/pay-to-play routine. Even better, I hope the work done now will pay dividends when the snow falls this winter. Best of luck with the remainder of summer (the heat, the smoke, the pandemic), the glorious autumn, the struggles of shoulder season, and the winter we’ve all been waiting for.


  • Building a Better Skier Part 3: Single Limb Stability

    Building a Better Skier Part 3: Single Limb Stability

    This is Part 3 of a series delving into how biomechanics and movement patterns affect skiing technique. If you haven’t already, start with the introduction, Part 1 which introduces the concept of a neutral spine posture, and Part 2 which describes spine stability and mobility.

    The ability to balance and be stable on one leg is where the rubber meets the road (or ski hits the snow). True, we generate propulsion with strength and endurance, but if that power is not transferred into glide, it becomes wasted effort. This is quite literally what separates the efficient from the inefficient. Or, the fast from the not so fast.

    This study set out to quantify the difference in glide between elite and sub-elite skiers (national vs regional skiers). As expected, they found that the higher caliber skiers did, in fact, glide better. In trying to quantify the why, fitness aside, they found that the national level skiers had a different pattern of foot pressure in the boot. Where the regional skiers only pressured the medial side (big toe side), the national skiers loaded their feet across the whole foot. 

    What’s really happening here is that the national level skiers were better at shifting their weight over the glide foot/ski. This “commitment” to the glide ski is one of the hardest things to master, especially for adults learning to Nordic skiing later in life. 

    When standing on two feet, your center of gravity falls in the middle between your feet. If you want to balance on one foot, your weight has to shift. You can’t just pick up one foot. To achieve this weight shift, you can lean your trunk, which will allow you to balance, but it is not a stable or powerful position. If you shift your pelvis to the side of the stance leg, you can accomplish the requisite weight shift AND place your body in a position where muscles are engaged and ready to roll .
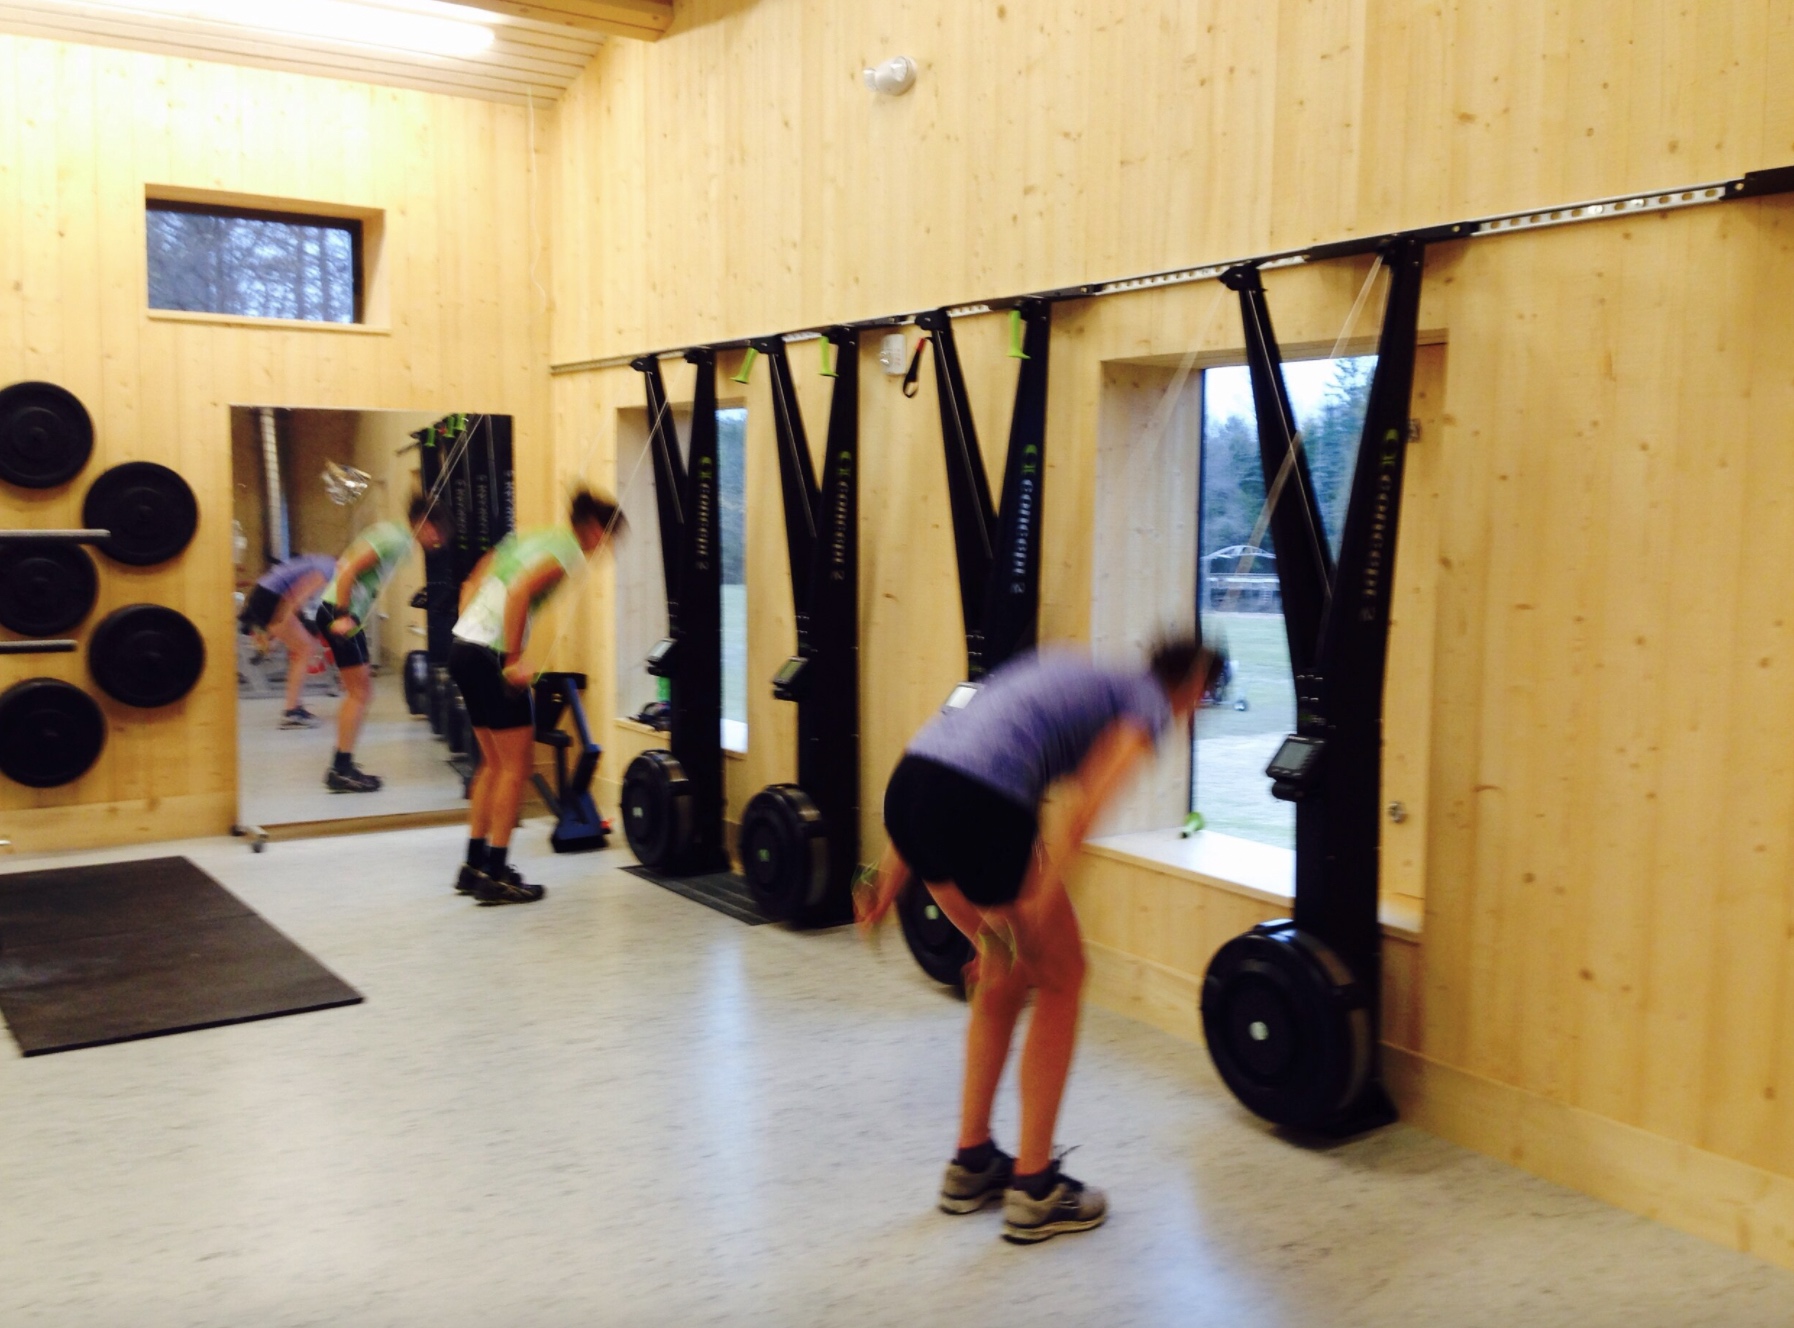
    The skiers in this video are fine examples of appropriate, hip-centric weight shifts. Notice how the upper body stays very quiet and still. There is no side to side movement. The pelvis, however, can clearly be seen moving side to side to move the skier’s center of gravity fully over top of the glide ski.

    This is all easier said than done. Go stand in front of a mirror — a bathroom vanity mirror is fine because you only need to see your shoulders. Balance on one foot. Do your shoulders stay level? Now move the opposite leg to the side and back a few times. Are your shoulders still level? If they are not, then it’s unlikely that you are shifting your weight appropriately. If you are struggling with balance on a smooth, flat floor, you can appreciate the challenge of finding stability while gliding down an undulating track on a toothpick of a ski.

    Another major component of single limb stability is the coordination of joint flexion at the hip, knee, and ankle. Anyone who’s had a ski lesson has heard the phrase nose, knees, and toes —  or that the shin and trunk should be parallel. These cues are all about getting the ankle, knee, and hip to flex together. The goal is to put the body in a position that is both inherently stable due to muscle activation and preloaded for propulsion. This is what I’ll be referring to as the basic shape.

    Norwegian biathlon star Johannes Thingnes Bø models “nose, knees, toes.” Notice that the shin and trunk (green lines) are parallel. (Photo: Ned Dowling)

    The next experiment requires a partner. Balance on one leg staying very upright with your knee and hip straight. Have your partner push you (gently!) from each side. Did you maintain your balance? Now aim for the nose, knees, toes position and have your partner push on you again. Which position was more stable? (If you had difficulty finding this position, there will be more cues with the exercises below.)

    If the distribution of foot pressure and coordinated joint flexion are two major components of single leg stability — which has been shown to be a major component of skiing efficiency — then it seems highly rational that we should strive to perfect these traits on dry land before we expect ourselves to do it on skis (including and arguably even more so on rollerskis). We must be able to form the basic shape.

    Adequate strength of the gluteal muscles is a prerequisite. If you don’t already incorporate glute exercises in your strength program, you can get some great ideas from previous FasterSkier articles here and here.

    Foot and ankle mechanics are also a primary contributor. In the basic shape, we are asking the ankle to flex forward at the same time that the foot has to accept our full weight. Insufficient or excessive flexion, or poorly controlled mobility through the foot and/or ankle can force the tibia (shin bone) to rotate inward, taking the knee with it. Lack of glute strength and control can have the same effect from the top down. With this extraneous  motion coming from either direction, the result is an increased valgus (medially-directed) force on the knee, which equates to increased loads in both the tibiofemoral and patellofemoral joints. Clinically, this is the most common cause of knee pain with Nordic skiing.

    If the prescription for controlling top-down motion is glute strength and coordination, the bottom-up is addressed through strength of the muscles in the foot and ankle. Conveniently, these can often be addressed by simply working on single limb stability — as long as you pay attention. Quality control is mandatory!

    A note on orthotics: In many circles, custom orthotics have fallen out of vogue especially since studies like this one have found them to be no better than exercise at helping knee pain. But the demands on the ankle joint are quite different in Nordic skiing than with walking or running, which are more commonly studied. Skiing generally requires a much greater amount of dorsiflexion. As mentioned above, we want this dorsiflexion to happen without internally rotating the tibia. The addition of external support to the foot has the potential to control this aberrant motion. I am a strong proponent of at least some upgrade of insoles in ski boots (and cycling shoes for the same reason). Most stock insoles are terrible, even the ones that came in my very expensive carbon boots. Out-of-the-box options from Superfeet, Sole, Powerstep, and Curex are all quite good and far less expensive than custom. For some, these might not provide enough support and custom orthotics with a strategic build up of additional material would be better. 

    How do you know? A quick test I do in the clinic is to have my patient balance and do a couple of single leg squats while barefoot. Then I have them do the same thing with a more supportive insole. Then I place a piece of ¼” (4mm) thick folded cardboard under the insole at the ball of the foot and have them repeat the balance and squats. I’m looking for whether they become “easier,” “less painful,” or appear better controlled to my eye. If the extra material under the insole made for improvements, then we talk about custom orthotics. If it made no difference, then I just advise an upgraded insole. Ultimately, we are looking to improve both the alignment of the knee as the ankle dorsiflexes AND improve balance.

    All of that said, here are my top three exercises/drills for ski-specific balance–the basic shape. Ideally, these are done barefoot, without the additional support of an insole and shoe (opposite of the previous conversion), so the muscles have to work harder and get stronger. The basic cues are the same for all three:

    • Tripod Foot: A tripod gets its stability from three legs and we want three primary pressure points on the foot–the ball of the foot, the pinky side ball of the foot, and the heel. Weight should be slightly biased forward off of the heel. The toes should be on the floor but relaxed and not gripping for dear life.
    • Nose, Knees, Toes: My preferred way of thinking about this is if snot is dripping from your nose, you want it to land on your shoe not down the front of your shirt. Bend at the ankle, knee, and hip to accomplish this. 
    • Weight Shift: comes from the pelvis/hip not leaning the trunk. Park yourself into the hip. If your glutes aren’t burning, you’re doing it wrong (or the exercise is too easy).
    • Posture: neutral spine is the goal. Forward trunk lean occurs through the hips, not the spine.
    • Forward Gaze: Avoid staring at your feet. You’ll need to keep your head up to look down the track while skiing, so best to get used to it in training. It will also remove some visual dependency and help with maintaining a neutral spine.
    • Quality vs Quantity: the emphasis is on how you do the exercise, not just going through the motions. 
    The author models “the basic shape”.

    Start by forming the basic shape. If this is challenging to maintain, then do not progress until it becomes natural and thoughtless.

    Exercise #1: Step Ups

    Stand sideways on a step (preferably the bottom, not top, step). Lower your outside foot towards the floor. As you lower, you should be going into the basic shape. Return to the tall starting position. Don’t worry about trying to fully touch the floor–that’s not the goal. The goal is to move up and down, in and out of the basic shape. For added challenge, hold a dumbbell in the outside hand. 2-3 sets of 10-15 reps should be adequate to bring on some fatigue and challenge your balance.

    Exercise #2: Single Leg Series with Band

    Loop a long exercise band around one ankle and face the anchor point of the band. Than, assume the basic shape standing on the unbanded leg. While maintaining the basic shape, pull straight back against the band to bring the foot in line with the standing leg, then follow through to kick the foot a few inches behind. Turn your body 90 degrees in either direction and repeat the process; extending the banded leg outward to work the gluteus medius muscles of the outer hip, or pulling the banded leg toward the standing leg to stimulate the inner adductor muscles. Ultimately, you will face four different directions but the force against the band is always in direct opposition to the anchor point of the band.

    If you can only source a “mini-band” loop, put it around both ankles and skip the pulling-in motion. A little resistance goes a long way with this exercise. Aim to perform 10-15 repetitions in each direction and do two laps on each leg.

    Exercise #3: Lateral Hops

    Form the basic shape on your right leg. Step onto the left leg, shifting your weight from the pelvis, and again form the basic shape. Progressively increase the distance between steps, turning it into more of a sideways hop than step. Keep the unloaded leg extended to the side as if skiing — do not let it flag behind the stance leg unless you are a speedskater.

    Keep it honest: make sure you are sticking the landing and holding your balance for a second or two on each leg before pushing off to the next side. This is meant to be a balance exercise, not plyometric strength work. The next progression is to hold a resistance band anchored from the side. I prefer to base this exercise on time (1-2 minutes) vs repetitions so there’s no question of whether that botched one was good enough to count.

    Notably absent from this article is the neurological component of balance. Many of my PT colleagues would absolutely berate me over this; however, I wanted to stick to the basic kinesiology and this article is long enough already. The brain receives massive amounts of information from vestibular, neural receptors in joints and soft tissue, and vision. In fractions of a second, it processes this information and directs muscles to act. If any link in that system is compromised, so too is your balance. If you think about the difference between skiing on a sunny, bluebird versus flat light or a storm, you can quickly appreciate how vision affects balance. There are certainly ways to challenge and train these systems, but that is beyond the scope of this article. However, an excellent way to progress any balance exercise is to do it with your eyes closed. 

  • Building a Better Skier Part 2: The Spine, When to Move it, and When to Keep it Still

    Building a Better Skier Part 2: The Spine, When to Move it, and When to Keep it Still

    Finland’s Krista Pärmäkoski racing during the 2021 Tour de Ski. (Photo: NordicFocus)

    This is Part 2 of a series delving into how biomechanics and movement patterns affect skiing technique. If you haven’t already, start with the introduction and Part 1, which introduces the concept of a neutral spine posture.

    There are many ways to conceptualize biomechanics, but they all need a starting place. If we think about ski technique, where do we want to start? On the glide leg? With the poles? At the hips? For this series, I have opted to start with the core and work outward. I could have started with the foot and moved upward; however, I see posture as an integral part of any movement. If the posture is compromised to begin with, then that deficit permeates the activity. 

    As was emphasized in Part 1, posture exists on a bandwidth of acceptability–everyone is a little different. But postures that fall outside of the bandwidth, especially when occurring within a dynamic activity like cross-country skiing, compounds load on the body. In the best case scenario, this increased load is inefficient and bleeds power. Worst case scenario, the additional load can exceed the body’s tolerance and lead to musculoskeletal injury.

    And yet the spine does move. Perhaps one of the best examples is the thoracic rotation that occurs with running. The shoulders do not stay pointed straight ahead. As the right leg and left arm swing forward (with the left foot on the ground) the shoulders are going to rotate to the right. This should be a product of rotation in the thoracic spine. If the thoracic spine has limited mobility, the motion will occur elsewhere, most often in the lumbar spine which has less motion available and will likely be less tolerant of this load. A case in point may be this recent study which found that the addition of thoracic mobility exercises decreased the incidence of low back pain in cross country skiers. 

    If you’re not already, sit with a neutral spine posture. Cross your arms with hands-on opposite shoulders. Rotate your body to the left and to the right. Make a mental note of how these movements felt. Now let your back flex forward in a slumping position. Try the same rotation to the left and right. I suspect they felt different. When the thoracic spine is flexed, its ability to rotate is decreased.

    Use it or lose it. Our bodies are use it or lose it machines. If we do not stretch a muscle to its full length, it will tend to shorten. If we do not move a joint to its end range of motion, it will tend to stiffen. As we get older, this becomes even more pronounced. If you are of Masters age, you should probably think of stretching and mobility exercises as more about maintaining what you have versus expecting to gain flexibility. The older we get, the less pliable our bodies become. But there’s a lot to be said for maintenance.

    Here are my three favorite thoracic mobility exercises – (aim to do these daily–1 or 2 minutes on the foam roll, 10x to each side with the rotation).


    Foam roll thoracic extension: lie on your back with a foam roll perpendicular to your spine. Support your head with your hands. Drop your shoulders towards the floor. Pause here for a few seconds then return to your starting/neutral position. Scoot on the floor so the foam roll moves up your spine. Repeat the extension motion dropping the shoulders towards the floor. Continue this process until you have worked the length of your thoracic spine. Avoid going into the lumbar spine as the fulcrum of the foam roll tends to be too sharp. On the upper end, once the foam roll is under the shoulder blades, it’ll be tough to get much motion. This exercise can also be done with an exercise ball.


    Book openings: Begin lying on your side with your knees bent and hands behind your head. Rotate your trunk like you are trying to get the top shoulder down to the floor. Pause here for a second or two and return to the starting position. This should be done on both sides.


    Lower Trunk Rotation: Lie on your back with both knees bent. Cross one leg over the other. Let the legs drop towards the floor to the side of the top leg. Pause here for a few seconds and return to the starting position. Do this on both sides.


    Stability could be defined as the opposite of mobility. If we are striving to maintain available mobility of the thoracic spine, perhaps it makes sense that we are striving to maintain stability at the lumbar spine. Anatomically, the body is well equipped to stabilize the lumbar spine. We have multiple layers of abdominal and back muscles that create a stable platform for the arms and legs. While the lumbar spine is lacking in rotary motion, it has quite a large range of available motion for bending forward, backward, and to the sides. Depending on the activity, this available motion needs to be either locked out like keeping a rigid trunk with skating V1 or well-controlled while bending over to put on your socks.

    If we are working under the assumption that neutral spine is the ideal, then it makes sense that our core strengthening or stability work should be done in neutral spine. Traditional sit-ups that involve considerable lumbar flexion are great for building those six-pack abs that look good on Instagram, but the exercise itself only contributes to a greater tendency to over-flex the spine during activity. “Flatten your back into the floor” is a frequent cue with core exercises. While this cue, and the associated posterior pelvic tilt, is effective at recruiting abdominal muscles, it also has the effect of training the body to rely on a flexed position for muscle activation. 

    Lie down on the floor with your knees bent and feet on the floor. Your lumbar spine will now be in its neutral position. If you slide a hand under your low back, your hand will likely have a bit of wiggle room between the floor and your back. This is the natural lordotic curve, and we want to maintain this during exercise (and activity). It’s easy to feel the increase in pressure on your hand when you tighten your abs and flatten your back. Conversely, if you tilt your pelvis in the other direction, arching your low back, you will have much more wiggle room. This excessive lordosis tends to be less stable since the abdominal muscles are in a lengthened, disadvantaged position for dynamic stability with much of the burden placed on the static stability of the joints.

    If you had a hard time controlling movement or differentiating between the flat, neutral, and arched positions, the following exercises can be helpful to train your awareness and coordination.


    ***

    Lumbar spine proprioception


    Pelvic tilts: Lie on your back with both knees bent. Start by trying to tilt your pelvis towards you. Think of trying to flatten your low back into the floor or of shortening the distance between your ribcage and pelvis. Now tilt the pelvis in the other direction like arching your back away from the floor. These motions should be isolated at the pelvis and lumbar spine–your legs shouldn’t feel like they are doing any work.


    Cat/Cow: This involves the same pelvic tilt motions but without the feedback of the floor. Again, the idea is to isolate the motion at the lumbar spine not by arching the upper back.


    A quick Google search for “core exercise videos” brings up over 66 million results. Clearly, we are not lacking in the number of possible exercises. But what about quality? In the treatment of chronic low back pain, there is no best exercise. From the perspectives of performance enhancement and injury prevention, while there is an argument for simply being strong, there is perhaps a better argument for incorporating exercises that help the body meet the specific demands of the activity or sport. If good ski technique demands maintenance of a relatively neutral spine, then exercises should be performed in a neutral spine. If the sport includes load through the upper extremities, like poling with skiing or weighting the handlebars with cycling, then core exercises that include weight-bearing through the arms should be included. Skate skiing places a large rotational force through the core; thus we ought to have exercises that train the body to counter-rotation. Conversely, running and classic diagonal stride involves thoracic rotation so it makes sense to train the body to perform lumbar stability and thoracic rotation simultaneously. 

    Here are my Top 3, best-bang-for-the-buck-exercises in each category. Remember, the goal is to maintain neutral spine. If you are unable to control the motion, then the exercise represents too much resistance/load and needs to be regressed. These are quality-intensive exercises. A reasonable program would include 2 or 3 sets of 5 to 10 repetitions (depending on fatigue) of each exercise. Doing the routine twice a week should be adequate.


    ***

    Stability exercises: these will challenge your ability to maintain a neutral lumbar spine


    Femur arc progression: Begin by lying on your back with knees and hips bent at 90°. Your back will be in its neutral position, which you are striving to maintain (there will be a little wiggle room between your low back and the floor–the amount will vary by the individual but the goal is the same). The basic femur arc is performed by lowering one foot to the floor while keeping the knee bent at 90°. The motion is isolated at the hip. There should be no motion in the low back–it will have a tendency to want to arch away from the floor as the leg goes down. Return to the starting position and repeat on the other side. Continue alternating legs. Progressions include straightening the knee as the leg lowers, lowering both legs together with bent knees, lowering both legs together with straight knees. 


    Mountain Climbers: These can be done with frisbees on carpet, socks on hardwood or tile, or with a TRX. The goal is to move alternating legs back and forth with no motion in the low back. There will be a tendency to flex as you pull a leg underneath you. This should be controlled by the core but also recognize that if you are trying to pull the leg through too far, you will run out of hip range of motion and be forced to flex the spine.


    Roll Out: Start on hands and knees with your hands on frisbees or a laminated placemat on the carpet, a towel on hardwood, TRX, or an old-school ab roller. The roll/slide-out motion will be a combination of shoulders and hips, but the spine stays in its neutral position.


    ***

    Anti-rotation exercises — as the title would imply, the resistance will try to twist your spine and your goal is to fight it


    Plank with Shoulder Tap: From a straight arm plank with shoulders, hips, and knees in line, tap a hand to the opposite shoulder. There will be a bit of a weight shift that needs to happen to maintain stability, but this should be in the form of a side-to-side movement of the pelvis, not a rotation. This can be made easier by doing from your knees. Make it harder by substituting the shoulder tap with a dumbbell row. 


    Paloff Press: The Paloff Press is a great lesson in the physics of levers. Stand using both hands to hold a resistance band or handle from the cable column weight machine. Push your hands straight out in front of you. As your arms straighten, the length of the lever increases and the resistance will exert more rotational force. Fight the twist. For more of a challenge, other than just increasing the resistance, stand with your feet together or in a lunge (with the band coming from the opposite side of the front leg).


    Lunge with unilateral shoulder extension: Go into a static lunge with a resistance band in the opposite hand of the lead leg. Keeping the elbow straight, pull on the band until your hand is just past your hip. This can also be done with a cable column weight machine.


    ***

    Combination lumbar stability with thoracic rotation: simply put, the lumbar spine stays still while the thoracic spine rotates 


    Seated Unilateral Row: This is a twist (sorry, bad pun) on a standard one-arm row. Sit on an exercise ball or chair facing the resistance band’s anchor. As you pull on the band, bend your elbow so your hand aims for the side of your ribcage, and rotate your chest and shoulders towards the band. Your butt should stay firmly planted and not rotate.


    Lunge Rotation with Band: Stand with the resistance band coming from one side. Go into a lunge with the opposite foot forward (band from the right = left foot forward). Keep your hips pointed forward while your upper body rotates against the resistance. 


    Seated Rotation (aka Russian Twist): This exercise gets a bad reputation because it’s very easy to do incorrectly, potentially placing a lot of load on the lumbar spine. It is often done in a V-sit position (like the photo but with the feet off of the floor), which is very difficult to maintain without collapsing into lumbar flexion. Add the potential to rotate through the lumbar spine and the combined motions create high loads. But we’re going to keep the lumbar spine neutral and isolate the rotation to the thoracic spine. The key points are attaining and maintaining a neutral spine while sitting with your knees bent and feet on the floor. Think about the rotation coming from the shoulders. Your belly button should stay pointed straight ahead. You can start without weight and progress to a medicine ball, dumbbell, or resistance band coming from the side. 

    Notably absent in this list are exercises that target the glutes. As the primary stabilizers of the hip joint, the gluteal muscles should not be ignored in any “core” routine. However, for the sake of organizing this series, the glutes will be addressed in Part 3 on single-limb stability. If you want a head start, this Faster Skier article includes some excellent exercises. 


  • An Intro to Building a Better Skier

    An Intro to Building a Better Skier

    Building a Better Skier is a multi-part series born from the inquisitive mind of a physical therapist and late-blooming Nordic skier. The objective is to explore how biomechanics and movement patterns affect skiing technique, and more importantly how you can apply these concepts to improve your skiing. To cover this topic thoroughly would likely require a hefty book, so apologies in advance if these articles lack depth or specificity. Please feel free to email the author with any questions: ned.dowling@hsc.utah.edu

    Many in the sport look to Swedish speedster Linn Svahn (Bib 14, here racing in Davos back in 2019), as a model of solid form and efficient skiing. (Photo: NordicFocus)

    Cross country skiing is hard. Very hard. Not only does it require a well-tuned cardiovascular engine, but technique can make the difference between a Ferrari and a Ford. Whether you’re a podium contender, looking to get some off-season training, or simply schussing about, we are all looking to propel ourselves efficiently. 

    Technique in any sport exists on a bandwidth. Everyone skis a little differently, just like everyone runs or swings a tennis racquet in their own personal style. If the technique falls within the bandwidth, where it is accurate, powerful, and efficient, then all is good. But when it falls outside of the acceptable range, the cost becomes prohibitive. From a performance perspective, this means bleeding power. From an injury prevention side, this equates to increased load on the system

    So what do we do when that efficient technique evades us? When balancing on the glide ski seems like a tightrope over the Grand Canyon? When that elbow angle never seems to satisfy your significant other? If you worked on it all winter and it still didn’t click, then it might be time to look at this technique thing a little differently. 

    A while back, FasterSkier interviewed Canadian World Cup skier Katherine Stewart-Jones and her coach at the time, Erik Bråten, to discuss the apparent improvement in Katherine’s technique, which led to some of the best results of her career. Sadly, they did not disclose any magic bullets or secrets to speed. However, there was a very large pearl of wisdom:

    Katherine Stewart-Jones racing on the World Cup in 2020. (Photo: Nordic Focus)

    “I took her off the skis as she could not really handle the movements I was asking her to do. And so until she was able to do that without skis, I think, it is unfair to put her on skinny skis at 30 K an hour and ask her to do it.”

    When an athlete has the physical capacity to perform the technique or movement pattern but lacks the understanding or knowledge, this is called a technical deficit. This deficit often will respond to instruction, cues, and coaching. But what if one understands what is being asked but the body won’t cooperate? This is considered a mechanical issue: when a physiological deficit like balance, stability, mobility, or coordination is preventing the appropriate execution. All the cues in the world won’t help if the athlete is physically incapable of moving as desired. 

    In Katherine’s case, it sounds like she had issues with both the mobility and proprioception (awareness of your body’s position and movement) of her spine. The posture she held, without the ability to correct it on her own, put her in a compromised position which led to a loss of power through her skis and poles. With the help of a physical therapist, she was able to improve these impairments in dryland training before progressing back onto the snow. With her mechanical deficits improved, she had the best race results of her professional career.

    I am not a coach or ski instructor and as a significant other I try to keep my mouth shut. I am not here to offer yet another “Hips High!” cue to overcome a technical deficit. As a physical therapist who loses sleep at night analyzing Nordic skiing biomechanics, I strive to help the readers (and my patients) overcome mechanical deficits. In what will be a series of conversions on the topic, Part 1 will be a deeper discussion about posture. Part 2 will go into more detail about the spine, when to move it, and when to keep it still. Part 3 will delve into single-limb stability for both glide and kick. Part 4 will offer advice on shoulder mechanics for powerful yet healthy poling.


  • A PT in Norway: By Ned Dowling

    Ned Dowling working on Sadie Maubet Bjornsen. (Photo: Ned Dowling collection)

    “Get whatever you want. I’m buying.”

    “It’s ok. I’ve got a card with me.”

    “No. You’re over here working for us. The least I could do is buy you a coffee and a bun.”

    Conversation over. Jessie Diggins bought my cinnamon bun and cappuccino. The same Jessie Diggins who won Gold at the last winter Olympics and is a regular on World Cup podiums just refused to let me buy my own snack at the café stop while skiing in Sjusjøen, Norway. If I didn’t already feel accepted, I did then.

    The email from U.S. Ski and Snowboard had arrived two months earlier. The Physical Therapist who was scheduled to work with the U.S. Cross Country Ski Team during races in March was unable to travel. Would I be able to cover for her? My jaw dropped. My pulse quickened. I’d just been asked to travel with the U.S. Ski Team to Norway—the Mecca, the Motherland. 

    I didn’t sleep a wink that night.

    This was not my first gig as a PT working with elite athletes. I’d had a stint as a part-time soigneur with a U.S. based, pro cycling team. In French, soigneur means “helper.” In every other language, it means “worst job in sports.” The hours are long, the tasks are menial, and the actual “physio” role is often limited to recovery massages (aka Rubs). I found myself exhausted, unappreciated, and wondering why I’d left my “easy” PT job in the clinic to work twice as long for half the pay. Like most experiences that become teachable moments and help us grow in life, my time as a soigneur was the sort of arduous misery that, once survived, opened doors to better things. While grateful, I was still more than a little burned.

    The burned feeling was felt even more by my wife. I’m pretty sure she could still smell the smoke when I asked her how she felt about a redo in Norway for two weeks. During my time with the cycling team, while I was off babysitting professional athletes, she was single-momming it with our toddler son. And she was not happy about it. Proving how wonderful she really is, my permission slip to Norway was signed. The other signature required was from my boss at work. That proved to be easier than imagined as my manager in the PT clinic at the University of Utah’s Orthopaedic Center gave me her full support. Permission granted, passport renewed, and official team logo wear issued, I was ready for Norway. 

    But I still wasn’t sure if this was going to be heaven or hell.

    I was used to communication from the cycling team management being brief, procrastinated, and severely limited to an “as needed” basis. Don’t call me, I’ll call you … maybe, sometimes a couple of days before you deploy. So I was quite surprised when I started getting timely and detailed emails from the ski team coaches, which included sentences like “Looking forward to working with you Ned!” and “Thanks again for joining us.” Maybe these folks are going to be different. Maybe they know how to feed themselves and do their own laundry. Maybe I won’t be working 14 hours a day with my face coated in a mixture of sweat, sports drink powder, and massage lotion. Maybe I’ll be appreciated. 

    After 21 hours of travel and 21 minutes of sleep, my train pulled into Lillehammer, site of the 1994 Winter Olympics. I had arrived! And I was greeted trackside by Matt Whitcomb and Jason Cork, two of the ski seam coaches. I did not have to send a text and wait for a ride. I did not have to catch a bus to some hotel I couldn’t pronounce. I was riding shotgun while Jason was wedged in the back of the van, imprisoned by duffel bags and pole cases. Severely jet-lagged, I tried to make sense of my surreal surroundings as Matt briefed me while we ascended the winding road to the cross-country heaven that is Sjusjøen.  

    The plan for the next two weeks looked something like this: The first week was to be a “training camp” for four of the top skiers. Then we would head to Drammen for the famous city sprint. After that would be the even more famous World Cups at Holmenkollen—the Super Bowl of cross country ski racing, typically attracting over 50,000 fans.

     As all plans are subject to change, so did this one. Multiple times. But one thing stayed consistent—everyone’s positive attitude. 

    That first week turned out to be more about recovery than training. The athletes in Sjusjøen were coming off of Ski Tour 2020, a new addition to the World Cup calendar with six races in nine days and no shortage of travel in between. Exhausted was an understatement. I felt like a jet-lagged zombie, but I met the cast of Night of the Living Dead when Simi Hamilton, Sadie Maubet Bjornsen, Jessie Diggins, and David Norris arrived at the cabin. We were surrounded by a few hundred kilometers of perfectly groomed ski tracks literally right outside of our door and not a single one of them wanted to ski. At least for a day. While I did my best to resuscitate their muscles and joints with daily manual therapy treatments, they slowly returned to the land of the living. 

    The silver lining for me was they all skied slowly enough that I could keep up. The days began to take on structure for me: wake up at a normal time (versus the jet-lagged pattern of undersleeping one night then oversleeping the next), eat, ski, eat, treat athletes, eat, sleep. Their days resembled mine except for being on the other side of the treatment table. Remarkably to me, the athletes and coaches took turns grocery shopping, cooking meals, and doing dishes. Everyone even did their own laundry! I was so used to working in the world of cyclists where “self-sufficient” wasn’t even in their dictionary. (We used to have a duffel bag labeled “DA” that was taken to the start of every bike race. It was full of extra jerseys, bib-shorts, and socks for the inevitable rider who forgot something. “DA” stood for Dumb Ass.) But these skiers were elite athletes, winners of medals, the best in America, and yet they could take care of themselves. 

    Despite the fatigue, a respiratory infection that was eventually passed to all of the athletes, a couple of days with sideways blowing snow, barley flour (“that’s all the grocery had!”) that left the baked goods flat as matzo, and the increasing presence of coronavirus in the news, the team just seemed to roll with the punches, make lemonade, and keep on keepin’ on.

    Just before we left Sjusjøen for Drammen, it was announced that, due to a lack of snow, the race would be moved to Konnerud. The race in Drammen is one of the coolest venues on the calendar with skiers sprinting up and down the main street through the old city center and around the Bragernes Church. Instead, it was moved to a small ski venue that had not hosted a World Cup caliber race since 2011. That 2011 race, it turns out, was the first World Cup start for both Jessie and Sadie. Now, veterans of the race circuit, they were excited for the venue change out of nostalgia, and the media loved the silver lining story.

    With the next day came the news that the weekend of races in Holmenkollen, the biggest party in Norway, would be closed to spectators due to fears over the spread of the coronavirus. While utterly disappointing, this made sense on two levels. For one, most of the 50,000 fans arrive packed like sardines in the trains from Oslo. Secondly, as pointed out by one of the health ministers, drunk people tend to make poor hygiene decisions. And the fans lining the Holmenkollen course are known to party.

    The next round of bad news came when Sadie, one of the top skiers and a front pack contender, did not start due to the bug that had made its way around the Sjusjøen cabin. (David would end up dropping from his race from the same cold). Saturday morning at the often raucous Holmenkollen began with an eerie quiet in the ski stadium and a little less chaos in the wax truck since only three women were starting the 30 k classic. 

    The race, at least on the front end, turned out to be one of the more exciting in recent years with the strongly favored Norwegian, Therese Johaug, getting caught and passed in the last kilometer by a young Swede, Frida Karlsson. 

    There was more bad news on the back end of the race as the American women struggled to keep pace  — like your local marathon hero trying to toe the line with Eliud Kipchoge. They fought hard for a grueling 90 minutes and finished at the bottom of the standings in what would turn out to be the last race of the season. But there was a remarkably bright spot in that foggy, ghost town of a ski stadium as I watched Kaitlynn Miller wait for Becca Rorabaugh. Exhausted and disappointed, they hugged and walked together past the podium presentation that was already starting. Seeing that display of kindness and friendship, my mood was immediately uplifted. I was proud to walk with these women, heads held high, past vacant looks from the media and other skiers. The results don’t always matter as much as the comradery of the team. 

    On Sunday, the men raced 50 k. At least those who finished. It was cold, wet, foggy, windy,  and – we’ll mention again — cold and wet. For over two hours the men slogged around an increasingly slow and sloppy track. David abandoned due to illness and anticipation of upcoming races that would eventually be canceled (had he known that he was in his last race of the season, he would have surely soldiered on). Ian Torchia dropped out after throwing up his breakfast and every ounce of liquid he tried to take in at the feed zones. Ben Lustgarten and Adam Martin persevered and crossed the finish line; both later suggested it was one of the more miserable races of their lives. 

    Ben Lustgarten (front) during the Oslo 50 k classic. (Photo: NordicFocus)

    At the team meeting that night, there might have been feelings of disappointment but no one showed it. As Matt spoke to the team, he emphasized that he was proud, not embarrassed, by the performances that weekend. There is no shame in showing up and trying your best, even if your best leaves you at the bottom of the results sheet. There’s much more to it than the results sheet. Gratitude and appreciation were reiterated with not a mention of anger or blame. 

    A rising tide lifts all boats is an idiom often used to describe a setting where one person’s success or positive attitude inspires others to push the limits of their own performance. Sadly there were no podium celebrations during my two-week stint, but that did not deter me from doing whatever I could to help, whether fetching coffee for wax techs (an errand that used to irritate the hell out of me when I was a soigneur) or tactfully (I hope) ushering Jessie away from admiring fans when she was needed elsewhere.

    And I was especially motivated to put my energy into the well-being of the athletes, simple as my role was: to methodically push on a joint here and a muscle there in hopes of giving the athletes the physical and psychological confidence to charge into battle with their skinny skis, carbon fiber poles, and Lycra armor. I’d like to think that I channeled my years of Physical Therapy practice and experience into their muscles, joints, and fascia to make them more resilient in the fight, whether that was 2 ½ minutes at full gas in a sprint or 2 ½ hours in the 50 k pain cave. My simple role was to help them perform at their best. 

    What I know I accomplished during these two weeks in Norway was an education in the meaning of team spirit. They cheered each other’s victories and consoled each other in defeat. They cooked each other meals and volunteered to do the dishes. They said thank you after every PT session. I would call my time with the U.S. Cross Country Ski Team a once in a lifetime experience, except that I want to go back next year.