From the FasterSkier archive — posts syndicated from athletes’ and coaches’ own blogs between 2004 and 2012, kept online as published. Current coverage is at fasterskier.com.

Tag: strength training

  • For Masters Skiers, More Recovery Is Not the Answer

    For Masters Skiers, More Recovery Is Not the Answer

    This article was made possible through the generous support of our voluntary subscribers. If you value coverage like this, please support FasterSkier with a voluntary subscription.

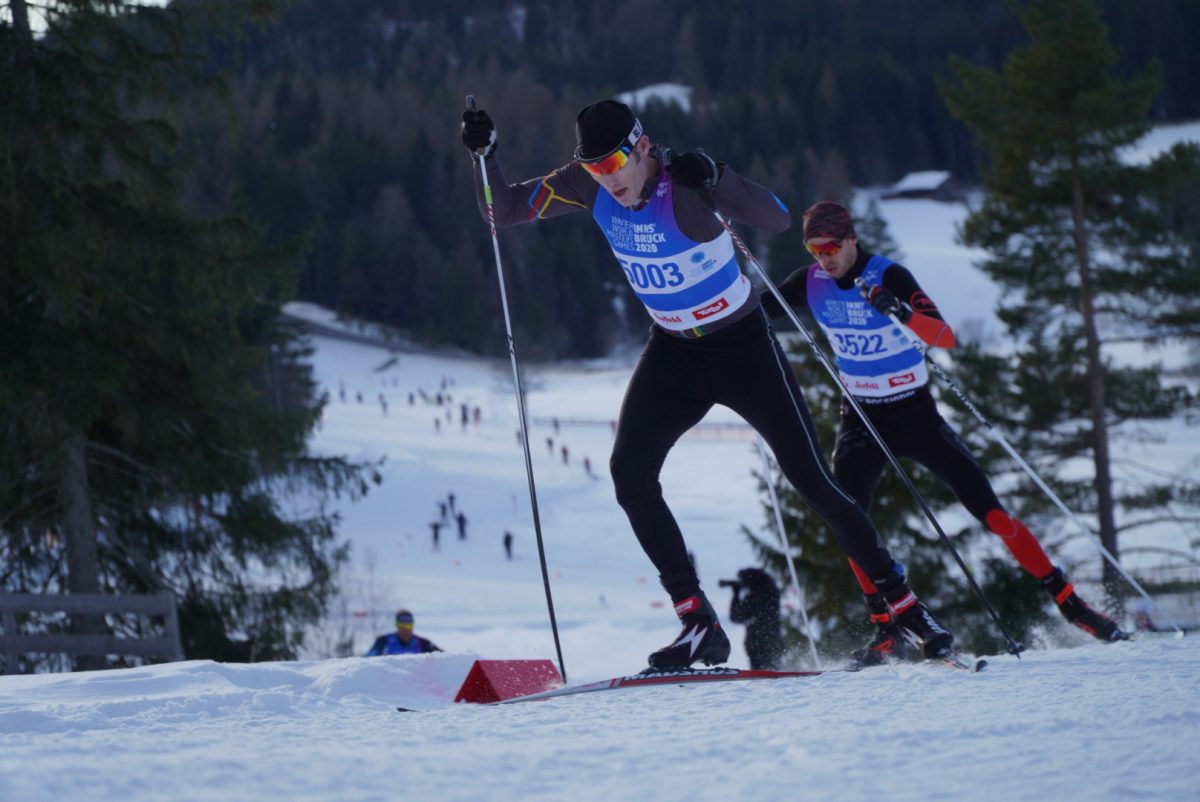
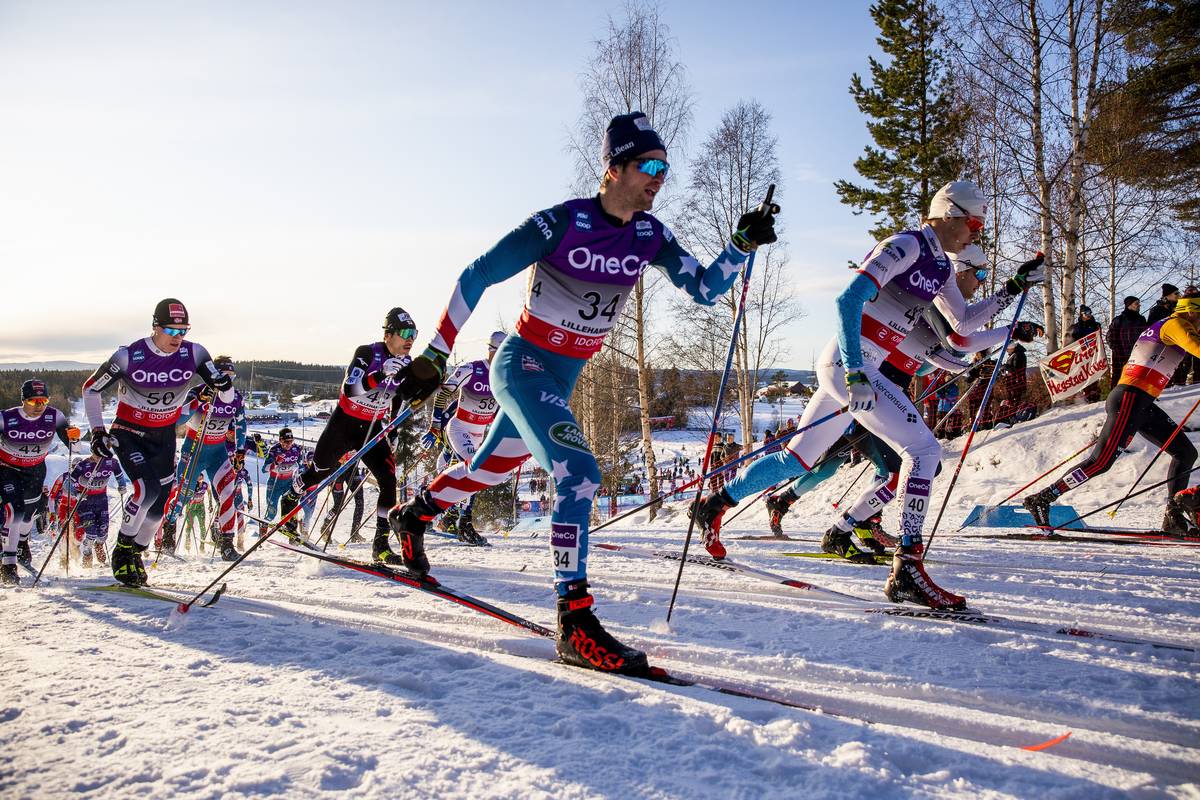
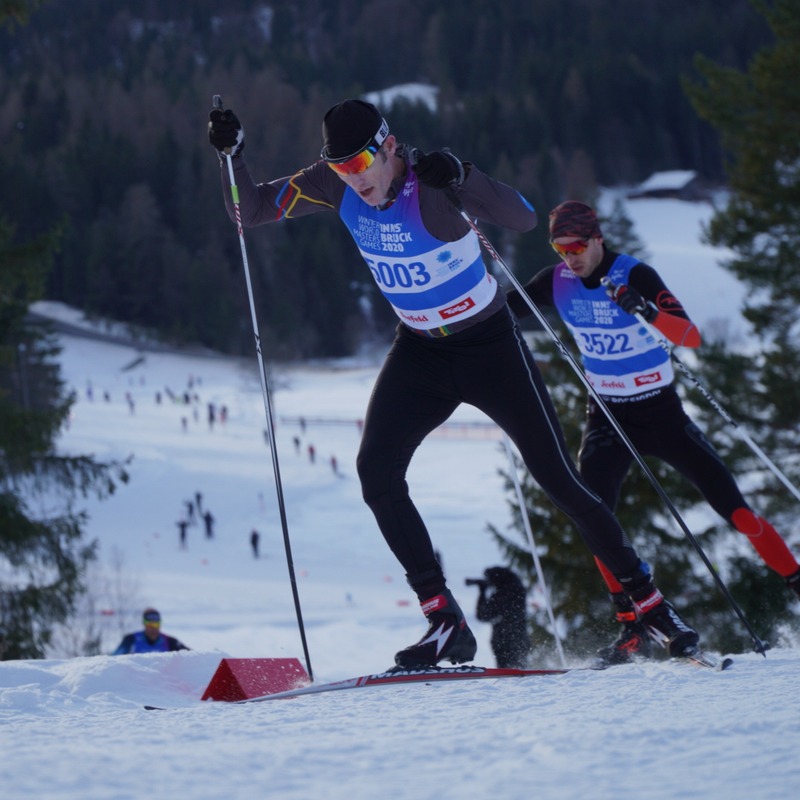
    Two masters racers skate up a rise in bibs from the 2020 Winter World Masters Games in Seefeld, Austria
    Tim Donahue racing at the 2020 Winter World Masters Games in Seefeld, Austria. Jim Galanes argues that the training masters skiers cut first is often the training that protects what aging takes away fastest. (Photo: Garrott Kuzzy / Lumi Experiences)

    There are two common problems I see in the masters athletes I consult with or coach. The first is the same problem we see with athletes of all ages: they tend to train “half hard” every day. Half hard, Zone 1 quickly drifts into Zone 2 or 3. The second is more specific to masters athletes. They try to follow a training plan that is basically a dumbed-down version of an elite athlete’s program.

    The first problem is relatively straightforward to address. Determine appropriate training zones and control the intensity of training more accurately.

    The second is more complicated. We need to determine the volume of training an athlete can recover from, adapt to and maintain consistently. Then we need to organize that training around the physiological capacities that are most likely to decline as we age.

    There is truth behind the conventional advice given to masters athletes. Recovery does change with age. Simply repeating the training we did at 25 or 30, or copying the program of an elite athlete, is never the best approach at 50, 60 or 70.

    But there is a problem with how we sometimes respond to that reality. Many of the training components we tend to remove as athletes age are exactly the components that address the physiological capacities declining most rapidly.

    The challenge of training as a masters skier isn’t simply figuring out how to recover better. It is figuring out how to provide enough training stimulus to maintain and improve the capacities that are naturally declining with age while still recovering sufficiently to adapt to the volume of training.
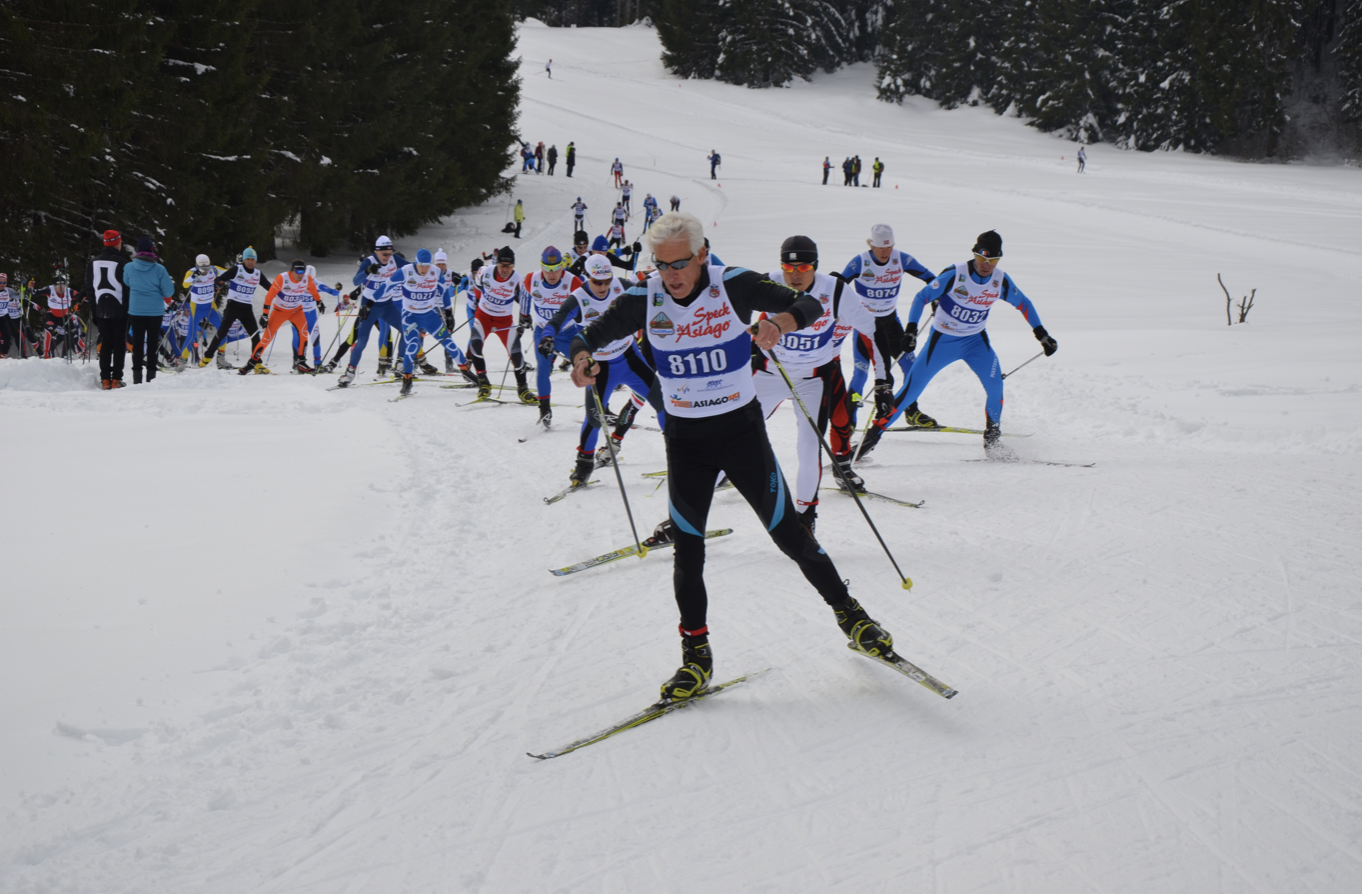
    A masters field skating up a snowy climb behind a white-haired leader wearing bib 8110
    A masters field on the climb at the 2014 Masters World Championship in Asiago, Italy. Endurance performance declines with age, but the individual components of performance do not decline at the same rate. (Courtesy photo)

    What Actually Changes with Age?

    We know endurance performance declines with age, but the individual components of performance do not decline at the same rate.

    One of the largest physiological changes is generally VO2max. Maximum heart rate declines. Muscle mass and maximal strength decline, both of which are important to maintaining aerobic capacity and skiing performance. Type II muscle fibers and explosive power become increasingly difficult to maintain.

    Meanwhile, exercise economy and the ability to sustain a relatively high percentage of VO2max can be reasonably well maintained in highly trained older athletes. That should tell us something about training.

    If these capacities decline at different rates, it doesn’t make much sense to treat them equally in training.

    There is a temptation as we age to gravitate toward the training we tolerate best. The problem is that the capacities we tolerate best may also be the capacities we are already preserving reasonably well.

    Training should not simply reflect what aging makes easiest to do. It must continue to address what aging is taking away. If VO2max, strength and power are among the capacities most vulnerable to aging, eliminating high-intensity and strength training in the name of increasing recovery may solve one problem while creating another.
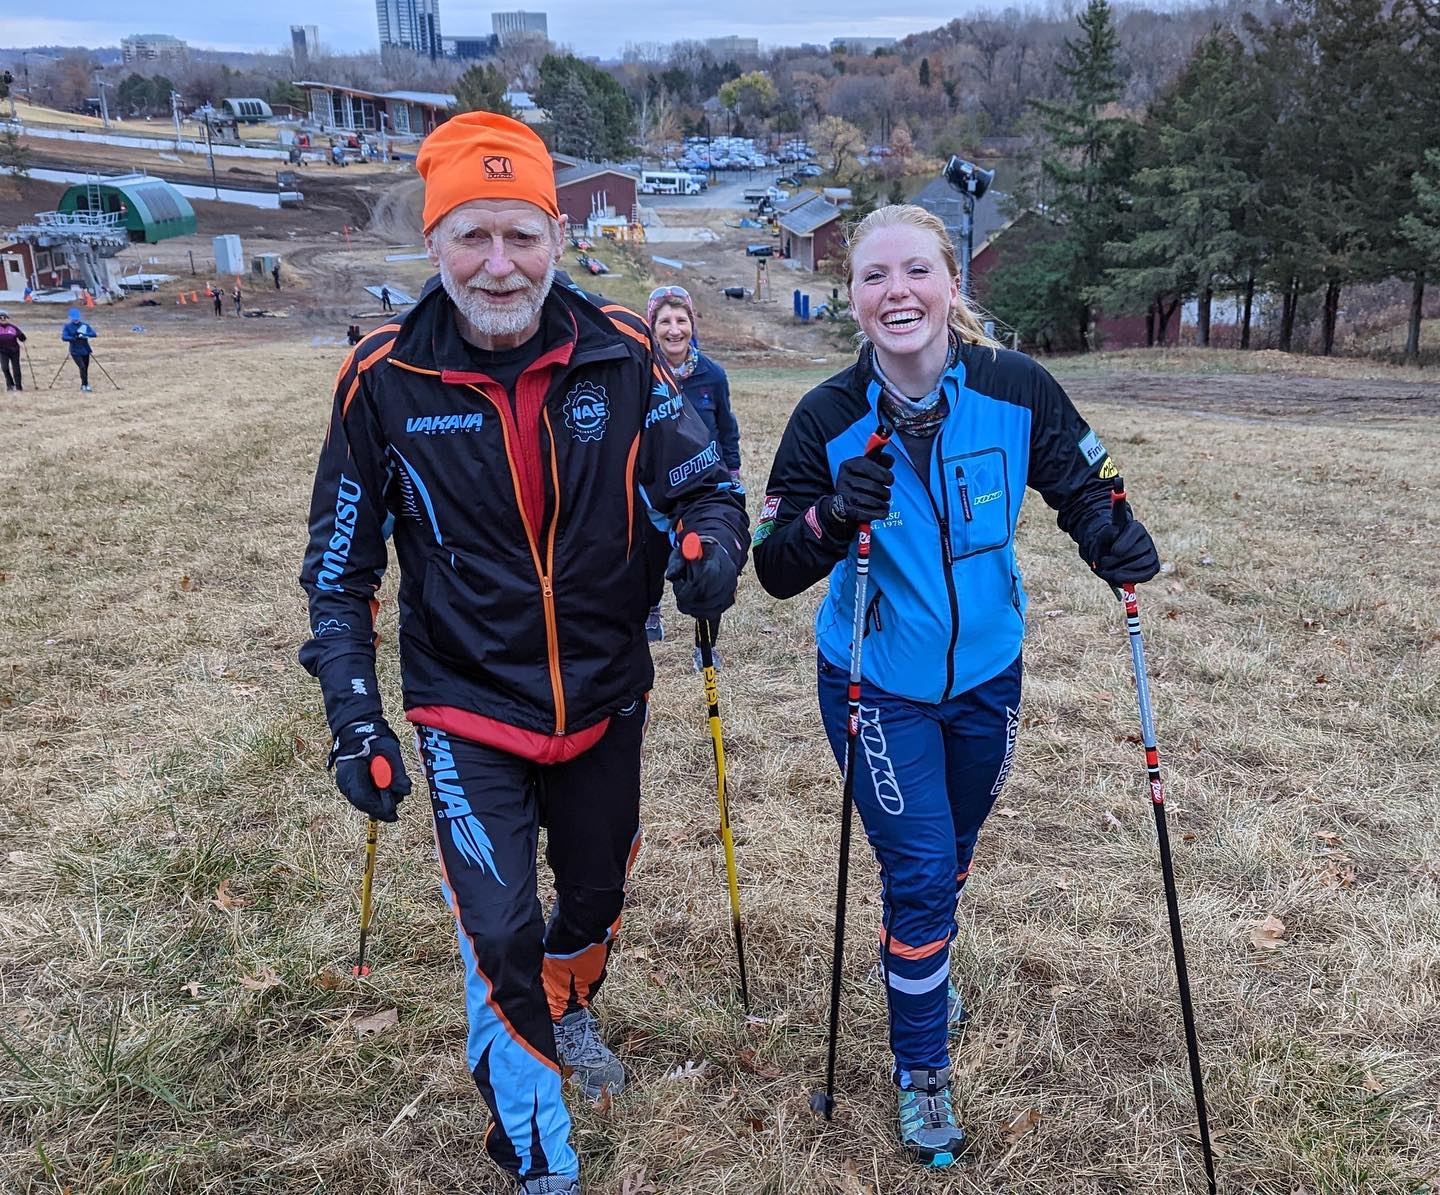
    An older skier in a Vakava race suit walks up a grassy hill with poles beside a younger skier
    Ahvo Taipale during a Vakava training session. Consistently accumulated aerobic volume remains one of the primary drivers of endurance adaptation, and one of the best defenses a masters skier has. (Photo: Finn Sisu)

    Maintain the Aerobic Volume

    There has been considerable emphasis in endurance training recently on large volumes of low-intensity training combined with substantial amounts of threshold and sub-threshold work.

    There are good reasons for that approach, particularly among highly trained elite athletes. But simply transferring that model to masters athletes can overlook the capacities most threatened by aging, particularly VO2max, strength and power.

    So how much Zone 1? How much threshold? How much VO2max?

    Those are important questions, but they can obscure something more fundamental.

    Consistently accumulated training volume remains one of the primary drivers of endurance adaptation. Masters athletes sometimes respond to aging by progressively reducing volume and attempting to compensate with intensity. There are limits to that strategy.

    Mitochondrial development, capillarization, fat oxidation, durability and the ability to maintain performance over long races are built largely through accumulated aerobic work. A two-hour easy ski is not interchangeable with a hard interval workout simply because the interval session produces more acute physiological stress.

    For a masters skier who has trained for decades, maintaining as much sustainable aerobic volume as possible may therefore be one of the most important defenses against declining endurance capacity.

    The key words are sustainable and consistent training.

    The volume has to be performed at the right intensity. It has to be something we can recover from day after day and, most importantly, adapt to over weeks and months.

    As we have written previously, occasional hero weeks followed by heavy fatigue and a subsequent reduction in training for recovery are less effective than weeks and months of consistent training at a sustainable level.
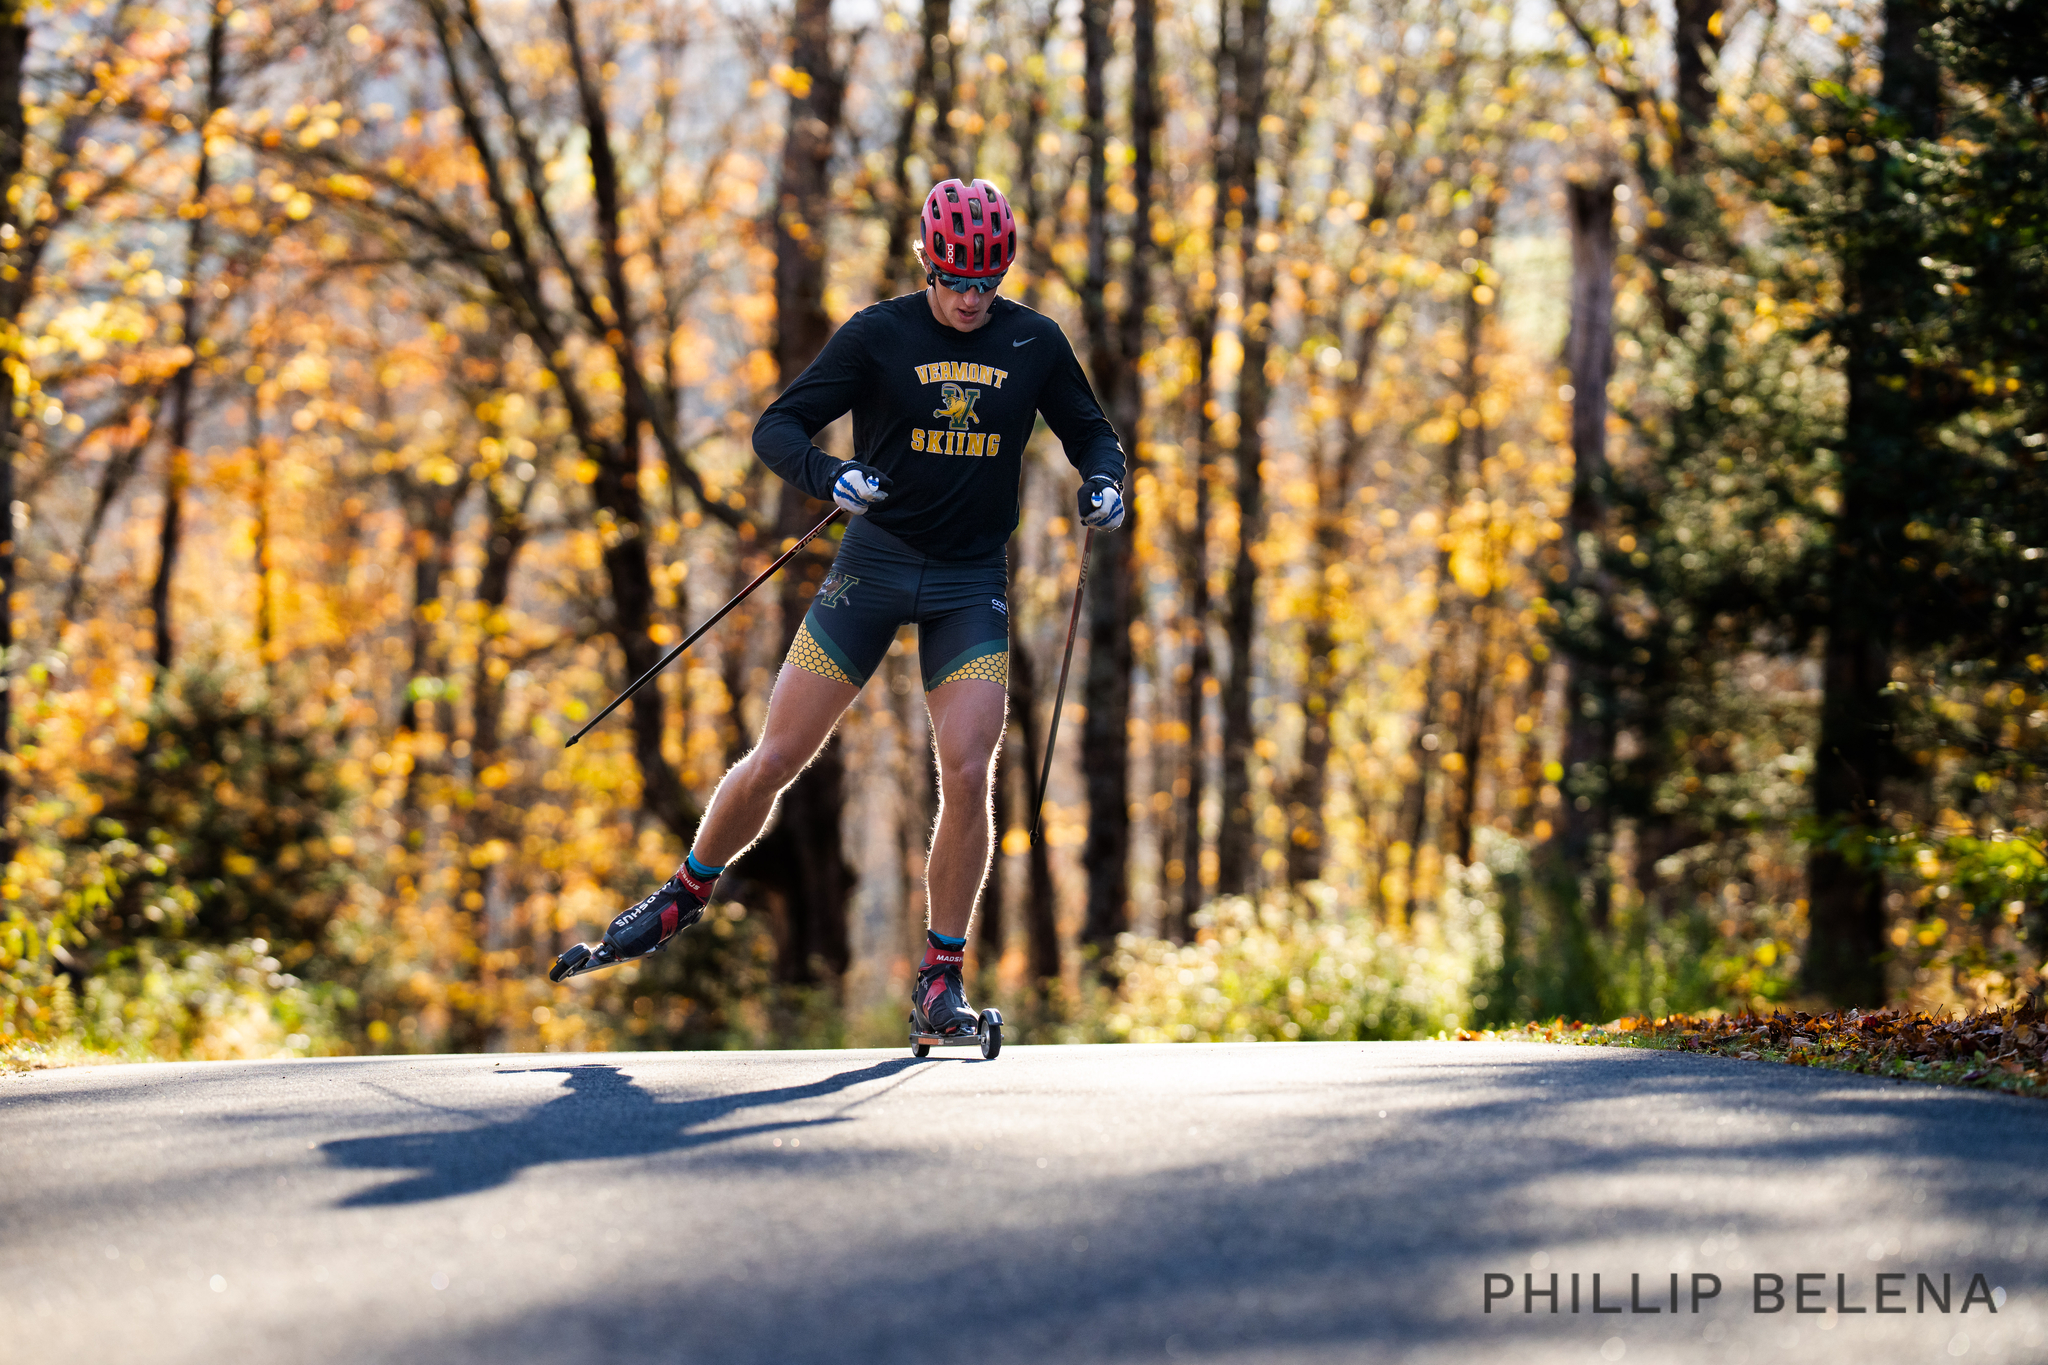
    A University of Vermont skier rollerskiing up a paved climb through autumn woods
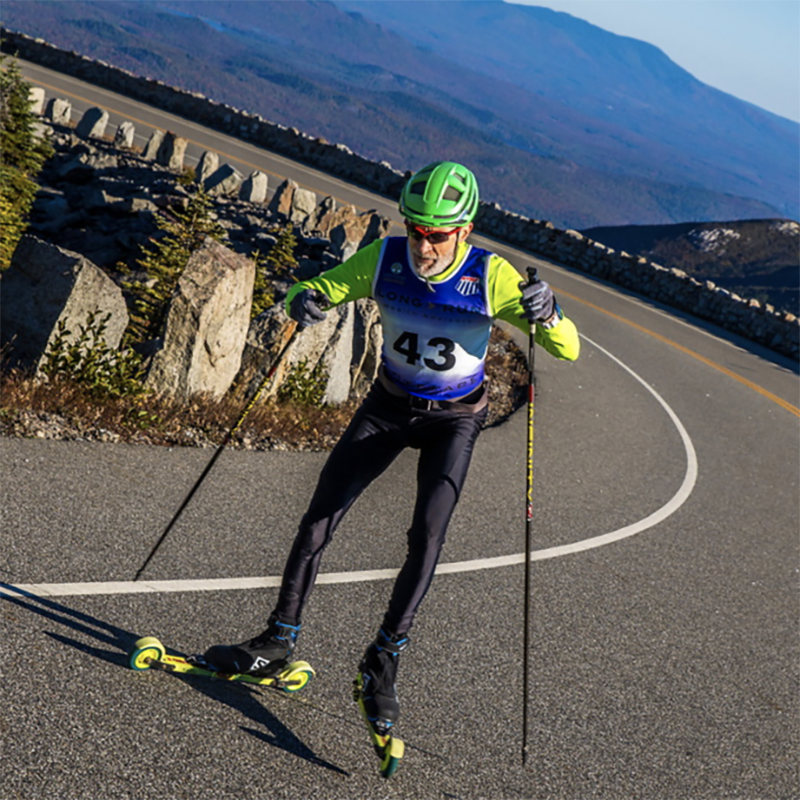
    UVM’s Fin Bailey drives up a climb on the Craftsbury Outdoor Center track. The answer to aging is not necessarily more high-intensity training, but keeping the frequency of the stimulus while controlling the dose. (Photo: Phillip Belena)

    Don’t Abandon Intensity

    The opposite mistake is maintaining plenty of volume while gradually eliminating the hard training. This is understandable, particularly for those who enjoy the “half hard” training.

    When we stop performing high-intensity training consistently, we lose some of our adaptation to that capacity. Every subsequent interval workout or race is then harder than it used to be, and recovery takes longer, because we have eroded that capacity. That can reinforce the idea that high intensity itself is the problem.

    But VO2max is also one of the physiological qualities most strongly affected by aging. So the training stimulus we may most need to maintain becomes increasingly difficult to perform and recover from. The answer isn’t necessarily more high-intensity training. It is maintaining the frequency of the stimulus while controlling the dose.

    That may mean less high-intensity work in an individual session, but performing it consistently throughout the year. Fifteen to twenty productive minutes near VO2max may provide a better stimulus than turning every interval workout into a contest to see how much we can do. For many masters skiers, one or two genuinely hard aerobic sessions every seven to ten days may accomplish more than two or three mediocre high-intensity sessions every week.

    The appropriate frequency depends on training history, age, fitness and recovery ability, not on a predetermined seven-day formula.

    A grey-haired skier spreads his arms in celebration wearing a finisher medal at the Engadin Skimarathon finish
    Gunnar Knapp finishes the Engadin Skimarathon. Threshold and sub-threshold training allow considerably more work to be accumulated at a high aerobic rate. (Photo: Garrott Kuzzy / Lumi Experiences)

    Threshold Has a Different Job

    Threshold training shouldn’t simply become the safer substitute for VO2max training. It is not. In fact, the metabolic and neuromuscular cost of a typical threshold session may be greater than that of a typical controlled VO2max session.

    VO2max training provides a powerful stimulus to central aerobic capacity, cardiac output and the ability to deliver and utilize large amounts of oxygen. Threshold and sub-threshold training allow considerably more work to be accumulated at a high aerobic rate while developing the ability to sustain that rate economically.

    One of the important considerations in deciding how much emphasis to place on each is fractional utilization: the percentage of VO2max an athlete can sustain for a prolonged period. An athlete with a relatively low VO2max but already high fractional utilization may gain relatively little by continually emphasizing the quality that is already strong while allowing the aerobic ceiling above it to decline.

    Conversely, an athlete with a large aerobic capacity but relatively poor ability to sustain a high percentage of it may have considerably more to gain from threshold and sub-threshold training.

    This becomes particularly important in highly trained skiers. The speeds elite skiers can maintain at threshold or just below it can be quite close to actual race velocities. That speed and the muscular demands associated with sustaining it are part of what makes the training effective.

    For cross-country skiers, both qualities matter.

    A skier may have an excellent VO2max but lack the muscular endurance to translate that capacity into sustained double poling or climbing. Another skier may have excellent threshold durability but gradually lose the aerobic ceiling above it.

    The question isn’t whether threshold or VO2max training is better. The question is which physiological limitation we are trying to change.
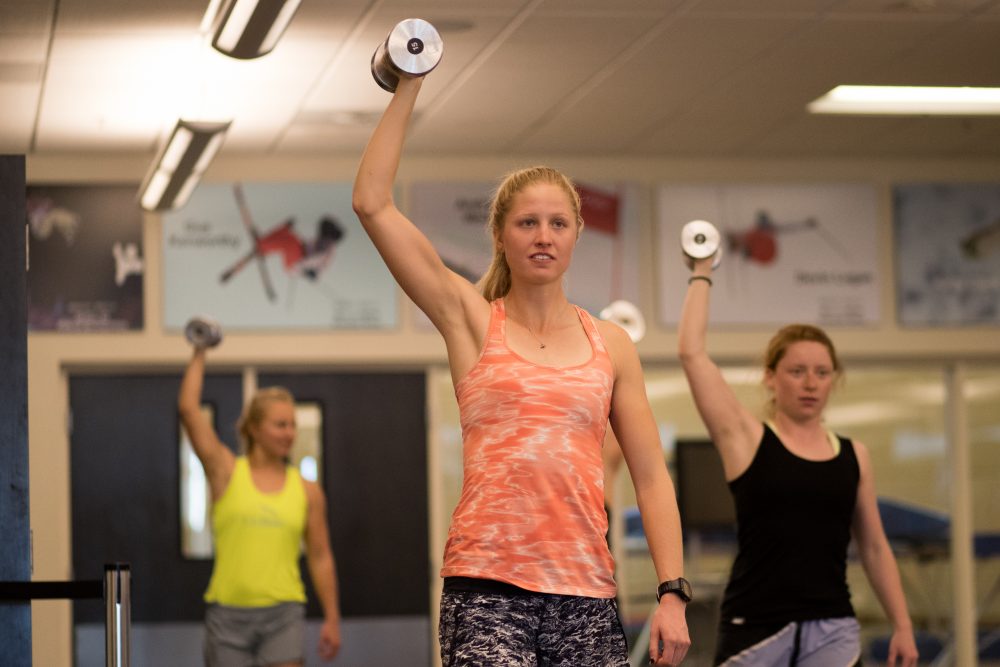
    Three athletes pressing dumbbells overhead during a gym strength session
    Hailey Swirbul during a strength session at a U.S. Ski Team camp in Park City, Utah. Research in cross-country skiers has shown that maximal-strength training can improve double-poling performance and economy. (Photo: Reese Brown)

    Strength Becomes More Important, Not Less

    Perhaps the clearest change in training priorities with age should be strength.

    Cross-country skiing has become increasingly dependent on upper-body force, whole-body strength and power. At the same time, aging progressively reduces muscle mass, maximal strength and particularly fast-twitch muscle function.

    Research in cross-country skiers has shown that maximal-strength training can improve double-poling performance and economy. One likely explanation is relatively simple. If every pole stroke represents a smaller percentage of your maximum force, repeatedly producing that force becomes less metabolically costly.

    For masters skiers, developing and preserving maximal strength is particularly valuable because it provides reserve capacity. The goal is maintaining the ability to produce force.

    That generally suggests relatively heavy resistance, good technique, low-to-moderate repetition ranges and sufficient recovery, rather than endless circuits of light weights.
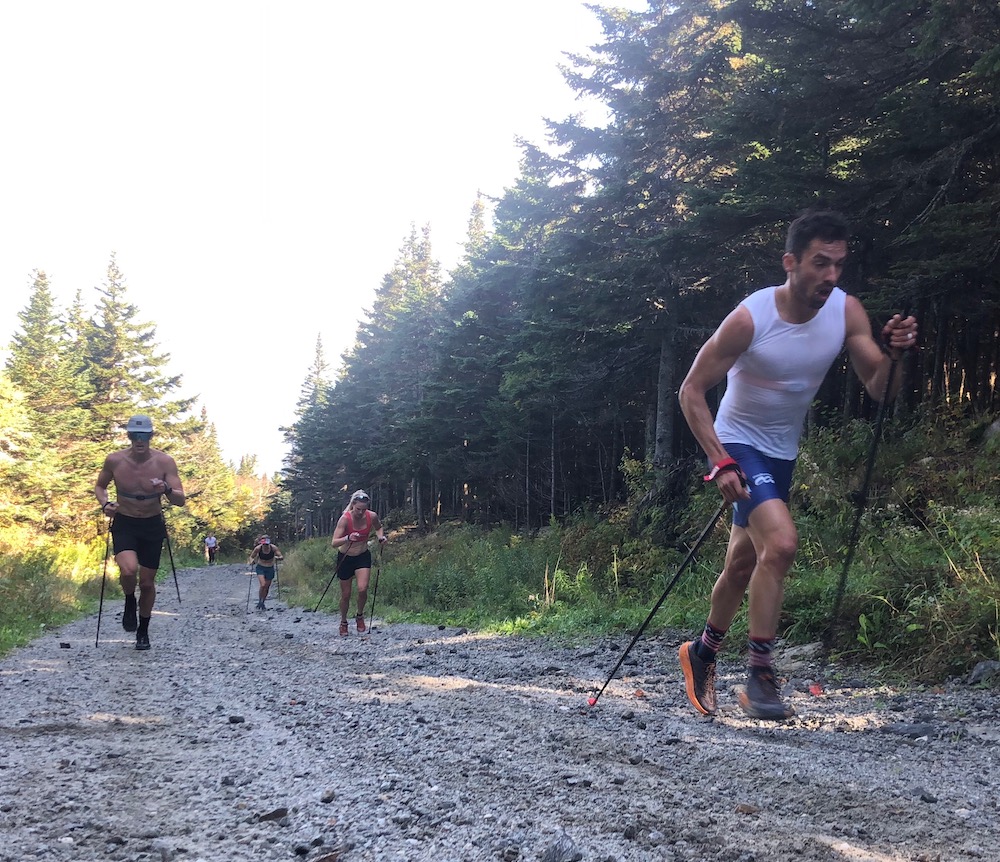
    Skiers bounding with poles up a steep gravel road lined with spruce trees
    Ian Torchia, right, leads bounding intervals up Stratton Mountain. Power tends to decline particularly rapidly with age, and short, fast work preserves it without requiring a large amount of metabolic stress. (Photo: Courtesy Stratton Mountain School)

    Power Is the Forgotten Quality

    Strength and power are not identical. Strength is how much force we can produce. Power is how fast we can produce it. Power tends to decline particularly rapidly with age.

    Acceleration over the top of a hill, changing gears on a climb, responding to an attack, generating force quickly through the poles and maintaining technique at race speed all depend on the ability to produce force quickly.

    Masters athletes therefore shouldn’t eliminate every fast movement from training. Short hill accelerations, controlled bounding, short ski sprints and explosive strength exercises can provide a neuromuscular stimulus without requiring a large amount of metabolic stress.

    The dosage doesn’t need to be large. What matters is the peak stimulus.

    But, as with nearly every aspect of training, consistency matters.
    Freshly groomed classic tracks in low sun beside a Masters World Cup course marker
    Fresh tracks on the Masters World Cup course in Alberta. Recovery is essential because adaptation occurs between workouts, but maximizing recovery is not the goal. (Photo: GibsonPictures)

    Recovery Serves Adaptation

    This brings us back to recovery. Recovery is essential because adaptation occurs between workouts. But maximizing recovery is not the goal of an athlete.

    Maximizing adaptation is.

    The masters athlete must solve a more complicated equation:

    Stimulus + Recovery = Adaptation

    Too much stimulus accumulated over days and weeks and we fail to recover sufficiently. Without recovery, we fail to adapt. The common theme in underperformance and overtraining is accumulating fatigue and a failure to adapt.

    Sometimes the better solution is reorganizing the training. Instead of a pattern of hard, hard, easy, hard, easy, hard, exhausted, rest over seven days, a masters skier might organize training so the important sessions are separated sufficiently to perform them well and adapt to them.

    The objective isn’t necessarily fewer quality sessions over the course of a month. It is enough recovery between those sessions to allow the athlete to absorb them.
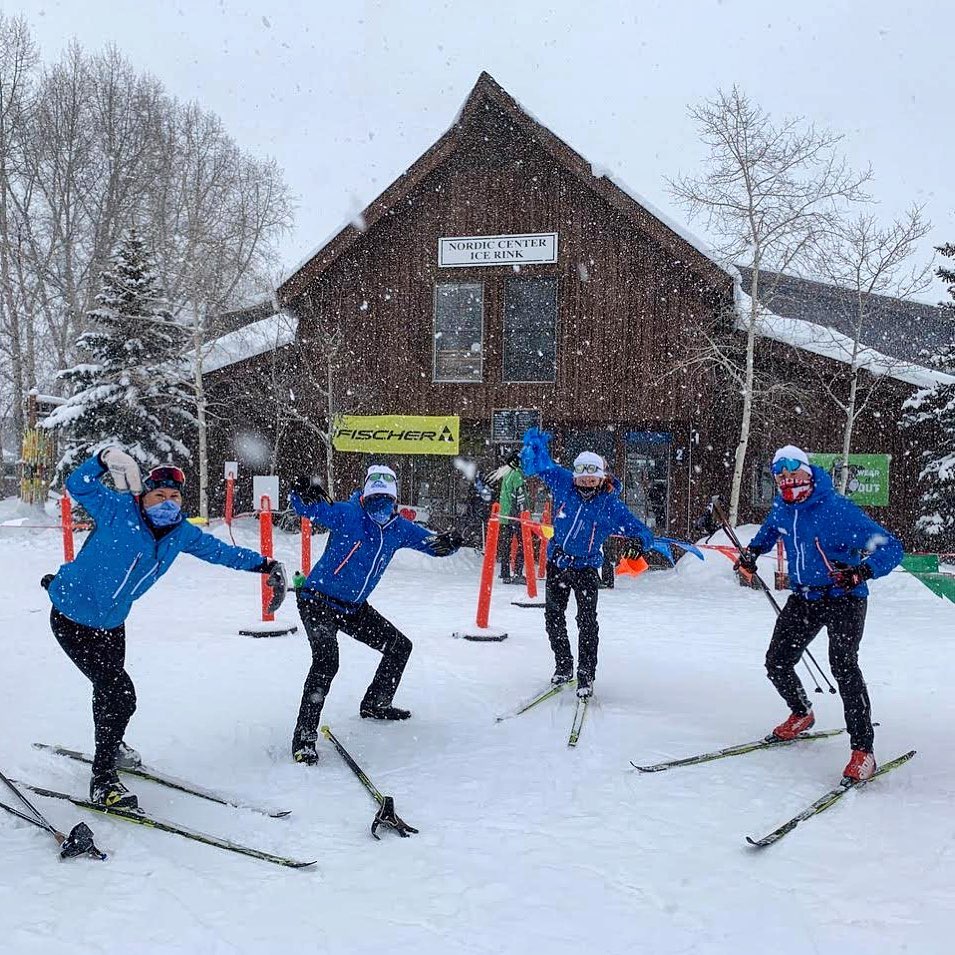
    Four coaches on skis in falling snow outside a nordic center lodge
    The coaches behind the masters performance group at Crested Butte Nordic in Colorado: from left, Rachel Bachman Perkins, Murray Banks, Cam Smith and Woody Martineau. Fitness is not created by individual workouts. (Courtesy photo)

    Consistency Beats Heroic Training

    For masters athletes, we need to adjust our perspective. Fitness is not created by individual workouts. It is created by the consistent implementation of easy endurance work, high-intensity aerobic training, strength, power and appropriate recovery.

    One big interval session does relatively little. One big training week does relatively little. Forty or fifty good weeks stacked together can produce remarkable fitness.

    That changes the definition of a successful workout.

    The question is no longer: How much training can I survive today?

    It becomes: What training can I absorb today that allows me to continue training tomorrow, next week and next month?

    That doesn’t mean avoiding hard work. It means implementing both easy and hard training in a way that provides adequate space for recovery and adaptation.

    An older skier in a propeller cap laughs with a young girl on a snow-covered town street
    Murray Banks at the Alley Loop in Crested Butte, Colorado. Chronological age alone doesn’t tell us enough: training history, injury history, available time, sleep, nutrition and life stress all matter. (Photo: Xavier Fane / Crested Butte Nordic)

    The Masters Training Equation

    Training, of necessity, must be individualized for athletes of every age. A highly trained 60-year-old with forty years of endurance training may tolerate workloads that would overwhelm a recreational 45-year-old who started skiing five years ago.

    Chronological age alone doesn’t tell us enough. Training history, injury history, available time, sleep, nutrition, life stress and individual recovery all matter. But the physiological objectives remain surprisingly familiar.

    • Maintain aerobic volume.
    • Maintain VO2max.
    • Develop threshold and muscular endurance.
    • Preserve maximal strength.
    • Preserve power.
    • Maintain ski-specific technique and economy.

    Then organize recovery around accomplishing those objectives. That is fundamentally different from starting with recovery and removing training until the athlete can tolerate what remains.

    Masters athletes don’t need a watered-down version of elite training. Nor do they simply need more recovery. They need training organized around the physiological capacities most threatened by aging, with enough stimulus to preserve and improve those capacities and enough recovery to adapt to that stimulus.

    Aging changes how we assemble the training. It doesn’t change what makes an endurance athlete fast.

    The great opportunity of masters sport is discovering how much performance we can preserve, and in many cases still improve, by continuing to give the body both the stimulus and the time and space it needs to adapt.


    Help Support Our Coverage!

    If you value the thoughtful work and access FasterSkier provides, please consider becoming a Voluntary Subscriber. Your support directly fuels our work to cover the people, places, and moments that make our sport special.

    Join the FasterSkier community!


  • Periodization Is About Emphasis, Not Elimination

    Periodization Is About Emphasis, Not Elimination

    This article was made possible through the generous support of our voluntary subscribers. If you value coverage like this, please support FasterSkier with a voluntary subscription.

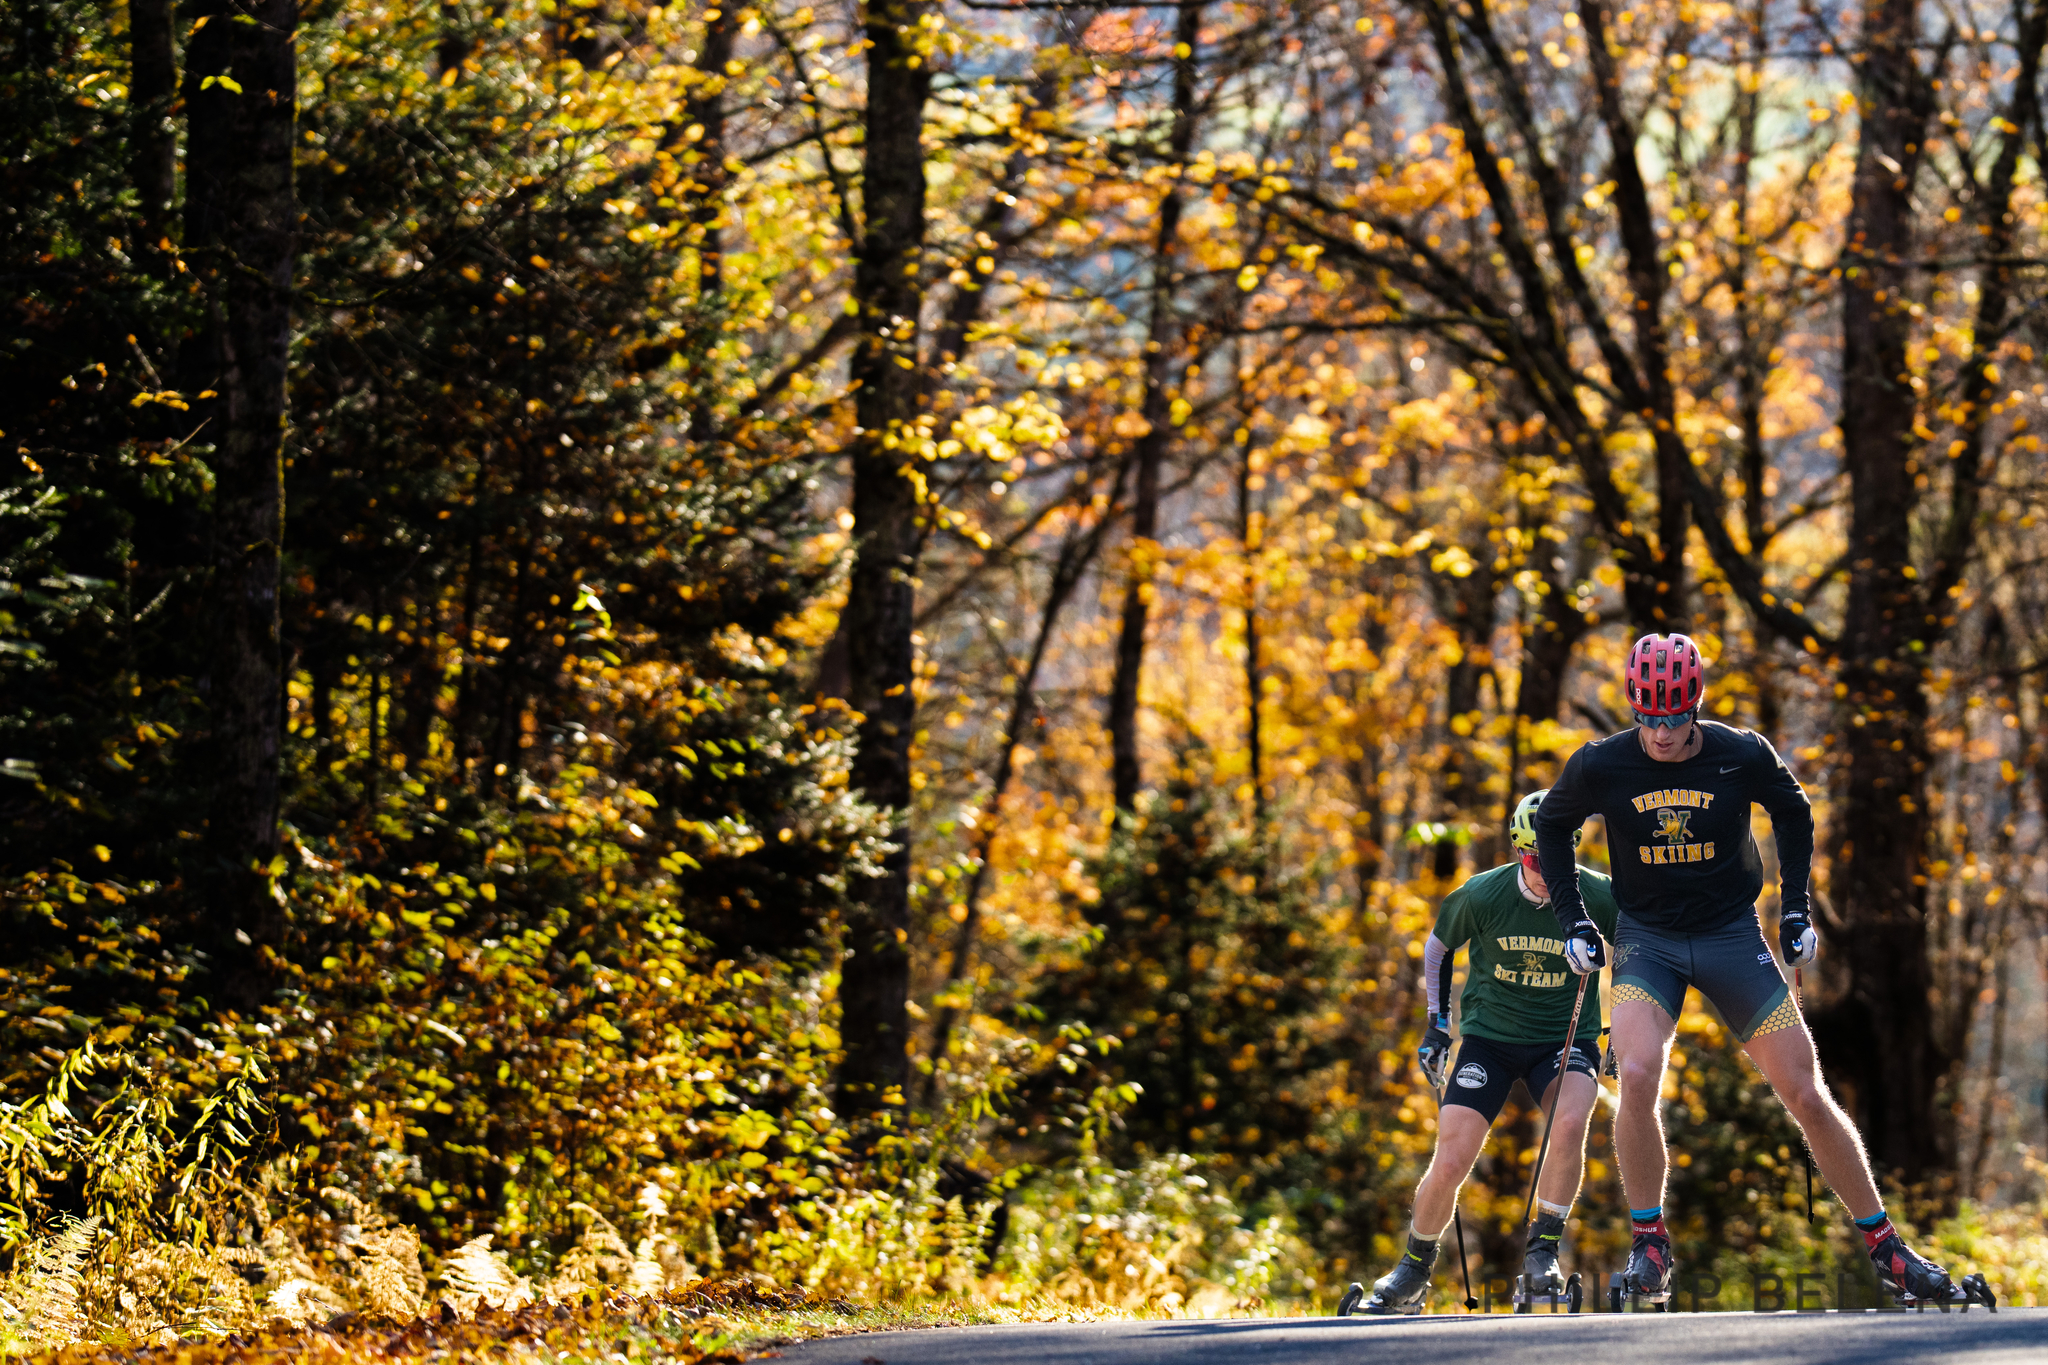
    A University of Vermont skier rollerskiing on a paved road lined with fall foliage at Craftsbury, Vermont
    Wilmington, Vermont’s Luke Rizio rollerskiing with the University of Vermont at Craftsbury last fall. Jim Galanes argues that a training year should change the dose of each quality, never remove one of them entirely. (Photo: Phillip Belena/EISA)

    One of the biggest misconceptions in endurance training is that we should train one physiological capacity at a time. The traditional model usually follows the same progression. First build an aerobic base, lots of easy endurance training. Then add “threshold” training in the middle of the summer. Then, as we move into the pre-competition period, shift the emphasis toward VO2max and race specific intensity.

    The emphasis certainly should change throughout the season. But this approach often leads coaches and athletes to unintentionally neglect important physiological systems for weeks or even months. The problem is that the human body doesn’t work that way.

    Aerobic performance is not determined by one physiological system. It emerges from the interaction of multiple systems, each supporting the development of the others. When one begins to decline, it limits the effectiveness of the entire system.

    The goal of periodization is not to sequentially build individual physiological systems. It is to continually maintain every important system while changing the emphasis toward the adaptations that offer the greatest opportunity for improvement.

    Every Workout Sends a Different Signal

    Training isn’t simply stress. Every workout sends a unique physiological signal for adaptation.

    Long aerobic training stimulates mitochondrial biogenesis, capillary development, fat oxidation, plasma volume expansion, and cardiac remodeling.

    “Threshold” training improves the ability to sustain a high fraction of aerobic power by increasing oxidative capacity, metabolic stability, and lactate transport. It should be noted, in spite of the current buzz, that “threshold” training is not a magic solution. Some athletes may need a heavier focus on VO2max training. Usually “threshold” type training is best for those doing high volumes and with an already high fractional utilization.

    (Note: while I use the common term “threshold” here, there is ample evidence that no threshold actually exists and that it is a vastly misleading term. There is also no consensus on what this so-called threshold is. Depending on which of the many methods you use to define it, the speed or intensity at these various definitions can differ by 40 to 50 percent.)

    VO2max intervals place the greatest demand on oxygen delivery, stimulating central cardiovascular adaptations while also improving mitochondrial function, the oxidative capacity of Type II fibers, lactate transport, and the speed or power that can be sustained at VO2max.

    Sprint training recruits high-threshold motor units, preserves neuromuscular coordination, maintains the oxidative capacity of fast-twitch fibers, and develops the ability to rapidly produce force.

    Strength training increases maximal force production, improves movement economy, enhances tendon stiffness, and helps reduce injury risk.

    These are not interchangeable adaptations. Each contributes something different to developing aerobic fitness and performance.

    The Systems Support Each Other

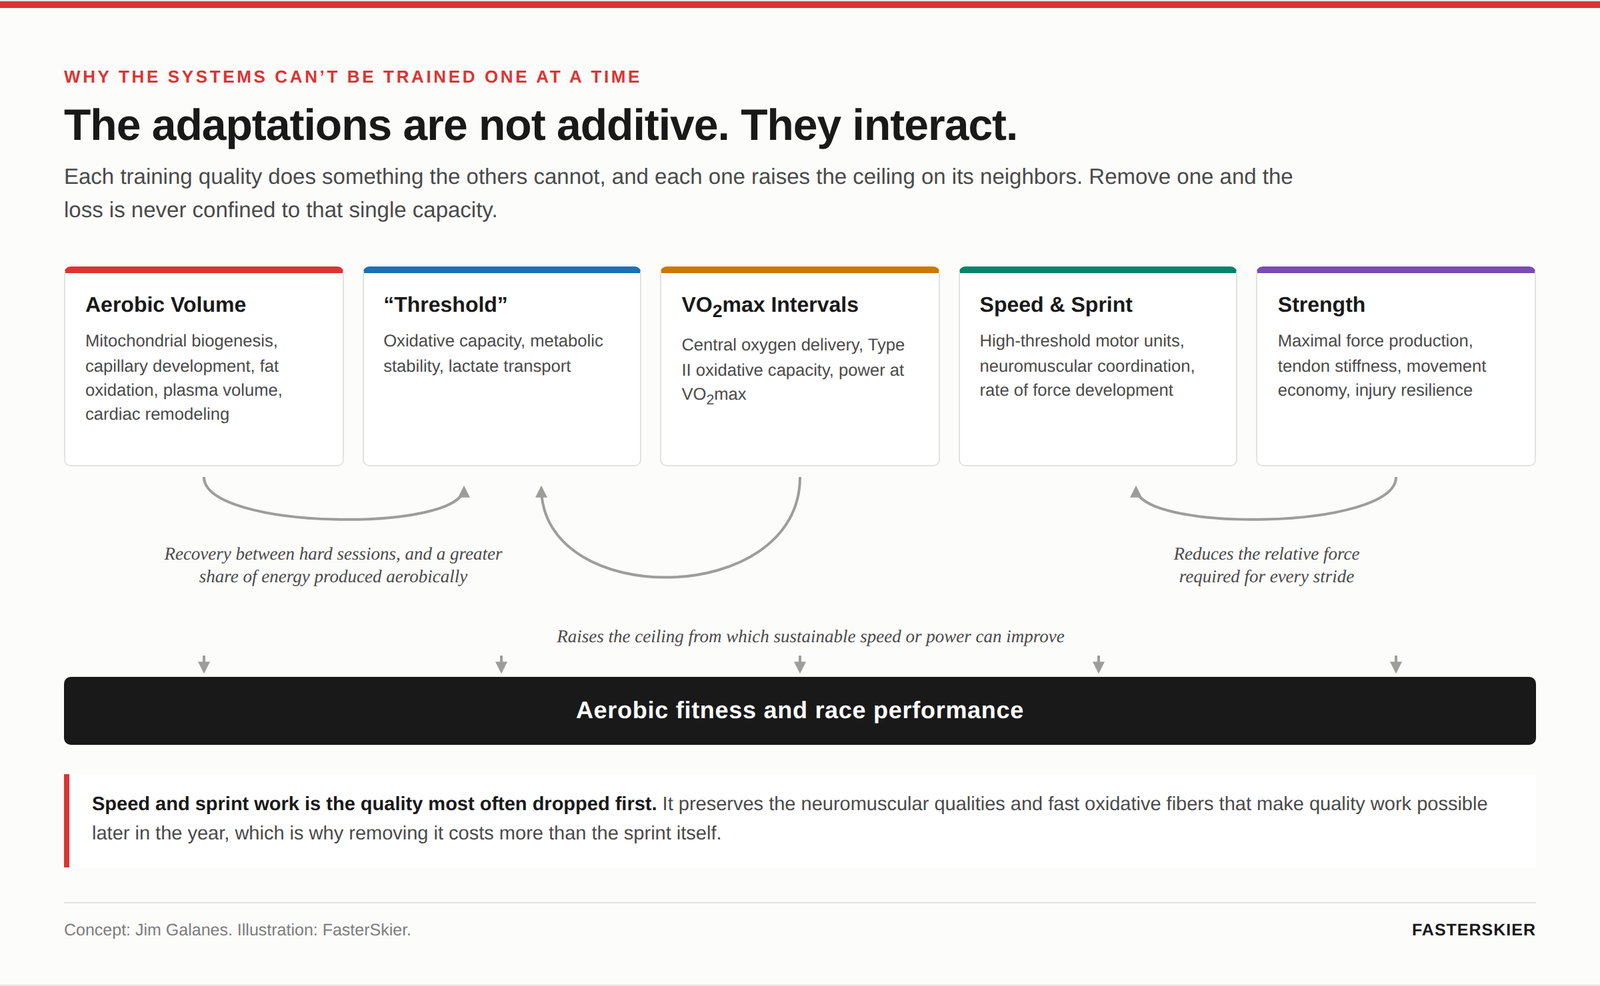
    These systems work synergistically. The mistake is assuming the adaptations are simply additive. They are not. They interact, and the combined effect on aerobic fitness is larger than the sum of the parts.

    A larger aerobic system allows the athlete to recover more quickly between hard sessions and to produce an increasing proportion of energy aerobically.

    Better “threshold” capacity allows more quality work to be performed with less fatigue. Greater maximal aerobic power raises the ceiling from which “threshold” speed or power can improve.

    Improved strength reduces the relative force required for every stride.

    Sprint training preserves the neuromuscular qualities that improve efficiency even during submaximal exercise. At every intensity, we can move faster and more efficiently.

    Diagram of five training qualities feeding into aerobic fitness and race performance
    Aerobic volume, “threshold” work, VO2max intervals, speed and strength each do something the others cannot, and each raises the ceiling on its neighbors. (Illustration: FasterSkier)

    What Happens When One System Is Ignored?

    Every physiological adaptation has a maintenance requirement. Remove the stimulus long enough and that adaptation begins to decline. An athlete who abandons speed training gradually loses neuromuscular recruitment and maximal power. An athlete who eliminates heavy strength training slowly loses force production and movement economy.

    When an athlete reduces aerobic endurance training, they don’t simply lose endurance. They lose the physiological foundation that supports every other adaptation.

    An athlete who removes VO2max work for extended periods may maintain excellent endurance while gradually losing the central cardiovascular adaptations that support maximal aerobic performance.

    These changes are rarely dramatic at first. What we see instead are the symptoms of overtraining. Performance in training declines. Interval sessions become harder. Race pace plateaus or drops.

    Many coaches respond by adding more volume or more intensity. Neither is the likely answer. The solution is to restore the balance between the physiological systems that support performance.

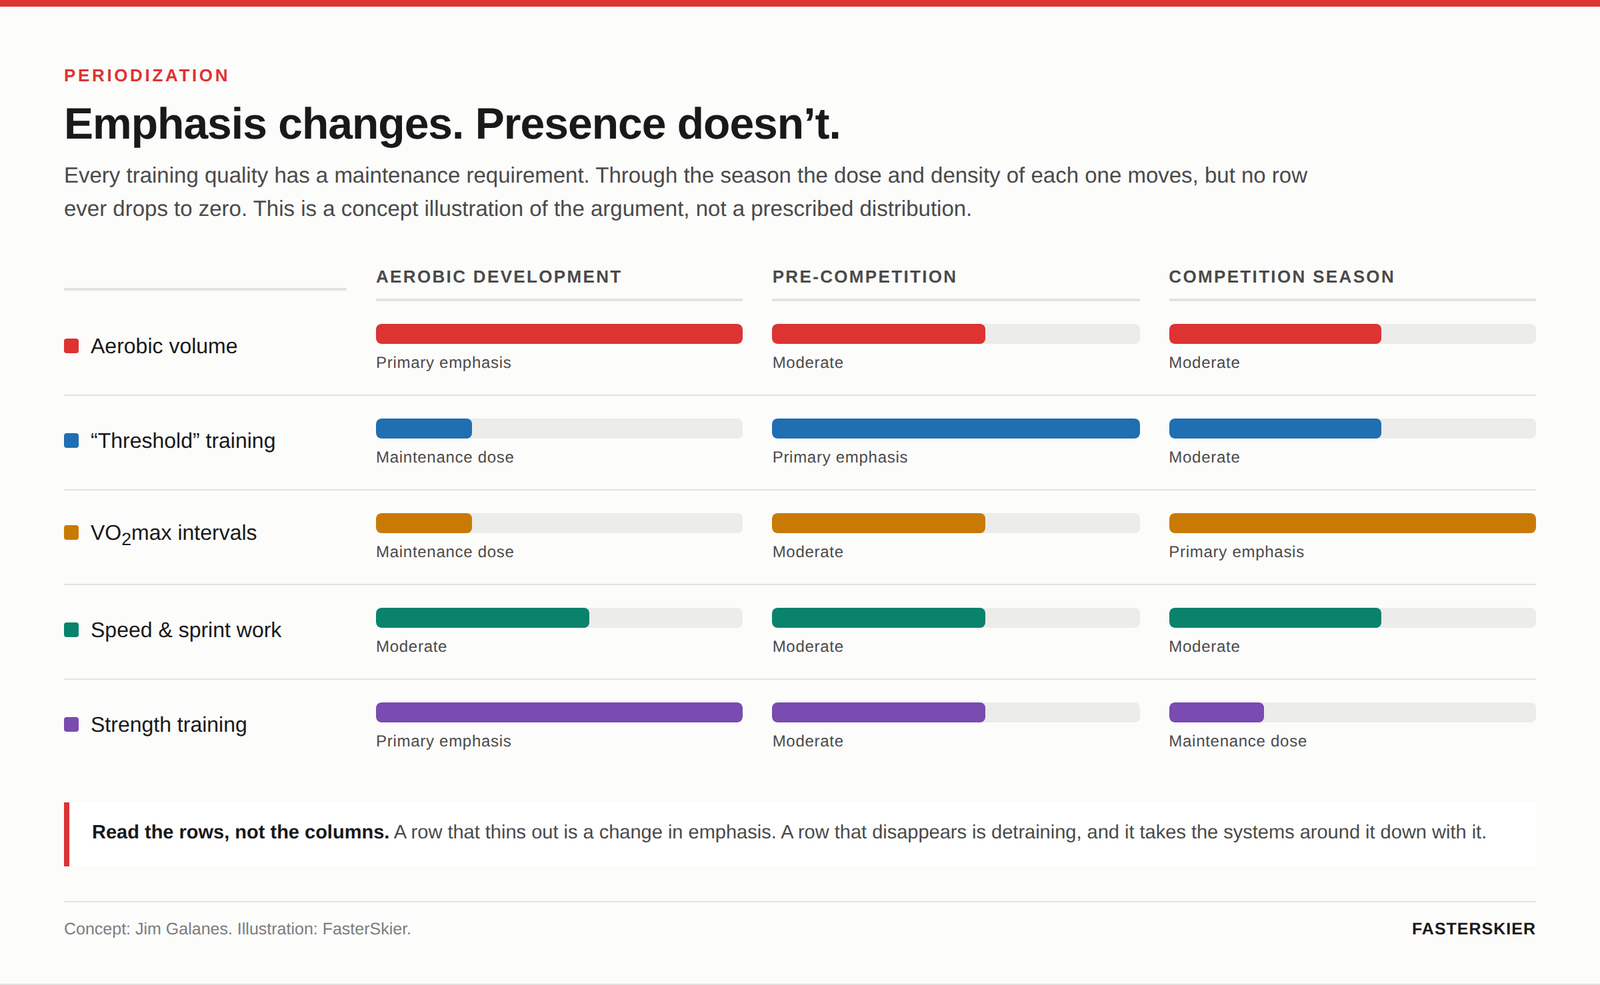
    Chart showing five training qualities across three season phases, with none dropping to zero
    Through the training year the dose and density of each quality moves, but no quality drops to zero. Concept illustration of Galanes’ argument, not a prescribed distribution. (Illustration: FasterSkier)
    Two skiers rollerskiing up a climb on a road through autumn woods
    University of Vermont skiers work up a climb during a fall dryland session at Craftsbury, Vermont. (Photo: Phillip Belena/EISA)

    Why High-Intensity Training Belongs in the Base Period

    One of the most common statements heard during base training is: “We shouldn’t do any hard training yet.”

    Current evidence suggests otherwise. High-intensity training during the base period is not about maximizing anaerobic fitness. It is about maintaining the physiological systems that complement the full development of aerobic capacity.

    Appropriately dosed high-intensity training helps preserve central cardiovascular function, maintains high-threshold motor unit recruitment, supports the oxidative capacity of fast-twitch muscle fibers, reinforces movement economy at higher speeds, and prepares the athlete for the demands of future training. Just as importantly, these adaptations support aerobic development rather than detract from it.

    A stronger cardiovascular system allows greater oxygen delivery during long aerobic sessions. Maintaining fast oxidative fibers improves the ability to perform “threshold” work later in the season. Preserving movement economy reduces the energy cost of every stride. Maintaining maximal aerobic capacity raises the ceiling from which “threshold” performance can continue to improve.

    High intensity doesn’t compete with aerobic development when it is properly dosed. It enhances it. This is why elite endurance athletes rarely eliminate intensity completely. They change the dose and the density. Not the presence.

    I often hear athletes say their first interval session or time trial in late July felt terribly slow, or metabolically challenged. Of course it did. That should come as no surprise. If high-intensity work has been absent for weeks or months, the physiological systems required to perform it have detrained. The athlete now has to rebuild those systems before meaningful race-specific adaptations can occur.

    Emphasis Is Not Elimination

    This doesn’t mean every quality deserves equal attention every week. Training emphasis should absolutely change throughout the year. An aerobic development phase should contain more aerobic volume. The pre-competition period should emphasize “threshold” and race-specific intensity. The competition season should prioritize race performance and recovery.

    But changing emphasis is very different from abandoning a physiological system. Even during an aerobic block, athletes should continue performing some high-intensity work, sprint training, and strength training.

    During race season, aerobic volume remains essential. While emphasizing VO2max development, “threshold” training still supports the ability to perform quality work.

    The dose and density change. The physiological adaptation remains.

    There Is No Optimal Intensity Distribution

    One of the most common questions in endurance sports is: “What is the optimal training intensity distribution?”

    The question assumes there is one correct percentage of easy, “threshold”, and hard training. There isn’t. The optimal distribution depends on the athlete’s training background and on which physiological system currently limits performance. Those limiting factors change throughout an athlete’s development.

    Early in a career, building aerobic capacity may deserve the greatest emphasis. Later, improving sustainable race pace may become the priority. Still later, improving neuromuscular power, force production, or movement economy may produce the greatest gains.

    As those priorities change, training distribution changes with them. Not because the principles change. Because the athlete changes.

    The coach’s responsibility is to continually adjust aerobic volume, “threshold” training, VO2max work, sprint training, and strength training so that each enhances the adaptations produced by the others while minimizing interference.

    There is no universal training formula. There is only the continual process of identifying the athlete’s current limiter, maintaining every important physiological system, and emphasizing the adaptations that will produce the greatest improvement.

    Great coaching is not about prescribing the perfect intensity distribution. It is about continually identifying the athlete’s current physiological limiter while maintaining every system that supports performance. As the athlete changes, the emphasis changes, but the physiology never disappears.

    Help Support Our Coverage!

    FasterSkier is independent, reader supported, and free to read. If coaching and training coverage like this is worth something to you, a voluntary subscription keeps it coming.

    Join the FasterSkier community!


    A ski coach in an olive fleece speaking with an athlete holding rollerski poles
    UVM coach Patrick Weaver talks with first year Hanna Koch of St. Paul, Minnesota, during a fall session at Craftsbury. Identifying an athlete’s current limiter, Galanes writes, is the coach’s central job. (Photo: Phillip Belena/EISA)
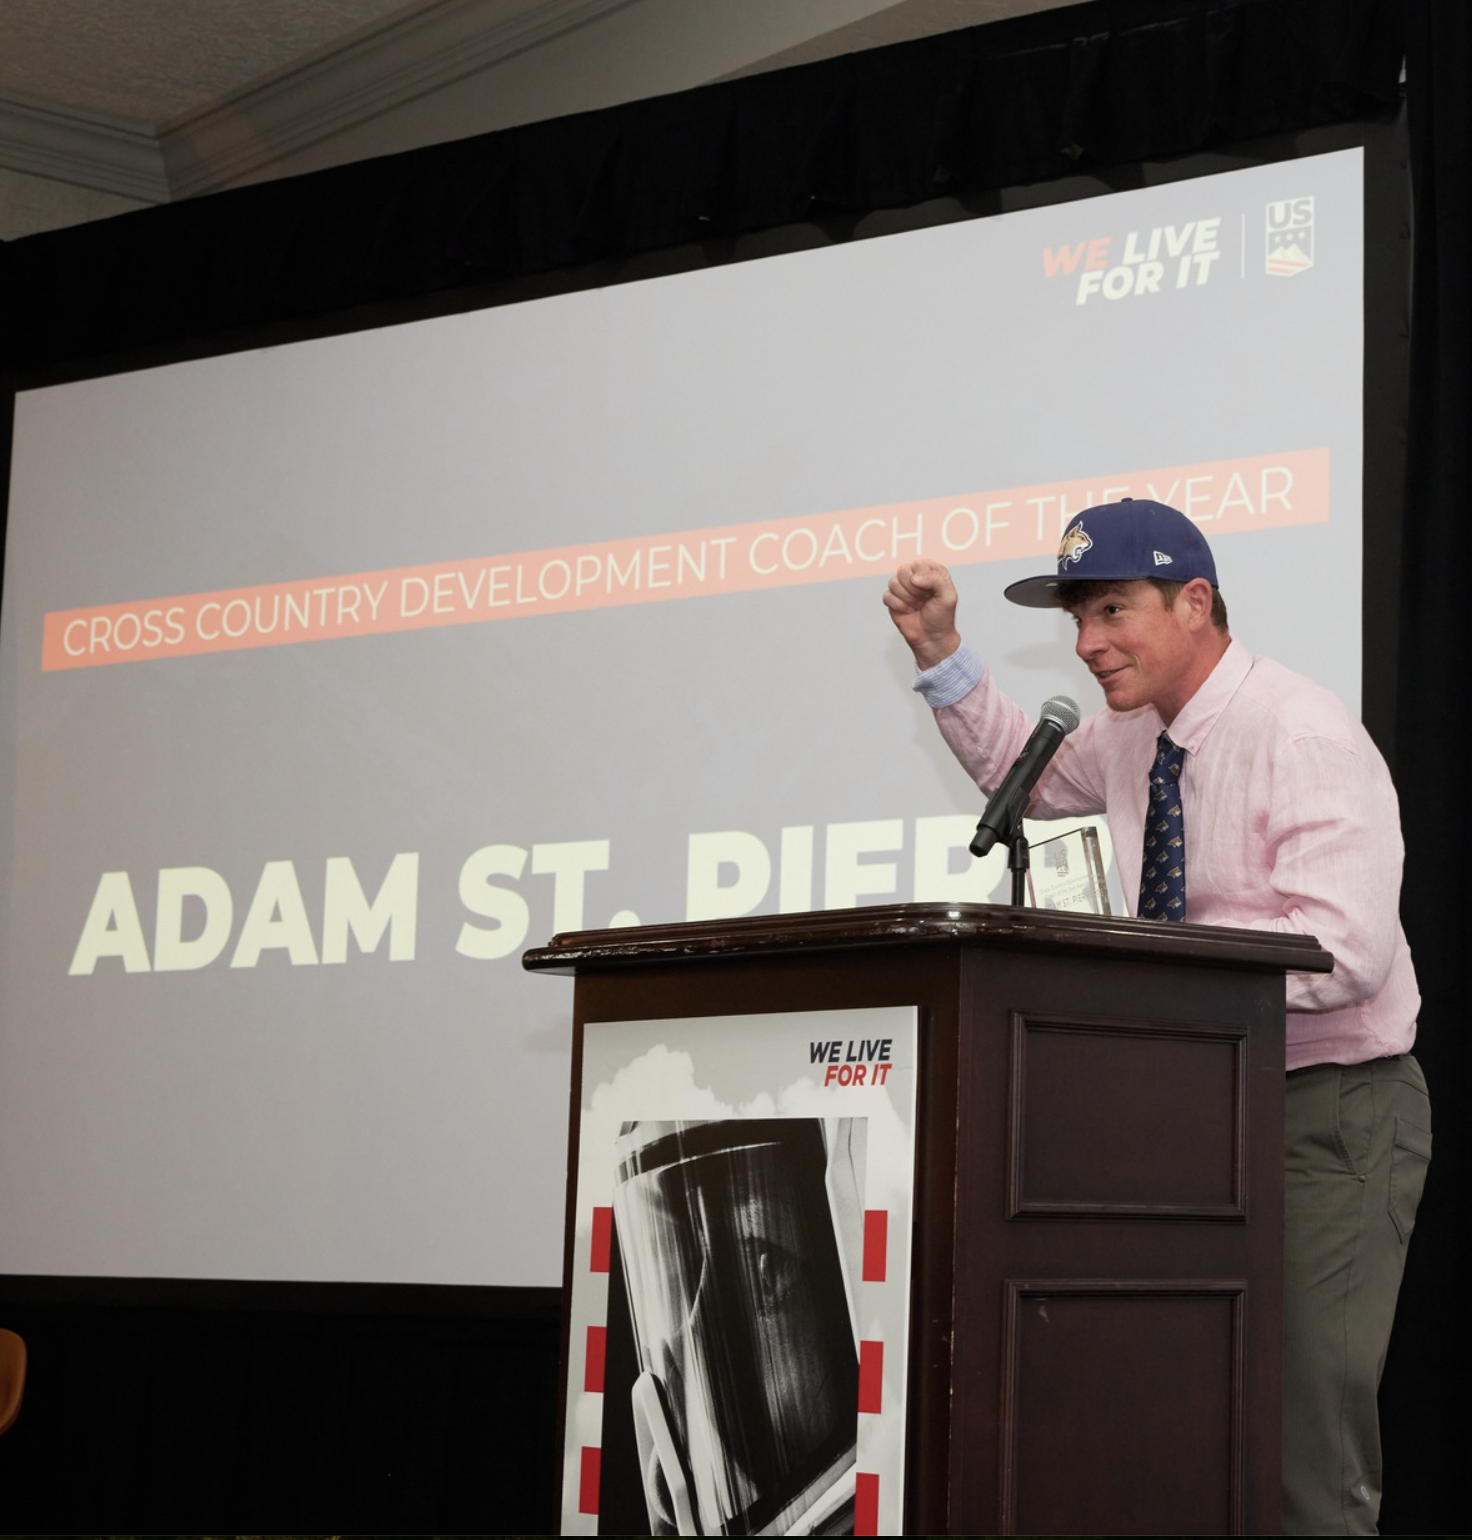
  • The Spice in the Soup: How Adam St. Pierre Thinks You Should Train

    The Spice in the Soup: How Adam St. Pierre Thinks You Should Train

    This article was made possible through the generous support of our voluntary subscribers. If you value coverage like this, please support FasterSkier with a voluntary subscription.

    Part two of a two-part series. Read part one here.

    A parent once cornered Adam St. Pierre to complain that he was letting the kids play games. St. Pierre had ten-year-olds on skis running sharks and minnows, shrieking and chasing each other across the snow, and the parent was not paying club dues for that. “I want coaching and training,” the parent told him. “This is…” and you can fill in the disappointment.

    St. Pierre thinks sharks and minnows on skis is one of the most effective training tools there is. He was lucky, he says, to have a parent board that backed him up in those rare confrontations, because he had no intention of stopping. Kids who are laughing are kids who come back, and kids who come back are the only kids who ever get good.

    That belief sits at the center of a coach who, on paper, should be the last person preaching simplicity. St. Pierre has a master’s in exercise science, a background running lactate and VO2 tests on athletes, and a relationship with a Montana State physiology lab that has done extensive work with U.S. Biathlon on both the metabolic and biomechanical sides. He reads the research. He can talk ratios and thresholds for as long as you’ll let him. And his most strongly held convictions keep coming out disarmingly plain. Go easy most of the time. Be consistent. Make it fun enough that people stick around. The science, in his hands, mostly ends up confirming things your grandmother could have told you.

    Consistency over the big block

    Start with periodization, the idea that a training year should be built in escalating blocks toward a peak. St. Pierre is skeptical of the old-school version of it, and his reasons are specific. A lot of that model, he points out, traces back to weightlifting research, some of it from an era when the subjects were quietly using anabolic steroids, which is not a foundation you want under your training plan. The rest tends to come from single-event sports. “In the marathon world or the Ironman world, you’ve got one event,” he said. “You just need to be good for that one event, like on August 2nd or whatever.” Skiing is not that. A ski racer has to be good across a whole season, weekend after weekend, from November into March.

    He points to a meta-analysis, published fairly recently, that looked at the day-to-day training of today’s top Norwegians. The finding was not a secret block of magic. “It really is consistency,” he said. “They’re not doing a big August and a big October. They do big weeks and recovery, and it’s just a very consistent progression.”

    The metaphor he keeps coming back to is one he borrows from Marius Bakken, the former Norwegian runner he half-jokingly calls a father of the Norwegian method. Intensity, in this telling, is not the meal. It is the seasoning. “The base of the soup is your endurance training,” St. Pierre said, “and then you add in a little bit of zip here and there. But if you put in too much zip, the soup is not going to be very good.” Roughly 90 percent of the work, whether on foot, on roller skis, on snow, or on a bike, is easy volume. The intensity is the spice, and Americans, he thinks, are forever dumping in too much.

    Only what’s livable

    There is also a question underneath all of this that the textbooks tend to skip, which is whether any of it is actually livable. St. Pierre still remembers sitting in a USA Triathlon coaching course, listening to a periodization lecture, and asking what he thought was the obvious question. What about a working person who cannot train 24 hours a week but could manage 16? What do you do with them? The answer from the front of the room was that they should take a vacation day and get the training in. “That’s not it,” he said. “That doesn’t work.” His approach is the reverse. Figure out what someone can actually do, how many hours are genuinely available, and then fill those hours with the best workouts possible.

    At MSU that math is dictated by a school calendar, and he has stopped fighting it. His athletes train before 10 a.m. so they can make a 10 o’clock class, and again in the afternoon, with nothing scheduled after 4 or 4:30. That produces a seven-day rhythm rather than the ten-day cycles some coaches prefer. Tuesday is intensity, usually threshold or VO2 work. Wednesday is a double of easy distance, with a few technique drills thrown in at the start to get the neurons firing before the athletes head out. Thursday morning is pure speed. Saturday brings intensity again, often paired with the long distance day. You cannot send skiers out for a two-hour roller ski on a Wednesday morning if they have class at ten, so you don’t. “There’s lots of ways to make a great soup,” he said, and it is not worth inducing a pile of needless stress to chase a perfect one.

    Two tests without a lab

    For readers without a lab down the hall, two of St. Pierre’s tools travel well. The first he calls a VT1 run, VT1 being the top of the easy zone, the hardest you can go while staying genuinely aerobic. Once a week, on flat ground, his athletes run 20 to 30 minutes at that effort and note the relationship between pace and heart rate. Flat terrain because it is the most reproducible. The point is twofold. It tracks fitness: if you run nine-minute miles at 150 beats in early summer and eight-minute miles at 150 by August, you have improved. And it works as an early-warning system. “One of the first signs of overreaching is a change in that heart rate to workload ratio,” he said. If the pace slows at the same heart rate, and it is not 105 degrees out and you are not dehydrated, it is probably time to rest. The signal can run the other way too. An athlete who normally sees 180 during intervals but suddenly cannot push the heart rate above 160 is, in his words, showing a pretty golden sign. Take some rest.

    The second tool he lifted from cycling: a five-minute maximal effort, a long recovery of maybe half an hour with some refueling, then a 20-minute maximal effort. The ratio between the two tells you whether an athlete leans anaerobic and sprint-oriented or aerobic and distance-oriented, no lab required. He built a version of it into his athletes’ training plans. He is quick to add the caveat that governs all of this, in the field or in the lab. Heat, dehydration, and altitude bend every number, and even a lab lactate value shifts with hydration. “No one metric is the god metric,” he said. “You’ve always got to have that context.”

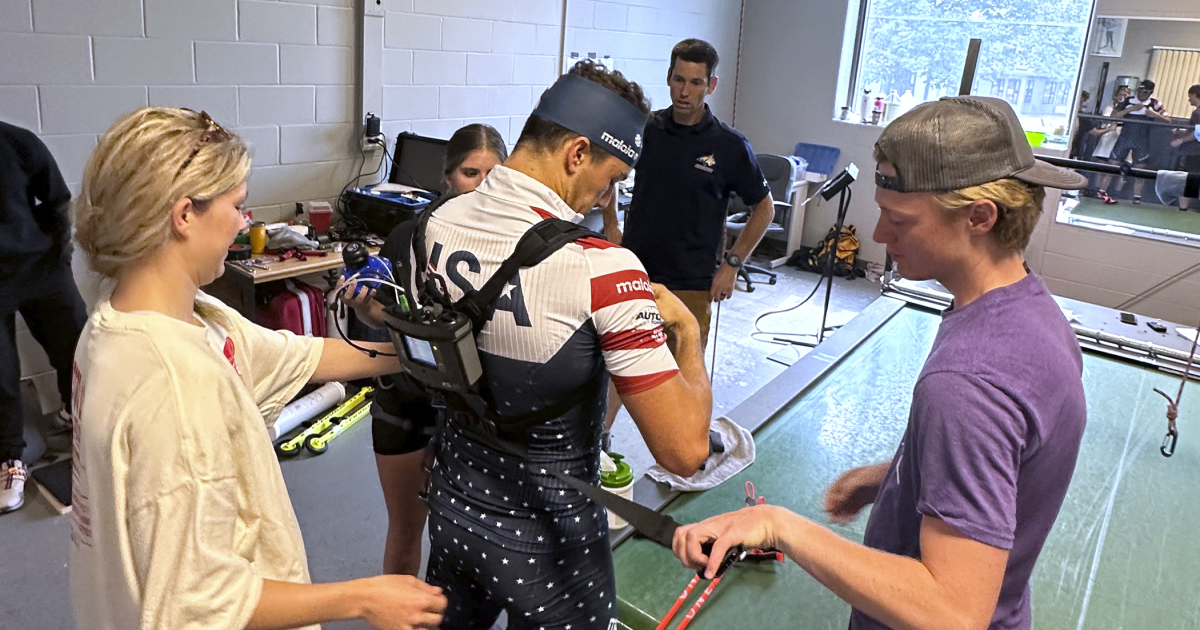
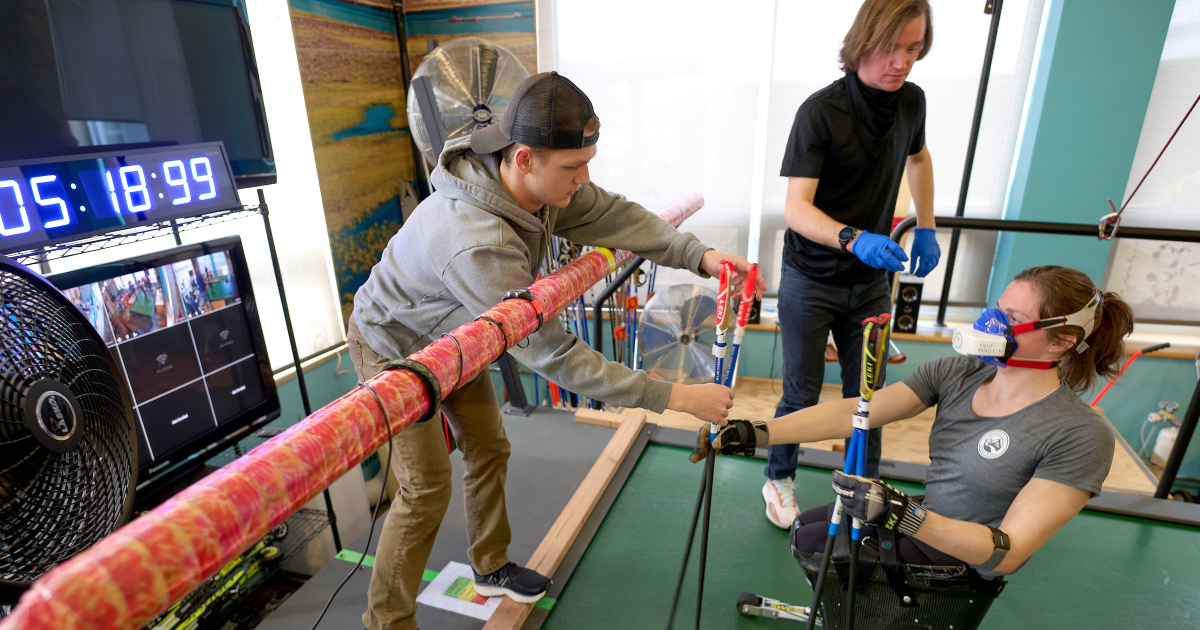
    Montana State students conduct physiologic and biomechanical assessments for U.S. Biathlon. (Photo: Montana State University)

    Building complete skiers

    The individualization matters more now because the college game is about to change. Sprinting is coming to the NCAA Championships, a change St. Pierre cares about personally, because he wrote the proposal years ago and watched it slowly work its way toward reality. In anticipation, he is nudging the team’s intensity mix, keeping most of the hard work at threshold but adding more VO2 and anaerobic speed than a pure distance program would. One test the MSU lab ran compares an athlete’s VO2 at threshold to their VO2 max. A skier sitting well above the roughly 90 percent that is typical probably skews distance and might gain from more VO2 work to lift the ceiling. A skier down in the low numbers might benefit from more threshold. Even so, his priority is all-around development. The sprinters still do threshold. The distance skiers still do speed. He wants complete skiers, partly because a race does not always let an athlete choose its terms. If a distance race comes down to a mass sprint, a distance skier who cannot find another gear finishes 20th.

    The place where St. Pierre thinks American skiing has a real and underrated advantage is strength. He knows the reputation, that Norwegians do not lift, and allows it may be true of many of them. He also knows that the Norwegians who have come through his own program found the strength work novel. As part of a university, MSU has a strength coach, Benito, a former mountain bike racer at UVM and one of the rare ones who understands endurance sport, and the two of them build a program meant to complement the skiing rather than pull against it. St. Pierre credits it for keeping his team generally healthy, and he pushes back on the notion that skiers only need core and pull-ups. “If you can produce power with your legs,” he said, “that’s necessary.”

    He connects strength to a broader idea about movement economy, and here he reaches, carefully, for the Nike Oregon Project. Setting aside the doping and the scandal that eventually swallowed that program, he finds one lesson from it genuinely useful. Its coach had noticed American distance runners getting outkicked, so the group attacked the last 400 meters with sprint work, max strength, and plyometrics. The athletes did improve their finishing kick. They also got faster over the first 9,600 meters of a 10k. Better economy, it turned out, does not just help you sprint. It lets you hold a faster pace all day.

    Montana State biomechanics students provide testing for para Nordic athletes. (Photo: Montana State University)

    The long game

    If that all sounds relentlessly optimized, it is worth returning to the sharks and minnows, because the fun is not a break from the method. It is the method. His college team plays ultimate on skis, using a ball instead of a frisbee to remove the throwing barrier, usually after a track workout, and they lobby to play more. For the youngest kids, he has long argued that the travel race is not really about the race. A ten-year-old drives across the state to ski a 1k, and the actual point is the hotel pool, the snowbanks, the hide-and-seek, the exhaustion on day two that horrifies the parents. “This is why kids get into ski racing,” he said. “It’s not the ski race. It’s hanging out with your friends in the hotel room.” Those bonds are what turn a ten-year-old into a fifteen-year-old who wants to go do a long mountain run with the same crew, and a fifteen-year-old who stays in the sport into an adult who never leaves it.

    Which is finally how St. Pierre defines success, and it is not a medal count. He worries a little about the sport’s fixation on the Nations Cup, because doing well in it requires a lot of athletes racing a full season well, and he is not sure the American pipeline has that base yet. He points to Jessie Diggins as the rare skier who reached the level where she could show up week in and week out and land in the top five every time. Whether that season-long consistency cost her an Olympic medal or two is, he admits, a whole separate and unanswerable question. Finding metrics for development beyond international results is genuinely hard, which is part of why he has soft-started a PhD. The idea is to pull two decades of national points lists and track individual athletes year over year. Are American skiers actually getting better as they age, or do they wash out? The kid who was brilliant at 18 and gone by 22 is memorable, he notes, but memorable is not the same as typical. “Is that the rule or the exception? I think that’s the exception,” he said. “I’d like to have some data to back up my opinion.” The numbers are public. He just needs the time.

    His personal definition is quieter. He wants his athletes to develop far enough that the door to international racing is open if they want to walk through it, and he wants the ones who don’t to keep loving skiing anyway, as coaches, as parents raising their own little skiers, or simply as people who stay active and outdoors for the rest of their lives. He tries to live it as a father, chasing his own two kids up mountains in the summer and out onto snow in the winter. “There’s so much outside of skiing,” he said, “that makes skiing great.”


    Help Support Our Coverage!

    If you value the thoughtful work and access FasterSkier provides, please consider becoming a Voluntary Subscriber. Your support directly fuels our work to cover the people, places, and moments that make our sport special.

    Join the FasterSkier community!


  • Inside the Masters Skier’s Training Equation: Recovery, Strength, and the End of Hero Workouts

    Inside the Masters Skier’s Training Equation: Recovery, Strength, and the End of Hero Workouts

    This article was made possible through the generous support of our voluntary subscribers. If you value coverage like this, please support FasterSkier with a voluntary subscription.

    A Different Equation

    Masters’ athletes are often told to “train smarter, not harder,” or the current version: “Go easy on the endurance sessions so you can go hard on the intense sessions.” Those phrases get repeated so often they’ve lost context and meaning. But there is a real physiological reason training for masters’ skiers must be approached differently than training for younger athletes.

    The challenge is not simply age itself. The challenge is balancing adaptation with recovery while preserving capacity, durability, consistency, and motivation over many years of training. Older athletes can still improve significantly. Aerobic capacity can improve. Sustainable race pace can improve. Technique can improve substantially. Strength and power can improve. What changes is the recovery required to create adaptation and the recognition that the margin for error narrows considerably compared to when we were younger.

    Daniel Schwenk on his way to 9th place in the Men’s Masters’ division of the Climb to the Castle. (Photo: Nancie Battaglia)
    The Biggest Mistakes

    Many masters athletes carry over the same training structure they used decades earlier, too moderate intensity (Zone 2 and 3 in most 5-zone models), hard sessions stacked too closely together, insufficient recovery between demanding workouts, and not enough attention to technique, strength, mobility, and durability.

    The results are absolutely predictable: chronic fatigue, declining velocity or pace in the hard sessions, stagnate or declining performance in spite of continued training, and simply a loss of motivation to train. Ironically, many master’s athletes are functionally overtrained, despite the reluctance in some circles to even use that term.

    Recovery and Adaptation Become a Primary Training Variable

    As we age, there is a clear reduction in recovery capacity due to reduced anabolic hormone response, decreased muscle protein synthesis, accumulated fatigue, and often greater life stress outside of training.

    None of this means that masters athletes cannot train hard. They absolutely can, and should. Maintaining aerobic capacity and muscular strength is strongly associated with health, function, and longevity. But masters’ athletes generally cannot stack hard sessions with the same frequency as younger athletes without compromising recovery and adaptation.

    For most skiers I have coached or consulted with, the question should not be, How much can I train? The better question is: How much can I recover from and adapt to consistently over the weeks and months ahead? That distinction is perhaps the most important one.

    Tim Donahue mid-race during the 2020 Winter World Masters Games in Seefeld, AUT. (Photo: Garrott Kuzzy / Lumi Experiences)
    Consistency Beats Hero Workouts

    The most successful athletes at any level are usually not the ones doing the biggest “hero” sessions. They are the ones who maintain consistent training and compound it week after week, month after month, and year after year.

    A training model built around sustainability always outperforms the commonly programmed “ramp” approach, where volume and/or intensity continually increase week to week and month to month. The assumption that training load must constantly rise in the short term, to add stress and create more adaptation to improve, is scientifically unsupported and not common practice among athletes who perform well over the long term.

    That means, fewer very hard sessions typically 1–2 every 7–10 days, endurance sessions performed at the correct intensity, usually easier than most athletes think, 1–2 true rest or recovery days per week, not “easy training” or so-called recovery workouts, but actual rest, consistent sleep and nutritional fueling, and proper control and management of both low and high-intensity sessions.

    One of the biggest contradictions in master’s training is that many athletes improve when they reduce training load. That does not necessarily mean less training volume. More often, it means better control of intensity and reduced accumulated stress.

    Masters World Championship, Asiago, Italy, 2014
    Intensity Still Matters

    One of the common mistakes today, especially with the influence of social media and the one-sided promotion of Zone 2 and threshold training, is the assumption that aerobic improvement comes only from easy or moderate training.

    To improve aerobic function, we still need hard training. High-intensity work improves mitochondrial function, increases oxidative capacity in high-threshold motor units, recruits more muscle fibers, and improves high-end aerobic power. The key is proper control of the dose and intensity.

    An elite athlete may tolerate three demanding intensity sessions per week plus strength work. That rarely works for most masters athletes. Many would benefit more from one VO2max session and one maximal steady-state session every 7–10 days, combined with two strength sessions and additional speed- and technique-focused work embedded within basic endurance training. While I really dislike rules of thumb or guidelines in a general sense, I feel using the 80/20 rule is a good starting point. Often confused with the duration or mileage of training. It is not that. The 80/20 guide is 80 percent of the total workouts in a week or a month are easy endurance-based, and 20 percent of the workouts are hard. If one applies this measure to the duration of training, I guarantee over-training.


    Help Support Our Coverage!

    If you value the thoughtful work and access FasterSkier provides, please consider becoming a Voluntary Subscriber. Your support directly fuels our work to cover the people, places, and moments that make our sport special.

    Join the FasterSkier community!
  • Spring Forward: Part II

    Spring Forward: Part II

    Jessie Diggins’ dryland training program includes exercises for strength, agility, power, balance, and endurance. (Photo: Instagram @jessiediggins)

    Ask most endurance athletes what quality they’d like to develop in their sport, and many would say “I want to be stronger.” Ironic, then, because “stronger” means different things to different athletes. To one, it means durable: able to withstand continued stresses and discomforts. To another, it means powerful: able to generate greater force in less time. To still another, it means actually stronger: able to move a heavier weight (regardless of the speed of the movement). When skiers say they want to be stronger, it seems what they mean is they want to be faster, and have that speed be sustainable throughout the distance of their events (those being the qualities that “strong skiers” display). The difficulty in training for that sort of improvement is that the quality they seek—speed—is actually produced by two different things: the push, and the glide. Greater speed comes from pushing harder. Maintaining speed is also facilitated by gliding more efficiently (effectively staying out of the way and letting the ski run). Skiers performing at top levels are adept at both, and both should be addressed in off-season training.

    Magnus Boee’s double poling strength propelled him to an NCAA individual championship in the 30 k Class Mass Start in 2024.
    What is Strength?

    Strength is the quality that allows an athlete to produce greater forces, or withstand greater pressures. In the ski world, it means simply that the stronger skier pushes harder (a measure that will also include a factor of power). When Magnus Boee (University of Colorado) double-poled away from the entire field in the NCAA Mass Start Classic finale, his advantage over everyone else was primarily a factor of strength: he simply put more force into each double pole than did his competitors. True, he also possessed the endurance to maintain that physiologically expensive effort longer than his competitors (and farther up each uphill than anyone else), but Boee’s incredible strength is what made his speed possible in the first place.

    Pushing

    Push harder: go faster. It’s a simple equation that appears true regardless of any athlete’s technique or efficiency. Improving strength and power allows a skier to ski faster. Physiologically, strength takes longer to develop than does endurance; therefore, if one of my goals is to be stronger next season, my regimen of strength training should begin very early. Many coaches would advise that strength, for skiers, is a whole-body thing, with some special emphases being placed on certain muscles that are crucial to ski technique and ski propulsion.

    The exercises that I typically include in ski-strength training programs are those that involve large muscle groups and full body movements (not the practice of isolating muscles like a body builder would). Skiers ski with their whole body; therefore, I like to recommend power-exercises that utilize free weights (and/or body weight) rather than machines. Standing push presses, cleans, upright rows, bent-over rows, squats, one-leg squats, step ups, et. al., allow the athlete to move the weight quickly, encouraging techniques that elicit some “pop.”

    One recommendation: strength training should be conducted when the athlete is fresh, NOT when the athlete is already tired. Simply put, go to the gym first and go for a training run later (not the other way ’round).

    Another recommendation: train one thing at a time (don’t try to make strength training into more endurance training). There’s no need to keep your heart rate high during strength training. While circuit training can be valuable, the fact that your pulse is elevated is actually hindering your physiological ability to train for strength.

    Gus Schumacher strides on his way to a 15th place finish in Stage 3 of the Tour de Ski in Oberstdorf, Germany (Photo: Nordic Focus).
    Gliding

    Holding yourself in the correct body posture to maximize glide during either Classic skiing or Freestyle skiing (hips forward, chest up, ankles flexed) can be an exhausting challenge, one that most ski-athletes find supremely difficult to sustain. Drills and exercises that develop stabilizer muscles (core exercises, balance drills, planks, etc.) can improve an athlete’s gliding characteristics and stability. Those are an important part of any dryland training program, and can produce a bit more speed in next year’s performance (allowing the athlete to maintain proper glide-posture, AND potentially to do so for a longer period of time). Even so, balance/stability training is not a replacement for strength training. Greatest gains in ski-speed come from pushing harder . . . and that means strength training.


    All this is just a long-winded way of professing that training for next season should be far more complex and comprehensive than simply hopping back on my roller skis. Ski racers are athletes who will benefit from a variety of training exercises and workouts in order to develop the numerous components of ski-success. The dryland training season is actually pretty short; there’s simply not much time to develop these new qualities. Getting started in the spring—on strength, on power, on glide—will make for a better, speedier winter.


  • Strong Skiers—Skiing and Resistance Training

    Strong Skiers—Skiing and Resistance Training

    Jessie Diggins (USA) diligently puts in her time in the gym. The right exercises and the right applications result in stronger, faster skiers. (Photo: FasterSkier)

    Cross country ski trails—and the grooming strategies that prepare those trails for race events—have changed dramatically in recent seasons, especially since artificial snow became commonplace at Nordic venues. Commensurately, skiing speeds have increased, and so has the reliance on upper body power for propulsion. This has been most visible in classic skiing where technique zones are put in place down to the junior level to ensure that striding remains part of the sport. These changes in course preparation have led to skiers relying on power in the double pole over efficiency in striding.  The resulting increase in speed is what many skiers are seeking; often, they incorporate strength training in search of that extra bit of speed.

    “Strength training” is a term that I don’t love as a coach and physiologist. I use the term, myself, but it is vague and hard to define. According to Oxford Languages (via Google), “strength” is the quality or state of being physically strong (the ability to move/lift a weight, or resist a force). When skiers think of what is often termed “strength training,” we usually imagine some form of resistance training designed to augment and improve our aerobic and anaerobic performances. The question that should be of interest to skiers, then, is what sort of strength/resistance training is most likely to benefit our skiing?

    Julia Kern (USA) employs in-season strength work between on-snow training sessions, Davos Switzerland. (Photo: Julia Kern)

    Resistance training—the term that better describes these workouts—is often thought of (by skiers) as time in the weight room or circuits in the park. These workouts can affect a variety of changes in one’s physiology. They can increase muscle mass through hypertrophy, increase load on bones, and strengthen connective tissue. Neuromuscular developments can also happen that allow the skier to recruit more motor units and—in doing so—recruit more muscle to that movement.

    These changes can have a variety of impacts on a cross country skier. More strength often translates into more power that can be put into the pole or ski, generating more speed. These changes also help protect the body from injury by increasing muscle mass resulting in better protection of the joints. Most often the focus of any training is on increasing ski speed. Recruiting more motor units is one of the main emphases of such training. By using motions similar to skiing, an athlete can transfer these newly strengthened pathways into their skiing motions. An example of this is the squat, the loading of the leg is very similar to the kick in either skating or classic skiing.

    “Strength is fundamental to maximizing ski performance,” remarked Team Birkie Head Coach, Chad Salmela. “In a similarly-perceived sport like distance running, one might be able to progress quite a lot simply by running more.  Performance in skiing, by comparison, requires a trained core and general strength accumulation to practice the fundamentals of the ski techniques, and then needs specific development beyond that. So, from the very basics, training to ski faster fundamentally requires fairly advanced muscular strength, whether organized into a weight lifting or gym routine, or simply growing up that way…I think periodizing strength development in the off-season, and strength maintenance during the racing season, especially for higher level athletes, is a pretty big part of performance coaching for skiers. There are a lot of effective ways to build and maintain muscular strength.  How that fits into developing other critical training priorities is one of the primary foundations of good coaching.”

    Core training and stability exercises have become a fundamental part of most ski-specific strength training programs. (Photo: FasterSkier)

    When incorporating strength training into one’s workout schedules, there are a variety of options. One is to create dedicated spaces and times for strength training. This is the routine typically employed by those who have access to these spaces. Another option is using body weight and/or creative solutions (like backpacks filled with rocks) to create resistance training in a park or back yard. With minimal equipment, skiers can achieve many of the same effects as those found in a weight room. Combining strength work with an endurance/interval factor (as in a timed circuit) is a nice way to develop general fitness, but the key to developing greater strength is to isolate those strength movements, and perform them when not under aerobic stress. In other words, there is no exercise or workout that is the solution for everything. With either of these strength training strategies, I like to design workouts focusing on three upper body exercises, three lower body exercise and three core exercises per training session. When choosing exercises, focus on those that incorporate multiple joints. This engages more muscles and lessens the number of movements needed to get a full body workout. One major difference that most endurance athletes employ in their strength training is training the whole body every time they do a resistance training session. Many weightlifters and body builders will alternate leg days and arm days to make daily resistance training more effective. Since resistance training for cross country skiers is often done 2-3x a week (with a day or more of rest in between sessions) it is effective to train the whole body each session.

    When discussed by endurance athletes, resistance training is often thought of with the single goal of “getting stronger.” When executed well, it can achieve a variety of outcomes depending on how it’s implemented. This training can be used to achieve four outcomes:

    • Increased power
    • Strength
    • Hypertrophy
    • Muscular endurance.

    To affect these outcomes, it’s helpful to know ones one rep max (the maximum amount of resistance you can lift in a single repetition for that exercise).

    In order to clearly understand our two workout examples (see below), it’s important to consider what a few of those terms mean:

    SETS: the number of times you go through that exercise’s repetitions.

    REPETITIONS: the number of times you move your body or the weight, while MAX indicates that you can’t accomplish even one more repetition. If the plan prescribes 12RM this means that you should select a weight heavy enough that you can’t accomplish the 13th repetition. If you can do more than the proscribed number of repetitions, then add weight for the next set.

    STRENGTH: Load greater than 85 %1RM, repetitions, less than or equal to six.

    POWER: loads of 80% 1RM, repetitions of two to five with multiple sets.

    HYPERTROPHY: Loads of 67-85% 1RM/ 6-12 repetitions.

    MUSCULAR ENDURANCE: loads less than or equal to 67 %1RM and greater than 12 repetitions.

    Source: Haff, G., and Triplett, N. (2016). Essentials of Strength and Conditioning (4th ed.). National Strength and Conditioning Association

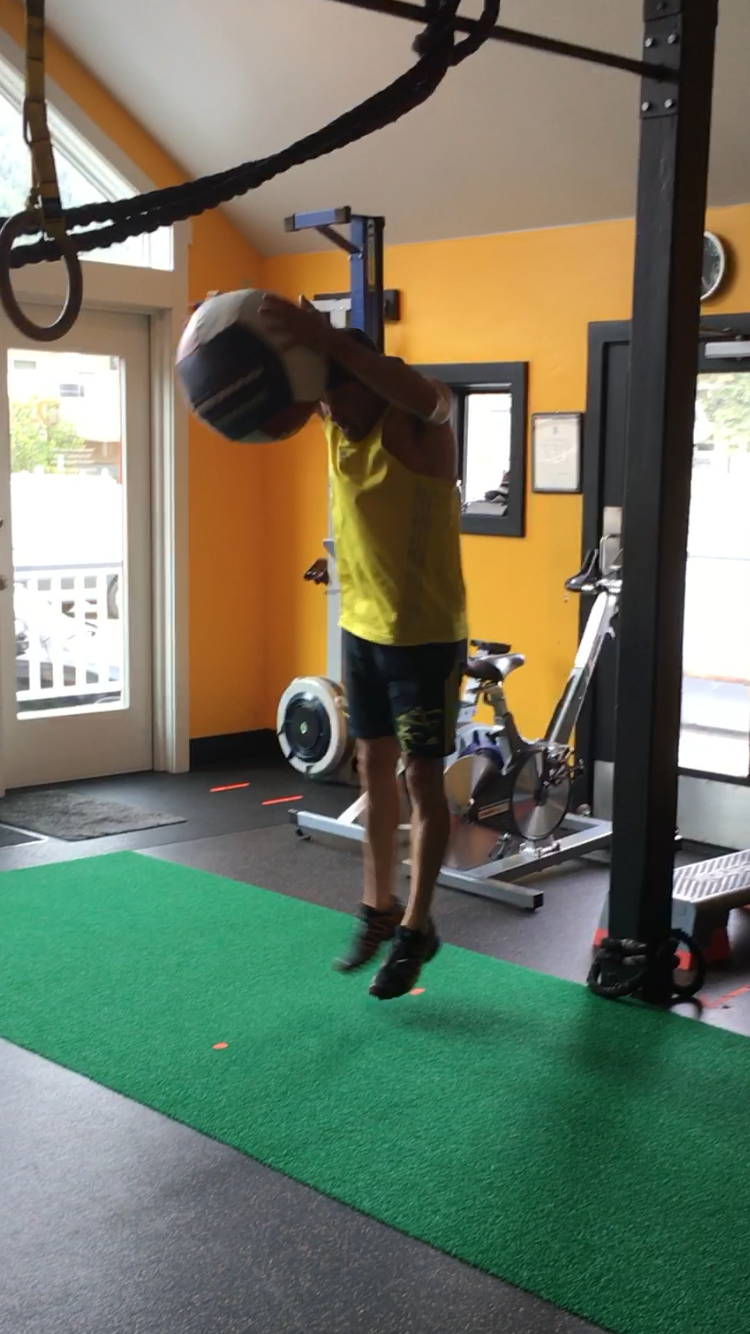
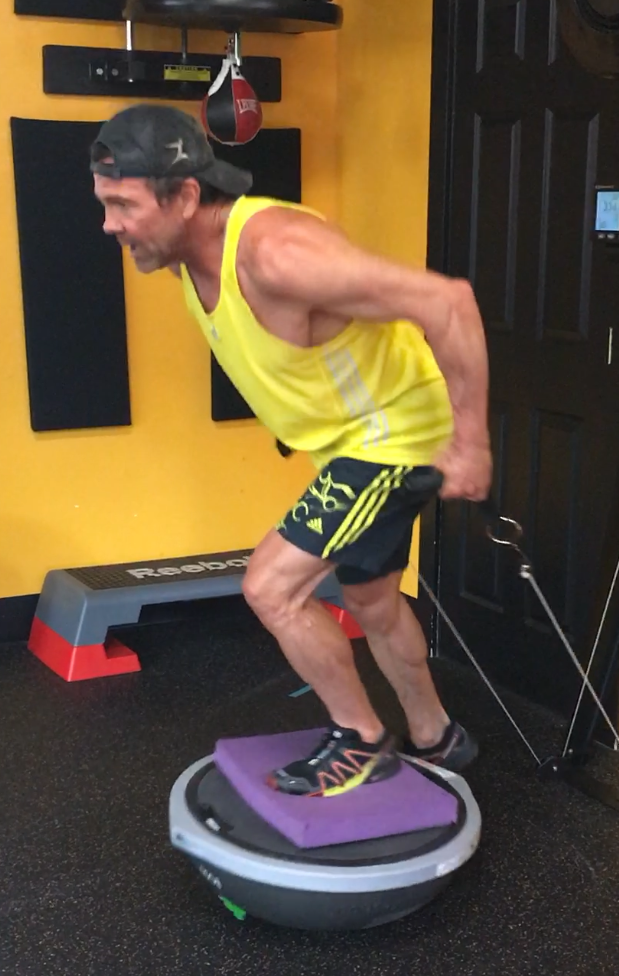
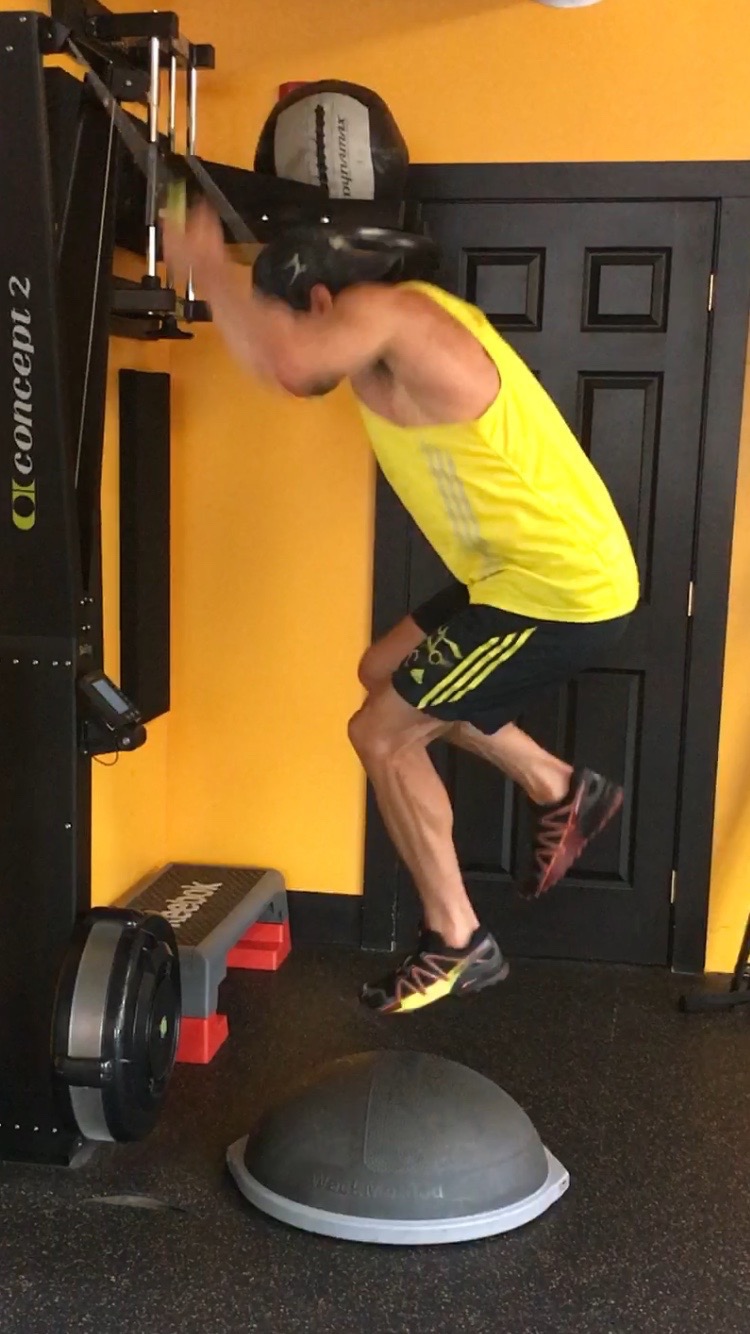
    The different set schemes for strength, power, hypertrophy and muscular endurance lead to some outcomes that are desirable for endurance athlete and some that are not desirable. Notably the hypertrophy set schemes are often avoided to limit the increases in mass that one has to carry on the ski trail. Exceptions to this are moving through it to condition someone to be able to use the power loads. Often training will periodize muscular endurance blocks and power blocks to compliment the other training goals throughout the year. Other priorities for cross country skiers include stability while gliding on one ski. Professional skiers often post on social media impressive pictures or videos that illustrate this prowess. As a developing skier becomes more proficient at many of the strength exercises, adding a balance component can be beneficial to their skiing. One example of this would be to stand on a Bosu ball while doing medicine ball throw downs or adding the Bosu ball to the body weight squats.

    There are good examples of these exercises on YouTube as well as in this guide.

    Sample Weight Room Workout

    3 sets, 14 RM, 2 minute between sets, 3 minutes between sets.

    Lat Pull Down

    Squats or Leg Press

    Dips

    Lunges

    Seated Row

    Single Leg Romanian Deadlift

    Front Plank

    Dead Bug

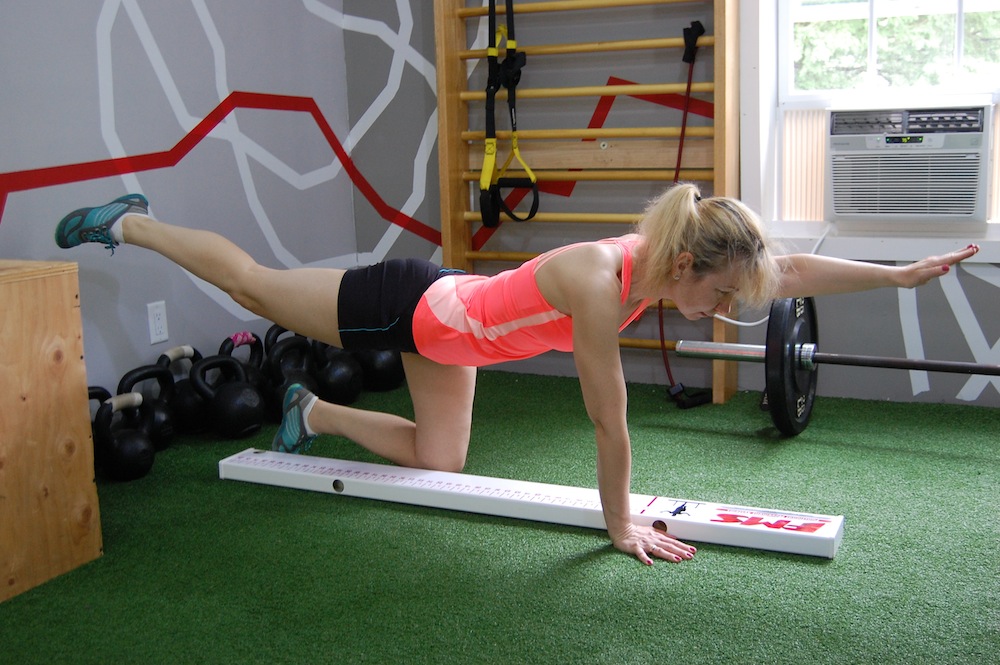
    Bird Dogs


    Sample Circuit Strength Workout

    3 rounds, 30-40 seconds on, 30-20 seconds off, 5 minute rest between rounds.

    Push Ups

    Lunges

    Crunches

    Chair Dips

    Body Weight squats

    High Plank with Shoulder Tap

    Medicine Ball Throw Downs

    Step ups or Box Jumps (picnic table bench or stair)

    Bird Dogs


  • Introducing a New Series: Ask the PT

    Introducing a New Series: Ask the PT

    When I began skiing halfway through high school, I remember my coach telling our team that cross-country skiing was a “lifelong sport”. Now, more than a decade and a half later, I don’t have to look far to see the truth in that statement. While out for a ski on local trails, I might see a 65 year old retiree who is training for the Korteloppet, a 50 year old former bike racer who has taken up skate skiing in the winter, a 75 year old skiing in jeans on fish scales, and a 17-year-old Junior Nationals hopeful. I might also see (or be) a parent towing their child(ren) in a chariot, a beginner working up the courage to “pizza” down a hill, or a former NCAA racer kicking and gliding effortlessly up the track. Each of us with unique starting points, individual differences in technique, and physiological strengths and weaknesses, the ski community encompasses a wide spectrum of athletes. 

    One of the authors favorite spots on her local trails at Spring Gulch near Carbondale, CO.

    The beauty of a low-impact sport is that it can be forgiving on the body, despite the cardiovascular toll it might require. At the same time – yes, it’s a low-impact sport, but “low-impact” does not mean cross-country skiing does not put a large strain on the body. It requires strength, balance, repetitive movement, and at times might involve an uncomfortable crash or two onto unforgiving hard packed snow. 

    Whether you have performance or fitness goals, are simply looking to improve technique and efficiency, or are looking for a path to return to a pain free ski experience following an injury, it’s likely that a question has run through your mind while out for a ski that you wish you had a physical therapist by your side to field.

    We’ve got your back. 

    FasterSkier is excited to introduce a new reader-driven series: “Ask the PT”. You ask, we answer.

    So who is the PT? 

    Already a familiar face on this site, Ned Dowling is a physical therapist based in Salt Lake City, UT. Most recently, Ned authored the “Building a Better Skier” series, focused on biomechanics, as well as articles on heart rate variability and an upcoming piece on SkiErg technique. 

    Though he had spent time on skis previously, Ned became hooked on cross-country skiing after moving to Salt Lake City a decade ago. With an extensive background in cycling, Ned worked as a physical therapist for a pro cycling team for several years, which gave him insights into the professional endurance sport world that have now transferred into his work with skiers. 

    After attending a U.S. Ski & Snowboard conference on ACL repair several years ago, Ned connected with some of the strength and conditioning coaches working at the Center for Excellence in Park City, and began learning more about the teams who trained there. These connections eventually led to a call in January 2020 asking him to travel to work with the U.S. Cross Country Team. 

    Ned Dowling out for a ski in Sjusjøen, Norway with Jessie Diggins and Matt Whitcomb. (Courtesy photo)

    In March 2020, as the pandemic loomed, Ned traveled to meet the team in Lillehammer, Norway, following Ski Tour 2020. (If, like us, you feel the last two years have been a blur, Ski Tour 2020 was a six-stage tour that began in mid-February in Östersund, Sweden and ended in Trondheim, Norway. The women’s Tour was won by Therese Johaug, with Pål Golberg taking the overall win for the men.)

    Ned has since continued his relationship with the U.S. Ski Team, and more recently assisted with athlete care during the team’s fall training camp in Park City, UT. Ned is also slated to join the team for the final two weekends of World Cup racing which are scheduled to take place in Falun, Sweden and Tyumen, Russia. 

    So how will this work? Shoot us your biomechanics and physical therapy-related questions to AskThePT@fasterskier.com. We’re aiming for a monthly article where Ned tackles a reader’s question, which hopefully benefits the broader nordic community as well. For other content related questions or comments, feel free to email info@fasterskier.com. 

    Stay tuned and happy trails! 

  • Building a Better Skier Part 4: The Shoulder

    Building a Better Skier Part 4: The Shoulder

    Rosie Brennan powers through the final meters for a commanding second place finish in Stage 4 of the 2021 Tour de Ski. (Photo: NordicFocus)

    This is Part 4 of a series delving into how biomechanics and movement patterns affect skiing technique. If you haven’t already, start with the introduction, Part 1 which introduces the concept of a neutral spine posture, Part 2 which describes spine stability and mobility, and Part 3 on single limb stability.

    ——————————————–

    Upper body power is a major contributor and perhaps even a determinant of cross country skiing performance. Poling accounts for up to 60% of propulsion in skate and classic diagonal and, obviously, 100% with double pole. For those who train for skiing year round, upper body work is an essential part of the routine. However, for those whose summers are focused on running, cycling, or hiking, arm strength is often forgotten once the snow melts.

    Let’s take a closer look at the structures and muscles involved in the upper body during the various poling motions of skiing. 

    The muscles that comprise the shoulder girdle can be roughly divided into two groups: the stabilizers and the movers. Coordinated motion requires “dynamic stability”, i.e., for the two groups to together such that the stabilizer muscles control extraneous joint motion while the movers perform the primary action. 

    The shoulder has a tremendous amount of motion available and relies heavily on the coordinated effort of multiple muscles to maintain proper alignment and movement of the joint. At the same time, it is capable of generating large amounts of power, whether that’s throwing a 90mph fastball, hammering a nail, or repeatedly pushing on a ski pole.

    The shoulder stabilizers can be further divided into those acting on the glenohumeral joint (the primary ball-and-socket shoulder joint) and those supporting the scapulothoracic joint (shoulder blade on the ribcage). 

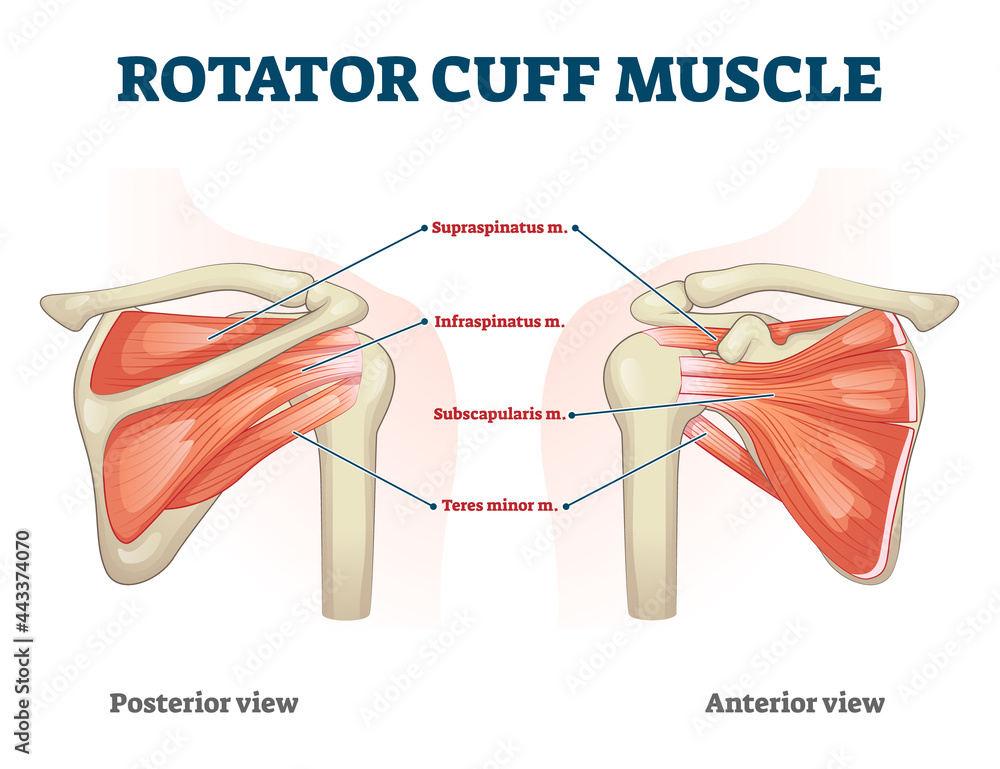
    The rotator cuff is a group of four muscles — supraspinatus, infraspinatus, teres minor, and subscapularis — that attach to both the scapula and humerus in close proximity to the joint. They are not particularly strong muscles, but they play a vital role in coordinating the movement of the glenohumeral joint. 

    A diagram of the muscle group involved in the shoulder’s rotator cuff. (Photo: www.freepik.com)

    The only rigid or bony attachment of the arm to the body is via the collarbone. This small bone is not enough to support the load of push ups, pull ups, or double poling. The base of support truly lies in the muscular attachment of the shoulder blade to the ribcage. For the sake of the simplicity of this article, we’ll limit the discussion to four muscles, one of which doesn’t count. (Side note: a classic physical therapy trivia question is to name all 17 muscles that attach to the scapula–clearly I’m skipping a few here.) 

    The primary stabilizers of the scapular are lower trapezius, middle trapezius, and serratus anterior. I’ll contend that the upper trapezius is a stabilizer but doesn’t count because it tends to exert force in the wrong direction (and is frequently overactive so needs little in the way of direct strengthening).

    The trapezius muscles stabilize and move the scapula along the ribcage. (Photo: www.freepik.com)

    As with any dynamic stability in the body — abdominal muscles for the lumbar spine, glutes for the hip, or the aforementioned muscles in the shoulder girdle — strength is important but intermuscular coordination is key. This is especially true at the shoulder due to its wide range of available motion and corresponding muscular complexity. 

    The following are exercises targeting the stabilizers, both at the shoulder joint and scapula.

    Exercises for the Stabilizers:

    (The intent of these exercises should be thought of more as activation drills and less about the heaviest weight you can find. Yes, we are looking to induce some fatigue but the emphasis is not on power.)

    Side Lying External Rotation: Lie on your side. Keep the top elbow bent at 90° and against your side. Rotate about the shoulder until your forearm is at about 45° to the horizontal. Try not to pull with your shoulder blade. A little bit of weight goes a long way.

    External Rotation + Uppercut: With a resistance band anchored on the opposite side, elbow fixed at 90°, and forearm against your belly. Rotate the forearm away from the belly to a neutral position (knuckles pointed forward). Then raise the arm by spinning through the shoulder. Again, the elbow should stay at 90° throughout. Only raise the arm to shoulder height. Motion should be isolated at the shoulder joint — don’t let the shoulder blade move. Finish by lowering the arm down and rotating the forearm back to the belly.

    Scaption: Raise both arms up your sides at 45° (not in front, not to the side, but halfway in between). Stop at shoulder height. Keep the shoulder blades fixed down and back. Start with light weights.

    Wall Slides: Loop a very light resistance band around both hands and stand facing a wall. Place both hands on the wall at about shoulder heights with elbows bent and palms facing inward. Stretch the band by squeezing your shoulder blades down and back, not just pulling from the arms. Keep the shoulder blades pinned down and back, band tensioned, and slide your hands up the wall until your elbows are at about shoulder height. Slide back down to the starting position. Ideally, the shoulder blades stay retracted throughout the set of repetitions, but you can stop and reset them between reps or as needed.

    Serratus Punch: The serratus anterior muscle attaches to the ribcage, inserts on the scapula, and, acting alone, protracts the scapula, or pulls it forward. As a stand alone movement, this scapular protraction is not especially functional unless you are a boxer hitting with a jab. However, the serratus anterior is a team player and becomes very functional when co-contracting with the posterior scapular muscles (especially middle and lower trapezius) to stabilize and coordinate movement of the scapula. The exercise will work the serratus anterior independently. 

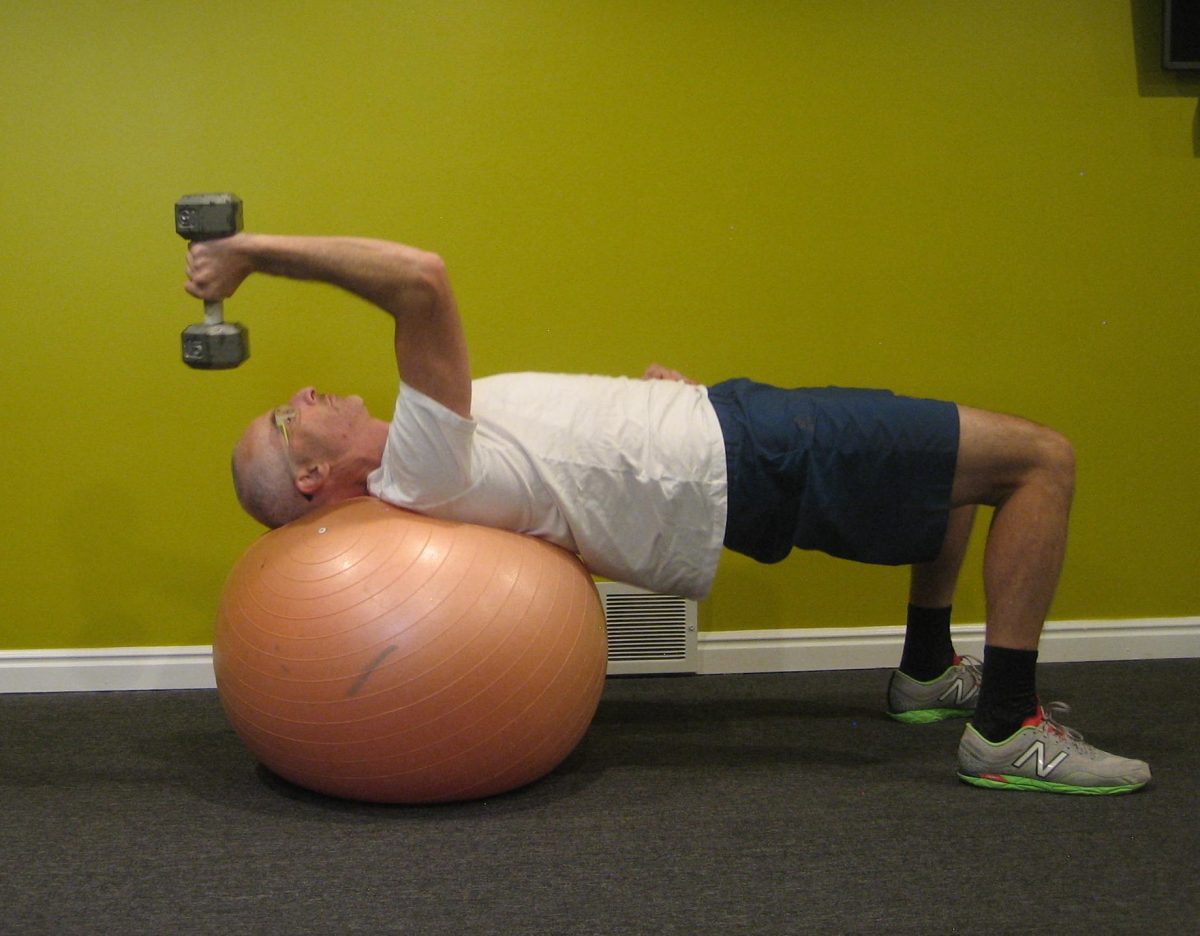
    Lie on your back holding a dumbbell in each hand. Knees are bent and elbows are straight. Push the dumbbells towards the ceiling by moving the shoulder blades forward on the ribcage. This is the opposite of the motion described in Wall Slides. The neck and thoracic spine stay relaxed. This can also be done with a resistance band.

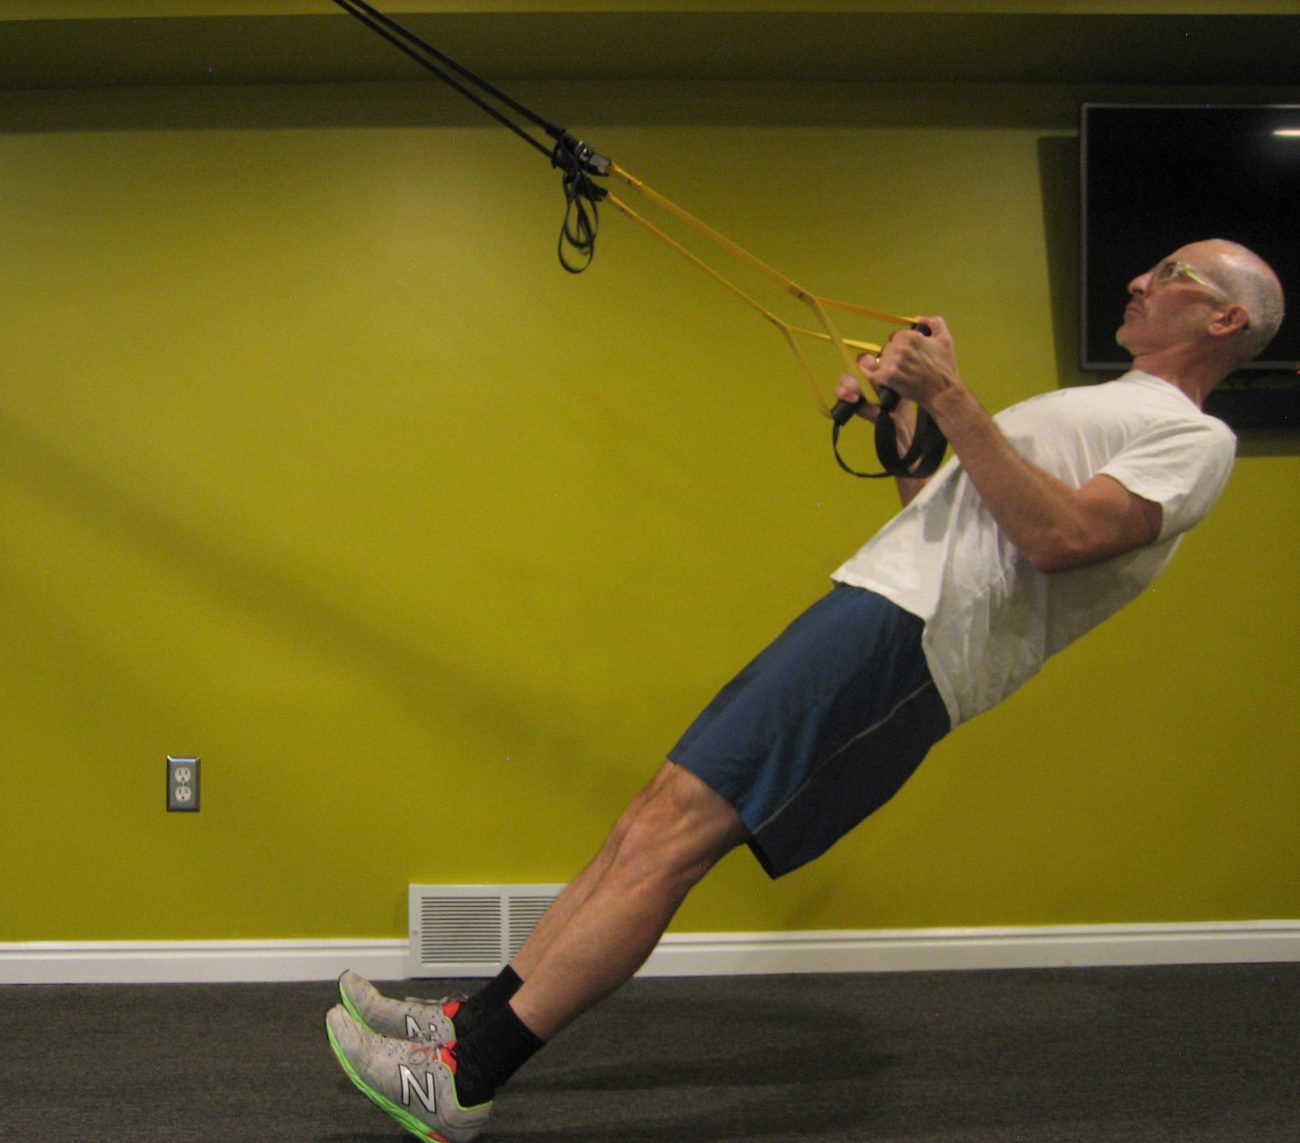
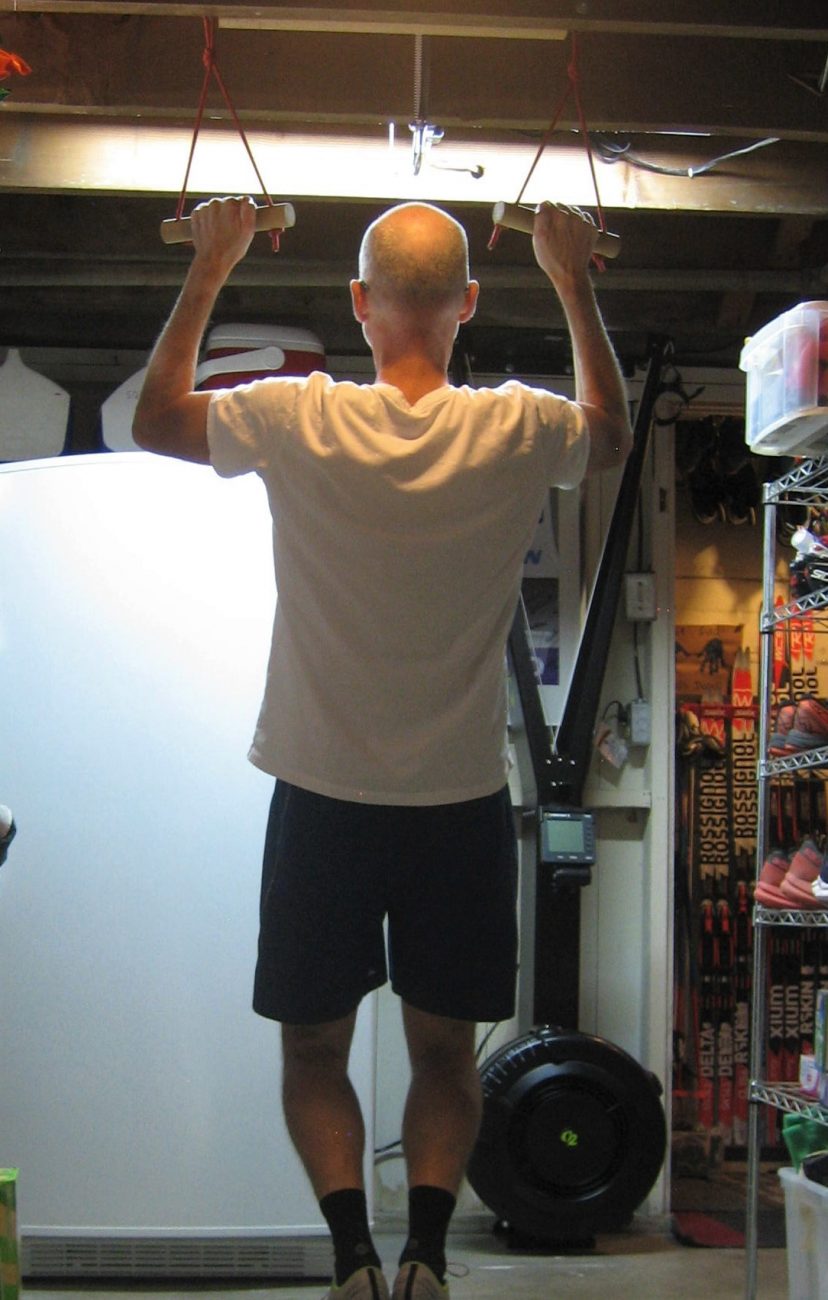
    Rows: The emphasis of the rowing motion is on squeezing the shoulder blades down and back as you pull the resistance towards you. This is the same motion described in Wall Slides and the opposite of the Serratus Punch. There are multiple means of adding resistance to the movement: resistance band, cable machine, single dumbbell/kettlebell, TRX, etc. 


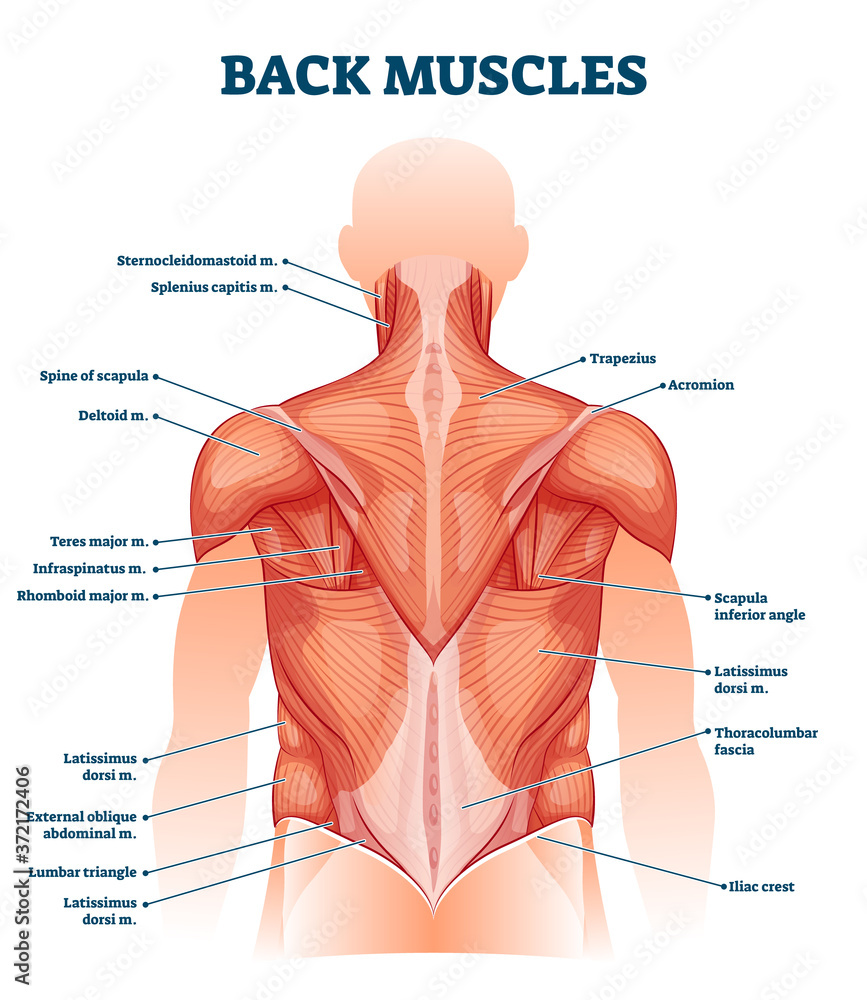
    In the propulsive phase of poling, the prime mover at the shoulder joint is the latissimus dorsi — often referred to as the “lats”. This big, broad muscle extends the shoulder, pulling an outwardly extended arm to the side as in freestyle swim strokes and pull ups. The lats are aided by the posterior portion of the deltoid muscle and teres major. 

    A diagram of the back muscles, including the latissimus dorsi. (Photo: www.freepik.com)

    The elbow joint is also involved with the triceps playing a rather complex role. This muscle, or more technically speaking, this group of muscles has a common insertion on the ulna and acts to straighten the elbow. However, the long head of the triceps, attaching to the scapular vs the humerus, is also able to play a role in shoulder extension. I say the triceps play a complex role because motion about the elbow varies with technique and terrain. In Skate V1 and V2 alternate and in Classic striding, there is a fair amount of elbow extension. However, in V2 and uphill double poling, there is very little motion at the elbow. 

    Notice how little motion takes place at the elbow during V2.


    A clinical case study: (Disclaimer: the subject of this case is the author, a potential duplicity that is frowned upon in academia.) In the lead up to ski season, I began doing “budget SkiErg” workouts double poling with resistance bands. After several weeks of twice a week workouts, I began to develop left posterior elbow pain. It didn’t take much to figure out I had irritated the insertional tendon of the triceps. So I stopped the workouts and focused on eccentric strengthening of the triceps, which has become the standard of care in the treatment of tendinopathies. 

    Come ski season, I could skate without any problems, but I continued to have elbow pain with more than about 45 minutes of classic. One night at dinner I was venting to my wife about my now chronic elbow pain. Ever the voice of reason, she asked what I would do if I was seeing myself in the clinic. What would I, the PT, do differently for a patient who is not responding? I replied that I would examine, biomechanically, how the patient is poling. So I started to think about how I was doing what I was doing. 

    My hypothesis was that I was using my triceps too much to generate shoulder extension. I started doing shoulder extension exercises with my elbow fixed at 90°. I focused on leading the motion with the back of my elbow, not my hand. Within a couple of weeks, the elbow pain was gone. The lesson from my mistake is that functional movement patterns often require a high degree of coordination. Because of our bodies’ anatomical redundancy, it is easy to fall into a suboptimal pattern that is inefficient in the best case and in the worst has potential for injury.

    Interestingly, the biceps appear to be very active during double poling, which seems counterintuitive since the action of the biceps is in the opposite direction of the propulsive phase of poling. The biceps do contribute to shoulder flexion so they are likely involved during the return phase. But, more likely, the majority of their action is co-contraction with the triceps to stabilize the elbow and hold it in the desired position. Perhaps this is rationale to include some biceps strengthening for more than just filling out the sleeves of your cycling jersey.

    David Norris models single-stick poling technique during a skiathlon in Lillehammer, Norway in December, 2019. (Photo: NordicFocu)
    Exercises for the Movers:

    Shoulder Extension: This is most easily done with a dumbbell, but a resistance band will work as well. As described in the case study, keep the elbow locked at 90° and focus on spinning at the shoulder joint by leading with the back of the elbow.

    Strengthening the Triceps: Like with Rows, there are numerous ways to work the triceps with no single exercise being the best. Resistance band, cable machine, dumbbell, push ups, and dips are all appropriate.


    Strengthening the Lats: The basic lat workout is pull ups. If these are too difficult to do at least 3 reps, then put your feet on a chair or on a long resistance band loop attached to the pull up bar (just make sure the band stays on your feet and not in between them!). Lat machines in the gym are a great alternative as you can select resistance that is lighter than body weight (or more than body weight if you can whip out 10+ regular pull ups)


    Epilogue: The goal of the Building a Better Skier series has been to identify some key biomechanical and kinematic components of cross country skiing and to provide exercises with the specific intent of facilitating these movement patterns and strength requirements. By no means has the depth of these articles been exhaustive. Nor have the lists of exercises covered all possibilities. Hopefully, these articles have been easy to follow and the exercises have been included in your twice weekly strength/dryland/pay-to-play routine. Even better, I hope the work done now will pay dividends when the snow falls this winter. Best of luck with the remainder of summer (the heat, the smoke, the pandemic), the glorious autumn, the struggles of shoulder season, and the winter we’ve all been waiting for.


  • Building a Better Skier Part 3: Single Limb Stability

    Building a Better Skier Part 3: Single Limb Stability

    This is Part 3 of a series delving into how biomechanics and movement patterns affect skiing technique. If you haven’t already, start with the introduction, Part 1 which introduces the concept of a neutral spine posture, and Part 2 which describes spine stability and mobility.

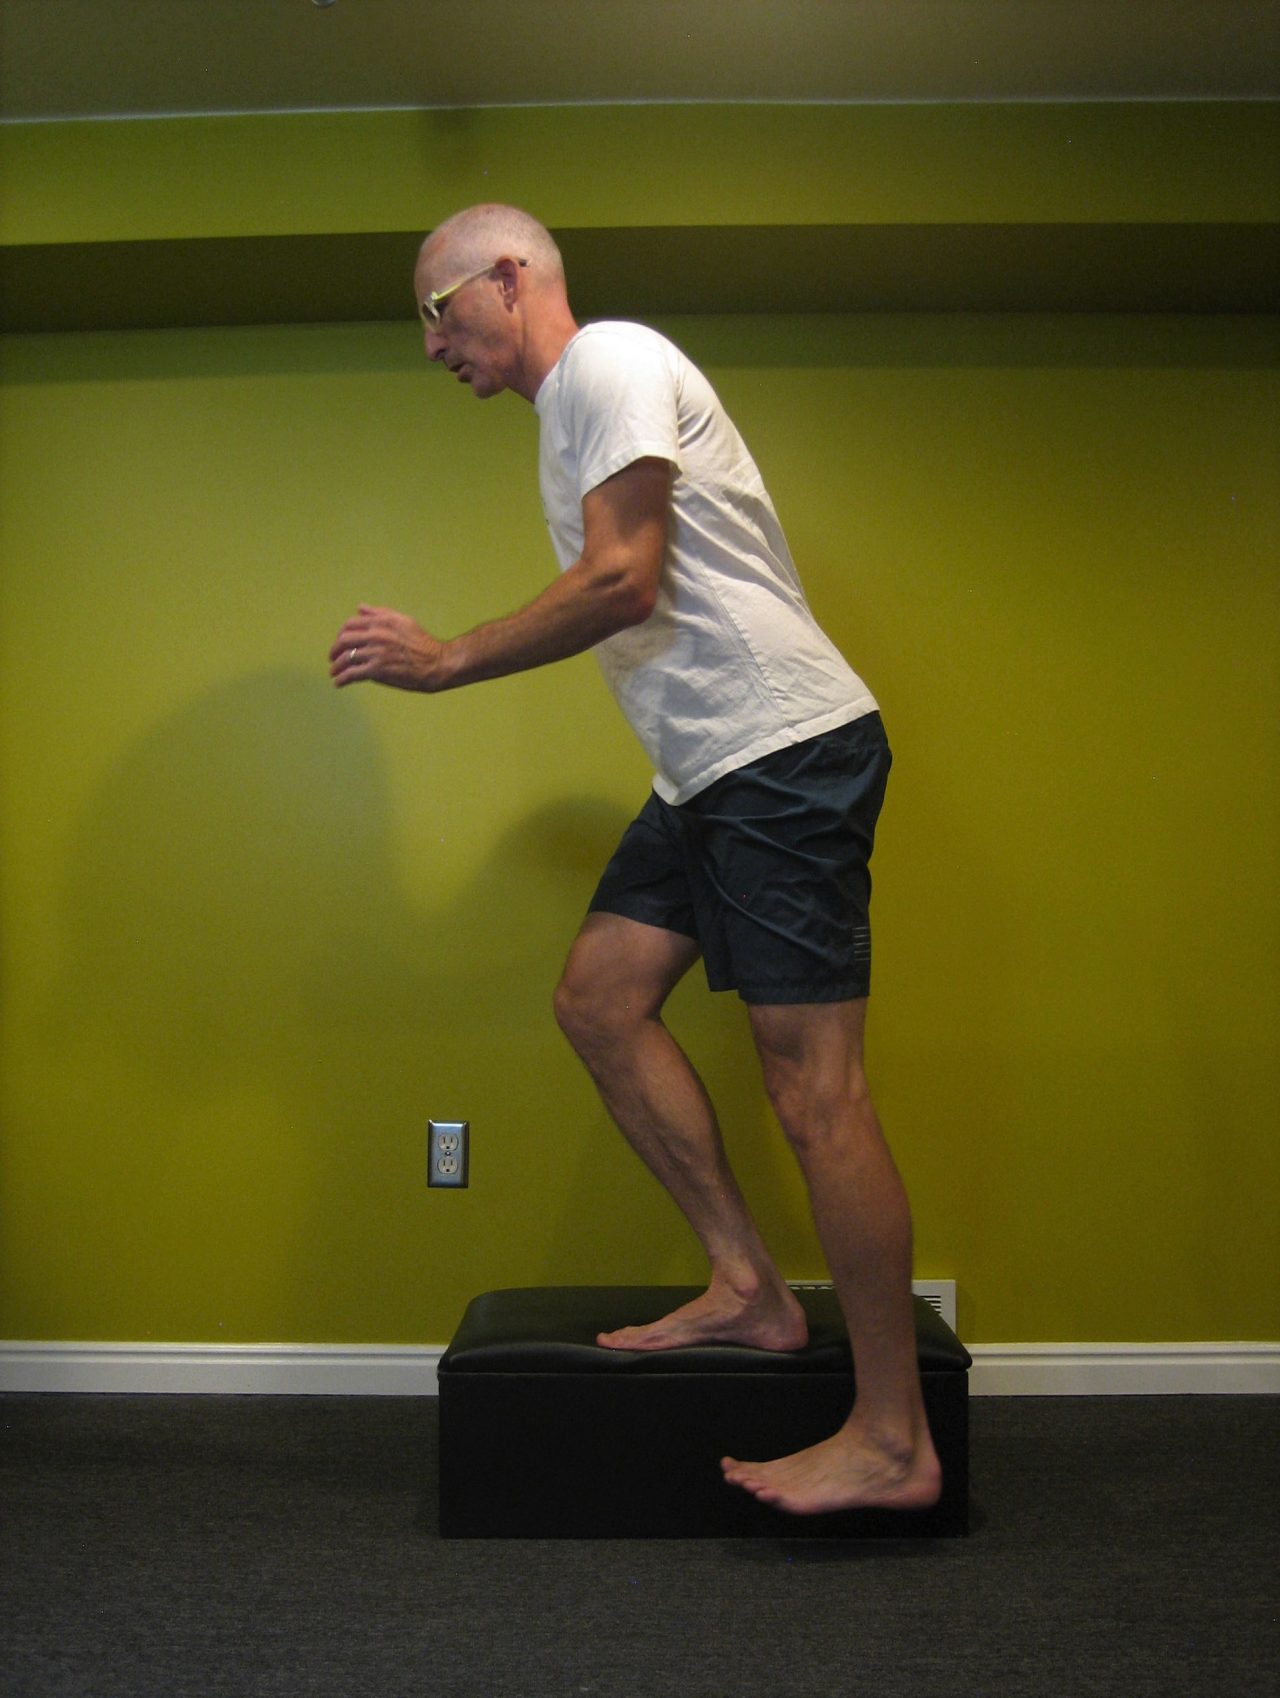
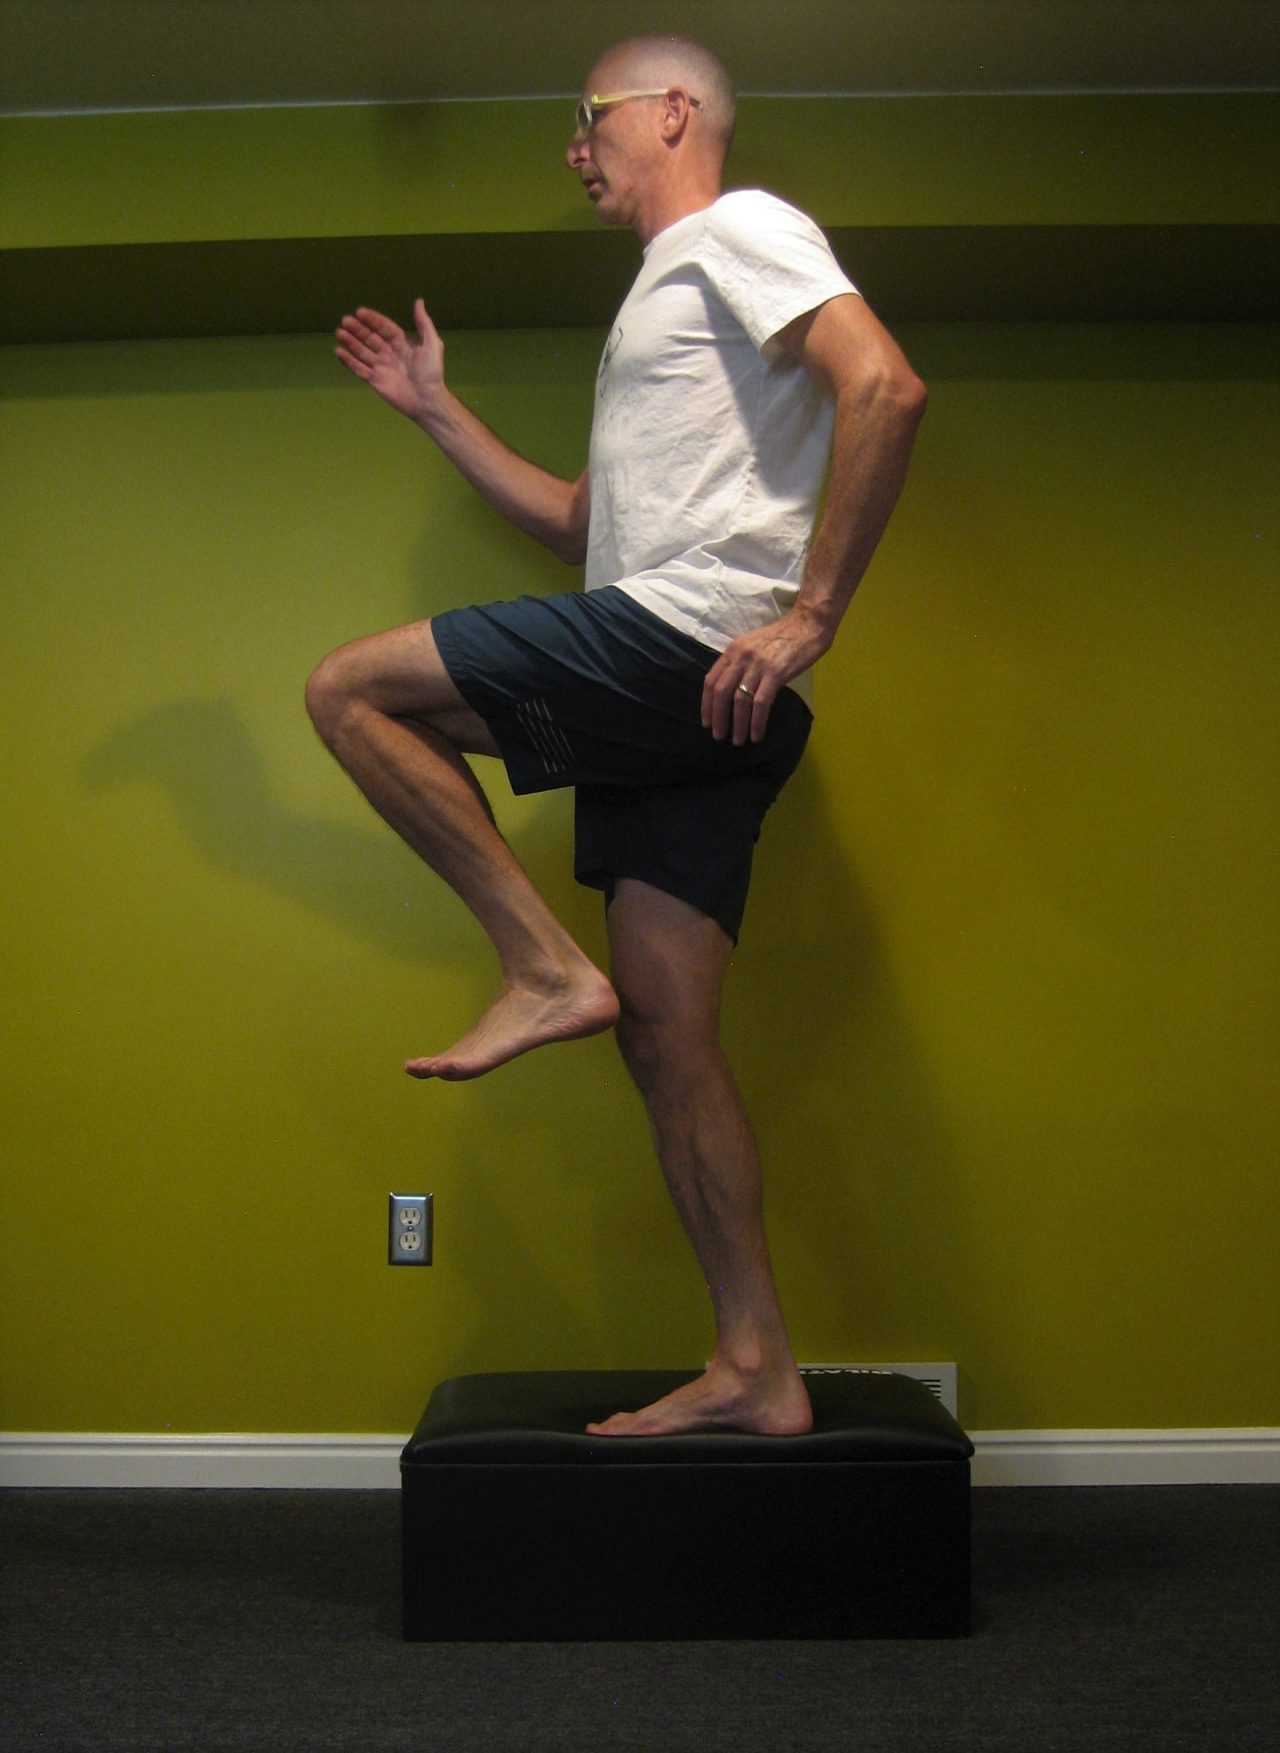
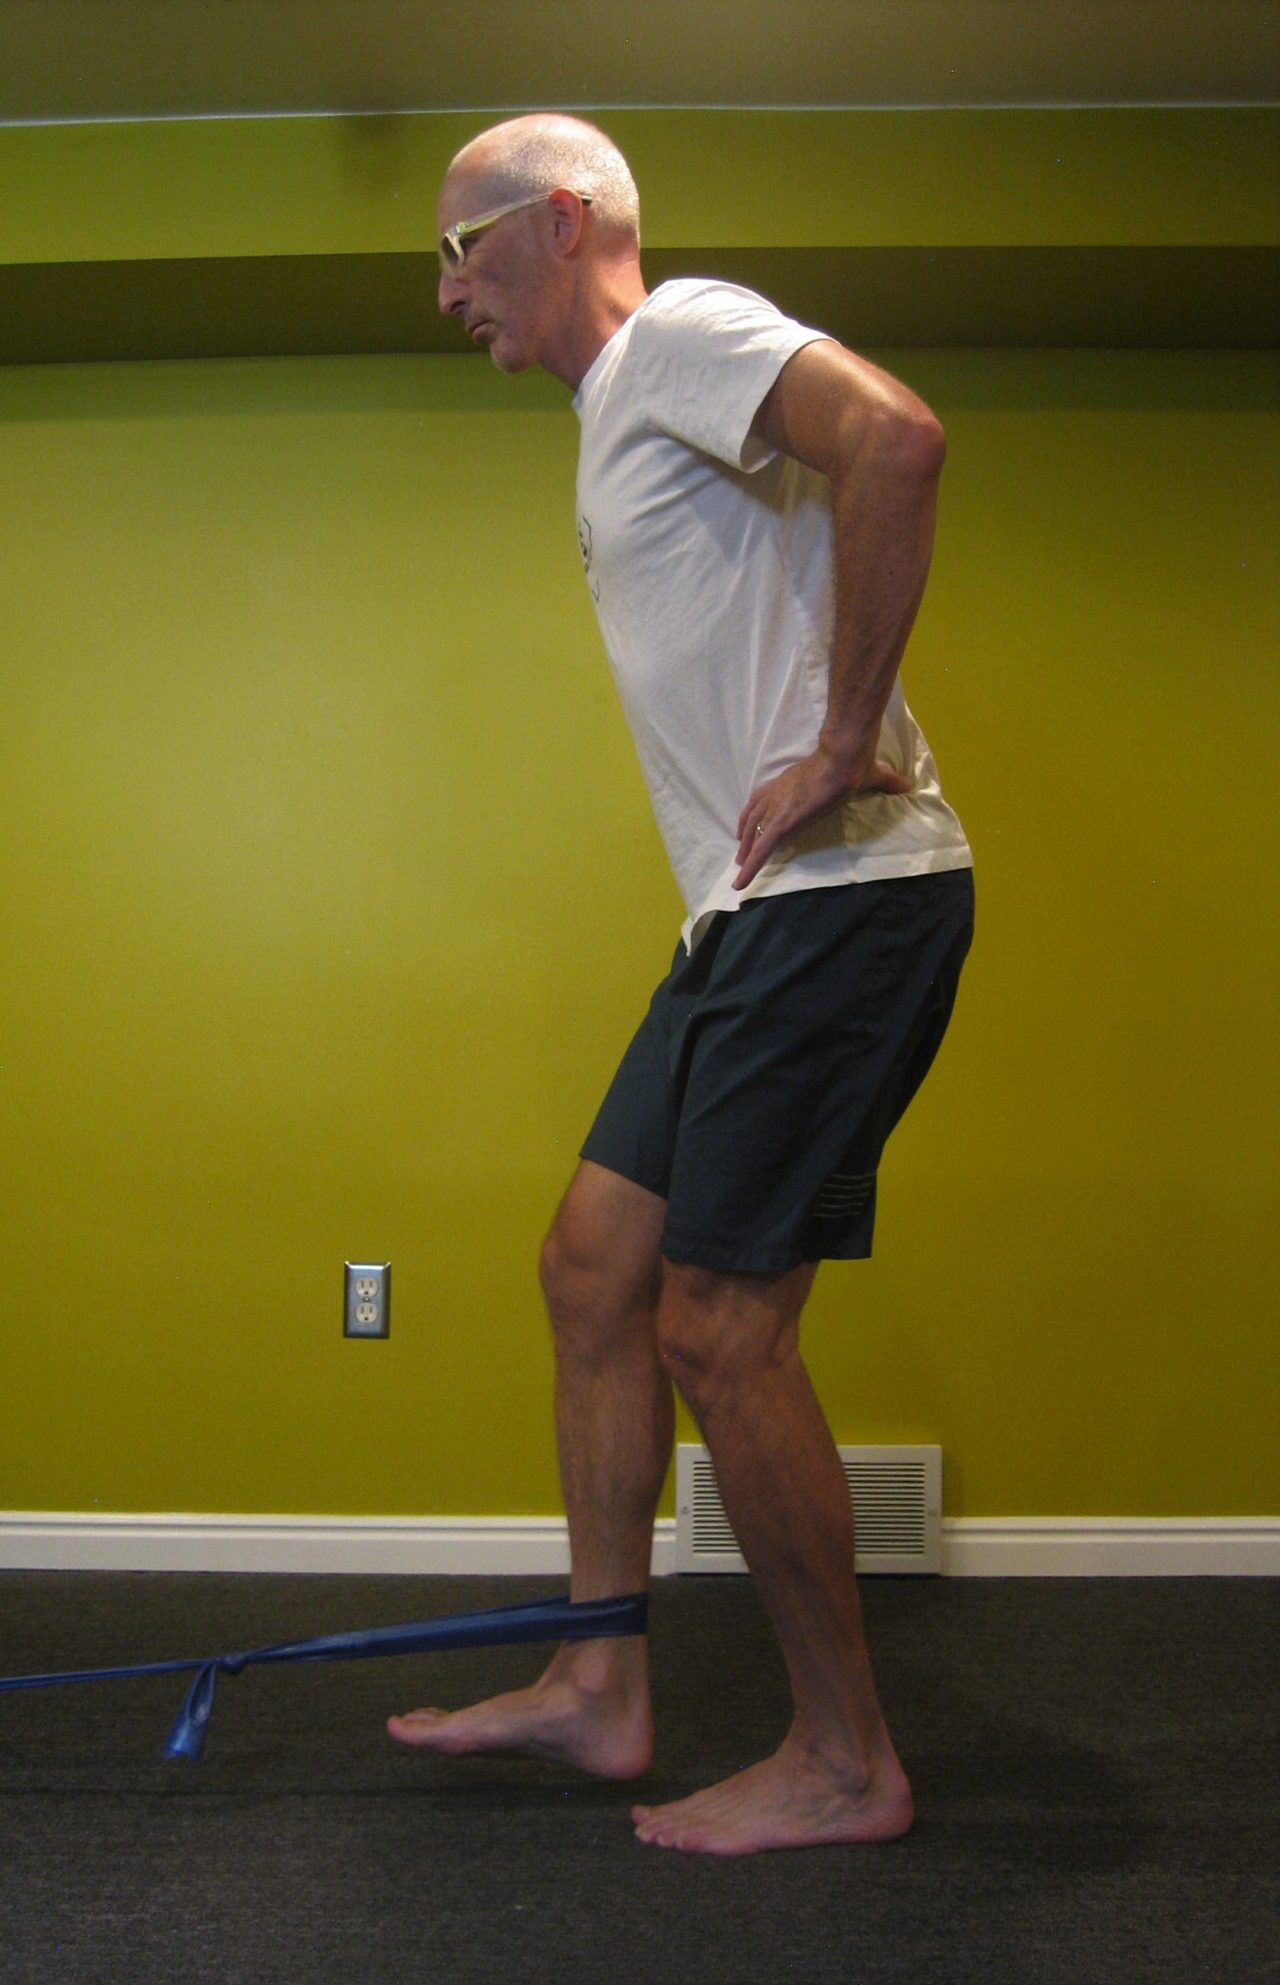
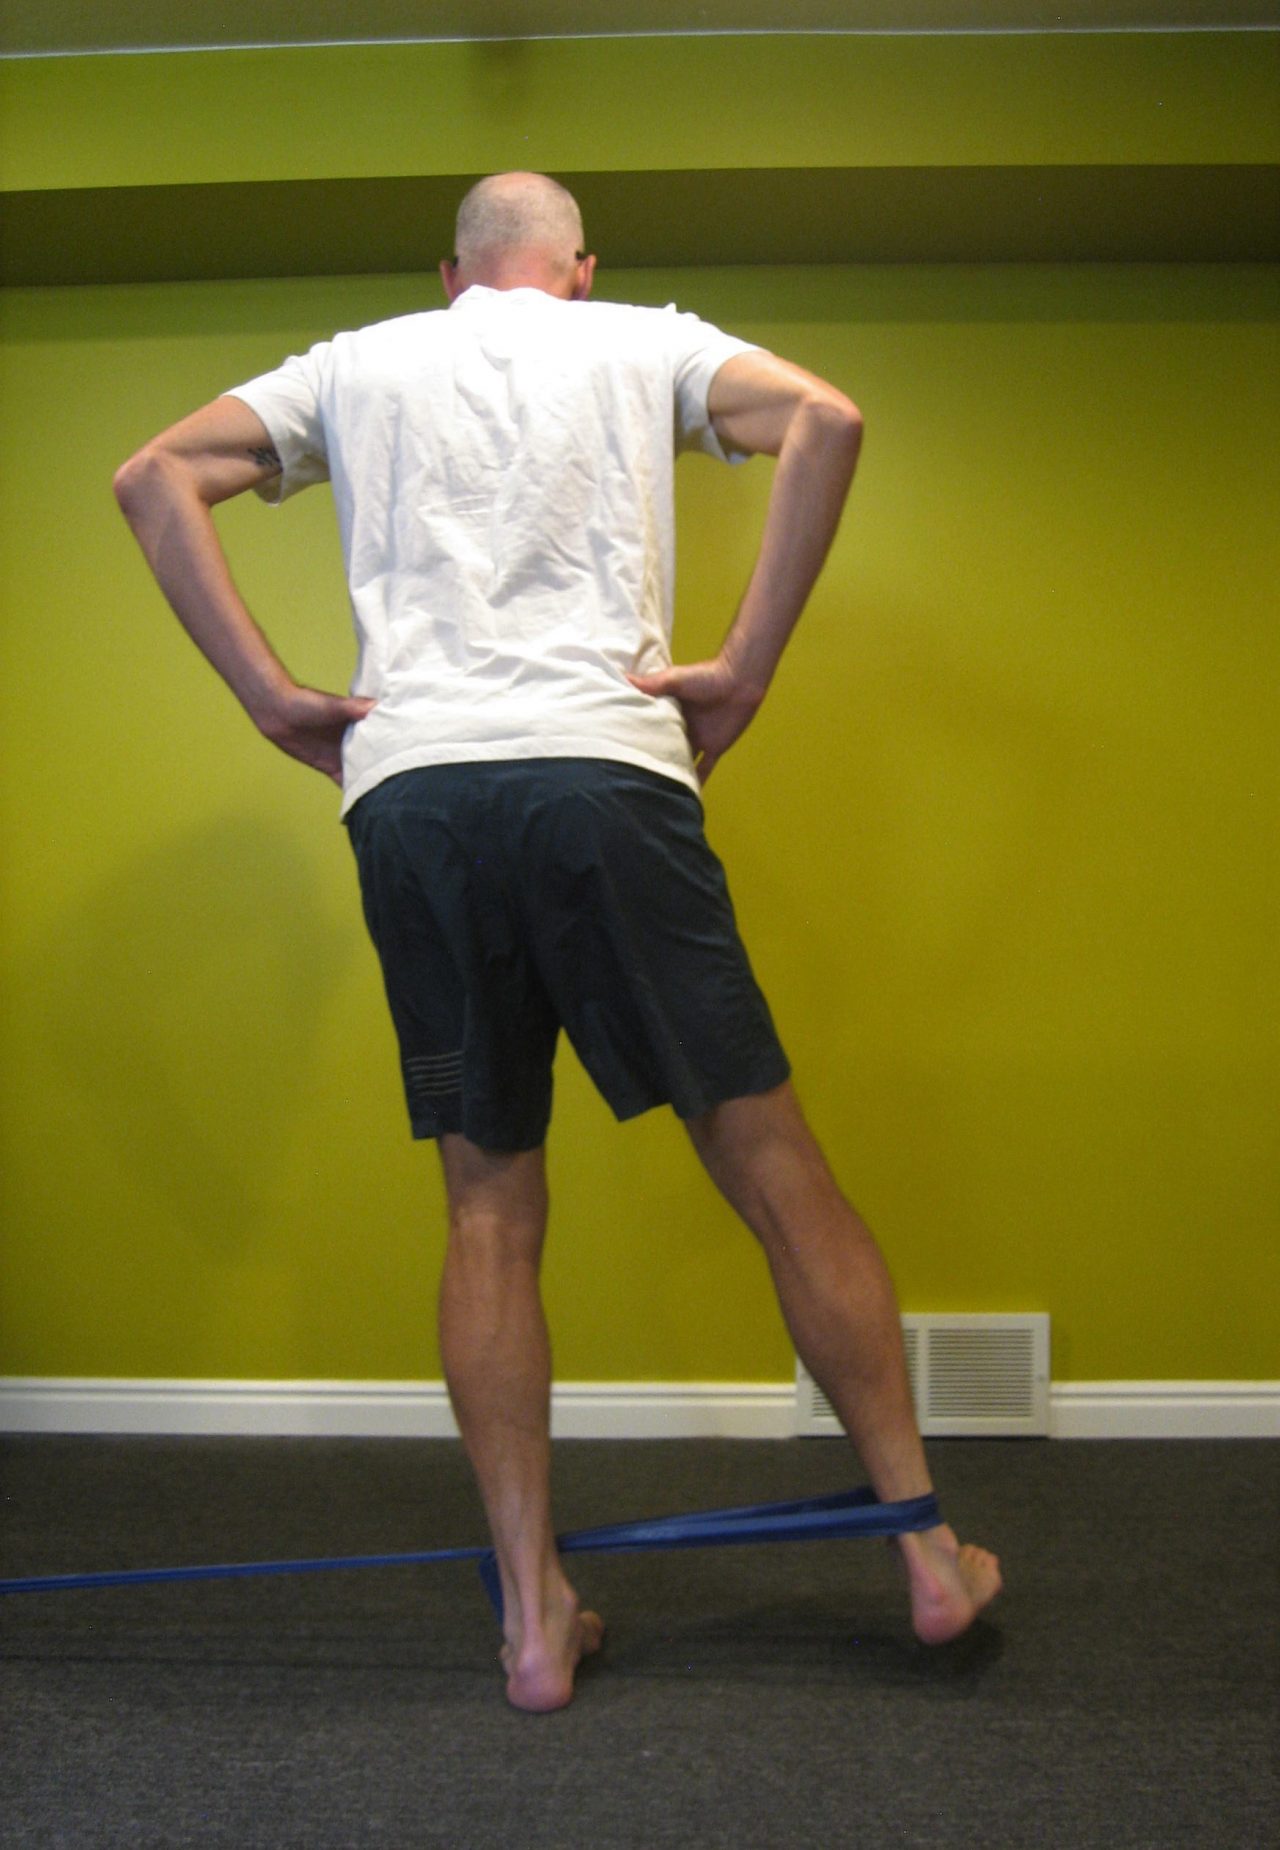
    The ability to balance and be stable on one leg is where the rubber meets the road (or ski hits the snow). True, we generate propulsion with strength and endurance, but if that power is not transferred into glide, it becomes wasted effort. This is quite literally what separates the efficient from the inefficient. Or, the fast from the not so fast.

    This study set out to quantify the difference in glide between elite and sub-elite skiers (national vs regional skiers). As expected, they found that the higher caliber skiers did, in fact, glide better. In trying to quantify the why, fitness aside, they found that the national level skiers had a different pattern of foot pressure in the boot. Where the regional skiers only pressured the medial side (big toe side), the national skiers loaded their feet across the whole foot. 

    What’s really happening here is that the national level skiers were better at shifting their weight over the glide foot/ski. This “commitment” to the glide ski is one of the hardest things to master, especially for adults learning to Nordic skiing later in life. 

    When standing on two feet, your center of gravity falls in the middle between your feet. If you want to balance on one foot, your weight has to shift. You can’t just pick up one foot. To achieve this weight shift, you can lean your trunk, which will allow you to balance, but it is not a stable or powerful position. If you shift your pelvis to the side of the stance leg, you can accomplish the requisite weight shift AND place your body in a position where muscles are engaged and ready to roll .

    The skiers in this video are fine examples of appropriate, hip-centric weight shifts. Notice how the upper body stays very quiet and still. There is no side to side movement. The pelvis, however, can clearly be seen moving side to side to move the skier’s center of gravity fully over top of the glide ski.

    This is all easier said than done. Go stand in front of a mirror — a bathroom vanity mirror is fine because you only need to see your shoulders. Balance on one foot. Do your shoulders stay level? Now move the opposite leg to the side and back a few times. Are your shoulders still level? If they are not, then it’s unlikely that you are shifting your weight appropriately. If you are struggling with balance on a smooth, flat floor, you can appreciate the challenge of finding stability while gliding down an undulating track on a toothpick of a ski.

    Another major component of single limb stability is the coordination of joint flexion at the hip, knee, and ankle. Anyone who’s had a ski lesson has heard the phrase nose, knees, and toes —  or that the shin and trunk should be parallel. These cues are all about getting the ankle, knee, and hip to flex together. The goal is to put the body in a position that is both inherently stable due to muscle activation and preloaded for propulsion. This is what I’ll be referring to as the basic shape.

    Norwegian biathlon star Johannes Thingnes Bø models “nose, knees, toes.” Notice that the shin and trunk (green lines) are parallel. (Photo: Ned Dowling)

    The next experiment requires a partner. Balance on one leg staying very upright with your knee and hip straight. Have your partner push you (gently!) from each side. Did you maintain your balance? Now aim for the nose, knees, toes position and have your partner push on you again. Which position was more stable? (If you had difficulty finding this position, there will be more cues with the exercises below.)

    If the distribution of foot pressure and coordinated joint flexion are two major components of single leg stability — which has been shown to be a major component of skiing efficiency — then it seems highly rational that we should strive to perfect these traits on dry land before we expect ourselves to do it on skis (including and arguably even more so on rollerskis). We must be able to form the basic shape.

    Adequate strength of the gluteal muscles is a prerequisite. If you don’t already incorporate glute exercises in your strength program, you can get some great ideas from previous FasterSkier articles here and here.

    Foot and ankle mechanics are also a primary contributor. In the basic shape, we are asking the ankle to flex forward at the same time that the foot has to accept our full weight. Insufficient or excessive flexion, or poorly controlled mobility through the foot and/or ankle can force the tibia (shin bone) to rotate inward, taking the knee with it. Lack of glute strength and control can have the same effect from the top down. With this extraneous  motion coming from either direction, the result is an increased valgus (medially-directed) force on the knee, which equates to increased loads in both the tibiofemoral and patellofemoral joints. Clinically, this is the most common cause of knee pain with Nordic skiing.

    If the prescription for controlling top-down motion is glute strength and coordination, the bottom-up is addressed through strength of the muscles in the foot and ankle. Conveniently, these can often be addressed by simply working on single limb stability — as long as you pay attention. Quality control is mandatory!

    A note on orthotics: In many circles, custom orthotics have fallen out of vogue especially since studies like this one have found them to be no better than exercise at helping knee pain. But the demands on the ankle joint are quite different in Nordic skiing than with walking or running, which are more commonly studied. Skiing generally requires a much greater amount of dorsiflexion. As mentioned above, we want this dorsiflexion to happen without internally rotating the tibia. The addition of external support to the foot has the potential to control this aberrant motion. I am a strong proponent of at least some upgrade of insoles in ski boots (and cycling shoes for the same reason). Most stock insoles are terrible, even the ones that came in my very expensive carbon boots. Out-of-the-box options from Superfeet, Sole, Powerstep, and Curex are all quite good and far less expensive than custom. For some, these might not provide enough support and custom orthotics with a strategic build up of additional material would be better. 

    How do you know? A quick test I do in the clinic is to have my patient balance and do a couple of single leg squats while barefoot. Then I have them do the same thing with a more supportive insole. Then I place a piece of ¼” (4mm) thick folded cardboard under the insole at the ball of the foot and have them repeat the balance and squats. I’m looking for whether they become “easier,” “less painful,” or appear better controlled to my eye. If the extra material under the insole made for improvements, then we talk about custom orthotics. If it made no difference, then I just advise an upgraded insole. Ultimately, we are looking to improve both the alignment of the knee as the ankle dorsiflexes AND improve balance.

    All of that said, here are my top three exercises/drills for ski-specific balance–the basic shape. Ideally, these are done barefoot, without the additional support of an insole and shoe (opposite of the previous conversion), so the muscles have to work harder and get stronger. The basic cues are the same for all three:

    • Tripod Foot: A tripod gets its stability from three legs and we want three primary pressure points on the foot–the ball of the foot, the pinky side ball of the foot, and the heel. Weight should be slightly biased forward off of the heel. The toes should be on the floor but relaxed and not gripping for dear life.
    • Nose, Knees, Toes: My preferred way of thinking about this is if snot is dripping from your nose, you want it to land on your shoe not down the front of your shirt. Bend at the ankle, knee, and hip to accomplish this. 
    • Weight Shift: comes from the pelvis/hip not leaning the trunk. Park yourself into the hip. If your glutes aren’t burning, you’re doing it wrong (or the exercise is too easy).
    • Posture: neutral spine is the goal. Forward trunk lean occurs through the hips, not the spine.
    • Forward Gaze: Avoid staring at your feet. You’ll need to keep your head up to look down the track while skiing, so best to get used to it in training. It will also remove some visual dependency and help with maintaining a neutral spine.
    • Quality vs Quantity: the emphasis is on how you do the exercise, not just going through the motions. 
    The author models “the basic shape”.

    Start by forming the basic shape. If this is challenging to maintain, then do not progress until it becomes natural and thoughtless.

    Exercise #1: Step Ups

    Stand sideways on a step (preferably the bottom, not top, step). Lower your outside foot towards the floor. As you lower, you should be going into the basic shape. Return to the tall starting position. Don’t worry about trying to fully touch the floor–that’s not the goal. The goal is to move up and down, in and out of the basic shape. For added challenge, hold a dumbbell in the outside hand. 2-3 sets of 10-15 reps should be adequate to bring on some fatigue and challenge your balance.

    Exercise #2: Single Leg Series with Band

    Loop a long exercise band around one ankle and face the anchor point of the band. Than, assume the basic shape standing on the unbanded leg. While maintaining the basic shape, pull straight back against the band to bring the foot in line with the standing leg, then follow through to kick the foot a few inches behind. Turn your body 90 degrees in either direction and repeat the process; extending the banded leg outward to work the gluteus medius muscles of the outer hip, or pulling the banded leg toward the standing leg to stimulate the inner adductor muscles. Ultimately, you will face four different directions but the force against the band is always in direct opposition to the anchor point of the band.

    If you can only source a “mini-band” loop, put it around both ankles and skip the pulling-in motion. A little resistance goes a long way with this exercise. Aim to perform 10-15 repetitions in each direction and do two laps on each leg.

    Exercise #3: Lateral Hops

    Form the basic shape on your right leg. Step onto the left leg, shifting your weight from the pelvis, and again form the basic shape. Progressively increase the distance between steps, turning it into more of a sideways hop than step. Keep the unloaded leg extended to the side as if skiing — do not let it flag behind the stance leg unless you are a speedskater.

    Keep it honest: make sure you are sticking the landing and holding your balance for a second or two on each leg before pushing off to the next side. This is meant to be a balance exercise, not plyometric strength work. The next progression is to hold a resistance band anchored from the side. I prefer to base this exercise on time (1-2 minutes) vs repetitions so there’s no question of whether that botched one was good enough to count.

    Notably absent from this article is the neurological component of balance. Many of my PT colleagues would absolutely berate me over this; however, I wanted to stick to the basic kinesiology and this article is long enough already. The brain receives massive amounts of information from vestibular, neural receptors in joints and soft tissue, and vision. In fractions of a second, it processes this information and directs muscles to act. If any link in that system is compromised, so too is your balance. If you think about the difference between skiing on a sunny, bluebird versus flat light or a storm, you can quickly appreciate how vision affects balance. There are certainly ways to challenge and train these systems, but that is beyond the scope of this article. However, an excellent way to progress any balance exercise is to do it with your eyes closed. 

  • Making a Healthy Transition to Running as the Seasons Change with Jessica Yeaton

    Making a Healthy Transition to Running as the Seasons Change with Jessica Yeaton

    The author crosses a snow field on a long run near her home in Colorado last summer.

    Last year at this time, I was primarily gym-ridden. After roughly five months on snow, my fitness was high but my tolerance for the impact and specific demands of running were low. Throwing better judgement to the wind, I gave in to the allure of warm days, rapidly drying trails, and beloved road loops around town, and paid the price.  

    Despite running between zero and ten miles total between December and the end of February, I took off for my first run of the season: 4.5 miles. That first week totalled 20 miles in four runs. Much lower than summer totals, but far greater than the sum of the months prior.

    Two weeks later, I did a 90 minute trail run with roughly 1,200 feet of climbing and descending. What started as the sensation that a tendon on the lateral side of my right knee was snagging with each leg swing quickly turned into a sharp stabbing pain. I hobbled my way home and by that afternoon, I couldn’t walk downstairs without sidestepping or even make it down the gentle slope of my front yard. Sound familiar?

    This experience is not uncommon. When snow conditions deteriorate in the spring but weather is perhaps not yet conducive to cycling or rollerskiing, our options for aerobic exercise that provides the same satisfaction as the kilometers we logged all winter are limited. The best available early season option is often running, so we lace up our cobwebbed sneakers, and fight the temptation to jump back in too quickly. 

    While some may tolerate a rapid transition, there are a myriad of running related injuries that could easily crop up. Last year at this time, FasterSkier featured recommendations from Dr. Ross McKinnon, DPT, to address the topic of a healthy transition to running. His advice included a slow increase in running volume, working on running mechanics, beginning with soft surfaces, and making sure your shoes are up to the task. 

    To add on, we reached out to DPT candidate, Olympian, and former APU Teammate Jess Yeaton for additional information to support a healthy return to running. 

    Jess Yeaton heads for home to win the 2018 Mt Marathon race in Seward, AK. (Photo: Anchorage Daily News/Lauren Holmes)

    Seconding Dr. McKinnon’s first recommendation, Yeaton began with the importance of committing to a gradual return.

    “I think the absolute biggest thing is taking a slow progression back and not increasing your weekly mileage too much, as well as adding in exercises that target strengthening glute med.”

    The gluteus medius muscle, or glute med, is a fan shaped muscle on the outside of the hip which connects the iliac crest to the top of the femur. The glute med plays a vital role in single leg stability, in particular, in maintaining level positioning of the hips and proper alignment of the leg during each stride. After all, running is essentially a repetitive high-impact single leg motion, so stability at the hips and through the core are key.

    By strengthening the glute med, runners can reduce “hip drop” and prevent the knee from caving inward with each stride. These phenomena reduce the body’s natural mechanisms for absorbing the impacts of running. They put abnormal strain on various ligaments, tendons, and joints down the chain, leading to IT Band Syndrome, knee and low back pain, and more. 

    The gluteus medius, or glute med, provides stability at the hip, a source of injury risk for runners. (Photo: Human Anatomy and Physiology Lab, LumenLearning.com)

    “Examples of [exercises to strengthen the glute med] would be things like donkey kicks, fire hydrants, bridging up with both legs and then holding with one leg,” Yeaton explained. “I actually had to do a community project working with a running group here in Albuquerque for school and made a video with some of these exercises, which is available on YouTube.”

    In the video, Yeaton demonstrates forward and lateral walks with an exercise band looped above the knees. Maintaining tension in the band activates and strengthens the glute med, promoting better stability in single leg movements, such as running — or skiing!

    Yeaton also contributed to an article on single-leg stability geared toward better balance on skis this fall, which can be found here. 

    In the gym, you could try single leg deadlifts with a kettlebell or free weight to build stability. To execute this move correctly, it is important to keep the hips level to the floor and avoid the tendency to rotate away from the standing leg. While keeping a flat back, focus on hinging  from the hip and staying within the range of motion that your hamstring flexibility allows rather than reaching the weight toward the floor, which often leads to rounding at the low back. In addition to challenging your single leg balance, you should feel this in the glute and hamstring of the standing leg. 

    Aim for a flat back with hips squared forward, and keep the toes of the lifted leg pointed toward the ground.

    Another option for enhanced glute med strength is to try a split squat with the rear leg elevated, also known as a Bulgarian split squat. With one foot resting on a box, stair, or bench, complete a single leg squat, creating a 90-degree bend in the knee of the standing leg. The knee of the elevated leg should drop straight down toward the ground, while the other knee stays stacked over the ankle and in line with the foot. 

    Be sure to keep your chest up and core tight to reduce wobbling and work the correct muscles.

    By pushing your heel into the ground as you come out of the squat, you can keep the action in your glute muscle, rather than letting the quadriceps muscles on the front of the upper leg take over. Again, the positioning of the hips is important; here they should stay squared forward throughout the movement. 

    Yeaton also noted that she commonly sees skiers develop calf and achilles related injuries from jumping back into running too quickly and recommended variations of calf raises and heel drops to combat these issues. 

    “Another one you could add is doing calf raises with a ball between your ankles, which puts you in a supinated position (meaning the foot is rotated slightly inward), which helps target tibialis posterior. I’ve noticed this muscle is a BIG problem for a lot of skiers.”

    Keeping pressure on the ball as you rise onto your toes and slowly lower cues and strengthens the tibialis posterior.

    The tibialis posterior lies underneath the gastrocnemius, more commonly known as the calf muscle. Running the full length of the lower leg, the tibialis posterior begins behind the knee and connects to the arch of the foot. It helps to flex the foot and reduce pronation, where the arch collapses and the ankle tracks inward. This is commonly seen in runners.

    To perform the exercise, hold a soft ball, such as a tennis ball, between the heels of your feet. Slowly rise onto your toes while maintaining the positioning of the ball, hold briefly at the top, then return slowly to standing. 

    “For achilles strength, you can do heel drop exercises on the stairs. Push up into a calf raise on both feet, then lower down slowly on one foot. The eccentric, or the slow, controlled lowering part is what’s important.”

    Use both feet to rise onto your toes, then slowly lower with just one foot to target the achilles.

    Returning to the concept of a gradual increase in running volume, Yeaton recommends actually calculating how quickly you are ramping up. Yeaton recommends the 10% rule — meaning volume should increase by no more than 10% per week. She referenced a 2014 study titled “Excessive progression in weekly running distance and risk of running-related injuries: an association which varies according to type of injury”, which followed roughly 900 runners for one year, tracking mileage increase and injuries. The research showed that athletes who increase by 30% or more were at a higher risk for injury, whereas those who increased by 10% or less were the least likely to incur a running-related injury. 

    “I think this is crazy when skiers put a number to it, because that really isn’t much of an increase… from what I’ve seen, what most athletes consider taking it slow and easing back in is really a pretty significant progression.”

    Obviously, there are caveats — if you start with one three mile run, you’ll probably be okay running more than 3.3 miles total the next week. If you ran 12 miles over four runs last week, you probably shouldn’t run 13 in one go the following week. However, paying attention to frequency, distance, and intensity of your runs as you progress can play a vital role in keeping your body happy.

    Anecdotally, running 5-7 miles once per week through this winter has made a big difference in my ability to progress this spring. 

    So there you have it. Work on hip stability and core strength (bonus: this will help your skiing too!), incorporate calf raises and heel drops, and keep an objective eye on your progression. Have fun and stay healthy!

  • Developing Single-Leg Stability for Improved Glide

    Developing Single-Leg Stability for Improved Glide


    If you’ve found your way here, you are likely familiar with the three tenets of cross country skiing: push off, weight transfer, and glide. Whether it’s diagonal stride in the track or V2 on the corduroy, your ability to experience a complete weight transfer, ride a flat ski, and carry momentum is heavily dependent on the stability of your standing leg. 

    Why is developing that balance and stability a challenge? For those who choose modalities other than roller skiing to enjoy the outdoors in the offseason, consider what types of motion those activities entail. Cycling, running, hiking, and walking are all very linear movements with fairly rapid tempo, meaning there is little emphasis on the lateral push off or extended single leg balance that are the cornerstones of cross country ski technique. 

    Simi Hamilton skiing to a World Cup career best 34th in a distance classic event. He popped the result in Ruka, Finland’s 2019 15 k classic. (Photo: NordicFocus)

    Be it your first season on skinny skis or your 50th, strengthening the lateral musculature of the hip and the tiny stabilizer muscles throughout the leg will help you develop confidence in your weight transfer and glide to help you hone your technique and enjoy sliding on snow this season. 

    There are lots of ways to improve single-leg stability; yoga, Pilates, even simply standing on one leg while brushing your teeth or doing the dishes is helpful. But if you want a few simple and targeted exercises, we have a few beneficial suggestions. Here we use mini resistance bands, which can be found for less than $20, to combine dynamic and isometric (holding in place against resistance) moves that target the musculature of the hip, improving strength and stability down the chain.

    The progression is endorsed by Doctor of Physical Therapy candidate, Australian National Team and APU Elite Team skier, 2018 Olympian, and 2020 Birkie Champion Jessica Yeaton. 

    Clamshells 

    Lie on your side with the band just above your knees. Hips and ankles should be in line with the knees bent roughly 90 degrees in front of the body. Then, rotating from the hip like a hing, open the top leg, holding at the top for two seconds, then slowly rotating back to the starting position. You should feel this in the outer part of your hip, specifically in the gluteus medius muscle which is responsible for abduction and external rotation of the leg from the hip. In layman’s terms, this means it helps keep your knee from caving inward in compensation for poor hip stability when you’re gliding on your ski and helps power your skate push off.  

    Try 2-3 sets of 10 to start, adding a longer hold or additional repetitions as you build strength.

    Some essential reminders from Yeaton: “Keep your top hip rolled forward, avoid flaring your ribs, keep your ankles together, and think about rotating at the hip rather than just lifting your knee. Again, the key is to keep your hip rolled forward and don’t let it roll back, or else you are working the wrong muscles.”

    Fire Hydrants

    Starting on hands and knees with the core engaged and the band above the knees, rotate from the hip to lift one knee off the ground. Hold at the top for two seconds, then slowly release. Keep a flat back and make sure you are not compensating by shifting your hips to the side or rotating from the spine. Keeping a ball or a light book on your low back can be a helpful cue — if it slides off, you are probably rotating your hips rather than just rotating the leg outward.  

    Try 2-3 sets of 10 to start, adding a longer hold or additional repetitions as you build strength.

    Glute Bridge With External Rotation

    For both of the exercises below, the band should again be placed just above the knees. 

    Level 1:

    Lying on your back with knees bent, feet hips width apart, and heels close to your butt, push your hips up into a bend. This should put your knees at a roughly 90 degree angle. Keeping the hips high, rotate the knees outward from the hips, further stretching the band.

    Try 2-3 sets of 30 second holds, increasing the time or repetitions as you progress.

    Level 2:

    Beginning again from the bridge position, extend one leg while focusing on keeping the hips level and not shifting side to side. You should maintain some tension in the band to keep the outer hip muscles firing, but do not need to try to add additional tension to the band.

    Again, try 2-3 sets of 30 second holds, increasing the time or reps to add challenge. 

    Yeaton reminds, “Really focusing on keeping your hips level. Don’t let the hip of the leg you are lifting off the ground drop — that’s the most important part.” 

    Skate Pushes

    With the band just above the ankles, stand on one leg with a skate ski body position. There should be a bend at the ankle, the angle of the shin and back should be parallel, and hips should be stacked over the heel. Slowly extend the free leg outward as if you were pushing off perpendicular to the trail. Hold at the top for two seconds and release slowly to the start position.

    It’s important to keep the motions slow and controlled. Just like in skate skiing, you do not want to compensate by tipping your torso to the side or letting the standing hip pop outward. A mirror can be helpful to help you maintain good form. If you’re finding it hard to maintain balance and form, try decreasing the resistance level of the band, or simply try it without the band until it becomes easier.

    Try 2-3 sets of 10 to start, adding a longer hold or additional repetitions as you build strength.

    Single-Leg Squat With Band

    If you found yourself wobbling and struggling to maintain good form with the skate pushes, it might be best to focus on the first three exercises for the time being. For those looking for a more advanced challenge, here is what Yeaton called her “favorite” exercise for single-leg stability. 

    This exercise uses a full sized resistance band wrapped just below the knee of the standing leg. Fix the other end to something stable, like a table or the vertical rung of a railing. The band should be providing resistance that tries to rotate your knee inward, and you’ll be focusing on keeping the knee in line with the toe to resist the band. 

    With the free leg extended behind, focus on maintaining pressure through the outside of the foot and keeping the hips squared forward as you drop into a single-leg half squat. You should have flexion at your ankle, knee, and hip, so the hip is stacked over the knee, just like when you’re out for a ski.  

    “Don’t let your hips rotate towards the resistance, or again, you aren’t working the right muscles!” Yeaton warns. 

    Yeaton adds, “Another option is to tie the band around the opposite leg (leg in the air), which can actually make it even harder to stabilize and keep your hips in line and not rotating.”

    Note: These exercises can all be made more challenging by incorporating a Bosu half ball or inflated disk to decrease the ground stability. 

    Wishing you improved balance and glide, and snowy trails to practice on! Give these exercises a try and you’ll be gliding like Sophie Caldwell in no time!
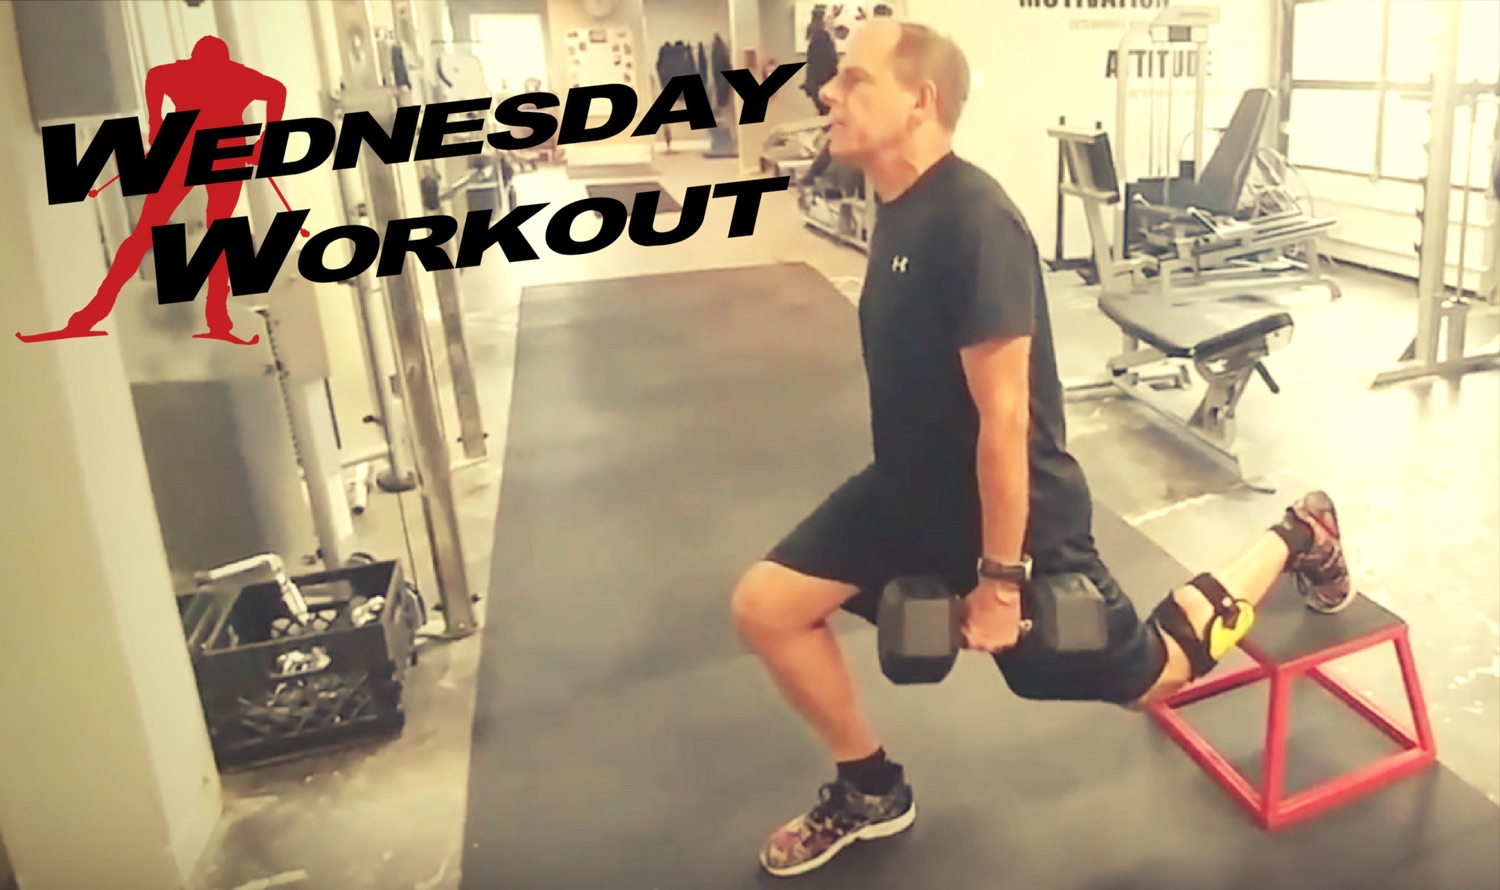
    Picture perfect. Sophie Caldwell on her way to qualifying in first in the 2019 Davos, Switzerland skate sprint. (Photo: NordicFocus)


  • Wednesday Workout: Strong From Home with Carolyn Parker of the Ripple Effect Training Center

    The small mountain town of Carbondale, CO is home to the Ripple Effect Training Center.

    Like many mountain towns, Carbondale, Colorado is a magnet for athletes. The definition of that word is used broadly — though there are plenty, it is not just home to the uber endurance junkie. Within 30 miles, you can find world-class rivers for whitewater kayaking or fly fishing, five ski resorts, a variety of rock climbing and bouldering objectives, and miles of single track to be run, hiked, or ridden. With this unbelievable backyard, we are a town full of people who like to play outside. 

    Another common thread that links many of us is our belief in and gratitude for “the Injury Unicorn”, Carolyn Parker, who is the owner and lead trainer at the Ripple Effect Training Center. We flock to Carolyn to help us identify the source of our problems and to guide us to a solution through functional strength and mobility. In her words, it’s “outcome based training.”

    Carolyn Parker, founder and lead trainer at the Ripple Effect Gym in Carbondale, CO, shares a workout to develop functional strength and mobility from home without any equipment. Parker has been training athletes since obtaining her certification through Gym Jones in 2010. (Photo: rippleeffecttraining.com)

    Carolyn and her team have helped athletes correct muscle imbalances, increase power and strength, and recover from surgeries or pregnancy. She has helped athletes chase a Grand Canyon speed record in a raft, keep their body healthy for 100 mile running races, and even relearn to walk after spinal cord injuries. Her training supports the longevity and progress of athletes of all levels so we can stay healthy and continue to adventure in the mountains for years to come.

    The Ripple Effect dogma is this:

    “Our goals are to train the mind of the individual alongside the body, for the mind compels the body to endure and to achieve. To injury proof the body all the while encouraging the athlete to excel. We have created an environment of support, where honesty, character and integrity are paramount; and where motivation, instruction, and guidance are given to those with the desire to change.

    “These practices do not apply to just the ‘elite’ of the athletic world. They apply to each and every one of us. We are all athletes! We all desire health, strength, happiness, and the capacity to excel in whatever we choose to do, at any level.”

    When the gym was forced to close due to public health orders in mid March, the Ripple Effect crew hopped to and created a set of workouts athletes could complete from home without any equipment. The workout below is from that list and shared with permission. 

    The team at Ripple Effect is also leading small group and private instruction via Zoom. Parker also offers virtual or in person coaching to develop a periodized training program using the equipment available to you to help you reach your goals in the mountains. You can find out more by contacting Ripple Effect through their website or by following along on Instagram.  

    ———————————————————————————————————–

    Warm up with 10 minutes of walking, light jogging, heavy house work like vacuuming, wrestling with kids, or a Zumba video. You get the idea — get your heart rate up a bit and get your body warm.

    Activation/Mobility:

    • 2 x 8 shoulder opener with belt, ski pole, or towel
    • 2 x 5 push-up, knees or toes.
    • 3 x 5 air squats

    Then: 

    • 4 x 30 sec push-ups/30 sec plank – 4 min total
    • 1:00 rest
    • 4 x 30 sec air squat/30 sec hold in the bottom of the squat – 4 min total
    • 1:00 rest
    • 4 x 30 sec sit up/30 sec with straight leg elevate 6” off the floor – 4 min total
    • 1:00 rest
    • 4 x 30 sec windshield wiper/30 sec flutter kick – 4 min total
    • 1:00 rest
    • 4 x 30 sec lunges in place/30 sec “rest” jog in place – 4 min total
    • 1:00 rest
    • 4 x 30 sec bicycles on back/ 30 sec mountain climbers – 4 min total

    Cool down with some light mobility exercises. 


    Celebrating her 50th birthday with a dream trip ski mountaineering in Antarctica. (Photo: Instagram @blitzkriegbarbie)

    Carolyn Parker is the founder and lead instructor at the Ripple Effect Gym in Carbondale, Colorado. She has been training athletes since obtaining her certification through Mark Twight / Gym Jones in 2010. Outside the gym, Parker is a life-long climber and AMGA certified mountain guide who has made the successful transition into full time coaching work. She has lead 5.12 rock, A3+, M8 mixed, and skis 50 degree couloirs. Parker has ski guided Mont Blanc, the famous Chamonix-Zermatt Haute Route, and the Italian Ortler Traverse multiple times. In 2001 she attempted to climb Makalu by a new route on the South Face with a small 4-person team. Most recently she has been competitive in mountain races and adventures, such as the Imogene Pass run, R2R2R in the Grand Canyon, the Sandia Crossing, the Four Pass Loop Elk Mountains, and the Power of Four Skimo Race. In 2019, she celebrated her 50th birthday by guiding a group of friends on a ski mountaineering trip to Antarctica, among other burly and spectacular mountain adventures. 

    Disclosure: The author is a paying member of the Ripple Effect Gym. Her goal is to be as badass, strong, and kind of a human being as Parker at 50. 


  • Want to Work Out With Johannes Høsflot Klæbo?

    01.12.2019, Ruka, Finland (FIN): Johannes Hoesflot Klaebo (NOR) - FIS world cup cross-country, pursuit men, Ruka (FIN). www.nordicfocus.com. © Modica/NordicFocus. Every downloaded picture is fee-liable.
    Johannes Høsflot Klæbo on course with fading December light in Ruka, Finland. (Photo: NordicFocus)

    A new reality is setting in. As a nation, we are isolating ourselves at home, minimizing our contact with others to flatten the curve. Depending on your geographical location, you may still have access to scarcely populated nearby ski trails, routes to run, or  bike paths to ride while still socially distancing. However, with schools closed, gyms shut down, and the challenges of working remotely, you may be finding that maintaining your usual exercise routine is challenging. 

    To help those looking for a quick strength routine that can be completed from home, Johannes Høsflot Klæbo went live on his YouTube channel this morning to lead a workout that can be completed without any special equipment. Klæbo addresses the audience in Norwegian, but he models each exercise, making it easy to follow. The full body workout includes familiar moves like sit ups, burpees, push ups, toe touches, mountain climbers, and planks, among others. 

    Stay healthy (and strong) and enjoy!

  • Wednesday Workout: Masters Strength at Sovereign (with Videos)

    Wednesday Workout: Masters Strength at Sovereign (with Videos)

    Eric de Nys (left) keeping the masters motivated at the end of a ski-striding intensity workout.

    VERNON, British Columbia — There are a lot of master blasters who are training hard all year. There are a lot less that progress from one season to the next. This strength program is designed to help one group of masters ski faster as they age.

    Eric de Nys, the program director and head coach at the Sovereign Lake Nordic Club (who previously coached Canadian World Cup athletes for a decade and at three Olympics), created a two-session-per-week strength plan for Sovereign’s Masters High Performance skiers.

    https://youtu.be/oSM2IsHGnYE

    The club’s regular masters program has 160 participants and is as much social as it is about learning to ski better. Its HP program is focussed on progressing to better results and has a limit of 20 skiers. At the first on-snow session early last November, de Nys set the group goal of showing significant gains at the 2019 World Masters, 15 months in the future.

    buy yaz online yasmin online

    The masters program is very different than the youth programs. The primary difference is that the kids show up for the scheduled sessions and don’t need videos to learn what they missed. The next big difference is that the school system trains kids to pay attention for an hour at a time. For masters, the videos never exceed four minutes in length.

    For Mesocycle 1, there are two strength workouts each week.

    Each workout starts with a 15- to 20-minute run/bike/treadmill/row in Zone 1.

    Next there is a warmup series of simple mobility drills, including high forward and backward skips, side shuffles, and hip mobility.

    The meat of the workout is the Day 1 and Day 2 exercises, followed by a Zone 1 cool down.

    The order and number of reps are laid out in this spreadsheet, but as de Nys explains in the intro video, one size does not fit all. Very few of the HP group are able to do this program unmodified. Check out these videos on progressions.

  • Wednesday Workout: Killer Ski-Specific Strength with the HardCore Training Center

    Wednesday Workout: Killer Ski-Specific Strength with the HardCore Training Center

    Author Bill Nurge and Matt Liebsch (l) on the Haig Glacier near Canmore, Alberta, last August. (All photos: Bill Nurge)

    This week’s workout comes from Bill Nurge, head coach and owner of the HardCore Training Center in Ketchum, Idaho, who has a master’s degree in exercise physiology. Starting July 28, Nurge and Matt Liebsch will be serving up a week of nordic-specific fitness training and technique work at the Sun Valley Nordic Fitness Academy. With a maximum of only 12 participants, they recommend signing up early. Click on this link for more information.

    ***

    You can blame Matt Liebsch for this workout … and for making me a better skier!

    Last August, my wife and I joined Coach Matt, and 25 other nordic tribe-mates, on the Haig Glacier for what turned out to be a bucket-list topper in every regard. One of the biggest takeaways from skating a dozen hours behind the terminally affable Birkie winner and World Cup skier was how annoyingly powerful and stable he is on one ski. Whether he was single-ski double poling up a hill, or gliding effortlessly on a long descent, he was always solid and skilled while perched atop a single Salomon S/Lab skate ski.  As much as I’d like to blame the fact that I didn’t start skiing until I was almost 30, and my equipment wasn’t as good (Matt promptly set me up with shorter poles, better boots, and hand-picked stable skis), the stark reality was simple: Matt possessed more power, greater dynamic stability, and better balance than I did.

    So once my 56-year-old brain got over being tweaked by my body’s inability to match his single-ski prowess, I set to work on developing a program to take my balance, core stability and functional power to a higher level. And the best part is that it worked! Prior to consistently performing the workout I’m about to share with you, my posture, balance, and power output would predictably spiral downward halfway into a 50k skate race. But this past March, I was able to string together two of my best back to back 50 k’s (10th overall at the West Yellowstone Rendezvous; 4th overall at the Cascade Crest Marathon) with no appreciable diminution in performance.

    It’s no secret that nordic skiing — particularly skating — is a single-leg sport. Unless you’re double poling or flying downhill in a tuck, the vast majority of time is spent balancing and producing “ground force” with one ski, and one or two poles. This is why single-leg power, core stability, and balance play such major roles in sustainable speed. Every powerful stride must be accompanied by a dynamic, and sometimes high-speed balancing act requiring huge amounts of stabilization at the hip, knee and ankle joints. In the 2 hours and 15 minutes — of mostly single-leg Pain Cave time — it took me to complete the relatively flat Cascade Crest 50 k in Bend, Oregon, I ended up doing roughly 4,000 V2 strokes on each leg. That’s a lot of time performing single-leg squats with hip abduction and balancing and repeating every second!

    So here’s the deal, most nordic athletes do a great job of cranking out lots of cardio hours, weighted pullups, dips, box jumps, and heavy squats. The problem is that some of the hard-earned endurance and strength will be squandered unless it’s matched with equal amounts of balance and stability training. With regard to function, the muscles of the hip can be separated into two groups: movers and stabilizers. Though they all technically perform both, it’s easier to think of them in these two distinct categories. Because strength and stability are two sides of the same coin, having strong “movers” (lats and glutes) and weak “stabilizers” not only compromises performance, but may contribute to shoulder, lower-back, knee, and ankle injuries. Bottom line: nordic skiers are only as “strong” as their weakest stabilizers. Just like their big-brother primary movers, the myriad behind-the-scenes stabilizer muscles need strength, stamina, power, AND intelligence to do their “balancing act” effectively. No stability, no balance, no fun.

    Here are five pairs of exercises you can add to your existing program to help improve single-leg balance and functional power (with links to demo videos):

    The Workout: Nordic-specific exercises to improve balance, core stability and functional power

    Warmup: About 20 minutes

    Before getting into high-intensity unilateral exercises, it’s always best to do a progressive and comprehensive warmup. I like to start with 2 minutes of Level 1-2 cardio on the AirDyne standing, treadmill forward run with pulsers, and SkiErg double-poling. I would then recommend doing 60 seconds of alternating single-leg squat dips, alternating side-skip med-ball slams, and alternating split-squat rope pulls.

    Then do a second set of 2 minutes of Level 2 cardio standing on the AirDyne, all directions on treadmill, and V2 on the SkiErg. Follow this up with 80 seconds of alternating dips, side-skip slams, and lateral skip rope pulls.

    Finally, a third set of 2 minutes alternating 10 seconds easy/10 seconds “harder” on AirDyne (hands on rings pulsing up and down), treadmill (forward only), and SkiErg V2 with jump, followed up by 90 seconds of tuck-jump dips, single-leg BOSU hop rope pulls, and side-skip slams.

    Side-skip on the treadmill with pulsers
    Side-skip slams

    Paired Exercises: About 25 minutes for one set of each

    For each of the paired exercises, I would recommend starting with a medium-hard 60-second first set with 30 seconds rest between each leg, and no rest between pairs. Note that on all but the first set you will be performing each of the paired exercises on the dominant leg first (left leg for most right handers), and then the non-dominant leg. I like to have the less coordinated/“weaker” leg follow the lead and learn from the smarter/stronger leg.

    So for example you would do (#2a) left-leg inverted SkiErg step ups, immediately followed by (#2b) left-leg single-leg slideboard double pole. After 30 seconds of rest, switch to the right leg of the same exercises. Then move on immediately to the next (#3) set. Try to build into each set and maintain form as you get fatigued. The demo videos are very helpful in showing proper form and body position.

    Performing one set of the 5 pairs equals 8 minutes (not counting the first pair which alternates legs) of total time-under-tension for each leg: roughly a hilly 10 k’s worth of single-leg balance for an elite skate-skier. After several weeks of this twice-weekly regimen you can add a second, more aggressive 75-second set of each exercise. This would amount to about 18 minutes of overload on each leg plus up to about 4 minutes of sandbag push and hip bridge swings. Total workout time (including 20 minute warmup) is approximately 1 hour.

    1) a. Sandbag Push: The key on this brutally effective, anterior-core exercise is to push the bag — or something heavy that slides — with your body, not your arm. Use your legs and side-flexion muscles to “shove” the bag forward. It should be heavy enough that you can’t push it with your arm alone. If you have a strong core you can do this exercise for two minutes alternating arms and directions. Make sure your push arm is on the same side as your lead leg.

    b. Hip Bridge Monkey Swings: This is essentially a dynamic hip bridge with isometric abduction, and posterior chain muscle tension. Keep the hips up, knees pushing “out” against the rubber band, and arms bent at 90 degrees. This can also be done — without the swinging — on a single TRX strap in single-handle mode walking your feet forward and backward. This exercise can be performed for up to two minutes.

    2) a. Inverted SkiErg Step Ups: The flywheel resistance provides a uniquely effective eccentric overload to the quads, hip extensors and lower back. This can also be done with weights or a heavy rubber band. The key is to use only the upper/loaded leg to pulse aggressively out of the bottom position. Use a cadence of about 60 strokes/minute and pause/glide for half a second at the top of each rep.

    Single-leg step ups with flywheel resistance

    b. Single-leg slideboard double-pole hops: Your primary hip-and-knee movers — quad and glute — should feel like they just did a breakaway on a big climb, but you still need your stabilizers to negotiate the technical downhill to the finish! While maintaining constant tension on the poling muscles you can hop or pull yourself up the slideboard and then allow yourself to glide backwards resulting in a big eccentric hit on the double-pole initiators. This can also be done using a TRX strap and performing partial pistol-squat pull-ups; although it’s not as intense on the balance muscles.

    Single-leg double-pole on sideboard

    3) a. Single-leg squat jump double pullup: The key on this exercise is start with a 90-degree knee-angle and no countermovement. Explode up and do one pullup while touching foot to bar, and then as quickly as possible do a halfway down pullup and repeat as quickly as possible. High-tempo partial range of motion/upper-half pullups are more nordic-specific because of the shoulder-joint angle and eccentric loading.

    b. Single-leg stomps on BOSU with high-tempo SkiErg double pole: Now that your big primary poling and leg muscles are hammered, similar to the end or a race, you have to sprint and produce lots of “ground force” with the tired arms and leg. Keep the cadence high (80-90 spm), stomp your foot on the BOSU, and sprint for the finish!

    Single-leg stomps on Bosu with SkiErg double-pole

    4) a. Single-leg TRX squats with arm extensions: Get in a position where you’re maximally dorsi-flexed at the ankle and the triceps are loaded. Perform about 1 rep per second with the arms extending only two-thirds of the way out (just like most of your V2 poling strokes). Make sure your hands go fully behind your head on every rep and you’ve got heavy tension on your triceps.

    b. Single-leg BOSU squats holding front-plank on slideboard: With your triceps dynamically fatigued this exercise will take them even deeper isometrically and help build integrity at  the “bottom” of their functional range of motion. Maintain anterior core and tricep tension the entire time you’re single-leg squatting and pulling yourself backwards with the hip flexors. This can also be performed on the floor with sliders.

    5) a. Single-leg ball bounce on Slackline: Having the slack line inclined simulates an uphill ski and forces more pressure on the ball of the foot resulting in ankle flexion. Hold off on actually throwing the balls until your able to balance for at least 30 seconds without falling. You want to get to the point where you can get 20-30 ball tosses in a minute without tipping over. This exercise can also be done on a balance disc; but it doesn’t feel the same as a skinny ski.

    b. Single-leg push and slide on zipline TRX strap: With your stabilizers statically fatigued, now it’s time to see how they perform dynamically … Pushing and gliding in a forward-leaning, front-plank position simulates the start position of most nordic strokes. Make sure you have vertical-hip displacement and are head over foot on every rep. This can also be done without the “zipline” (a ceiling-mounted track with a chain hanging down from it and a Core Flyte Dynamic Stability Trainer under your foot) but it’s not as FUNctional 🙂

    So there you have it … Try to hit the unilateral balance work 1-2 times/week and you should find yourself feeling significantly more solid and confident in your ability to powerfully push, and effortlessly glide!

    ***

  • Wednesday Workout: Change Up Your Strength Routine (Videos)

    Wednesday Workout: Change Up Your Strength Routine (Videos)

    Personal trainer and author Peter Minde demonstrating the rear-foot elevated split squat.

    Whether you’re an elite athlete or a master blaster, you want to be strong enough to ski at your fastest in your target event. If strength training isn’t part of your training plan, you’re missing an important fitness component.

    “Functional training is considered to be training that attempts to mimic the specific physiological demands of real-life activities.”  — Ives et al., Psychophysics in Functional Strength and Power Training (February 2003)

    There are many great fundamental movements you can do in the gym. They translate not only to skiing, but also to the functions of daily living.

    In addition to traditional moves like deadlifts and squats, single-leg exercises can enhance your fitness in a couple of ways. When you’re classic skiing, you kick and then glide on one leg. All the skating moves are done on one leg.  Unless you’re hammering a double-pole sprint or tucking a downhill, you’re on one leg.

    “Resistance exercises performed on machines can contribute to [muscle] imbalances unless proper precautions are observed.” – Shirley Sahrmann, Diagnosis and Treatment of Movement Impairment Syndromes

    Single-leg exercises will stress the neutralizer and stabilizer muscles in your legs, as well as training the prime movers. And in a single-leg move, bodyweight becomes part of the load. What does this mean? You can get a good training effect with a lower amount of outside weight, reducing the risk of injury.

    “In a conventional squat, we strengthen the prime movers and neglect the stabilizers.” – Michael Boyle, Advances in Functional Training

    Here are some moves that can enhance your strength and may reduce your risk of injury.

    All of these moves have some commonalities: Keep your weight over your stance leg; get those core muscles firing and keep a neutral spine.

    The rear-foot elevated split squat (RFESS) primarily trains the quadriceps and gluteus maximus. The hamstrings, gluteus medius and glute minimus are stabilizers. Dig your toe into the box. As with a traditional squat, you want to get your femur parallel with the floor or below parallel. Drive up through your heel.

    The single-leg squat is the progression from RFESS. It works the same muscles as the RFESS. Without the support of a bench, all of the load will be on your stance leg. With this movement, you may not be able to move as much outside weight as with the RFESS. Don’t be surprised if it’s more difficult getting your femurs to parallel.

    When working with severely deconditioned individuals, I often program a two-legged sit-to-stand. After watching an arena football player doing single leg sit-to-stand with a 20-kilogram kettlebell, I wanted to try them out. This move will train glutes, quadriceps, hamstrings, and anterior tibialis – an important muscle for dorsiflexion and thus ankle mobility.

    You can progress a sit-to-stand by choosing a lower height box in addition to adding weight. The lower the box, the tougher it will be.

    Originally, I learned the single-leg deadlift during physical therapy. This move trains the glutes, hamstrings and adductor magnus.  Brace your core, and maintain a neutral spine. Use the “up” leg as a counterbalance. Drive up by contracting your glute.

    In addition to the latissimus dorsi middle and lower trapezius, rhomboids and posterior deltoids, the single-leg, single-arm row trains the glutes, hips, and the neutralizer and stabilizer muscles that help us balance. To do these, hold the grip in the hand opposite your stance leg. (If standing on your left leg, hold the grip in your right hand) Brace your core and pull, retracting your shoulder blade. Keep your spine neutral. Don’t twist or rotate.

    A progression from this would be a single-arm, single-leg squat to row. This move transfers force from the leg through the hip, sacroiliac joint and thoracolumbar fascia to the opposite side latissimus dorsi. This is how force is transferred when we’re running or skiing.

    These are just some of the moves I like in the gym. We haven’t delved into movements in the frontal plane (think lateral stepups or lateral lunges) or compound movements. By no means am I suggesting that you ditch traditional squats or deadlifts. But you may find that programming single-leg movements can enhance your overall strength and fitness.

  • Wednesday Workout: Race-Season Prep with SISU Strong

    Wednesday Workout: Race-Season Prep with SISU Strong

    Setting up for a deadlift: part of a SISU Strong workout to help build the posterior chain. (Courtesy photo)
    Setting up for a deadlift: part of a SISU Strong workout to help build the posterior chain. (Courtesy photo)

    Editor’s note: This week’s workout was submitted by a company specializing in performance training. We were not paid for this, but chose to run it based on its merit and anticipated value to readers. 

    ***

    Race-Season Prep: Building the Posterior Chain

    Race season is here! Are you ready for explosive, double-pole starts and mid-­race attacks? How about sprint finishes? With race season already firing up across most of North America, SISU Strong wants to make sure you’re maximizing your time in the gym to accomplish these goals!

    Based in Park City, Utah, SISU Strong works with actions sports athletes and outdoor recreation enthusiasts to build strength, improve movement, and increase resistance to injury. Founder and Head Coach Deacon Andrews has made a name for himself by adapting time­tested strength training protocols to optimize performance for everyone from weekend warriors to pros in a variety of outdoor sports.

    In this Wednesday Workout, Andrews takes us through a typical strength training session with one of his cross-­country skiers, focusing on developing the posterior chain.

    The muscles of the posterior chain are much more than just stabilizers. They’re also responsible for hip extension, which is the primary movement that drives you forward when you skate or kick classic. A stronger posterior chain means a stronger push, which translates to greater efficiency, more speed, better overall performance and less potential for injury through a long season of training. Developing your “backside” will also improve endurance, slow the onset of muscular fatigue, and therefore allow you to maintain greater control throughout your race or training session.

    Assuming you can already train through a good range of motion without pain, posterior chain weakness is a fairly easy issue to address. Taking the time to work on this now will build the strength and muscle endurance that will give you an edge on race day, while also helping you avoid injury by stabilizing the hips and knees.

    The Workout

    Warm up (mobility and activation):

    2 rounds (easy pace | 5-­10 minutes)

    Strength:

    4 rounds (moderate pace | 20­-30 minutes)

    Cool down:

    Practice Diaphragmatic Breathing for 1­-3 minutes

    Hip Flexor Stretch x 10 seconds each side x 3

    This workout can be once per week for 3­-4 weeks. Start with your bodyweight or some light resistance, and add a small amount of resistance each week, provided you can maintain good technique and range of motion. Add 1 round to the strength portion of the workout every 1­-2 weeks.

    Read on for descriptions of the core exercises and instructions on how to progress to greater resistance:

    Posterior Chain Exercises -­ Technique and Progressions

    Glute Bridges ­(demo video) ­

    Lay flat on your back, on the floor. Bend your knees, moving your heels towards your butt, and make sure your feet are flat on the floor. Push up through your heels and squeeze your butt, lifting yourself off of the floor into a “bridge” position. Hold for a second, then return to a resting position on the floor. Repeat. You can load this movement by placing a barbell, dumbbell or kettlebell on your lap. To build strength through different positions and phases of the movement, vary the tempo and add in some pauses, as shown in this video.

    Romanian Deadlifts (demo video) ­

    From a standing position, bend your knees slightly while keeping your torso upright. Keeping your chest up and head neutral (don’t crane your neck in any direction), slowly push your hips back. As your hips move back, try to keep your knees from moving forward. Keeping the knees back helps take your quads out of the equation and allows the hamstrings and glutes to do the work through this range of motion. Go to the point where you start to feel tension build up in your hamstrings, then, keeping your knees in that same slightly bent position, return to standing. If doing this movement unweighted, place your hands on your hips. To add resistance, hold a weight in front of your hips with both hands, lowering it between your legs through the descending portion of the movement. Be careful not to allow your upper or lower back to round during this movement.

    Ring Rows ­(demo video) ­

    For this movement, you’ll need a pair of gymnastic rings with straps, a TRX, or some sort of homemade equivalent. Most commercial gyms have this equipment nowadays. Adjust the rings or TRX so that the bottom is at or about knee height.

    Grab one ring/handle in each hand and walk backwards until the rings are about chest­height with your arms fully extended. Slowly, and with a firm grip on the rings, walk your feet forwards toward the rig, or whatever sturdy object the rings are hanging from. Your arms should be fully extended, your weight should be supported partially by the rings, and your body should be at an angle to the floor. Squeeze your butt to set your brace and prevent sagging through the midsection during this movement. Starting with your palms facing down, simply pull your body up until the rings are almost touching your chest. As you pull, rotate your arms so that you finish with your palms facing in.

    Band Pull Apart ­(demo video)

    For this movement, you’ll need a resistance band. I recommend starting with something fairly light, as this movement is harder than it sounds. Holding one end of the band in each hand, extend your arms out so that the band is taut and held away from your chest. Then, squeeze your butt to set your brace and rotate your shoulder blades down and back ­ try to think about putting them in your back pockets. Then, focusing on using your upper back, and keeping your arms locked out, “spread” the band by moving your hands away from each other until the band touches your chest. Don’t puff your chest out to reach the band. There should be no movement at the elbow joint. Do this exercise in several sets of 10­20 repetitions.

    To learn more about how a well-­planned strength training program can help develop your posterior chain and take your training and performance to the next level, check out our website at sisustrong.com and sign up for a free consultation!

    Acy Watson

    Co­-Owner | Manager | Coach

    SISU Strong Athletic Performance

  • Anything But Cruise Control for Burke

    Anything But Cruise Control for Burke

    Tim Burke racing to a season-best sixth in the men's 10 k sprint on Friday at the IBU World Cup in Khanty-Mansiysk, Russia. (Photo: US Biathlon/Twitter)
    Tim Burke (US Biathlon) racing to a season-best sixth in the men’s 10 k sprint at the 2016 IBU World Cup in Khanty-Mansiysk, Russia. (Photo: US Biathlon/Twitter)

    Cruise control is anathema to US Biathlon veteran Tim Burke. He’s part-workhorse, part-cerebral technician. There’s the heart rate aspect of simply going all out, and then there’s the controlled breathing, the nanosecond impulse of sighting, triggering and nailing a quarter-sized target.

    Two seasons ago, in 2014/2015, Burke finished the season ranked 34th on the International Biathlon Union (IBU) World Cup. Twelve months later, that overall ranking would be more than halved: Burke, 34, concluded his 2015/2016 season ranked 15th overall, only two spots behind age-defying Norwegian star, Ole Einar Bjørndalen (age 42). And to cap it all, Burke was FasterSkier’s North American Biathlete of the Year.

    Recently, on Oct. 15, Burke placed second to US Biathlon teammate Lowell Bailey at the team’s rollerski trials (Burke and Bailey had both already prequalified for the World Cup). The next day, Burke placed first.

    Tim Burke with his wife Andrea skiing in Whistler, British Columbia. (Courtesy photo)
    Tim Burke with his wife, Andrea, downhill skiing in Whistler, British Columbia, this past spring. (Courtesy photo)

    Despite these successes, Burke says he’s continually looking for that edge coming into the current season.

    “Every year I definitely try and make some changes,” Burke explained on the phone. “One thing that I have realized throughout my career, for me personally, that if I just continue to do the same plan, it doesn’t necessarily mean that my body will adapt to it the same way every year. I feel like it is really important to keep your body guessing and mix things up to throw new challenges at yourself if you want to improve.”

    Improvement, in Burke’s case, involves scrutinizing past training logs and ensuring that the input correlates to positive output.

    “One of the big changes I have made this year, I really want to make sure that all the strength training that I am doing carries over to skiing,” he said of his willingness to ensure all his training benefits fast skiing and precise shooting. “We all spend a lot of time in the weight room doing different things, and it’s always hard to know if those gains will really transfer over to skiing. So this year I have gone through my old strength program and actually added back in a lot more specific strength.”

    That specific strength may seem counterintuitive in biathlon, a sport where athletes skate ski exclusively. “I’ve always done a lot of double poling,” Burke explained. “But this year I added a lot more double poling also in my interval sessions. And I know it’s something a lot of people probably don’t think that a biathlete would do, but it definitely helps me a lot for my skating as well.”

    Bottom line, Burke asks this about all of his training: am I getting faster? “That is one of the great cross-country skiing questions,” Burke said. “I have heard so many different opinions on that, it is one of those things that is really challenging to quantify … are you getting better on skis? At the end of the day, that is what counts for us.”

    Tim Burke clearing his property outside Lake Placid, New York. "I did almost all of the clearing myself and it turned out to be great early season strength work!" (Courtesy photo)
    Tim Burke clearing his property outside Lake Placid, N.Y. “I did almost all of the clearing myself and it turned out to be great early season strength work!” (Courtesy photo)

    Although a large percentage of a biathlete’s time on course is spent skiing, poor shooting can crush an otherwise stellar ski performance. While Burke fine tunes the skiing, he’s also focused time on becoming a more efficient and proficient shooter.

    “One thing that I have done this year is I started working a lot closer with Matt Emmons, who is one of the best position shooters in the world,” Burke said of Emmons, a renowned U.S. sport shooter. “He had multiple Olympic medals, world records, he’s still competing. He’s someone I’ve worked closely with this year and was fortunate enough to do a training camp with him in Ruhpolding this summer. Just to kind of pick his brain, and that has been it has helped me.”

    Emmons’s work with Burke has involved micro-adjustments.

    “It is very minute technical details, but I was just really shocked working with him,” Burke explained. “The level of knowledge he has is unlike anything I have ever experienced. He understands shooting positions unlike anyone I have ever worked with. So it was really great to have one of the best shooters in the world sit there and watch me shoot. And it just gave me some small technical points about positions that make a big difference … He can watch me shoot and tell me if he thinks I should add more pressure in my prone sling for example, like I should shorten that up . And then the big aspect for him as well is the mental side. He is someone it is such a huge part of his sport — to be able to share some of his secrets like how he stays focused in competition, there is a lot of crossover there.”

    Tim Burke with Lowell Bailey -- fall threshold intervals on Whiteface Mountain. (Photo: Erik Lewish)
    Tim Burke with US Biathlon teammate Lowell Bailey doing fall threshold intervals on Whiteface Mountain. (Photo: Erik Lewish)

    Over the years, Burke has battled minor injuries and illness due to the wear and tear of elite sport. Coming into this season, Burke said his body feels sharp.

    “I am very happy in how things have gone so far this year,” he said. “Knock on wood, I’ve been healthy all year and no injuries. I have been able to really train and do exactly everything the way I want to. And this year I also feel very in control right now. I have been feeling good when I expect to feel good and tired when I expect to feel tired so that it is nice to feel like I am in charge right now.”

    The IBU World Cup begins Nov. 25 in Beitostølen, Norway.

    ***

    We asked Burke to give our ’17 Questions for 2017′ a go. Here are his responses:

    1. Biggest change in your life in the last five or so months since the ski season ended?

    Andrea and I started building a house here in Lake Placid.  It has been fun but definitely a little more time consuming than I expected!

    2. Biggest change in your training?

    I totally restructured my strength training this year.  I liked my old program but I still need to throw new things at my body to improve.

    3. Major areas of improvement you’ve seen so far?

    I feel that with the improvements I have made through my strength training, that my V2 is better than ever this year.

    4. Whom you’ve been working closest with this offseason (coaches or training partners)?

    I have continued to work directly with my personal coach Per Nilsson.  I train the most sessions with Lowell Bailey but this year I have also trained quite a bit with the entire team that trains in Lake Placid.

    5. Best trip in the last five months (and why)?

    Andrea and I went for a ski trip to Whistler this Spring.  It was nice to enjoy the area without the pressure of racing for the first time.

    6. Favorite cross-training?

    I bought a surfski this Spring and have enjoyed occasionally mixing that into my training.

    7. Favorite non-athletic activity or pastime this summer?

    Fly fishing is definitely my favorite non-athletic activity but the house project has really cut into my fishing this year!

    8. Song that was your jam this summer?

    I listen to Pandora quite a bit.  The Dirty Heads station has been my go-to this summer.

    9. All-time favorite race moment?

    My silver medal from World Champs in 2013.

    10. First thing you pack in your bag when you leave for Europe?

    Kindle

    11. Venue/event you’re most excited to visit this season?

    World Championships in Hochfilzen, Austria.  This course really suits my strengths so I was thrilled the minute I heard they were awarded world champs.

    12. Who will win the men’s and women’s World Cup titles this year?

    Fourcade and Makarainen

    13. Biggest sacrifice you feel you’ve made choosing this career path?

    Spending time away from family and friends.

    14. If you could change one thing about your sport, what would it be?

    I wish the IBU was more interested in fighting for clean athletes. Sometimes I get the feeling that they are more interested in upholding an image than actually finding the truth. The Mclaren report is a great example of this. I highly doubt that anything will come of this.

    15. What did you have for breakfast this morning?

    This morning for breakfast I had a green smoothie, oatmeal, eggs, toast and too much coffee.

    16. In 5 years, I’ll be ____?

    In 5 years I hope to be giving back to sport and have more time for fly fishing!

    17. In 50 years, I’ll be ____?

    Hopefully still kicking!

  • Wednesday Workout: APU’s Chelsea Holmes Breaks Down Strength Training

    Wednesday Workout: APU’s Chelsea Holmes Breaks Down Strength Training

    Chelsea Holmes performs a single-leg squat with her back foot on a plyo box. (All photos courtesy of Chelsea Holmes)
    Chelsea Holmes performs a single-leg squat with her back foot on a plyo box. (All photos courtesy of Chelsea Holmes)

    This week’s workout comes from Chelsea Holmes, who recently joined the Alaska Pacific University (APU) Elite Nordic Team after three seasons with the Sun Valley Ski Education Foundation in Sun Valley, Idaho. Originally from Girdwood, Alaska, Holmes, 27, returned to her hometown glacier earlier this summer as one of 14 of women with the North American Women’s Training Alliance — a U.S. Ski Team camp held annually in Anchorage and on Eagle Glacier. Below she gives a detailed explanation of what she does to build strength and work on her weaknesses.

    ***

    My Strengths (and many weaknesses)!

    Strength training should be an important staple in every endurance athlete’s regimen. It is important to note that the weight, duration, number of repetitions and sets are all individual and should be catered around the individual’s experience, age, and training plan. The quality of technique should be priority, and only when comfortable and confident in an exercise should an individual attempt maximal exercises.  Additionally it is recommended to have a partner to spot and assist in these exercises.

    My strength sessions often address numerous muscle groups and modes of training and development within a single session. This is due to the irregular and intense nature of cross-country ski training and the time constraints in a week.

    Chelsea Holmes working on some ladder drills (Courtesy photo)
    Chelsea Holmes working on quickness with some ladder drills (Courtesy photo)

    My current routine includes:

    – Focus: Maximal-strength exercises where the load is high and the repetitions are low.

    – Quickness (often incorporated into my warmup): I like to spend some time during the workout doing either drills on a speed ladder (shown above) or jump rope. When jump roping, focus on speed and the power coming from your calves. Try 30 on both legs before moving to 15 per single leg.

    Single-leg squats (All photos courtesy of Chelsea Holmes)
    Single-leg squats with back leg on floor, back toes pointing down

    What: Single-Leg Squats

    Position: In a standard-squat rack, put a reasonable weight on the squat bar. Lift the weight and once set and balanced, place one foot back behind you on a low stand with your foot perpendicular to the floor (useful tools: plyo boxes, stools), or, as shown at right, just place your back leg on the floor with your toe facing down. While keeping your front knee inline over your toe (no twisting or caving medially) perform a squat motion. Switch sides!

    The front leg should be the source of power, felt in the quadriceps, hamstring and gluteus. The back leg is there only for stability and balance. This should be felt in the quadriceps, hamstring, and gluteus. If you feel the need to use your back leg when powering up, go down in weight. Do not bend forward at the waist, or try to lift with your back.  Your core acts as a stabilizer here.

    Why: I have been using single-leg exercise because in the past I have noticed a personal tendency to favor a leg and compensate. I also use the single-leg squat as it should stimulate the intrinsic muscles as there is a balance component to the exercise. Maximal exercises develop the time to peak force, efficiency and maximal power.

    Note: After comfort and proficiency have been developed, try to superset this exercise. I will sometimes perform a set of 6-8 jumps (high jumps onto a plyo box, tuck jumps or skate jumps) directly after each set.

    Chelsea Holmes demonstrates a standard pull-up.
    Chelsea Holmes demonstrates a standard pull-up.

    What: Pull-Ups

    Position: A standard pull-up (shown above). The important cues to note in this exercise are full range of motion, a wide enough hand position that you are engaging your latissimus fully and minimal swing.  I most often use an overhand grip.

    Dumbbell press on a Swiss ball, as demonstrated by Chelsea Holmes
    Dumbbell press on a Swiss ball, as demonstrated by Chelsea Holmes

    What: Dumbbell Press on Swiss Ball

    This is a simple a bench press (shown above), only using dumbbells and instead of laying on a bench you are supported by laying with your upper back centered on a Swiss ball and feet planted in a stable position. From a sitting position on the Swiss ball, roll yourself forward on the ball so that the ball is centered underneath your upper back with your feet planted firmly and your core held in a plank position (of course, chest face up here!), perform a standard press.

    Why: There is so much focus on posterior exercises in skiing that it is important to ensure a balanced body.  I like the addition of a swiss ball because it adds a component of balance and core.

    Skate jumps with Chelsea Holmes
    Skate jumps with Chelsea Holmes

    What: Skate Jumps (above) — a lateral jump focused on developing quickness, power and stability. Do this exercise in front of a mirror to help focus on technique.

    Position: While standing on a single leg sink into the leg before exploding up and over lateral to the opposing leg.  Through the landing on the opposite leg, try to control the forces and stay balanced. Through the landing phase, you should end up in the starting position for the next jump. The jump should come from the forefoot.  Use your upper body mimic a powerful skating motion.

    What: Balance

    1. Single-leg squats on a Bosu ball or instability disk. (If using an instability disk, you might have to place the disk on a small box to allow for the range of motion through the squat.)

    In front of a mirror, stand one footed on a Bosu ball with the platform down. Place the foot, toe slightly turned out, with the ball of the foot being placed on top and in the center of the dome or disk.  Balancing on that foot, slowly perform a squat to a comfortable and stable depth. A broom handle held across the shoulders parallel to the floor can be a useful tool to ensure no twisting or leaning. The focus is balance, so really focus on minimal teetering and extraneous movement. When first beginning these, simply spend a few sessions doing half squats or just practice standing on one leg.

    These are not only great for balance but also the many stabilizer muscles that are extremely important but easy to forget about.  This exercise is great to practice breathing and total focus — it’s easy to get distracted in a busy gym! I prefer to do these in the second half of my workout when my body and mind begin to tire — mind over matter!

    It’s easy to get distracted in a busy gym! I prefer to do [single-leg squats] in the second half of my workout when my body and mind begin to tire — mind over matter!

    Chelsea Holmes working on core with a leg raise and twist from the pull-up bar
    Chelsea Holmes finishes up some tough sets while working her core with a hanging twist. “Basically you pull up so that your elbows are at a 90 degree angle and the hold yourself there while bringing your legs up vertically (so that you are somewhat folded in half),” she explained in an email. “Then while holding your core strong you move your legs in a window-wiper motion… Only go so far to one side as you can feel your core then back the other side (so that your toes draw a full rainbow, back and forth, that’s one). I am not as strong, so I try to do 4-5 total.”

    What: Core

    1. Pikes — Either a TRX or a Swiss ball can be used in this situation.

    Position: Place yourself in a plank position with your feet either in the TRX stirrup (toes down) or if using a Swiss ball, place the top of your foot on the ball.  Your hands should be planted beneath your shoulders, palms against the ground and arms straight, similar to a push up position.

    Exercise: Bring your body into a pike position with as little arm and knee bend possible, return to plank, now bring your knees underneath your body, driving the opposing knee to opposing elbow. The knees should bend together and twist so that you feel a rotational core component. To get the most out of this exercise, don’t rush it!  Perform it in a controlled manner and with purpose.

    Why: I really like this exercise because it is full body, and no matter how many times I do it, it is always a challenge.  It has an isometric, concentric and eccentric component. Bang for your buck!

    2. Garhammers (video demo)

    Position: Hang from a pull-up bar with straight legs. Start by bringing you knees up so that your quadriceps are parallel to the ground, this is where the exercise starts and finishes for each repetition. Then drive your knees upwards by rotating your pelvis forward and focusing on your core making that movement.

    Please note, there is not a tremendous range of motion with this exercise. If you feel you are ready for a more advanced version of this exercise, after driving your knees up, straighten your lower legs and lower your legs slowly back to parallel.

    3. Alternating Push-Ups

    I truly despise pushups so I think I gravitated to this style because it is much harder for me than standard push-ups and as such I cannot do as many.  This is not a cop out, these are tough.

    Position: From a standard pushup position, move your right hand back along your body so it is planted below the bottom of your rib cage (it is placed next to your body, not away from it), while leaving your left hand up slightly away from the shoulder.  When you lower yourself into a pushup your upper right arm should track back parallel against your body so that it targets not only the front deltoid but your triceps as well.  Your left arm will track as it usually does in a standard push-up.   Start with 5 per side before switching.  If you feel your core begin to sag, move to your knees- I always end my sets worn out and doing the last push ups from my knees.

  • Wednesday Workout: Audrey Weber’s CrossFit Experiment (with Video)

    Wednesday Workout: Audrey Weber’s CrossFit Experiment (with Video)

    Audrey Weber's CrossFit Kingfield team hard at work. "The energy of the group pulls you along," she says. (Courtesy photo)
    Audrey Weber’s CrossFit Kingfield team hard at work. “The energy of the group pulls you along,” she says. (Courtesy photo)

    Today’s weekly workout is brought to you by Audrey Weber, a Minneapolis-based former elite nordic racer. In her first year of dental school, the 27 year old has less time for ski-specific training and instead shifted her focus to the gym, where she’s found success with the CrossFit method. While this high-intensity, strength training regimen isn’t for everyone, Weber offers a closer look at what it’s all about. 

    ***

    Graduate school might be the first time where ‘real life’ has seriously impeded my ability to get outside and exercise as much as I would like to. I went back to school and that was really the end of my motivation to get out and ski in any but the most-tolerable conditions. Rollerskiing and running were out of the question. Between all the free pizza they serve at Lunch and Learns, and my shortage of time and energy, I might as well have resigned myself to the couch and an early grave.

    Thankfully, in the nine months before starting school, I had become immersed in this new sport that seems to be really catching on. The sport is CrossFit, maybe you have heard of it. Currently, I am 13 months into my own personal case study called, “How Fit Can an Ex-Cross Country Ski Racer Stay on Four Hours of Training Per Week?” Some preliminary results are in, and the findings are quite interesting.

    A quick rundown on CrossFit, save the cultish doctrine. There is a lot to like about CrossFit as a competitive athlete. CrossFit strives to address the “ten general physical skills required of optimal physical competence.” It basically focuses on making you the most-prepared well-rounded athlete possible. Now, of course, that is a arbitrary definition, which some would argue fails to emphasize endurance and glycogen storage capacity, but so far, my experience is that it is actually a highly-efficient and enjoyable way to get yourself physically and mental prepared for many of life’s challenges.

    Audrey Weber (Courtesy photo)
    The Skier-ness Test: I wish I had a before picture of myself, because I’ve come a long way on this. You can see my right arm (that is my bad shoulder) still sneaks in front of the left.

    CrossFit is not ski training, so why should a skier be interested in something that is expressly not skiing? Here is a quick test: sit on the floor with your legs crossed. Sit up straight and tall and extend your arms straight over head. Have someone take a picture from the lateral view to see if you are actually sitting straight up and down. If you have trouble achieving this position without severely straining yourself, congratulations, that means you are a true skier!

    And that is why you might need CrossFit. The repetitive motions of cross country skiing will steadily erode your body’s ability to work in a full range of motion, which typically means tight shoulders, tight hips, and tight psoas muscles. And when mobility is limited, bad things start to happen.

    CrossFit’s emphasis on proper body mechanics and mobility may be even more important that the strength and fitness gains that come with the training. One of the reasons, in my opinion, that Jessie Diggins has been such a successful athlete, is because she has the intrinsic quality of being extremely flexible and bendy. I have seen the girl do dynamic leg swings, she is built like Gumby. And that is a sign of long, healthy muscles that can work at maximum efficiency.

    So unless you are born with the gift of great flexibility, you have to put a concentrated effort on a daily basis to gaining that mobility. And let’s be honest, who among us is as faithful to our foam roller as we should be? It is hard to do without expert guidance and a structured, motivational environment. Simple human psychology. CrossFit provides that guidance (a coach) and environment (the gym community).

    Disclaimer: CrossFit alone does not constitute ski training. Obviously, if you want to ski a race of any duration, you need to add volume with distance training. You also need ski-specific technique training. In an ideal world, you would have the time and means to incorporate CrossFit two to four times per week, while also getting distance, over-distance, and steady state workouts in.

    The Skier-ness Test. I wish I had a before picture of myself, because I’ve come a long way on this. You can see my right arm (that is my bad shoulder) still sneaks in front of the left. (Photo: Audrey Weber)
    ” Don’t mind if I draw the comparison.” See below photo of Marit Bjørgen. (Photo: Audrey Weber)
    Marit Bjørgen: "Don’t mind if I draw the comparison," says Audrey Weber.
    Marit Bjørgen

    The Workout: 7:30-8:30 PM Friday, January 18th at CrossFit Kingfield in South Minneapolis

    The coaches: Danny Yeager, Amanda Sullivan, and Tony “The Librarian” Christopherson

    The Team: range of individuals, men and women, ages 24 to 55, elite to recreational athletes

    The Warm Up (20 minutes): At my gym (or “box” as the lingo goes), CrossFit Kingfield in south Minneapolis, the workout starts with some combination of active warm up and dynamic stretching. Some days it is a classic track warm up with running drills done across the gym floor. Today’s warm up was a partner activity that involved three quick couplets of exercises completed at “medium” intensity (whatever . . . my team still won).

    The next part of the warm up is specific to the day’s workout. The Ballistic Squat Warm Up is a series of squat drills performed with light weight to build technique, range of motion, and speed coming out of the bottom of a squat. One would typically start with just the weight of the barbell (we have some as light at 25 lbs) and then work up over several weeks to what feels like a moderate load that you can still move quickly (in the video I am performing a shortened version of the drill using 95 lbs). The whole thing can be done in under a minute like this:

    • One full depth squat held at the bottom with weight in the heels, chest up, lumbar spine in a neutral position, and knees out. This position is held 5-10 seconds.
    • Next is three full depth squats performed in quick succession and at high speed
    • Third comes three squats with a pause at parallel (higher than full depth) and then a bounce out of the bottom all the way up to the top.
    • Finally, is a squat to parallel, pause, bounce out of the bottom back to parallel (repeated three times) and then bounce all the way to the top.
    CrossFit Kingfield coaches (left to right) Tony Christopherson, Amanda Sullivan (co owner) and Danny Yeager (head coach and co owner). (Photo: Audrey Weber)
    CrossFit Kingfield coaches (left to right): Tony Christopherson, Amanda Sullivan (co-owner) and Danny Yeager (head coach and co owner). (Photo: Audrey Weber)

    The strength workout (20 minutes): The next portion of the workout is also variable. Sometimes it is a max lift and other times it is working with one of the Olympic lifts (clean & jerk or snatch). This day was our second-to-last day in a three-week squat cycle. During this cycle we high-bar back squatted multiple days per week at increasingly high percentages of our one-rep max. Coach Danny says,

    “The idea of this training is to stimulate the nervous system response in which our bodies adapt to squatting heavy weight on a regular basis. Once that three-week cycle is complete, it is important to deload for one week, and then begin a standard 8-12 week linear regression cycle, which will allow our bodies to make the correct adaptation and convert the gains made during the 3-week cycle into real top-end strength.”

    • High bar back squat: 8 sets of 4 at 80% of athlete’s 1-rep max -or- as heavy as possible without compromising form, speed, or safety. (example for me: 0.8 x 255lbs = 225lbs, which I dropped down to a manageable but tough 185lbs)

    This being the end of the cycle, weights got pretty heavy for people, so there were three coaches on hand to supervise and spot the 12 athletes. Remarkably, within the same space, these 12 people squatted 12 different weights that ranged from 75 lbs to 265 lbs. Pretty wild.

    Squatting is not supposed to be pretty. (Photo: Audrey Weber)
    Squatting is not supposed to be pretty. (Photo: Audrey Weber)

    The biggest concern I had for doing this type of training is that I would have to start purchasing the dreaded “size medium” scrubs for school, and I was terrified of the idea of “getting too big.” I am happy to report, however, that after one year of heavy training, I have made huge gains in strength, while I weigh no more than I did when I was ski racing, and my size 4 jeans feel only minimally snugger.

    The Workout of the Day (WOD) (15 minutes, 40 seconds): Huge variety of formats and rep schemes for this portion of the workout. Duration can range from as short as 5 minutes as long as 25 minutes.

    Every minute, on the minute (EMOM) for 8 rounds or 15 minutes and 40 seconds

    – Even minute: 15/30 (women/men) hand release push ups, or as many as you can do in 40 seconds

    – Odd minute: 50 double unders (no scaling) (or as many as you can do in 40 seconds)

    The last 20 seconds of every minute is for transition.

    The genius of this workout is just how torturous such a simple-sounding combination of push ups and jumping rope becomes after you do it nearly continuously for 15 minutes. The number of push ups is designed so you are blowing your arms out for at least 35 seconds of the first minute, and then mustering all your hand coordination and forearm strength to rotate a jump rope at at least 150 RPM in the second minute (that is the speed you need to get 100 rotations or 50 double under’s in 40 seconds).

    It wasn’t until the VERY last round that I finally did all 50 double unders in the allotted time. The fatigue has an amazing way of building such that you can push yourself continuously and ride the upper limit of your work capacity for an extended time. You find little ways to recover within the movements and are forced to achieve a high level of efficiency in order to do so. Sounds kind of like ski racing.

    The cool down (20 minutes): The post-workout usually consists of lying on the floor for a few minutes, drinking some water, and then smashing or stretching. It is a nice social time to catch up and maybe help a sister out with some myofacial gunk in a hard-to-reach place.

    Audrey Weber rolling it out on the Battlestar. "That’s the pain face." (Courtesy photo)
    Audrey Weber rolling it out on the Battlestar. “That’s the pain face.” (Courtesy photo)

    Skiers, its time to graduate from the foam roller to the Battlestar (see photo at right).

    Heading home to refuel and continue to rehydrate is next priority, of course.

    And if the workout is completed in the evening, and you hope to get a good night’s sleep, I would recommend spending 10-15 minutes draining the legs with some legs-up-the-wall.

    I believe that skiers in general have a lot to learn about mobility work and basic athletic movement, both of which are highly developed and emphasized within the CrossFit framework. CrossFit is great for staying in shape for people with limited time to train, as well as for providing a structured and motivational atmosphere.

    ***

    About the author: Audrey Weber is a former racer and is currently in her first year at the University of Minnesota School of Dentistry.