Tag: TRX

  • Wednesday Workout: Race-Season Prep with SISU Strong

    Wednesday Workout: Race-Season Prep with SISU Strong

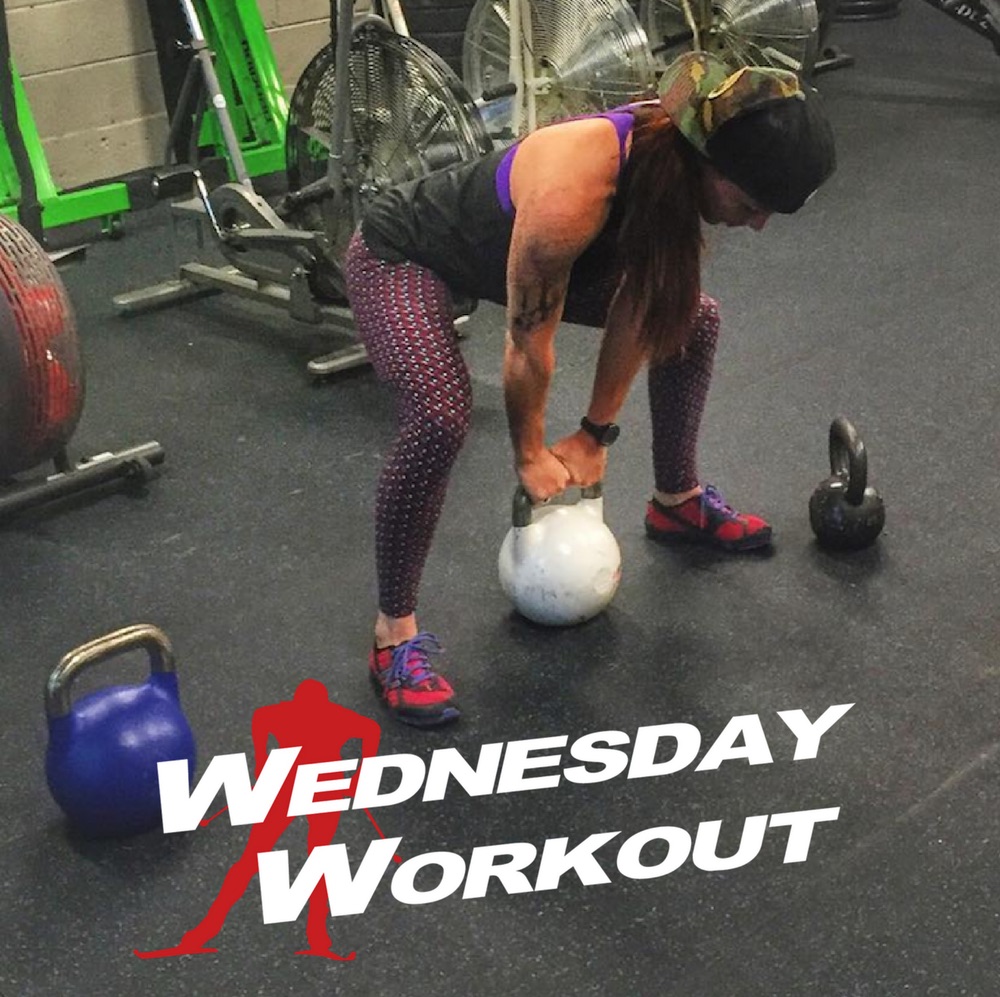
    Setting up for a deadlift: part of a SISU Strong workout to help build the posterior chain. (Courtesy photo)
    Setting up for a deadlift: part of a SISU Strong workout to help build the posterior chain. (Courtesy photo)

    Editor’s note: This week’s workout was submitted by a company specializing in performance training. We were not paid for this, but chose to run it based on its merit and anticipated value to readers. 

    ***

    Race-Season Prep: Building the Posterior Chain

    Race season is here! Are you ready for explosive, double-pole starts and mid-­race attacks? How about sprint finishes? With race season already firing up across most of North America, SISU Strong wants to make sure you’re maximizing your time in the gym to accomplish these goals!

    Based in Park City, Utah, SISU Strong works with actions sports athletes and outdoor recreation enthusiasts to build strength, improve movement, and increase resistance to injury. Founder and Head Coach Deacon Andrews has made a name for himself by adapting time­tested strength training protocols to optimize performance for everyone from weekend warriors to pros in a variety of outdoor sports.

    In this Wednesday Workout, Andrews takes us through a typical strength training session with one of his cross-­country skiers, focusing on developing the posterior chain.

    The muscles of the posterior chain are much more than just stabilizers. They’re also responsible for hip extension, which is the primary movement that drives you forward when you skate or kick classic. A stronger posterior chain means a stronger push, which translates to greater efficiency, more speed, better overall performance and less potential for injury through a long season of training. Developing your “backside” will also improve endurance, slow the onset of muscular fatigue, and therefore allow you to maintain greater control throughout your race or training session.

    Assuming you can already train through a good range of motion without pain, posterior chain weakness is a fairly easy issue to address. Taking the time to work on this now will build the strength and muscle endurance that will give you an edge on race day, while also helping you avoid injury by stabilizing the hips and knees.

    The Workout

    Warm up (mobility and activation):

    2 rounds (easy pace | 5-­10 minutes)

    Strength:

    4 rounds (moderate pace | 20­-30 minutes)

    Cool down:

    Practice Diaphragmatic Breathing for 1­-3 minutes

    Hip Flexor Stretch x 10 seconds each side x 3

    This workout can be once per week for 3­-4 weeks. Start with your bodyweight or some light resistance, and add a small amount of resistance each week, provided you can maintain good technique and range of motion. Add 1 round to the strength portion of the workout every 1­-2 weeks.

    Read on for descriptions of the core exercises and instructions on how to progress to greater resistance:

    Posterior Chain Exercises -­ Technique and Progressions

    Glute Bridges ­(demo video) ­

    Lay flat on your back, on the floor. Bend your knees, moving your heels towards your butt, and make sure your feet are flat on the floor. Push up through your heels and squeeze your butt, lifting yourself off of the floor into a “bridge” position. Hold for a second, then return to a resting position on the floor. Repeat. You can load this movement by placing a barbell, dumbbell or kettlebell on your lap. To build strength through different positions and phases of the movement, vary the tempo and add in some pauses, as shown in this video.

    Romanian Deadlifts (demo video) ­

    From a standing position, bend your knees slightly while keeping your torso upright. Keeping your chest up and head neutral (don’t crane your neck in any direction), slowly push your hips back. As your hips move back, try to keep your knees from moving forward. Keeping the knees back helps take your quads out of the equation and allows the hamstrings and glutes to do the work through this range of motion. Go to the point where you start to feel tension build up in your hamstrings, then, keeping your knees in that same slightly bent position, return to standing. If doing this movement unweighted, place your hands on your hips. To add resistance, hold a weight in front of your hips with both hands, lowering it between your legs through the descending portion of the movement. Be careful not to allow your upper or lower back to round during this movement.

    Ring Rows ­(demo video) ­

    For this movement, you’ll need a pair of gymnastic rings with straps, a TRX, or some sort of homemade equivalent. Most commercial gyms have this equipment nowadays. Adjust the rings or TRX so that the bottom is at or about knee height.

    Grab one ring/handle in each hand and walk backwards until the rings are about chest­height with your arms fully extended. Slowly, and with a firm grip on the rings, walk your feet forwards toward the rig, or whatever sturdy object the rings are hanging from. Your arms should be fully extended, your weight should be supported partially by the rings, and your body should be at an angle to the floor. Squeeze your butt to set your brace and prevent sagging through the midsection during this movement. Starting with your palms facing down, simply pull your body up until the rings are almost touching your chest. As you pull, rotate your arms so that you finish with your palms facing in.

    Band Pull Apart ­(demo video)

    For this movement, you’ll need a resistance band. I recommend starting with something fairly light, as this movement is harder than it sounds. Holding one end of the band in each hand, extend your arms out so that the band is taut and held away from your chest. Then, squeeze your butt to set your brace and rotate your shoulder blades down and back ­ try to think about putting them in your back pockets. Then, focusing on using your upper back, and keeping your arms locked out, “spread” the band by moving your hands away from each other until the band touches your chest. Don’t puff your chest out to reach the band. There should be no movement at the elbow joint. Do this exercise in several sets of 10­20 repetitions.

    To learn more about how a well-­planned strength training program can help develop your posterior chain and take your training and performance to the next level, check out our website at sisustrong.com and sign up for a free consultation!

    Acy Watson

    Co­-Owner | Manager | Coach

    SISU Strong Athletic Performance

  • Wednesday Workout: USBA Camp Strength Stations (and Shooting)

    Wednesday Workout: USBA Camp Strength Stations (and Shooting)

    Last week, more than 100 athletes from the U.S., Canada and Sweden came out for the US Biathlon Association’s (USBA) annual development camp in Jericho, Vt. It was one of US Biathlon’s largest and best-attended camps yet, according to national-team assistant coach Erik Lewish.

    “The camp is a great experience for biathletes from all over North America to get together for a week of training and educational sessions that culminate with the North American Summer Biathlon Championships at the end of the week on Saturday and Sunday,” Lewish wrote in an email.

    Those championships took place last weekend on Aug. 13-14.

    In the week leading up to the races, the U.S. Anti-Doping Agency (USADA) visited the camp to present on True Sport “and what to expect when one makes it to a high enough level that they are in the registered testing pool,” Lewish explained. “Our Head Development coach Jean Paquet took the athletes on a course scan of the roller loop and talked about ski technique and how to really ‘attack’ a course. Andrea Burke (formerly Henkel) gave a great motivational/inspirational presentation about her time as an athlete. Overall it is a great chance for the athletes to learn about the sport and hone their individual skills before competing in the continental championships.”

    The Monday before the championships, camp participants did an eight-station strength workout that involved some partnering up.

    Lewish explained that the workout was jointly created by himself, Paquet and Kari Korpela, the biathlon coach for the Sollefteå Skidgymnasium in Sweden.

    “The whole workout took about 1.5 hours from warm up to cool down,” Lewish wrote. “This was the second session of the day, after a long, easy roller ski in the morning.”

    The Workout: Biathlon Strength Stations (and Shooting)

    Warmup: 15-20 minutes of running

    First 20-Minute Set:

    – 40 seconds of each station/exercise followed by 1 single shot on the range, then 40 seconds of the next station/exercise

    Second Set:

    – Reload rifle magazine and do some longer bouts: 4 minutes of 40 seconds on/20 off at a station, then move onto the next exercise. After 4 minutes, take 5 shots on the range and return to next station. Repeat for a total of four shooting bouts (shooting order: prone, prone, standing, standing).

    The Stations:

    1. TRX leg crunches: Start in a pushup position with your feet in the straps of a TRX Suspension Trainer.  Lift your hips and pull your knees into your chest.

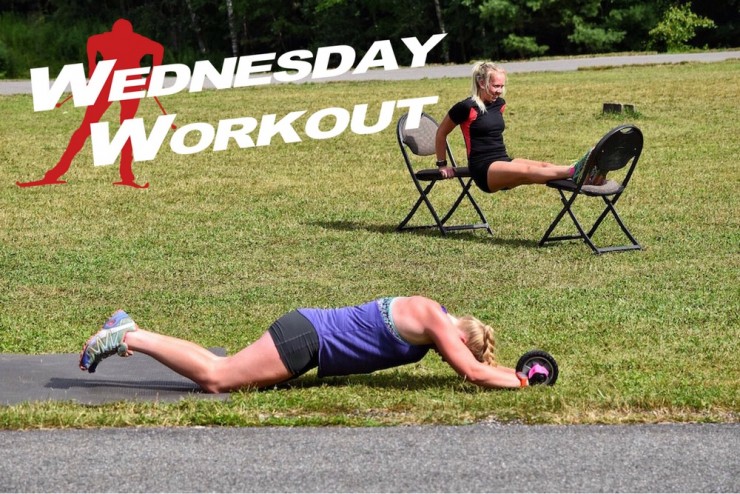
    2. Ab Roller: Start on your knees and roll out as far as you can while bracing your core, pause at the farthest point and then return to the starting position.

    3. V-Sits: Start lying down flat with your hands above your head. Bring your legs and torso up together and touch your toes at the top.

    4. Partner Burpees: Standard burpee done in sync with a partner. High five at the top of the jump for added fun!

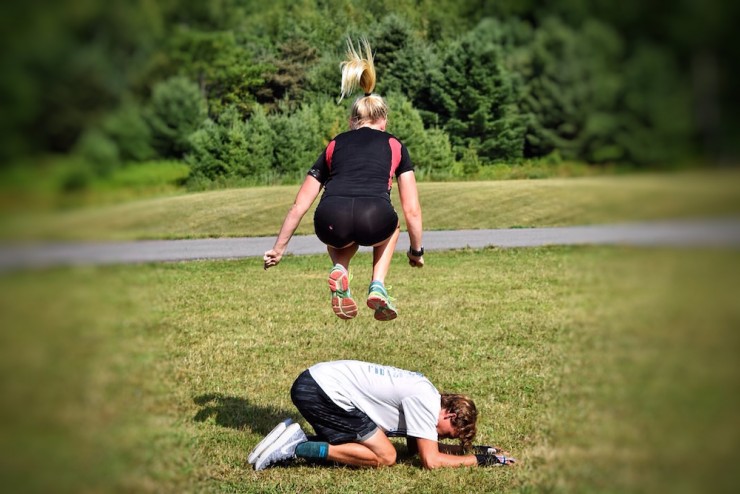
    5. Under-Overs: One person jumps over and crawls under the other person.

    6. Human Rock Climbing: One person starts on the back of the other and tries to climb 360 degrees around the other person without touching the ground.

    7. Tricep Dips: Sit on a chair, holding the edge with both hands, knuckles pointing forward.  Straighten your arms to raise your body and extend legs straight out with heels on the ground (or on another ch. Bend at your elbows to lower your entire body while keeping your legs straight. Hold at the bottom for a moment without touching ground.

    8. Single-Leg Plyo-Jumps:  Jumps done side-side to mimic skate skiing with a small hop in between before transferring to the other side.

    Cool down: 15-20 min. run


  • Wednesday Workout: Ring Training for Your Inner Gymnast

    Wednesday Workout: Ring Training for Your Inner Gymnast

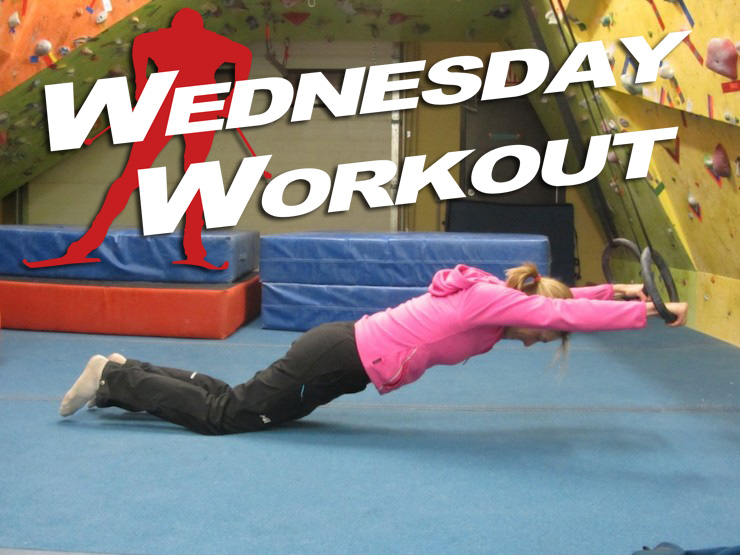
    Katie Bono demonstrating the kneeling ring rollout.
    Katie Bono demonstrating the kneeling ring rollout.

    Cross-country skiers are a pretty fit lot. We tend to pride ourselves on overall fitness, and indeed it’s true that ski training does a great job of developing Crossfit-like versatility. Even in strength workouts, the nemesis of many upper-body-challenged athletes, skiers tend to do pretty well. Look at photos of Kikkan Randall, Andy Newell, and other top-level skiers doing weighted pullups and you’ll realize this.

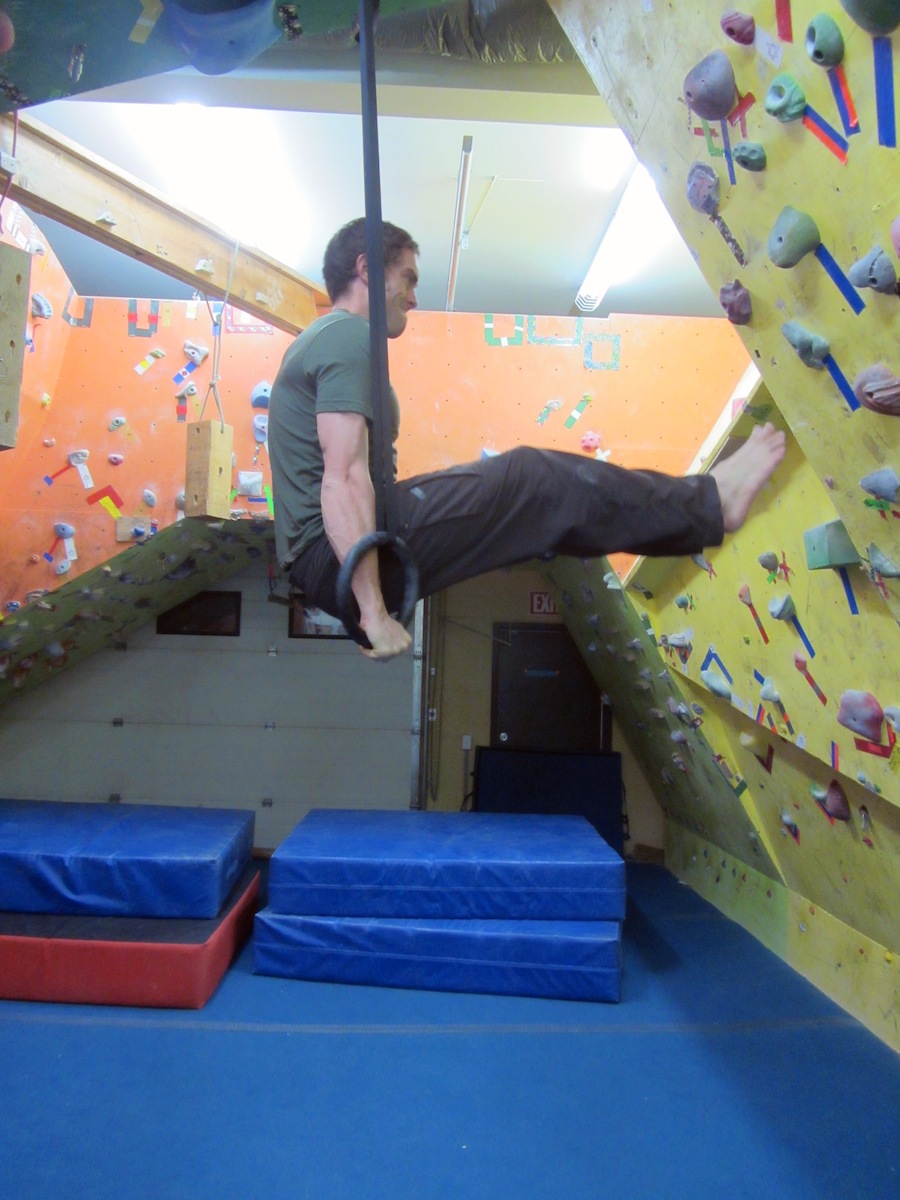
    Cody Doolan in an L-sit
    Cody Doolan in an L-sit

    Clearly, skiers need some new exercises to bump up the difficulty level in the weight room. If you find yourself maxing out the difficulty level of your current weight-room exercises, or if you are simply bored with all of them, give strength training with rings a try.

    Gymnastic ring training isn’t anything new. Although it and it’s trendier cousin, TRX suspension training, are making some waves in the fitness world right now, rings have been around for ages. However, if you’d like to make significant gains in upper-body and core strength and stability, take a new look at ring training.

    Training on rings has a plethora of benefits: it’s fun, the rings are extremely portable and versatile, and the exercises develop strength, coordination, and stability. However, the main benefit is that ring training is HARD. Like REALLY HARD. Ring training is the most difficult training I’ve ever done in a gym.

    I started doing ring workouts as training for skiing and all-around fitness at a point when my strength fitness was relatively high, and was amazed at the difficulty in performing relatively benign exercises like dips. Although my ego was somewhat shattered, I quickly discovered that the intense difficulty of ring training paid off mightily in my fitness. If you’d like to experiment with ring training, start off with intro exercises and work up.

    A big plus to ring training is that, for all intents and purposes, you can never get too strong for them. As a frame of reference, Olympic gymnastic exercises are rated on a scale from A to E, with A being the easiest. A muscle-up on rings, a fairly difficult exercise for the layman or laywoman, is an A-. Check your local gym to see if they have rings to use or buy your own and bring ’em along!

    Exercises

    Here are some exercises to get you started, but be creative and do some googling! Many traditional upper body and core exercises can be done (albeit at a harder grade) on rings.

    Ring Pushups: Adjust the rings so they are low to the floor. Place your feet on the floor, your hands in the rings, and do pushups. The lower to the floor the rings are, the harder it will be. If you perfect these, prop your feet up on a weight bench level with the rings.

    Ring Pullup and Dips: Pullups and dips on rings. Make sure to not let your arms rest on the straps as you do dips. If you want to make the dips harder, let your body come in front of the rings and turn your hands out (see photo).

    Ring Rollouts: Similar to rollouts done with a squat bar. Adjust the rings so they are just above the ground. Put your feet close to the rings and bend over to grasp the rings. Slowly move your hands and the rings away from you until you are stretched out and suspended by the rings. Then pull your body back to the starting position using only your core. An easier version of this is to start in a kneeling position instead of standing.

    L-sits: Adjust the rings to just above your waist, and support yourself on the rings (as if you were at the top position of a dip). Then lift your legs up to the level of your waist.

    Full and Half Levers: Adjust the rings to just above your head. Hang from the rings, and keeping your body rigid in a plank position, raise your body until it is parallel to the ground. An easier version is to bend one leg so your knee is up by your chest (half lever). Don’t let your butt sag!

    The Iron Cross: Perhaps not as ski specific as the other exercises, this is a good one to impress your friends. Save it for off-season tomfoolery. Rated a B on the Olympic gymnastic exercise scale, the way to do this one is to start in the support position (the starting position for dips). Lower your body by moving your arms out to the side until your hands are almost level with your shoulders. Yikes!