Tag: core

  • Wednesday Workout: Core Nordic Exercises with Stuart Kremzner

    Wednesday Workout: Core Nordic Exercises with Stuart Kremzner

    More Core with Stuart Kremzner.

    The following strength and performance tips come from one of our resident experts, Stuart Kremzner, MS, CSCS, FMSII, OS, RN, an exercise physiologist who has coached and raced in nordic skiing for over 20 years. Kremzner has trained/consulted with college athletic programs, elite teams, and athletes with the goal of improving athletic performance and injury prevention. When not working, he is running and skiing on the trails in New Hampshire or writing wax tips for the TOKO Tech Team. Kremzner can be found at e3sportsperformance.com.  

    ***

    In my recent article, “Back to Basics: How to ‘Reset’ for Nordic Performance”, I  discussed how to prime our nervous system and core muscles in an optimized firing pattern. This article will delve into how to strengthen the core muscles now that they are more active and firing in an improved pattern. The goal of these exercises is to strengthen the core muscles in a reflexive dynamic pattern. The primary muscles targeted are the deep pelvic floor, transverse abdominal and gluteus medius muscles. Many other muscles are still very active as well.

    Additionally, we learned how the reflexive core discussed in Original Strength is driven by three pillars: Vestibular stimulation, midline crossing or contralateral movement and diaphragmatic breathing. If what you are doing doesn’t satisfy these criteria then it is not reflex driven as far as the core is concerned,  (Shropshire, 2018). The exercises below encompass these criteria.

    When we read fitness books, articles or see YouTube videos about core training, it can be overwhelming and spark the questions– what do I need to do? What is most relevant for improving my Nordic skiing performance?

    This is where having an assessment by a trainer certified in Original Strength or Functional Movement Systems will pay off in dividends, as the exercises will be targeted for you, versus a general starting point that is presented below. That said these are exercises that address the majority of deficits in a wide range of athletes from 10-year-old soccer players to skiers on the national team.     

    Consider the exercises below as a starting point, this is one of many potential good core exercise sets. Every athlete’s needs are different. If your reflexive core is already well developed then progress the exercises. Essentially, to keep developing and stimulating an adaptation you need to challenge yourself. Start with the basic exercises below. If you can do three sets of 10-12 repetitions with excellent technique then progress the exercise to a point where on your 8th-10th repetition your perfect body position, technique or muscles fail.  This is the point of ideal adaptation for you.

    Many of the exercises below are based on the Original Strength system of training. To learn more and really develop the knowledge to challenge yourself, I would recommend getting one of Original Strength’s books or check out more of their website videos.   

    Core Exercise Routine

    Start with rolling out and doing some myofascial release. Then move into resetting and activating your nervous system with the Original Strength activation/warm-up discussed in last week’s article, this will prime your nervous system and accelerate your adaptation to the core exercises.  
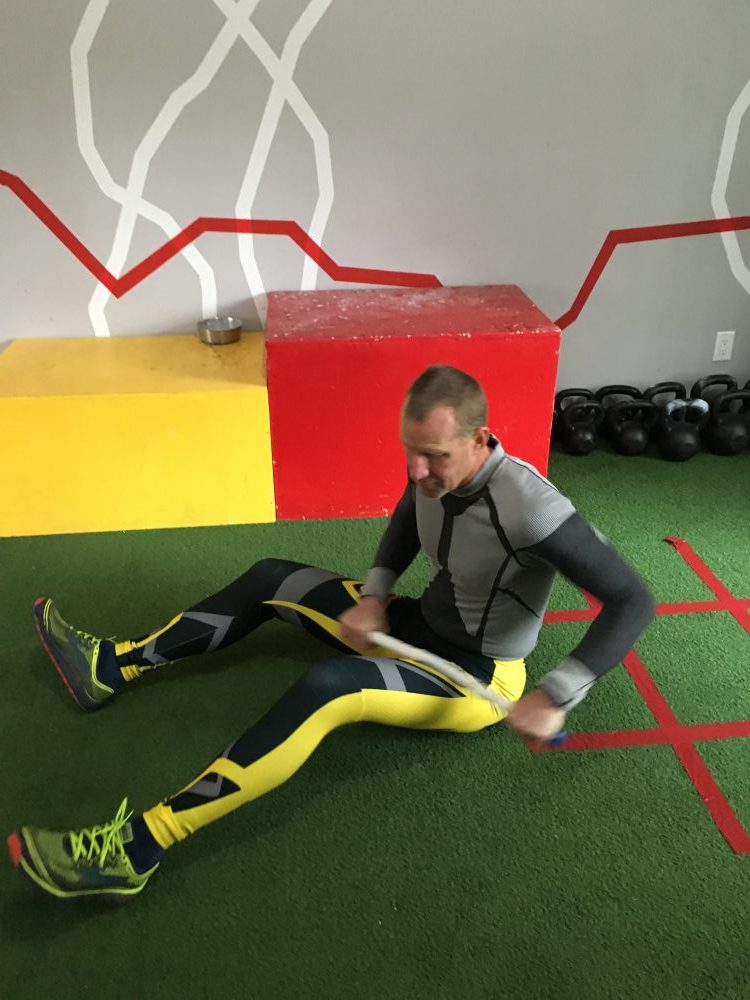
    Myofascial release. (Photo: Stuart Kremzner collection)

    Important Points:

    -These exercises can be done as an individual workout or added into an existing strength routine.  

    -For rapid adaptation, you should do these every day, or at a minimum 3 times a week.  

    -Maintain a good body position, continue to diaphragm breathe with good depth and rhythm.   

    -Execute the exercise with perfect technique. Remember 1-2 seconds with perfect technique is far more effective than compensated movement patterns (twisting,  breaking position, holding your breath). This compensated movement will keep reinforcing a dysfunctional motor program and feeding into the same problem.

    -As with the reset exercises described last week, continue to diaphragm breathe. Belly breathe deeply in and out through your nose. Your exhale should be 2x as long as your inhale. The tongue should be pressing on the roof of your mouth just behind your teeth.  On the inhale push your belly button up as much as possible. The belly should always rise before shoulders. 

    -To advance these exercises, you can add load, (gravity or weight), pushing or pulling a load, create a less stable platform, or distraction (resistance pulling you in another direction, with a band or opposite limb movement).

    For example to progress dead bugs, add a weight to the hand or ankle, or flip around and convert the exercise to a super dog. To progress super dog, put a dynadisk under the weight bearing hand or knee, then both. Then you can further progress the activity with knees off the ground about 1-2 cm.  

    The Workout

    EXERCISES

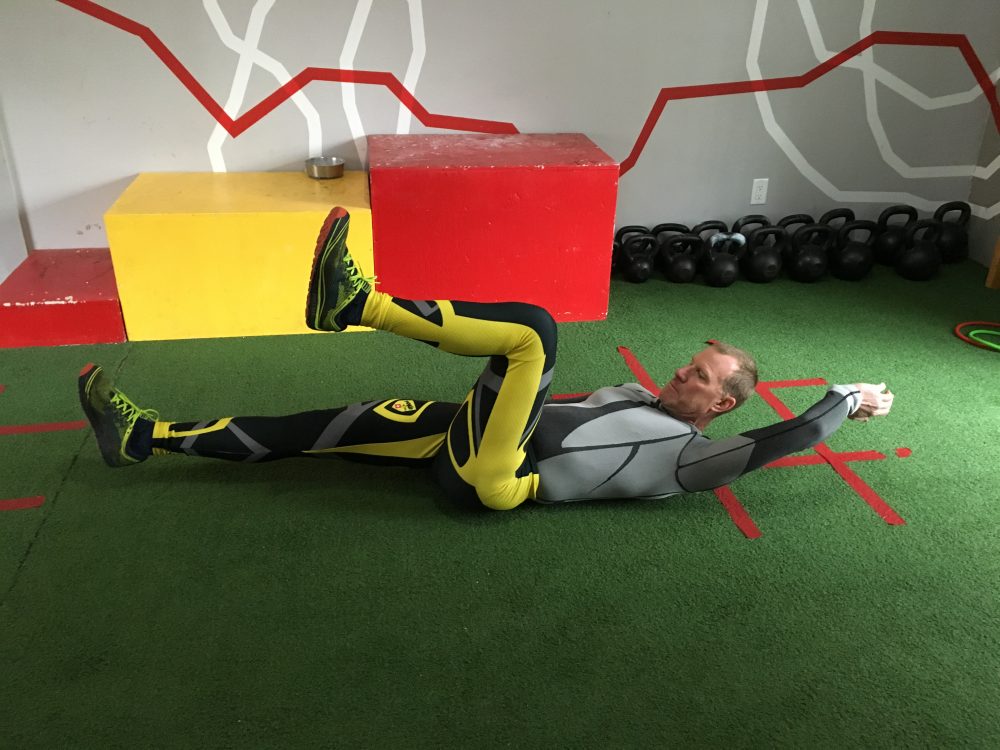
    Dead Bugs- Lay on your back.  Starting position arms and legs extended, 90 degrees to the ground.  Elevate head, extend leg and opposite arm position just above the ground but not touching, hold 5-10 seconds (or to fatigue), return to start position, repeat opposite side.
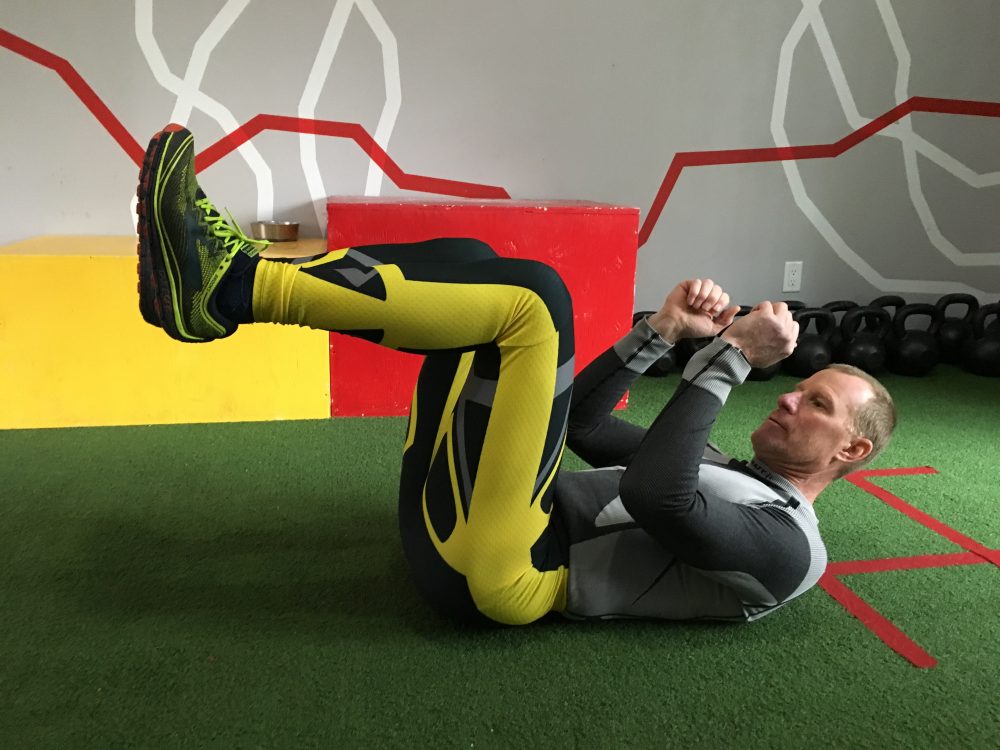
    Deadbug start. (Photo: Stuart Kremzner collection)


    Dead bug finish. (Photo: Stuart Kremzner collection)


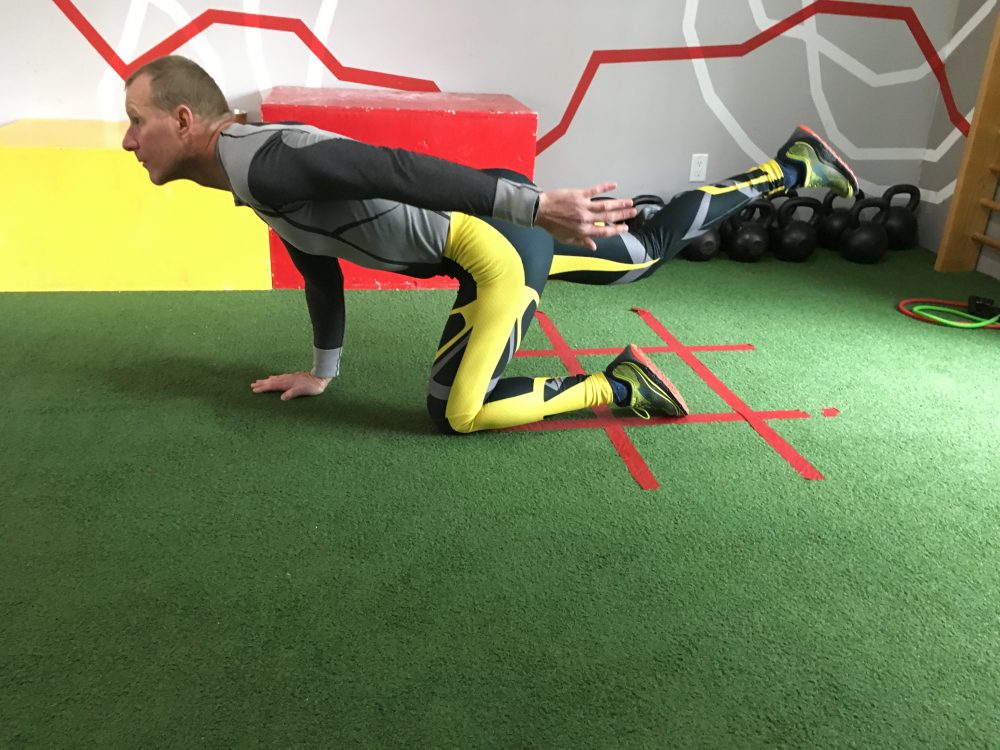
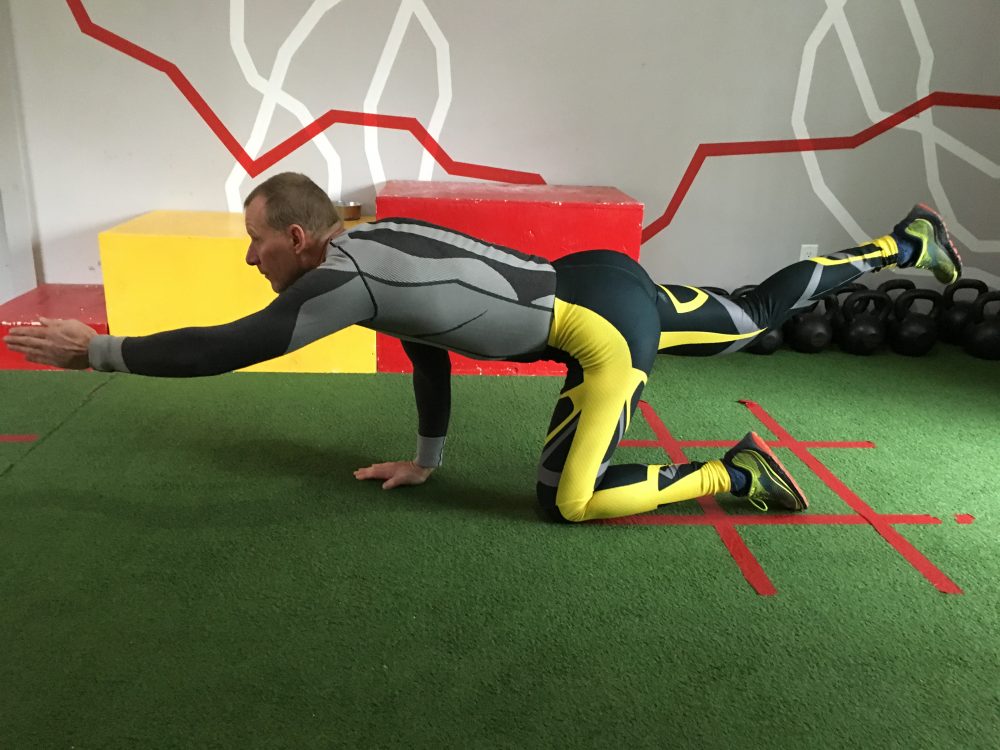
    Bird Dogs/Speed Skaters– Begin on all fours, hands under shoulders, knees under hips, with a neutral spine. Brace your midsection and extend your opposite arm and leg. Hold for 2-10 seconds. Concentrate on contracting your glutes without extending your back.  Keep your head up throughout the exercise. Repeat opposite side. To progress, add load, or try the quadraped lift off with hip extension as presented in Gus Kaeding’s 8/31 Wednesday workout article.
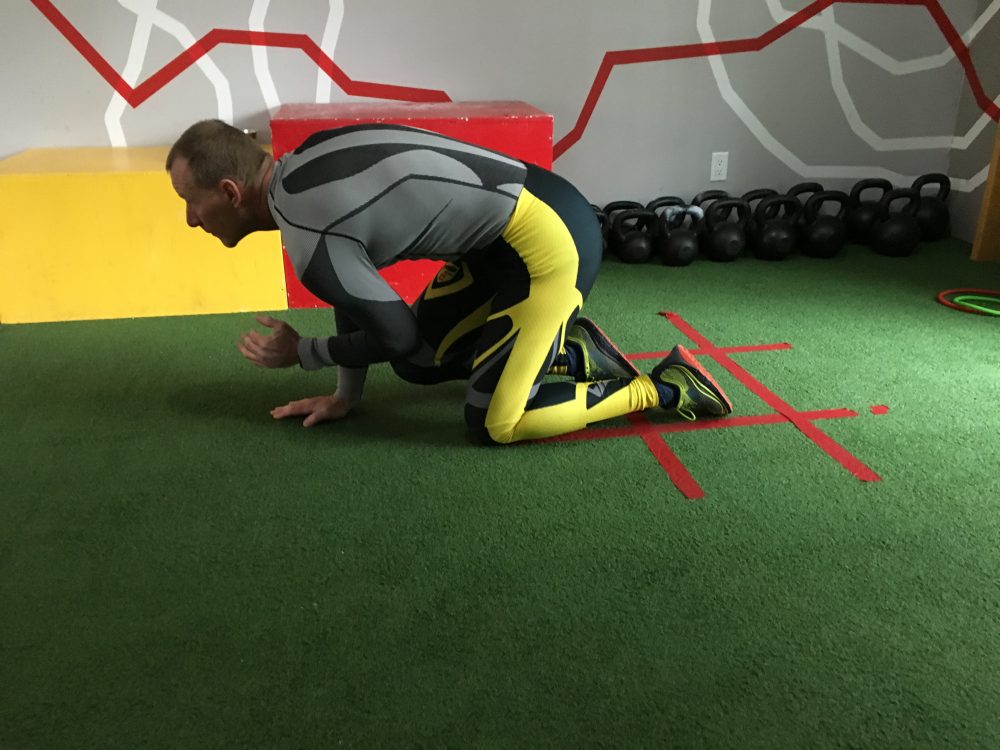
    Bird dog start. (Photo: Stuart Kremzner collection)


    Bird dog finish. (Photo: Stuart Kremzner collection)


    Speed Skater. (Photo: Stuart Kremzner collection)


    Incline Dynamic Plank- Start with an elevation of 24”-28”,  have elbows on the box, and body extended with hips pressed forward, contract glutes to help with this.  It is important to keep the torso, hips, and legs extended, and level with no twisting or compensation. Extend an arm and hold to fatigue for 2-10 seconds, then another arm, then each leg.  Repeat 2-3 times. Remember, perfect body position is the key, twisting, or pushing your butt back just to get 10 seconds does not achieve the goal of the exercise. You will just end up skiing with the same compensated pattern come snow time.  
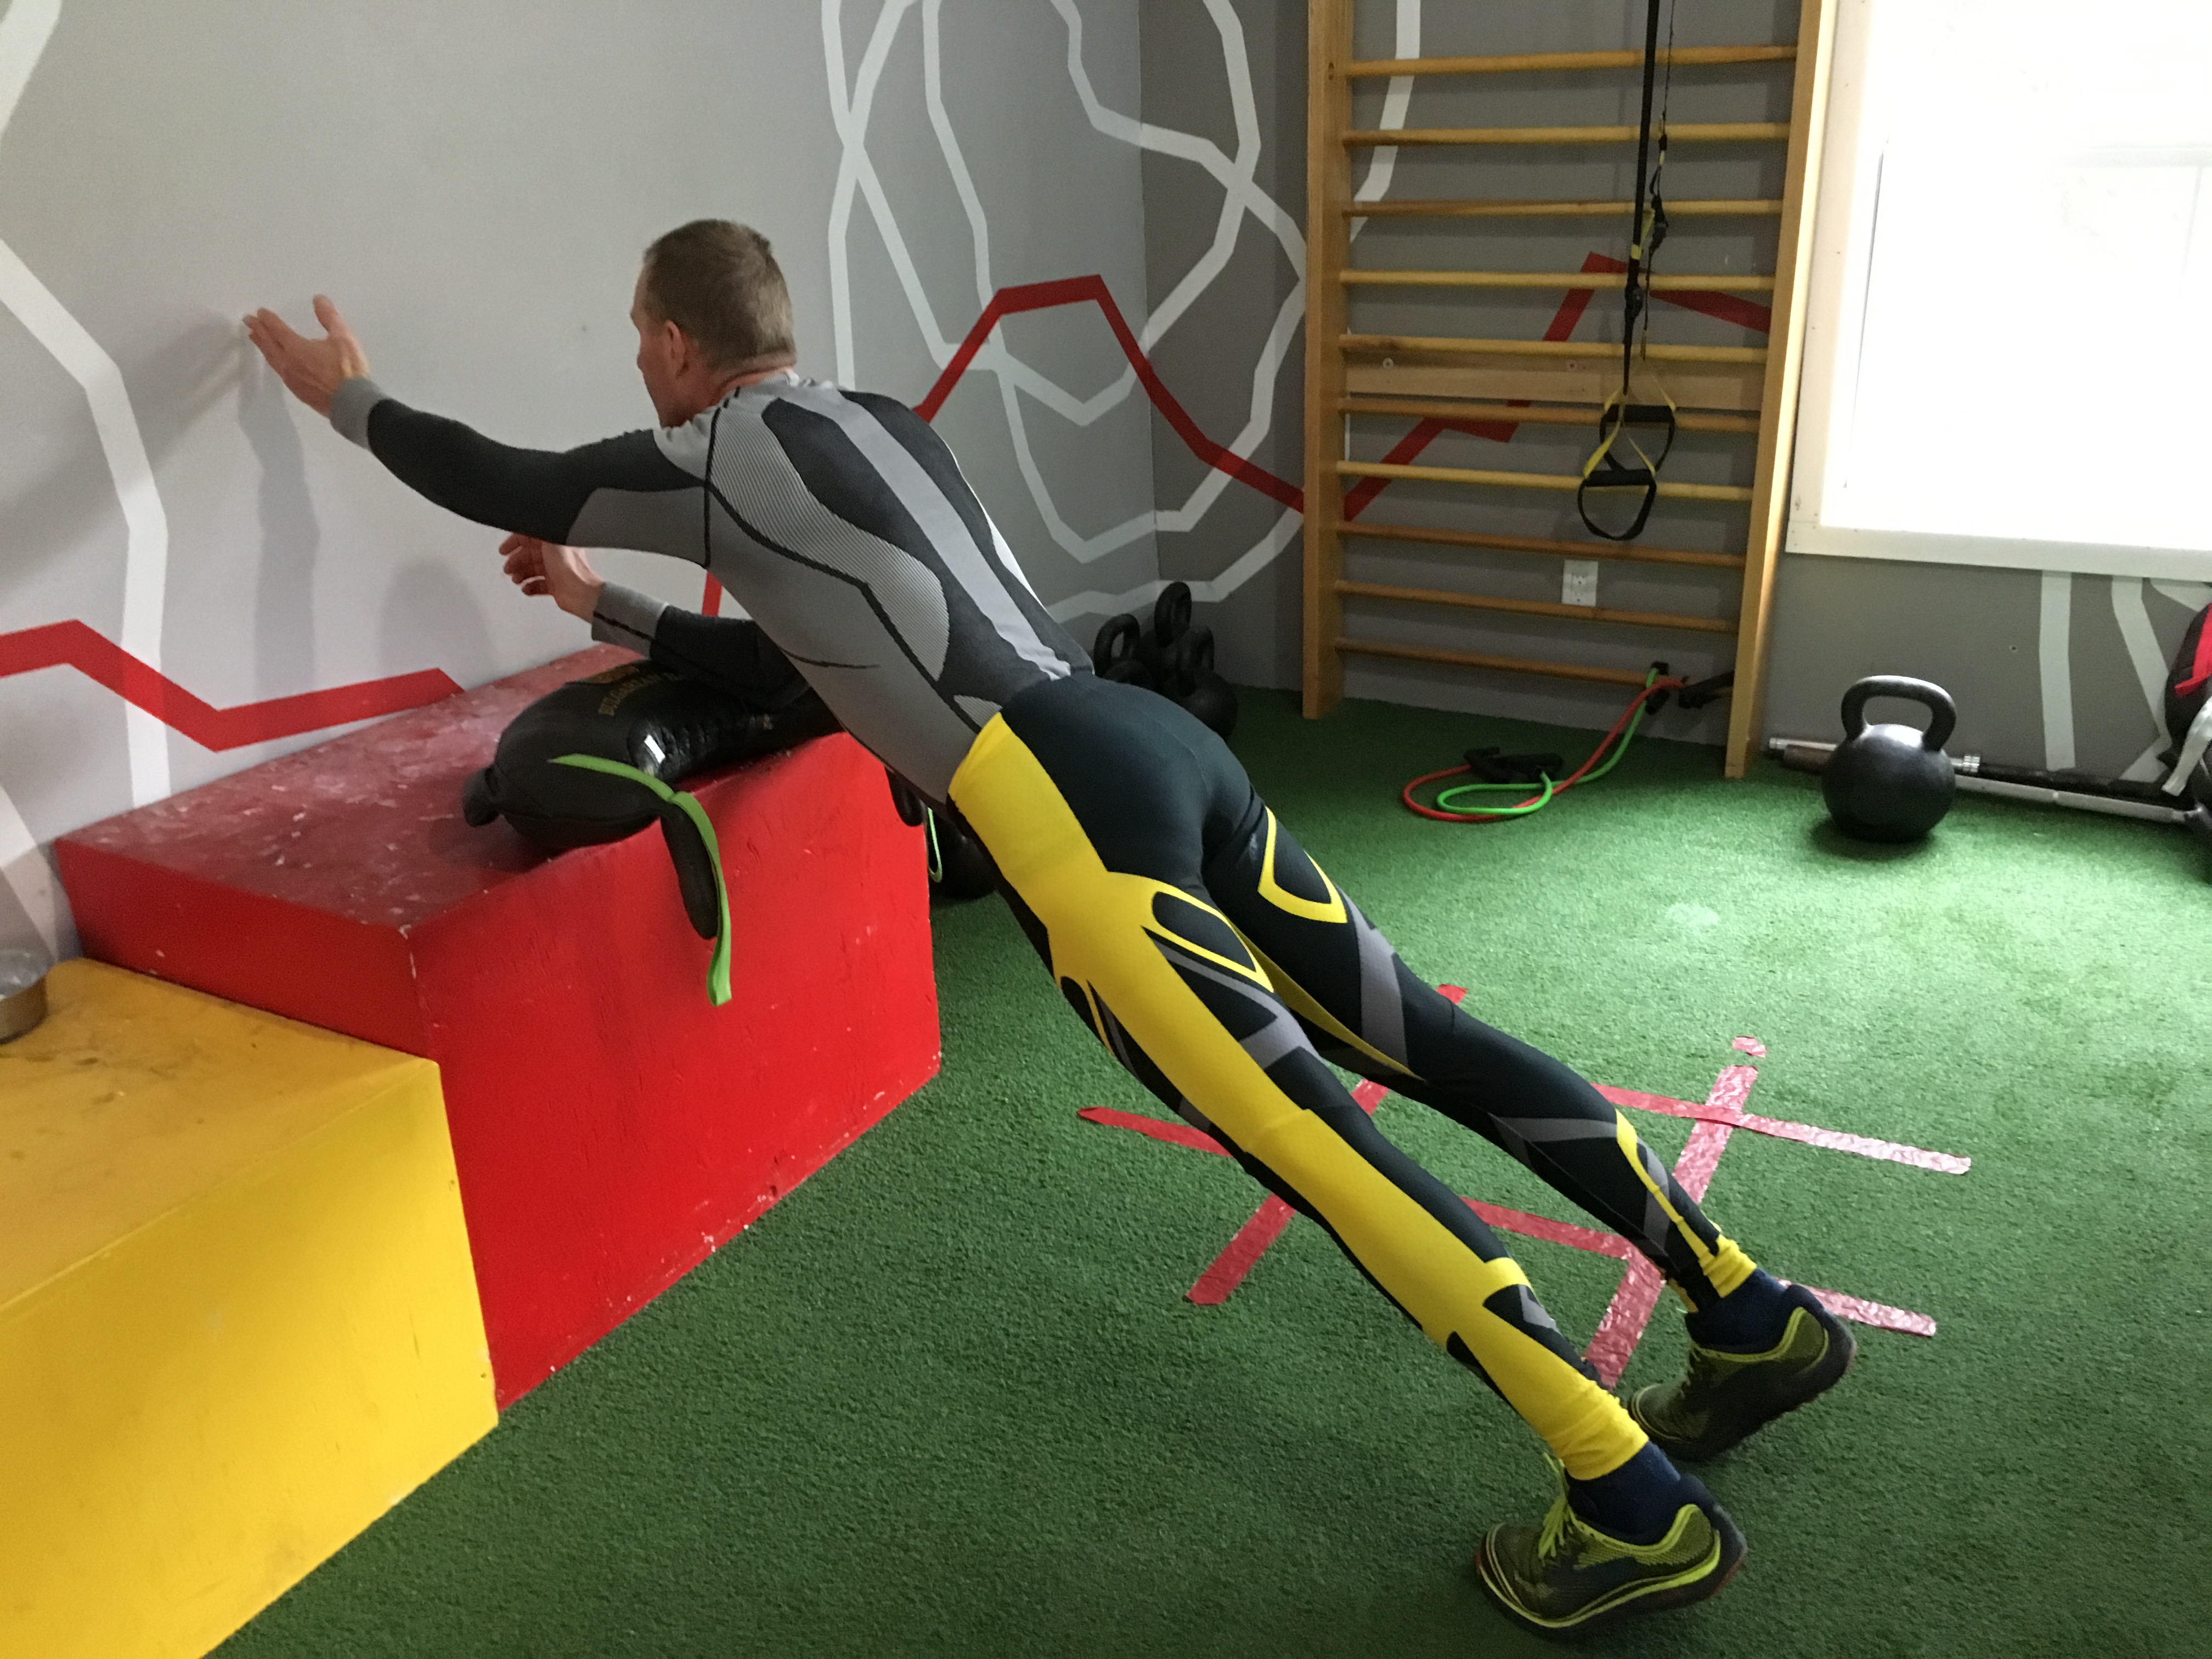
    Beginner Plank. (Photo: Stuart Kremzner collection)

    To progress exercises- increase time first to 10 seconds, then decrease incline to lower box, then lift arm and leg, increase the time to 10 seconds, and decrease incline to flat. Once flat, you can add load, distraction, or instability.
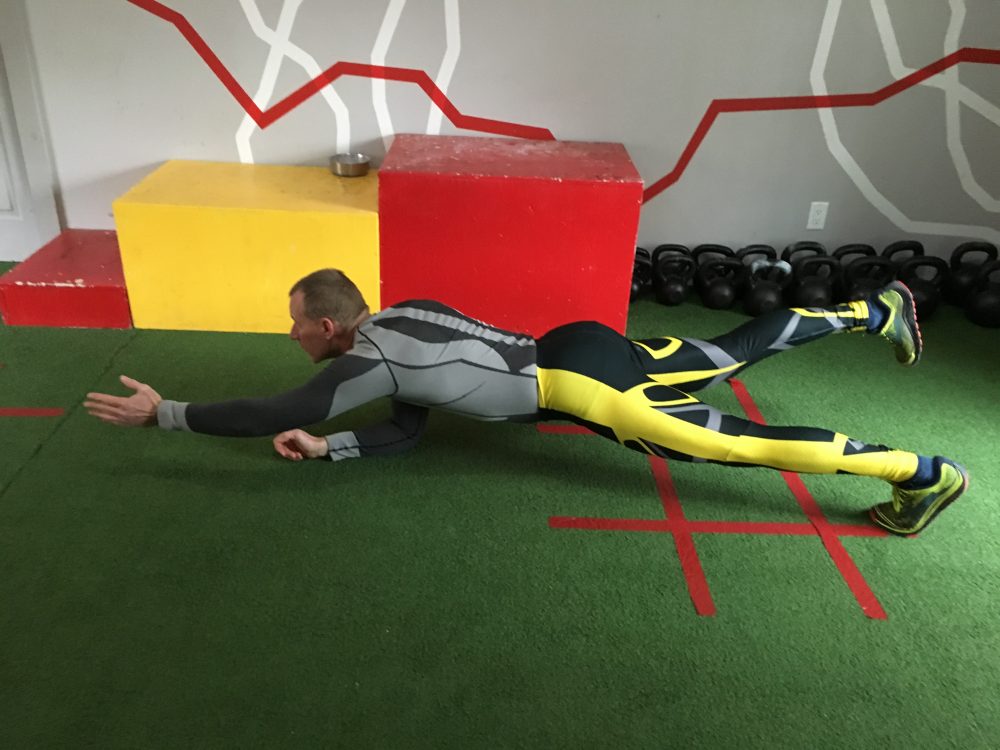
    Advanced plank. (Photo: Stuart Kremzner collection)

    Baby and Elevated Forward and Lateral Crawls– These are baby crawls with more resistance. Focus on keeping a neutral spine and head up. To increase load, advance to Leopard Crawls by elevating knees 1-3 cm off the ground. Keep the same rhythm and technique as baby crawls.
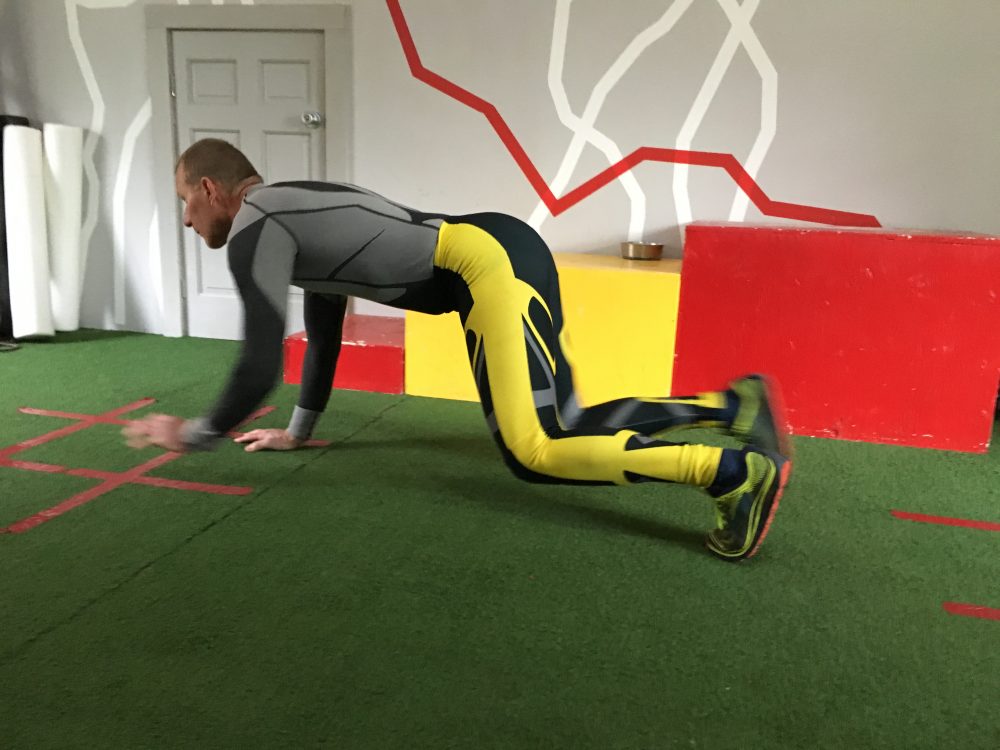
    Elevated crawls. (Photo: Stuart Kremzner collection)


    Static Single Leg Glute Bridge- Lay on your back, draw one heel up 6” from buttock, lift hips up with opposite leg extended. Hold 2-10 seconds. To advance exercise, cross arms across chest, use distraction or increased load on opposite leg.
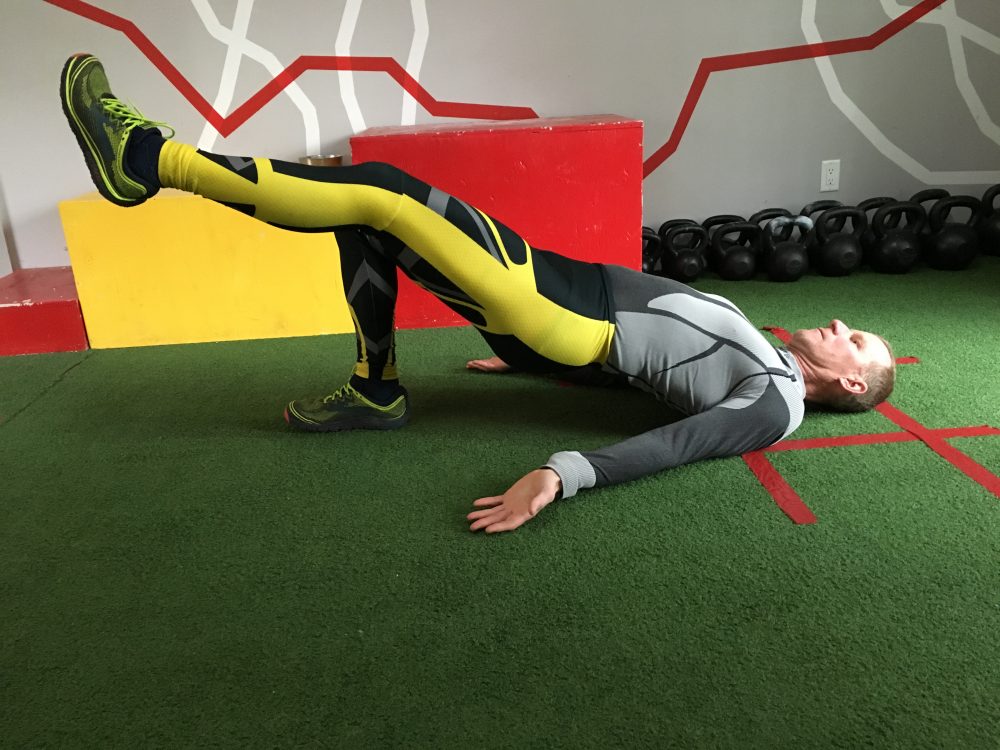
    HS bridge. (Photo: Stuart Kremzner collection)


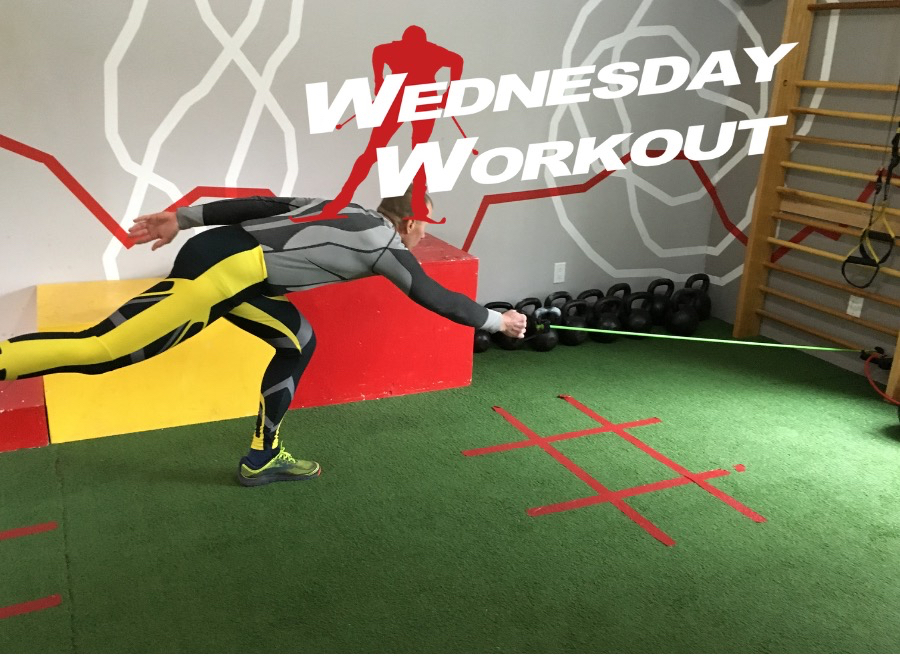
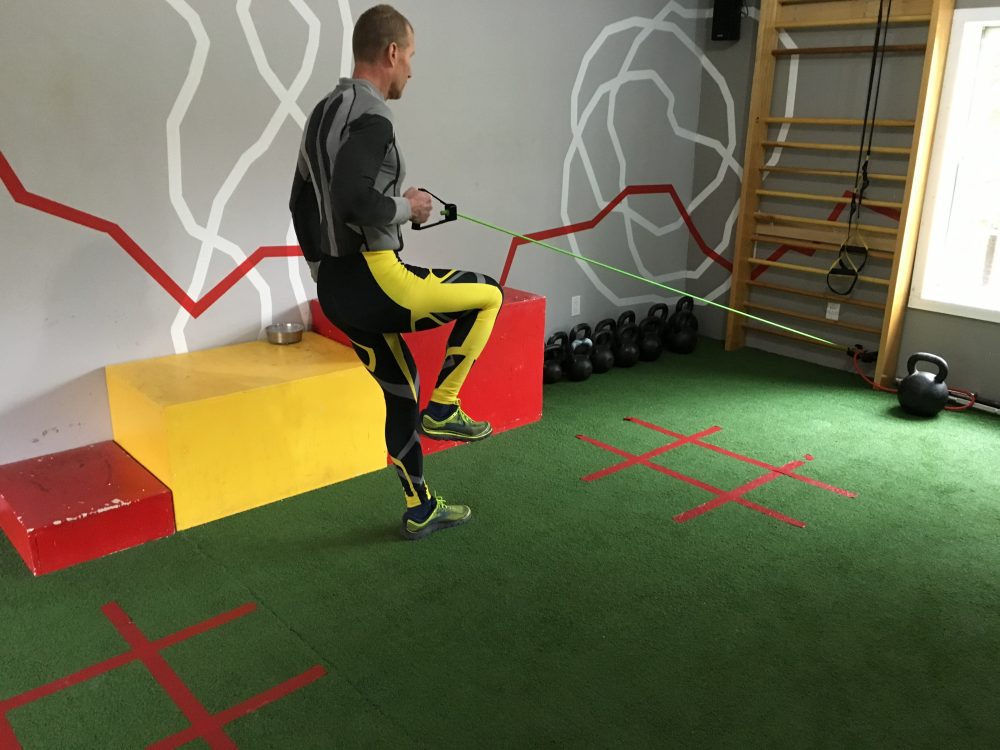
    Glute Pulls– This exercise was developed by Mark Shropshire. This is a more advanced method of strengthening the glute-hamstring complex. Have a resistance band or chain with minimal initial load-but with some resistance-attached to a fixed sturdy object. Hold resistance band in right hand, and standing on right leg while extending down and forward, towards the ground, hinge at hips while bending knee, extend left leg, hold, then return upright while lifting the right knee and pulling back with the right arm. Switch sides, repeat.
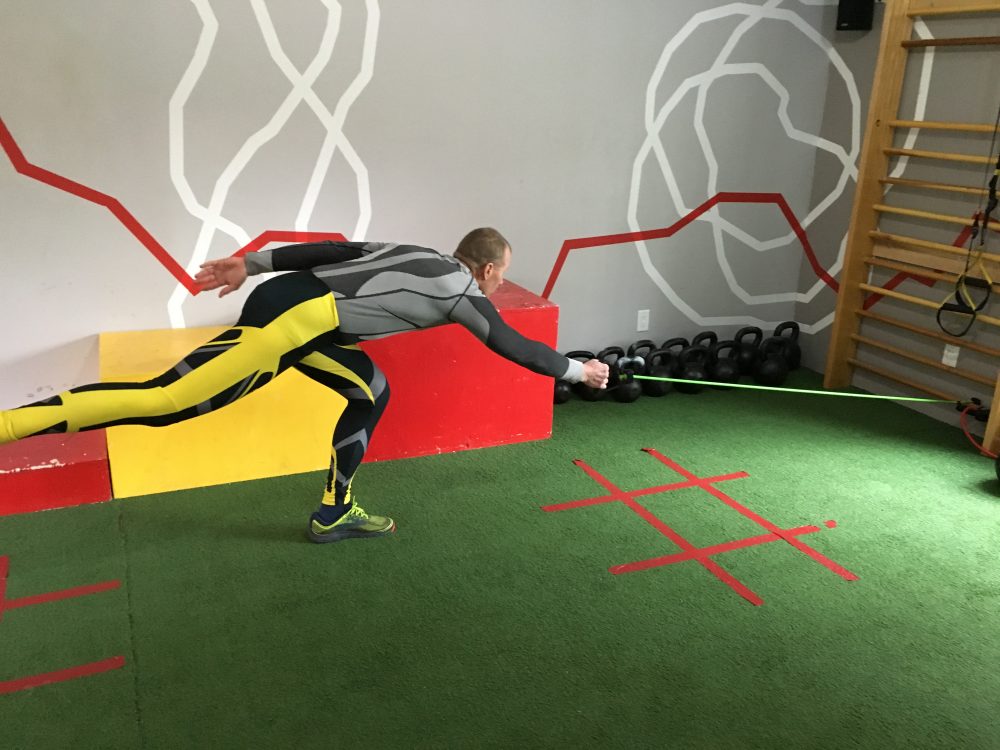
    Glute pull. (Photo: Stuart Kremzner collection)


    Glute pull finish. (Photo: Stuart Kremzner collection)
  • Wednesday Workout: Gym Time with Andrea Burke (with Videos)

    Wednesday Workout: Gym Time with Andrea Burke (with Videos)

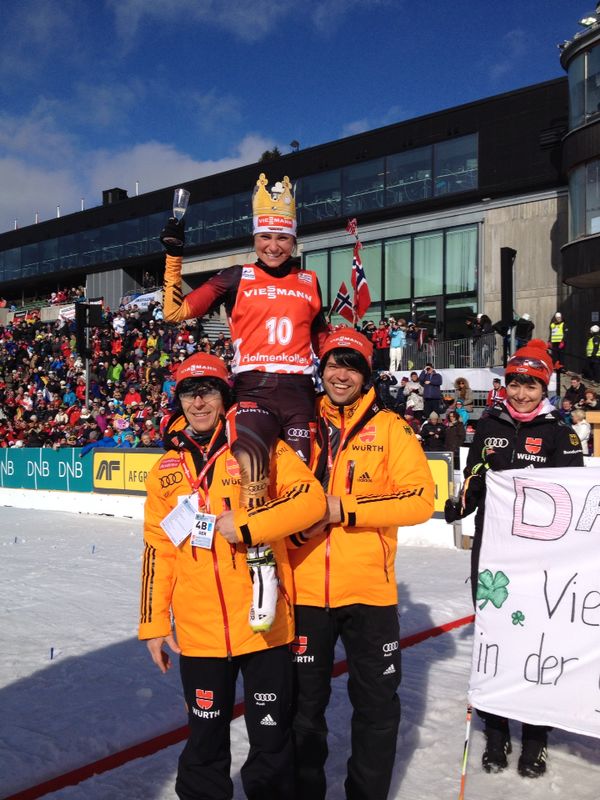
    Germany's Andrea Henkel, now Burke, after the last race of her career in March 2014 at Holmenkollen in Oslo, Norway. (Courtesy photo)
    Germany’s Andrea Henkel, now Burke, after the last race of her career in March 2014 at Holmenkollen in Oslo, Norway. (Courtesy photo)

    For Andrea Burke, formerly Henkel, retirement has meant embracing workouts in a new form. The 37-year-old German, who stopped racing a year ago and married Tim Burke in October, has found that in the time since she’s been able to enjoy mixed methods of exercise.

    A four-time Olympic medalist and the first biathlete to win every individual event at World Championships, Burke is currently transitioning to moving from Oberhof, Germany, to Lake Placid, N.Y., where her husband grew up. There, she aims to start a personal-training business, and has been taking classes and getting licenses to do so.

    In an email earlier this spring, she provided this strength workout as a cross-training option, “especially when you do not have so much time or the conditions are very bad outside,” she wrote. “I promise you some sweat and heart rate.”

    Burke added that she started doing gym sessions like these in the last two years, and more so when she finished biathlon.

    “I really like to do [these] kind of programs for staying in shape and get some heart rate between studying,” she wrote. “It’s a great possibility to work out by having not so much time but still feel I get a good workout done.”

    She recommends doing this kind of full-body workout twice a week.

    Warmup:

    • 10 minute jog or bike
    • Hand walk (10 reps) (see video)

    Workout:

    Part 1 (do 4 times in a row with 30 seconds rest in between)

    • 15-second stationary sprint (in place with knees up)
    • 5-second rest
    • 15 seconds of burpees (video)

    Part 2: Strength circle (do 2 complete sets with a deep breath between each exercise)

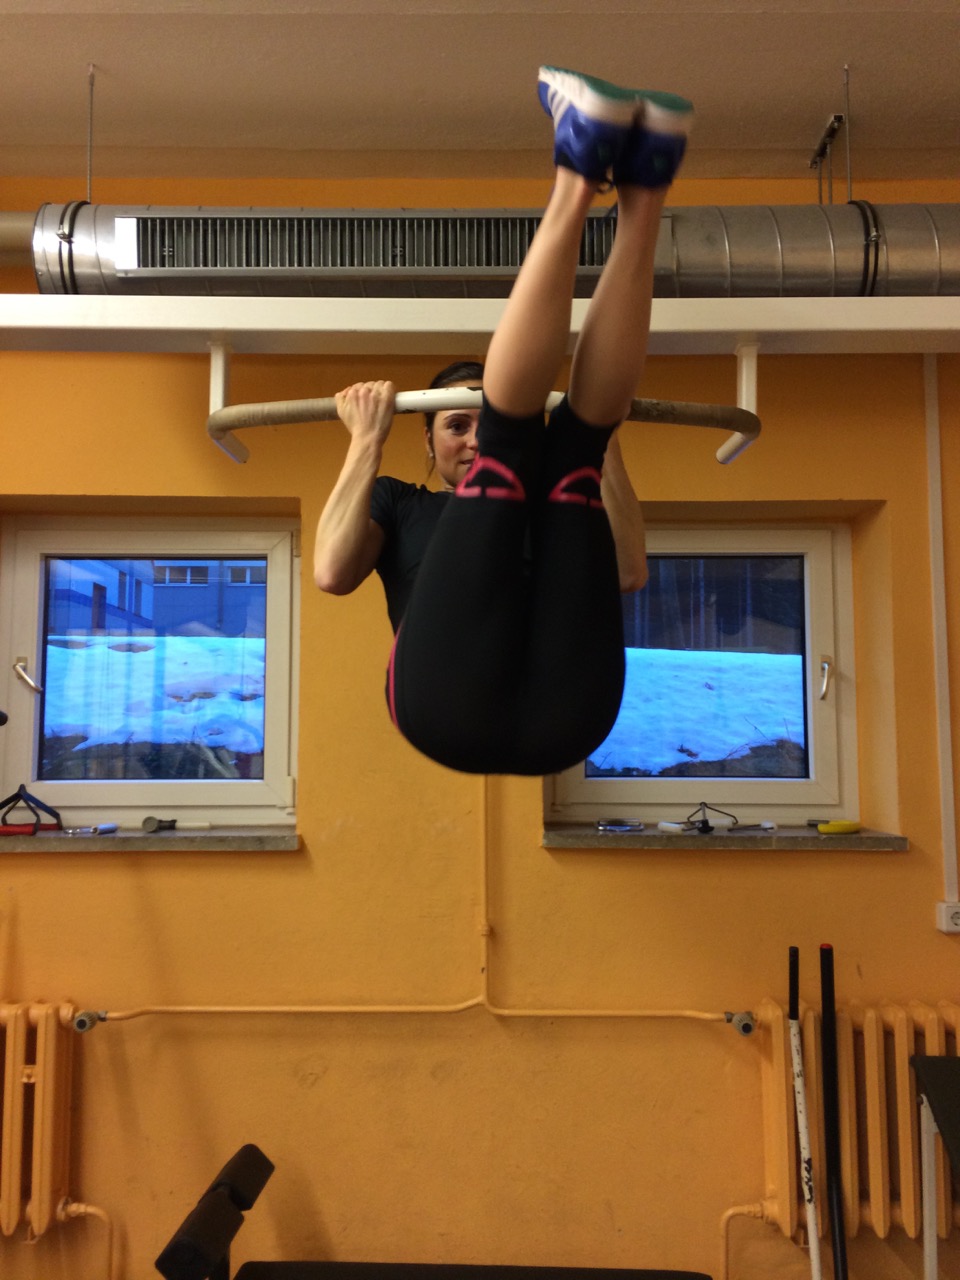
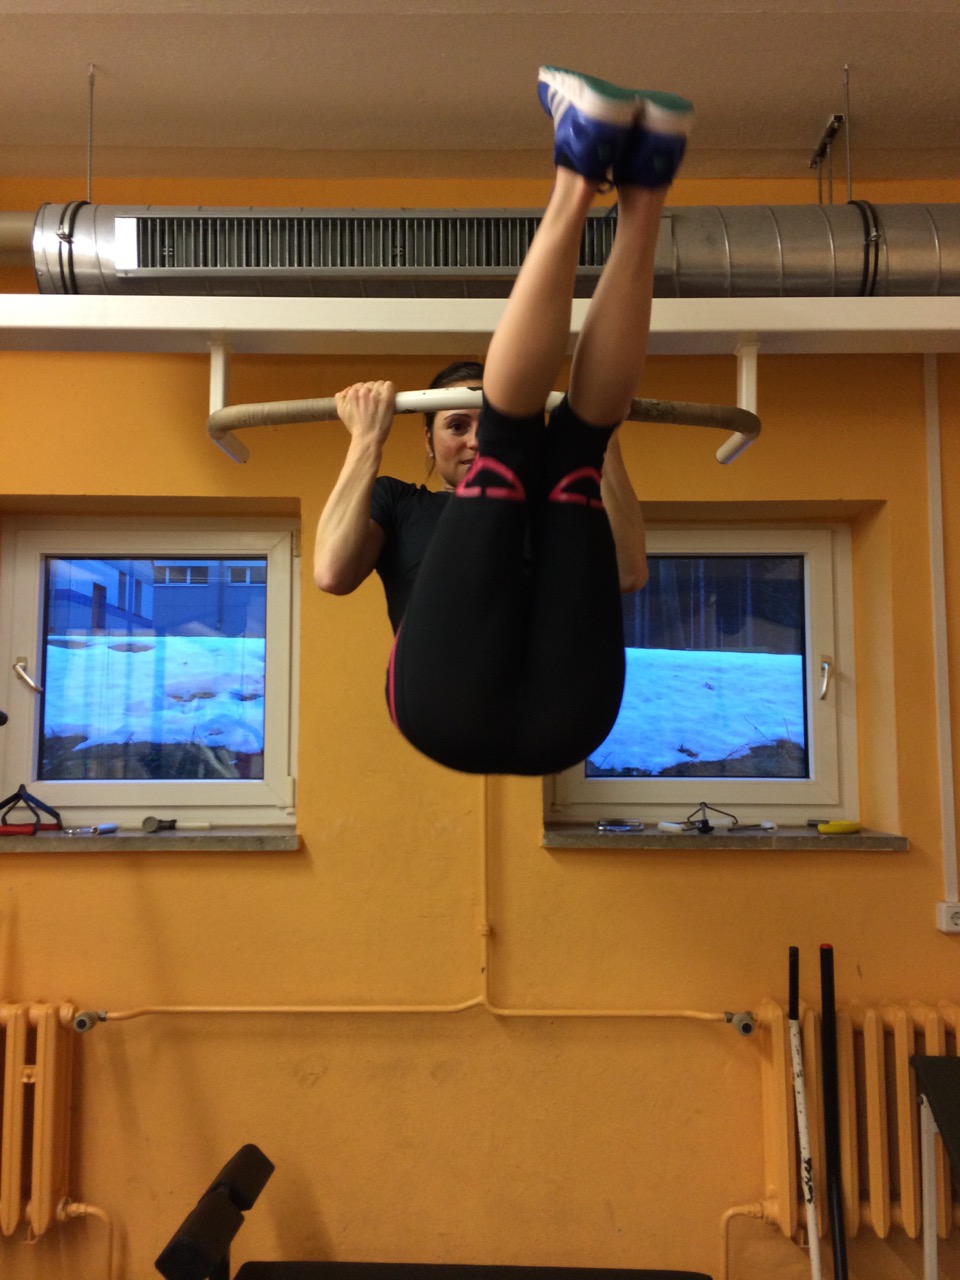
    Andrea Burke demonstrates a leg raise on a pull-up bar. Do as many as possible to improve core strength. (Courtesy photo)
    Andrea Burke demonstrates a leg raise on a pull-up bar. Do as many as possible to improve core strength. (Courtesy photo)
    • Step up (20 on each leg) (video)
    • Side plank on hand, small hip movements (50 on each side) (video)
    • Lunges with upper-body turn (video)
    • Plank on elbows, heels moving forward and backward (1 minute) (video)
    • Back exercise, with arm movements as big as possible (1 minute) (video)
    • Side plank on hand, elbow to knee (20 each side) (video)
    • Leg raise on pull-up bar (see photo at right)

    Part 3: (Do each exercise as fast as possible for 20 seconds for a total of 3 sets with 10-second rests in between)

    • Jumping jacks
    • Mountain climbers
    • Squats
    • Push ups

    Cool down:

    • 10-minute jog or bike
  • Wednesday Workout: APU’s Chelsea Holmes Breaks Down Strength Training

    Wednesday Workout: APU’s Chelsea Holmes Breaks Down Strength Training

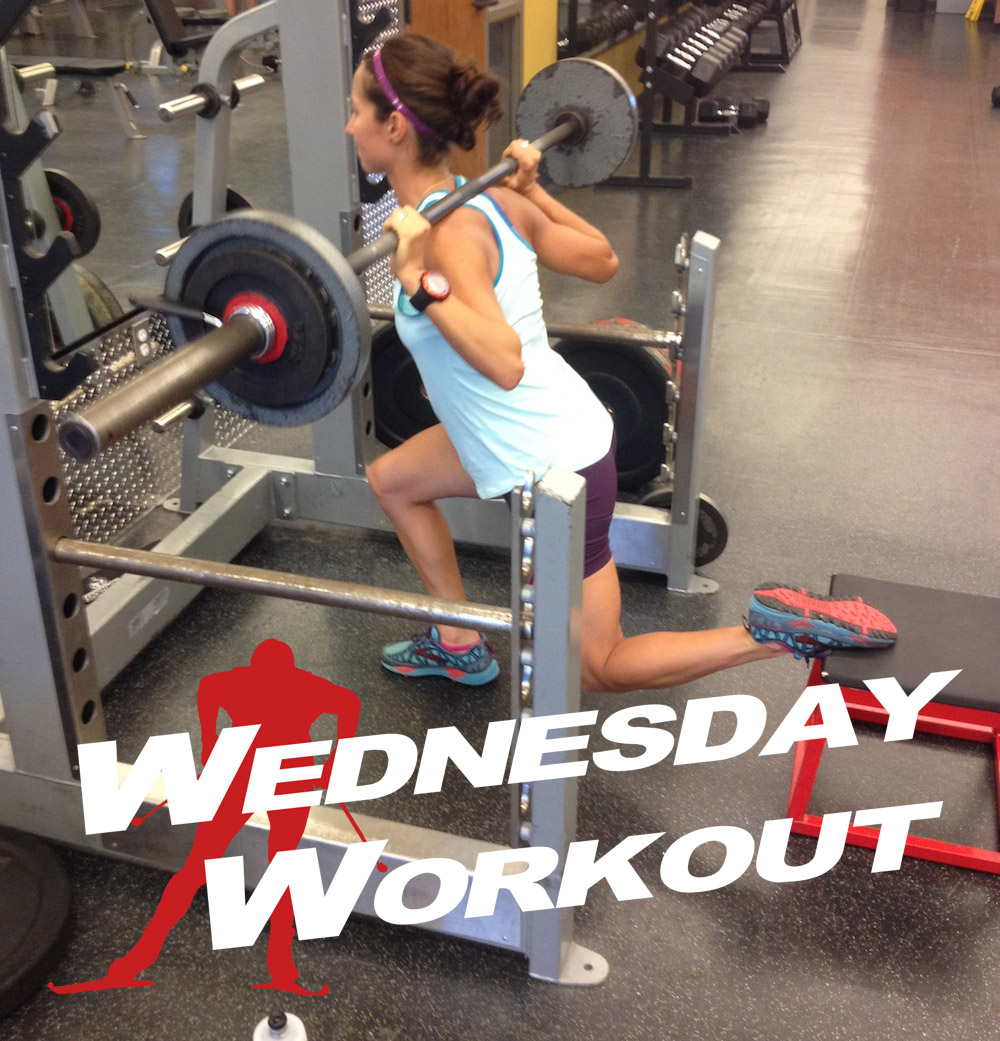
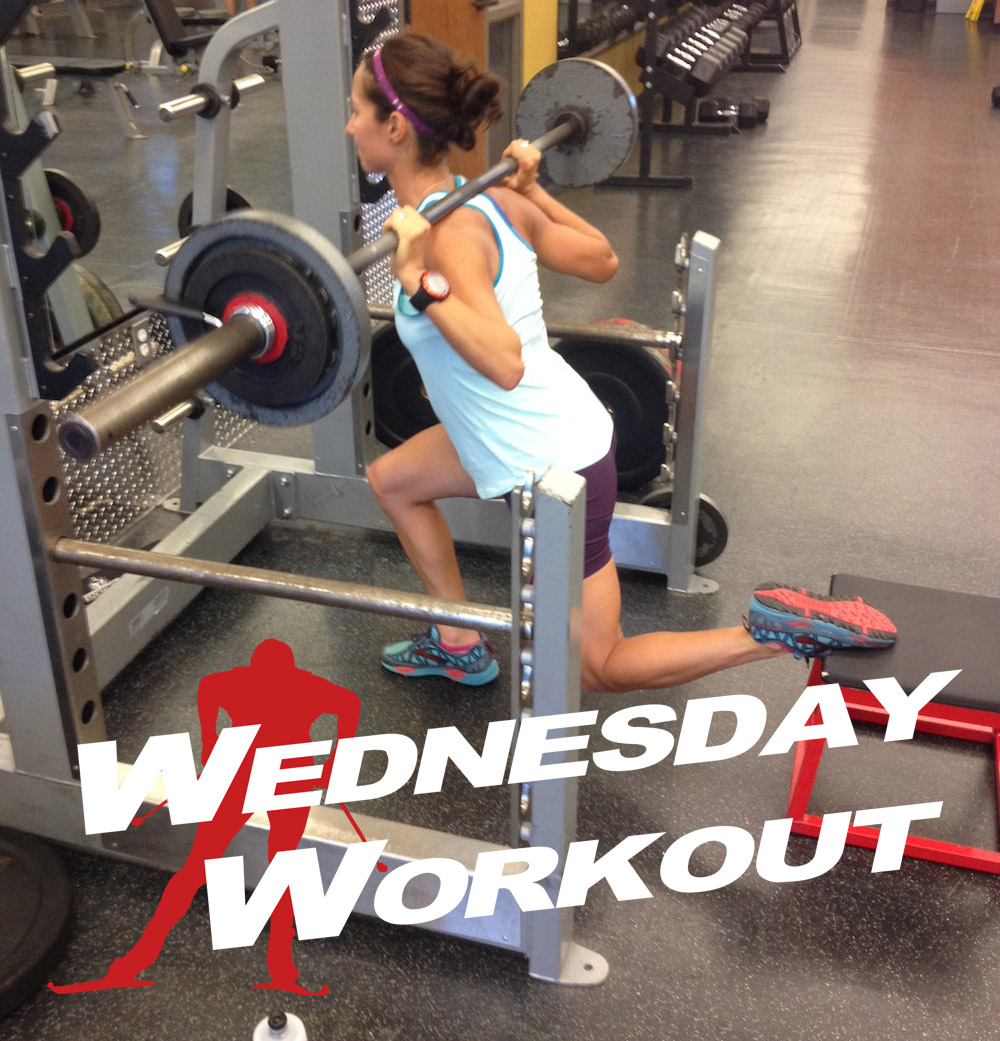
    Chelsea Holmes performs a single-leg squat with her back foot on a plyo box. (All photos courtesy of Chelsea Holmes)
    Chelsea Holmes performs a single-leg squat with her back foot on a plyo box. (All photos courtesy of Chelsea Holmes)

    This week’s workout comes from Chelsea Holmes, who recently joined the Alaska Pacific University (APU) Elite Nordic Team after three seasons with the Sun Valley Ski Education Foundation in Sun Valley, Idaho. Originally from Girdwood, Alaska, Holmes, 27, returned to her hometown glacier earlier this summer as one of 14 of women with the North American Women’s Training Alliance — a U.S. Ski Team camp held annually in Anchorage and on Eagle Glacier. Below she gives a detailed explanation of what she does to build strength and work on her weaknesses.

    ***

    My Strengths (and many weaknesses)!

    Strength training should be an important staple in every endurance athlete’s regimen. It is important to note that the weight, duration, number of repetitions and sets are all individual and should be catered around the individual’s experience, age, and training plan. The quality of technique should be priority, and only when comfortable and confident in an exercise should an individual attempt maximal exercises.  Additionally it is recommended to have a partner to spot and assist in these exercises.

    My strength sessions often address numerous muscle groups and modes of training and development within a single session. This is due to the irregular and intense nature of cross-country ski training and the time constraints in a week.

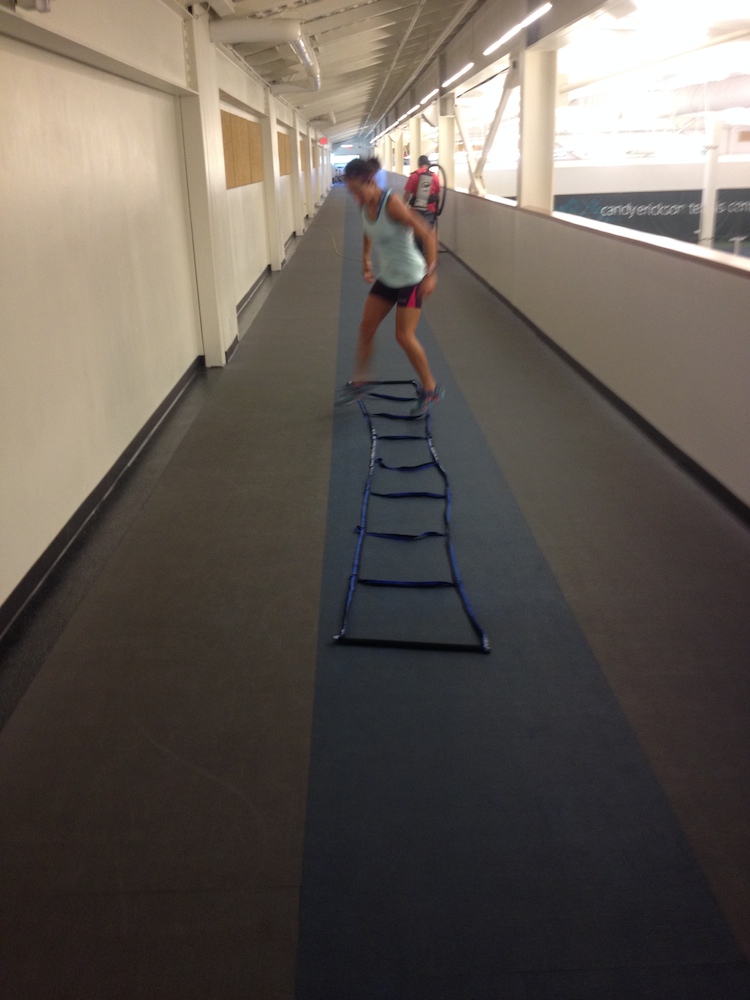
    Chelsea Holmes working on some ladder drills (Courtesy photo)
    Chelsea Holmes working on quickness with some ladder drills (Courtesy photo)

    My current routine includes:

    – Focus: Maximal-strength exercises where the load is high and the repetitions are low.

    – Quickness (often incorporated into my warmup): I like to spend some time during the workout doing either drills on a speed ladder (shown above) or jump rope. When jump roping, focus on speed and the power coming from your calves. Try 30 on both legs before moving to 15 per single leg.

    Single-leg squats (All photos courtesy of Chelsea Holmes)
    Single-leg squats with back leg on floor, back toes pointing down

    What: Single-Leg Squats

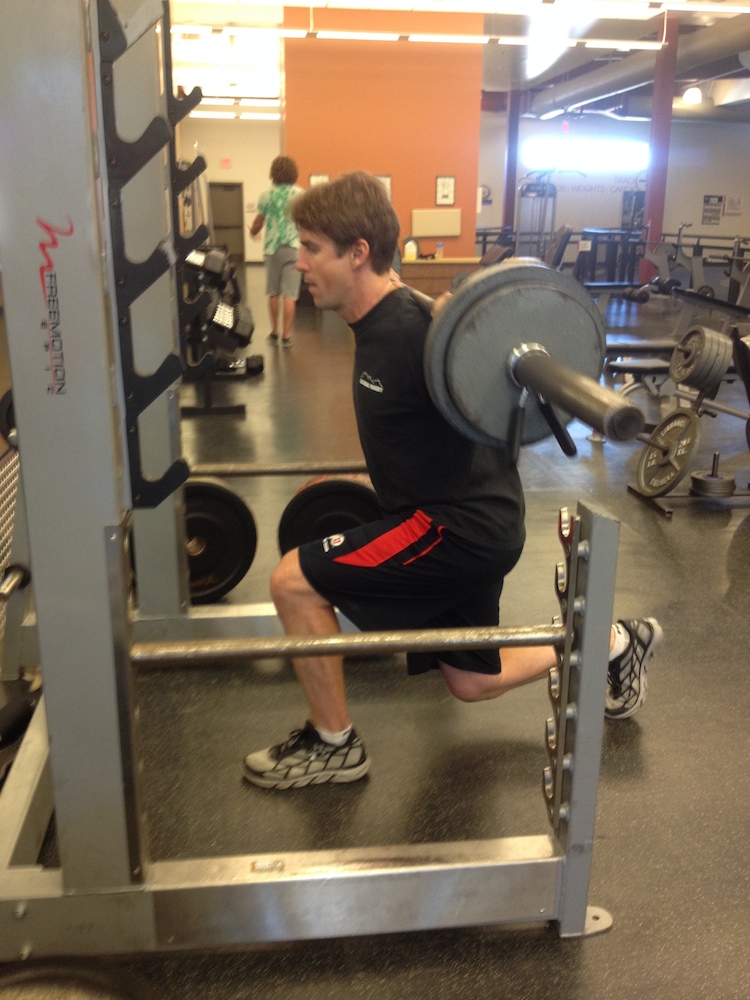
    Position: In a standard-squat rack, put a reasonable weight on the squat bar. Lift the weight and once set and balanced, place one foot back behind you on a low stand with your foot perpendicular to the floor (useful tools: plyo boxes, stools), or, as shown at right, just place your back leg on the floor with your toe facing down. While keeping your front knee inline over your toe (no twisting or caving medially) perform a squat motion. Switch sides!

    The front leg should be the source of power, felt in the quadriceps, hamstring and gluteus. The back leg is there only for stability and balance. This should be felt in the quadriceps, hamstring, and gluteus. If you feel the need to use your back leg when powering up, go down in weight. Do not bend forward at the waist, or try to lift with your back.  Your core acts as a stabilizer here.

    Why: I have been using single-leg exercise because in the past I have noticed a personal tendency to favor a leg and compensate. I also use the single-leg squat as it should stimulate the intrinsic muscles as there is a balance component to the exercise. Maximal exercises develop the time to peak force, efficiency and maximal power.

    Note: After comfort and proficiency have been developed, try to superset this exercise. I will sometimes perform a set of 6-8 jumps (high jumps onto a plyo box, tuck jumps or skate jumps) directly after each set.

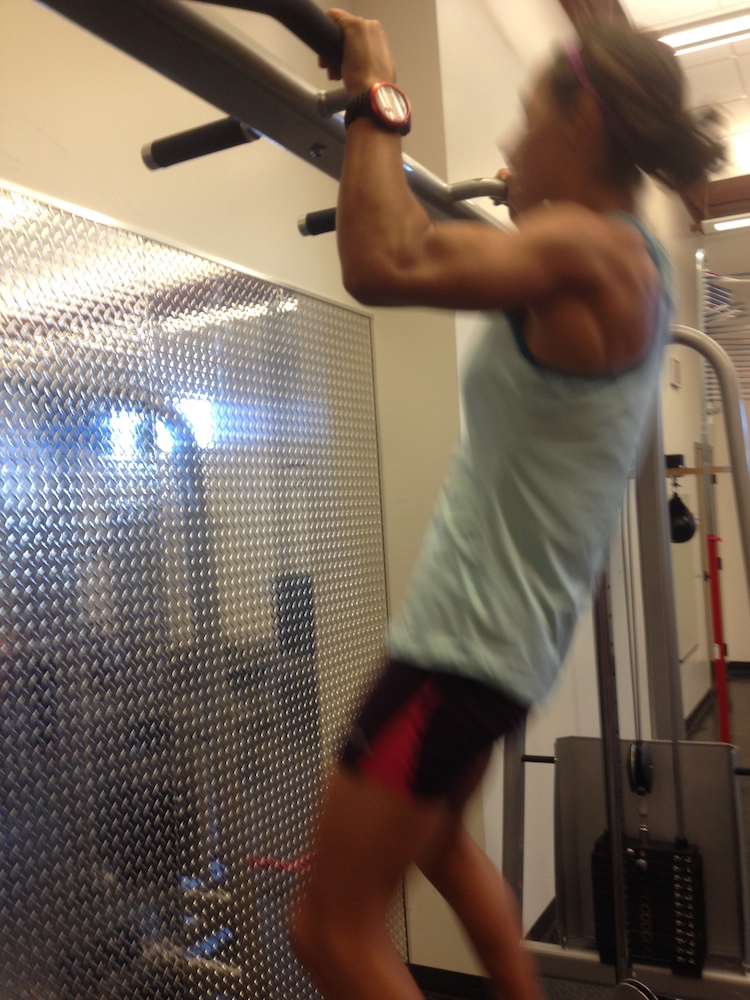
    Chelsea Holmes demonstrates a standard pull-up.
    Chelsea Holmes demonstrates a standard pull-up.

    What: Pull-Ups

    Position: A standard pull-up (shown above). The important cues to note in this exercise are full range of motion, a wide enough hand position that you are engaging your latissimus fully and minimal swing.  I most often use an overhand grip.

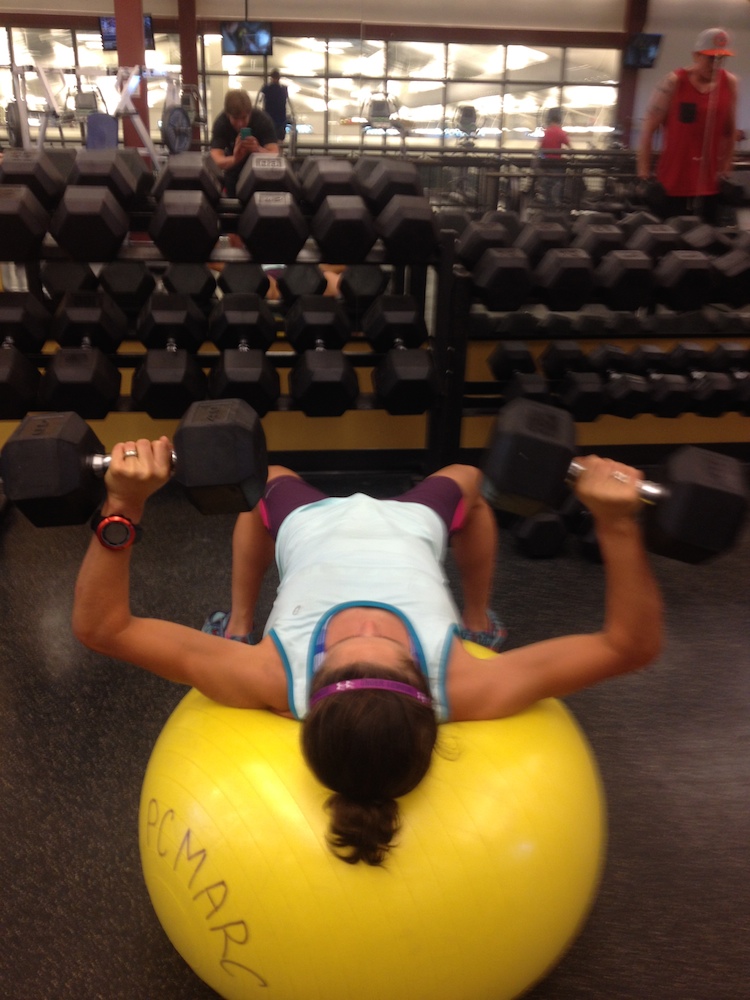
    Dumbbell press on a Swiss ball, as demonstrated by Chelsea Holmes
    Dumbbell press on a Swiss ball, as demonstrated by Chelsea Holmes

    What: Dumbbell Press on Swiss Ball

    This is a simple a bench press (shown above), only using dumbbells and instead of laying on a bench you are supported by laying with your upper back centered on a Swiss ball and feet planted in a stable position. From a sitting position on the Swiss ball, roll yourself forward on the ball so that the ball is centered underneath your upper back with your feet planted firmly and your core held in a plank position (of course, chest face up here!), perform a standard press.

    Why: There is so much focus on posterior exercises in skiing that it is important to ensure a balanced body.  I like the addition of a swiss ball because it adds a component of balance and core.

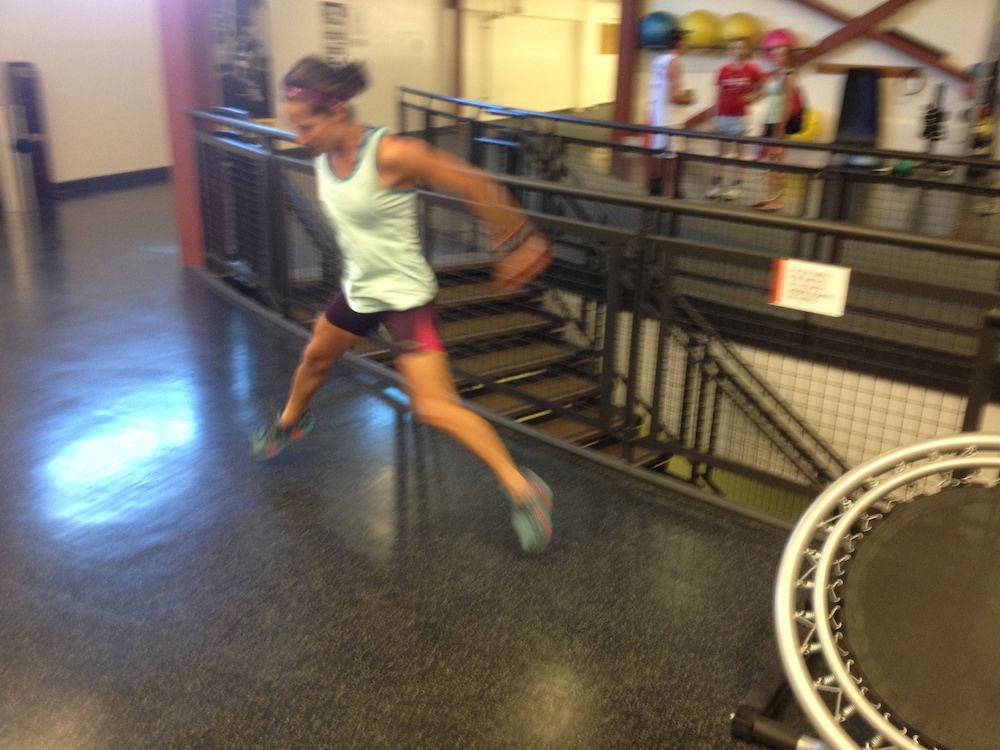
    Skate jumps with Chelsea Holmes
    Skate jumps with Chelsea Holmes

    What: Skate Jumps (above) — a lateral jump focused on developing quickness, power and stability. Do this exercise in front of a mirror to help focus on technique.

    Position: While standing on a single leg sink into the leg before exploding up and over lateral to the opposing leg.  Through the landing on the opposite leg, try to control the forces and stay balanced. Through the landing phase, you should end up in the starting position for the next jump. The jump should come from the forefoot.  Use your upper body mimic a powerful skating motion.

    What: Balance

    1. Single-leg squats on a Bosu ball or instability disk. (If using an instability disk, you might have to place the disk on a small box to allow for the range of motion through the squat.)

    In front of a mirror, stand one footed on a Bosu ball with the platform down. Place the foot, toe slightly turned out, with the ball of the foot being placed on top and in the center of the dome or disk.  Balancing on that foot, slowly perform a squat to a comfortable and stable depth. A broom handle held across the shoulders parallel to the floor can be a useful tool to ensure no twisting or leaning. The focus is balance, so really focus on minimal teetering and extraneous movement. When first beginning these, simply spend a few sessions doing half squats or just practice standing on one leg.

    These are not only great for balance but also the many stabilizer muscles that are extremely important but easy to forget about.  This exercise is great to practice breathing and total focus — it’s easy to get distracted in a busy gym! I prefer to do these in the second half of my workout when my body and mind begin to tire — mind over matter!

    It’s easy to get distracted in a busy gym! I prefer to do [single-leg squats] in the second half of my workout when my body and mind begin to tire — mind over matter!

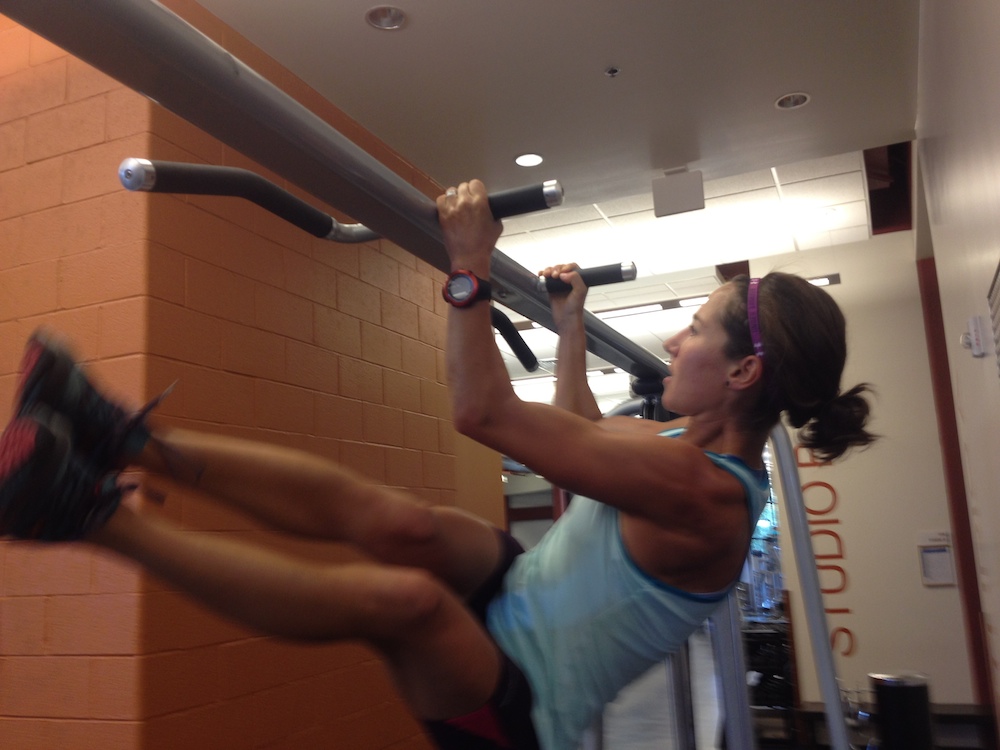
    Chelsea Holmes working on core with a leg raise and twist from the pull-up bar
    Chelsea Holmes finishes up some tough sets while working her core with a hanging twist. “Basically you pull up so that your elbows are at a 90 degree angle and the hold yourself there while bringing your legs up vertically (so that you are somewhat folded in half),” she explained in an email. “Then while holding your core strong you move your legs in a window-wiper motion… Only go so far to one side as you can feel your core then back the other side (so that your toes draw a full rainbow, back and forth, that’s one). I am not as strong, so I try to do 4-5 total.”

    What: Core

    1. Pikes — Either a TRX or a Swiss ball can be used in this situation.

    Position: Place yourself in a plank position with your feet either in the TRX stirrup (toes down) or if using a Swiss ball, place the top of your foot on the ball.  Your hands should be planted beneath your shoulders, palms against the ground and arms straight, similar to a push up position.

    Exercise: Bring your body into a pike position with as little arm and knee bend possible, return to plank, now bring your knees underneath your body, driving the opposing knee to opposing elbow. The knees should bend together and twist so that you feel a rotational core component. To get the most out of this exercise, don’t rush it!  Perform it in a controlled manner and with purpose.

    Why: I really like this exercise because it is full body, and no matter how many times I do it, it is always a challenge.  It has an isometric, concentric and eccentric component. Bang for your buck!

    2. Garhammers (video demo)

    Position: Hang from a pull-up bar with straight legs. Start by bringing you knees up so that your quadriceps are parallel to the ground, this is where the exercise starts and finishes for each repetition. Then drive your knees upwards by rotating your pelvis forward and focusing on your core making that movement.

    Please note, there is not a tremendous range of motion with this exercise. If you feel you are ready for a more advanced version of this exercise, after driving your knees up, straighten your lower legs and lower your legs slowly back to parallel.

    3. Alternating Push-Ups

    I truly despise pushups so I think I gravitated to this style because it is much harder for me than standard push-ups and as such I cannot do as many.  This is not a cop out, these are tough.

    Position: From a standard pushup position, move your right hand back along your body so it is planted below the bottom of your rib cage (it is placed next to your body, not away from it), while leaving your left hand up slightly away from the shoulder.  When you lower yourself into a pushup your upper right arm should track back parallel against your body so that it targets not only the front deltoid but your triceps as well.  Your left arm will track as it usually does in a standard push-up.   Start with 5 per side before switching.  If you feel your core begin to sag, move to your knees- I always end my sets worn out and doing the last push ups from my knees.

  • Wednesday Workout: SUP to Improve Balance, Core Strength

    Wednesday Workout: SUP to Improve Balance, Core Strength

    Wednesday Workout SUP
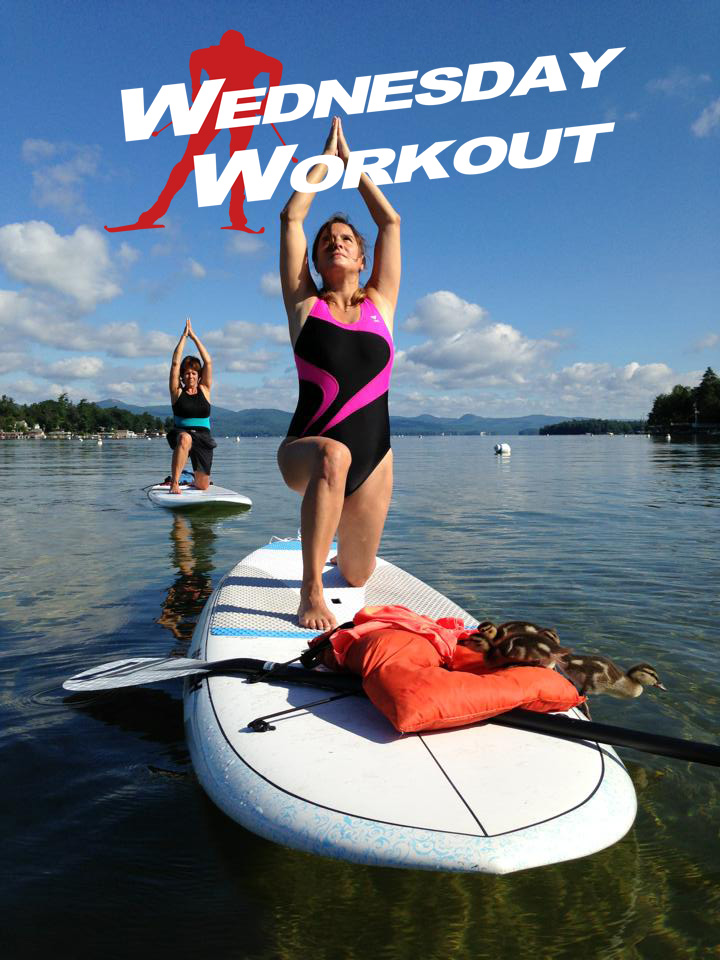
    SUP yoga takes balance, stretching and strengthening to another level. When else can you work out with baby ducks? (Photo: Patty’s Water Sports Boutique, Lake George, N.Y.)

    When it’s too hot to run, rollerski, hike, bike or even jog, seek water. Stand-up paddling (SUP) is one of the latest-and-greatest exercise activities to hit the water in recent years, and while it might look simple enough, there’s plenty to keep you busy if you want to do it right.

    Why worry about technique? Because if you’re going to do it — and if you plan on paddling for long stretches at a time — you might as well do it efficiently. Muscling your way through it or paddling too leisurely with either injure or bore you, but finding the “sweet spot” in between will leave you feeling it in your abdominal area, as well as your upper and lower body.

    A beginner stand-up paddling session led by Patty Pensel of Patty's Water Sports on Lake George, N.Y.
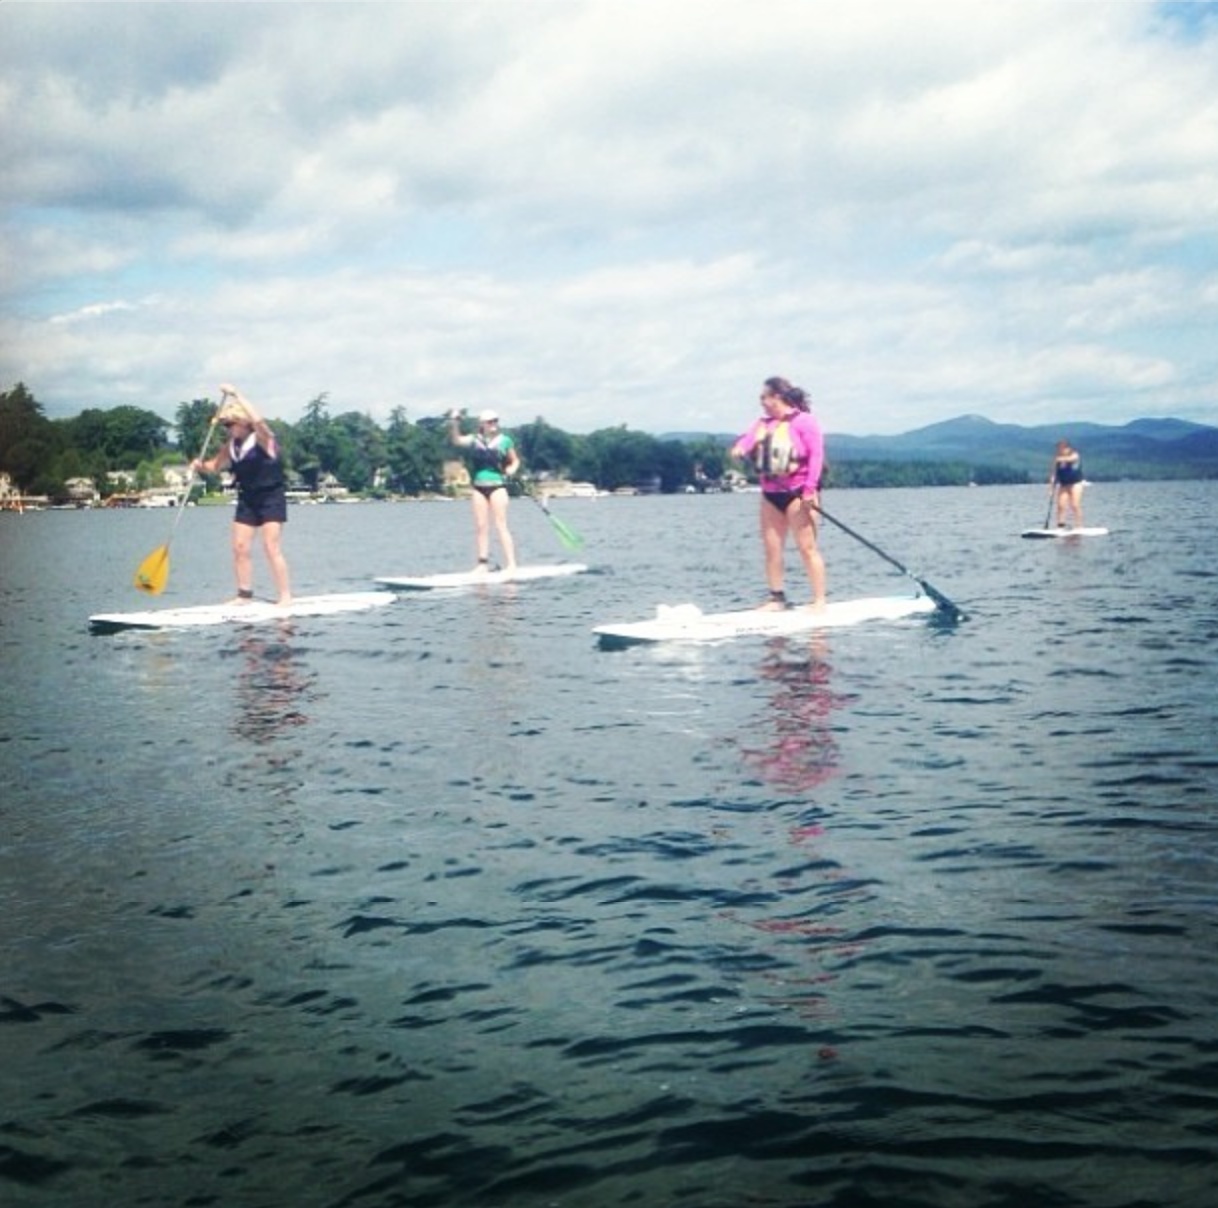
    A beginner stand-up paddling session led by Patty Pensel (second from r) of Patty’s Water Sports on Lake George, N.Y.

    Without reading on, you’ve already learned one of the keys to success in paddle boarding: finding the sweet spot. That’s the place on your board where you’ll find the most stability: each foot on either side of the handle (the handhold that helps you carry the board out of water).

    Too far in front or back (tip and tail) of the board will leave you wobbly, although more advanced paddlers can take a surf stance near the tail to further develop leg strength and balance.

    After you get your balance, it’s a matter of keeping it. Concentration is important, especially in windy, wavy, or variable conditions, but so is relaxing. Keep your head and chest up, lead with your arms, and stay loose with a slightly bent stance — checking that your feet are evenly spaced from the sides and center of the board, about shoulder-width apart.

    If all this is easy, focus on your stroke: Catch, Pull, Relax (CPR). The first part of the stroke, the catch, should begin with the paddle entering the water 2 to 3 feet in front of your feet, angled part of the blade facing away, according to “Stand Up Paddling” by Rob Casey. Submerge the blade, then drag it straight back parallel to the board (without hitting it) and twisting your torso as you do so. That’s the power phase — the push.

    Just as if you were thinking of “Toe-Knee-Nose” while practicing V1-skate technique, spend some time actually following your paddles movement back toward your feet — while keeping your lower body in a forward-facing fixed position.

    When the blade passes your feet, pull it out of the water. Relax as you release. To return to start, twist your lower wrist forward to “feather” the blade and minimize wind resistance and maximize efficiency.

    Repeat and switch sides as necessary to keep the board straight (or turn it), swinging the paddle shaft in front of your chest like a pendulum and trading out top and bottom hands to stroke on the other side.

    According to Men’s Fitness, stand-up paddling is one of the top-five water activities for burning calories. Probably more important for skiers, it works on core strength and balance.

    “SUP, as it’s affectionately known—is just as good as kayaking and more so because the lower body component comes into play more consistently,” the article states, explaining that it engages quadriceps, hamstrings, and glute muscles throughout.

    Compared to swimming, waterskiing and kayaking, the calorie burn per 30 minutes is on the lower side if you’re doing it leisurely in flat water (with no wind), but it still compares to surfing at around 123 calories for a 180-pound person.

    At race pace, the burn can soar up to 850 calories per hour for a 160-pound person. A fitness paddle (in calm water, light wind, but continuous high pace and elevated heart rate) clocks in around 500 calories per hour for the same person.

    Add wind, choppy water and the added challenge of riding waves, and you could burn hundreds of more calories per hour, according a SUP fitness article on the Isle Surfboards blog.

    “SUP builds endurance and balance, giving your entire body a complete cardio workout—in fact, some experts say that 30 minutes of SUP is equivalent to running six miles,” Men’s Fitness states.

    Perfect Your Stand Up Paddling Technique (adopted from Seabreeze.com.au)

    Hand position: If you hold the paddle above your head then your elbows should be at a 90-degree angle.  If they’re too far either side of this then your paddling will be inefficient.  Think about getting some tape and marking out where your bottom hand should be – at least till you get a feel for it.

    Feet position: Think of your feet as the foundations for your arms and your paddle – weak foundations equal an unstable paddle technique. To get it right, your feet should be a shoulder width apart with one foot a couple of inches in front of the other to keep you stable front-to-back.

    The technique:
     You can break the paddle stroke down into distinct stages:

    1.      The Catch.  This is when you get your paddle in the water and before you begin pulling it back.  Have your arms fully extended, and then aim to place your paddle about a foot beyond where the paddle would enter the water if you kept it in a vertical position.  Get your paddle blade deep into the water before you begin pulling back.
    2.      The Stroke [or pull/power phase].  Focus on pulling yourself past the paddle, rather than pulling the paddle past you…  Keep your bottom arm almost straight and twist your shoulders for good positioning and to ensure that you really get ‘over’ the paddle and put maximum power into your stroke.  You should aim for a good clean stroke in one consistent motion.
    3.      The Return [release/relax].  When your blade gets level with your feet then it’s time to think about pulling it out of the water.  By the time it’s completely out it should be no more than two feet behind your body.  Aim to lift the blade out quickly and at an angle – so that you’re not lifting your arms up too high, but ‘swinging’ the blade away from you and out of the water.  Once it’s clear of the water, turn your blade through 90-degrees, so that it’s got minimal wind resistance and bring it back up to the correct position for the start of The Catch.

  • Wednesday Workout: Ring Training for Your Inner Gymnast

    Wednesday Workout: Ring Training for Your Inner Gymnast

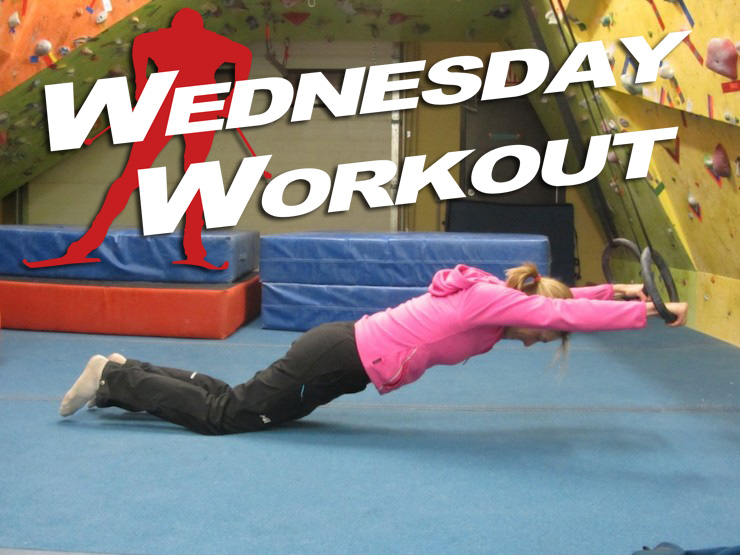
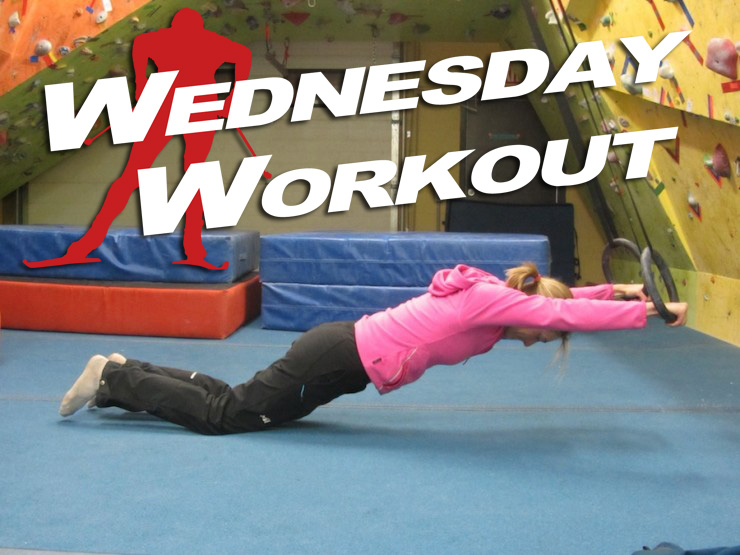
    Katie Bono demonstrating the kneeling ring rollout.
    Katie Bono demonstrating the kneeling ring rollout.

    Cross-country skiers are a pretty fit lot. We tend to pride ourselves on overall fitness, and indeed it’s true that ski training does a great job of developing Crossfit-like versatility. Even in strength workouts, the nemesis of many upper-body-challenged athletes, skiers tend to do pretty well. Look at photos of Kikkan Randall, Andy Newell, and other top-level skiers doing weighted pullups and you’ll realize this.

    Cody Doolan in an L-sit
    Cody Doolan in an L-sit

    Clearly, skiers need some new exercises to bump up the difficulty level in the weight room. If you find yourself maxing out the difficulty level of your current weight-room exercises, or if you are simply bored with all of them, give strength training with rings a try.

    Gymnastic ring training isn’t anything new. Although it and it’s trendier cousin, TRX suspension training, are making some waves in the fitness world right now, rings have been around for ages. However, if you’d like to make significant gains in upper-body and core strength and stability, take a new look at ring training.

    Training on rings has a plethora of benefits: it’s fun, the rings are extremely portable and versatile, and the exercises develop strength, coordination, and stability. However, the main benefit is that ring training is HARD. Like REALLY HARD. Ring training is the most difficult training I’ve ever done in a gym.

    I started doing ring workouts as training for skiing and all-around fitness at a point when my strength fitness was relatively high, and was amazed at the difficulty in performing relatively benign exercises like dips. Although my ego was somewhat shattered, I quickly discovered that the intense difficulty of ring training paid off mightily in my fitness. If you’d like to experiment with ring training, start off with intro exercises and work up.

    A big plus to ring training is that, for all intents and purposes, you can never get too strong for them. As a frame of reference, Olympic gymnastic exercises are rated on a scale from A to E, with A being the easiest. A muscle-up on rings, a fairly difficult exercise for the layman or laywoman, is an A-. Check your local gym to see if they have rings to use or buy your own and bring ’em along!

    Exercises

    Here are some exercises to get you started, but be creative and do some googling! Many traditional upper body and core exercises can be done (albeit at a harder grade) on rings.

    Ring Pushups: Adjust the rings so they are low to the floor. Place your feet on the floor, your hands in the rings, and do pushups. The lower to the floor the rings are, the harder it will be. If you perfect these, prop your feet up on a weight bench level with the rings.

    Ring Pullup and Dips: Pullups and dips on rings. Make sure to not let your arms rest on the straps as you do dips. If you want to make the dips harder, let your body come in front of the rings and turn your hands out (see photo).

    Ring Rollouts: Similar to rollouts done with a squat bar. Adjust the rings so they are just above the ground. Put your feet close to the rings and bend over to grasp the rings. Slowly move your hands and the rings away from you until you are stretched out and suspended by the rings. Then pull your body back to the starting position using only your core. An easier version of this is to start in a kneeling position instead of standing.

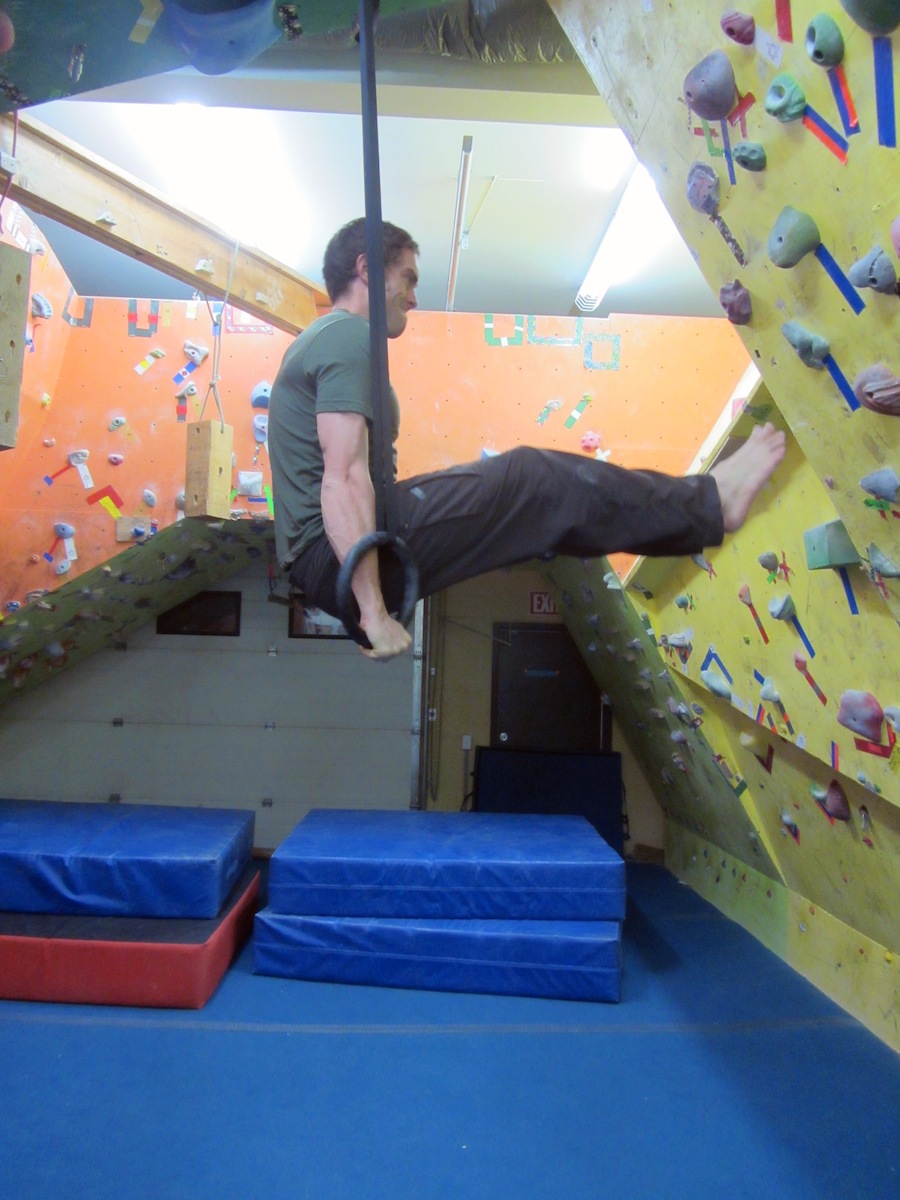
    L-sits: Adjust the rings to just above your waist, and support yourself on the rings (as if you were at the top position of a dip). Then lift your legs up to the level of your waist.

    Full and Half Levers: Adjust the rings to just above your head. Hang from the rings, and keeping your body rigid in a plank position, raise your body until it is parallel to the ground. An easier version is to bend one leg so your knee is up by your chest (half lever). Don’t let your butt sag!

    The Iron Cross: Perhaps not as ski specific as the other exercises, this is a good one to impress your friends. Save it for off-season tomfoolery. Rated a B on the Olympic gymnastic exercise scale, the way to do this one is to start in the support position (the starting position for dips). Lower your body by moving your arms out to the side until your hands are almost level with your shoulders. Yikes!

  • Wednesday Workout: The Rest of the Work, Giving 110 Percent

    Wednesday Workout: The Rest of the Work, Giving 110 Percent

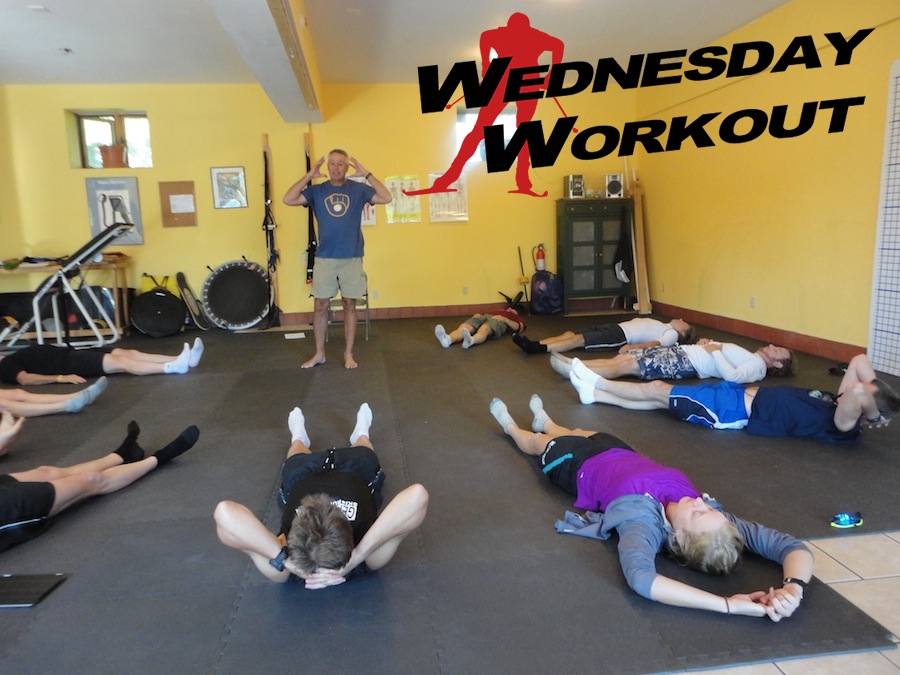
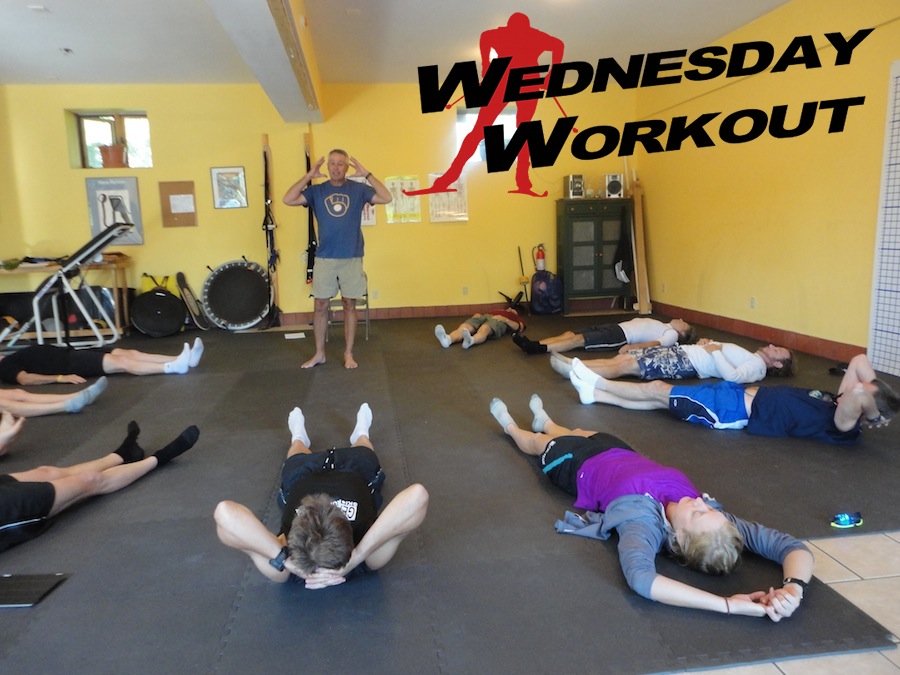
    Jay Tapper, who runs stretching programs for a company called ActivEdge, leads a masters group through some floor exercises and core work last fall. (Photo: Bill Pierce)
    Jay Tapper, who runs stretching programs for a company called ActivEdge, leads a masters group through some floor exercises and core work last fall. (Photo: Bill Pierce)

    By Bill Pierce

    Welcome to Wednesday Workout, the newest workout series on FasterSkier. This week, Central Cross Country (CXC) Elite Team coach Bill Pierce talks about going the extra 10 percent by being diligent about flexibility, recovery and agility. 

    ***

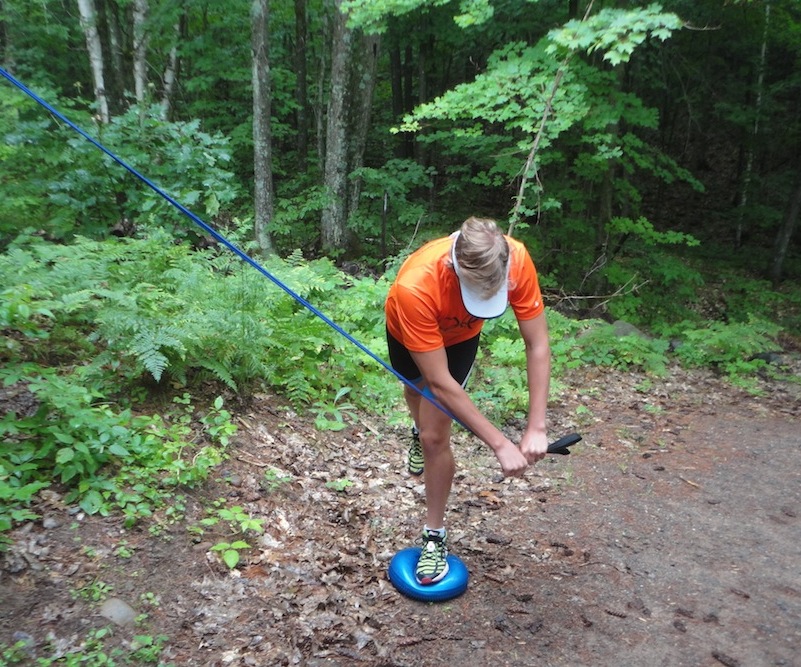
    A cross-over bungee pull: a simple leg and arm pendulum swinging and the other. While standing on the pillow, pull 90 degrees, twisting the shoulders and core but not the hips. This fires the glutes and the IT band for leg alignment and stabilization during the glide phase. Development of the glute is especially important in having a stable and aligned leg during the loading of the glide phase. (Photo: Bill Pierce)
    A cross-over bungee pull: a simple leg and arm pendulum swinging and the other. While standing on the pillow, pull 90 degrees, twisting the shoulders and core but not the hips. This fires the glutes and the IT band for leg alignment and stabilization during the glide phase. Development of the glute is especially important in having a stable and aligned leg during the loading of the glide phase. (Photo: Bill Pierce)

    I can think of quite a few workouts that I could call my favorites but I thought that I would contribute some work ideas that I have been focusing on as a coach with athletes and the team this season. When it comes to the workouts in our resume of experience, we are either working on endurance, intensity, or strength.

    When we add up all the time and ratios of this work it should be 100%. I tell athletes that if we are to be the best, you have to give 110%, all the time.  So, what do I think the other 10% is? Flexibility, physical recovery, and agility.

    At the beginning of the month Mikey Sinnott penned an article on stretching. It was spot on! Best advice was “make it a routine”, like brushing your teeth. We talk about it at clinics, camps, and workout sessions, but we just don’t do it on a consistent daily basis.

    While full-body stretching from extremities to core should be worked on, at the very least skiers should focus on stretching the body zones of power application; shoulders and chest, core, and hips/glutes/quads/hamstrings are the three areas that if ignored will very quickly tighten. Eventually a decrease in performance and an increase injuries will happen.  Bottom line, stretching will enhance your performance and keep you less prone to injury, ask Mikey!

    Shoulders and chest, core, and hips/glutes/quads/hamstrings are the three areas that if ignored will very quickly tighten.

    The second piece of the extra 10% is physical recovery. Foam rolling, stick massage, icing/baths, and sauna are just a few of the options for speeding recovery that athletes should be using. Foam rolling and massage are not options. Every athlete from juniors, collegiate, seniors, and masters should own and travel with a foam roller.

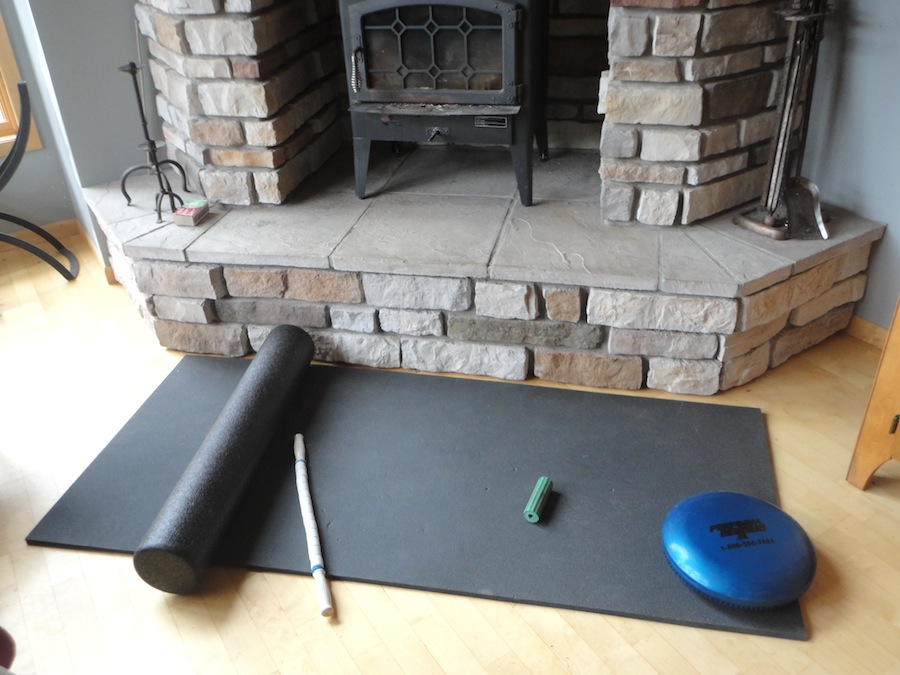
    Tools for success: a mat, foam roller (l), dowel, small ribbed roller (great for the bottom of the foot and helping prevent plantar fasciitis issues) and balance pillow (r). (Photo: Bill Pierce)
    Tools for success: a mat, foam roller (l), dowel, small ribbed roller (great for the bottom of the foot and helping prevent plantar fasciitis issues) and balance pillow (r). (Photo: Bill Pierce)

    While stretching is the first component to a post-workout routine, rolling should be the second. Self-massage or myofascial release (tissue work via gentle pressure or stretching) will help knead out trigger points, further stretch and massage the muscle, and increase circulation to the muscle to speed the recovery process. Again, developing the routine and habit of rolling the specific muscle groups used in a workout will speed your recovery and enhance your performance down the line.

    And the last piece of the extra 10% is agility. Being agile on skis is all about our balance skill. In order to possess that skill, we must train the muscle groups and movement patterns that help us achieve balance.  The more we work at it from the strength room to the trail, the quicker we learn it.

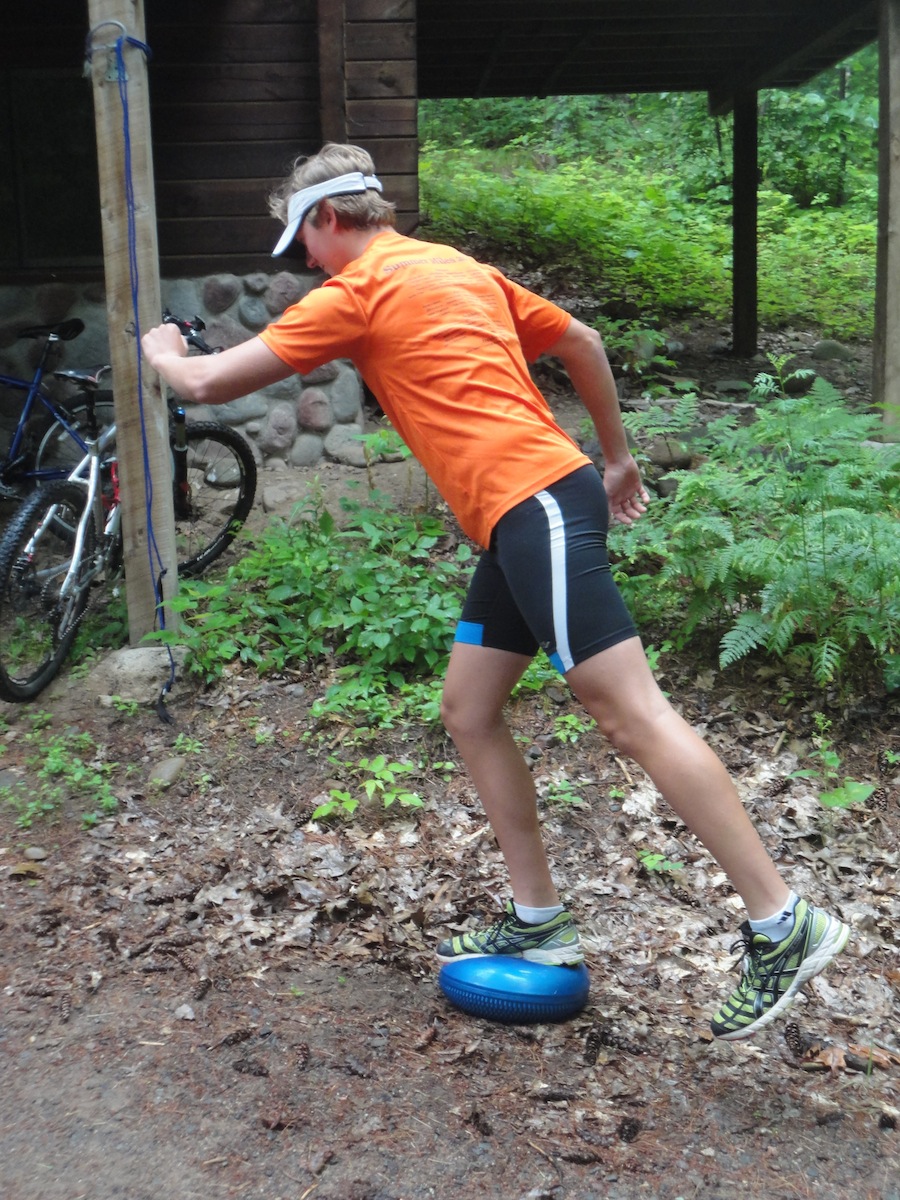
    A balancing exercise on what Bill Pierce calls the balance or air pillow.
    A balancing exercise on what Bill Pierce calls the balance or air pillow.

    One of the tools I have been using the past half dozen years is the balance (air) pillow, or the Bosu.  Athletes start by learning how to first stand and “swing out” on a pillow. Swinging out is nothing more than a pendulum motion of the arms and legs for warm up and movement pattern development. Push ups, squats and toe touches can all be exercises done off of unstable bearing in order to enhance the development of balance.

    Eventually, we incorporate many of their strength exercises onto a pillow so that they can simulate the instability of snow conditions in the power application phase of ski technique. Quiet a few of the exercises that we incorporate or design into a routine help develop the ability to quiet the core and stabilize the leg. While some athletes may have a better understanding of body awareness, it is mostly a learned and trained skill. You still have to do the work.

    So when you find yourself looking for that extra edge and advantage when you step to the line this winter, ask yourself, “Are you giving 110% everyday?” It’s never too late to start!

    Related: Foam Rolling – How To Start and Finish That Workout Right

  • Is Your Ab Workout Hurting Your Back?

    The New York Times health blog “Well” recently posted a piece on core strength, and the potential risks to the back.  Many standard core practices are called into question, and Stuart McGill, a highly regarded professor of spine biomechanics at the University of Waterloo in Canada and a back-pain clinician, provides some sample exercises that are “back-friendly.”

    Read the article here